Melty Blood/MBAACC/Akiha Tohno/Half Moon: Difference between revisions
(Added roadmap.) |
|||
| (30 intermediate revisions by 13 users not shown) | |||
| Line 1: | Line 1: | ||
==Character Page Progress== | {{TOClimit|3}} | ||
== Character Page Progress == | |||
{{#lst:Melty_Blood/MBAACC:Roadmap|H-Akiha}} | |||
== Additional Resources == | |||
[http://mbaacc.melty.games/?p1moon=h&p1char=akiha H-Akiha Match Video Database]<br> | |||
[https://www.youtube.com/watch?v=Itsh6IJBeuI H-Akiha combo and tech compilation] | |||
==Notable Players== | |||
{ | {| class="wikitable" | ||
!width="170"|Name!! width="60"|Color | |||
!width="125"|Region !! Common Venues !! Status !! Details | |||
|- | |||
|[http://mbaacc.melty.games/?p1moon=h&p1char=akiha&p1name=cc. cc.]|| style="text-align:center;"| | |||
[[File:Akiha-color36.png|Color|55px]] | |||
| Europe || Netplay || Inactive || Was one of the best players in Europe. | |||
== | |- | ||
|[https://mbaacc.melty.games/?p1char=akiha&p1name=batto+%28ばっと%29 batto (ばっと)]|| style="text-align:center;"| | |||
[[File:MBAACC Akiha Palette 21.png|Color|55px]] | |||
| Japan || KorewaMelty || Inactive || Batsister, one of the better players of this character. Has been around ever since the original Actress Again. | |||
|- | |||
[ | |[https://mbaacc.melty.games/?p1moon=h&p1char=akiha&p1name=GO1 GO1]|| style="text-align:center;"| | ||
[[File:Akiha-color24.png|Color|55px]] | |||
| Japan || A-cho || Inactive || | |||
== | |- | ||
|[http://mbaacc.melty.games/?p1moon=h&p1char=akiha&p1name=houjou%20(%E5%8C%97%E6%9D%A1) Houjou (北条)]|| style="text-align:center;"| | |||
[[File:Akiha-color3.png|Color|55px]] | |||
| Japan || A-cho || Inactive || | |||
|- | |- | ||
| | |[https://mbaacc.melty.games/?p1moon=h&p1char=akiha&p1name=yume+%28%E5%A4%A2%29 Yume (夢)]|| style="text-align:center;"| | ||
| | [[File:Akiha-color29.png|Color|55px]] | ||
| Japan || A-cho || Active || While still active, he doesn't play this moon a lot anymore, playing F more. | |||
|- | |||
| | |||
| | |||
|} | |} | ||
==General Gameplan== | == Overview == | ||
H-Akiha essentially plays similar Akiha neutral in which she uses her jumps and super double jumps to leverage advantage over their opponent. The only key difference from F and C is that H-akiha doesn't have ribbons at all like the others. H Akiha then has auto detonation pits. Not particularly too useful in neutral unless its someone committed to the ground. She's fitted with the ability to reverse beat which makes her corner mixups decent enough to end the matches there. Her combos typically corner carry across the board. Neutral is slightly lacking due to loss of ribbons so you will have to depend on your fundamentals to aid you in navigating neutral but you do have a good jump in called j.C to boot. Once you get a hit, corner carry and use j.236B after j.2C to discourage jump outs since it hits meaty if you don't hold the B button to delay its detonation. A good rushdown character like any H moon character with good corner carry and mixups to boot. | |||
{{StrengthsAndWeaknesses | |||
|intro= | |||
'''H-Akiha''' is a slow, hard-hitting tank with good meter gain. | |||
|pros= | |||
*'''Large Health Pool''': Has the highest health in the game. It is debatable whether this version of Akiha has the most health out of the 3. | |||
*'''Great Damage''': Combos reach 5k damage. Combos are flexible in terms of execution, but generally more effort = more reward. | |||
*'''Corner carry and oki''': Most combos can lead to corner oki situation. The oki with j.236B is pretty good. | |||
*'''Good Pressure''': Pressure resets, safe meaties, command grab super, triple overhead. Shes got it all. | |||
|cons= | |||
*'''Slow Neutral''': Because she doesn't have air ribbons like other Akihas, she is less mobile in the air. | |||
*'''Poor defence''': H-Akiha lacks good reversals. Inability to exguard, and being forced into H-Moon shield counter also doesn't help. | |||
|tablewidth=80 | |||
}} | |||
== General Gameplan == | |||
H-Akiha essentially plays similar Akiha neutral in which she uses her jumps and super double jumps to leverage advantage over their opponent. The only key difference from F and C is that H-akiha doesn't have ribbons at all like the others. H-Akiha then has auto detonation pits. Not particularly too useful in neutral unless its someone committed to the ground. She's fitted with the ability to reverse beat which makes her corner mixups decent enough to end the matches there. Her combos typically corner carry across the board. | |||
Neutral is slightly lacking due to loss of ribbons so you will have to depend on your fundamentals to aid you in navigating neutral but you do have a good jump-in called j.C to boot. Once you get a hit, corner carry and use j.236B after j.2C to discourage jump outs since it hits meaty if you don't hold the B button to delay its detonation. A good rushdown character like any H moon character with good corner carry and mixups to boot. Neutral and pressure is not as strong as the other Akihas. | |||
=== Neutral === | |||
Neutral unlike the other moons of this Akiha is very barebones. You mainly will be looking to be at venues to leverage your j.C as it's your best jump-in. Other than that, H-Akiha can use her dash to move in spots since all moons of Akiha Tohno can block frame 1. Dash 2C can be good in places where you cross under and trip guard the opponent, dash 4C is also good since its a fast command normal that hits a lot of space. Again to stress, a lot of H-Akiha's air normals hit downward so its much better for her to be above the opponent. | |||
Occasionally use j.22X to force the awareness that the opponent cannot stay on the ground idly. Other than that it will really depend on your understanding of how melty's neutral interactions and the demand for micro decisions work in order to work with her in neutral simply due to not having ribbons. | |||
===Pressure=== | === Pressure === | ||
A lot of her pressure is simple melty pressure with H and C moons where you use rebeats to disguise pressure resets within the staggers. | A lot of her pressure is simple melty pressure with H and C moons where you use rebeats to disguise pressure resets within the staggers. Some examples include: | ||
*2AA 5B, 5B | *2AA > 5B, 5B | ||
*2AA 5B | *2AA > 5B > delay 2C | ||
*2AA 5B 5A6A | *2AA > 5B > 5A6A > 214B | ||
*2AA 5AA dash grab | *2AA > 5AA, dash grab | ||
*2AA 5AA delay 6AA | *2AA > 5AA > delay 6AA | ||
*2AAAA | *2AAAA, IAD j.B/j.C | ||
These are basic examples but should send the point that with enough staggers you can even incorporate things like 236A into your pressure ideas. Also be sure to take advantage of your 5B's long cancel window since it will be an important frame trap window. Of course when they respect your pressure enough you can then attempt to grab and if they are looking to OS or mash you can then deter than with instant j.2C or 236A. 214B is + but has considerable start up that can be either shielded, jumped out of or backdashed so be sure to show other options and not default to a single option to rotate from. | |||
<u>'''Okizeme'''</u> | <u>'''Okizeme'''</u> | ||
Her oki after j.2C is probably her strongest point as you can decide to either include | Her oki after j.2C is probably her strongest point as you can decide to either include j.236B or not. Most times you will want to add j.236B in order to make her oki stronger since web meaties opponents and in extension to that it also enforces respect. Some of the oki options if you include web (j.236B) that also works without web are these. | ||
*super jump into low | *super jump into low | ||
*super jump delay air dash j.C | *super jump delay air dash j.C | ||
*dash grab(better if you have j.236B set) | *dash grab (better if you have j.236B set) | ||
*super jump j. | *super jump j.CB | ||
*super jump j.A air dash j.C | *super jump j.A air dash j.C | ||
There's plenty more you can learn from matches but these are some ideas to start you off. | There's plenty more you can learn from matches but these are some ideas to start you off. | ||
===Defense=== | === Defense === | ||
There's not much to this Akiha's options since her shield is much weaker, no | There's not much to this Akiha's options since her shield is much weaker, no EX Guard mechanics, etc, but here's some defensive options: | ||
For abare you have 2A and 4C both good at their own ranges and work for different purposes. 2A is really good if you manage to incorporate 1A~D in your defensive options while 4C is a fast command normal that hits far. Other than that you do have dodge, shield, metered bunker, regular bunker and jump and block all of which has its consequences/risks to them. Out of those options block and jump when its time to do so is the least risky option but if you always choose this option it can be a detriment to your defense overall. so be sure to recognize when to metered bunker, dodge, shield or even dash out of the corner if the opponent presents enough of a gap to do so. | For abare you have 2A and 4C, both good at their own ranges and work for different purposes. 2A is really good if you manage to incorporate 1A~D in your defensive options while 4C is a fast command normal that hits far. Other than that you do have dodge, shield, metered bunker, regular bunker and jump and block all of which has its consequences/risks to them. Out of those options block and jump when its time to do so is the least risky option but if you always choose this option it can be a detriment to your defense overall. so be sure to recognize when to metered bunker, dodge, shield or even dash out of the corner if the opponent presents enough of a gap to do so. | ||
==Combos== | == Combos == | ||
{{ComboLegend-MB}} | {{ComboLegend-MB}} | ||
=== | === Normal Combos === | ||
{{CollapsingComboTable-MB | {{CollapsingComboTable-MB | ||
|data= | |data= | ||
{{CollapsingComboData-MB | {{CollapsingComboData-MB | ||
|condition=Normal starter, grounded opponent | |condition=Normal starter, grounded opponent | ||
|character= | |character= | ||
|damage= | |damage=3902 | ||
|metergen= | |metergen=61.4 | ||
|metero= | |metero=26.4 | ||
|link= | |link=https://youtu.be/Itsh6IJBeuI?t=19 | ||
|input=* | |input= *2AA > 5C > 4C > 6C > 2C > 5BB > j8.BC > sdj.C > j.2C | ||
|simput= | |simput= | ||
|note= | |note= Beginner combo that won't be needed when you get past the unfamiliarity with this character. | ||
}} | }} | ||
{{CollapsingComboData-MB | {{CollapsingComboData-MB | ||
|condition=Normal starter, grounded opponent | |condition=Normal starter, grounded opponent | ||
|character= | |character= | ||
|damage= | |damage=4834 | ||
|metergen= | |metergen=95.6 | ||
|metero= | |metero=41.9 | ||
|link= | |link=https://youtu.be/Itsh6IJBeuI?t=32 | ||
|input=*j.2C | |input= *2AA > 5C > 4C > 6C > 5A6AA, (2A/2B >) 2C > 5[B] > 4C > j.AAC > sdj.AC > j.2C (> j.236B) | ||
|simput= | |simput= | ||
|note= | |note= Beginner combo that can be used in both the corner and midscreen. You can use 2A to make things easier or use 2B for better damage. If you have the corner you can then use j.236B for web oki. | ||
}} | }} | ||
{{CollapsingComboData-MB | |||
|condition=Normal starter, grounded opponent | |||
|characters=Everyone except Arcueid, Warc and Nero | |||
|damage=4880 | |||
|metergen=125.0 | |||
|metero=75.1 | |||
|link=https://youtu.be/Itsh6IJBeuI?t=45 | |||
|input= *2AA > 5C > 4C > 6C > 5A6AA, 4C > 5C > 2C > 5A(w)6AA, 2C > 5[B] > 4C > j.AAC > sdj.AC > j.2C > delay j.236B | |||
|simput= | |||
|note= A corner carry route to use and also does a lot of meter gain as well. May need to do 4C > 5C > 2C > (slight delay) 5A6AA to make the combo stable. Use the route below on Arc, Warc and Nero. | |||
}} | }} | ||
{{CollapsingComboData-MB | {{CollapsingComboData-MB | ||
|condition=Normal starter, grounded opponent | |condition=Normal starter, grounded opponent | ||
| | |characters=Arcueid, Warc and Nero | ||
|damage= | |damage=4771 (vs Warc) | ||
|metergen= | |metergen=128.1 | ||
|metero= | |metero=82.3 | ||
|link= | |link=https://youtu.be/Itsh6IJBeuI?t=78 | ||
|input=* | |input= *2AA > 5C > 4C > 6C > 5A6AA, 4C > 6C > 2C > 5A(w)6AA, 2C > 5[B] > 4C > j.AAC > sdj.A(A)C > j.2C > delay j.236B | ||
|simput= | |simput= | ||
|note= | |note= A character-specific variation of the above corner carry route. | ||
}} | }} | ||
{{CollapsingComboData-MB | {{CollapsingComboData-MB | ||
|condition=Normal starter, grounded opponent | |condition=Normal starter, grounded opponent | ||
|character= | |character= | ||
|damage= | |damage=4863 | ||
|metergen= | |metergen=138.3 | ||
|metero= | |metero=100.8 | ||
|link= | |link=https://youtu.be/Itsh6IJBeuI?t=97 | ||
|input=* | |input= *2AA > 5C > 4C > 6C > 5A6AA, 4C > 5C > 2C 5A(w)6AA, 6C > 2C 5A(w)6AA, 2C > slight delay 5B > 5C > j.AAC > sdj.AC > j.2C > j.236B | ||
|simput= | |simput= | ||
|note=A | |note= A stylish combo that only works if you started from barely outside of the corner. It corner carries to the full corner otherwise and gives a lot of meter gain in the process. The trickiest part about this combo is the section regarding 6C > 2C after the first rep of 5A6AA. To do this combo you want to slight delay all of your 5A6AA reps to ensure you get parts after to connect in a stable manner. | ||
}} | }} | ||
{{CollapsingComboData-MB | {{CollapsingComboData-MB | ||
|condition= | |condition=Standing Shield Counter starter | ||
|character= | |character= | ||
|damage= | |damage=2858 | ||
|metergen= | |metergen=60.8 | ||
|metero= | |metero=24.6 | ||
|link= | |link=https://youtu.be/Itsh6IJBeuI?t=186 | ||
|input=*j. | |input= *5D, 2C > 5[B] > 4C > j.AAC > sdj.AC > j.2C | ||
|simput= | |simput= | ||
|note= | |note= Basic shield counter combo that you can use. | ||
}} | }} | ||
{{CollapsingComboData-MB | |||
|condition=Standing Shield Counter starter | |||
|character= | |||
|damage=3056 | |||
|metergen=68.5 | |||
|metero=27.9 | |||
|link=https://youtu.be/Itsh6IJBeuI?t=198 | |||
|input= *5D, 2C > 2A(w), 2A > 2C > 5[B] > 4C > j.AAC > sdj.AC > j.2C | |||
|simput= | |||
|note= Another variant shield counter combo that you can use. | |||
}} | }} | ||
{{CollapsingComboData-MB | {{CollapsingComboData-MB | ||
|condition= | |condition=Standing Shield Counter starter | ||
|character= | |character= | ||
|damage= | |damage=3243 | ||
|metergen= | |metergen=90.1 | ||
|metero= | |metero=37.2 | ||
|link=https://youtu.be/Itsh6IJBeuI?t= | |link=https://youtu.be/Itsh6IJBeuI?t=210 | ||
|input= * | |input= *5D, 2B > 5C > 2C > 5A(w)6AA, 2C > 5[B] > 4C > j.AAC > sdj.AC > j.2C | ||
|simput= | |simput= | ||
|note= | |note=A slightly more optimized shield counter combo and the most stable. | ||
}} | }} | ||
{{CollapsingComboData-MB | {{CollapsingComboData-MB | ||
|condition= | |condition=Standing Shield Counter starter | ||
|character= | |character= | ||
|damage= | |damage= | ||
|metergen= | |metergen= | ||
|metero= | |metero= | ||
|link= | |link= | ||
|input= * | |input= *5D, 2C > 2A(w), 2A > 5C > 2C > 5A(w)6AA, 2C > 5[B] > 4C > j.AAC > sdj.AC > j.2C | ||
|simput= | |simput= | ||
|note= | |note= A more optimized shield counter for damage and metergain. | ||
}} | }} | ||
{{CollapsingComboData-MB | {{CollapsingComboData-MB | ||
|condition= | |condition=Standing Shield Counter starter | ||
|character= | |character= | ||
|damage= | |damage=3524 | ||
|metergen= | |metergen=98.5 | ||
|metero= | |metero=43.5 | ||
|link=https://youtu.be/Itsh6IJBeuI?t= | |link=https://youtu.be/Itsh6IJBeuI?t=227 | ||
|input= * | |input= *5D, 2C > 2A(w), [5A > 2C > 2A(w)]*2 , 2A > 2C > 5A(w)6AA, 2C > 5[B] > 4C > j.AAC > sdj.AC > j.2C | ||
|simput= | |simput= | ||
|note= | |note= Optimized shield counter combo. Very dependent on how high the opponent is when you hit them with 2C. | ||
}} | }} | ||
{{CollapsingComboData-MB | {{CollapsingComboData-MB | ||
|condition= | |condition=Standing Shield Counter starter | ||
| | |characters=Nero | ||
|damage= | |damage=3048 | ||
|metergen= | |metergen=97.1 | ||
|metero= | |metero=41.0 | ||
|link=https://youtu.be/Itsh6IJBeuI?t= | |link=https://youtu.be/Itsh6IJBeuI?t=244 | ||
|input= * | |input= *5D, 5A > 2C > 2A(w), 2A > 5C > 2C > 5A(w)6AA, 2C > 5[B] > 4C > j.AAC > sdj.C > j.2C | ||
|simput= | |simput= | ||
|note= | |note=Nero-specific shield counter route. | ||
}} | }} | ||
{{CollapsingComboData-MB | {{CollapsingComboData-MB | ||
|condition= | |condition=Raw Air Throw starter | ||
| | |character= | ||
|damage= | |damage=3027 | ||
|metergen= | |metergen=47.4 | ||
|metero= | |metero=20.4 | ||
|link=https://youtu.be/Itsh6IJBeuI?t= | |link=https://youtu.be/Itsh6IJBeuI?t=287 | ||
|input= * | |input= *Raw AT, 2A > 2C > 5[B] > 4C > j.AAC > sdj.AC > j.2C | ||
|simput= | |simput= | ||
|note= | |note= A basic raw air throw combo. | ||
}} | }} | ||
{{CollapsingComboData-MB | {{CollapsingComboData-MB | ||
|condition= | |condition=Raw Air Throw starter | ||
|character= | |character= | ||
|damage= | |damage=3398 | ||
|metergen= | |metergen=79.6 | ||
|metero= | |metero=34.2 | ||
|link=https://youtu.be/Itsh6IJBeuI?t= | |link=https://youtu.be/Itsh6IJBeuI?t=299 | ||
|input= *( | |input= *Raw AT, 5A > 2C > 2A(w), 2A > 2C > 5A(w)6AA, 2C > 5[B] > 4C, j.AAC > sdj.AC > j.2C | ||
|simput= | |simput= | ||
|note= | |note= A more optimized raw air throw combo. | ||
}} | |||
}} | }} | ||
=== Corner Combos === | |||
{{CollapsingComboTable-MB | |||
|data= | |||
{{CollapsingComboData-MB | {{CollapsingComboData-MB | ||
|condition= | |condition=Normal starter, grounded opponent | ||
|character= | |character= | ||
|damage= | |damage=4914 | ||
|metergen= | |metergen=106.8 | ||
|metero= | |metero=50.9 | ||
|link=https://youtu.be/Itsh6IJBeuI?t= | |link=https://youtu.be/Itsh6IJBeuI?t=113 | ||
|input= * | |input= *2AA > 5C > 4C > 6C > 5A6AA, 2B > 5C > 2C > 5[B] > 6C > 4C > j.AAC > sdj.AC > j.2C | ||
|simput= | |simput= | ||
|note= | |note=Basic corner combo to use. Does a good bit of damage as well. | ||
}} | }} | ||
{{CollapsingComboData-MB | {{CollapsingComboData-MB | ||
|condition= | |condition=Normal starter, grounded opponent | ||
|character= | |character= | ||
|damage= | |damage=5108 | ||
|metergen= | |metergen=129.9 | ||
|metero= | |metero=83.2 | ||
|link=https://youtu.be/Itsh6IJBeuI?t= | |link=https://youtu.be/Itsh6IJBeuI?t=127 | ||
|input= * | |input= *2AA > 5C > 4C > 6C > 5A6AA, 4C > 2C > 5C, 5C > 2C > 2A(w), 2AA > 2C > 5[B] > 4C > j.AAC > sdj.AC > j.2C | ||
|simput= | |simput= | ||
|note= | |note= Optimized version of the corner combo. | ||
}} | }} | ||
{{CollapsingComboData-MB | {{CollapsingComboData-MB | ||
|condition= | |condition=Normal starter, grounded opponent | ||
| | |characters=Nero | ||
|damage= | |damage=4733 | ||
|metergen= | |metergen=34.8 | ||
|metero= | |metero=91.8 | ||
|link= | |link=https://youtu.be/Itsh6IJBeuI?t=146 | ||
|input= * | |input= *2AA > 5C > 4C > 6C > 5A6AA, 4C > 2C > 5C, 2C > 5C, 2C > 2A(w), 2AA > 2C > 5[B] > 4C > j.AAC > sdj.AC > j.2C | ||
|simput= | |simput= | ||
|note= | |note=Nero-only variant. | ||
}} | }} | ||
{{CollapsingComboData-MB | {{CollapsingComboData-MB | ||
|condition= | |condition=Normal starter, grounded opponent | ||
| | |characters=Nero | ||
|damage= | |damage=4769 | ||
|metergen= | |metergen=142.4 | ||
|metero= | |metero=110.5 | ||
|link=https://youtu.be/Itsh6IJBeuI?t= | |link=https://youtu.be/Itsh6IJBeuI?t=164 | ||
|input= * | |input= *2AA > 5C > 4C > 6C > 5A6AA, 4C > 2C > 5C, 2C > 2A(w), 2A > 2C > 5C, 2C > 2A(w), 2AA > 2C > 5[B] > 4C > j.AAC > sdj.AC > j.2C | ||
|simput= | |simput= | ||
|note= optimized | |note=A more optimized version of the Nero variant. | ||
}} | }} | ||
{{CollapsingComboData-MB | {{CollapsingComboData-MB | ||
|condition= | |condition=Raw Air Throw starter | ||
| | |character= | ||
|damage= | |damage=3472 | ||
|metergen= | |metergen=80.3 | ||
|metero= | |metero=34.5 | ||
|link=https://youtu.be/Itsh6IJBeuI?t= | |link=https://youtu.be/Itsh6IJBeuI?t=316 | ||
|input= * | |input= *Raw AT, 2A > 2C > 5C, 5C > 2C 2A(w), 2A > 2C > 5[B] > 4C > j.AAC > sdj.AC > j.2C | ||
|simput= | |simput= | ||
|note= | |note= Corner raw air throw combo. | ||
}} | }} | ||
{{CollapsingComboData-MB | {{CollapsingComboData-MB | ||
|condition=Air | |condition=Raw Air Throw starter | ||
|character= | |character= | ||
|damage= | |damage=3586 | ||
|metergen= | |metergen=87.3 | ||
|metero= | |metero=37.5 | ||
|link=https://youtu.be/Itsh6IJBeuI?t= | |link=https://youtu.be/Itsh6IJBeuI?t=331 | ||
|input= *( | |input= *Raw AT, 5A > 2C > 2A(w), 2A > 2C > 5C, 5C > 2C > 2A(w), 2A > 2C > 5[B] > 4C > j.AAC > sdj.AC > j.2C | ||
|simput= | |simput= | ||
|note= | |note=Optimized version of the previous combo. | ||
}} | |||
}} | }} | ||
{{ | == Move Descriptions == | ||
| | {{AttackData-MB/Infobox}} | ||
| | === Normal Moves === | ||
|damage= | ==== Standing Normals ==== | ||
| | ===== <span class="invisible-header">5A</span> ===== | ||
| | {{MoveData | ||
| | |image=MB_H-Akiha_5A.png | ||
| | |image2=MB_H-Akiha_5A6A.png | ||
| | |image3=MB_H-Akiha_5A6AA.png | ||
| | |caption= | ||
|name=5A | |||
|linkname=5A | |||
|input=5A~6A~6A | |||
|data= | |||
{{AttackData-MB | |||
|version=5A | |||
|damage=300 | |||
|reddamage=115 | |||
|proration=75% (O) | |||
|circuit=2.1% | |||
|cancel=-SE-, -N-, -SP-, -EX-, (J) | |||
|guard=LH | |||
|startup=5 | |||
|active=3 | |||
|recovery=8 | |||
|frameAdv=1 | |||
|invuln= | |||
|description=Mid-level swipe which can hit crouchers. | |||
}} | |||
{{AttackData-MB | |||
|header=no | |||
|version=5A~6A | |||
|damage=600 | |||
|reddamage=384 | |||
|proration=80% (M) | |||
|circuit=4.2% | |||
|cancel=N, SP, EX (J) | |||
|guard=LH | |||
|startup=8 | |||
|active=4 | |||
|recovery=16 | |||
|frameAdv=-5 | |||
|invuln= | |||
|description=First 6A followup is a disjointed kick, moves Akiha forward. | |||
}} | |||
{{AttackData-MB | |||
|header=no | |||
|version=5A~6A~6A | |||
|damage=1000 | |||
|reddamage=768 | |||
|proration=60% (O) | |||
|circuit=7.0% | |||
|cancel=(N), SP, EX (J) | |||
|guard=LH | |||
|startup=10 | |||
|active=4 | |||
|recovery=15 | |||
|frameAdv=-1 | |||
|invuln= | |||
|description=Second followup is a swipe which advances Akiha even more. | |||
}} | |||
}} | }} | ||
===== <span class="invisible-header">5B</span> ===== | |||
{{MoveData | |||
|image=C-Akiha5B.png | |||
|image2=akiha_5B.png | |||
|image3=C-Akiha5BB.png | |||
|caption=5B | |||
|caption2=5[B] | |||
|caption3=5BB | |||
|name=5B | |||
|linkname=5B | |||
|input=5B/[B]~B | |||
|data= | |||
{{AttackData-MB | |||
|version=5B | |||
|damage=650 | |||
|reddamage=384 | |||
|proration=100% | |||
|circuit=4.2% | |||
|cancel=N, SP, -CH-, EX, (J) | |||
|guard=LH | |||
|startup=8 | |||
|active=4 | |||
|recovery=14 | |||
|frameAdv=-3 | |||
|invuln= | |||
|description=Downward swipe that moves Akiha forward. Causes ground-techable knockdown on crouching opponents. | |||
}} | |||
{{AttackData-MB | |||
|header=no | |||
|version=5[B] | |||
|damage=650*3 (1888) | |||
|reddamage=(1116) | |||
|proration=100% | |||
|circuit=4.2%*3 (12.6%) | |||
|cancel=N, SP, -CH-, EX, (J) | |||
|guard=LH | |||
|startup=21 | |||
|active={{Tooltip | text=9| hovertext=1, 4, 4}} | |||
|recovery=8 | |||
|frameAdv=3 | |||
|invuln= | |||
|description=3-hit charged version of 5B that does huge damage. +3 on block. | |||
}} | |||
{{AttackData-MB | |||
|header=no | |||
|version=~B | |||
|damage=400 | |||
|reddamage=192 | |||
|proration=70% (O) | |||
|circuit=1.4% | |||
|cancel=N, SP, EX, (J) | |||
|guard=LH | |||
|startup=8 | |||
|active=4 | |||
|recovery=20 | |||
|frameAdv=-6 | |||
|invuln= | |||
|description=Superjump-cancellable launcher followup. +2 if rebeated into 5A. | |||
}} | |||
}} | }} | ||
=== | ===== <span class="invisible-header">5C</span> ===== | ||
{{ | {{MoveData | ||
|image=C-Akiha5C.png | |||
|caption= | |||
|name=5C | |||
|linkname=5C | |||
|data= | |data= | ||
{{ | {{AttackData-MB | ||
| | |damage=1000 | ||
| | |reddamage=672 | ||
| | |proration=90% (M) | ||
| | |circuit=5.6% | ||
| | |cancel=N, SP, EX, (J) | ||
| | |guard=LH | ||
| | |startup=11 | ||
| | |active=6 | ||
| | |recovery=15 | ||
|frameAdv=-3 | |||
|invuln= | |||
|description=Forward-moving kick. Wallslams airborne opponents. | |||
}} | }} | ||
}} | |||
==== Crouching Normals ==== | |||
===== <span class="invisible-header">2A</span> ===== | |||
{{MoveData | |||
|image=C-Akiha2a.png | |||
|caption= | |||
|name=2A | |||
|linkname=2A | |||
|data= | |||
{{AttackData-MB | |||
|damage=350 | |||
|reddamage=144 | |||
|proration=75% (O) | |||
|circuit=2.8% | |||
|cancel=-SE-, -N-, -SP-, -EX-, (J) | |||
|guard=L | |||
|startup=5 | |||
|active=4 | |||
|recovery=8 | |||
|frameAdv=0 | |||
|invuln= | |||
|description=Standard chainable low 2A. | |||
}} | |||
}} | |||
===== <span class="invisible-header">2B</span> ===== | |||
{{MoveData | |||
|image=C-Akiha2B.png | |||
|image2=C-Akiha2BB.png | |||
|image3=C-Akiha2BBB.png | |||
|caption=2B | |||
|caption2=2BB | |||
|caption3=2BBB | |||
|name=2B | |||
|linkname=2B | |||
|input=2B~2B~2B | |||
|data= | |||
{{AttackData-MB | |||
|version=2B | |||
|damage=500 | |||
|reddamage=249 | |||
|proration=85% (O) | |||
|circuit=3.5% | |||
|cancel=N, SP, -CH-, EX, (J) | |||
|guard=LH | |||
|startup=7 | |||
|active=4 | |||
|recovery=15 | |||
|frameAdv=-4 | |||
|invuln= | |||
|description=Doesn't actually hit low, but has followups even on whiff. | |||
}} | |||
{{AttackData-MB | |||
|header=no | |||
|version=~2B | |||
|damage=400 | |||
|reddamage=192 | |||
|proration=100% | |||
|circuit=2.8% | |||
|cancel=N, SP, -CH-, EX, (J) | |||
|guard=LA | |||
|startup=8 | |||
|active=4 | |||
|recovery=9 | |||
|frameAdv=2 | |||
|invuln= | |||
|description=2B followup that actually hits low, but is air blockable. | |||
}} | |||
{{AttackData-MB | |||
|header=no | |||
|version=~2B~2B | |||
|damage=500 | |||
|reddamage=576 | |||
|proration=75% (O) | |||
|circuit=4.2% | |||
|cancel=J | |||
|guard=HA | |||
|startup=28 | |||
|active=4 | |||
|recovery=18 | |||
|frameAdv={{Tooltip | text=-5| hovertext=18 on jump cancel.}} | |||
|invuln= | |||
|description=2BB followup. A leaping overhead with rather slow start-up that launches on hit. Can be jump-cancelled on Hit OR Block so it is safe so long as it doesn't whiff. | |||
}} | |||
}} | |||
{{ | ===== <span class="invisible-header">2C</span> ===== | ||
| | {{MoveData | ||
| | |image=Akiha_2C.png | ||
|damage= | |caption= | ||
| | |name=2C | ||
| | |linkname=2C | ||
| | |input=2[C] | ||
| | |data= | ||
| | {{AttackData-MB | ||
| | |version=2C | ||
|damage=900 | |||
|reddamage=490 | |||
|proration=55% (O) | |||
|circuit=7.0% | |||
|cancel=N, SP, EX, (J) | |||
|guard=L | |||
|startup=8 | |||
|active=4 | |||
|recovery=25 | |||
|frameAdv=-11 | |||
|invuln= | |||
|description=Forward-moving sweep with an unusually tall hitbox. +2 if rebeated into 5A. | |||
}} | |||
{{AttackData-MB | |||
|header=no | |||
|version=2[C] | |||
|damage=900 | |||
|reddamage=768 | |||
|proration=55% (O) | |||
|circuit=4.9% | |||
|cancel=N, SP, EX, (J) | |||
|guard=L | |||
|startup=20 | |||
|active=5 | |||
|recovery=25 | |||
|frameAdv=-12 | |||
|invuln= | |||
|description=Charged version is mostly identical. | |||
}} | |||
}} | }} | ||
{{ | ==== Jumping Normals ==== | ||
| | ===== <span class="invisible-header">j.A</span> ===== | ||
| | {{MoveData | ||
|damage= | |image=caki_ja.png | ||
| | |caption= | ||
| | |name=j.A | ||
| | |linkname=j.A | ||
| | |data= | ||
| | {{AttackData-MB | ||
| | |damage=350 | ||
|reddamage=192 | |||
|proration=75% (O) | |||
|circuit=2.1% | |||
|cancel=SE, N, SP, EX, J | |||
|guard=LHA | |||
|startup=6 | |||
|active=4 | |||
|recovery=11 | |||
|frameAdv= | |||
|invuln= | |||
|description=Downward mid-hitting kick. | |||
}} | |||
}} | }} | ||
===== <span class="invisible-header">j.B</span> ===== | |||
{{MoveData | |||
|image=cakiha_jb.png | |||
|caption= | |||
|name=j.B | |||
|linkname=j.B | |||
|data= | |||
{{AttackData-MB | |||
|damage=400, 500 (859) | |||
|reddamage=(514) | |||
|proration=95%*2 (M) | |||
|circuit=2.8%, 4.2% (7.0%) | |||
|cancel=N, SP, EX, J | |||
|guard=HA | |||
|startup=6 | |||
|active={{Tooltip | text=8| hovertext=2, 6}} | |||
|recovery= | |||
|frameAdv= | |||
|invuln= | |||
|description=2-hitting forward swipe. Frontal hitbox and long active frames make it a useful air to air. | |||
}} | |||
}} | |||
{{ | ===== <span class="invisible-header">j.C</span> ===== | ||
| | {{MoveData | ||
| | |image=fakiha_jc.png | ||
|damage= | |caption= | ||
| | |name=j.C | ||
| | |linkname=j.C | ||
| | |data= | ||
| | {{AttackData-MB | ||
| | |damage=1000 | ||
| | |reddamage=480 | ||
|proration=90% (O) / {{Tooltip | text=50% (O) | hovertext=If rising 2f before active and opponent is hit grounded}} | |||
|circuit=7.0% | |||
|cancel=N, SP, EX, J | |||
|guard=HA | |||
|startup=10 | |||
|active=4 | |||
|recovery= | |||
|frameAdv= | |||
|invuln= | |||
|description=Akiha slashes downwards with both hands, giving a jump-in attack with a cross-up hitbox. | |||
}} | |||
}} | }} | ||
==== Command Normals ==== | |||
===== <span class="invisible-header">4C</span> ===== | |||
{{MoveData | |||
|image=akiha_4c.png | |||
|caption= | |||
|name=4C | |||
|linkname=4C | |||
|data= | |||
{{AttackData-MB | |||
|damage=500*2 (887) | |||
|reddamage=(596) | |||
|proration=80% (O) | |||
|circuit=4.9%, 6.3% (11.2%) | |||
|cancel=N, SP, EX, (J) | |||
|guard=LH | |||
|startup=8 | |||
|active={{Tooltip | text=4| hovertext=2, 2}} | |||
|recovery=26 | |||
|frameAdv=-10 | |||
|invuln= | |||
|description=Advancing swipe that acts as a quick poke. Long recovery on whiff. | |||
}} | |||
}} | |||
{{ | ===== <span class="invisible-header">6C</span> ===== | ||
| | {{MoveData | ||
| | |image=akiha_6c.png | ||
| | |caption= | ||
| | |name=6C | ||
| | |linkname=6C | ||
| | |data= | ||
| | {{AttackData-MB | ||
| | |damage=600 | ||
| | |reddamage=384 | ||
|proration=80% (O) | |||
|circuit=5.6% | |||
|cancel=N, SP, EX, (J) | |||
|guard=LH | |||
|startup=8 | |||
|active=4 | |||
|recovery=22 | |||
|frameAdv=-8 | |||
|invuln= | |||
|description=Rich girl kick. Wallslams airborne opponents much like 5C. Doesn't cause any pushback on hit. | |||
}} | |||
}} | }} | ||
===== <span class="invisible-header">j.2C</span> ===== | |||
{{MoveData | |||
|image=Fakiha_j2c.png | |||
|caption= | |||
|name=j.2C | |||
|linkname=j.2C | |||
|data= | |||
{{AttackData-MB | |||
|damage=700 | |||
|reddamage=288 | |||
|proration=70% (M) | |||
|circuit=4.9% | |||
|cancel=SP, EX | |||
|guard=LHA | |||
|startup=14 | |||
|active=7 | |||
|recovery= | |||
|frameAdv=8 (TK) | |||
|invuln= | |||
|description=No longer an overhead, and has some odd momentum associated with it. Doesn't completely stop her momentum like Crescent Akiha's j.2C but doesn't completely retain it either. Has crossup hitboxes and causes untechable knockdown on airborne opponents, making it a combo ender. | |||
}} | |||
}} | |||
{{ | === Universal Mechanics === | ||
| | ===== <span class="invisible-header">Ground Throw</span> ===== | ||
| | {{MoveData | ||
| | |image=MB_C-Akiha_Throw.png | ||
| | |caption= | ||
| | |name=Ground Throw | ||
| | |linkname=Ground Throw | ||
| | |input=6/4A+D | ||
| | |data= | ||
| | {{AttackData-MB | ||
|damage=200*7 (1266) | |||
|reddamage=(588) | |||
|proration=100% | |||
|circuit=0.0% | |||
|cancel= | |||
|guard=U | |||
|startup=3 | |||
|active=1 | |||
|recovery=20 | |||
|frameAdv= | |||
|invuln= | |||
|description=Akiha grabs the opponent by the neck and goes in a 7-hit sequence ending in an untechable knockdown. | |||
}} | |||
}} | }} | ||
===== <span class="invisible-header">Air Throw</span> ===== | |||
{{MoveData | |||
|image=MB_C-Akiha_Throw_Air.png | |||
|caption= | |||
|name=Air Throw | |||
|linkname=Air Throw | |||
|input=j.6/4A+D | |||
|data= | |||
{{AttackData-MB | |||
|damage=1600 (Raw)<br>1000 | |||
|reddamage=465 | |||
|proration=30% | |||
|circuit=0.0% | |||
|cancel= | |||
|guard=U | |||
|startup=2 | |||
|active=1 | |||
|recovery={{Tooltip | text=12| hovertext=Landing recovery.}} | |||
|frameAdv= | |||
|invuln= | |||
|description=Akiha takes the opponent to the ground with the power of her legs. As a combo ender it will be untechable but will leave you at a distance. | |||
}} | |||
}} | |||
===== <span class="invisible-header">Shield Counter</span> ===== | |||
{{MoveData | |||
|image=MB_F-Akiha_236D.png | |||
|image2=MB_H-Akiha_236D.png | |||
|image3=MB_F-Akiha_j.236D.png | |||
|caption= | |||
|name=Shield Counter | |||
|linkname=Shield Counter | |||
|input=Auto after a successful Shield (Air OK) | |||
|data= | |||
{{AttackData-MB | |||
|version=Standing | |||
|damage=500 (345) | |||
|reddamage=198 | |||
|proration=50% | |||
|circuit=3.5% | |||
|cancel=(SP), (EX), (J) | |||
|guard=LHA | |||
|startup=9 | |||
|active=4 | |||
|recovery=18 | |||
|frameAdv=-4 | |||
|invuln= | |||
|description=Same animation as 5BB. | |||
}} | |||
{{AttackData-MB | |||
|header=no | |||
|version=Crouching | |||
|damage=1500 (1117) | |||
|reddamage=714 | |||
|proration=50% | |||
|circuit=10.5% | |||
|cancel=(SP), (EX) | |||
|guard=LA | |||
|startup=9 | |||
|active=4 | |||
|recovery=18 | |||
|frameAdv=-4 | |||
|invuln= | |||
|description=Same animation as Shield Bunker. | |||
}} | |||
{{AttackData-MB | |||
|header=no | |||
|version=Aerial | |||
|damage=500 (345) | |||
|reddamage=198 | |||
|proration=50% | |||
|circuit=3.5% | |||
|cancel= | |||
|guard=HA | |||
|startup=9 | |||
|active=4 | |||
|recovery= | |||
|frameAdv= | |||
|invuln=Full 1-3 | |||
|description=Same animation as j.2C. Has a small amount of invincibilty on startup. | |||
}} | |||
}} | }} | ||
===== <span class="invisible-header">Shield Bunker</span> ===== | |||
{{MoveData | {{MoveData | ||
|image= | |image=MB_C-Akiha_214D.png | ||
|image2=MB_H-Akiha_214D.png | |||
|caption= | |caption= | ||
|name= | |name=Shield Bunker | ||
|input= | |linkname=Shield Bunker | ||
|data= | |input=214D in neutral or blockstun | ||
|data= | |||
|damage= | {{AttackData-MB | ||
|reddamage= | |version=Neutral | ||
|proration= | |damage=500 | ||
|circuit= | |reddamage=192 | ||
|cancel= | |proration=50% | ||
|guard= | |circuit=0.0% | ||
|startup= | |cancel= | ||
|active= | |guard=LHA | ||
|recovery= | |startup=26 | ||
|frameAdv= | |active=4 | ||
|invuln= | |recovery=19 | ||
|description= | |frameAdv=-5 | ||
|invuln=Clash 1-10 | |||
|description= | |||
}} | |||
{{AttackData-MB | |||
|header=no | |||
|version={{Tooltip | text=(Clash)| hovertext=If an attack connects with this Shield Bunker's clash box, this is the followup that happens afterwards.}} | |||
|damage=500 | |||
|reddamage=192 | |||
|proration=50% | |||
|circuit=0.0% | |||
|cancel= | |||
|guard=LHA | |||
|startup=8 | |||
|active=4 | |||
|recovery=19 | |||
|frameAdv=-5 | |||
|invuln={{Tooltip | text=Strike 1-7| hovertext=1-15 Strike invicibility on whiff.}} | |||
|description=Akiha's bunker bears special mention, as it has several odd properties: it has a low profile and hitboxes (though it still hits mid), and it moves her forward. Even on whiff, it can get you out of corner, especially if the opponent went into the air. | |||
Due to its odd properties, however, it can fail you when you need it for regular bunker things, especially hitting airborne enemies. Generally, it's considered awkward and unreliable. | |||
}} | |||
{{AttackData-MB | |||
|header=no | |||
|version=Blockstun | |||
|damage=0 | |||
|reddamage=0 | |||
|proration=100% | |||
|circuit=-100.0% | |||
|cancel= | |||
|guard=LHA | |||
|startup=19 | |||
|active=3 | |||
|recovery=22 | |||
|frameAdv=-7 | |||
|invuln= | |||
|description=H-Moon specific reversal bunker. | |||
}} | }} | ||
}} | }} | ||
===== <span class="invisible-header">Circuit Spark</span> ===== | |||
{{MoveData | |||
|image=MB_C-Akiha_CSpark.png | |||
|image2=MB_C-Akiha_CSpark_Air.png | |||
|name=Circuit Spark | |||
|linkname=Circuit Spark | |||
|input=In Heat:<br>Auto during hitstun<br>A+B+C during blockstun | |||
|caption= | |||
|data= | |||
{{AttackData-MB | |||
|version=Ground | |||
|damage=100 | |||
|reddamage=0 | |||
|proration=100% | |||
|circuit=removes all | |||
|cancel= | |||
|guard=U | |||
|startup=11 | |||
|active=10 | |||
|recovery=20 | |||
|frameAdv= | |||
|invuln=Full 1-39 | |||
|description= | |||
}} | |||
{{AttackData-MB | |||
|header=no | |||
|version=Air | |||
|damage=100 | |||
|reddamage=0 | |||
|proration=100% | |||
|circuit=removes all | |||
|cancel= | |||
|guard=U | |||
|startup=12 | |||
|active=10 | |||
|recovery={{Tooltip | text=15| hovertext=Landing recovery.}} | |||
|frameAdv= | |||
|invuln=Strike 1-30 | |||
|description=Universal burst mechanic. Unlike Crescent/Full Heat activation, the hitbox and frame data doesn't vary between characters. However, you can be thrown out of this move if you input it in the air. | |||
}} | |||
}} | |||
=== | === Special Moves === | ||
''Disclaimer: For reasons involving momentum and disjointed stationary projectile hitboxes, the visual representation of Akiha's moves below may not always be pixel perfect.'' | |||
==== Grounded Specials ==== | |||
===== <span class="invisible-header">236X</span> ===== | |||
{{MoveData | |||
|image=MB_H-Akiha_236A.png | |||
|image2=MB_H-Akiha_236B.png | |||
|image3=MB_H-Akiha_236C.png | |||
|caption= | |||
|name=Plucking Birds | |||
|linkname=236X | |||
|input=236A/B/C | |||
|data= | |||
{{AttackData-MB-Simple | |||
|description=Akiha jumps and summons a ribbon projectile. Very slow startup, but with barely any recovery. | |||
}} | |||
{{AttackData-MB | |||
|version=A | |||
|damage=450*2 (754) | |||
|reddamage=(483) | |||
|proration=70% (O) | |||
|circuit=2.1%*2 (4.2%) | |||
|cancel= | |||
|guard=LHA | |||
|startup=41 | |||
|active={{Tooltip | text=4| hovertext=2, 2}} | |||
|recovery=4 | |||
|frameAdv=10 ~ 15 | |||
|invuln= | |||
|description=A version jumps forward. | |||
}} | |||
{{AttackData-MB | |||
|header=no | |||
|version=B | |||
|damage=450*2 (754) | |||
|reddamage=(483) | |||
|proration=70% (O) | |||
|circuit=2.1%*2 (4.2%) | |||
|cancel= | |||
|guard=LHA | |||
|startup=40 | |||
|active={{Tooltip | text=4| hovertext=2, 2}} | |||
|recovery={{Tooltip | text=0*| hovertext=Neutral frame happens during the last active frame.
Can act instantly after active frames.}} | |||
|frameAdv=15 ~ 20 | |||
|invuln= | |||
|description=B version jumps back. | |||
}} | |||
{{AttackData-MB | |||
|header=no | |||
|version=EX | |||
|damage=400*8 (2848) | |||
|reddamage=(1368) | |||
|proration=70% (O) | |||
|circuit=-100.0% | |||
|cancel=-J- | |||
|guard=LHA | |||
|startup={{Tooltip | text=15+22| hovertext=Post-flash startup may vary.}} | |||
|active={{Tooltip | text=28| hovertext=8 hits.}} | |||
|recovery={{Tooltip | text=15+35| hovertext=Full animation.}} | |||
|frameAdv=34 | |||
|invuln=Full 14-18 | |||
|description=EX version is a 8-hit large ribbon which you can jump-cancel out of before it even becomes active, giving you lots of frame advantage on block. | |||
}} | |||
}} | |||
===== <span class="invisible-header">623X</span> ===== | |||
{{MoveData | {{MoveData | ||
|image= | |image=MBAACC C-Akiha 623a.png | ||
|image2=MBAACC C-Akiha 623b.png | |||
|image3=MBAACC C-Akiha 623c.png | |||
|caption= | |caption= | ||
|name= | |name=Brilliant Impetus - Autumn Leaves | ||
|input= | |linkname=623X | ||
|input=623A/B/C | |||
|data= | |data= | ||
{{AttackData-MB-Simple | |||
|damage= | |description=Akiha's 623X series, also known as Momiji. Akiha runs to the opponent, launches them (if they aren't airbone already) and sending them to the ground with a slash. Despite being dragon punches, they are all weak reversals. | ||
|reddamage= | }} | ||
|proration= | {{AttackData-MB | ||
|circuit= | |version=A | ||
|cancel= | |damage=600, 800 (1282) | ||
|guard= | |reddamage=(533) | ||
|startup= | |proration=100% | ||
|active= | |circuit=4.2%, 5.6% (9.8%) | ||
|recovery= | |cancel= | ||
|frameAdv= | |guard=LH, LHA | ||
|invuln= | |startup=6 | ||
|description= | |active=7 (3) 4 | ||
|recovery=27 | |||
|frameAdv=-13 | |||
|invuln=High 1-15 | |||
|description=This shoryu has quick startup and depending on the situation can be used as an anti-air. Has invincibility on the upper part of Akiha's body and the first hit (ONLY the first one) is unblockable from the air. | |||
}} | |||
{{AttackData-MB | |||
|header=no | |||
|version=B | |||
|damage=400*2, 600, 800 (1987) | |||
|reddamage=(748) | |||
|proration=100% | |||
|circuit=2.8%*2, 4.2%, 5.6% (15.4%) | |||
|cancel=EX (1-2) | |||
|guard=LH (1-3), LHA (4) | |||
|startup=9 | |||
|active={{Tooltip | text=35| hovertext=2 (4) 2 (13) 3 (7) 4}} | |||
|recovery=33 | |||
|frameAdv=-17 | |||
|invuln=Low 1-10, 23-29 | |||
|description=Has ten frames of invincibility on Akiha's lower body and can be EX-Cancelled before you go into the airborne part of this move. | |||
The first hit has minimal hitstun. This means that hitting an extended hurtbox can make the second hit whiff, letting the rest be blocked. 623C shares the same issue. | |||
}} | |||
{{AttackData-MB | |||
|header=no | |||
|version=EX | |||
|damage=400, 1000, 1500 (1502) | |||
|reddamage=(1038) | |||
|proration=50% (O), 45% (O) | |||
|circuit=-100.0% | |||
|cancel=(N), (SP), (EX), (J) | |||
|guard=LH (1-3), LHA (4) | |||
|startup=4+3 | |||
|active={{Tooltip | text=35| hovertext=2 (4) 5 (3) 2 (3) 5 (7) 4}} | |||
|recovery=43 | |||
|frameAdv=-29 | |||
|invuln=Full 1-8<br>Clash 15-17, 21-22, 26-27 | |||
|description=Akiha's metered true reversal. Very easy to outspace, jump over, or just otherwise cover, and it's hitbox and frame data leave much to be desired. Can be normal cancelled on hit after the last part, making it a fairly high damage reversal. OTG Relaunches | |||
}} | }} | ||
}} | }} | ||
=== | ===== <span class="invisible-header">214X</span> ===== | ||
{{MoveData | {{MoveData | ||
|image= | |image=MB_C-Akiha_214AB.png | ||
|caption= | |image2=MB_C-Akiha_214B_BE.png | ||
|name= | |image3=MB_C-Akiha_214C.png | ||
|input= | |caption= | ||
|name=Piercing the Moon<br>(EX: Piercing the Waxing Moon) | |||
|linkname=214X | |||
|input=214A/B/C | |||
|data= | |data= | ||
{{AttackData-MB-Simple | |||
|damage= | |description=Akiha summons a pillar of fire in front of her. All versions are unblockable mid-air. However, they can be shielded. | ||
|reddamage= | }} | ||
|proration= | {{AttackData-MB | ||
|circuit= | |version=A | ||
|cancel= | |damage=600 | ||
|guard= | |reddamage=576 | ||
|startup= | |proration=70% (O) | ||
|active= | |circuit=4.2% | ||
|recovery= | |cancel= | ||
|frameAdv= | |guard=LH | ||
|invuln= | |startup=16 | ||
|description= | |active=8 | ||
|recovery=29 | |||
|frameAdv=-12 | |||
|invuln= | |||
|description=A version summons a pillar at a distance of two character lengths. Has fast startup so it can be used as an anti-air. Its high recovery leaves Akiha vulnerable if the move does anything but hit. | |||
}} | |||
{{AttackData-MB | |||
|header=no | |||
|version=B | |||
|damage=500 | |||
|reddamage=480 | |||
|proration=70% (O) | |||
|circuit=3.5% | |||
|cancel= | |||
|guard=LH | |||
|startup=33 | |||
|active=8 | |||
|recovery=1 | |||
|frameAdv=16 | |||
|invuln= | |||
|description=Summons a pillar at a distance of two character lengths. Has the same range of the A version but slower startup. However, it has little to none recovery, so it puts Akiha on an advantage if blocked. Being single-hit, a counter-hit can be followed up by anything. | |||
}} | |||
{{AttackData-MB | |||
|header=no | |||
|version=[B] | |||
|damage=500*2 (797) | |||
|reddamage=(766) | |||
|proration=70% (O) | |||
|circuit=3.5%*2 (7.0%) | |||
|cancel= | |||
|guard=LH | |||
|startup=46 | |||
|active={{Tooltip | text=8| hovertext=4, 4}} | |||
|recovery=1 | |||
|frameAdv=18 | |||
|invuln= | |||
|description=The charged version has even slower startup and hits at a distance of five character lengths, being very risky to use. It also hits twice, spoiling counterhits, but you can follow up a hit with IAD or a forward superjump. | |||
}} | |||
{{AttackData-MB | |||
|header=no | |||
|version=EX | |||
|damage=380*8 (2422) | |||
|reddamage=(1528) | |||
|proration=100% | |||
|circuit=-100.0% | |||
|cancel= | |||
|guard=LH | |||
|startup=2+24 | |||
|active={{Tooltip | text=8| hovertext=1 x8}} | |||
|recovery=22 | |||
|frameAdv=1 | |||
|invuln= | |||
|description=A tracking pillar that hits for 2422 damage unprorated. Pretty quick activation, appears under the opponent no matter where they are, though they have enough time to airdash out. Has an almost infinite vertical range but due to being multi-hit the opponent can tech out of it. | |||
The ex-pillar is insurance, at a certain point during the startup, the projectile will be guaranteed and won't disappear on hit. | |||
}} | }} | ||
}} | }} | ||
=== | ===== <span class="invisible-header">22X</span> ===== | ||
{{MoveData | {{MoveData | ||
|image= | |image=MB_H-Akiha_22A.png | ||
|caption= | |image2=MB_H-Akiha_22B.png | ||
|name= | |image3=MB_H-Akiha_22C.png | ||
|input= | |caption= | ||
|name=Maximizing Beasts | |||
|linkname=22X | |||
|input=22A/B/C | |||
|data= | |data= | ||
{{AttackData-MB-Simple | |||
|damage= | |description=Pit series. Unlike in C-Moon, those will auto-detonate right before Akiha's animation ends. Has a very small amount of meter drain. | ||
|reddamage= | }} | ||
|proration= | {{AttackData-MB | ||
|circuit= | |version=A | ||
|cancel= | |damage=300*3 (802) | ||
|guard= | |reddamage=(306) | ||
|startup= | |proration=100% | ||
|active= | |circuit={{Tooltip | text=2.1%*3 (6.3%)| hovertext=Drain 3.6% of the opponent's meter and return 1.3%.}} | ||
|recovery= | |cancel= | ||
|frameAdv= | |guard=LHA | ||
|invuln= | |startup=49 | ||
|description= | |active={{Tooltip | text=3| hovertext=1, 1, 1
...(4) 2 Including the meter drain box afterwards.}} | ||
|recovery=0 | |||
|frameAdv= | |||
|invuln=Low 12-33 | |||
|description=A summons the pit at Akiha's initial position. | |||
}} | |||
{{AttackData-MB | |||
|header=no | |||
|version=B | |||
|damage=300*3 (802) | |||
|reddamage=(306) | |||
|proration=100% | |||
|circuit={{Tooltip | text=2.1%*3 (6.3%)| hovertext=Drain 3.6% of the opponent's meter and return 1.3%.}} | |||
|cancel= | |||
|guard=LHA | |||
|startup=54 | |||
|active={{Tooltip | text=3| hovertext=1, 1, 1
...(4) 2 Including the meter drain box afterwards.}} | |||
|recovery=2 | |||
|frameAdv= | |||
|invuln=Low 17-41 | |||
|description=B summons the pit farther away from the Akiha's position. | |||
}} | |||
{{AttackData-MB | |||
|header=no | |||
|version=EX | |||
|damage=300*6 (1492) | |||
|reddamage=(1433) | |||
|proration=100% | |||
|circuit=-100.0% | |||
|cancel= | |||
|guard=LHA | |||
|startup=2+36 | |||
|active={{Tooltip | text=17| hovertext=1 x5, 12
Meter drain box on active frames 8-9.}} | |||
|recovery={{Tooltip | text=2+45| hovertext=Full animation.}} | |||
|frameAdv= | |||
|invuln=Full 1-9, Low 10-31 | |||
|description=EX Pit will be set at B's position, hitting 6 times. | |||
}} | }} | ||
}} | }} | ||
=== | ==== Aerial Specials ==== | ||
===== <span class="invisible-header">j.236X</span> ===== | |||
{{MoveData | {{MoveData | ||
|image= | |image=MB_H-Akiha_j.236AB.png | ||
|caption= | |image2=MB_H-Akiha_j.236C.png | ||
|name= | |caption= | ||
|input= | |name=Brilliant Impetus - Temporary String | ||
|linkname=j.236X | |||
|input=j.236A/B/C<br>(Hold OK) | |||
|data= | |data= | ||
{{AttackData-MB-Simple | |||
|damage= | |description=Akiha sets up a ball of string which will detonate after a short period. All versions can have their explosions delayed for max. 58 frames by holding the corresponding button. | ||
|reddamage= | }} | ||
|proration= | {{AttackData-MB | ||
|circuit= | |version=A | ||
|cancel= | |damage=1200 | ||
|guard= | |reddamage=960 | ||
|startup= | |proration=70% (O) | ||
|active= | |circuit=7.0% | ||
|recovery= | |cancel= | ||
|frameAdv= | |guard=LHA | ||
|invuln= | |startup=54 ~ 112 | ||
|description= | |active=5 | ||
|recovery={{Tooltip | text=18| hovertext=Landing recovery.}} | |||
|frameAdv= | |||
|invuln= | |||
|description= | |||
}} | |||
{{AttackData-MB | |||
|header=no | |||
|version=B | |||
|damage=1200 | |||
|reddamage=960 | |||
|proration=70% (O) | |||
|circuit=7.0% | |||
|cancel= | |||
|guard=LHA | |||
|startup=60 ~ 118 | |||
|active=5 | |||
|recovery={{Tooltip | text=18| hovertext=Landing recovery.}} | |||
|frameAdv= | |||
|invuln= | |||
|description=Small string ball, the main difference between A and B version is that B won't immediately alter your air momentum and has a 6f slower startup.<br> | |||
Fully holding these versions will result in a smaller hitbox. | |||
}} | |||
{{AttackData-MB | |||
|header=no | |||
|version=EX | |||
|damage=2000 | |||
|reddamage=1344 | |||
|proration=70% (O) | |||
|circuit=-100.0% | |||
|cancel= | |||
|guard=LHA | |||
|startup=2+(50 ~ 108) | |||
|active=5 | |||
|recovery={{Tooltip | text=18| hovertext=Landing recovery.}} | |||
|frameAdv= | |||
|invuln= | |||
|description=Big string ball, hitbox is the same wheter it is fully charged or not. | |||
}} | |||
}} | |||
===== <span class="invisible-header">j.22X</span> ===== | |||
{{MoveData | |||
|image=MB_H-Akiha_22A.png | |||
|image2=MB_H-Akiha_22B.png | |||
|image3=MB_H-Akiha_22C.png | |||
|caption= | |||
|name=Maximizing Beasts (Air) | |||
|linkname=j.22X | |||
|input=j.22A/B/C | |||
|data= | |||
{{AttackData-MB-Simple | |||
|description=Aerial versions of H-Akiha's auto-detonating Pits. | |||
}} | |||
{{AttackData-MB | |||
|version=A/B | |||
|damage=300*3 (802) | |||
|reddamage=(306) | |||
|proration=100% | |||
|circuit={{Tooltip | text=2.1%*3 (6.3%)| hovertext=Drain 3.6% of the opponent's meter and return 1.3%.}} | |||
|cancel= | |||
|guard=LHA | |||
|startup=47 | |||
|active={{Tooltip | text=3| hovertext=1, 1, 1
...(4) 2 Including the meter drain box afterwards.}} | |||
|recovery={{Tooltip | text=40*| hovertext=Total move duration before regaining actions.}} | |||
|frameAdv= | |||
|invuln=Low 10-X | |||
|description= | |||
}} | |||
{{AttackData-MB | |||
|header=no | |||
|version=EX | |||
|damage=300*6 (1492) | |||
|reddamage=(1433) | |||
|proration=100% | |||
|circuit=-100.0% | |||
|cancel= | |||
|guard=LHA | |||
|startup=1+37 | |||
|active={{Tooltip | text=17| hovertext=1 x5, 12
Meter drain box on active frames 8-9.}} | |||
|recovery={{Tooltip | text=1+39*| hovertext=Total move duration before regaining actions.}} | |||
|frameAdv= | |||
|invuln=Full 1-9, Low 10-X | |||
|description= | |||
}} | }} | ||
}} | }} | ||
=== Arc Drive === | |||
{{MoveData | {{MoveData | ||
|image= | |image=MB_H-Akiha_AD_Throw.png | ||
|image2=MB_C-Akiha_AD.png | |||
|caption= | |caption= | ||
|name= | |name=Red Mistress - Locks of Hair | ||
|input= | |linkname=Arc Drive | ||
|data= | |input=41236C during Heat<br>(~X) | ||
|data= | |||
|damage= | {{AttackData-MB | ||
|reddamage= | |version=(Throw)<br>(Strike) | ||
|proration= | |damage=450*23 (3515)<br>300*13 (1550) | ||
|circuit= | |reddamage=(2241)<br>(1241) | ||
|cancel= | |proration=50% (O) | ||
|guard= | |circuit=removes all | ||
|startup= | |cancel= | ||
|active= | |guard=A<br>LHA | ||
|recovery= | |startup=3+1 | ||
|frameAdv= | |active=1 (4) {{Tooltip | text=26| hovertext=2 x13}} | ||
|invuln= | |recovery=44 | ||
|description= | |frameAdv=-31 ~ -9 | ||
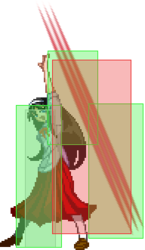
|invuln=Full 1-45 | |||
|description=This Arc Drive will try to grab the opponent instantly after the 55f superflash, and if it cannot, will go into a far-reaching upward multi-hit claw strike. This throw hitbox is actually blockable in the air only, making it an unique ground unblockable. | |||
You can add more hits on a successful grab by pressing buttons, but it will make it actually do less damage if you do it without thinking.<br> | |||
You should only start mashing towards very end, when the proration of the AD already went down. This then can increase damage up to 3698. | |||
}} | }} | ||
}} | }} | ||
{{Navbox-MBAACC}} | {{Navbox-MBAACC}} | ||
[[Category:Melty Blood Actress Again Current Code]] | [[Category:Melty Blood Actress Again Current Code]] | ||
[[Category:Akiha Tohno]] | |||
Latest revision as of 14:34, 7 February 2024
Character Page Progress
This page is mostly complete, consider joining as an editor to help finish it up. Please update this character's roadmap page when one of the editing goals have been reached.
| In Progress | To-do |
|---|---|
|
Additional Resources
H-Akiha Match Video Database
H-Akiha combo and tech compilation
Notable Players
| Name | Color | Region | Common Venues | Status | Details |
|---|---|---|---|---|---|
| cc. | Europe | Netplay | Inactive | Was one of the best players in Europe. | |
| batto (ばっと) | Japan | KorewaMelty | Inactive | Batsister, one of the better players of this character. Has been around ever since the original Actress Again. | |
| GO1 | Japan | A-cho | Inactive | ||
| Houjou (北条) | Japan | A-cho | Inactive | ||
| Yume (夢) | Japan | A-cho | Active | While still active, he doesn't play this moon a lot anymore, playing F more. |
Overview
| H-Akiha is a slow, hard-hitting tank with good meter gain. | |
| Pros | Cons |
|
|
General Gameplan
H-Akiha essentially plays similar Akiha neutral in which she uses her jumps and super double jumps to leverage advantage over their opponent. The only key difference from F and C is that H-akiha doesn't have ribbons at all like the others. H-Akiha then has auto detonation pits. Not particularly too useful in neutral unless its someone committed to the ground. She's fitted with the ability to reverse beat which makes her corner mixups decent enough to end the matches there. Her combos typically corner carry across the board.
Neutral is slightly lacking due to loss of ribbons so you will have to depend on your fundamentals to aid you in navigating neutral but you do have a good jump-in called j.C to boot. Once you get a hit, corner carry and use j.236B after j.2C to discourage jump outs since it hits meaty if you don't hold the B button to delay its detonation. A good rushdown character like any H moon character with good corner carry and mixups to boot. Neutral and pressure is not as strong as the other Akihas.
Neutral
Neutral unlike the other moons of this Akiha is very barebones. You mainly will be looking to be at venues to leverage your j.C as it's your best jump-in. Other than that, H-Akiha can use her dash to move in spots since all moons of Akiha Tohno can block frame 1. Dash 2C can be good in places where you cross under and trip guard the opponent, dash 4C is also good since its a fast command normal that hits a lot of space. Again to stress, a lot of H-Akiha's air normals hit downward so its much better for her to be above the opponent.
Occasionally use j.22X to force the awareness that the opponent cannot stay on the ground idly. Other than that it will really depend on your understanding of how melty's neutral interactions and the demand for micro decisions work in order to work with her in neutral simply due to not having ribbons.
Pressure
A lot of her pressure is simple melty pressure with H and C moons where you use rebeats to disguise pressure resets within the staggers. Some examples include:
- 2AA > 5B, 5B
- 2AA > 5B > delay 2C
- 2AA > 5B > 5A6A > 214B
- 2AA > 5AA, dash grab
- 2AA > 5AA > delay 6AA
- 2AAAA, IAD j.B/j.C
These are basic examples but should send the point that with enough staggers you can even incorporate things like 236A into your pressure ideas. Also be sure to take advantage of your 5B's long cancel window since it will be an important frame trap window. Of course when they respect your pressure enough you can then attempt to grab and if they are looking to OS or mash you can then deter than with instant j.2C or 236A. 214B is + but has considerable start up that can be either shielded, jumped out of or backdashed so be sure to show other options and not default to a single option to rotate from.
Okizeme
Her oki after j.2C is probably her strongest point as you can decide to either include j.236B or not. Most times you will want to add j.236B in order to make her oki stronger since web meaties opponents and in extension to that it also enforces respect. Some of the oki options if you include web (j.236B) that also works without web are these.
- super jump into low
- super jump delay air dash j.C
- dash grab (better if you have j.236B set)
- super jump j.CB
- super jump j.A air dash j.C
There's plenty more you can learn from matches but these are some ideas to start you off.
Defense
There's not much to this Akiha's options since her shield is much weaker, no EX Guard mechanics, etc, but here's some defensive options:
For abare you have 2A and 4C, both good at their own ranges and work for different purposes. 2A is really good if you manage to incorporate 1A~D in your defensive options while 4C is a fast command normal that hits far. Other than that you do have dodge, shield, metered bunker, regular bunker and jump and block all of which has its consequences/risks to them. Out of those options block and jump when its time to do so is the least risky option but if you always choose this option it can be a detriment to your defense overall. so be sure to recognize when to metered bunker, dodge, shield or even dash out of the corner if the opponent presents enough of a gap to do so.
Combos
| Combo Notation Help | |
|---|---|
| Disclaimer: Combos are written by various writers, so the actual notation used in pages can differ from the standard one. | |
| X > Y | X input is cancelled into Y. |
| X > delay Y | Must wait for a short period before cancelling X input into Y. |
| X, Y | X input is linked into Y, meaning Y is done after X's recovery period. |
| X+Y | Buttons X and Y must be input simultaneously. |
| X/Y | Either the X or Y input can be used. |
| X~Y | This notation has two meanings.
|
| X(w) | X input must not hit the opponent (Whiff). |
| j.X | X input is done in the air, implies a jump/jump cancel if the previous move was done from the ground. Applies to all air chain sections:
|
| sj.X | X input is done after a super jump. Notated as sj8.X and sj9.X for neutral and forward super jumps respectively. |
| dj.X | X input is done after a double jump. |
| sdj.X | X input is done after a double super jump. |
| tk.X | Stands for Tiger Knee. X motion must be buffered before jumping, inputting the move as close to the ground as possible. (ex. tk.236A) |
| (X) | X is optional. Typically the combo will be easier if omitted. |
| [X] | Input X is held down. Also referred to as Blowback Edge (BE). Depending on the character, this can indicate that this button is held down and not released until indicated by the release notation. |
| ]X[ | Input X is released. Will only appear if a button is previously held down. This type of input is referred to as Negative Edge. |
| {X} | Button X should only be held down briefly to get a partially charged version instead of the fully charged one. |
| X(N) | Attack "X" should only hit N times. |
| (XYZ)xN | XYZ string must be performed N times. Combos using this notation are usually referred to as loops. |
| (XYZ^) | A pre-existing combo labelled XYZ is inserted here for shortening purposes. |
| CH | The first attack must be a Counter Hit. |
| Air CH | The first attack must be a Counter Hit on an airborne opponent. |
| 66 | Performs a ground forward dash. |
| j.66 | Performs an aerial forward dash, used as a cancel for certain characters' air strings. |
| IAD/IABD | Performs an Instant AirDash. |
| AT | Performs an Air Throw. (j.6/4A+D) |
| IH | Performs an Initiative Heat. |
| AD | Performs an Arc Drive. |
| AAD | Performs an Another Arc Drive. |
Normal Combos
Corner Combos
Move Descriptions
| Frame Data Help | |
|---|---|
| Header | Tooltip |
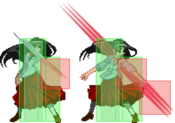
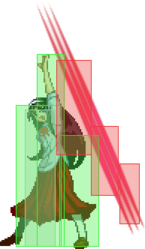
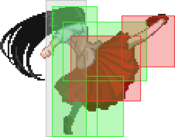
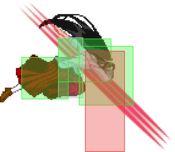
| Move Box Colors |
Light gray = Collision Box (A move lacking one means it can go through the opponent's own collision box). |
| Damage | Base damage done by this attack.
(X) denotes combined and scaled damage tested against standing V. Sion. |
| Red Damage | Damage done to the recoverable red health bar by this attack. The values are inherently scaled and tested against standing V. Sion.
(X) denotes combined damage. |
| Proration | The correction value set by this attack and the way it modifies the scaling during a string. See this page for more details.
X% (O) means X% Overrides the previous correction value in a combo if X is of a lower percentage. |
| Circuit | Meter gained by this attack on hit.
(X%) denotes combined meter gain. |
| Cancel | Actions this move can be cancelled into.
SE = Self cancelable. |
| Guard | The way this move must be blocked.
L = Can block crouching |
| Startup | Amount of frames that must pass prior to reaching the active frames. Also referred to as "True Startup". |
| Active | The amount of frames that this move will have a hitbox. (x) denotes frame gaps where there are no hitboxes is present. Due to varied blockstuns, (x) frames are difficult to use to determine punish windows. Generally the larger the numbers, the more time you have to punish. |
| Recovery | Frames that this move has after the active frames if not canceled. The character goes into one frame where they can block but not act afterwards, which is not counted here. |
| Advantage | The difference in frames where you can act before your opponent when this move is blocked (assuming the move isn't canceled and the first active frame is blocked). If the opponent uses a move with startup that is at least 2 frames less than this move's negative advantage, it will result in the opponent hitting that move. |
| Invul | Lists any defensive properties this move has.
X y~z denotes X property happening between the y to z frames of the animations. If no frames are noted, it means the invincibility lasts through the entire move. Invicibility:
Hurtbox-Based Properties:
Miscellaneous Properties
|
Normal Moves
Standing Normals
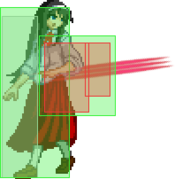
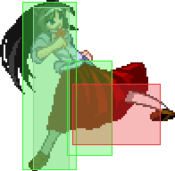
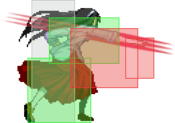
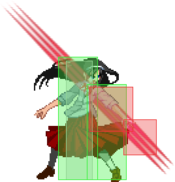
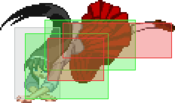
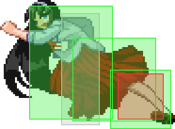
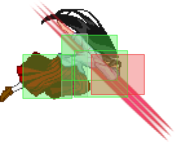
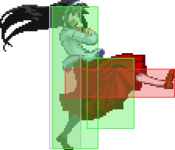
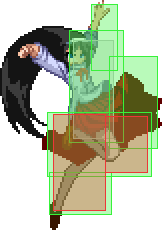
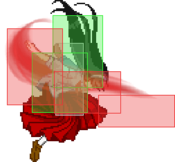
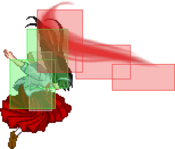
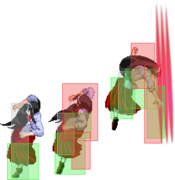
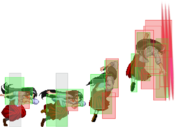
5A
5A
5A~6A~6A |
|---|
5B
5B 5B/[B]~B 5B 5B 5[B] 5[B] 5BB 5BB
|
|---|
5C
Crouching Normals
2A
2B
2B 2B~2B~2B 2B 2B 2BB 2BB 2BBB 2BBB
|
|---|
2C
2C
2[C] |
|---|
Jumping Normals
j.A
j.B
j.C
Command Normals
4C
6C
j.2C
Universal Mechanics
Ground Throw
Ground Throw
6/4A+D |
|---|
Air Throw
Air Throw
j.6/4A+D |
|---|
Shield Counter
Shield Counter
Auto after a successful Shield (Air OK) |
|---|
Shield Bunker
Shield Bunker
214D in neutral or blockstun |
|---|
Circuit Spark
Special Moves
Disclaimer: For reasons involving momentum and disjointed stationary projectile hitboxes, the visual representation of Akiha's moves below may not always be pixel perfect.
Grounded Specials
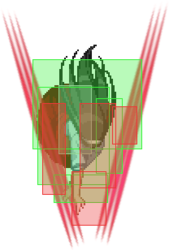
236X
Plucking Birds
236A/B/C |
|---|
623X
214X
22X
Maximizing Beasts
22A/B/C |
|---|
Aerial Specials
j.236X
j.22X
Maximizing Beasts (Air)
j.22A/B/C |
|---|
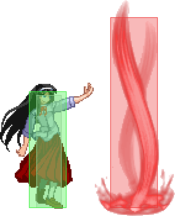
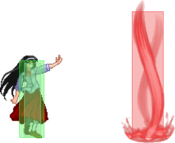
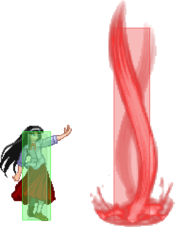
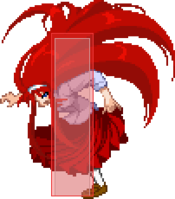
Arc Drive


