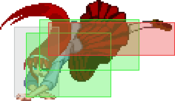
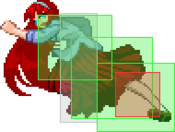
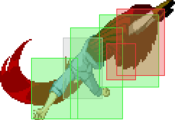
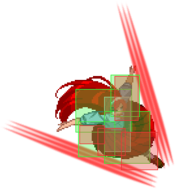
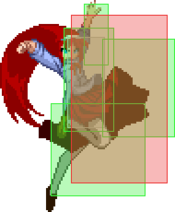
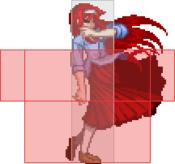
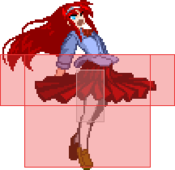
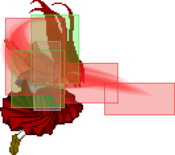
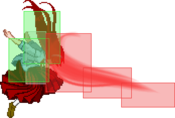
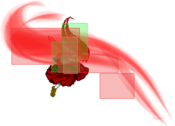
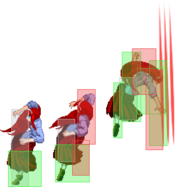
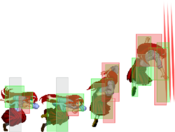
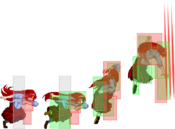
Melty Blood/MBAACC/Akiha Vermilion/Half Moon: Difference between revisions
mNo edit summary |
|||
| (287 intermediate revisions by 18 users not shown) | |||
| Line 1: | Line 1: | ||
{{TOClimit|3}} | |||
= | == Character Page Progress == | ||
{{#lst:Melty_Blood/MBAACC:Roadmap|H-VAkiha}} | |||
== Overview == | |||
{{StrengthsAndWeaknesses | |||
|intro=[[File:H vaki.png]] '''H-VAkiha''' is ''speed''. | |||
|pros= | |||
*'''Lightning fast:''' H-Vaki is one of the most mobile characters in the game with two fast airdashes, great dash speed once she gets moving, and multiple ways to manipulate momentum. | |||
*'''Great corner carry:''' Ground hits and air counterhits readily convert into fullscreen carry and corner oki. | |||
*'''Stable oki:''' H-VAki oki is very safe and maintains consistent offense. Some setups can instead lead into corner mixup. | |||
*'''Good offense:''' Many normals move forward to help keep pressure on, and given the opportunity H-VAki has solid mixup with j.C airdash j.B fuzzy setups. | |||
*'''Half Moon Synergy:''' H-VAki is not meter reliant and plays well with auto-Heat, guard cancel Bunker, and 6AA. | |||
|cons= | |||
: | *'''Fragile:''' VAki has the lowest health in the game and limited reversal options. Heat helps extend her life pool, but rounds can snowball against her very quickly. | ||
*'''Poor stray hit conversions:''' Stray hits often lead to air combos and weak airthrow oki. | |||
}} | |||
== Additional Resources == | |||
[http://mbaacc.melty.games/?p1moon=h&p1char=vakiha H-V.Akiha Match Video Database]<br> | |||
[https://drunkardshade.com/2015/08/03/melty-bits-h-v-akiha/ Melty Bits: H-V.Akiha] <br> | |||
[https://docs.google.com/document/d/1-A6LD21iHVJMa29i9tS6k9XnlBx6wcL1gQz0GAtu4Gs/edit?usp=sharing @DRK_Player: Playing H-VAkiha.] A PDF mirror of the document is available [[Media:Playing H-VAkiha.pdf|here.]] | |||
== Move Descriptions == | |||
{{AttackData-MB/Infobox}} | |||
=== Normal Moves === | |||
==== Standing Normals ==== | |||
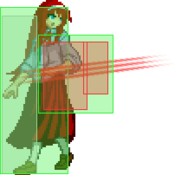
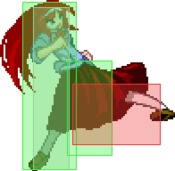
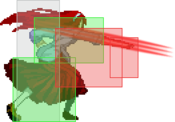
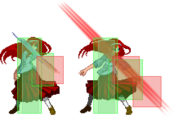
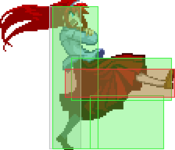
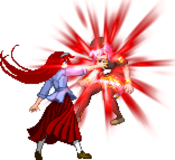
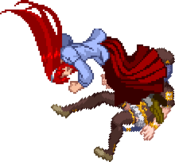
===== <span class="invisible-header">5A</span> ===== | |||
{{MoveData | |||
|image=hvakiha_5a.png | |||
|image2=hvakiha_6a.png | |||
|image3=hvakiha_6aa.png | |||
|caption=Plus on block. | |||
|caption2=Good for staggers. | |||
|caption3=BNB filler. | |||
|name=5A | |||
|linkname=5A | |||
|input=5A~6A~6A | |||
|data= | |||
{{AttackData-MB | |||
|version=5A | |||
|damage=300 | |||
|reddamage=115 | |||
|proration=75% (O) | |||
|circuit=2.1% | |||
|cancel=-SE-, -N-, -SP-, -CH-, -EX-, (J) | |||
|guard=LH | |||
|startup=5 | |||
|active=3 | |||
|recovery=8 | |||
|frameAdv=1 | |||
|invuln= | |||
|description=Insane 5A. Fast, large horizontal range, +1 on block, hits crouchers. Rebeating into it at close range is just as good as whiff cancelling a move for advantage—and you can stagger out of it instead of letting it recover to frametrap people, too, much like a whiff cancel. Since it's plus, if you let it recover, you can frametrap some characters and reset your available normals at the same time. It's an ideal reset point. This is the backbone of H-V.Akiha pressure at close range. | |||
== | Notice than 5A has better proration than 2A, so it's good for good quick punishes or mashes after a dash or after a j.C you know it's gonna hit instead of 2A. | ||
}} | |||
{{AttackData-MB | |||
|header=no | |||
|version=5A~6A | |||
|damage=600 | |||
|reddamage=384 | |||
|proration=80% (M) | |||
|circuit=4.2% | |||
|cancel=N, SP, -CH-, EX, (J) | |||
|guard=LH | |||
|startup=8 | |||
|active=4 | |||
|recovery=16 | |||
|frameAdv=-5 | |||
|invuln= | |||
|description=Decent 6A that moves VAkiha forward and has very little pushback on block. Useful in combos and stagger pressure. | |||
}} | |||
{{AttackData-MB | |||
|header=no | |||
|version=5A~6A~6A | |||
|damage=1000 | |||
|reddamage=768 | |||
|proration=60% (O) | |||
|circuit=7.0% | |||
|cancel=(N), SP, EX, (J) | |||
|guard=LH | |||
|startup=10 | |||
|active=4 | |||
|recovery=15 | |||
|frameAdv=-1 | |||
|invuln= | |||
|description=Decent 6AA; mostly used as combo filler. It's the main reason why H-V.Akiha can perform combos with fullscreen corner carry from almost any hit. You can use it in pressure, but do note that it can only be cancelled into specials on block. | |||
}} | |||
}} | |||
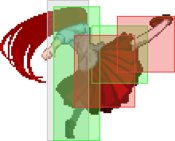
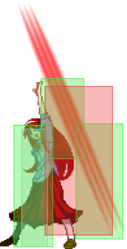
===== <span class="invisible-header">5B</span> ===== | |||
{{MoveData | |||
|image=vakiha_5b.png | |||
|image2=vakiha_5bBE.png | |||
|image3=vakiha_5bb.png | |||
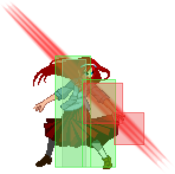
|caption=Essential pressure tool. | |||
|caption2=Slow but plus. | |||
|caption3=Launcher. | |||
|name=5B | |||
|linkname=5B | |||
|input=5B/[B]~B | |||
|data= | |||
{{AttackData-MB | |||
|version=5B | |||
|damage=550 | |||
|reddamage=384 | |||
|proration=100% | |||
|circuit=4.2% | |||
|cancel=N, SP, -CH-, EX, (J) | |||
|guard=LH | |||
|startup=7 | |||
|active=4 | |||
|recovery=12 | |||
|frameAdv=-1 ~ 2 | |||
|invuln= | |||
|description=The backbone of H-VAki pressure when you're more pushed out. Moves you forward slightly and has a huge cancel window, in addition to being -1 on block; this allows for extremely ambiguous staggers and pressure resets. Since this move moves you forward while the hitbox is out, it can become neutral or plus on block if you're spaced right and it hits in the later frames. | |||
Be sure to tap the button for at most 3 frames when you use it, or you risk getting a longer startup from partially charging the move. Also note that it trips crouchers on hit. In that case, you can either follow it with 2C > delayed 4C > 623B in the corner, delayed 4C > 2C > delayed 623B also in the corner or delayed 4C > 5C > 2C > delayed 5A(w)6AA combos in midscreen. Or you could just try to punish ground tech. | |||
''' | It's her best normal starter so 5B > 5C > 4C > 5A6AA leads to her most damaging combos on Standing opponents. | ||
}} | |||
{{AttackData-MB | |||
|header=no | |||
|version=5[B] | |||
|damage=500, 400*3 (1624) | |||
|reddamage=(1146) | |||
|proration=100% | |||
|circuit=2.8%*4 (11.2%) | |||
|cancel=N, SP, -CH-, EX, (J) | |||
|guard=LH | |||
|startup=30 | |||
|active={{Tooltip | text=9| hovertext=1, 2, 2, 4}} | |||
|recovery=8 | |||
|frameAdv=3 | |||
|invuln= | |||
|description=Slow, charged version of 5B. Plus on block, but the long startup limits its usefulness. You can use it as an air counterhit pickup instead of 5B. The multihit will give you enough time to react whether you should go for a ground corner carry route or an air combo depending on the height it hits. It'll do extra damage this way. The half charged version only sees use as a gimmick where you charge it and then go for a low when the opponent expects 6C, or as a way to frame trap from a previous button instead of delaying the cancel. | |||
}} | |||
{{AttackData-MB | |||
|header=no | |||
|version=~B | |||
|damage=500 | |||
|reddamage=240 | |||
|proration=70% (O) | |||
|circuit=4.2% | |||
|cancel=N, SP, EX, (J) | |||
|guard=LH | |||
|startup=8 | |||
|active=3 | |||
|recovery=29 | |||
|frameAdv=-14 | |||
|invuln= | |||
|description=H-VAki's launcher; mostly used in combos. Sometimes, it's the only option after awkward pickups, like an unexpected 4c on an opponent that just jumped. On hit, hold 8 to get a command superjump to continue your combo. Outside combos, it's mostly used to catch opponents blocking X214 high in the air since it's the only air unblockable move that can hit them. Like 5b, it will slide you forward a bit, although it's not as effective in pressure since it has considerable pushback and its cancel window is very short. | |||
}} | |||
}} | |||
===== <span class="invisible-header">5C</span> ===== | |||
{{MoveData | |||
|image=vakiha_5c.png | |||
|caption= | |||
|name=5C | |||
|linkname=5C | |||
|data= | |||
{{AttackData-MB | |||
|damage=1000 | |||
|reddamage=624 | |||
|proration=90% (O) | |||
|circuit=7.7% | |||
|cancel=N, SP, EX, (J) | |||
|guard=LH | |||
|startup=10 | |||
|active=6 | |||
|recovery=17 | |||
|frameAdv=-5 | |||
|invuln= | |||
|description=Big 5C that moves you forward a ton. Good in pressure for catching jumpouts and mash; also sees some use as an antiair, since it's harder to whiff punish than 4c, although it knocks them away and wallslams them on air hit. This moves also sees use as a tech punish. | |||
}} | |||
}} | |||
==== Crouching Normals ==== | |||
===== <span class="invisible-header">2A</span> ===== | |||
{{MoveData | |||
|image=vakiha_2a.png | |||
|caption= | |||
|name=2A | |||
|linkname=2A | |||
|data= | |||
{{AttackData-MB | |||
|damage=350 | |||
|reddamage=144 | |||
|proration=65% (O) | |||
|circuit=2.8% | |||
|cancel=-SE-, -N-, -SP-, -EX-, (J) | |||
|guard=L | |||
|startup=5 | |||
|active=3 | |||
|recovery=10 | |||
|frameAdv=-1 | |||
|invuln= | |||
|description=Low-hitting swipe. | |||
}} | |||
}} | |||
*''' | ===== <span class="invisible-header">2B</span> ===== | ||
{{MoveData | |||
|image=vakiha_2b.png | |||
|image2=vakiha2b2.png | |||
|image3=vakiha_2b3.png | |||
|caption=Underrated button. | |||
|caption2= | |||
|caption3=Slow overhead. | |||
|name=2B | |||
|linkname=2B | |||
|input=2B~2B~2B | |||
|data= | |||
{{AttackData-MB | |||
|version=2B | |||
|damage=250*6 (653) | |||
|reddamage=(460) | |||
|proration=85% (O) | |||
|circuit=2.0%*3 (6.0%) | |||
|cancel=N, SP, -CH-, EX, (J) | |||
|guard=LH | |||
|startup=6 | |||
|active={{Tooltip | text=9| hovertext=1, 4, 4}} | |||
|recovery=13 | |||
|frameAdv=-2 | |||
|invuln= | |||
|description=Big, fast 2B with a lot of pushback on hit or block if most of the hits connect. Although it's a bit hard, you can cancel the move after the first hit to get significantly less pushback. It's a decent abare tool, and can get you to a good spacing fast in pressure. It's also a good button to fight wakeup 5D. However, it doesn't hit low. Since it's so active, it's a good move for catching ground tech attempts. Notice that the amount of hits conecting depends on distance (3 hits being the closest to the opponent and 1 hit the farthest). Because of this, the move is only -2 on block if the three hits are blocked, -6 if two are blocked and -7 if only one of them is blocked (it almost never happens). | |||
}} | |||
{{AttackData-MB | |||
|header=no | |||
|version=~2B | |||
|damage=200*3 (580) | |||
|reddamage=(279) | |||
|proration=100% (O) | |||
|circuit=0.7%*3 (2.1%) | |||
|cancel=-CH- | |||
|guard=LA | |||
|startup={{Tooltip | text=1| hovertext=1 ~ 2f if buffered during 2B's last 2 active frames.}} | |||
|active={{Tooltip | text=5| hovertext=6 on hit/block. 3 hits.}} | |||
|recovery=20 | |||
|frameAdv=-10 ~ -9 | |||
|invuln= | |||
|description=2B's sad followup; hits low, but only cancels into 2BBB and trips on hit, so it's pretty useless. Instantly active if done during 2B's recovery. You can link some normals after it trips, and you may have seen this in combo videos, but there are still no known practical combos that involve this technique. | |||
}} | |||
{{AttackData-MB | |||
|header=no | |||
|version=~2B~2B | |||
|damage=500 | |||
|reddamage=576 | |||
|proration=75% (O) | |||
|circuit=4.2% | |||
|cancel=J | |||
|guard=HA | |||
|startup=26 | |||
|active=5 | |||
|recovery=16 | |||
|frameAdv=-3 | |||
|invuln= | |||
|description=Very telegraphed overhead that bounces them on hit; you need to jump cancel to follow it up for any damage. It's only usable as a gimmick. It can be jump cancelled for on block for a gimmicky pressure reset, but, since 2BBB is the only thing you can do out of 2BB, the opponent has to be asleep for it to work. The button sees almost no use as a result. If you manage to make both 2B and 2BB whiff, like in a wakeup situation, it can probably catch your opponent off guard the first time. | |||
}} | |||
}} | |||
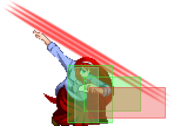
===== <span class="invisible-header">2C</span> ===== | |||
{{MoveData | |||
|image=vakiha_2c.png | |||
|caption=Sweep. | |||
|name=2C | |||
|linkname=2C | |||
|data= | |||
{{AttackData-MB | |||
|damage=900 | |||
|reddamage=480 | |||
|proration=60% (O) | |||
|circuit=5.6% | |||
|cancel=N, SP, EX, (J) | |||
|guard=L | |||
|startup=9 | |||
|active=5 | |||
|recovery=20 | |||
|frameAdv=-7 | |||
|invuln= | |||
|description=Does everything you'd expect of a sweep. It's situationally useful as an antiair and abare button, and also sees use as a poke, but it's very easy to whiff punish. This move will slightly slide you forward after using it. 2C is not disjointed, but due to the nature of the game, it has a tendency to trade most of the time when used as anti-air against certain moves, such as C-V.Sion's j.B. If it trades this way, you may be able to follow with 2A > 2C > 5A6AA > delay 6C, or any variation of it. | |||
}} | |||
}} | |||
==== Aerial Normals ==== | |||
===== <span class="invisible-header">j.A</span> ===== | |||
{{MoveData | |||
|image=vakiha_ja.png | |||
|caption=Fast air poke. | |||
|name=j.A | |||
|linkname=j.A | |||
|data= | |||
{{AttackData-MB | |||
|damage=300 | |||
|reddamage=144 | |||
|proration=72% (O) | |||
|circuit=2.1% | |||
|cancel=SE, N, SP, EX, J | |||
|guard=LHA | |||
|startup=5 | |||
|active=4 | |||
|recovery=10 | |||
|frameAdv= | |||
|invuln= | |||
|description=Passable j.A. The boxes by themselves are weak, but on a character as fast as V.Aki, they work fine. Can also be used in airdash mixup (e.g., IAD j.A > j.66 > j.C for high, IAD j.A, land 2A for low). | |||
}} | |||
}} | |||
===== <span class="invisible-header">j.B</span> ===== | |||
{{MoveData | |||
|image=vakiha_jb.png | |||
|caption= | |||
|name=j.B | |||
|linkname=j.B | |||
|data= | |||
{{AttackData-MB | |||
|damage=700 | |||
|reddamage=336 | |||
|proration=90% (O) | |||
|circuit=4.9% | |||
|cancel=N, SP, EX, J | |||
|guard=HA | |||
|startup=7 | |||
|active=7 | |||
|recovery= | |||
|frameAdv= | |||
|invuln= | |||
|description=Fantastic, very active air poke. Go-to air-to-air for opponents above or in front of you. Will whiff on most crouchers after an IAD. | |||
}} | |||
}} | |||
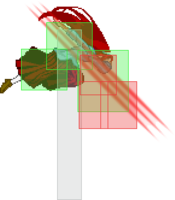
===== <span class="invisible-header">j.C</span> ===== | |||
{{MoveData | |||
|image=hvakiha_jc.png | |||
|caption= | |||
|name=j.C | |||
|linkname=j.C | |||
|data= | |||
{{AttackData-MB | |||
|damage=1000 | |||
|reddamage=480 | |||
|proration=90% (O) | |||
|circuit=7.0% | |||
|cancel=N, SP, EX, J | |||
|guard=HA | |||
|startup=10 | |||
|active=5 | |||
|recovery= | |||
|frameAdv= | |||
|invuln= | |||
|description=Very strong j.C, and your high of choice in airdash mixups. It has a relative large hitbox in the rear, so it can crossup very easily. Vertical spacing is key for this move. If spaced correctly, it'll basically beat every 5A anti-air. It's worth noting, though, that if you want to air-to-air with this button you need to either 1) be behind them or 2) be a good ways above them and hit the button preemptively. | |||
}} | |||
}} | |||
* | ==== Command Normals ==== | ||
===== <span class="invisible-header">4C</span> ===== | |||
{{MoveData | |||
|image=vakiha_4c.png | |||
|caption=Good abare tool. | |||
|name=4C | |||
|linkname=4C | |||
|data= | |||
{{AttackData-MB | |||
|damage=500*2 (984) | |||
|reddamage=(661) | |||
|proration=100% | |||
|circuit=3.5%*2 (7.0%) | |||
|cancel=N, SP, EX, (J) | |||
|guard=LH | |||
|startup=8 | |||
|active={{Tooltip | text=4| hovertext=2, 2}} | |||
|recovery=26 | |||
|frameAdv=-10 | |||
|invuln= | |||
|description=This button is large, and fast, but it's very easy to whiff punish due to the total duration of the move. It's decent as an antiair, good as a callout in neutral, great in pressure, and fantastic as abare. You will be using it a lot. Frame advantage is -12 if only the first hit connects. | |||
}} | |||
}} | |||
===== <span class="invisible-header">6C</span> ===== | |||
{{MoveData | |||
|image=vakiha_6c.png | |||
|caption=Slow overhead. | |||
|name=6C | |||
|linkname=6C | |||
|data= | |||
{{AttackData-MB | |||
|damage=600 | |||
|reddamage=288 | |||
|proration=75% | |||
|circuit=5.6% | |||
|cancel=(SP), (EX) | |||
|guard=H | |||
|startup=26 | |||
|active=4 | |||
|recovery=18 | |||
|frameAdv=-4 | |||
|invuln= | |||
|description=Okay overhead. On hit, it'll send the opponent flying and wallslam them. It's cancellable into a command dash on hit, which is crucial for your midscreen BnB. You can cancel this command dash into another dash. Further, when used after another C normal in pressure (e.g., the string 2AA > 5C > 6C), it will trade with mashing for a full combo, and beat certain options like dodge and F-Kohaku's counter. It's also sometimes used for okizeme when mixed with 5{B} 2a as a low option. | |||
}} | |||
}} | |||
=== Universal Mechanics === | |||
===== <span class="invisible-header">Ground Throw</span> ===== | |||
{{MoveData | |||
|image=MB_C-VAkiha_Throw.png | |||
|caption= | |||
|name=Ground Throw | |||
|linkname=Ground Throw | |||
|input=6/4A+D | |||
|data= | |||
{{AttackData-MB | |||
|damage=170*7 (1076) | |||
|reddamage=(462) | |||
|proration=100% | |||
|circuit=0.0% | |||
|cancel= | |||
|guard=U | |||
|startup=3 | |||
|active=1 | |||
|recovery=20 | |||
|frameAdv= | |||
|invuln= | |||
|description=V.Akiha grabs the opponent by the neck and goes into a 7-hit sequence. Untechable knockdown. | |||
}} | |||
}} | |||
===== <span class="invisible-header">Air Throw</span> ===== | |||
{{MoveData | |||
|image=MB_C-VAkiha_Throw_Air.png | |||
|caption= | |||
|name=Air Throw | |||
|linkname=Air Throw | |||
|input=j.6/4A+D | |||
|data= | |||
{{AttackData-MB | |||
|damage=1600 (Raw)<br>1000 | |||
|reddamage=465 | |||
|proration=100% | |||
|circuit=0.0% | |||
|cancel= | |||
|guard=U | |||
|startup=2 | |||
|active=1 | |||
|recovery={{Tooltip | text=12| hovertext=Landing recovery.}} | |||
|frameAdv= | |||
|invuln= | |||
|description=V.Akiha takes the opponent to the ground with the power of her legs. As a combo ender it will be untechable but will leave you at a distance. | |||
}} | |||
}} | |||
===== <span class="invisible-header">Shield Counter</span> ===== | |||
{{MoveData | |||
|image=MB_F-VAkiha_236D.png | |||
|image2=MB_H-VAkiha_236D.png | |||
|image3=MB_F-VAkiha_j.236D.png | |||
|caption= | |||
|name=Shield Counter | |||
|linkname=Shield Counter | |||
|input=Auto after a successful Shield (Air OK) | |||
|data= | |||
{{AttackData-MB | |||
|version=Standing | |||
|damage=500 (345) | |||
|reddamage=198 | |||
|proration=50% | |||
|circuit=3.5% | |||
|cancel=(SP), (EX), (J) | |||
|guard=LHA | |||
|startup=9 | |||
|active=4 | |||
|recovery=18 | |||
|frameAdv=-4 | |||
|invuln= | |||
|description=Same animation as 5BB. | |||
}} | |||
{{AttackData-MB | |||
|header=no | |||
|version=Crouching | |||
|damage=1500 (1117) | |||
|reddamage=714 | |||
|proration=50% | |||
|circuit=10.5% | |||
|cancel=(SP), (EX) | |||
|guard=LA | |||
|startup=9 | |||
|active=4 | |||
|recovery=18 | |||
|frameAdv=-4 | |||
|invuln= | |||
|description=Same animation as Shield Bunker. | |||
}} | |||
{{AttackData-MB | |||
|header=no | |||
|version=Aerial | |||
|damage=500 (345) | |||
|reddamage=198 | |||
|proration=50% | |||
|circuit=3.5% | |||
|cancel= | |||
|guard=HA | |||
|startup=9 | |||
|active=4 | |||
|recovery= | |||
|frameAdv= | |||
|invuln=Full 1-3 | |||
|description=Same animation as C-Moon j.C. | |||
}} | |||
}} | |||
===== <span class="invisible-header">Shield Bunker</span> ===== | |||
{{MoveData | |||
|image=MB_C-VAkiha_214D.png | |||
|image2=MB_H-VAkiha_214D.png | |||
|caption= | |||
|name=Shield Bunker | |||
|linkname=Shield Bunker | |||
|input=214D in neutral or blockstun | |||
|data= | |||
{{AttackData-MB | |||
|version=Neutral | |||
|damage=500 | |||
|reddamage=192 | |||
|proration=50% | |||
|circuit=0.0% | |||
|cancel= | |||
|guard=LHA | |||
|startup=26 | |||
|active=4 | |||
|recovery=19 | |||
|frameAdv=-5 | |||
|invuln=Clash 1-10 | |||
|description= | |||
}} | |||
{{AttackData-MB | |||
|header=no | |||
|version={{Tooltip | text=(Clash)| hovertext=If an attack connects with this Shield Bunker's clash box, this is the followup that happens afterwards.}} | |||
|damage=500 | |||
|reddamage=192 | |||
|proration=50% | |||
|circuit=0.0% | |||
|cancel= | |||
|guard=LHA | |||
|startup=8 | |||
|active=4 | |||
|recovery=19 | |||
|frameAdv=-5 | |||
|invuln={{Tooltip | text=Strike 1-7| hovertext=1-15 Strike invicibility on whiff.}} | |||
|description=V.Akiha's shield bunker is a special slide with low to the ground hitboxes. | |||
}} | |||
{{AttackData-MB | |||
|header=no | |||
|version=Blockstun | |||
|damage=0 | |||
|reddamage=0 | |||
|proration=100% | |||
|circuit=-100.0% | |||
|cancel= | |||
|guard=LHA | |||
|startup=19 | |||
|active=3 | |||
|recovery=22 | |||
|frameAdv=-7 | |||
|invuln= | |||
|description=H-Moon specific reversal bunker. | |||
}} | |||
}} | |||
===== <span class="invisible-header">Circuit Spark</span> ===== | |||
{{MoveData | |||
|image=MB_C-VAkiha_CSpark.png | |||
|image2=MB_C-VAkiha_CSpark_Air.png | |||
|name=Circuit Spark | |||
|linkname=Circuit Spark | |||
|input=In Heat:<br>Auto during hitstun<br>A+B+C during blockstun | |||
|caption= | |||
|data= | |||
{{AttackData-MB | |||
|version=Ground | |||
|damage=100 | |||
|reddamage=0 | |||
|proration=100% | |||
|circuit=removes all | |||
|cancel= | |||
|guard=U | |||
|startup=11 | |||
|active=10 | |||
|recovery=20 | |||
|frameAdv= | |||
|invuln=Full 1-39 | |||
|description= | |||
}} | |||
{{AttackData-MB | |||
|header=no | |||
|version=Air | |||
|damage=100 | |||
|reddamage=0 | |||
|proration=100% | |||
|circuit=removes all | |||
|cancel= | |||
|guard=U | |||
|startup=12 | |||
|active=10 | |||
|recovery={{Tooltip | text=15| hovertext=Landing recovery.}} | |||
|frameAdv= | |||
|invuln=Strike 1-30 | |||
|description=Universal burst mechanic. Unlike Crescent/Full Heat activation, the hitbox and frame data doesn't vary between characters. However, you can be thrown out of this move if you input it in the air. | |||
}} | |||
}} | |||
=== Special Moves === | |||
==== Grounded Specials ==== | |||
===== <span class="invisible-header">236X</span> ===== | |||
{{MoveData | |||
|image=MB_H-VAkiha_236A.png | |||
|image2=MB_H-VAkiha_236B.png | |||
|image3=MB_H-VAkiha_236C.png | |||
|caption= | |||
|name=Plucking Birds | |||
|linkname=236X | |||
|input=236A/B/C | |||
|data= | |||
{{AttackData-MB-Simple | |||
|description=Akiha will jump and shoot some short range flame ribbons. These are mostly used as resets. | |||
}} | |||
{{AttackData-MB | |||
|version=A | |||
|damage=800 | |||
|reddamage=480 | |||
|proration=70% (O) | |||
|circuit=4.2% | |||
|cancel= | |||
|guard=LHA | |||
|startup=41 | |||
|active=2 | |||
|recovery=6 | |||
|frameAdv=13 | |||
|invuln= | |||
|description=Akiha jumps a little and throws a flame ribbon. It hops over low moves and is very plus on block, but it's hard to use in pressure because it's so slow. | |||
*It can be timed to safejump after 623b knockdowns. | |||
*It can be used to punish HEAT activations from C and F characters, mostly after a neutral jump j.22A/C on okizeme and sometimes it kills bunkers on wake up or after blocking the setup projectile. | |||
*If the opponent shields it (H or F) and you can react fast enough, you can shield back their Shield Counter.<br> | |||
*It can be confirmed with a buffered dash 2A even done at max range.<br> | |||
*Some use can be found vs Kohaku cactus oki. Shield into 236A works and VAkiha doesnt get hit. In addition cactus would move forward from under you, so if you land and opponent blocks the ribbon, you are clean plus. | |||
}} | |||
{{AttackData-MB | |||
|header=no | |||
|version=B | |||
|damage=800 | |||
|reddamage=480 | |||
|proration=70% (O) | |||
|circuit=4.2% | |||
|cancel=-J- | |||
|guard=LHA | |||
|startup=41 | |||
|active=2 | |||
|recovery=6 | |||
|frameAdv=3 | |||
|invuln= | |||
|description=It's kind of like a super backward jump that leaves a ribbon.<br> | |||
It won't hit anyone unless they mash big normals. Leaves you with a jump cancel and 2 airdashes.<br> | |||
Mostly used after KD to threaten meaty. When opponent crouch blocks, you have an option to air dash j.C to hit overhead. It's a knowledge check. | |||
}} | |||
{{AttackData-MB | |||
|header=no | |||
|version=EX | |||
|damage=400*8 (2848) | |||
|reddamage=(1368) | |||
|proration=70% (O) | |||
|circuit=-100.0% | |||
|cancel=-J- | |||
|guard=LHA | |||
|startup={{Tooltip | text=13+26| hovertext=Post-flash startup may vary.}} | |||
|active={{Tooltip | text=28| hovertext=8 hits.}} | |||
|recovery={{Tooltip | text=13+31| hovertext=Full animation.}} | |||
|frameAdv=33 | |||
|invuln= | |||
|description=Akiha jumps high enough so that most normals won't even touch her and shoots a lot of flame ribbons.<br> | |||
Useless outside of okizeme. On okizeme, though, it can be used to safejump or visually obscure meaty mixups. If they shield one hit, they're forced to shield the rest, so shields are a free throw. | |||
}} | |||
}} | |||
===== <span class="invisible-header">623X</span> ===== | |||
{{MoveData | |||
|image=MB_C-VAkiha_623A.png | |||
|image2=MB_C-VAkiha_623B.png | |||
|image3=MB_C-VAkiha_623C.png | |||
|name=Brilliant Impetus - Autumn Leaves | |||
|linkname=623X | |||
|input=623A/B/C | |||
|caption= | |||
|data= | |||
{{AttackData-MB-Simple | |||
|description=Not your standard DP. These are very punishable on block/whiff. These don't see much use in neutral and their usage as a reversal tool is limited. All of them give a hard knockdown. | |||
''' | }} | ||
{{AttackData-MB | |||
|version=A | |||
|damage=600, 800 (1282) | |||
|reddamage=(533) | |||
|proration=100% | |||
|circuit=4.2%, 5.6% (9.8%) | |||
|cancel= | |||
|guard=LH, LHA | |||
|startup=7 | |||
|active=3 (7) 4 | |||
|recovery=23 | |||
|frameAdv=-9 | |||
|invuln=High 1-9 | |||
|description=Very reliable anti-air with mediocre reward. You only get a knockdown on hit, unless the opponent crosses you up, which makes the second hit of 623A whiff. If you get a counterhit this way, which most probably will be the case, you'll be able to convert it into big damage. Usage is matchup specific. Keeps your dash momentum, oddly enough. | |||
}} | |||
{{AttackData-MB | |||
|header=no | |||
|version=B | |||
|damage=300, 200, 500, 400 (1279) | |||
|reddamage=(519) | |||
|proration=70% (O) | |||
|circuit=2.45%, 1.4*2, 3.5% (8.7%) | |||
|cancel= | |||
|guard=LH (1-2), LHA (3-4) | |||
|startup=9 | |||
|active={{Tooltip | text=32| hovertext=2 (4) 2 (10) 3 (7) 4}} | |||
|recovery=23 | |||
|frameAdv=-9 | |||
|invuln=Low 1-10 | |||
|description=Low crushes and gives a hard knockdown; punishable on block. Can be used as a risky reversal against meaty 2As, but it's mostly a combo tool. | |||
}} | |||
{{AttackData-MB | |||
|header=no | |||
|version=EX | |||
|damage=200, 300*2, 400 (1089) | |||
|reddamage=(577) | |||
|proration=60% (M) | |||
|circuit=-100.0% | |||
|cancel= | |||
|guard=LH (1-2), LHA (3-4) | |||
|startup=6+3 | |||
|active={{Tooltip | text=35| hovertext=2 (4) 2 (13) 3 (7) 4}} | |||
|recovery=23 | |||
|frameAdv=-9 | |||
|invuln=Full 1-10 | |||
|description=A real reversal; active on frame 9, invincible until frame 10. The hard knockdown is longer than 623B's. However, it has disgustingly poor vertical reach, and doesn't get too far horizontally before the invuln wears off, either. Prorates very badly. Quite punishable on whiff or block. The last hit is jump/dash cancellable.<br> | |||
Save meter to do a bunker instead. | |||
}} | |||
}} | |||
===== <span class="invisible-header">214X</span> ===== | |||
{{MoveData | |||
|image=MB_C-VAkiha_214A.png | |||
|image2=MB_C-VAkiha_214B.png | |||
|image3=MB_C-VAkiha_214C.png | |||
|name=Piercing the Moon<br>(EX: Piercing the Waxing Moon) | |||
|linkname=214X | |||
|input=214A/[A]/B/[B]/C | |||
|caption= | |||
|data= | |||
{{AttackData-MB-Simple | |||
|description= Spawns a slowly advancing row of pillars. Useful as a zoning tool, or a situational anti-air; can also be used to end pressure reasonably safely (if uncharged) or to riskily reset pressure with big plus frames (if charged). Very situationally useful as okizeme post airthrow. | |||
}} | |||
{{AttackData-MB | |||
|version=A/B | |||
|damage=400*3 (1009) | |||
|reddamage=(531) | |||
|proration=80% (O) | |||
|circuit=2.1%*3 (6.3%) | |||
|cancel= | |||
|guard=LHA | |||
|startup=21 | |||
|active={{Tooltip | text=22| hovertext=3 hits, overlapping hitboxes.}} | |||
|recovery=13 | |||
|frameAdv=-14 ~ 0 | |||
|invuln= | |||
|description= | |||
}} | |||
{{AttackData-MB | |||
|header=no | |||
|version=[A]/[B] | |||
|damage=400*5 (1578) | |||
|reddamage=(830) | |||
|proration=80% (O) | |||
|circuit=2.1%*5 (10.5%) | |||
|cancel= | |||
|guard=LHA | |||
|startup=29 | |||
|active=X {{Tooltip | text=(64)| hovertext=8 (6) 8 (7) 8 (5) 8 (6) 8}} | |||
|recovery=35 | |||
|frameAdv=-14 ~ 42 | |||
|invuln= | |||
|description='''A:''' Spawns three pillars in front of you; neutral on block if the third pilar is blocked, -7 if the first two hits are blocked and -14 if only the first hit is blocked (it only happens when done very close to a cornered opponent). In Midscreen it can become up to +7 on block if done almost at point blank as the first move in a blockstring or when done after an A button at point blank as the opponent is pushed away. This is the version you usually anti-air with.<br> | |||
'''[A]:''' Spawns six pillars in front of you. Primarily used as risky zoning or a risky pressure reset. Can give you good frame advantage for a pressure reset. | |||
== | '''B:''' Exactly the same as A except the pillars start just after the range of uncharged A. Making it plus on block is a little more complicated as it needs a very specific distance. Adjust use accordingly.<br> | ||
'''[B]:''' Same as [A], but pillars start where uncharged A version ends. Again, adjust use accordingly. | |||
}} | |||
{{AttackData-MB | |||
|header=no | |||
|version=EX | |||
|damage=280*15 (2497) | |||
|reddamage=(1716) | |||
|proration=96% (M)*15 | |||
|circuit=-100.0% | |||
|cancel= | |||
|guard=LHA | |||
|startup=2+33 | |||
|active=X {{Tooltip | text=(118)| hovertext=15 hits, overlapping hitboxes.}} | |||
|recovery=29 | |||
|frameAdv=-8 ~ 90 | |||
|invuln=Full 1-9 | |||
|description=Slow startup, and the pillars spawn very close to you, and move very slowly ,for a very long time. It has some invincible frames on startup, but doesn't really work as a reversal or anti-air. It's mainly used as a meter dump in neutral to avoid heat, provided you won't get punished. | |||
}} | |||
}} | |||
===== <span class="invisible-header">22X</span> ===== | |||
{{MoveData | |||
|image=MB_H-VAkiha_22A.png | |||
|image2=MB_H-VAkiha_22B.png | |||
|image3=MB_H-VAkiha_22C.png | |||
|caption= | |||
|name=Maximizing Beasts | |||
|linkname=22X | |||
|input=22A/B/C | |||
|data= | |||
{{AttackData-MB | |||
|version=A | |||
|damage=300*3 (802) | |||
|reddamage=(306) | |||
|proration=100% | |||
|circuit={{Tooltip | text=2.1%*3 (6.3%)| hovertext=Drain 3.6% of the opponent's meter and return 1.3%.}} | |||
|cancel= | |||
|guard=LHA | |||
|startup=40 | |||
|active={{Tooltip | text=3| hovertext=1, 1, 1
...(4) 2 Including the meter drain box afterwards.}} | |||
|recovery=9 | |||
|frameAdv=32 | |||
|invuln=Low 12-33 | |||
|description= | |||
}} | |||
{{AttackData-MB | |||
|header=no | |||
|version=B | |||
|damage=300*3 (802) | |||
|reddamage=(306) | |||
|proration=100% | |||
|circuit={{Tooltip | text=2.1%*3 (6.3%)| hovertext=Drain 3.6% of the opponent's meter and return 1.3%.}} | |||
|cancel= | |||
|guard=LHA | |||
|startup=45 | |||
|active={{Tooltip | text=3| hovertext=1, 1, 1
...(4) 2 Including the meter drain box afterwards.}} | |||
|recovery=12 | |||
|frameAdv=29 | |||
|invuln=Low 17-41 | |||
|description=* An auto-detonating pit that is very plus on block; it's used primarily for zoning and safe okizeme. Somewhat frustratingly, the pits aren't very active; for the A and B versions, each of the three pit ticks is a single frame, and for the EX version, each tick is active for maybe 3 frames. | |||
* Note that air pits are jump and forward airdash cancellable; furthermore, they have a lot less recovery than the ground pits when TK'd. (In fact, they don't even have any landing recovery.) This makes the ground version pits basically useless. See [[#j.22X]] for air version data. | |||
'''A:''' The pit appears below VAkiha. The air version pops you up slightly, but keeps your momentum. The last hit drains some small amount of meter on block.<br> | |||
'''B:''' Almost exactly the same as A, but B pit appears where the A pit ends. Note also that the air version does not pop you up, unlike A. | |||
}} | |||
{{AttackData-MB | |||
|header=no | |||
|version=EX | |||
|damage=300*5 (1270) | |||
|reddamage=(813) | |||
|proration=100% | |||
|circuit=-100.0% | |||
|cancel= | |||
|guard=LHA | |||
|startup=2+36 | |||
|active=X {{Tooltip | text=(17)| hovertext=5 hits.}} | |||
|recovery=11 | |||
|frameAdv=50 | |||
|invuln=Full 1-9, Low 10-31 | |||
|description=Same as B, but has 5 ticks instead of 3, and the ticks are no longer active for a single frame (17f total active frames, versus 3). This makes it much more forgiving to time as okizeme. | |||
}} | |||
}} | |||
==== Aerial Specials ==== | |||
===== <span class="invisible-header">j.236X</span> ===== | |||
{{MoveData | |||
|image=MB_H-VAkiha_j.236AB.png | |||
|image2=MB_H-VAkiha_j.236C.png | |||
|caption= | |||
|name=Brilliant Impetus - Temporary String | |||
|linkname=j.236X | |||
|input=j.236A/B/C | |||
|data= | |||
{{AttackData-MB | |||
|version=A | |||
|damage=1200 | |||
|reddamage=960 | |||
|proration=70% (O) | |||
|circuit=8.4% | |||
|cancel= | |||
|guard=LHA | |||
|startup=56 | |||
|active=5 | |||
|recovery={{Tooltip | text=18| hovertext=Landing recovery.}} | |||
|frameAdv= | |||
|invuln= | |||
|description=It spawns a red web that explodes after a set time. It's unshieldable, and very plus, but not very active. These are mostly TK'd; if you 66 then TK, you'll drop straight down instead of jutting backwards like you usually would. Webs are her best combo starters on the ground in any of the three versions if you manage to confirm after Web > dash. Notice that webs don't appear as part of the combo hit counter but the damage does add up. | |||
*j.236A stops you in the air before setting the web, then H-V.Akiha drops at a fixed angle and speed. <br> | |||
*j.236A is mostly TK'd and used for okizeme. Meatying with web is strong, safe, and gives you ample plus frames to continue pressure. Do 66 TK j.236A for a throw setup. You land next to them and can throw them after they get up, the web goes off during the throw and adds to your throw damage.<br> | |||
*Not jump cancellable so don't do it high in the air. | |||
*All the web versions are incapable of doing CHs. | |||
*Even though a bunker can be done after blocking the web, if the web is put as a meaty and you buffer the bunker as you wake up, the bunker won't come out. | |||
}} | |||
{{AttackData-MB | |||
|header=no | |||
|version=B | |||
|damage=1200 | |||
|reddamage=960 | |||
|proration=70% (O) | |||
|circuit=8.4% | |||
|cancel= | |||
|guard=LHA | |||
|startup=59 | |||
|active=5 | |||
|recovery={{Tooltip | text=18| hovertext=Landing recovery.}} | |||
|frameAdv= | |||
|invuln= | |||
|description=j.236B keeps your momentum in the startup. After leaving the web you'll drop in a fixed angle that goes back.<br> | |||
*Useful in some autotimed safejump setups.<br> | |||
*You keep your air options after doing it so it's somewhat usable in neutral. Can also use it to bail if you overextend pressure. | |||
}} | |||
{{AttackData-MB | |||
|header=no | |||
|version=EX | |||
|damage=2000 | |||
|reddamage=1344 | |||
|proration=70% (O) | |||
|circuit=-100.0% | |||
|cancel= | |||
|guard=LHA | |||
|startup=2+50 | |||
|active=5 | |||
|recovery={{Tooltip | text=18| hovertext=Landing recovery.}} | |||
|frameAdv= | |||
|invuln= | |||
|description=Same as A, except it has a bigger sprite and hitbox, it does more damage and has a slightly faster startup (4f faster). | |||
}} | |||
}} | |||
' | ===== <span class="invisible-header">j.22X</span> ===== | ||
* | {{MoveData | ||
|image=MB_H-VAkiha_22A.png | |||
|image2=MB_H-VAkiha_22B.png | |||
|image3=MB_H-VAkiha_22C.png | |||
|caption= | |||
|name=Maximizing Beasts (Air) | |||
|linkname=j.22X | |||
|input=j.22A/B/C | |||
|data= | |||
{{AttackData-MB | |||
|version=A/B | |||
|damage=300*3 (802) | |||
|reddamage=(306) | |||
|proration=100% | |||
|circuit={{Tooltip | text=2.1%*3 (6.3%)| hovertext=Drain 3.6% of the opponent's meter and return 1.3%.}} | |||
|cancel= | |||
|guard=LHA | |||
|startup=38 | |||
|active={{Tooltip | text=3| hovertext=1, 1, 1
...(4) 2 Including the meter drain box afterwards.}} | |||
|recovery=1 | |||
|frameAdv=41 | |||
|invuln=Low 10-X | |||
|description= | |||
}} | |||
{{AttackData-MB | |||
|header=no | |||
|version=EX | |||
|damage=300*5 (1270) | |||
|reddamage=(813) | |||
|proration=100% | |||
|circuit=-100.0% | |||
|cancel= | |||
|guard=LHA | |||
|startup=2+36 | |||
|active=X {{Tooltip | text=(17)| hovertext=5 hits.}} | |||
|recovery=4 | |||
|frameAdv=59 | |||
|invuln=Full 1-7, Low 8-X | |||
|description=These are used more often than their ground counterparts thanks to lower recovery, no landing-recovery and being harder to punish in some cases. j.22A and j.22C are the choices for okizeme setups (close to the ground when falling) after a 623B in the corner, j.22A with a forward or neutral jump while j.22C with a backwards jump or after an Instant Air Back Dash (IABD). j.22C is by far the best oki setup projectile for H-V.Akiha in terms of frame advantage as it gives her time to basically do anything she wants, even mixups like 66 > 9 > j.C > air dash j.B/fall 2A (AKA Yuhi Fuzzy). | |||
The three versions can be used in neutral to force the opponent to jump and they can be confirmed into combos sometimes if the opponent was on the ground or very close to it, though their very slow startup make H-V.Akiha very prone to getting punished on reaction, so be careful with the spacing. | |||
}} | |||
}} | |||
=== Arc Drive === | |||
* | {{MoveData | ||
|image=MB_C-VAkiha_AD.png | |||
|caption= | |||
|name=Red Mistress - Ubiquitous | |||
|linkname=Arc Drive | |||
|input=41236C during MAX/Heat | |||
|data= | |||
{{AttackData-MB | |||
|damage=650*10 (2813) | |||
|reddamage=(1663) | |||
|proration=50% (O) | |||
|circuit=removes all | |||
|cancel= | |||
|guard=LHA | |||
|startup=3+6 | |||
|active={{Tooltip | text=24| hovertext=10 hits.}} | |||
|recovery=62 | |||
|frameAdv=-40 | |||
|invuln=Full 1-41 | |||
|description=Akiha shoots an almost, but not quite, fullscreen laser from her eyes. Has some invincible frames at the startup so it can be used as a reversal, but it's easily punishable on block done up close and it'll end your heat. Also used as a fullscreen punish. | |||
Believe it or not, this move whiffs on most crouchers. | |||
}} | |||
}} | |||
== Combos == | |||
{{ComboLegend-MB}} | |||
'''All damage values were calculated on V.Sion using the momiji loop #2 where applicable.''' | |||
You should always go for the okizeme ender unless you want to end the round. | |||
=== Non-Situational Combos === | |||
{{CollapsingComboTable-MB | |||
|data= | |||
{{CollapsingComboData-MB | |||
|condition=Midscreen or corner | |||
|characters= | |||
|damage=4609 | |||
|metergen=89.9% | |||
|metero=42.2% | |||
|link= | |||
|input=*2AA > 5C > 4C > 5B > 2C > 623B > (Momiji loop^) | |||
|simput= | |||
|note=Your BnB midscreen to get meterless oki. Skip 5B or the second hit of 4C when you aren't close enough (like after a blocked j.C). There isn't a way of squeezing any more noticeable damage for getting the meterless oki. | |||
<br>5B would cause them to trip it opponent crouching, but it doesnt matter as 2C would trip them anyway. | |||
}} | |||
{{CollapsingComboData-MB | |||
|condition=Corner | |||
|characters= | |||
|damage=5033 | |||
|metergen=92% | |||
|metero=39.4% | |||
|link= | |||
|input=*2AA > 5C > 4C > 5B > 2C > 623B > 5B > 2C > 5C > 4C > j.BC > 66 > j.B > j.BC > AT | |||
|simput= | |||
|note=Optimal damage route for meterless corner combo. | |||
}} | |||
{{CollapsingComboData-MB | |||
|condition=Corner carry | |||
|character= | |||
|damage=4410 | |||
|metergen=123.5% | |||
|metero=91.2% | |||
|link= | |||
|input=*2AA > 5C > 4C > 5A6AA > 6C > 66 > delay > 5B > 2C > 2A(w) > (5C) > 4C > 623B > (Momiji Loop^) | |||
|simput= | |||
|note=Be aware of wall bounce from 5C and omit it if you think it will happen. | |||
}} | |||
{{CollapsingComboData-MB | |||
|condition=6AA Loop, Midscreen | |||
|characters= | |||
|damage=4525 | |||
|metergen=130.5% | |||
|metero=108.6% | |||
|link= | |||
|input=*2AA > 5C > 4C > 5A6AA > delay > 4C > 5C > tiny delay > 2C > 5A(w)6AA > 2C > 623B > (Momiji Loop^) | |||
|simput= | |||
|note=Does not work near the corner due to 5C causing wallbounce. 6AA should hit as late as possible. | |||
}} | |||
{{CollapsingComboData-MB | |||
|condition=6AA Loop, Midscreen | |||
|character= | |||
|damage=4392 | |||
|metergen=136.1% | |||
|metero=119.9% | |||
|link= | |||
|input=*2AA > 5C > 4C > 5A6AA > 6C > 66 > delay 4C > 5C > 2C > 5A(w)6AA > 2C > 623B > (Momiji Loop^) | |||
|simput= | |||
|note=Requires a lot of space. | |||
}} | |||
{{CollapsingComboData-MB | |||
|condition=6AA Loop, Corner carry | |||
|character= | |||
|damage=4620 | |||
|metergen=145.2% | |||
|metero=142.1% | |||
|link= | |||
|input=*2AA > 5C > 4C > 5A6AA > delay > 4C > 5C > 2C > 5A(w)6AA > 2C > delay > 5C > 4C > 623B > (Momiji Loop^) | |||
|simput= | |||
|note=Probably worth practicing for the meter and damage. If you end up too close omit the 5C at the end. | |||
<br>Make sure you 623B when opponent is close to ground, so that 623B does 4 hits. Due to this combo having lots of hits, opponent might be able to tech if not all 623B hits connect. | |||
}} | |||
{{CollapsingComboData-MB | |||
|condition=Gap Setup, Corner | |||
|character= | |||
|damage=3066 | |||
|metergen=44.8% | |||
|metero=19.2% | |||
|link= | |||
|input=*2AA > 5C > 4C > 5A6AA > 6C, 2C > 2A(w) | |||
|simput= | |||
|note=The only way to get a gap in the corner is by wall-slamming the opponent. Only 5C and 6C have this property. This is the easiest way to set up a gap in the corner. | |||
}} | |||
{{CollapsingComboData-MB | |||
* | |condition=Gap Setup, Corner | ||
|character= | |||
|damage=4013 | |||
|metergen=61.9% | |||
|metero=26.5% | |||
|link= | |||
|input=*2AA > 5C > 4C > 5B > 2C > 623B, 5B > 2C > 2A(w) > 5C, 2C > 2A(w) | |||
|simput= | |||
|note=This is the so called "half momiji" setup. At first you may think a variation of this combo could be done after a corner carry route (6C > 66 etc), but that's not possible since the combo requires a low hitcount. | |||
}} | |||
{{CollapsingComboData-MB | |||
|condition=Gap Setup, Corner<br>(100% meter) | |||
|character= | |||
|damage=3944 | |||
|metergen=-100% + 57.7% | |||
|metero=26.9% | |||
|link= | |||
|input=*2AA > 5C > 4C > 5B > 2C > 623B, 4C > 5B > 5C > 623C > dj.8/dj.9/dj.7/anything | |||
|simput= | |||
|note=This is probably not the most optimal way to perform this combo, but it's the most consistent. If you did it correctly, you'll hit the opponent from behind with 623C, and you may be facing the opposite way if you jump cancel. There will be no physical gap at all if you stay in the air when the opponent lands. | |||
<br>Only works on low hitcount. Character specific. First hit of 623C should whiff. | |||
}} | |||
}} | |||
= | === The Momiji Loop === | ||
* If you miss one hit of 623B while doing these (i.e you started it too far away) following up with 4C won't work. Use 2B instead. | |||
== | {{CollapsingComboTable-MB | ||
|data= | |||
{{CollapsingComboData-MB | |||
|condition=Momiji Loop #1 | |||
|character= | |||
|damage= | |||
|metergen=46.5% | |||
|metero= | |||
|link= | |||
|input=*delay 4C > 2C > delay 623B, delay 4C > 2C > (delay 5BB >) 623B | |||
|simput= | |||
|note=You should learn this one even if you intend to do the harder ones. You can do 5BB > 623B twice but it will prorate a lot. You must delay the last 623B if 5BB isn't used right before it. | |||
}} | |||
{{CollapsingComboData-MB | |||
|condition=Momiji Loop #2 | |||
|character= | |||
|damage= | |||
|metergen=51.0% | |||
|metero= | |||
|link= | |||
|input=*delay 5B > 2C > 2A(w) > 4C > 623B, 5B > 2C > 2A(w) > 4C > 623B | |||
|simput= | |||
|note=Optimized version. Whiffing 2a is optional. It doesn't change anything but the timing. If you are a bit far, you can perform the easier version; it has better reach. | |||
}} | |||
{{CollapsingComboData-MB | |||
|condition=Momiji Loop #3 | |||
|characters= | |||
|damage= | |||
|metergen=80.1% | |||
|metero= | |||
|link= | |||
|input=*delay 5B > 2C > 5A(w), 2A > 2C > delay 4C > 623B, 5B > 2C > 5A(w)6AA, 2C > 4C > 5BB > 623B | |||
|simput= | |||
|note=Requires low gravity. The second rep is very finnicky regarding gravity. The 5A whiff doesn't work on everyone. <br> You may replace 5a(w) with 2a(w) but it becomes a 1f link and it works only once. | |||
}} | |||
{{CollapsingComboData-MB | |||
|condition=Momiji Loop <br> (Requires 2B) | |||
|characters= | |||
|damage= | |||
|metergen= | |||
|metero= | |||
|link= | |||
|input=*2B > 2C > 2A(w) > 4C > 5BB > 623B, 5B > 2C > 2A(w) > 4C > 623B | |||
|simput= | |||
|note=If 623B missed a few hits, it becomes impossible to follow the combo with 5B or 4C. This is not an unusual occurrence, so learning this variation is a must. | |||
}} | |||
}} | |||
=== Situational Combos === | |||
{{CollapsingComboTable-MB | |||
|data= | |||
<!-- Standing Shield Counter / Air CH --> | |||
{{CollapsingComboData-MB | |||
|condition=Standing Shield Counter<br>/ Air Counterhit | |||
|characters= | |||
|damage=2507 | |||
|metergen=41.3% | |||
|metero= | |||
|link= | |||
|input=*5D/Air CH, 5B > 4C > j.ACB > j.AC > AT | |||
|simput= | |||
|note=(Damage calculated from Shield Counter starter)<br>Easy and very stable air confirm. Do this if you can't do the j.BC > j.BC > AT combo. | |||
}} | |||
{{CollapsingComboData-MB | |||
|condition=Standing Shield Counter<br>/ Air Counterhit | |||
|characters= | |||
|damage=3056 | |||
|metergen=60.1% | |||
|metero= | |||
|link= | |||
|input=*5D/Air CH, (2C >) 5B > (5C >) 4C > j.(A)BC > dj.(A)BC > AT | |||
|simput= | |||
|note=(Damage calculated from Shield Counter starter)<br>Optimal air combo confirm. The opponent must be as high as possible for 5B > 4C to still connect. j.As are not doable if you decide to use 5C. | |||
}} | |||
{{CollapsingComboData-MB | |||
|condition=Standing Shield Counter<br>/ Air Counterhit | |||
|characters= | |||
|damage=3270 | |||
|metergen=95.5% | |||
|metero= | |||
|link= | |||
|input=*5D/Air CH, 4C > 5C > 2C > delay 5A(w)6AA, 2C > (2A(w) > 4C >) 623B > (Momiji Loop^) | |||
|simput= | |||
|note=(Damage calculated from Shield Counter starter and without the optional moves) | |||
*Do it if you're between 55% to 30% of the screen away from corner. | |||
*If you wanna do 623B right after 2C, delay the 623B. | |||
*From air CHs this combo works for forward jump j.A/B/C and neutral jump j.B/C. | |||
*Against Nero, Arcueid or Kouma delay the 5C. | |||
*Against Necos for forward jump j.A replace 4C > 5C > 2C with 2B(3) > 2C. | |||
}} | |||
{{CollapsingComboData-MB | |||
|condition=Standing Shield Counter<br>/ Air Counterhit | |||
|characters= | |||
|damage=3096 | |||
|metergen=99% | |||
|metero= | |||
|link= | |||
|input=*5D/Air CH, 4C > 5C > 2C > delay 5A(w)6AA > delay 6C > 66 > 2C > delay 623B > (Momiji Loop^) | |||
|simput= | |||
|note=(Damage calculated from Shield Counter starter and without the optional moves) Full corner carry version. | |||
*Do it if you're between 55% of the screen away from corner. | |||
*If you wanna do 623B right after 2C, delay the 623B. | |||
*From air CHs this combo works for forward jump j.A/B/C and neutral jump j.B/C. | |||
*Against Nero, Arcueid or Kouma delay the 5C. | |||
*Against Necos for forward jump j.A replace 4C > 5C > 2C with 2B(3) > 2C. | |||
}} | |||
{{CollapsingComboData-MB | |||
|condition=Standing Shield Counter<br>/ Air Counterhit<br>(Corner) | |||
|characters= | |||
|damage=3311 | |||
|metergen=77.3% | |||
|metero= | |||
|link= | |||
|input=*5D/Air CH, 5B > 2C > delay 4C > (Momiji Loop^) | |||
|simput= | |||
|note=(Damage calculated from Shield Counter starter)<br>Only possible near the corner. You can omit everything but 2C. | |||
}} | |||
== | <!-- Crouching Shield Counter --> | ||
{{CollapsingComboData-MB | |||
|condition=Crouching Shield Counter | |||
|characters= | |||
|damage=3670 | |||
|metergen=69.7% | |||
|metero= | |||
|link= | |||
|input=*2D > 623B > (Momiji Loop^) | |||
|simput= | |||
|note=If you aren't near the corner prefer the 2D knockdown instead. | |||
}} | |||
{{CollapsingComboData-MB | |||
|condition=Crouching Shield Counter<br>(100% meter) | |||
|characters= | |||
|damage= | |||
|metergen= | |||
|metero= | |||
|link= | |||
|input=*2D > delay 623C, 5B > 2C > 5C > 4C > 623B > (Momiji Loop^ (1 Rep)) | |||
|simput= | |||
|note=Metered fullscreen corner carry. | |||
}} | |||
{{CollapsingComboData-MB | |||
|condition=Crouching Shield Counter<br>(Counterhit) | |||
|characters= | |||
|damage=3892 | |||
|metergen=98.3% | |||
|metero= | |||
|link= | |||
|input=*CH 2D, delayed 2A > 5C > 2C > delay 5A6AA, 2C > (2A(w) > 4C >) delay 623B > (Momiji Loop^) | |||
|simput= | |||
|note=Meterless corner carry only possible if 2D hits Counter Hit. | |||
*Do it if you're between 55% to 30% of the screen away from corner. | |||
*Against Nero, Arc and Kouma replace 2A > 5C with 4C > delayed 5C. | |||
}} | |||
{{CollapsingComboData-MB | |||
|condition=Crouching Shield Counter<br>(Counterhit) | |||
|characters= | |||
|damage=3782 | |||
|metergen=103.9% | |||
|metero= | |||
|link= | |||
|input=*CH 2D, delayed 2A > 5C > 2C > delay 5A6AA, delay 6C > 66 > 2C > delay 623B > (Momiji Loop^) | |||
|simput= | |||
|note=Full corner carry variant of the previous one. | |||
*Do it only if you're at least 55% of the stage away from corner. | |||
*Against Nero, Arc and Kouma replace 2A > 5C with 4C > delayed 5C. | |||
}} | |||
{{CollapsingComboData-MB | |||
|condition=Crouching Shield Counter<br>(Counterhit) | |||
|characters= | |||
|damage=3713 | |||
|metergen= | |||
|metero= | |||
|link= | |||
|input=*CH 2D, 5A > 2C > 2A, 2A > 2C > 5A6AA > delay 6C > 66 > 2C > (Momiji Loop^) | |||
|simput= | |||
|note=The combo routes for this one are very similar to the golden air throw routes, so you can adjust it accordingly and forget about the 6C if you're too close to the corner. For some reason, this combo is much easier than its gAT counterpart, so it's worth practicing. | |||
}} | |||
<!-- Raw Airthrow --> | |||
{{CollapsingComboData-MB | |||
|condition=Raw Airthrow | |||
|characters= | |||
|damage=2980 | |||
|metergen=37.8% | |||
|metero= | |||
|link= | |||
|input=*Raw AT, 2A > 5B > 4C > j.BC > dj.BC > AT | |||
|simput= | |||
|note=Basic damage confirm that works everywhere. | |||
}} | |||
{{CollapsingComboData-MB | |||
|condition=Raw Airthrow<br>(Corner) | |||
|characters= | |||
|damage=2183 | |||
|metergen=15% | |||
|metero= | |||
|link= | |||
|input=*Raw AT, delay 2A > delay 2C > 623B | |||
|simput= | |||
|note=After 623B a Momiji Loop can be done only in the corner for more damage and meter. | |||
}} | |||
{{CollapsingComboData-MB | |||
|condition=Raw Airthrow | |||
|characters= | |||
|damage=3455 | |||
|metergen=83.6% | |||
|metero= | |||
|link= | |||
|input=*Raw AT, 5B > 5C > 2C > delay 5A(w)6AA > 2C > (2A(w) > 4C >) delay 623B > (Momiji Loop^) | |||
|simput= | |||
|note=A very important reason to practice tapping 5B. | |||
*It can only be done if you're between 55% and 30% of the stage away from the corner. | |||
*The 5B must be done before the opponent touches the floor again. | |||
*Against Nero replace 5B with delayed 2A. | |||
*Against Satsuki and the Necos replace 5B > 5C > 2C with 2B(3) > 2C. | |||
}} | |||
{{CollapsingComboData-MB | |||
|condition=Raw Airthrow | |||
|characters= | |||
|damage=3341 | |||
|metergen=87.1% | |||
|metero= | |||
|link= | |||
|input=*Raw AT, 5B > 5C > 2C > delay 5A(w)6AA > delay 6C > 66 > 2C > delay 623B > (Momiji Loop^) | |||
|simput= | |||
|note=Full corner carry variant of the previous one. | |||
*Use it if you're at least 55% of the stage away from the corner. | |||
*The 5B must be done before the opponent touches the floor again. | |||
*Against Nero replace 5B with delayed 2A. | |||
*Against Satsuki and the Necos replace 5B > 5C > 2C with 2B(3) > 2C. | |||
}} | |||
{{CollapsingComboData-MB | |||
|condition=Raw Airthrow | |||
|characters= | |||
|damage= | |||
|metergen= | |||
|metero= | |||
|link=https://www.youtube.com/watch?v=jiEEQD2y4ec | |||
|input=*Raw AT, 5A > 2C > 2A(w), 2A > 2C > 5A(w)6AA > delay 6C > 66 > 2C > 623B > (Momiji Loop^) | |||
|simput= | |||
|note= | |||
}} | |||
{{CollapsingComboData-MB | |||
|condition=Raw Airthrow | |||
|characters= | |||
|damage=3601 | |||
|metergen=79.8% | |||
|metero= | |||
|link= | |||
|input=*Raw AT, 5A > 2C > 2A(w), 2A > 2C > 5A(w)6AA, 2C > 2A(w) > 2A > 5C > IAD j.C, land j.BC > dj.BC > AT | |||
|simput= | |||
|note=Damage variation of the one above | |||
}} | |||
== | <!-- 6C --> | ||
{{CollapsingComboData-MB | |||
|condition=Midscreen 6C | |||
|characters= | |||
|damage=4242 | |||
|metergen=71.7% | |||
|metero= | |||
|link= | |||
|input=*6C > delay 66 > 5B > 2C > 2A(w) > 4C > 623B > (Momiji Loop^) | |||
|simput= | |||
|note=The dash after 6C needs to be delayed or H-V.Akiha will end up hitting the opponent on the other side. This combo gives Full Corner Carry, and more damage and meter than a 6C combo in the corner (how ironic). | |||
}} | |||
{{CollapsingComboData-MB | |||
|condition=Corner 6C | |||
|characters= | |||
|damage= | |||
|metergen= | |||
|metero= | |||
|link= | |||
|input=*6C, 2C > 2A(w) > 4C > 623B > (Momiji Loop^ (1 Rep)) | |||
|simput= | |||
|note=Only one rep of the Momiji Loop can be done because 6C already used one Wallbounce. | |||
}} | |||
{{CollapsingComboData-MB | |||
|condition=Corner 6C | |||
|characters= | |||
|damage=4109 | |||
|metergen=83.6% | |||
|metero= | |||
|link= | |||
|input=*6C > 66 (cross-under) > dl 2A(w) > 5C > 2C > dl 5A6AA > 6C > 66 > 2C > 2A(w) > dl 5C > 4C > 623B, dl 4C > 2C > dl 623B | |||
|simput= | |||
|note=More optimized combo from Corner 6C but also less stable. | |||
*Against Nero, Arc, Kouma and Tohno delay a little bit the first 2C so the 5A in 5A6AA whiffs, this whiff is a MUST. | |||
*The delay to the first 2A is to prevent the opponent from floating too high so the 2C hits. | |||
*The combo can be optimized more depending on the character with 5B > 2C > 2A(w) > 4C > 623B in the last Momiji rep. | |||
}} | |||
<!-- 2BBB --> | |||
{{CollapsingComboData-MB | |||
|condition=2BBB | |||
|characters= | |||
|damage=3416 | |||
|metergen=35.4% | |||
|metero=14.2% | |||
|link= | |||
|input=*2BBB > dj.IAD j.C, land j.BC > dj.C > AT | |||
|simput= | |||
|note=First two 2B's are blocked. Third is an overhead. I hope you aren't planning to hit anyone with this. | |||
}} | |||
= | <!-- 623C Reversal --> | ||
== | {{CollapsingComboData-MB | ||
|condition=623C Reversal | |||
|characters= | |||
|damage=3448 | |||
|metergen=18.0% | |||
|metero= | |||
|link= | |||
|input=*623C, 4C > 2C > 623B > (Momiji Loop^ (1 Rep)) | |||
|simput= | |||
|note=Unstable. Not full corner carry. | |||
}} | |||
{{CollapsingComboData-MB | |||
|condition=623C Reversal | |||
|characters= | |||
|damage= | |||
|metergen= | |||
|metero= | |||
|link= | |||
|input=*623C, 4C > 2C > 5A(w)6AA, 2C > 623B > (Momiji Loop^ (1 Rep)) | |||
|simput= | |||
|note=Unstable. Full corner carry. 6AA should hit as late as possible. | |||
}} | |||
{{CollapsingComboData-MB | |||
|condition=623C Reversal | |||
|characters= | |||
|damage= | |||
|metergen= | |||
|metero= | |||
|link= | |||
|input=*623C > j.66 > delay j.C(w), land 5B > 2C > 5C > 4C > 623B > (Momiji Loop^ (1 Rep)) | |||
|simput= | |||
|note=Full corner carry. Recommended. | |||
}} | |||
{{CollapsingComboData-MB | |||
|condition=623C Reversal | |||
|characters= | |||
|damage=3518 | |||
|metergen=27.8% | |||
|metero= | |||
|link= | |||
|input=*623C, delay 4C(2) > 2C > delayed 5A(w)6AA, 2C > delay 623B > (Momiji Loop^ (1 Rep)) | |||
|simput= | |||
|note=Fullscreen combo into corner setup from 623C DP. | |||
*It can be done from 60% away from the corner and 100%. | |||
*When this combo is done completely from the opposite corner, due to distance restrictions only 4C > 2C > 623B can be done as the last rep. Notice that this 623B has no delay before it. | |||
*Against Arc and Nero the first 2C must be delayed so the 5A whiffs. | |||
*Against the Necos both 623Bs must not have delays before them. | |||
}} | |||
}} | |||
=== OTG === | |||
Useful if only needing a small amount of damage to kill after a knockdown. You can also incorporate 22C or 623C to relaunch them for more damage and better oki. | |||
|- | {{CollapsingComboTable-MB | ||
| | |data= | ||
{{CollapsingComboData-MB | |||
|condition=OTG | |||
|characters= | |||
|damage= | |||
|metergen= | |||
|metero= | |||
|link= | |||
|input=* 2A*5 > 5BB > 4C > 5C > 5A6A > 2B | |||
|simput= | |||
|note=Probably the longest OTG string possible. | |||
}} | |||
{{CollapsingComboData-MB | |||
|condition=OTG | |||
|characters= | |||
|damage= | |||
|metergen= | |||
|metero= | |||
|link= | |||
|input=* 2A*3 > 4C > 5B > 2B | |||
|simput= | |||
|note=It pushes H-V.Akiha just enough to punish forward techs, while keeping the possibility to confirm into Momiji loops with 4 hits in the 623B. | |||
}} | |||
}} | |||
- | == General Gameplan == | ||
H-VAki's mobility and safe tools lend themselves to a strong hit and run gameplan. She is very difficult for opponents to chase down, yet constantly a threat that opponents cannot recklessly overextend against. This lets her dictate tempo in most matchups, engaging when favorable and backing off if things get too dangerous. Once she gets a hit she can convert it to safe, stable corner offense, and if pressure eventually becomes too risky to extend she can back off into neutral. Understanding how to manage these risks is especially important given H-VAki's low health and limited range. She has very few ways to control space outside her immediate vicinity, mostly relying on her top class mobility to close gaps as needed. | |||
If H-VAki gets a life lead this dynamic shifts even further in her favor, allowing her to minimize risk and interaction with many characters and forcing them into dangerous situations to try and catch her. On the other hand, losing the life lead means H-VAki eventually needs to engage with her opponent. This can diminish the value of her mobility if the opponent is no longer incentivized to approach, though it still makes her own approaches difficult to read and cover. | |||
- | === Neutral === | ||
H-VAki has a great deal of freedom in neutral. Many characters cannot easily catch her, so mobility is key to staying safe and creating favorable situations. She is especially difficult to catch in the air, but must still manage air options carefully lest she make it easier for the opponent to trap her as she eventually lands. Her air normals cover different angles effectively and can control space, air to air, or initiate her offense. Her ground movement is somewhat more committal, with long startup on her dash that prevents her from blocking. Her dash is extremely fast once in motion however, and complements her air movement as a way to slip under airborne opponents or quickly close space if respected. Her larger ground buttons are somewhat committal for their range, so closing space to start offense is more often the goal than poking. They can nonetheless check approaches, antiair, and keep the opponent from invading her space too freely. Her 214X series also gives her some ground and low air space control while on the ground that can check approaches and leads to offense if blocked. | |||
=== Pressure === | |||
H-VAki's offense centers on frame trap pressure to catch defensive options, jump outs, or sneak in throws. She has good frame traps, a variety of forward moving normals to help stay in, good frame advantage with a +1 5A and +2 rebeats into w5A from C normals, and the Half Moon 5A6AA series as an additional threat for extending pressure. Her committal dash makes pressure resets somewhat risky, but she also can layer in IAD resets or go for 214[X] to try and buy another chance at offense. She can also simply reset to neutral to avoid the risk of resetting pressure if desired. H-VAki does also have a standing overhead, and while it's somewhat telegraphed it may catch opponents off guard if used sparingly. | |||
=== Setplay === | |||
==== Knockdown times ==== | |||
This data was collected manually using framestep. | |||
The height of the opponent affects the frame advantage. More height equals more advantage. | |||
The following are your untechable knockdowns and their frame advantage against a standing V.Akiha. | |||
Please, take this as a '''ROUGH''' estimate and not as fixed absolute values. | |||
{| | |||
|- | |||
! Move !! Frame advantage | |||
|- style="background:#EEEEEE" | |||
| 2c || 45f or 71f if jump cancelled. | |||
|- | |||
| 623b || 63f | |||
|- | |- | ||
| | |- style="background:#FFEEEE" | ||
| '''623c''' || 71f or '''109f''' if jump cancelled. | |||
|- | |- | ||
| | | 623a || 18f | ||
|- style="background:#EEEEEE" | |||
| Throw || 39f | |||
|- | |- | ||
| | | Combo AT || 12f | ||
|- style="background:#EEEEEE" | |||
| Golden AT || 57f or 80f if jump cancelled | |||
|- | |- | ||
| | | 2d || 47f | ||
|- style="background:#EEEEEE" | |||
| Guard cancel bunker || 55f | |||
| | |||
|- | |||
|} | |} | ||
=== Defense === | |||
Defense is a very dangerous situation for any VAki moon to be in, and HVaki is no exception. Her low health makes any action on defense a risk, so the best defense is avoiding the situation entirely whenever possible. When she does find herself on defense, jumping out to reset to neutral is often one of her better options. She can also challenge with normals such as 2A, 2B, 2C, or 4C, utilize system mechanics as the situation dictates, or spend meter on guard cancel Bunker when attempting to escape. Her 623C is also a true reversal, albeit with limited invulnerability, and 623A/B have situational defensive value to anti-air and low crush opponent's attacks, respectively. | |||
== Notable Players == | |||
{| class="wikitable" | |||
!width="120"|Name!! width="49"|Color | |||
!width="125"|Region !! Common Venues !! Status !! Details | |||
|- | |- | ||
| | | [http://mbaacc.melty.games/?p1moon=h&p1char=vakiha&p1name=Eika Eika]|| style="text-align:center;"| | ||
[[File:MBAACC_VAkiha_Color05.png|Color|44px]] | |||
| Europe || Netplay || Active || | |||
|- | |- | ||
| | | [http://mbaacc.melty.games/?p1moon=h&p1char=vakiha&p1name=Rhiya Rhiya]|| style="text-align:center;"| | ||
[[File:MBAACC_VAkiha_Color30.png|Color|44px]] | |||
| North America || Netplay || Inactive || Big labber of this character. Can be found and asked questions in the Community Server. | |||
|- | |- | ||
| | | [https://mbaacc.melty.games/?p1moon=c&p1char=vakiha&p1name=heavymetalmixer Heavymetalmixer]|| style="text-align:center;"| | ||
[[File:Vakiha Color36.png|Color|44px]] | |||
| North Latin America || Netplay || Active || Colombian player and H-V.Akiha main since 2013. Part of the LAN community | |||
|- | |- | ||
| | | [http://mbaacc.melty.games/?p1moon=h&p1char=vakiha&p1name=tsubasa%20(%E7%BF%BC) Tsubasa<br>(翼)]|| style="text-align:center;"| | ||
[[File:MBAACC_VAkiha_Color32.png|Color|44px]] | |||
| Japan || Play Spot BIG ONE 2nd || Inactive || A longtime Melty player and Japan's gold standard for H-VAki play. | |||
| | |||
| | |||
| | |||
| | |||
| | |||
| | |||
|} | |} | ||
{{ | {{Navbox-MBAACC}} | ||
[[Category:Melty Blood]] | [[Category:Melty Blood Actress Again Current Code]] | ||
[[Category:Akiha Vermilion]] | |||
Revision as of 01:00, 24 June 2024
Character Page Progress
This page is still a work in progress, consider joining as an editor to help expand it. Please update this character's roadmap page when one of the editing goals have been reached.
| In Progress | To-do |
|---|---|
|
Overview
Additional Resources
H-V.Akiha Match Video Database
Melty Bits: H-V.Akiha
@DRK_Player: Playing H-VAkiha. A PDF mirror of the document is available here.
Move Descriptions
| Frame Data Help | |
|---|---|
| Header | Tooltip |
| Move Box Colors |
Light gray = Collision Box (A move lacking one means it can go through the opponent's own collision box). |
| Damage | Base damage done by this attack.
(X) denotes combined and scaled damage tested against standing V. Sion. |
| Red Damage | Damage done to the recoverable red health bar by this attack. The values are inherently scaled and tested against standing V. Sion.
(X) denotes combined damage. |
| Proration | The correction value set by this attack and the way it modifies the scaling during a string. See this page for more details.
X% (O) means X% Overrides the previous correction value in a combo if X is of a lower percentage. |
| Circuit | Meter gained by this attack on hit.
(X%) denotes combined meter gain. |
| Cancel | Actions this move can be cancelled into.
SE = Self cancelable. |
| Guard | The way this move must be blocked.
L = Can block crouching |
| Startup | Amount of frames that must pass prior to reaching the active frames. Also referred to as "True Startup". |
| Active | The amount of frames that this move will have a hitbox. (x) denotes frame gaps where there are no hitboxes is present. Due to varied blockstuns, (x) frames are difficult to use to determine punish windows. Generally the larger the numbers, the more time you have to punish. |
| Recovery | Frames that this move has after the active frames if not canceled. The character goes into one frame where they can block but not act afterwards, which is not counted here. |
| Advantage | The difference in frames where you can act before your opponent when this move is blocked (assuming the move isn't canceled and the first active frame is blocked). If the opponent uses a move with startup that is at least 2 frames less than this move's negative advantage, it will result in the opponent hitting that move. |
| Invul | Lists any defensive properties this move has.
X y~z denotes X property happening between the y to z frames of the animations. If no frames are noted, it means the invincibility lasts through the entire move. Invicibility:
Hurtbox-Based Properties:
Miscellaneous Properties
|
Normal Moves
Standing Normals
5A
5A 5A~6A~6A Plus on block. Plus on block. Good for staggers. Good for staggers. BNB filler. BNB filler.
|
|---|
5B
5B 5B/[B]~B Essential pressure tool. Essential pressure tool. Slow but plus. Slow but plus. Launcher. Launcher.
|
|---|
5C
Crouching Normals
2A
2B
2B 2B~2B~2B Underrated button. Underrated button. Slow overhead. Slow overhead.
|
|---|
2C
Sweep. Sweep.
|
|---|
Aerial Normals
j.A
Fast air poke. Fast air poke.
|
|---|
j.B
j.C
Command Normals
4C
Good abare tool. Good abare tool.
|
|---|
6C
Slow overhead. Slow overhead.
|
|---|
Universal Mechanics
Ground Throw
Ground Throw
6/4A+D |
|---|
Air Throw
Air Throw
j.6/4A+D |
|---|
Shield Counter
Shield Counter
Auto after a successful Shield (Air OK) |
|---|
Shield Bunker
Shield Bunker
214D in neutral or blockstun |
|---|
Circuit Spark
Special Moves
Grounded Specials
236X
Plucking Birds
236A/B/C |
|---|
623X
214X
Piercing the Moon
(EX: Piercing the Waxing Moon) 214A/[A]/B/[B]/C |
|---|
22X
Maximizing Beasts
22A/B/C |
|---|
Aerial Specials
j.236X
Brilliant Impetus - Temporary String
j.236A/B/C |
|---|
j.22X
Maximizing Beasts (Air)
j.22A/B/C |
|---|
Arc Drive
Red Mistress - Ubiquitous
41236C during MAX/Heat |
|---|
Combos
| Combo Notation Help | |
|---|---|
| Disclaimer: Combos are written by various writers, so the actual notation used in pages can differ from the standard one. | |
| X > Y | X input is cancelled into Y. |
| X > delay Y | Must wait for a short period before cancelling X input into Y. |
| X, Y | X input is linked into Y, meaning Y is done after X's recovery period. |
| X+Y | Buttons X and Y must be input simultaneously. |
| X/Y | Either the X or Y input can be used. |
| X~Y | This notation has two meanings.
|
| X(w) | X input must not hit the opponent (Whiff). |
| j.X | X input is done in the air, implies a jump/jump cancel if the previous move was done from the ground. Applies to all air chain sections:
|
| sj.X | X input is done after a super jump. Notated as sj8.X and sj9.X for neutral and forward super jumps respectively. |
| dj.X | X input is done after a double jump. |
| sdj.X | X input is done after a double super jump. |
| tk.X | Stands for Tiger Knee. X motion must be buffered before jumping, inputting the move as close to the ground as possible. (ex. tk.236A) |
| (X) | X is optional. Typically the combo will be easier if omitted. |
| [X] | Input X is held down. Also referred to as Blowback Edge (BE). Depending on the character, this can indicate that this button is held down and not released until indicated by the release notation. |
| ]X[ | Input X is released. Will only appear if a button is previously held down. This type of input is referred to as Negative Edge. |
| {X} | Button X should only be held down briefly to get a partially charged version instead of the fully charged one. |
| X(N) | Attack "X" should only hit N times. |
| (XYZ)xN | XYZ string must be performed N times. Combos using this notation are usually referred to as loops. |
| (XYZ^) | A pre-existing combo labelled XYZ is inserted here for shortening purposes. |
| CH | The first attack must be a Counter Hit. |
| Air CH | The first attack must be a Counter Hit on an airborne opponent. |
| 66 | Performs a ground forward dash. |
| j.66 | Performs an aerial forward dash, used as a cancel for certain characters' air strings. |
| IAD/IABD | Performs an Instant AirDash. |
| AT | Performs an Air Throw. (j.6/4A+D) |
| IH | Performs an Initiative Heat. |
| AD | Performs an Arc Drive. |
| AAD | Performs an Another Arc Drive. |
All damage values were calculated on V.Sion using the momiji loop #2 where applicable.
You should always go for the okizeme ender unless you want to end the round.
Non-Situational Combos
The Momiji Loop
- If you miss one hit of 623B while doing these (i.e you started it too far away) following up with 4C won't work. Use 2B instead.
Situational Combos
OTG
Useful if only needing a small amount of damage to kill after a knockdown. You can also incorporate 22C or 623C to relaunch them for more damage and better oki.
General Gameplan
H-VAki's mobility and safe tools lend themselves to a strong hit and run gameplan. She is very difficult for opponents to chase down, yet constantly a threat that opponents cannot recklessly overextend against. This lets her dictate tempo in most matchups, engaging when favorable and backing off if things get too dangerous. Once she gets a hit she can convert it to safe, stable corner offense, and if pressure eventually becomes too risky to extend she can back off into neutral. Understanding how to manage these risks is especially important given H-VAki's low health and limited range. She has very few ways to control space outside her immediate vicinity, mostly relying on her top class mobility to close gaps as needed.
If H-VAki gets a life lead this dynamic shifts even further in her favor, allowing her to minimize risk and interaction with many characters and forcing them into dangerous situations to try and catch her. On the other hand, losing the life lead means H-VAki eventually needs to engage with her opponent. This can diminish the value of her mobility if the opponent is no longer incentivized to approach, though it still makes her own approaches difficult to read and cover.
Neutral
H-VAki has a great deal of freedom in neutral. Many characters cannot easily catch her, so mobility is key to staying safe and creating favorable situations. She is especially difficult to catch in the air, but must still manage air options carefully lest she make it easier for the opponent to trap her as she eventually lands. Her air normals cover different angles effectively and can control space, air to air, or initiate her offense. Her ground movement is somewhat more committal, with long startup on her dash that prevents her from blocking. Her dash is extremely fast once in motion however, and complements her air movement as a way to slip under airborne opponents or quickly close space if respected. Her larger ground buttons are somewhat committal for their range, so closing space to start offense is more often the goal than poking. They can nonetheless check approaches, antiair, and keep the opponent from invading her space too freely. Her 214X series also gives her some ground and low air space control while on the ground that can check approaches and leads to offense if blocked.
Pressure
H-VAki's offense centers on frame trap pressure to catch defensive options, jump outs, or sneak in throws. She has good frame traps, a variety of forward moving normals to help stay in, good frame advantage with a +1 5A and +2 rebeats into w5A from C normals, and the Half Moon 5A6AA series as an additional threat for extending pressure. Her committal dash makes pressure resets somewhat risky, but she also can layer in IAD resets or go for 214[X] to try and buy another chance at offense. She can also simply reset to neutral to avoid the risk of resetting pressure if desired. H-VAki does also have a standing overhead, and while it's somewhat telegraphed it may catch opponents off guard if used sparingly.
Setplay
Knockdown times
This data was collected manually using framestep. The height of the opponent affects the frame advantage. More height equals more advantage. The following are your untechable knockdowns and their frame advantage against a standing V.Akiha.
Please, take this as a ROUGH estimate and not as fixed absolute values.
| Move | Frame advantage |
|---|---|
| 2c | 45f or 71f if jump cancelled. |
| 623b | 63f |
| 623c | 71f or 109f if jump cancelled. |
| 623a | 18f |
| Throw | 39f |
| Combo AT | 12f |
| Golden AT | 57f or 80f if jump cancelled |
| 2d | 47f |
| Guard cancel bunker | 55f |
Defense
Defense is a very dangerous situation for any VAki moon to be in, and HVaki is no exception. Her low health makes any action on defense a risk, so the best defense is avoiding the situation entirely whenever possible. When she does find herself on defense, jumping out to reset to neutral is often one of her better options. She can also challenge with normals such as 2A, 2B, 2C, or 4C, utilize system mechanics as the situation dictates, or spend meter on guard cancel Bunker when attempting to escape. Her 623C is also a true reversal, albeit with limited invulnerability, and 623A/B have situational defensive value to anti-air and low crush opponent's attacks, respectively.
Notable Players
| Name | Color | Region | Common Venues | Status | Details |
|---|---|---|---|---|---|
| Eika | Europe | Netplay | Active | ||
| Rhiya | North America | Netplay | Inactive | Big labber of this character. Can be found and asked questions in the Community Server. | |
| Heavymetalmixer | North Latin America | Netplay | Active | Colombian player and H-V.Akiha main since 2013. Part of the LAN community | |
| Tsubasa (翼) |
Japan | Play Spot BIG ONE 2nd | Inactive | A longtime Melty player and Japan's gold standard for H-VAki play. |
