|
|
| Line 917: |
Line 917: |
| | width="" style="background:#E8E8E8;"| '''<font size = "3"> 「Transient Dream」 </font> ''' | | | width="" style="background:#E8E8E8;"| '''<font size = "3"> 「Transient Dream」 </font> ''' |
|
| |
|
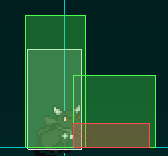
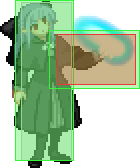
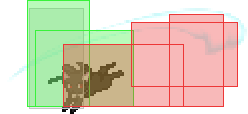
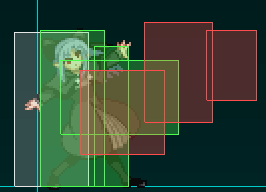
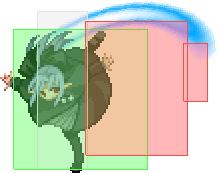
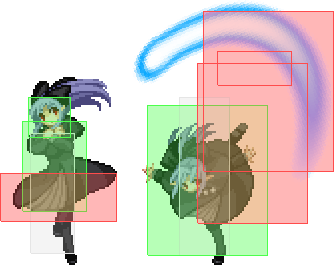
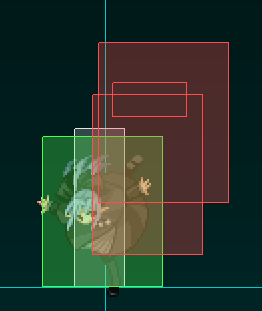
| * '''(Description)''' - Len casts forth a ball of loli energy, which travels relatively fast forwards. Len is very vulnerable after casting this move. Mainly used as a reversal or combo ender. '''You can change the outfit you wear if you hold either A,B,C or D when the move hits''' | | * '''(Description)''' - Len casts forth a ball of loli energy, which travels relatively fast forwards and infinitely. Len is very vulnerable after casting this move. Mainly used as a reversal or combo ender. '''Len can change the outfit she wears if either A,B,C or D is held when the move hits''' |
|
| |
|
| |} | | |} |
Combos
Basic Combos and Advance Combos are a translation from the French wiki BasGrosPoing.
Original can be seen at : http://wiki.basgrospoing.fr/index.php/Melty_Blood/Len/Full_Moon
Be sure to check this article about F-Len: https://drunkardshade.com/2015/08/11/melty-bits-f-len-2/
Basic combos
  (5A) > 5B > 5C(4) > 3C > 623A > jBC > jBC > AT
Basic BnB.
  jB-counter > (5B > 5C)/(5C > 623A) > jBC > jBC > AT
AirCounter combo.
  j6E > 5C(4) > 623A > jBC > jBC > AT
Golden AirThrow combo.
Advanced Combos
  (5A) > 5B > 5C(4) > 623B > 3C > 623A > instant AT > 5A > 2B
Corner combo.
  (5A) > 5B(3) > 5C(4) > 623B into mirror > 2B > 5C(2) > 3C > 623A > jBC > jBC > AT
"214A mirror" placed at the opposite screen.
  (5A) > 5B > 5C(4) > 3C > 623A > jBC > jBC > AT into mirror > dash jBC > jBC > AT
"j.214B mirror" placed half screen in the air, away from the enemy.
  (5A) > 5B(3) > 2B > 4B > 214B > j214B > 214B > 5B(3) before the enemy hits the mirror > jBC > jBC > AT dans le mirror > High jump > jBC > jBC > AT
"j.214B mirror" placed half screen in the air, away from the enemy.
  j6E > 2B > 5C(2) > 3C > 623A > jBC > jBC > AT
Golden AirThrow combo.
  (5A) > 5B > 5C(4) > instant AT > (3C > 623B > instant AT)x3 > 5A > 2B
Corner combo.
  236D > 214B > 2B > (5A > 2B) x n >5C(2) > 3C > jBC > jBC > AT
After-shield combo, to be confirmed
Not BasGrosPoing Stuff
note that the difficulty may be a bit subjective as it factors in personal experience + a non-Len player's experience with the combo
| Input
|
Location
|
Setup Required
|
Damage (vs VSion)
|
Net Meter Gained
|
Difficulty
|
Video
|
| 5B > 2B > 3C > 623A > jc > j.BC > j.BC > AT
|
Anywhere
|
None
|
4368
|
72.4%
|
Easy
|
[Insert Video]
|
- Far range confirm. Effective at the ranges from the middle to the end of 5B's hitbox
- This combo lacks compared to the bnb in every aspect, so only use it at the effective range
| Input
|
Location
|
Setup Required
|
Damage (vs VSion)
|
Net Meter Gained
|
Difficulty
|
Video
|
| (5A/2A) > 5B > 5C (4) > 3C > 623A > jc> instant AT > 3C > 623B > j.ABC > j.BC > AT
|
Corner
|
None
|
5635
|
99%
|
Medium
|
[Insert Video]
|
- Corner Combo derived from the bnb
- Delay the 623A as much as possible so the instant air throw can connect. The jA is necessary as jB is too slow for the sequence after 623B
- The 623B may have to be done fast
- Does not work on Necos
| Input
|
Location
|
Setup Required
|
Damage (vs VSion)
|
Net Meter Gained
|
Difficulty
|
Video
|
| (5A/2A) > 5B > 2B > 214A > (wallbounce) 5B > 2B > 214A
|
Corner
|
None
|
2595
|
15.3%
|
Very Easy
|
[Insert Video]
|
- Basic mirror oki
- Safe jump if the opponent has a reversal that is 6+ frames startup
- Also becomes a safe jump if the 2nd mirror is omitted or if an air dash is used (Len has to manually time these jumps/air dashes, it's very hard)
- The second 214A can be placed instead as a tk. 214B allowing it to be activated in the air, useful for jump in baits and mixups. See: [insert video]
| Input
|
Location
|
Setup Required
|
Damage (vs VSion)
|
Net Meter Gained
|
Difficulty
|
Video
|
| 6E > (5A > 2B) x 3 > n > 5C(2) > 3C > 623A > jc > j.BC > j.BC >AT
|
Corner
|
None
|
3141
|
81%
|
Medium - Hard
|
[Insert Video]
|
- Corner throw combo with 5A > 2B loop
- 5A 2B timings may change depending on the opponent's character
- The 3rd loop may have to be omitted depending on the opponent's character and whether a dash was used leading into the grab
- A very minuscule delay may be required for the 5C(2)
- Do this if you struggle with the instant AT version below
| Input
|
Location
|
Setup Required
|
Damage (vs VSion)
|
Net Meter Gained
|
Difficulty
|
Video
|
| 6E > (5A > 2B) x 2 > 3C > 623A > jc > instant AT > 3C > 623B > j.ABC > j.BC > AT
|
Corner
|
None
|
3250
|
94%
|
Harder than lightning loops apparently
|
[Insert Video]
|
- Advanced corner throw combo
- 5A 2B timings may change depending on the opponent's character
- Delay the first 3C so that the opponent is as low as possible to the ground
- Delay the 623A as much as possible for the instant air throw
- The 623B may have to be done fast
- The jA is necessary as jB is too slow for the sequence after 623B
- Does not work on Necos
| Input
|
Location
|
Setup Required
|
Damage (vs VSion)
|
Net Meter Gained
|
Difficulty
|
Video
|
| (5A/2A) > 5B > 5C (4) > 3C > 623A > tk. 214B > 214B > j.BC > j.BC > AT > j.BC > j.BC > AT
|
Corner
|
j214B Mirror 1 jump height (midscreen in air) in corner
|
6909
|
155.2%
|
Medium
|
[Insert Video]
|
- Advanced Corner Combo that requires setup
- Jump cancel the tk.214B mirror
- Time the tk.214B mirror to be placed as the opponent hits the mid air set up mirror (it's placed almost immediately after the 623A)
- Timing may change due to opponent character height
- The first airthrow should send the opponent into the grounded 214B mirror
- The 2nd jBC string timing is a bit awkward
| Input
|
Location
|
Setup Required
|
Damage (vs VSion)
|
Net Meter Gained
|
Difficulty
|
Video
|
| (5A/2A) > 5B > 5C(4) > 3C > 214B > j.214B > 214B > 623A > jc > j.BC > j.BC > AT > j.BC > j.BC > AT
|
Corner
|
j214B Mirror slightly less than 1 jump height (midscreen in air) in corner
|
7309
|
154.0%
|
Medium
|
[Insert Video]
|
- Advanced character specific corner combo that requires setup
- Confirmed to work against the Sion's, other characters still need testing
- The j.214B has to be done at the right height (almost as high as possible, see vid)
- The 623A should hit the opponent before they land into the 214B mirror placed
- The ending sequence of the j.BC is identical to the above combo
Strategy
FLen is a high damage character and the highest damaging of all the Len's, so many Len players go for her higher damaging combos over the less damaging oki setups. As far as oki goes, FLen can use her mirrors, meaty 236A (provided FLen is at the correct distance), and a safe jump (provided the safe jump oki setup was used). If the standard AT combo ender is used, go for a tech trap (5B during an opponent's ground tech, if done properly it will catch them during their tech, therefore leading into another combo). Practice this tech trap. It is very essential to not just FLen's, but all Len's gameplay. This tech trap covers the most options if FLen can put her opponent into the corner. In fact, many options for combos or oki are only available in corner, so try to force her opponents there. Fortunately, FLen has no trouble getting her opponents in corner thanks to her 214A mirrors, not to mention her standard bnb also carries the opponent little over halfway of the stage. In neutral, FLen can set up a mirror relatively safely if she cancels it into initiative heat or 236C. Mirrors can NOT be shielded by an opponent (barring 214C), so take advantage of that property. Also note that mirrors do not counter hit an opponent. FLen should be sure of every commitment they make as committing to a move at the wrong time will end up with her taking a combo. FLen is a lower health character, so it is essential that she avoids get hit. FLen is a character who struggles against rushdown and strong oki characters (like C-Seifuku) due to her lack of strong reversal options. Meter management is not that difficult with FLen as she does not get any major combo extensions off of meter. The times that FLen usually uses meter are for pressure (236C, meaty 214C) or for Initiative Heat (healing) or Blood Heat (reversal + healing), or for burst. It's advisable to save meter for Initiative heat / Blood heat as the heal is a solution to the problem of FLen being a low health character
Full
eating cake makes you full
Spacing
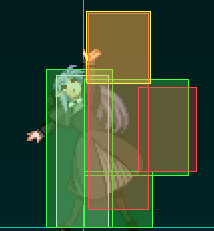
FLen is a 'control' character with many tools to space and control the neutral, however it is important to think before committing to a move as a lot of her useful moves leave her open to counterhit. As with all fighting games, it is important to know your opponent's and your own effective ranges. FLen is effective within several different ranges (i.e. at the edge of 5B, or within 5A). Take advantages of the several disjoints she has, as well as the special moves she can use. Keep in mind the frame data on FLen's moves as well as using a move at the wrong timing and spacing can result in FLen eating a combo.
Pressure
FLen's pressure is rather linear in that she has only one low and no standing overhead. Keep varying the moves that are used in a blockstring to avoid becoming predicable. Please note that the lack of reverse beating from a blockstring means that FLen is limited in how she can reclose the gap to her opponent. Stay creative and unpredictable when you do this. Tick throws, stagger pressure, and fuzzy guard mixups are strong options FLen has for mixups.
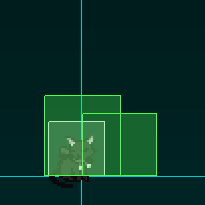
Being in a disadvantaged state is very particularly bad for FLen as she lacks any decent reversal option. Other options that FLen players should master are "catwalk" , and shield counters. Catwalk is performed by holding 3, and allows FLen to crawl in cat form with a hurtbox size that almost matches her cat sprite size. Some jumping normals will whiff over this, so use this property to your advantage. For reversal options, Len either has very weak moves or very expensive moves. Her 623C is lower body invuln and propells her into the air, meaning it will beat out some 2A's but if it trades then Len is in a very bad position and may end up eating a full combo. Heats and Arc Drives can work as reversal options, but don't be too predicable. FLen's AD is significantly better than her AAD as an escape option because it is multihit, has clash, and is generally pretty safe. Shield and shield followups are decent alternative to FLen's stronger reversal options. FLen's shield counter is a bit slow, so an alternative method of escaping a ready opponent is shield counter > 236X/623B (236C works pretty well due to multihit properties). In very specific cases (i.e. FPCiel's high rock toss) 4B's clash hitbox can be used and will chain into 5C (5C is a very good normal that Len has).
Summary
- Be aware of the tradeoff that FLen faces when going for oki or full damage combos
- Master the tech trap
- Mirrors create unique pressure and cannot be shielded
- Many options open up in corner for FLen so try to force the opponent into corner
- Be aware before committing FLen to a move, she is low health therefore making mistakes extremely punishing
- Using meter to heal is a way to alleviate the severity of mistakes
- FLen struggles to escape a disadvantaged state due to lack of strong options
- FLen lacks strong mixups so master tick throws, staggers, and fuzzy guards
Move Descriptions
Normal Moves
(Frame data for the moves were collected from the Japanese wiki as well as FrameDisplay)
2A
| Startup
|
Active
|
Recovery
|
Advantage on Block
|
Guard
|
| 4
|
4
|
6
|
+3
|
Mid
|
- Fastest crouching normal
- Since 2A's hitbox is really low it will lose to any lower body invulnerability moves that the opponent may have
|
5A
| Startup
|
Active
|
Recovery
|
Advantage on Block
|
Guard
|
| 5
|
4
|
5
|
+3
|
Mid
|
- Fastest standing normal
- Useful for pokes, frame traps, and setting up tick throws
|
2B
| Startup
|
Active
|
Recovery
|
Advantage on Block
|
Guard
|
| 8
|
3
|
14
|
-1
|
Low
|
- FLen's only low
- Good for poking due to disjoint
- Forces knockdown on the opponent
|
5B
Sequence 1
| Startup
|
Active
|
Recovery
|
Advantage on Block
|
Guard
|
| 9
|
2
|
-
|
-
|
Mid
|
Sequence 2
| Gap
|
Active
|
Recovery
|
Advantage on Block
|
Guard
|
| 0
|
3
|
-
|
-
|
Mid
|
Sequence 3
| Gap
|
Active
|
Recovery
|
Advantage on Block
|
Guard
|
| 0
|
3
|
8
|
+1
|
Mid
|
(Sequence 2 and 3 are identical)
- Further range compared to Len's H and C moons, but does not hit low
- Good normal for controlling the neutral
- Decent for ranged poking due to disjoint
- Long active frames makes 5B great for tech traps and meaties
|
4B
| Startup
|
Active
|
Recovery
|
Advantage on Block
|
Guard
|
| 10
|
4
|
20
|
-9
|
Mid
|
- Situational anti air with clash hitbox
- Launches the opponent
|
2C
| Startup
|
Active
|
Recovery
|
Advantage on Block
|
Guard
|
| 14
|
7
|
(37)?
|
-4
|
Mid
|
- 2C cannot be cancelled into any other move
- Pretty much only useful for mixing up blockstring with 3C
- 2C becomes less minus on block the further away it hits an opponent
|
3C
| Startup
|
Active
|
Recovery
|
Advantage on Block
|
Guard
|
| 7
|
7
|
24
|
-14
|
Mid
|
- Launches the opponent off the ground
- Useful for ground confirming air counter hits if a (5A > 2B) loop cannot be performed
- Use in conjunction with 2C for blockstring pressure. Note that this move can only cancel into specials
|
5C
Sequence 1
| Startup
|
Active
|
Recovery
|
Advantage on Block
|
Guard
|
| 7
|
3
|
-
|
-
|
Mid
|
Sequence 2
| Gap
|
Active
|
Recovery
|
Advantage on Block
|
Guard
|
| 0
|
3
|
-
|
-
|
Mid
|
Sequence 3
| Gap
|
Active
|
Recovery
|
Advantage on Block
|
Guard
|
| 13?
|
4
|
-
|
-
|
Mid
|
Sequence 4
| Gap
|
Active
|
Recovery
|
Advantage on Block
|
Guard
|
| 0
|
4
|
-
|
-
|
Mid
|
Sequence 5
| Gap
|
Active
|
Recovery
|
Advantage on Block
|
Guard
|
| 0
|
4
|
16
|
-2 (-5)
|
Mid
|
- Can be used to ground confirm air counter hits
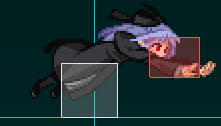
- Hitbox travels relatively high about Len, becoming a disjoint. Coupled with the fact that 5C is 7 frame startup allows the move to be used as a fast anti-air. Note that trades are likely to happen if 5C is used as such.
- Also note that 5C anti-airs can be baited out and punished with another jump or air shield
- The gap during the move can be used as a frametrap with 236X
|
JA
| Startup
|
Active
|
Landing Recovery
|
Advantage on Block
|
Guard
|
| 6
|
4
|
9
|
-
|
High
|
- Fastest and best air-to-air normal
- Use this move to fish for counter hits
|
JB
| Startup
|
Active
|
Landing Recovery
|
Advantage on Block
|
Guard
|
| 8
|
8
|
2
|
-
|
High
|
- Decent air-to-air normal due to disjoint, and active frames
|
JC
| Startup
|
Active
|
Landing Recovery
|
Advantage on Block
|
Guard
|
| 11
|
3
|
2
|
-
|
High
|
- Excellent normal for jump ins
- Can cross up (keep in mind that there's cross up protection in MBAACC)
- Fast enough to use out of an IAD (Instant Air Dash)
- Can set up fuzzy block scenarios
- 11 frame startup allows this normal to be used as a feint
- 11 frame startup leaves Len open to counter hits
|
J2C
Sequence 1
| Startup
|
Active
|
Landing Recovery
|
Advantage on Block
|
Guard
|
| 10
|
4
|
0?
|
-
|
High
|
Sequence 2
| Gap
|
Active
|
Landing Recovery
|
Advantage on Block
|
Guard
|
| 0
|
4
|
0?
|
-
|
High
|
Sequence 3
| Gap
|
Active
|
Landing Recovery
|
Advantage on Block
|
Guard
|
| 2?
|
4
|
0?
|
-
|
High
|
Sequence 4
| Gap
|
Active
|
Landing Recovery
|
Advantage on Block
|
Guard
|
| 0
|
4
|
0?
|
-
|
High
|
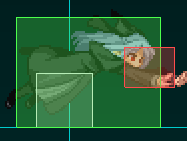
- If j2C is pressed when falling, Len can press 8 just before landing, this will cause the move to hop up a tiny bit, extending the move. This in turn causes the move to be able to be guarded mid.
|
Special Moves
Name 「JP name」 - 22ABC
- (Description) - Simply describe the move here and what it can be used for
- (A version) - This is where you put what the version of the move can be used for and how its different from the rest of the moves.
- (B version) - Ditto
- (EX version) - This is were you describe what happens when you feed it 100%
|
「Flame Snow」 - 236ABC
- (Description) - Len throws a fire(snow)ball that travels in a straight path close to and parallel to the ground. All versions are used for pressure of some form
- (A version) - Slow moving, and reaches only half the screen's distance. Best used in pressure/resetting pressure. In certain scenarios, it can be used as an anti air that will usually trade.
- (B version) - Fast moving, reaches almost the whole screen's distance. Used in mixing up with the A version, or if immediate distance pressure is required.
- (EX version) - Travels until it hits or moves offscreen. Has 4 hits. 1268 damage total. Best used to keep pressure up or for safely placing a mirror in neutral. Also can be used in conjunction with a shield to escape pressure
|
| 「」 - 28ABC
|
「London Rondo」 - 623ABC
- (Description) - Len winds up and does a kick.
- (A Version) - Has upper body invulnerability. This move is a situational anti air due to the startup time. Mainly used for launchers in combos
A Version
| Startup
|
Active
|
Recovery
|
Advantage on Block
|
Guard
|
| 11
|
6
|
20(35)
|
-7
|
Mid
|
- (B Version) - Launches the opponent horizontally, causing a wallbounce if they impact a wall. Used in pressure and in certain combos
B Version
| Startup
|
Active
|
Recovery
|
Advantage on Block
|
Guard
|
| 11
|
5
|
20(35)
|
-7
|
Mid
|
- (EX Version) - Len hops and spins, then does a high reaching kick. Has lower body invuln. Goes into the standard air combo ender if it connects.
EX Version
Sequence 1
| Startup
|
Active
|
Recovery
|
Advantage on Block
|
Guard
|
| 4
|
3
|
-
|
-
|
Mid
|
Sequence 2
| Gap
|
Active
|
Recovery
|
Advantage on Block
|
Guard
|
| 0
|
3
|
-
|
-
|
Mid
|
Sequence 3
| Gap
|
Active
|
Recovery
|
Advantage on Block
|
Guard
|
| 0
|
3
|
-
|
-
|
Mid
|
Sequence 4
| Gap
|
Active
|
Recovery
|
Advantage on Block
|
Guard
|
| 0
|
3
|
-
|
-
|
Mid
|
Sequence 5
| Gap
|
Active
|
Recovery
|
Advantage on Block
|
Guard
|
| 0
|
3
|
-
|
-
|
Mid
|
Sequence 6
| Gap
|
Active
|
Recovery
|
Advantage on Block
|
Guard
|
| 0
|
3
|
-
|
-
|
Mid
|
Sequence 7
| Gap
|
Active
|
Recovery
|
Advantage on Block
|
Guard
|
| 0
|
3
|
-
|
-
|
Mid
|
Sequence 8
| Gap
|
Active
|
Recovery
|
Advantage on Block
|
Guard
|
| 0
|
3
|
-
|
-
|
Mid
|
(sequence 2-8 are identical)
Sequence 9
| Gap
|
Active
|
Recovery
|
Advantage on Block
|
Guard
|
| 11
|
3
|
28(70)
|
-13
|
Mid
|
|
「Saint Elmo」 - 214ABC
- (Description) - Len deploys a mirror which is activated upon opponent contact in a combo'd state or activated manually. FLen is allowed up to 1 grounded mirror and 1 j. mirror and 1 EX mirror at a time. A or EX reflects most projectiles. Offers a unique style of pressure as they have a lot of blockstun and the A and B versions cannot be shielded.
- (A version) - Len places a mirror horizontally (standing tall, moves horizontally when activated). Reflects most projectiles. Can OTG an opponent if deployed fast enough. Best used for pressure as it only becomes a combo extender in certain placements. j.214A has the same applications as its grounded variant.
- (B version) - Len places a mirror vertically (lying down, moves vertically when activated). Does not reflect projectiles. Grounded 214B is best used as a combo extender after an AT as it is hard to combo an opponent if the mirror is used for pressure. j.214B is best used in pressure as well as a combo extender.
- (EX version) - Len places a 6 hit mirror that very slowly moves towards the opponent. Reflects most projectiles. Best used as a meaty or for pressure.
|
| 「」 - 421ABC
|
| 「」 - J22ABC
|
「」 - 426ABC
- (Description) - ...
- (A version) -
- (B version) -
- (EX version) -
|
「」 - BC
- (Description) - ...
- (Standing) -
- (Crouching) -
- (Airborne) -
|
Arc Drive
「Transience」
- (Description) - Len casts a ball of energy that accelerates forwards. Travels infinitely. Multihit, and has clash hitbox. This move is very safe and is mainly used as a reversal, or in pressure.
|
Another Arc Drive
「Transient Dream」
- (Description) - Len casts forth a ball of loli energy, which travels relatively fast forwards and infinitely. Len is very vulnerable after casting this move. Mainly used as a reversal or combo ender. Len can change the outfit she wears if either A,B,C or D is held when the move hits
|
Last Arc
「」
- (Description) - LA description. Mention where it is activated (air or ground shield) first.
|
MBAACC Navigation
