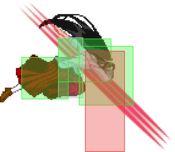
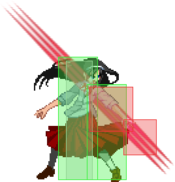
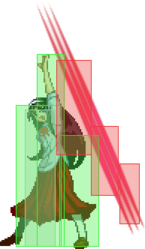
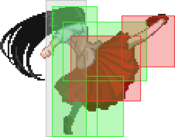
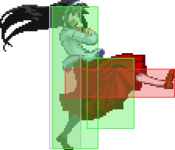
|
|
| Line 29: |
Line 29: |
| ==Normal Moves== | | ==Normal Moves== |
|
| |
|
| ======<font style="visibility:hidden" size="0">2A</font>======
| |
| {{MoveData | | {{MoveData |
| |image=C-Akiha2a.png | | |image=C-Akiha2a.png |
| Line 53: |
Line 52: |
| }} | | }} |
|
| |
|
| ======<font style="visibility:hidden" size="0">5A</font>======
| | <br/> |
| | |
| {{MoveData | | {{MoveData |
| |image=placeholder.jpg | | |image=placeholder.jpg |
| Line 77: |
Line 77: |
| }} | | }} |
|
| |
|
| ======<font style="visibility:hidden" size="0">5A>6A</font>======
| | <br/> |
| | |
| {{MoveData | | {{MoveData |
| |image=placeholder.jpg | | |image=placeholder.jpg |
| Line 101: |
Line 102: |
| }} | | }} |
|
| |
|
| ======<font style="visibility:hidden" size="0">5A>6A>6A</font>======
| | <br/> |
| | |
| {{MoveData | | {{MoveData |
| |image=placeholder.jpg | | |image=placeholder.jpg |
| Line 125: |
Line 127: |
| }} | | }} |
|
| |
|
| ======<font style="visibility:hidden" size="0">2B</font>======
| | <br/> |
| | |
| {{MoveData | | {{MoveData |
| |image=C-Akiha2B.png | | |image=C-Akiha2B.png |
| Line 149: |
Line 152: |
| }} | | }} |
|
| |
|
| ======<font style="visibility:hidden" size="0">2BB</font>======
| | <br/> |
| | |
| {{MoveData | | {{MoveData |
| |image=C-Akiha2BB.png | | |image=C-Akiha2BB.png |
| Line 173: |
Line 177: |
| }} | | }} |
|
| |
|
| ======<font style="visibility:hidden" size="0">2BBB</font>======
| | <br/> |
| | |
| {{MoveData | | {{MoveData |
| |image=C-Akiha2BBB.png | | |image=C-Akiha2BBB.png |
| Line 197: |
Line 202: |
| }} | | }} |
|
| |
|
| ======<font style="visibility:hidden" size="0">5B</font>======
| | <br/> |
| | |
| {{MoveData | | {{MoveData |
| |image=C-Akiha5B.png | | |image=C-Akiha5B.png |
| Line 221: |
Line 227: |
| }} | | }} |
|
| |
|
| ======<font style="visibility:hidden" size="0">5BB</font>======
| | <br/> |
| | |
| {{MoveData | | {{MoveData |
| |image=C-Akiha5BB.png | | |image=C-Akiha5BB.png |
| Line 245: |
Line 252: |
| }} | | }} |
|
| |
|
| ======<font style="visibility:hidden" size="0">5[B]</font>======
| | <br/> |
| | |
| {{MoveData | | {{MoveData |
| |image=placeholder.png | | |image=placeholder.png |
| Line 269: |
Line 277: |
| }} | | }} |
|
| |
|
| ======<font style="visibility:hidden" size="0">2C</font>======
| | <br/> |
| | |
| {{MoveData | | {{MoveData |
| |image=placeholder.jpg | | |image=placeholder.jpg |
| Line 293: |
Line 302: |
| }} | | }} |
|
| |
|
| ======<font style="visibility:hidden" size="0">5C</font>======
| | <br/> |
| | |
| {{MoveData | | {{MoveData |
| |image=C-Akiha5C.png | | |image=C-Akiha5C.png |
| Line 317: |
Line 327: |
| }} | | }} |
|
| |
|
| ======<font style="visibility:hidden" size="0">4C</font>======
| | <br/> |
| | |
| {{MoveData | | {{MoveData |
| |image=akiha_4c.png | | |image=akiha_4c.png |
| Line 341: |
Line 352: |
| }} | | }} |
|
| |
|
| ======<font style="visibility:hidden" size="0">6C</font>======
| | <br/> |
| | |
| {{MoveData | | {{MoveData |
| |image=akiha_6c.png | | |image=akiha_6c.png |
Revision as of 10:10, 28 January 2020
Combos
(Imported from French wiki: http://wiki.basgrospoing.fr/index.php/Melty_Blood_Actress_Again_Current_Code)
BnB midscreen
- (2AA) 5C 6C 4C 6AAA 2C 5[B]B jBC jB2C delay j236B : 4300
- The input order of 5C 6C and 4C doesn't matter. The ending j236B isn't part of the combo, but allow a meaty so you can place 2AA after.
BnB corner
- (2AA) 6C 4C 2C 5C 5C 2C 5[B] 4C jBC jB2C
Metered Combos
- ...
Strategy
Do what you need to do to extrapolate on the character. Here are example categories below.
Half
Spacing
Pressure
Move Descriptions
Normal Moves
2A
|
| Damage
|
Red Damage
|
Proration
|
Cancel
|
Guard
|
| 350
|
150
|
Absolute: 75%
|
SE, SP, EX, (J), N
|
L
|
| First Active
|
Active
|
Recovery
|
Frame Adv
|
Circuit
|
Invuln
|
| 4
|
4
|
8
|
+11 Hit
+0 Block
|
4.0%
|
-
|
|
description
|
|
5A
|
| Damage
|
Red Damage
|
Proration
|
Cancel
|
Guard
|
| 300
|
120
|
Absolute: 75%
|
SE, SP, EX, (J), N
|
HL
|
| First Active
|
Active
|
Recovery
|
Frame Adv
|
Circuit
|
Invuln
|
| 4
|
3
|
8
|
+12 Hit
+1 Block
|
3.0%
|
-
|
|
description
|
|
5A>6A
|
| Damage
|
Red Damage
|
Proration
|
Cancel
|
Guard
|
| -
|
-
|
Absolute:
|
SE, SP, EX, (J), N
|
HL
|
| First Active
|
Active
|
Recovery
|
Frame Adv
|
Circuit
|
Invuln
|
| -
|
-
|
-
|
+15 Hit
-5 Block
|
-
|
-
|
|
description
|
|
5A>6A>6A
|
| Damage
|
Red Damage
|
Proration
|
Cancel
|
Guard
|
| -
|
-
|
Absolute:
|
SE, SP, EX, (J), N
|
HL
|
| First Active
|
Active
|
Recovery
|
Frame Adv
|
Circuit
|
Invuln
|
| -
|
-
|
-
|
Launch on Hit
-1 Block
|
-
|
-
|
|
description
|
|
2B
|
| Damage
|
Red Damage
|
Proration
|
Cancel
|
Guard
|
| 500
|
260
|
Absolute: 85%
|
SP, EX, (J), N
|
L
|
| First Active
|
Active
|
Recovery
|
Frame Adv
|
Circuit
|
Invuln
|
| 6
|
4
|
15
|
+15 Hit
-4 Block
|
5.0%
|
-
|
|
description
|
|
2BB
|
| Damage
|
Red Damage
|
Proration
|
Cancel
|
Guard
|
| 400
|
400
|
100%
|
SP, EX, (J), N
|
LA
|
| First Active
|
Active
|
Recovery
|
Frame Adv
|
Circuit
|
Invuln
|
| 9
|
3
|
14
|
+17 Hit
+2 Block
|
4.0%
|
-
|
|
description
|
|
2BBB
|
| Damage
|
Red Damage
|
Proration
|
Cancel
|
Guard
|
| 500
|
600
|
Absolute: 75%
|
J
|
HA
|
| First Active
|
Active
|
Recovery
|
Frame Adv
|
Circuit
|
Invuln
|
| 26
|
4
|
51
|
Launch on Hit
Varies on Block
|
+6.0%
|
-
|
|
An overhead with rather slow start-up. Can be jump-cancelled on Hit OR Block so it is safe so long as it doesn't whiff. Very rarely used.
|
|
5B
|
| Damage
|
Red Damage
|
Proration
|
Cancel
|
Guard
|
| 650
|
400
|
100%
|
SP, EX, (J), N
|
HL
|
| First Active
|
Active
|
Recovery
|
Frame Adv
|
Circuit
|
Invuln
|
| 10
|
4
|
11
|
+15 Hit
-3 on Block
|
6.0%
|
-
|
|
description
|
|
5BB
|
| Damage
|
Red Damage
|
Proration
|
Cancel
|
Guard
|
| 400
|
200
|
Absolute: 70%
|
SP, EX, (J), N
|
HL
|
| First Active
|
Active
|
Recovery
|
Frame Adv
|
Circuit
|
Invuln
|
| 7
|
4
|
20
|
+17 Hit
+2 Block
|
2.0%
|
-
|
|
description
|
|
5[B]
|
| Damage
|
Red Damage
|
Proration
|
Cancel
|
Guard
|
| 650 x3
|
400 x3
|
100%
|
SP, EX, (J), N
|
HL
|
| First Active
|
Active
|
Recovery
|
Frame Adv
|
Circuit
|
Invuln
|
| 20
|
1, 4, 4
|
9
|
+15 Hit
+3 Block
|
3.0% x3
|
-
|
|
description
|
|
2C
|
| Damage
|
Red Damage
|
Proration
|
Cancel
|
Guard
|
| 900
|
500
|
Relative: 55%
|
SP, EX, (J), N
|
L
|
| First Active
|
Active
|
Recovery
|
Frame Adv
|
Circuit
|
Invuln
|
| 11
|
6
|
23
|
Hard Knockdown
-11 Block
|
7.0%
|
-
|
|
description
|
|
5C
|
| Damage
|
Red Damage
|
Proration
|
Cancel
|
Guard
|
| 1000
|
700
|
Relative: 90%
|
SP, EX, (J), N
|
HL
|
| First Active
|
Active
|
Recovery
|
Frame Adv
|
Circuit
|
Invuln
|
| 10
|
6
|
15
|
+18 Hit
-3 Block
|
8.0%
|
-
|
|
description
|
|
4C
|
| Damage
|
Red Damage
|
Proration
|
Cancel
|
Guard
|
| 1000
|
700
|
Relative: 80%
|
SP, EX, (J), N
|
HL
|
| First Active
|
Active
|
Recovery
|
Frame Adv
|
Circuit
|
Invuln
|
| 7
|
4
|
26
|
+17 Hit
-12 Block
|
16.0%
|
-
|
|
description
|
|
6C
|
| Damage
|
Red Damage
|
Proration
|
Cancel
|
Guard
|
| 600
|
400
|
Relative: 80%
|
SP, EX, (J), N
|
HL
|
| First Active
|
Active
|
Recovery
|
Frame Adv
|
Circuit
|
Invuln
|
| 7
|
4
|
22
|
+13 Hit
-8 Block
|
8.0%
|
-
|
|
description
|
|
Special Moves
Name 「JP name」 - 22ABC
- (Description) - Simply describe the move here and what it can be used for
- (A version) - This is where you put what the version of the move can be used for and how its different from the rest of the moves.
- (B version) - Ditto
- (EX version) - This is were you describe what happens when you feed it 100%
|
| 「」 - 236ABC
|
| 「」 - 28ABC
|
| 「」 - 623ABC
|
| 「」 - 214ABC
|
| 「」 - 421ABC
|
| 「」 - J22ABC
|
「」 - 426ABC
- (Description) - ...
- (A version) -
- (B version) -
- (EX version) -
|
「」 - BC
- (Description) - ...
- (Standing) -
- (Crouching) -
- (Airborne) -
|
Arc Drive
「」
- (Description) - AD description
|
Another Arc Drive
「」
- (Description) - AAD description
|
Last Arc
「」
- (Description) - LA description. Mention where it is activated (air or ground shield) first.
|
MBAACC Navigation


