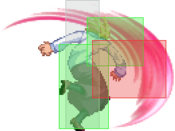
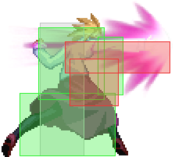
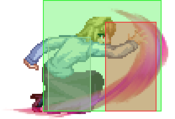
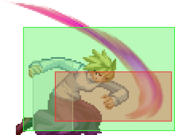
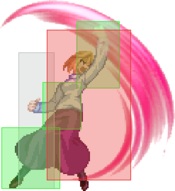
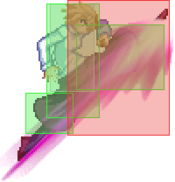
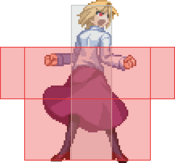
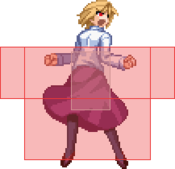
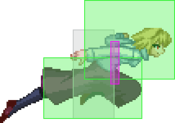
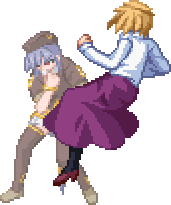
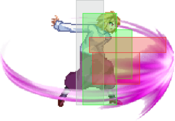
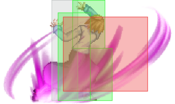
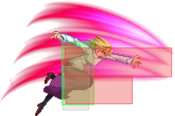
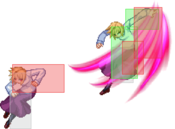
Melty Blood/MBAACC/Arcueid Brunestud/Half Moon: Difference between revisions
m (→Arc Drive) |
Scatteraxis (talk | contribs) |
||
| (95 intermediate revisions by 22 users not shown) | |||
| Line 1: | Line 1: | ||
= | {{TOClimit|3}} | ||
== Character Page Progress == | |||
{{#lst:Melty_Blood/MBAACC:Roadmap|H-Arc}} | |||
: | |||
== Overview == | |||
{{StrengthsAndWeaknesses | |||
|intro=[[File:Arc's Severed Head .png|link]] '''H-Arc''' is a heavy hitting mids pressurebeast. | |||
|pros= | |||
''' | *'''High meterless damage:''' H-Arc hurts. Her BnB deals a whopping 5k, even midscreen. | ||
*... | *'''Corner carry:''' H-Arc's BnB also happens to goes from corner to corner, augmenting her already scary pressure. | ||
:... | *'''Above average pressure:''' A good assortment of plus frames, 5A6AA, rebeat, and solid forward moving buttons gives H-Arc seemingly endless pressure. | ||
*'''Great normals:''' H-Arc has very solid buttons for both the air and the ground. 5A6AA is a fantastic tool all around, 2B is quite low profile and good range when slid into. In the air, j.2C provides a great jump in attack, j.B hits crossup and j.C remains the trademark Arcueid wall.''' | |||
*'''Good mobility:''' Very fast, slightly evasive ground dash enhances her already great ground game. A variety of tools to change air trajectory (teleport, j.2B) can make her air game slippery as well. | |||
*'''Above average meter gain:''' Long meterless combos give H-Arc good meter gain. | |||
|cons= | |||
*'''Honest mids:''' Has a difficult time opening up patient opponents due to no fast standing overheads that mix, unblockables, or command grabs, and relies mostly on a strike/throw game. | |||
*'''Limited meterless defensive options:''' Defense wise, is not as robust as C-Arc due to no full invuln on 22B, EX shield, or EX guard. | |||
= | |tablewidth=80 | ||
}} | |||
== Move Descriptions == | |||
{{AttackData-MB/Infobox}} | |||
=== Normal Moves === | |||
==== Standing Normals ==== | |||
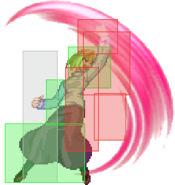
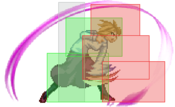
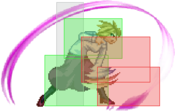
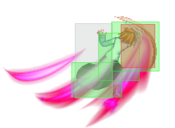
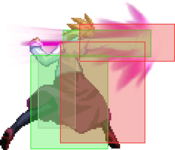
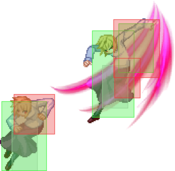
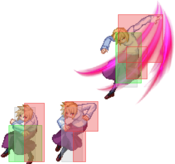
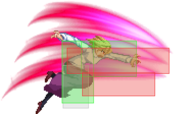
===== <span class="invisible-header">5A</span> ===== | |||
{{MoveData | |||
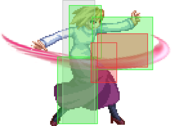
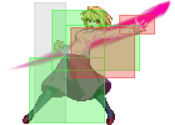
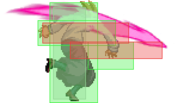
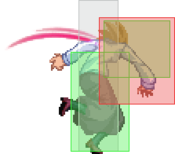
|image=MB_H-Arc_5A.png | |||
|image2=MB_H-Arc_5A6A.png | |||
|image3=MB_H-Arc_5A6AA.png | |||
|caption= | |||
|name=5A | |||
|linkname=5A | |||
|input=5A~6A~6A | |||
|data= | |||
{{AttackData-MB | |||
|version=5A | |||
|damage=300 | |||
|reddamage=96 | |||
|proration=75% (O) | |||
|circuit=2.1% | |||
|cancel=-SE-, -N-, -SP-, -CH-, -EX-, (J) | |||
|guard=LH | |||
|startup=5 | |||
|active=4 | |||
|recovery=7 | |||
|frameAdv=1 | |||
|invuln= | |||
|description=Mid-height swipe. | |||
}} | |||
{{AttackData-MB | |||
|version=5A~6A | |||
|damage=600 | |||
|reddamage=384 | |||
|proration=80% (M) | |||
|circuit=4.2% | |||
|cancel=N, SP, -CH-, EX, (J) | |||
|guard=LH | |||
|startup=8 | |||
|active=4 | |||
|recovery=16 | |||
|frameAdv=-5 | |||
|invuln= | |||
|description=Reaches upward with some forward movement. Useful for approaching opponents on the ground. | |||
}} | |||
{{AttackData-MB | |||
|version=5A~6A~6A | |||
|damage=1000 | |||
|reddamage=768 | |||
|proration=60% (O) | |||
|circuit=7.0% | |||
|cancel=(N), SP, EX, (J) | |||
|guard=LH | |||
|startup=10 | |||
|active=4 | |||
|recovery=14 | |||
|frameAdv=0 | |||
|invuln= | |||
|description=Reaches downward, has the most forward movement. Neutral on block. Launches. | |||
}} | |||
}} | |||
== | ===== <span class="invisible-header">5B</span> ===== | ||
{{MoveData | |||
|image=MBCArc5BBE1.png | |||
|image2=MBCArc5BBE2.png | |||
|caption= | |||
|name=5B | |||
|linkname=5B | |||
|data= | |||
{{AttackData-MB | |||
|damage=650 | |||
|reddamage=384 | |||
|proration=80% (O) | |||
|circuit=4.2% | |||
|cancel=N, SP, EX, (J) | |||
|guard=LH | |||
|startup=8 | |||
|active=4 | |||
|recovery=15 | |||
|frameAdv=-4 | |||
|invuln= | |||
|description=A punch that moves Arc forward. It's long cancel window and blockstun allows for unpredictable frametraps, can also be used to tickthrow opponents after you make them scared of mashing against by doing a lot of frametraps with it. | |||
}} | |||
}} | |||
===== <span class="invisible-header">5C</span> ===== | |||
{{MoveData | |||
|image=MBCArc5C.png | |||
|caption= | |||
|name=5C | |||
|linkname=5C | |||
|data= | |||
{{AttackData-MB | |||
|damage=1000 | |||
|reddamage=672 | |||
|proration=90% (O) | |||
|circuit=5.6% | |||
|cancel=N, SP, EX, (J) | |||
|guard=LH | |||
|startup=8 | |||
|active=4 | |||
|recovery=23 | |||
|frameAdv=-9 | |||
|invuln= | |||
|description=Straight punch. Has slight forward movement. | |||
}} | |||
}} | |||
= | ==== Crouching Normals ==== | ||
== | ===== <span class="invisible-header">2A</span> ===== | ||
{{MoveData | |||
|image=MBCArc2A.png | |||
|caption=2A | |||
|image2=MBCarc2aa.png | |||
|caption2=2AA | |||
|name=2A | |||
|input=2A~2A | |||
|linkname=2A | |||
|data= | |||
{{AttackData-MB | |||
|version=2A | |||
|damage=350 | |||
|reddamage=96 | |||
|proration=72% (O) | |||
|circuit=2.1% | |||
|cancel=-SE-, -N-, -SP-, CH, -EX-, (J) | |||
|guard=L | |||
|startup=5 | |||
|active=4 | |||
|recovery=8 | |||
|frameAdv=0 | |||
|invuln= | |||
|description= Standard jab that hits low. Spammable. | |||
}} | |||
{{AttackData-MB | |||
|version=~2A | |||
|damage=350 | |||
|reddamage=144 | |||
|proration=75% (O) | |||
|circuit=2.8% | |||
|cancel=SE, N, SP, EX, (J) | |||
|guard=LA | |||
|startup=5 | |||
|active=4 | |||
|recovery=9 | |||
|frameAdv=-1 | |||
|invuln= | |||
|description=A longer reach followup if you cancel 2A into itself on block/hit. | |||
}} | |||
}} | |||
===== <span class="invisible-header">2B</span> ===== | |||
{{MoveData | |||
|image=MBCArc2B.png | |||
|caption= | |||
|name=2B | |||
|linkname=2B | |||
|data= | |||
{{AttackData-MB | |||
|damage=450 | |||
|reddamage=288 | |||
|proration=70% (O) | |||
|circuit=3.5% | |||
|cancel=N, SP, EX, (J) | |||
|guard=L | |||
|startup=7 | |||
|active=4 | |||
|recovery=15 | |||
|frameAdv=-4 | |||
|invuln= | |||
|description= A low kick. Poking tool, moves forward a bit. Goes under a lot of moves, it's low hurtbox and disjointed hitbox allow you to safely beat out some moves in neutral and even anti-air certain jumping attacks. | |||
}} | |||
}} | |||
===== <span class="invisible-header">2C</span> ===== | |||
{{MoveData | |||
|image=MBCArc2C.png | |||
|caption= | |||
|name=2C | |||
|linkname=2C | |||
|data= | |||
{{AttackData-MB | |||
|damage=900 | |||
|reddamage=672 | |||
|proration=60% (O) | |||
|circuit=5.6% | |||
|cancel=N, SP, EX, (J) | |||
|guard=L | |||
|startup=10 | |||
|active=3 | |||
|recovery=21 | |||
|frameAdv=-6 | |||
|invuln= | |||
|description= A sweep that reaches pretty high and far. Long recovery. | |||
}} | |||
}} | |||
|- | ==== Aerial Normals ==== | ||
| | ===== <span class="invisible-header">j.A</span> ===== | ||
{{MoveData | |||
|image=MBCArcjA.png | |||
|caption= | |||
|name=j.A | |||
|linkname=j.A | |||
|data= | |||
{{AttackData-MB | |||
|damage=300 | |||
|reddamage=192 | |||
|proration=75% (O) | |||
|circuit=2.1% | |||
|cancel=SE, N, SP, EX, J | |||
|guard=LHA | |||
|startup=5 | |||
|active=4 | |||
|recovery=10 | |||
|frameAdv= | |||
|invuln= | |||
|description=Standard j.A that hits mid. It's short recovery allows you to do this move while rising off the ground and still be able to jump in on the opponent with j.C | |||
}} | |||
}} | |||
===== <span class="invisible-header">j.B</span> ===== | |||
{{MoveData | |||
|image=MB_H-Arc_j.B.png | |||
|caption= | |||
|name=j.B | |||
|linkname=j.B | |||
|data= | |||
{{AttackData-MB | |||
|damage=600 | |||
|reddamage=528 | |||
|proration=80% (O) | |||
|circuit=4.2% | |||
|cancel=N, SP, EX, J | |||
|guard=HA | |||
|startup=7 | |||
|active=4 | |||
|recovery= | |||
|frameAdv= | |||
|invuln= | |||
|description= A stellar jump in that hits on both sides and is bugged, it ignores clash boxes entirely. Hits crossup so it's really useful when jumping on opponent who like to dash under Arc. | |||
}} | |||
}} | |||
===== <span class="invisible-header">j.C</span> ===== | |||
{{MoveData | |||
|image=MBHalfArcjC.png | |||
|caption= | |||
|name=j.C | |||
|input= | |||
|linkname=j.C | |||
|data= | |||
{{AttackData-MB | |||
|damage=1000 | |||
|reddamage=576 | |||
|proration=90% (M) | |||
|circuit=4.9% | |||
|cancel=N, SP, EX, J | |||
|guard=HA | |||
|startup=7 | |||
|active=10 | |||
|recovery= | |||
|frameAdv= | |||
|invuln= | |||
|description=Arc kicks up. Lots of active frames. Hitbox is a bit smaller compared to C-Moon. Your primary tool to control the skies, can beat most of the moves in the game in air-to-air scenarios. | |||
}} | |||
}} | |||
==== Command Normals ==== | |||
===== <span class="invisible-header">3C</span> ===== | |||
{{MoveData | |||
|image=MBCArc3C.png | |||
|image2=MB_C-Arc_3C_Clash.png | |||
|caption2=(Clash Boxes) | |||
|name=3C | |||
|input= | |||
|linkname=3C | |||
|data= | |||
{{AttackData-MB | |||
|damage=1000 | |||
|reddamage=672 | |||
|proration=80% (M) | |||
|circuit=7.0% | |||
|cancel=SP, EX, (J) | |||
|guard=LH | |||
|startup=13 | |||
|active=3 | |||
|recovery=22 | |||
|frameAdv=-10 | |||
|invuln=Clash 9-12 | |||
|description=A swipe up which launches opponents. There are clash frames on her head before the hitboxes come out, and has a disjointed hitboxe above her head. Can't rebeat after this move. | |||
}} | |||
}} | |||
===== <span class="invisible-header">4C</span> ===== | |||
{{MoveData | |||
|image=MBCArc4C.png | |||
|caption=4C | |||
|image2=MBCArc4CBE.png | |||
|caption2=4[C] | |||
|name=4C | |||
|input=4[C] | |||
|linkname=4C | |||
|data= | |||
{{AttackData-MB | |||
|version=4C | |||
|damage=300, 1000 (1108)<br>/ {{Tooltip | text=800| hovertext=2nd hit only.}} | |||
|reddamage=(735)<br>/ {{Tooltip | text=288| hovertext=2nd hit only.}} | |||
|proration=90% (M), 65% (O) | |||
|circuit=2.1%, 7.0% (9.1%)<br>/ {{Tooltip | text=5.6%| hovertext=2nd hit only.}} | |||
|cancel=(N), (SP), (EX), (J) | |||
|guard=LH, LHA | |||
|startup=10 | |||
|active=2 (2) 9 | |||
|recovery=33 | |||
|frameAdv=-24 | |||
|invuln= | |||
|description=Arcueid does a rising knee strike which launches the opponent. Only cancellable on hit. | |||
}} | |||
{{AttackData-MB | |||
|version=4[C] | |||
|damage=900 | |||
|reddamage=288 | |||
|proration=50% (O) | |||
|circuit=5.6% | |||
|cancel=N, SP, EX, J | |||
|guard=H | |||
|startup=32 | |||
|active=9 | |||
|recovery=36 | |||
|frameAdv=-27 {{Tooltip |text=(18)|hovertext=On jump cancel.}} | |||
|invuln= | |||
|description= You'll frequently half-charge this move in combo loops, but full charge is generally never used, despite being an overhead. Not only is this overhead over 30 frames, but the combo you get off it is quite terrible. Nevertheless, you can situationally use this move to rob your opponent if they are somehow not looking at the screen, or don't know that it's cancellable on block. | |||
}} | |||
}} | |||
===== <span class="invisible-header">j.2B</span> ===== | |||
{{MoveData | |||
|image=MBCArcj2B.png | |||
|caption= | |||
|name=j.2B | |||
|linkname=j.2B | |||
|data= | |||
{{AttackData-MB | |||
|damage=750 | |||
|reddamage=392 | |||
|proration=100% | |||
|circuit=8.0% | |||
|cancel={{Tooltip |text=-SP-, -EX-|hovertext=Cancellable during landing recovery.}} | |||
|guard=LHA | |||
|startup=9 | |||
|active=8 | |||
|recovery={{Tooltip |text=14|hovertext=Landing recovery.}} | |||
|frameAdv=4 (TK) | |||
|invuln= | |||
|description= A claw dive. Special cancellable on landing recovery. | |||
}} | |||
}} | |||
===== <span class="invisible-header">j.2C</span> ===== | |||
{{MoveData | |||
|image=MB_H-Arc_j.2C.png | |||
|image2=MB_H-Arc_j.2C_BE.png | |||
|caption= | |||
|name=j.2C | |||
|input=j.2[C] | |||
|linkname=j.2C | |||
|data= | |||
{{AttackData-MB | |||
|version=j.2C | |||
|damage=1000 | |||
|reddamage=768 | |||
|proration=70% (O) | |||
|circuit=7.0% | |||
|cancel=SP, EX | |||
|guard=HA | |||
|startup=10 | |||
|active=4 | |||
|recovery= | |||
|frameAdv= | |||
|invuln= | |||
|description=Overhead slam attack. Ground techable knockdown on airborne opponents. | |||
}} | |||
{{AttackData-MB | |||
|version=j.2[C] | |||
|damage=1100 | |||
|reddamage=768 | |||
|proration=75% (O) | |||
|circuit=3.5% | |||
|cancel=SP, EX | |||
|guard=HA | |||
|startup=22 | |||
|active=4 | |||
|recovery= | |||
|frameAdv= | |||
|invuln= | |||
|description=Charged version of j.2C boasting a slightly bigger hitbox and being a hard knockdown which you can OTG out of when hitting an airborne opponent. In combos this move ground bounces which is used to both loop the opponent and get a knockdown on them. Can also be used to beat a lot of moves in neutral if timed right, but against airborne opponents all you get is an OTG. | |||
}} | |||
}} | |||
=== Universal Mechanics === | |||
===== <span class="invisible-header">Ground Throw</span> ===== | |||
{{MoveData | |||
|image=MBArcThrow.png | |||
|image2=MB_C-Arc_Throw_2.png | |||
|caption2=~2 | |||
|name=Ground Throw | |||
|linkname=Ground Throw | |||
|input=4/6A+D(~2) | |||
|data= | |||
{{AttackData-MB | |||
|version=Ground Throw | |||
|damage=700 | |||
|reddamage=465 | |||
|proration=40% | |||
|circuit=0.0% | |||
|cancel= | |||
|guard=U | |||
|startup=3 | |||
|active=1 | |||
|recovery=20 | |||
|frameAdv= | |||
|invuln= | |||
|description= Wall splats in the corner and is comboable. | |||
}} | |||
{{AttackData-MB | |||
|version=~2 | |||
|damage=1500 | |||
|reddamage=372 | |||
|proration=40% | |||
|circuit=0.0% | |||
|cancel= | |||
|guard=U | |||
|startup=3 | |||
|active=1 | |||
|recovery=20 | |||
|frameAdv= | |||
|invuln= | |||
|description= Hold 2 to slam them next to you with a hard knockdown. | |||
}} | |||
}} | |||
===== <span class="invisible-header">Air Throw</span> ===== | |||
{{MoveData | |||
|image=MB_C-Arc_Throw_Air.png | |||
|caption= | |||
|name=Air Throw | |||
|linkname=Air Throw | |||
|input=j.4/6A+D | |||
|data= | |||
{{AttackData-MB | |||
|damage=1600 (Raw)<br>1200 (Ender) | |||
|reddamage=465 | |||
|proration=30% | |||
|circuit=0.0% | |||
|cancel= | |||
|guard=U | |||
|startup=2 | |||
|active=1 | |||
|recovery={{Tooltip | text=12| hovertext=Landing recovery.}} | |||
|frameAdv=- | |||
|invuln= | |||
|description=Arc grabs the opponent by the neck and slams them to the ground just before landing. Switches sides if not touching the corner wall. Ground bounces and can immediatly be followed up by an air attack if done Raw, untechable knockdown with Arc landing at a further distance from the opponent as a combo ender. | |||
}} | |||
}} | |||
===== <span class="invisible-header">Shield Counter</span> ===== | |||
{{MoveData | |||
|image=MB_F-Arc_236D.png | |||
|image2=MB_H-Arc_236D.png | |||
|image3=MB_F-Arc_j.236D.png | |||
|caption= | |||
|name=Shield Counter | |||
|linkname=Shield Counter | |||
|input=Auto after a successful shield (Air OK) | |||
|data= | |||
{{AttackData-MB | |||
|version=Standing | |||
|damage=500 (345) | |||
|reddamage=198 | |||
|proration=40% | |||
|circuit=3.5% | |||
|cancel=SP, EX, (J) | |||
|guard=LHA | |||
|startup=9 | |||
|active=4 | |||
|recovery=18 | |||
|frameAdv=-4 | |||
|invuln= | |||
|description=Same animation as 3C. | |||
}} | |||
{{AttackData-MB | |||
|version=Crouching | |||
|damage=1500 (1035) | |||
|reddamage=662 | |||
|proration=50% | |||
|circuit=10.5% | |||
|cancel=SP, EX, (J) | |||
|guard=LA | |||
|startup=9 | |||
|active=4 | |||
|recovery=18 | |||
|frameAdv=-4 | |||
|invuln= | |||
|description=Same animation as F-Moon 2C. | |||
}} | |||
{{AttackData-MB | |||
|version=Air | |||
|damage=500 (345) | |||
|reddamage=198 | |||
|proration=50% | |||
|circuit=3.5% | |||
|cancel= | |||
|guard=HA | |||
|startup=9 | |||
|active=4 | |||
|recovery= | |||
|frameAdv= | |||
|invuln= | |||
|description=Same animation as j.C | |||
}} | |||
}} | |||
===== <span class="invisible-header">Shield Bunker</span> ===== | |||
{{MoveData | |||
|image=MB_C-Arc_214D.png | |||
|image2=MB_H-Arc_214D.png | |||
|caption= | |||
|name=Shield Bunker | |||
|linkname=Shield Bunker | |||
|input=214D in neutral or blockstun | |||
|data= | |||
{{AttackData-MB | |||
|version=Neutral | |||
|damage=500 | |||
|reddamage=192 | |||
|proration=50% | |||
|circuit=0.0% | |||
|cancel= | |||
|guard=LHA | |||
|startup=26 | |||
|active=4 | |||
|recovery=19 | |||
|frameAdv=-5 | |||
|invuln=Clash 1-10 | |||
}} | |||
{{AttackData-MB | |||
|version={{Tooltip | text=(Clash)| hovertext=If an attack connects with this Shield Bunker's clash box, this is the followup that happens afterwards.}} | |||
|damage=500 | |||
|reddamage=192 | |||
|proration=100% | |||
|circuit=0.0% | |||
|cancel= | |||
|guard=LHA | |||
|startup=8 | |||
|active=4 | |||
|recovery=19 | |||
|frameAdv=-5 | |||
|invuln={{Tooltip | text=Strike 1-7| hovertext=1-15 Strike invicibility on whiff.}} | |||
|description=Moves arc slightly forward. | |||
}} | |||
{{AttackData-MB | |||
|version=Blockstun | |||
|damage=0 | |||
|reddamage=0 | |||
|proration=100% | |||
|circuit=-100.0% | |||
|cancel= | |||
|guard=LHA | |||
|startup=19 | |||
|active=3 | |||
|recovery=22 | |||
|frameAdv=-7 | |||
|invuln= | |||
|description=H-Moon specific reversal bunker. | |||
}} | |||
}} | |||
===== <span class="invisible-header">Circuit Spark</span> ===== | |||
{{MoveData | |||
|image=MB_C-Arc_CSpark.png | |||
|image2=MB_C-Arc_CSpark_Air.png | |||
|name=Circuit Spark | |||
|linkname=Circuit Spark | |||
|input=In Heat:<br>Auto during hitstun<br>A+B+C during blockstun | |||
|caption= | |||
|data= | |||
{{AttackData-MB | |||
|version=Ground | |||
|damage=100 | |||
|reddamage=0 | |||
|proration=100% | |||
|circuit=removes all | |||
|cancel= | |||
|guard=U | |||
|startup=11 | |||
|active=10 | |||
|recovery=20 | |||
|frameAdv= | |||
|invuln=Full 1-39 | |||
|description= | |||
}} | |||
{{AttackData-MB | |||
|header=no | |||
|version=Air | |||
|damage=100 | |||
|reddamage=0 | |||
|proration=100% | |||
|circuit=removes all | |||
|cancel= | |||
|guard=U | |||
|startup=12 | |||
|active=10 | |||
|recovery={{Tooltip | text=15| hovertext=Landing recovery.}} | |||
|frameAdv= | |||
|invuln=Strike 1-30 | |||
|description=Universal burst mechanic. Unlike Crescent/Full Heat activation, the hitbox and frame data doesn't vary between characters. However, you can be thrown out of this move if you input it in the air. | |||
}} | |||
}} | |||
=== Special Moves === | |||
==== Special Movement ==== | |||
===== <span class="invisible-header">Forward Dash</span> ===== | |||
{{MoveData | |||
|image=MB_C-Arc_66.png | |||
|image2=MB_C-Arc_66_Crossup.png | |||
|caption= | |||
|name=(Forward Dash) | |||
|linkname=Forward Dash | |||
|input=66 | |||
|data= | |||
{{AttackData-MB | |||
|version=Crossup | |||
|damage= | |||
|reddamage= | |||
|proration= | |||
|circuit= | |||
|cancel= | |||
|guard= | |||
|startup={{Tooltip | text=8 (min)| hovertext=Until trigger box is active.}} | |||
|active={{Tooltip | text=15| hovertext=Crossup portion, invincible.}} | |||
|recovery={{Tooltip | text=1| hovertext=No neutral frame.}} | |||
|frameAdv= | |||
|invuln=Full 8-22 | |||
|description=Special forward dash that makes Arc jump up behind the opponent on contact. Does not trigger if the opponent is in the corner, with no space inbetween them and the wall. If you input an action (like a jump) immediately after the crossup, the direction will be reversed as if done while still on the pre-crossup side. | |||
}} | |||
}} | |||
==== Grounded Specials ==== | |||
===== <span class="invisible-header">236X</span> ===== | |||
{{MoveData | |||
|image=MB_C-Arc_236AB.png | |||
|image2=MB_C-Arc_236AB_236AB.png | |||
|image3=MB_C-Arc_236AB_236AB_236AB.png | |||
|image4=MB_C-Arc_236AB_236AB_214AB.png | |||
|image5=MB_C-Arc_236AB_236AB_214AB_BE.png | |||
|image6=MB_C-Arc_236C.png | |||
|caption=A/B | |||
|caption2=~236A/B | |||
|caption3=~236A/B Ender | |||
|caption4=~214A/B Ender | |||
|caption5=~214[A/B] Ender | |||
|caption6=EX | |||
|name=You're in the way! <br> (EX: I'm going to get a little serious...!) | |||
|linkname=236X | |||
|input=236A/B/C <br> (~236A/B) <br> (~236A/B / 214A/[A]/B/[B]) | |||
|data= | |||
{{AttackData-MB | |||
|version=A/B | |||
|damage=600 / 700 | |||
|reddamage=288 / 384 | |||
|proration=100% | |||
|circuit=4.2% / 4.9% | |||
|cancel=-CH-, -EX- | |||
|guard=LHA | |||
|startup=12 / 11 | |||
|active=5 | |||
|recovery=18 / 20 | |||
|frameAdv=-5 / -7 | |||
|invuln= | |||
|description=* Rekka starter hit. | |||
'''A''': Arcueid swings her arm forward, with a pinkish-purple aura following it. Moves forward.<br> | |||
'''B''': Same as above, but the attack pushes Arcueid slightly further. | |||
}} | |||
{{AttackData-MB | |||
|version=~236A/B | |||
|damage=300 / 400 | |||
|reddamage=192 / 240 | |||
|proration=100% | |||
|circuit=2.1% | |||
|cancel=-CH-, -EX- | |||
|guard=LHA | |||
|startup=12 | |||
|active=5 | |||
|recovery=25 | |||
|frameAdv=-12 | |||
|invuln= | |||
|description=*Second hit. | |||
'''A''': Arcueid swings again, moving her even further. <br> | |||
'''B''': Same as above, but she moves further. | |||
}} | |||
{{AttackData-MB | |||
|version=~236A/B (Ender) | |||
|damage=900 | |||
|reddamage=384 | |||
|proration=100% | |||
|circuit=4.9% | |||
|cancel=EX | |||
|guard=LA | |||
|startup=12 | |||
|active=3 | |||
|recovery=37 | |||
|frameAdv=-28 | |||
|invuln= | |||
|description=*Last hit. | |||
'''A''': Arcueid swings one more time. Hits low.<br> | |||
'''B''': Same as above. Goes further. | |||
}} | |||
{{AttackData-MB | |||
|version=~214A/B (Ender) | |||
|damage=1500 | |||
|reddamage=672 | |||
|proration=100% | |||
|circuit=7.0% | |||
|cancel= | |||
|guard=LHA | |||
|startup=12 | |||
|active=2 | |||
|recovery=16 | |||
|frameAdv=-7 | |||
|invuln= | |||
|description=* Alternative rekka ender. | |||
'''A''': Downward swing, hits mid. Hard knockdown on hit.<br> | |||
'''B''': Same as above, but goes slightly further. | |||
}} | |||
{{AttackData-MB | |||
|version=~214[A/B] (Ender) | |||
|damage=1500 | |||
|reddamage=672 | |||
|proration=100% | |||
|circuit=7.0% | |||
|cancel= | |||
|guard=HA | |||
|startup=27 | |||
|active=2 | |||
|recovery=16 | |||
|frameAdv=-7 | |||
|invuln= | |||
|description=* Charged version of the above. | |||
'''[A]''': Hits overhead. Hard knockdown on hit.<br> | |||
'''[B]''': Same, but moves further. | |||
}} | |||
{{AttackData-MB | |||
|version=EX | |||
|damage=600, 120, 150*3, 600, 120*4, 800, 300 (2716) | |||
|reddamage=(2378) | |||
|proration=100% | |||
|circuit=-100.0% | |||
|cancel= | |||
|guard=LHA (1-10, 12), LA (11) | |||
|startup=2+8 | |||
|active={{Tooltip | text=69| hovertext=12 hits. Has separate hitboxes that overlap with the ones coming directly from Arcueid.
 4,1 (1) 1 (1) 1 (20) 4,1 (1) 1 (1) 1 (2) 2 (21) 1 (3) 2}} | |||
|recovery=53 | |||
|frameAdv=-32 | |||
|invuln=Full 1-14 | |||
|description=Automated version of Arcueid's rekka. Hits low at the beginning of the last part (11th hit). Unsafe on block. | |||
}} | |||
}} | |||
===== <span class="invisible-header">623X</span> ===== | |||
{{MoveData | |||
|image=MB_C-Arc_623A.png | |||
|image2=MB_C-Arc_623A_6X.png | |||
|image3=MB_C-Arc_623B.png | |||
|image4=MB_C-Arc_623B_6X.png | |||
|image5=MB_C-Arc_623C.png | |||
|caption=A | |||
|caption2=~6X | |||
|caption3=B | |||
|caption4=~6X | |||
|caption5=EX | |||
|name=What are you doing...! | |||
|linkname=623X | |||
|input=623A/B/C<br>(623A/B~6X) | |||
|data= | |||
{{AttackData-MB | |||
|version=A | |||
|damage=700 | |||
|reddamage=480 | |||
|proration=90% (O) | |||
|circuit=4.9% | |||
|cancel=-CH- | |||
|guard=LA | |||
|startup=13 | |||
|active=4 | |||
|recovery=19 | |||
|frameAdv=-11 | |||
|invuln= | |||
|description=Low-hitting claw strike, hard knockdown on hit. | |||
}} | |||
{{AttackData-MB | |||
|version=B | |||
|damage=1000 | |||
|reddamage=768 | |||
|proration=75% (O) | |||
|circuit=7.0% | |||
|cancel=-CH-, -EX-, (J) | |||
|guard=LH | |||
|startup=8 | |||
|active=6 | |||
|recovery=17 | |||
|frameAdv=-5 | |||
|invuln= | |||
|description=Air-unblockable upper claw strike. | |||
}} | |||
{{AttackData-MB | |||
|version=A~6X | |||
|damage=700 | |||
|reddamage=480 | |||
|proration=50% (O) | |||
|circuit=2.8% | |||
|cancel=(J) | |||
|guard=LH | |||
|startup=15 | |||
|active=1 | |||
|recovery=27 | |||
|frameAdv=-10 | |||
|invuln= | |||
|description= | |||
}} | |||
{{AttackData-MB | |||
|version=B~6X | |||
|damage=700 | |||
|reddamage=480 | |||
|proration=50% (O) | |||
|circuit=2.8% | |||
|cancel=(SP), (EX), (J) | |||
|guard=LH | |||
|startup=16 | |||
|active=2 | |||
|recovery=23 | |||
|frameAdv=-7 | |||
|invuln= | |||
|description=6X followup, can be done even on whiff. Arcueid advances for a launching claw strike. Jump cancellable on hit, and if done from 623B you can also cancel into any special on hit. | |||
}} | |||
{{AttackData-MB | |||
|version=EX | |||
|damage=500, 300*6, 600 (2316) | |||
|reddamage=(1614) | |||
|proration=70% (O) | |||
|circuit=-100.0% | |||
|cancel= | |||
|guard=LHA | |||
|startup=4+6 | |||
|active={{Tooltip |text=13 (15) 1|hovertext=8 hits.
1,2,2,2,2,2,2 (15) 1}} | |||
|recovery=25 | |||
|frameAdv=-14 | |||
|invuln= | |||
|description=Multihit EX version similar to 623A~6X. Wallslams on hit. | |||
}} | |||
}} | |||
===== <span class="invisible-header">214X</span> ===== | |||
{{MoveData | |||
|image=MB_C-Arc_214AB.png | |||
|image2=MB_C-Arc_214B_C.png | |||
|image3=MB_C-Arc_214C.png | |||
|caption2=B Auto-followup | |||
|name=Ready... Go! | |||
|linkname=214X | |||
|input=214A/B/C | |||
|data= | |||
{{AttackData-MB | |||
|version=A | |||
|damage=800 | |||
|reddamage=384 | |||
|proration=100% | |||
|circuit=7.0% | |||
|cancel=-EX- | |||
|guard=LH | |||
|startup=16 | |||
|active=5 | |||
|recovery=12 | |||
|frameAdv=1 | |||
|invuln= | |||
|description= Charging elbow. A pressure reset tool, it's plus on block and you can generally frametrap mash attempts with 2B. Unfortunately this move is very prone to being shielded, since most players are guessing if you're going to continue your 6AAA string or not anyway. | |||
}} | |||
{{AttackData-MB | |||
|version=B /<br>(Block/Hit) | |||
|damage=700, 1000 (1280) | |||
|reddamage=(926) | |||
|proration=60% (O) | |||
|circuit=4.9%*2 (9.8%) | |||
|cancel=-EX-, (J) | |||
|guard=LH, LHA | |||
|startup=16 | |||
|active=8 /<br>8 (9) 4 | |||
|recovery=7 /<br>16 | |||
|frameAdv=-<br>-19, -2 | |||
|invuln= | |||
|description= Goes about double A's distance. On block/hit, Arcueid will automatically go into a 5C-like followup which launches on hit, can also be jump cancelled on hit. Used a ton in combos, but also as a niche timing-change-up frame trap | |||
}} | |||
{{AttackData-MB | |||
|version=EX | |||
|damage=800, 600*2, 1000 (2602) | |||
|reddamage=(1840) | |||
|proration=50% (M)<br>100% | |||
|circuit=-100.0% | |||
|cancel= | |||
|guard=LH | |||
|startup=6+7 | |||
|active=8 | |||
|recovery=18 | |||
|frameAdv=-11 | |||
|invuln=Clash 2-8 | |||
|description=Arcueid charges, and follows with an automatic air combo if the first hit lands, but does not guarantee if all of the attacks will connect, a lot weird combo circumstances prevents this move from being as reliable as you'd like. Finishes on a hard knockdown. Has a clash box on startup. | |||
}} | |||
}} | |||
===== <span class="invisible-header">421X</span> ===== | |||
{{MoveData | |||
|image=MB_H-Arc_421AB.png | |||
|image2=MB_H-Arc_421C.png | |||
|caption= | |||
|name=Over here, over here!<br>(EX: Are you ready?) | |||
|linkname=421X | |||
|input=421A/B/C<br>(421C~2) | |||
|data= | |||
{{AttackData-MB | |||
|version=A/B | |||
|damage= | |||
|reddamage= | |||
|proration= | |||
|circuit= | |||
|cancel= | |||
|guard= | |||
|startup=6/7 | |||
|active=20 | |||
|recovery=8 | |||
|frameAdv= | |||
|invuln=Full 6-25<br>/ 7-26 | |||
|description=Forward teleporting dash series. Punishable during the recovery. | |||
}} | |||
{{AttackData-MB | |||
|version=EX<br>~2 | |||
|damage=1400 (1356)<br>2700 (2615) | |||
|reddamage=(810)<br>(1620) | |||
|proration=100% | |||
|circuit=-100.0% | |||
|cancel= | |||
|guard=LH | |||
|startup=3+8 | |||
|active=8 | |||
|recovery=17 | |||
|frameAdv=-9 | |||
|invuln=Full 5-24 | |||
|description=EX version is a hitgrab that ends like a more damaging regular ground throw on hit, meaning you can also opt for Throw~2 knockdown. | |||
}} | |||
}} | |||
===== <span class="invisible-header">22X</span> ===== | |||
{{MoveData | |||
|image=MB_C-Arc_22A.png | |||
|image2=MB_H-Arc_22B.png | |||
|image3=MB_C-Arc_22AB_66AB.png | |||
|image4=MB_C-Arc_22X_66C.png | |||
|image5=MB_C-Arc_22C.png | |||
|caption=A | |||
|caption2=B | |||
|caption3=~66A/B | |||
|caption4=~66C | |||
|caption5=EX<br>(2nd last hitboxes are repeated) | |||
|name=Quiet! (Fly!) | |||
|linkname=22X | |||
|input=22A/B/C<br>(22A~66A/C)<br>(22B~66B/C) | |||
|data= | |||
{{AttackData-MB | |||
|version=A | |||
|damage=700, 500 (1125) | |||
|reddamage=(533) | |||
|proration=100% | |||
|circuit=4.9%, 3.5% (8.4%) | |||
|cancel=CH | |||
|guard=LH | |||
|startup=6 | |||
|active=2 (1) 7 | |||
|recovery=36 | |||
|frameAdv=-25 | |||
|invuln= | |||
|description= An air-unblockable 2 hit anti-air. Usually can force a trade or beat certain things clean if timed properly. Situationally a counter hit starter. This move is not a reversal, it doesn't have invincibility. | |||
}} | |||
{{AttackData-MB | |||
|version=B | |||
|damage=600*2, 400*2 (1829) | |||
|reddamage=(1011) | |||
|proration=100% | |||
|circuit=4.2%*2, 2.8%*2 (14.0%) | |||
|cancel=CH | |||
|guard=LH | |||
|startup=5 | |||
|active={{Tooltip | text=4 (1) 7| hovertext=2, 2 (1) 4, 3}} | |||
|recovery=47 | |||
|frameAdv=-36 | |||
|invuln=Full 1-2, 7-8<br> High 3-6, 9 | |||
|description= An overall functionally worse version of it's predecessor 22A. It's not full body invulnerable, and will still get hit by meaty attacks. The extra hits make it much more unlikely to score a combo off an anti-air counter-hit. The most realistic niche scenario where you would opt to use this move over the other anti-air options H-Arc has (623B, 22A, 5A) would be if you labbed something that specifically works at 4 frame startup, but doesn't past 5 and beyond, or if the extra verticality the move provides makes the difference. | |||
}} | |||
{{AttackData-MB | |||
|version=A~66A | |||
|damage=500 | |||
|reddamage=288 | |||
|proration=50% (O) | |||
|circuit=3.5% | |||
|cancel=-EX- | |||
|guard=LHA | |||
|startup=15 | |||
|active=6 | |||
|recovery={{Tooltip | text=3| hovertext=Landing recovery.}} | |||
|frameAdv=-13 | |||
|invuln= | |||
|description= | |||
}} | |||
{{AttackData-MB | |||
|version=B~66B | |||
|damage=500 | |||
|reddamage=288 | |||
|proration=50% (O) | |||
|circuit=3.5% | |||
|cancel=(EX) | |||
|guard=LHA | |||
|startup=14 | |||
|active=6 | |||
|recovery={{Tooltip | text=3| hovertext=Landing recovery.}} | |||
|frameAdv=-40 | |||
|invuln= | |||
|description=Forward slash followup. | |||
}} | |||
{{AttackData-MB | |||
|version=X~66C<br>(EX) | |||
|damage=1800 | |||
|reddamage=960 | |||
|proration=100% | |||
|circuit=-100.0% | |||
|cancel= | |||
|guard=LHA | |||
|startup=4+10 | |||
|active=6 | |||
|recovery={{Tooltip | text=3| hovertext=Landing recovery.}} | |||
|frameAdv=-16 (Best) | |||
|invuln= | |||
|description=Metered followup. Wallslams on hit. | |||
}} | |||
{{AttackData-MB | |||
|version=EX | |||
|damage=600*2, 500*2, 300, 500*2, 300 (3134) | |||
|reddamage=(2078) | |||
|proration=100% | |||
|circuit=-100.0% | |||
|cancel= | |||
|guard=LH | |||
|startup=2+2 | |||
|active={{Tooltip | text=35| hovertext=8 hits.
 3, 3 (2) 4, 2 (1) 1 (11) 4, 2 (1) 1}} | |||
|recovery=40 | |||
|frameAdv=-45 ~ -54 | |||
|invuln=Full 1-11 | |||
|description= Arcueid performs the slashes twice in succession. Success with this attack involves abusing it's invulnerability frames, because otherwise it's liable to being shielded on reaction post-super flash. | |||
}} | |||
}} | |||
==== Aerial Specials ==== | |||
===== <span class="invisible-header">j.421X</span> ===== | |||
{{MoveData | |||
|image=MB_H-Arc_j.421X.png | |||
|caption= | |||
|name=Over here, over here! (Air) | |||
|linkname=j.421X | |||
|input=j.421A/B/C (No EX) | |||
|data= | |||
{{AttackData-MB | |||
|version=A/C<br>/ B | |||
|damage= | |||
|reddamage= | |||
|proration= | |||
|circuit= | |||
|cancel=-N-, -J- | |||
|guard= | |||
|startup= | |||
|active= | |||
|recovery={{Tooltip |text=33<br>/ 37|hovertext=Full duration.}} | |||
|frameAdv= | |||
|invuln=Full 8-27<br>/ 12-31 | |||
|description=A set command teleporting airdashes. Can use an air normal, double jump or forward airdash afterwards. Other options require you to use your dj/airdash beforehand. | |||
'''A:''' Teleports forward.<br> | |||
'''B:''' Has more forward distance than A, but has slower startup before moving.<br> | |||
'''C:''' Teleports backwards. Same speed as A. | |||
}} | |||
}} | |||
===== <span class="invisible-header">j.22X</span> ===== | |||
{{MoveData | |||
|image=MB_C-Arc_j.22A.png | |||
|image2=MB_C-Arc_j.22B.png | |||
|image3=MB_C-Arc_22AB_66AB.png | |||
|image4=MB_C-Arc_22X_66C.png | |||
|image5=MB_C-Arc_j.22C.png | |||
|caption=A | |||
|caption2=B | |||
|caption3=~66A/B | |||
|caption4=~66C | |||
|caption5=EX<br>(2nd last hitboxes are repeated) | |||
|name=Quiet! (Fly!)<br>(Air) | |||
|linkname=j.22X | |||
|input=j.22A/B/C<br>(j.22A~66A/C)<br>(j.22B~66B/C) | |||
|data= | |||
{{AttackData-MB | |||
|version=A | |||
|damage=600*2 (1111) | |||
|reddamage=(533) | |||
|proration=100% | |||
|circuit=4.2%*2 (8.4%) | |||
|cancel=CH | |||
|guard=LHA | |||
|startup=3 | |||
|active=3 (1) 4 | |||
|recovery={{Tooltip | text=18| hovertext=Landing recovery.}} | |||
|frameAdv= | |||
|invuln=Full 1-5 | |||
|description=Very fast, invincible air upward slash. | |||
}} | |||
{{AttackData-MB | |||
|version=B | |||
|damage=500*2, 400*2 (1632) | |||
|reddamage=(878) | |||
|proration=100% | |||
|circuit=2.8%, 3.5%, 2.8%*2 (11.9%) | |||
|cancel=CH | |||
|guard=LHA | |||
|startup=3 | |||
|active={{Tooltip | text=4 (1) 4 (3) 4| hovertext=1,3 (1) 4 (3) 4}} | |||
|recovery={{Tooltip | text=15| hovertext=Landing recovery.}} | |||
|frameAdv= | |||
|invuln=Full 3-6 | |||
|description=Jumps up much higher, 4 hits. Startup is just as fast but not invincible. | |||
}} | |||
{{AttackData-MB | |||
|version=A~66A | |||
|damage=500 | |||
|reddamage=288 | |||
|proration=50% (O) | |||
|circuit=5.0% | |||
|cancel=-EX- | |||
|guard=LHA | |||
|startup=15 | |||
|active=6 | |||
|recovery={{Tooltip | text=3| hovertext=Landing recovery.}} | |||
|frameAdv= | |||
|invuln= | |||
|description= | |||
}} | |||
{{AttackData-MB | |||
|version=B~66B | |||
|damage=500 | |||
|reddamage=288 | |||
|proration=50% (O) | |||
|circuit=3.5% | |||
|cancel=(EX) | |||
|guard=LHA | |||
|startup=14 | |||
|active=6 | |||
|recovery={{Tooltip | text=3| hovertext=Landing recovery.}} | |||
|frameAdv= | |||
|invuln= | |||
|description=Forward slash followup. | |||
}} | |||
{{AttackData-MB | |||
|version=X~66C<br>(EX) | |||
|damage=1800 | |||
|reddamage=960 | |||
|proration=100% | |||
|circuit=-100.0% | |||
|cancel= | |||
|guard=LHA | |||
|startup=4+10 | |||
|active=6 | |||
|recovery={{Tooltip | text=3| hovertext=Landing recovery.}} | |||
|frameAdv= | |||
|invuln= | |||
|description=Metered followup. Wallslams on hit. | |||
}} | |||
{{AttackData-MB | |||
|version=EX | |||
|damage=700, 500, 600, 500, 600 (3134) | |||
|reddamage=(1740) | |||
|proration=100% | |||
|circuit=-100.0% | |||
|cancel= | |||
|guard=LHA | |||
|startup=1+3 | |||
|active={{Tooltip | text=28| hovertext=5 hits.
 3 (1) 2 (2) 2 (12) 2 (2) 2}} | |||
|recovery={{Tooltip | text=9| hovertext=Landing recovery.}} | |||
|frameAdv= | |||
|invuln=Full 1-6 | |||
|description=EX reversal. Performs 2 slashes in succession. No followup. | |||
}} | |||
}} | |||
=== Arc Drive === | |||
{{MoveData | |||
|image=MB_C-Arc_AD_AAD.png | |||
|caption=(Chain textures unavailable) | |||
|name=From Dreams to Reality (Marble Phantasm) | |||
|linkname=Arc Drive | |||
|input=41236C during Heat | |||
|data= | |||
{{AttackData-MB | |||
|damage=0, 350*10, 700 (3310) | |||
|reddamage=(2254) | |||
|proration=100% | |||
|circuit=removes all | |||
|cancel= | |||
|guard=LH | |||
|startup=15+1 | |||
|active=2 | |||
|recovery=54 | |||
|frameAdv=-37 | |||
|invuln=Full 1-19 | |||
|description=Fullscreen-wide chain attack, hitbox as tall as the highest horizontal chain. Air unblockable hitgrab, hard knockown on hit. | |||
}} | |||
}} | |||
== General Gameplan == | |||
H-Arcueid is very well known for her high octane rushdown prowess. Her overall gameplan is fairly simple, it's running over to the opponent and smashing them in with relentless pressure and she's quite good at it. She has quite an array of tools to choose from. Whether its 5A6A, sliding 2B (this will be covered in the neutral section below) and those are just her ground normals; you also have j.2C and j.C for her air normals that are used frequently. When she lands the hit on someone grounded expect to be corner carried where H-Arc truly shines. With having a lot of normal cancel windows on her staggers it can be very frustrating to deal against and fulfilling to do them on someone. She's a typical melty blood character that adheres to the foundation of strike/throw game, but happens to be one of the best at it. A really strong, stable character that might just be for you if you happen to want a simple gameplan while also having a good set of tools to accomplish the job. | |||
=== Neutral === | |||
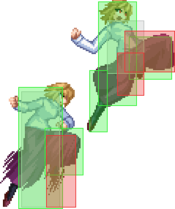
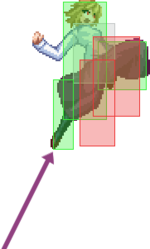
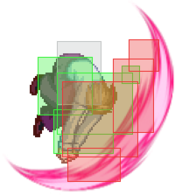
H-Arc has the ability to function just about anywhere if you place yourself right. You'll want to note that you have a pretty fast run that can cover the screen in around 1-2 seconds. This lets you take advantage of being able to move into spaces at any point. While you're on the ground you're going to want to find spots to do dash 5A6AA, since it's 0 on block it's a safe 123 to throw out and see if anything sticks, if it does you can then go do your combo and corner carry. There is also sliding 2B at your disposal; Sliding 2B is done by doing '''66/6A+B, 3B'''. When you do this you retain momentum from your dash as you do 2B so you get more range out of 2B. What's more is that it can low profile a lot of things while also being a low and still confirms into 5A6AA. Each tool while they do similar goals have different applications, 5A6AA will catch backdashes and you can even slightly stagger to confirm if someone was jumping out by the time you hit 5A6A to go into an air combo or do the last 6A to confirm your ground starter while 2B is a low that low profiles that may catch people off guard while they are standing. Make good use of these while you're on the ground in tandem with your excellent ground mobility and you'll quickly see how effective H-Arc can be on the ground. | |||
With all this in mind its not like she's terrible in the air either! You have j.C which is a normal that is active for 10F. Very strong for air to air and is hard to contest once its out. Its fast as well since the normal is active on the 7th frame. Now, j.C is a bit different from C-Arc's j.C by a small margin and it has a chance of being low profiled, however unlike C-Arc you now have j.2C which is a strong jump in button as well as j.B. A lot of the time you can use these normals for just about anything a situation would call for. since j.C is very active you could do neutral jump rising j.C to stuff anyone's air approach. You can also do jump forward j.C, airdash j.C and the list goes on. Make good use of dash jump since it carries momentum and in some cases you may need to use that to augment your airdash to cover more distance for j.C or j.2C depending on what's happening on the screen. On an air counter hit you get a ground starter that will corner carry with the damage that comes along with it. | |||
Overall as long as you understand melty movement and basics this character has all the tools needed to play neutral with the entire cast and make people hurt once they get hit. | |||
=== Pressure === | |||
H-Arcueid has quite a few ways to apply pressure. As she is a typical melty blood character she does rely on a lot of staggers from her normals and her normals boast a long normal and special cancel window. A lot of her pressure may seem endless and with the help of 5A6AA that is 0 on block and 214A having small recovery and being +1 on block, there's honestly so much you can do here are some examples to try out for pressure | |||
*2A > delay 2A > 5B > 2B > 5A(w) | |||
*2AA > 5B > 5A6A > delay 6A | |||
*2A > 5B, 2A > 5B > 5A6A > delay 6A | |||
*2A > 5B > delay 2B | |||
*2A > 2A > 5B > delay 2B > 214A(blocked), 5A/2A | |||
*2A > 2A > delay 2B > 2C > 214A(whiff), 2B | |||
*2A > 2A, run up grab | |||
*2A > 5B, Grab | |||
*2A > 5B > delay 2B > delay 2C > 5A6A > Delay 6A, delay 214B | |||
These are just small things to show how long the normal/special cancel windows are. Go into training mode and you will quickly find that staggering 5A6AA, letting your 5B and 2B recover vs staggering them will quickly make your pressure much better, when they get scared enough that's when you can throw. When you throw you can choose to either hold down or not. Holding down sends them to the ground and does more damage, while not holding down throws them to the wall which you can do either 22A without meter or ''22A > 623C'' to get a little bit more damage | |||
<u>'''Okizeme'''</u> | |||
H-Arc's Oki comes from either doing a ''2C > 4C > j.2[C]'' ender or from doing a rekka ender. There are reasons to do one over the other. The j.2[C] ender is more damage and allows for more set up time. What you do from there is the following: | |||
*j.2[C], 2A(w), sj.2C | |||
*j.2[C], 2A(w), sj > air dash j.2C | |||
*j.2[C], 2A(w), sj, land 2A/2B | |||
*j.2[C], 2A(w), sj, land Throw | |||
*j.2[C], 2A(w), sj.B > airdash j.2C | |||
*j.2[C], 2A(w), sj.2[C](whiff, but late enough to show charge animation), Throw | |||
For rekka ender you can do the same thing listed above and also you get a safe jump which to set it up is ''2C > delay 236A~236A~214B''. these are the specific notes for the safe jump: | |||
''Note: if you delay Rekka after 2C it pops them up a bit higher and gives you better frame adv'' | |||
'''Post rekka ender safe jumps:''' | |||
*'''j9.C:''' Ryougi, Miyako, Sion, Vsion, Roa, Mech, Koha, Neco, Hisui, Vakiha, Seifuku, Arc, Ciel, Akiha, Hime | |||
*'''Delayed Rekka,''' j9.C: Nanaya, Tohno, Wara, Satsuki, Wlen | |||
*'''sj9.C:''' Warc, PCiel | |||
*'''Delayed Rekka, sj9, j.C:''' Aoko, Nero, Len | |||
*'''Delayed Rekka, slightly walk forward, j9.C:''' Kouma, Ries | |||
=== Defense === | |||
Other than the basic defensive options you have Bunker (214D), 22C and 421C. | |||
22C is her actual DP but is metered and since you are H-Moon you only really have one chance to do this until you can land a hit again, so make good use of it. Bunker also uses 100% and while 421C isn't invuln on start up it can be used to call out some pressure resets from some chars like F-Akiha's 214C pressure reset and such. | |||
- | == Combos == | ||
{{ComboLegend-MB}} | |||
* '''Note:''' dl.X is used here to indicate a delay before an input. | |||
|- | === Starters === | ||
| | {{CollapsingComboTable-MB | ||
|data= | |||
{{CollapsingComboData-MB | |||
|condition=Normal starter, grounded opponent | |||
|character= | |||
|damage=2680 | |||
|metergen=28.7 | |||
|metero=12.3 | |||
|link= | |||
|input=*2A > (5B >) 2B > 5C > 5A6AA | |||
|simput= | |||
|note= Usually the go to starter that is easy to understand and execute. | |||
}} | |||
- | {{CollapsingComboData-MB | ||
|condition=Normal starter, grounded opponent | |||
|character= | |||
|damage=2398 | |||
|metergen=25.9 | |||
|metero=11.1 | |||
|link= | |||
|input=*2A > (5B >) 2B > 2C > dl.5C > 214B/4C | |||
|simput= | |||
|note= This is other one that is a valid starter to do the combo. The minor difficulty is when you do 4C you want to jump immediately after and do '''j.2[C], 2A > (5B >) 2B > 2C > dl.5C > 4C''' | |||
}} | |||
| | {{CollapsingComboData-MB | ||
| | |condition=Normal starter, grounded opponent | ||
|character= | |||
|damage=2443 | |||
|metergen=26.6 | |||
|metero=11.4 | |||
|link= | |||
|input=*2A > (5B >) 2B > 2C > dl.5C > 4C > j.9 | |||
|simput= | |||
|note= This is other one that is a valid starter to do the combo. The minor difficulty is when you do 4C you want to jump immediately after and do j.2[C], if you can get past this minor difficulty i would suggest doing this over '''2C > dl.5C > 214B''' as it's much more easier and stable to perform as your starter and goes into similar sequences. | |||
}} | |||
}} | |||
- | === Enders === | ||
{{CollapsingComboTable-MB | |||
|data= | |||
{{CollapsingComboData-MB | |||
|condition=Normal starter, grounded opponent | |||
|character= | |||
|damage=310 | |||
|metergen=21.7 | |||
|metero=17.6 | |||
|link= | |||
|input=*2B/5C > 2C > 4{C} > j.2[C] | |||
|simput= | |||
|note= As stated above you use this ender for more set up timing. Depending on the char's hitbox as well as the match's circumstance will determine to use 5C > 2C vs 2B > 2C. | |||
}} | |||
| | {{CollapsingComboData-MB | ||
| | |condition=Normal starter, grounded opponent | ||
|character= | |||
|damage= | |||
|metergen= | |||
|metero= | |||
|link= | |||
|input=*2B/5C > 2C > dl.236A~236A~214B | |||
|simput= | |||
|note= This ender in particular is to set up safe jumps. Along with the safe jump you can use the OS to dodge heats if the opponent is known to heat. Depending on the char's hitbox as well as the match's circumstance will determine to use 5C > 2C vs 2B > 2C. | |||
}} | |||
}} | |||
- | === OTG Pick ups === | ||
{{CollapsingComboTable-MB | |||
|data= | |||
{{CollapsingComboData-MB | |||
|condition=Normal starter, grounded opponent, 100% meter | |||
|character= | |||
|damage= | |||
|metergen= | |||
|metero= | |||
|link= | |||
|input=*623C | |||
|simput= | |||
|note=You'll only really see this after 236A~236A~236A or 236A~236A~214B (although the timing is a bit stricter). | |||
}} | |||
}} | |||
|- | === Normal Combos === | ||
| | {{CollapsingComboTable-MB | ||
|data= | |||
{{CollapsingComboData-MB | |||
|condition=Normal starter, grounded opponent | |||
|character= | |||
|damage=4969(5149) | |||
|metergen=86.6 | |||
|metero=37.2 | |||
|link=https://youtu.be/XC1Yo_hVNmA?t=41 | |||
|input= *2A > (5B >) 2B > 5C > 5A6AA, dl.2B > 2C > dl.5C > 214B(1) > j.2[C], 5C > 2C > 4{C} > j.2[C], 5C > 2C > Ender | |||
|simput= | |||
|note=This is one of the more stable combos and should work on almost all of the cast. You can choose either ender depending on what you want. | |||
}} | |||
- | {{CollapsingComboData-MB | ||
|condition=Normal starter, grounded opponent | |||
|character= | |||
|damage=4925(5103) | |||
|metergen= | |||
|metero= | |||
|link= | |||
|input= *2A > (5B >) 2B > 5C > 5A6AA, dl.2B > 2C > dl.5C > 214B(1) > j.2[C], 2B > 2C > dl.5A(w)6AA, 2C > 4{C} > j.2[C], 5C > 2C > Ender | |||
|simput= | |||
|note=This is a variation used for meter gain and for stablizing the combo for corner carry. | |||
}} | |||
| | {{CollapsingComboData-MB | ||
| | |condition=Normal starter, grounded opponent | ||
|character=All except Warc and Kohaku | |||
|damage=5305(5494) | |||
|metergen= | |||
|metero= | |||
|link=https://youtu.be/XC1Yo_hVNmA | |||
|input= *2A > (5B >) 2B > 5C > 5A6AA, dl.5C > 2C > 2A(w), 5A > 2C > dl.5C > 214B(1) > j.2[C], 5C > 2C > 4{C} > j.2[C], 5C > 2C > Ender | |||
|simput= | |||
|note=Optimal variation of the previous combo, doesn't work on Warc and Kohaku. | |||
}} | |||
- | {{CollapsingComboData-MB | ||
|condition=Normal starter, grounded opponent | |||
|character=All | |||
|damage=5593 | |||
|metergen=133.7% | |||
|metero=107.1% | |||
|link=https://youtu.be/LUxH0-lr9n8 | |||
|input= *2A > (5B >) 2B > 5C > 5A6AA, dl.5C > 2C > 2A(w), 5A > 2C > dl.5C > 214B(1) > j.2[C], 5C > 2C > 2A(w), 2A > 2C > dl.5A(w)6AA, 2C > 4{C} > j.2[C], 5C > 2C > 4{C} > j.2[C] | |||
|simput= | |||
|note=Optimal variation of the previous combo, replace the first 5C > 2C with 5B > 2C for Kohaku and Warc. Does not work in the corner against the previously mentioned characters. | |||
}} | |||
| | {{CollapsingComboData-MB | ||
| | |condition=Normal starter, grounded opponent | ||
|character= | |||
|damage= | |||
|metergen= | |||
|metero= | |||
|link= | |||
|input= *2A > (5B >) 2C, dl.5C > 214B(1) > j.2[C], 2B > 2C > 4C > j.2[C], 2B > 2C > Ender | |||
|simput= | |||
|note=Basic route for 214B starter. Some distances will cause this combo to fail. | |||
}} | |||
- | {{CollapsingComboData-MB | ||
|condition=Normal starter, grounded opponent | |||
|character= | |||
|damage= | |||
|metergen= | |||
|metero= | |||
|link= | |||
|input= *2A > (5B >) 2C > dl.5C > 214B(1) > j.2[C], 2B > 2C > dl.5A(w)6AA, 2C > 4{C} > j.2[C], 5C > 2C > Ender | |||
|simput= | |||
|note=This is a variation used for meter gain and for stablizing the combo for corner carry. This is especially important if you did 214B route. | |||
}} | |||
|} | {{CollapsingComboData-MB | ||
|condition=Normal starter, grounded opponent | |||
|character= | |||
|damage=4800(5027) | |||
|metergen= | |||
|metero= | |||
|link=https://youtu.be/s6es9-QjHl0?t=12 | |||
|input= *2A > (5B >) 2B > 2C > 5C > 4C > j9.2[C], 5C > 2C > 2A(w), 5A > 2C > dl.5C > 214B(1) > j.2[C], 5C > 2C > 2A(w), 5A > 2C > 236B~236B~214B | |||
|simput= | |||
|note=This is one of many routes to do in the event you do 4C for your starter. | |||
}} | |||
== | {{CollapsingComboData-MB | ||
|condition=Normal starter, grounded opponent | |||
|character= | |||
|damage= | |||
|metergen= | |||
|metero= | |||
|link= | |||
|input= *2A > (5B >) 2B > 2C > 5C > 4C > j9.2[C], 2B > 2C > dl.5A(w)6AA, 2C > 4{C} > j.2[C], 5C > 2C > Ender | |||
|simput= | |||
|note=Another variation of the combo listed above. | |||
}} | |||
{| | {{CollapsingComboData-MB | ||
| | |condition=Normal starter, grounded opponent | ||
|character= | |||
|damage= | |||
|metergen= | |||
|metero=4287(4549) | |||
|link= | |||
|input= *2A > (5B >) 2B > 2C > 5C > 4C > j9.2[C], 5C > 2C > 4{C} > j.2[C], 5C > 2C > 4{C} > Ender | |||
|simput= | |||
|note=The 4C variant for midscreen. Universal combo as well. | |||
}} | |||
{{CollapsingComboData-MB | |||
|condition=Normal starter, grounded opponent | |||
* | |character= | ||
|damage=4647(4887) | |||
|metergen= | |||
|metero= | |||
|link= | |||
|input= *2A > (5B >) 2B > 2C > 5C > 4C > j9.2[C], 5C > 2C > 2A(w), 5A > 2C > dl.5C > 214B(1) > j.2[C], 5C > 2C > 4{C} > Ender | |||
|simput= | |||
|note=The 4C variant for midscreen. Universal combo and a bit more optimal. | |||
}} | |||
}} | |||
|- | === Corner Combos === | ||
| | {{CollapsingComboTable-MB | ||
|data= | |||
{{CollapsingComboData-MB | |||
|condition=Normal starter, grounded opponent | |||
|character= | |||
|damage=4784(4976) | |||
|metergen= | |||
|metero= | |||
|link=https://youtu.be/XC1Yo_hVNmA?t=50 | |||
|input= *2A > (5B >) 2B > 5C > 5A6AA, 2B > 2C > dl.5C > 214B(1) > j.2[C], 2B > 2C > 4{C} > j.2[C], 2B > 2C > Ender | |||
|simput= | |||
|note= Universal combo. | |||
}} | |||
{{CollapsingComboData-MB | |||
* | |condition=Normal starter, grounded opponent | ||
|character= | |||
|damage=3999(4264) | |||
|metergen= | |||
|metero= | |||
|link= | |||
|input= *2A > (5B >) 2B > 2C > dl.5C > 214B(1) > j.2[C], 2B > 2C > 4{C} > j.2[C], 2B > 2C > Ender | |||
|simput= | |||
|note= Universal combo without the 214B part, you may use this in case you caught a stagger somewhere. | |||
}} | |||
| | {{CollapsingComboData-MB | ||
| | |condition=Normal starter, grounded opponent | ||
|character= | |||
|damage=5392(5567) | |||
|metergen= | |||
|metero= | |||
|link= | |||
|input= *2A > (5B >) 2B > 5C > 5A6AA, dl.5C > 2C > 2A(w), 5A > 2C, dl.5C > 214B(1) > j.2[C], 5C > 2C > 2A(w), 2A > 2C > 4{C} > j.2[C], 5C > 2C > Ender | |||
|simput= | |||
|note= Optimal combo in the corner. | |||
}} | |||
{{CollapsingComboData-MB | |||
|condition=Normal starter, grounded opponent | |||
|character= | |||
* | |damage=3872(4154) | ||
|metergen= | |||
|metero= | |||
|link= | |||
|input= *2A > (5B >) 2C > dl.5C > 214B(1) > j.2[C], 2B > 2C > 4{C} > j.2[C], 2B > 2C > Ender | |||
|simput= | |||
|note= Universal combo. | |||
}} | |||
| | {{CollapsingComboData-MB | ||
| | |condition=Normal starter, grounded opponent | ||
|character= | |||
|damage=3965 | |||
|metergen= | |||
|metero= | |||
|link= | |||
|input= *2C > dl.5C > 214B(1) > j.2[C], 2B > 2C > 4{C} > j.2[C], 2B > 2C > Ender | |||
|simput= | |||
|note= Basic way to convert from this specific starter. | |||
}} | |||
{{CollapsingComboData-MB | |||
|condition=Normal starter, grounded opponent | |||
* | |character | ||
|damage=4771 | |||
|metergen= | |||
|metero= | |||
|link= | |||
|input= *2C > dl.5C > 214B(1) > j.2[C], 5C > 2C > 2A(w), 5A > 2C > 2A(w), 2A > 2C > dl.5A(w)6AA, 2C > 4{C} > j.2[C], 5C > 2C > Ender | |||
|simput= | |||
|note= This is one of the more challenging but rewarding variation to maximize your damage. | |||
}} | |||
| | {{CollapsingComboData-MB | ||
| | |condition=Normal starter, grounded opponent, 100% meter | ||
|character | |||
|damage=4560(4915) | |||
|metergen= | |||
|metero= | |||
|link= | |||
|input= *2A > (5B >) 2B > 5C > 5A6AA, 2B > 2C > dl.5C > 214B(1) > j.2[C], (5C/2B >) 2C > dl.623C, walk back 5A > 2C | |||
|simput= | |||
|note= Set up for the left/right mix-up. It's determined by how far you walk back. If you walk back enough before 5A > 2C you get the cross up, otherwise same side. | |||
}} | |||
{{CollapsingComboData-MB | |||
|condition=Normal starter, grounded opponent | |||
|character | |||
* | |damage=4046(4309) | ||
|metergen= | |||
|metero= | |||
|link= | |||
|input= *2A > (5B >) 2B > 2C > 5C > 4C > j9.2[C], 2B > 2C > 4{C} 2B > 2C > 4{C} > Ender | |||
|simput= | |||
|note= Universal 4C starter combo. | |||
}} | |||
| | {{CollapsingComboData-MB | ||
| | |condition=Normal starter, grounded opponent | ||
|character=All except Warc, Ciel and Kohaku | |||
|damage=4647(4887) | |||
|metergen= | |||
|metero= | |||
|link= | |||
|input= *2A > (5B >) 2B > 2C > 5C > 4C > j9.2[C], 5C > 2C > 2A(w), 5A > 2C > dl.5C > 214B(1) > j.2[C], 5C > 2C > 4{C} > Ender | |||
|simput= | |||
|note= This is the 4C starter route, get used to this starter route if you happened to go straight to 2C > 5C for conversion. Does not work on Warc, Ciel and Kohaku. Optimal for damage otherwise. | |||
}} | |||
{{CollapsingComboData-MB | |||
* | |condition=Normal starter, grounded opponent | ||
|character=All except Warc, Ciel and Kohaku | |||
|damage=4756(4979) | |||
|metergen= | |||
|metero= | |||
|link= | |||
|input= *2A > (5B >) 2B > 2C > 5C > 4C > j9.2[C], 5C > 2C > 2A(w), 5AA > 2C > 2A(w), 2A > 2C > dl.5A(w)6AA, 2C > 4{C} > j.2[C], 5C > 2C > 4{C} > j.2[C] | |||
|simput= | |||
|note= Another variant of the combo above. Again, it does not work on Warc, Ciel and Kohaku. | |||
}} | |||
|} | {{CollapsingComboData-MB | ||
|condition=Ground Throw starter, 100% meter | |||
|character= | |||
|damage=1884 | |||
|metergen= | |||
|metero= | |||
|link= | |||
|input= *Throw, 22A > 623/421C, 5A > 2C > 4{C} > j.2[C] | |||
|simput= | |||
|note= Basic throw combo if you happen to have the meter on hand, 623/421C is dependent on your position to the opponent but more than likely you will input 421C to get the correct EX Move to perform the combo. | |||
}} | |||
== | {{CollapsingComboData-MB | ||
|condition=Ground Throw starter, 100% meter | |||
|character=All except Warc and Kohaku | |||
|damage=2370 | |||
|metergen= | |||
|metero= | |||
|link= | |||
|input= *Throw, 22A > 623/421C, 5C > 2C > 2A(w), 5AA > 2C > 2A(w), 2A > 2C > dl.5A(w)6AA, 2C > 4{C} > j.2[C] | |||
|simput= | |||
|note= A more optimized version of the combo above, char specific in its delays, does not work on Warc and Kohaku. | |||
}} | |||
{| | {{CollapsingComboData-MB | ||
| | |condition=Ground Throw starter, 100% meter | ||
|character | |||
|damage=2171 | |||
|metergen= | |||
|metero= | |||
|link= | |||
|input= *Throw, 22A > 623/421C, 5AA > 2C > 2A(w), 2A > 2C > dl.5A(w)6AA, 2C > 4{C} > j.2[C] | |||
|simput= | |||
|note= Universal combo. | |||
}} | |||
* | {{CollapsingComboData-MB | ||
|condition=Ground Throw starter, 100% meter | |||
|character | |||
|damage=2047 | |||
|metergen= | |||
|metero= | |||
|link= | |||
|input= *Throw, 22A > 623/421C, 5AA > 2C > 2A(w), 2A > 2C > dl.5C > 214B(1) > j.2[C] | |||
|simput= | |||
|note= Universal combo. | |||
}} | |||
}} | |||
== Additional Resources == | |||
[http://mbaacc.melty.games/?p1moon=h&p1char=arc H-Arcueid Match Video Database]<br> | |||
[https://www.youtube.com/watch?v=XC1Yo_hVNmA Basic H-Arc Combos]<br> | |||
[https://youtu.be/s6es9-QjHl0 Kfl's H-Arc Combos] <br> | |||
[https://youtu.be/qrawYJwbpPg?t=650 H-Arc Basic Resources] | |||
== Notable Players == | |||
{| class="wikitable" | |||
!width="90"|Name!! width="80"|Color | |||
!width="110"|Region !! Common Venues !! Status !! Details | |||
|- | |||
| [https://mbaacc.melty.games/?p1moon=h&p1char=arc&p1name=Inami Inami<br>(Inami#2878)]|| style="text-align:center;"| | |||
[[File:Arc Color22.png]] | |||
| North America || Netplay || Active || | |||
|- | |||
| [https://mbaacc.melty.games/?p1moon=h&p1char=arc&p1name=okuu%20(お空) okuu<br>(お空)]|| style="text-align:center;"| | |||
[[File:Arc Color32.png]] | |||
| Japan || A-cho, KoreWaMelty || Inactive || | |||
|- | |||
| [https://mbaacc.melty.games/?p1moon=h&p1char=arc&p1name=Shinobi Shinobi<br>(Shinobi!#2954)]|| style="text-align:center;"| | |||
[[File:Arc Color23.png]] | |||
| North America || Climax of Night, Netplay || Active || | |||
|- | |||
|} | |} | ||
{{Navbox-MBAACC}} | |||
[[Category:Arcueid Brunestud]] | |||
[[Category:Melty Blood Actress Again Current Code]] | |||
Latest revision as of 19:51, 24 February 2024
Character Page Progress
This page is still a work in progress, consider joining as an editor to help expand it. Please update this character's roadmap page when one of the editing goals have been reached.
| In Progress | To-do |
|---|---|
|
|
Overview
Move Descriptions
| Frame Data Help | |
|---|---|
| Header | Tooltip |
| Move Box Colors |
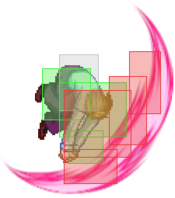
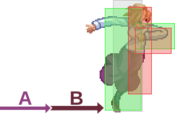
Light gray = Collision Box (A move lacking one means it can go through the opponent's own collision box). |
| Damage | Base damage done by this attack.
(X) denotes combined and scaled damage tested against standing V. Sion. |
| Red Damage | Damage done to the recoverable red health bar by this attack. The values are inherently scaled and tested against standing V. Sion.
(X) denotes combined damage. |
| Proration | The correction value set by this attack and the way it modifies the scaling during a string. See this page for more details.
X% (O) means X% Overrides the previous correction value in a combo if X is of a lower percentage. |
| Circuit | Meter gained by this attack on hit.
(X%) denotes combined meter gain. |
| Cancel | Actions this move can be cancelled into.
SE = Self cancelable. |
| Guard | The way this move must be blocked.
L = Can block crouching |
| Startup | Amount of frames that must pass prior to reaching the active frames. Also referred to as "True Startup". |
| Active | The amount of frames that this move will have a hitbox. (x) denotes frame gaps where there are no hitboxes is present. Due to varied blockstuns, (x) frames are difficult to use to determine punish windows. Generally the larger the numbers, the more time you have to punish. |
| Recovery | Frames that this move has after the active frames if not canceled. The character goes into one frame where they can block but not act afterwards, which is not counted here. |
| Advantage | The difference in frames where you can act before your opponent when this move is blocked (assuming the move isn't canceled and the first active frame is blocked). If the opponent uses a move with startup that is at least 2 frames less than this move's negative advantage, it will result in the opponent hitting that move. |
| Invul | Lists any defensive properties this move has.
X y~z denotes X property happening between the y to z frames of the animations. If no frames are noted, it means the invincibility lasts through the entire move. Invicibility:
Hurtbox-Based Properties:
Miscellaneous Properties
|
Normal Moves
Standing Normals
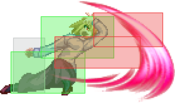
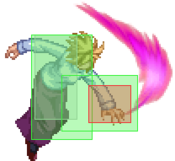
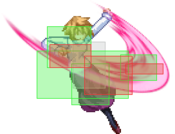
5A
5A
5A~6A~6A |
|---|
5B
5C
Crouching Normals
2A
2A 2A~2A 2A 2A 2AA 2AA
|
|---|
2B
2C
Aerial Normals
j.A
j.B
j.C
Command Normals
3C
(Clash Boxes) (Clash Boxes)
|
|---|
4C
4C 4[C] 4C 4C 4[C] 4[C]
|
|---|
j.2B
j.2C
j.2C
j.2[C] |
|---|
Universal Mechanics
Ground Throw
Ground Throw 4/6A+D(~2) ~2 ~2
|
|---|
Air Throw
Air Throw
j.4/6A+D |
|---|
Shield Counter
Shield Counter
Auto after a successful shield (Air OK) |
|---|
Shield Bunker
Shield Bunker
214D in neutral or blockstun |
|---|
Circuit Spark
Special Moves
Special Movement
Forward Dash
Grounded Specials
236X
You're in the way! (EX: I'm going to get a little serious...!) 236A/B/C (~236A/B) (~236A/B / 214A/[A]/B/[B]) A/B A/B ~236A/B ~236A/B ~236A/B Ender ~236A/B Ender ~214A/B Ender ~214A/B Ender ~214[A/B] Ender ~214[A/B] Ender EX EX
|
|---|
623X
A A ~6X ~6X B B ~6X ~6X EX EX
|
|---|
214X
Ready... Go! 214A/B/C B Auto-followup B Auto-followup
|
|---|
421X
22X
A A B B ~66A/B ~66A/B ~66C ~66C EX (2nd last hitboxes are repeated) EX
(2nd last hitboxes are repeated) |
|---|
Aerial Specials
j.421X
Over here, over here! (Air)
j.421A/B/C (No EX) |
|---|
j.22X
A A B B ~66A/B ~66A/B ~66C ~66C EX (2nd last hitboxes are repeated) EX
(2nd last hitboxes are repeated) |
|---|
Arc Drive
From Dreams to Reality (Marble Phantasm) 41236C during Heat (Chain textures unavailable) (Chain textures unavailable)
|
|---|
General Gameplan
H-Arcueid is very well known for her high octane rushdown prowess. Her overall gameplan is fairly simple, it's running over to the opponent and smashing them in with relentless pressure and she's quite good at it. She has quite an array of tools to choose from. Whether its 5A6A, sliding 2B (this will be covered in the neutral section below) and those are just her ground normals; you also have j.2C and j.C for her air normals that are used frequently. When she lands the hit on someone grounded expect to be corner carried where H-Arc truly shines. With having a lot of normal cancel windows on her staggers it can be very frustrating to deal against and fulfilling to do them on someone. She's a typical melty blood character that adheres to the foundation of strike/throw game, but happens to be one of the best at it. A really strong, stable character that might just be for you if you happen to want a simple gameplan while also having a good set of tools to accomplish the job.
Neutral
H-Arc has the ability to function just about anywhere if you place yourself right. You'll want to note that you have a pretty fast run that can cover the screen in around 1-2 seconds. This lets you take advantage of being able to move into spaces at any point. While you're on the ground you're going to want to find spots to do dash 5A6AA, since it's 0 on block it's a safe 123 to throw out and see if anything sticks, if it does you can then go do your combo and corner carry. There is also sliding 2B at your disposal; Sliding 2B is done by doing 66/6A+B, 3B. When you do this you retain momentum from your dash as you do 2B so you get more range out of 2B. What's more is that it can low profile a lot of things while also being a low and still confirms into 5A6AA. Each tool while they do similar goals have different applications, 5A6AA will catch backdashes and you can even slightly stagger to confirm if someone was jumping out by the time you hit 5A6A to go into an air combo or do the last 6A to confirm your ground starter while 2B is a low that low profiles that may catch people off guard while they are standing. Make good use of these while you're on the ground in tandem with your excellent ground mobility and you'll quickly see how effective H-Arc can be on the ground.
With all this in mind its not like she's terrible in the air either! You have j.C which is a normal that is active for 10F. Very strong for air to air and is hard to contest once its out. Its fast as well since the normal is active on the 7th frame. Now, j.C is a bit different from C-Arc's j.C by a small margin and it has a chance of being low profiled, however unlike C-Arc you now have j.2C which is a strong jump in button as well as j.B. A lot of the time you can use these normals for just about anything a situation would call for. since j.C is very active you could do neutral jump rising j.C to stuff anyone's air approach. You can also do jump forward j.C, airdash j.C and the list goes on. Make good use of dash jump since it carries momentum and in some cases you may need to use that to augment your airdash to cover more distance for j.C or j.2C depending on what's happening on the screen. On an air counter hit you get a ground starter that will corner carry with the damage that comes along with it.
Overall as long as you understand melty movement and basics this character has all the tools needed to play neutral with the entire cast and make people hurt once they get hit.
Pressure
H-Arcueid has quite a few ways to apply pressure. As she is a typical melty blood character she does rely on a lot of staggers from her normals and her normals boast a long normal and special cancel window. A lot of her pressure may seem endless and with the help of 5A6AA that is 0 on block and 214A having small recovery and being +1 on block, there's honestly so much you can do here are some examples to try out for pressure
- 2A > delay 2A > 5B > 2B > 5A(w)
- 2AA > 5B > 5A6A > delay 6A
- 2A > 5B, 2A > 5B > 5A6A > delay 6A
- 2A > 5B > delay 2B
- 2A > 2A > 5B > delay 2B > 214A(blocked), 5A/2A
- 2A > 2A > delay 2B > 2C > 214A(whiff), 2B
- 2A > 2A, run up grab
- 2A > 5B, Grab
- 2A > 5B > delay 2B > delay 2C > 5A6A > Delay 6A, delay 214B
These are just small things to show how long the normal/special cancel windows are. Go into training mode and you will quickly find that staggering 5A6AA, letting your 5B and 2B recover vs staggering them will quickly make your pressure much better, when they get scared enough that's when you can throw. When you throw you can choose to either hold down or not. Holding down sends them to the ground and does more damage, while not holding down throws them to the wall which you can do either 22A without meter or 22A > 623C to get a little bit more damage
Okizeme
H-Arc's Oki comes from either doing a 2C > 4C > j.2[C] ender or from doing a rekka ender. There are reasons to do one over the other. The j.2[C] ender is more damage and allows for more set up time. What you do from there is the following:
- j.2[C], 2A(w), sj.2C
- j.2[C], 2A(w), sj > air dash j.2C
- j.2[C], 2A(w), sj, land 2A/2B
- j.2[C], 2A(w), sj, land Throw
- j.2[C], 2A(w), sj.B > airdash j.2C
- j.2[C], 2A(w), sj.2[C](whiff, but late enough to show charge animation), Throw
For rekka ender you can do the same thing listed above and also you get a safe jump which to set it up is 2C > delay 236A~236A~214B. these are the specific notes for the safe jump:
Note: if you delay Rekka after 2C it pops them up a bit higher and gives you better frame adv
Post rekka ender safe jumps:
- j9.C: Ryougi, Miyako, Sion, Vsion, Roa, Mech, Koha, Neco, Hisui, Vakiha, Seifuku, Arc, Ciel, Akiha, Hime
- Delayed Rekka, j9.C: Nanaya, Tohno, Wara, Satsuki, Wlen
- sj9.C: Warc, PCiel
- Delayed Rekka, sj9, j.C: Aoko, Nero, Len
- Delayed Rekka, slightly walk forward, j9.C: Kouma, Ries
Defense
Other than the basic defensive options you have Bunker (214D), 22C and 421C.
22C is her actual DP but is metered and since you are H-Moon you only really have one chance to do this until you can land a hit again, so make good use of it. Bunker also uses 100% and while 421C isn't invuln on start up it can be used to call out some pressure resets from some chars like F-Akiha's 214C pressure reset and such.
Combos
| Combo Notation Help | |
|---|---|
| Disclaimer: Combos are written by various writers, so the actual notation used in pages can differ from the standard one. | |
| X > Y | X input is cancelled into Y. |
| X > delay Y | Must wait for a short period before cancelling X input into Y. |
| X, Y | X input is linked into Y, meaning Y is done after X's recovery period. |
| X+Y | Buttons X and Y must be input simultaneously. |
| X/Y | Either the X or Y input can be used. |
| X~Y | This notation has two meanings.
|
| X(w) | X input must not hit the opponent (Whiff). |
| j.X | X input is done in the air, implies a jump/jump cancel if the previous move was done from the ground. Applies to all air chain sections:
|
| sj.X | X input is done after a super jump. Notated as sj8.X and sj9.X for neutral and forward super jumps respectively. |
| dj.X | X input is done after a double jump. |
| sdj.X | X input is done after a double super jump. |
| tk.X | Stands for Tiger Knee. X motion must be buffered before jumping, inputting the move as close to the ground as possible. (ex. tk.236A) |
| (X) | X is optional. Typically the combo will be easier if omitted. |
| [X] | Input X is held down. Also referred to as Blowback Edge (BE). Depending on the character, this can indicate that this button is held down and not released until indicated by the release notation. |
| ]X[ | Input X is released. Will only appear if a button is previously held down. This type of input is referred to as Negative Edge. |
| {X} | Button X should only be held down briefly to get a partially charged version instead of the fully charged one. |
| X(N) | Attack "X" should only hit N times. |
| (XYZ)xN | XYZ string must be performed N times. Combos using this notation are usually referred to as loops. |
| (XYZ^) | A pre-existing combo labelled XYZ is inserted here for shortening purposes. |
| CH | The first attack must be a Counter Hit. |
| Air CH | The first attack must be a Counter Hit on an airborne opponent. |
| 66 | Performs a ground forward dash. |
| j.66 | Performs an aerial forward dash, used as a cancel for certain characters' air strings. |
| IAD/IABD | Performs an Instant AirDash. |
| AT | Performs an Air Throw. (j.6/4A+D) |
| IH | Performs an Initiative Heat. |
| AD | Performs an Arc Drive. |
| AAD | Performs an Another Arc Drive. |
- Note: dl.X is used here to indicate a delay before an input.
Starters
Enders
OTG Pick ups
Normal Combos
Corner Combos
Additional Resources
H-Arcueid Match Video Database
Basic H-Arc Combos
Kfl's H-Arc Combos
H-Arc Basic Resources
Notable Players
| Name | Color | Region | Common Venues | Status | Details |
|---|---|---|---|---|---|
| Inami (Inami#2878) |
North America | Netplay | Active | ||
| okuu (お空) |
Japan | A-cho, KoreWaMelty | Inactive | ||
| Shinobi (Shinobi!#2954) |
North America | Climax of Night, Netplay | Active |
