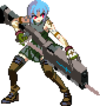
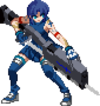
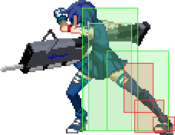
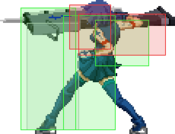
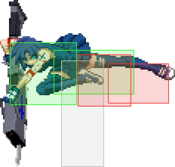
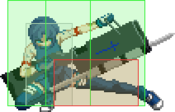
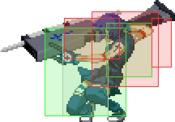
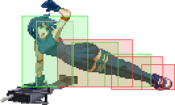
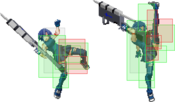
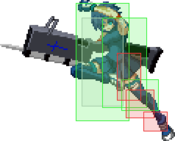
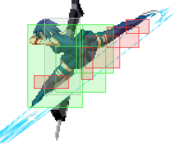
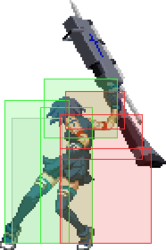
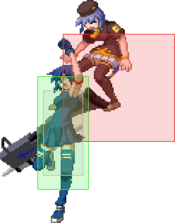
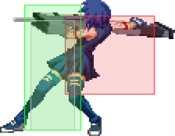
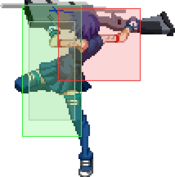
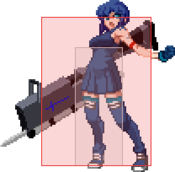
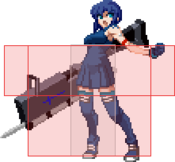
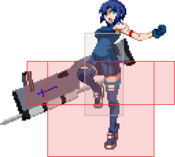
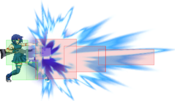
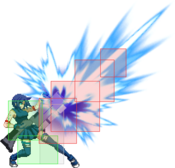
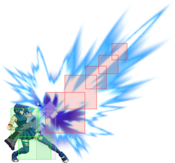
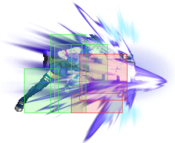
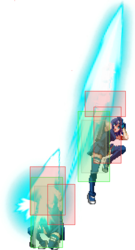
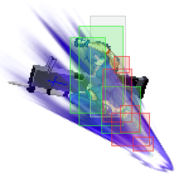
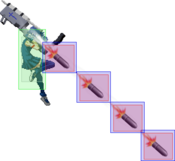
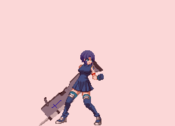
Melty Blood/MBAACC/Powered Ciel/Full Moon: Difference between revisions
M mochizuki (talk | contribs) (→j.214X) |
m (→Overview) |
||
| (133 intermediate revisions by 12 users not shown) | |||
| Line 1: | Line 1: | ||
{{TOClimit|3}} | {{TOClimit|3}} | ||
== Additional Resources == | == Additional Resources == | ||
[http://mbaacc.melty.games/?p1moon=f&p1char=pciel F-P.Ciel Match Video Database]<br> | *[http://mbaacc.melty.games/?p1moon=f&p1char=pciel F-P.Ciel Match Video Database]<br> | ||
[https://www.youtube.com/playlist?list=PLAN-unEFmGlQf-npz3rvxheKJp374Q-5Z TexasTim's F-PCiel Video Guides Playlist] | *[https://docs.google.com/document/d/1fjogQnwJ3I1LvQY2d34RYbRzx5V46vQNsuKJeYVhUlE/edit?usp=sharing OnionLust's Combo Doc (WIP)] | ||
*[https://docs.google.com/document/d/16aEcykDZ3mCqpOOSL1U-EhSealaM-tsBzvb9FjFVOIc/view?usp=sharing OnionLust's Oki Doc] | |||
*[https://www.youtube.com/playlist?list=PLAN-unEFmGlQf-npz3rvxheKJp374Q-5Z TexasTim's F-PCiel Video Guides Playlist.] (Disclaimer: Many of TexasTim's routes are more CMV style combos with impractical execution or other significant downsides such as generating large amounts of meter for the opponent. Players interested in more practical or entry-level combos may prefer to learn the routes listed in the combo section further below.) | |||
*[https://lumenbell.s-ul.eu/smu24FIJ m's matchup chart (2024)] | |||
== | == Overview == | ||
{{StrengthsAndWeaknesses | |||
|intro= | |||
[[File:MBAACC_p_ciel900_08.png|link=]] '''F-PCiel''' is a slow, powerful zoner with brutal offense. | |||
|pros= | |||
*'''Range:''' Oppressive fullscreen projectiles, huge normals, and a fully disjointed halfscreen 236A. | |||
*'''Abare:''' One of the fastest sweeps in the game, and one of the largest 4 frame 2As. | |||
*'''Antiairs:''' Arguably the best grounded antiairs of the entire cast in 623A and 2B. | |||
*'''Deep combo routes:''' Fullscreen corner carry and okizeme from any hit, and advanced airthrow loops which allow her to deny the opponent's MAX and checkmate them via timeout. | |||
*'''Meter management:''' Very high meter gain, and good uses for meter in every game state. | |||
*'''Projectile okizeme:''' Unreactable high/low okizeme, enforced by 624B rocks which heavily restrict the opponent's wakeup options. | |||
*'''Pressure:''' Easily loops meterless plus frames, forcing opponents to take risks to escape from the corner. | |||
*'''Comboable throw:''' Any throw leads into 2-3k damage and generates at least 100 meter. | |||
*'''Great options out of shield:''' Strong shield followups in any situation, arguably better than most Crescent moon characters. | |||
|cons= | |||
*'''High commitment neutral tools:''' Many of F-PCiel's grounded tools have significant recovery, making them susceptible to whiff punishing. | |||
*'''Limited mobility:''' Her ground dash has high unactionable startup, her super jump covers a very short distance, and her airdashes are mediocre, making neutral awkward when fighting other zoners. | |||
*'''Takes a lot of damage:''' PCiel has a poor defense modifier, and her large hurtboxes enable exclusive high-damage combos on her, meaning she is punished heavily for her mistakes. | |||
*'''High jump startup:''' Uniquely has the slowest jump startup in the entire game, reducing the effectiveness of fuzzy jump defense and making her unable to escape from Half/Full moon shield counters. | |||
|tablewidth=80 | |||
}} | |||
== Notable Players == | |||
{| class="wikitable" | {| class="wikitable" | ||
!width="170"|Name!! width="105"|Color | !width="170"|Name!! width="105"|Color | ||
!width="125"|Region !! Common Venues !! Status !! Details | !width="125"|Region !! Common Venues !! Status !! Details | ||
|- | |||
|[http://mbaacc.melty.games/?p1moon=f&p1char=pciel&p1name=hirohiro%20(%E3%81%B2%E3%82%8D%E3%81%B2%E3%82%8D) Hirohiro (ひろひろ)]|| style="text-align:center;"| | |||
[[File:PCiel-color17.png|Color|100px]] | |||
| Japan || Play Spot BIG ONE 2nd || Inactive || Formerly the most prolific arcade F-PCiel main. Very aerial neutral with a focus on proactively putting out large, low commitment hitboxes to control space. Tends to stick with simple, reliable combo routes. Has a remarkable talent for finding gold air throws. | |||
|- | |- | ||
|[http://mbaacc.melty.games/?p1moon=f&p1char=pciel&p1name=kouki%20(%E3%82%B3%E3%82%A6%E3%82%AD) Kouki]|| style="text-align:center;"| | |[http://mbaacc.melty.games/?p1moon=f&p1char=pciel&p1name=kouki%20(%E3%82%B3%E3%82%A6%E3%82%AD) Kouki (コウキ)]|| style="text-align:center;"| | ||
[[File:PCiel-color6.png|Color|100px]] | [[File:PCiel-color6.png|Color|100px]] | ||
| Japan || Play Spot BIG ONE 2nd || | | Japan || Play Spot BIG ONE 2nd || Active || C-Arc legend with a surprisingly good pocket F-PCiel. Highly aggressive, always looking to force mixups in neutral and bully opponents in close range scrambles. The most optimal F-PCiel by a considerable margin in terms of combos. | ||
|- | |- | ||
|[ | |[https://mbaacc.melty.games/?p1moon=f&p1char=pciel&p1name=m_ m]|| style="text-align:center;"| | ||
[[File:PCiel- | [[File:PCiel-color26.png|Color|100px]] | ||
| | | Europe || Netplay || Inactive || The top F-PCiel outside of Japan. Defensive, grounded neutral gameplan focused on controlling the midscreen and intercepting approaches. Practical combo selection, good meter management, and a robust okizeme flowchart designed to minimize risk. As seen on [https://www.youtube.com/watch?v=Q6fpCJeGkeU&t=1183s Will it Kill]. | ||
|- | |- | ||
|[http://mbaacc.melty.games/?p1moon=f&p1char=pciel&p1name= | |[http://mbaacc.melty.games/?p1moon=f&p1char=pciel&p1name=sunohara%20(%E3%81%99%E3%81%AE%E3%81%AF%E3%82%89) Sunohara (すのはら)]|| style="text-align:center;"| | ||
[[File:PCiel- | [[File:PCiel-color9.png|Color|100px]] | ||
| Japan || || Inactive || | | Japan || A-Cho || Inactive || A very old school PCiel player who has tri-mained all three PCiel moons since she was added to the game in version 1.05. Plays a balanced, grounded neutral game, combining zoning with aggression. Does some unique 623AA>2C extensions in midscreen combos. | ||
|- | |- | ||
|[http://mbaacc.melty.games/?p1moon=f&p1char=pciel&p1name= | |[http://mbaacc.melty.games/?p1moon=f&p1char=pciel&p1name=Tsa TSA]|| style="text-align:center;"| | ||
[[File:PCiel- | [[File:PCiel-color25.png|Color|100px]] | ||
| Japan || A-Cho || Inactive || | | Japan || A-Cho || Inactive || C-Kohaku specialist with many strong secondaries, including F-PCiel. Likes to approach from the air. | ||
|- | |- | ||
|[ | |[https://mbaacc.melty.games/?p1moon=f&p1char=pciel&p1name=wau%20(%E3%82%8F%E3%81%86) Wau (わう)]|| style="text-align:center;"| | ||
[[File:PCiel- | [[File:PCiel-color1.png|Color|100px]] | ||
| | | Japan || Port 24 Yagoto || Active || The up and coming arcade F-PCiel main of the modern era, regularly found at Port 24 freeplays on [https://www.youtube.com/@user-cb3fs4xd4h/streams Yume's channel]. Confident and aggressive, with consistent hitconfirms and very good pressure. Random colour user. | ||
|- | |- | ||
| | |[http://mbaacc.melty.games/?p1moon=f&p1char=pciel&p1name=zakuro%20(%E3%82%B6%E3%82%AF%E3%83%AD) Zakuro (ザクロ)]|| style="text-align:center;"| | ||
[[File:PCiel- | [[File:PCiel-color1.png|Color|100px]] | ||
| | | Japan || Game Fuji Ichikawa || Inactive || A player with very creative okizeme, showcasing the full variety of setups available to the character. | ||
|- | |- | ||
|} | |} | ||
== | == General Gameplan == | ||
F-PCiel is a slow, somewhat technical zoner, with a high reliance on good positioning and half-circle inputs. She excels at controlling space with her infamous Grand Zappa rock projectile, bullying opponents on the ground with an array of incredible pokes, and shooting them out of the sky with her stellar antiairs. Once she has her opponent pinned down, she can easily beat them into submission with her suffocating okizeme and pressure. | |||
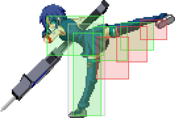
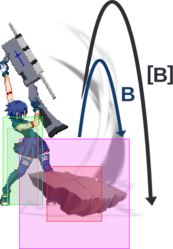
F-PCiel's main grounded pokes are '''5B''', '''2C''' and '''236A,''' which allow her to outspace the vast majority of the cast. If an opponent approaches her from the air, she can defend herself with '''2B''', her '''623X''' series, or a well-spaced rising '''j.C'''. She also possesses a highly potent fireball style projectile in '''214A''', and strong jump-in normals in '''j.B''' and '''j.C'''. On top of all of this, her '''624B''', the notorious rock, is one of the most versatile and oppressive projectiles in the game, singlehandedly allowing her to dictate the pace of neutral in most matchups. | |||
After securing a knockdown, F-PCiel can pull a '''624B''' rock before attacking to greatly restrict her opponent's defensive options, forcing them to defend against her strong overheads like '''j.A''' and '''3[B]'''. During pressure, she can easily obtain frame advantage with plus on block moves like '''2A''', '''236[A]''', and '''624B'''. Her offense is incredibly difficult to disrespect, and she excels at abusing overly cautious defense with her devastating '''throw'''. | |||
To somewhat balance all of this, F-PCiel can struggle somewhat when knocked down in the corner, having fairly low HP and lacking reliable reversals outside of system mechanics. Fortunately, her toolkit synergizes very well with her Full Moon system mechanics, with great options such as '''623A out of shield''' and good pokes to challenge with after '''EX Guard'''. Her high meter gain also grants her a fearsome '''comeback factor''', able to easily force herself into MAX to turn the tide of a losing round with '''Initiative Heat''' or '''Circuit Spark'''. | |||
While an unconventional character by Melty Blood standards due to her limited movement options in the air, F-PCiel is incredibly strong, usually occupying a spot around the top 10 in modern tier lists. Her flaws are significant compared to most other top tiers, but her extreme strengths more than make up for them; in the hands of a skilled player, F-PCiel can feel truly overwhelming to play against. A strong F-PCiel's opponents will find themselves frustrated in neutral, and pulverized into dust in the corner. | |||
=== Neutral === | === Neutral === | ||
<div class="mw-collapsible mw-collapsed" style="display:inline-block"> | |||
<u>'''Long range'''</u><br> | |||
'''624B:''' Rocks are generally safe to pull at long range. Can be played around aggressively or defensively, to hold your ground or to claim large amounts of space and safely approach. | |||
'''214A:''' Quickly and effectively denies grounded approaches, and gives large frame advantage on block if you dash in after it. Use this to force opponents to either jump or shield. | |||
<u>'''Mid range'''</u><br> | |||
'''624B:''' Rocks are still strong here, but are a large frame commitment vulnerable to aggressive approaches. Useful against passive, conditioned opponents or as part of a mixup with her other midrange tools. | |||
'''5B:''' Very big 8f button, allows F-PCiel to easily outpoke most of the cast. Somewhat difficult to whiff punish, but susceptible to being low profiled. | |||
'''Dash 5B:''' Surprisingly fast and long range approach option. Useful for catching passive opponents waiting to bait and whiff punish something else. Good pressure starter. | |||
'''236A:''' Extremely strong and fast tool to check grounded opponents and disrupt zoning at mid range. Useful for discouraging grounded aggression as it beats almost anything on the ground and is generally only weak to air approaches. | |||
'''236[A]:''' Slower, larger version of 236A. Good in certain situations, but generally not as useful as 236A due to the higher frame cost. Very high reward if it hits near the corner. | |||
'''214A:''' Similar in application to 236A, but a little safer in exchange for being slower and less rewarding on non-counterhit. Cannot be whiff punished from the ground, unlike 236A. Good at forcing opponents into the air or trading with other projectiles. | |||
'''623A:''' Quickly puts you into an aggressive position in the air, while also acting similarly to a conventional j.9A check against aerial approaches due to its low commitment. | |||
<u>'''Close range'''</u><br> | |||
'''2A:''' Big 2A. F-PCiel's fastest move on the ground. Good in most situations where it can reach the opponent, and goes into anything you want on hit or block. | |||
'''5B:''' 5B. Still a very good button to press at close range if 2A won't reach. | |||
'''2C:''' Higher risk, lower reward version of 5B. Slightly shorter, but is faster, cannot be low profiled, and lacks a hurtbox until active. Very unsafe on whiff. | |||
'''623A:''' Antiair/scramble move. Relatively safe to whiff, making it generally a good option to use if you feel scared. | |||
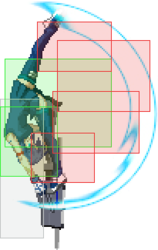
'''2B:''' Low risk antiair and counterpoke. Strong hitbox, high active frames, low recovery. Very safe defensive button to check a lot of options without giving up your current position like 623A does. | |||
<u>'''In the air'''</u><br> | |||
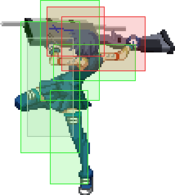
'''j.C:''' Very large, very disjointed air-to-air, with a jump-in crossup hitbox. Somewhat slow, so it is more effective the earlier you press it. The disjoint extends upwards, making it easy for grounded opponents to antiair at most spacings. | |||
'''j.B:''' Deep, disjointed jump-in. Beats most antiairs when spaced, but is vulnerable to antiair shield due to PCiel's inability to jump out of air normals. | |||
'''j.A:''' Very fast, very active close range button. Good in aerial scrambles and easily confirmed on non-counterhit with j.236AA. | |||
'''Airthrow:''' High risk, high reward callout against opponents looking to exploit PCiel's lack of cancel options on block in the air. Feels amazing to land, but pretty unsafe. | |||
'''624B>j.B:''' A good way to attack the ground from the air while staying safe. Useful to pin down aggressive grounded movement and gain solid momentum from the frame advantage. | |||
'''j.214X:''' A good way to protect your landings if your opponent is seeking to chase down your air movement. Its high recovery is easy to exploit if the opponent is looking for it, however. | |||
'''j.236AA:''' A divekick, kind of. Not very good due to the high landing recovery, but can sometimes be used as an escape option if all other movement options are exhausted. | |||
</div> | |||
=== Pressure === | === Pressure === | ||
<div class="mw-collapsible mw-collapsed" style="display:inline-block"> | |||
'''5B>6B>624B:''' Simple, strong pressure sequence which can be looped into itself indefinitely in the corner. 624B is +4 on block at minimum, and 5B and 6B move forward, allowing the 624B to connect in an airtight string against crouching opponents. Weak to EX guard. | |||
'''Throw:''' Extremely rewarding throw. Good to structure your pressure around due to the high risk of many defensive actions that beat throw. | |||
'''2A/5A:''' +2 and +3 on block respectively. Fast, low hitting A normals. Good for setting up tick throws and catching people who stand tech. | |||
'''3[B]:''' Relatively fast overhead. Forces a high/low mixup at close range, but generally ends pressure if blocked. | |||
'''236[A]:''' +13 on block. Large, slow, and unshieldable. One of F-PCiel's highest damage starters in the corner. The frame advantage makes it a useful way to reset pressure after pushing yourself out. Also useful as a highly rewarding callout for many defensive options such as jump or shield. | |||
'''624A:''' Sometimes useful for punishing low mashes capable of poking underneath 624B. Forces opponents into pre-block from very far away, so it can be used to prevent people from holding upback. | |||
'''5C:''' Low invuln move which combos into 236[A] on counterhit for very high damage in the corner. Can be used in throw mixup scenarios as a high reward way to beat low mash/low shield. | |||
</div> | |||
=== Okizeme === | |||
<div class="mw-collapsible mw-collapsed" style="display:inline-block"> | |||
<u>'''Mixup options:'''</u><br> | |||
'''High:''' 3[B], falling j.A, late airdash j.A. | |||
'''Low:''' 3B half charge>2C, empty jump 2A, late airdash j.6C whiff>2A. | |||
'''Throw:''' Throw. | |||
<u>'''Setups (236A Ender)'''</u><br> | |||
'''624[B]:''' After 236A, pull a charged rock. The rock will hit with a slight delay, leaving a large window of ambiguity where you can either strike, throw, jump, or do nothing. Meaty 2A into a 3B mixup will be airtight, since the rock will hit at the timing between 2A and 3B. | |||
'''Delay 624B:''' After 236A, walk backwards slightly or whiff 5A then pull an uncharged rock. Usually done after a rock loop with too few reps for 624[B] to connect afterwards. The rock will hit earlier than it would uncharged, meaning anti-meaty options such as wakeup shield or bunker are stronger and require more active counterplay. | |||
'''624B>j.B:''' After an uncharged 624B setup, jump forwards and hit the rock with j.B. Allows for a very safe meaty as you do not make contact with the enemy yourself. Puts opponents into a lot of blockstun, but certain options within this setup can lose to fuzzy 5A mash. | |||
'''624A>624A:''' After 236A, whiff one 624A followed by another 624A. Another safe meaty option, but with less blockstun, allowing you to threaten throw afterwards. | |||
<u>'''236C Ender Setup'''</u><br> | |||
'''624B:''' After 236C, pull an uncharged rock. Similar to a normal uncharged 624B setup, but a little tighter due to 236C's weaker knockdown compared to 236A. | |||
</div> | |||
=== Defense === | === Defense === | ||
<div class="mw-collapsible mw-collapsed" style="display:inline-block"> | |||
'''Patience:''' Recommended. PCiel's low health and large hitstun hurtboxes make it very punishing for her to be hit in the corner, so the risk/reward on many defensive actions is skewed heavily against her. | |||
'''EX Guard:''' As a Full moon, F-PCiel has access to EX Guard. Very useful to get into the habit of using, as it pushes opponents away and creates openings in their pressure with essentially no opportunity cost. | |||
'''j.7>sdj9:''' Despite PCiel's high jump startup, upback is still a reliable defensive option in many scenarios, and her super double jump is one of her few movement options which covers a similar distance to the rest of the cast, allowing her to return to midscreen with relative safety. | |||
'''Shield:''' Arguably the character's most reliable defensive option due to her ability to cancel it into 623A, which, unlike shield counter, is inescapable once the shield has been triggered. PCiel's strong shield makes it rewarding to wait for options that can be shielded on reaction, or as a challenge to attempts to enforce frame advantage. | |||
'''Bunker:''' Good, long range bunker. Can be used to escape from multi-hitting pressure reset moves, or as a lower reward, slightly lower risk alternative to shield. | |||
'''Backdash:''' Surprisingly good backdash. Very strong for escaping midscreen pressure, but has fairly high recovery, making it vulnerable in the corner. | |||
'''2A:''' 4f low mash. Good for disrespecting neutral or +1 frame advantage against characters with 5f A normals, and as a relatively safe way to check dashes. | |||
'''2C:''' 6f sweep. High risk, medium reward. Extremely fast for its range, allowing PCiel to challenge opponents in many situations they may not typically expect. Very good for forcing trades due to its lack of a hurtbox on startup. Also very unsafe on whiff, often resulting in full crouching grounded punishes. | |||
'''623A:''' 5f bufferable move. Can be a good defensive tool in many situations due to the fast startup and very strong hitbox, and is relatively safe on whiff or block. | |||
'''623C:''' 1f EX move that sends you into the sky. Very good at disrespecting gaps in pressure, but has a high cost. | |||
'''236C:''' Long range EX move with some invuln in the middle, allowing it to go through projectiles sometimes. Not very reliable, and extremely unsafe if blocked. | |||
</div> | |||
== Combos == | == Combos == | ||
{{ComboLegend-MB}} | {{ComboLegend-MB}} | ||
The below combos are intended primarily as a starting resource for beginner F-PCiel players. I would encourage | The below combos are intended primarily as a starting resource for beginner F-PCiel players. I would encourage players interested in learning F-PCiel to think of her combos less as a strict series of inputs from start to finish and more like a series of individual chunks that can be fit together depending on the situation. F-PCiel's combo routes are very flexible, and the ability to adjust them depending on situation will come with experience and watching a lot of Hirohiro and Kouki match footage. Good luck! | ||
=== Normal Combos === | === Normal Combos === | ||
| Line 102: | Line 213: | ||
|condition=Beginner, Midscreen | |condition=Beginner, Midscreen | ||
|character= | |character= | ||
|damage= | |damage=3249 | ||
|metergen= | |metergen=36,9% | ||
|metero= | |metero=12,3% | ||
|link= | |link= | ||
|input=* 5B>6B>2C>3C>j.B>2C>236A | |input=* 5B>6B>2C>3C>j.B>2C>236A | ||
|simput= | |simput= | ||
|note= Basic, easy midscreen confirm ending in 236A knockdown that works anywhere. 2C>3C>j.B forms the core of most of F-PCiel's grounded confirms, so | |note= Basic, easy midscreen confirm ending in 236A knockdown that works anywhere. 2C>3C>j.B forms the core of most of F-PCiel's grounded confirms, so it is important to learn the timing for the j.B delay early. | ||
}} | }} | ||
| Line 114: | Line 225: | ||
|condition=Corner Carry, Midscreen | |condition=Corner Carry, Midscreen | ||
|character= | |character= | ||
|damage= | |damage=4263 | ||
|metergen= | |metergen=57,6% | ||
|metero= | |metero=19,2% | ||
|link= | |link=https://youtu.be/ZfU1NRJifMQ | ||
|input=* 5B>6B>2C>3C>j.B>6B>2C>623A~X>2A>236A | |input=* 5B>6B>2C>3C>j.B>6B>2C>623A~X>2A>236A | ||
|simput= | |simput= | ||
|note= Standard midscreen bnb. Mostly consistent across the entire cast, and | |note= Standard midscreen bnb. Mostly consistent across the entire cast, and goes from corner to corner allowing for 624[B] oki. j.B must be delayed for the 6B to connect, and the 623A must be delayed for all of the hits of the followup to connect and allow it to combo into 2A. | ||
}} | }} | ||
| Line 126: | Line 237: | ||
|condition=Midscreen transition into corner loop | |condition=Midscreen transition into corner loop | ||
|character= | |character= | ||
|damage= | |damage=4801 | ||
|metergen= | |metergen=72.9% | ||
|metero= | |metero=24.3% | ||
|link= | |link= | ||
|input=* 5B>6B>2C>3C>j.B>6B>2C>3C>624B>j.B>2A>3B>2C>624B>3B>2C>236A | |input=* 5B>6B>2C>3C>j.B>6B>2C>3C>624B>j.B>2A>3B>2C>624B>3B>2C>236A | ||
|simput= | |simput= | ||
|note= Advanced combo which transitions from the midscreen route to the corner rock loop | |note= Advanced combo which transitions from the midscreen route to the corner rock loop when close enough to the corner. In general, the 3C before 624B will need to be delayed in order for the rock to connect. After 624B>j.B, 2C>236A can be used as an ender if 2A will not reach. | ||
}} | }} | ||
{{CollapsingComboData-MB | {{CollapsingComboData-MB | ||
|condition=Air CH, Midscreen | |condition=Air CH, Midscreen | ||
|character= | |character= | ||
|damage= | |damage=Varies | ||
|metergen= | |metergen=Varies | ||
|metero= | |metero=Varies | ||
|link= | |link= | ||
|input=* (Air CH) 2C>3C>j.B>rest of combo | |input=* (Air CH) 2C>3C>j.B>rest of combo | ||
|simput= | |simput= | ||
|note= Easy air CH pickup. | |note= Easy air CH pickup. 2B>3B>2C can be used instead at close ranges, but it can be awkward to space and time so it is generally not worth it to go for it over simply picking up with 2C. | ||
}} | }} | ||
}} | }} | ||
| Line 153: | Line 264: | ||
|condition=Rock Loop, Corner | |condition=Rock Loop, Corner | ||
|character= | |character= | ||
|damage= | |damage=5046 | ||
|metergen= | |metergen=95.4% | ||
|metero= | |metero=33.4% | ||
|link= | |link=https://youtu.be/78lRYRGdy54 | ||
|input=* 5B>2C>3C>j.B>2B>(3B>2C>624B)x3>3B>624B>3B>2C>624B>3B>2C>236A | |input=* 5B>2C>3C>j.B>2B>(3B>2C>624B)x3>3B>624B>3B>2C>624B>3B>2C>236A | ||
|simput= | |simput= | ||
|note= Essential corner combo. The damage, meter gain and knockdown granted by this combo are essential in making | |note= Essential corner combo. The damage, meter gain and knockdown granted by this combo are essential in making F-PCiel's hits threatening. Against certain characters such as Satsuki, or with too many hits in the opening ground string, getting 3 full loops in the first half becomes impossible and the third must be omitted. | ||
}} | }} | ||
{{CollapsingComboData-MB | {{CollapsingComboData-MB | ||
|condition=236[A] starter, Corner | |condition=236[A] starter, Corner | ||
|character= | |character= | ||
|damage= | |damage=5623 | ||
|metergen= | |metergen=81.4% | ||
|metero= | |metero=27.1% | ||
|link= | |link= | ||
|input=* 236[A]>66>5B>3C>superjump cancel> | |input=* 236[A]>66>5B>3C>superjump cancel>j.C>j.236A~X>2A>5A>3B>2C>624B>(rock loop) | ||
|simput= | |simput= | ||
|note= Far 236[A} starter into rock loop. From closer ranges, | |note= Far 236[A} starter into rock loop. From closer ranges, 66>3B>2C>3C>j.B can be used to start a rock loop for higher damage, but be aware that the 236[A] will have used up one groundbounce. | ||
}} | }} | ||
| Line 194: | Line 305: | ||
|cancel=-SE-, -N-, -SP-, -EX-, (J) | |cancel=-SE-, -N-, -SP-, -EX-, (J) | ||
|guard=L | |guard=L | ||
|startup= | |startup=5 | ||
|active=4 | |active=4 | ||
|recovery=5 | |recovery=5 | ||
|frameAdv=3 | |frameAdv=3 | ||
|invuln= | |invuln= | ||
|description= | |description= Low-hitting kick. Slightly slower and shorter than 2A. | ||
+3 on block. | |||
}} | }} | ||
}} | }} | ||
| Line 223: | Line 334: | ||
|cancel=N, SP, -CH-, EX, (J) | |cancel=N, SP, -CH-, EX, (J) | ||
|guard=LH | |guard=LH | ||
|startup= | |startup=8 | ||
|active=2 | |active=2 | ||
|recovery=18 | |recovery=18 | ||
|frameAdv=-2 | |frameAdv=-2 | ||
|invuln= | |invuln= | ||
|description= | |description= Midrange poke with good startup and a wide variety of cancel options. Physically slides PCiel's collision box forwards during its animation, giving it deceptively very long range. | ||
The high | The high hitbox makes this move susceptible to being low profiled. | ||
}} | }} | ||
{{AttackData-MB | {{AttackData-MB | ||
| Line 241: | Line 352: | ||
|cancel=N, SP, EX, (J) | |cancel=N, SP, EX, (J) | ||
|guard=LH | |guard=LH | ||
|startup= | |startup=10 | ||
|active=3 | |active=3 | ||
|recovery=24 | |recovery=24 | ||
|frameAdv=-9 | |frameAdv=-9 | ||
|invuln= | |invuln= | ||
|description= 5B followup. | |description= 5B followup. Not very useful for anything due to a combination of high proration, high pushback, high startup and high recovery. | ||
}} | }} | ||
}} | }} | ||
| Line 253: | Line 364: | ||
{{MoveData | {{MoveData | ||
|image=Fpciel-5C.png | |image=Fpciel-5C.png | ||
|caption= | |caption= Named 'Idol Kick' in the game's files. | ||
|name=5C | |name=5C | ||
|input= | |input= | ||
| Line 265: | Line 376: | ||
|cancel=N, SP, EX, (J) | |cancel=N, SP, EX, (J) | ||
|guard=LH | |guard=LH | ||
|startup= | |startup=13 | ||
|active=6 | |active=6 | ||
|recovery=24 | |recovery=24 | ||
|frameAdv=-12 | |frameAdv=-12 | ||
|invuln=Low 3-25 | |invuln=Low 3-25 | ||
|description= | |description= Long range, sliding kick with lower body invulnerability. Strong on paper, but held back by the fact that it halts all dash momentum on use and generally does not lead to a full combo against crouching opponents. | ||
Deals slightly more damage and prorates slightly better than 2C, making it optimal for standing confirms into 3C. | |||
}} | }} | ||
}} | }} | ||
| Line 292: | Line 403: | ||
|cancel=-SE-, -N-, -SP-, -EX-, (J) | |cancel=-SE-, -N-, -SP-, -EX-, (J) | ||
|guard=L | |guard=L | ||
|startup= | |startup=4 | ||
|active=3 | |active=3 | ||
|recovery=7 | |recovery=7 | ||
|frameAdv=2 | |frameAdv=2 | ||
|invuln= | |invuln= | ||
|description= | |description= Fast, low kick with very good range for its speed. One of the better 4 frame normals in the game, good at everything a 2A needs to do. | ||
+2 on block. | |||
}} | }} | ||
}} | }} | ||
| Line 318: | Line 429: | ||
|cancel=N, SP, EX, (J) | |cancel=N, SP, EX, (J) | ||
|guard=LH | |guard=LH | ||
|startup= | |startup=7 | ||
|active=5 | |active=5 | ||
|recovery=13 | |recovery=13 | ||
|frameAdv=0 | |frameAdv=0 | ||
|invuln= | |invuln= | ||
|description= | |description= Short range attack with a good hitbox, high active frames, and low recovery. Useful as an antiair or as a counterpoke against characters who extend a lot of green. | ||
+0 on block, and beats high shield. | |||
}} | }} | ||
}} | }} | ||
| Line 330: | Line 443: | ||
{{MoveData | {{MoveData | ||
|image=HPCiel-2C.png | |image=HPCiel-2C.png | ||
|caption= | |caption= Rich white girl sweep. | ||
|name=2C | |name=2C | ||
|input= | |input= | ||
| Line 342: | Line 455: | ||
|cancel=N, SP, EX, (J) | |cancel=N, SP, EX, (J) | ||
|guard=L | |guard=L | ||
|startup= | |startup=6 | ||
|active=4 | |active=4 | ||
|recovery= | |recovery=29 | ||
|frameAdv=-15 | |frameAdv=-15 | ||
|invuln= | |invuln= | ||
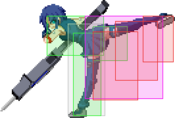
|description= | |description= Low sweeping kick. Extremely fast for its range, with only '''5 frames''' of startup. Does not extend any green before becoming active. | ||
Very dangerous to whiff due to its high recovery. | |||
}} | }} | ||
}} | }} | ||
| Line 355: | Line 468: | ||
==== Jumping Normals ==== | ==== Jumping Normals ==== | ||
'''Notes:''' | '''Notes:''' | ||
* | * PCiel's air normals cannot be canceled into other air normals, double jump, air dashes or air throw. They can still be Special/EX canceled on hit or block, however. | ||
* j.A does not recover in midair, P.Ciel must land before recovering if j.A isn't canceled. | * j.A does not recover in midair, P.Ciel must land before recovering if j.A isn't canceled. | ||
* If PCiel's j.B, j.C, or j.6C connect with a 624B rock's active frames, she immediately enters a completely neutral state and can take any action, including blocking. | |||
===== <span class="invisible-header">j.A</span> ===== | ===== <span class="invisible-header">j.A</span> ===== | ||
| Line 373: | Line 487: | ||
|cancel=SP, EX | |cancel=SP, EX | ||
|guard=HA | |guard=HA | ||
|startup= | |startup=6 | ||
|active={{Tooltip | text=5| hovertext=2, 3}} | |active={{Tooltip | text=5| hovertext=2, 3}} | ||
|recovery= | |recovery= | ||
|frameAdv= | |frameAdv= | ||
|invuln= | |invuln= | ||
|description= | |description= Two hit upwards kick. Launches opponents upwards on hit, even when grounded. F-PCiel's fastest air normal. | ||
Both hits of j.A hit overhead. | |||
}} | }} | ||
}} | }} | ||
| Line 399: | Line 513: | ||
|cancel=SP, EX | |cancel=SP, EX | ||
|guard=HA | |guard=HA | ||
|startup= | |startup=8 | ||
|active=6 | |active=6 | ||
|recovery= | |recovery= | ||
|frameAdv= | |frameAdv= | ||
|invuln= | |invuln= | ||
|description= | |description= Deep kick directly below and in front of PCiel. Very disjointed jump-in. Groundbounces on air hit, allowing for combo continuations. | ||
}} | }} | ||
}} | }} | ||
| Line 423: | Line 537: | ||
|cancel=SP, EX | |cancel=SP, EX | ||
|guard=HA | |guard=HA | ||
|startup= | |startup=10 | ||
|active=5 | |active=5 | ||
|recovery= | |recovery= | ||
|frameAdv= | |frameAdv= | ||
|invuln= | |invuln= | ||
|description= | |description= Long, disjointed horizontal kick with a slight upwards angle, and a crossup hitbox behind PCiel. Extremely powerful air-to-air spacing tool, especially when done with backwards momentum. | ||
}} | }} | ||
}} | }} | ||
| Line 449: | Line 563: | ||
|cancel=N, SP, EX, (J) | |cancel=N, SP, EX, (J) | ||
|guard=LH | |guard=LH | ||
|startup= | |startup=11 | ||
|active=2 | |active=2 | ||
|recovery=34 | |recovery=34 | ||
|frameAdv=-18 | |frameAdv=-18 | ||
|invuln= | |invuln= | ||
|description= | |description= Short overhead swing. Hits mid when uncharged. Knocks airborne opponents down to the ground into a small groundbounce. | ||
Useful as a combo tool, and one half of F-PCiel's grounded high/low mixup when half charged into 2C. | |||
}} | }} | ||
{{AttackData-MB | {{AttackData-MB | ||
| Line 465: | Line 581: | ||
|cancel=N, SP, EX, (J) | |cancel=N, SP, EX, (J) | ||
|guard=H | |guard=H | ||
|startup= | |startup=25 | ||
|active=2 | |active=2 | ||
|recovery=34 | |recovery=34 | ||
|frameAdv=-18 | |frameAdv=-18 | ||
|invuln= | |invuln= | ||
|description= | |description= Charged 3B. Overhead. Rather fast for a grounded overhead by Melty standards. | ||
On air hit, knocks opponents to the ground into a higher launching groundbounce, which looks very cool but is not very practically applicable. | |||
}} | }} | ||
}} | }} | ||
| Line 491: | Line 607: | ||
|cancel=N, SP, EX, (J) | |cancel=N, SP, EX, (J) | ||
|guard=LH | |guard=LH | ||
|startup= | |startup=12 | ||
|active=4 | |active=4 | ||
|recovery=22 | |recovery=22 | ||
|frameAdv=-8 | |frameAdv=-8 | ||
|invuln= | |invuln= | ||
|description= | |description= Long step forward into a donkey kick. Sends opponents flying into a wallbounce on hit. | ||
Slides forward a great deal, making it useful in pressure and midscreen combos. | |||
}} | }} | ||
}} | }} | ||
| Line 517: | Line 633: | ||
|cancel=SP, EX, (J) | |cancel=SP, EX, (J) | ||
|guard=LH | |guard=LH | ||
|startup= | |startup=11 | ||
|active=2 | |active=2 | ||
|recovery=35 | |recovery=35 | ||
|frameAdv=-19 | |frameAdv=-19 | ||
|invuln=Low 11-24 | |invuln=Low 11-24 | ||
|description= | |description= Flip kick upwards. Pressing 8 after this move will perform a super jump cancel on hit. Not a good antiair despite its appearance, due to extending a large hurtbox upwards before becoming active. Whiffs against most crouching characters at most ranges. | ||
Mostly a combo tool, but has some niche anti-jump applications in corner pressure. | |||
}} | }} | ||
}} | }} | ||
| Line 541: | Line 659: | ||
|cancel=SP, EX | |cancel=SP, EX | ||
|guard=HA | |guard=HA | ||
|startup= | |startup=9 | ||
|active=5 | |active=5 | ||
|recovery= | |recovery= | ||
|frameAdv= | |frameAdv= | ||
|invuln= | |invuln= | ||
|description= | |description= Short, disjointed command normal that covers above and in front of PCiel. Knocks back into a wallbounce on hit. | ||
Not a very useful move as j.A does most things it does better. | |||
}} | }} | ||
}} | }} | ||
| Line 571: | Line 691: | ||
|frameAdv= | |frameAdv= | ||
|invuln= | |invuln= | ||
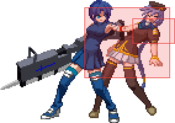
|description= | |description= Ground throw that gives no knockdown but acts as a combo starter. As a throw, the resulting combo is also burst safe for the entire duration. | ||
Dramatically higher reward than most throws, giving a full combo worth of (30% prorated) damage and meter. | |||
}} | }} | ||
}} | }} | ||
| Line 597: | Line 717: | ||
|frameAdv= | |frameAdv= | ||
|invuln= | |invuln= | ||
|description= | |description= Somewhat odd airthrow that retains cancel options while leaving the opponent airborne, allowing for combo extensions afterwards. | ||
Resets the bounce limit when used mid-combo, allowing for very long combo extensions with correct routing. | |||
}} | }} | ||
}} | }} | ||
| Line 623: | Line 745: | ||
|frameAdv=-4 | |frameAdv=-4 | ||
|invuln= | |invuln= | ||
|description= Standard Full Moon Shield Counter. | |description= Standard Full Moon Shield Counter. Launches on hit for an easy pickup with 2C. | ||
Generally overshadowed by 623A out of shield, but still a useful option in certain situations due to its invulnerability. | |||
}} | }} | ||
{{AttackData-MB | {{AttackData-MB | ||
| Line 682: | Line 804: | ||
|frameAdv=-5 | |frameAdv=-5 | ||
|invuln={{Tooltip | text=Strike 1-7| hovertext=1-15 Strike invicibility on whiff.}} | |invuln={{Tooltip | text=Strike 1-7| hovertext=1-15 Strike invicibility on whiff.}} | ||
|description= | |description= Very long Bunker. Can be low profiled by certain attacks. | ||
}} | }} | ||
}} | }} | ||
| Line 706: | Line 828: | ||
|frameAdv= | |frameAdv= | ||
|invuln=Full 1-19 | |invuln=Full 1-19 | ||
|description=Second fastest heat startup in the game along with Hime's. Initiative Heat | |description= Second fastest heat startup in the game along with Hime's. Generally not as useful as Initiative Heat. | ||
}} | }} | ||
}} | }} | ||
| Line 748: | Line 870: | ||
|frameAdv= | |frameAdv= | ||
|invuln=Strike 1-30 | |invuln=Strike 1-30 | ||
|description=Universal burst mechanic. Unlike | |description= Universal burst mechanic. Unlike Heat activation, the hitbox and frame data doesn't vary between characters. Susceptible to airthrows if performed in the air. | ||
}} | }} | ||
}} | }} | ||
| Line 778: | Line 900: | ||
|cancel= | |cancel= | ||
|guard=LH | |guard=LH | ||
|startup= | |startup=13 | ||
|active=4 | |active=4 | ||
|recovery=30 | |recovery=30 | ||
|frameAdv=-1 | |frameAdv=-1 | ||
|invuln= | |invuln= | ||
|description= | |description= Large, very disjointed grounded poke. Knocks opponents into a fullscreen, untechable knockdown on hit. PCiel's hurtbox retracts during the startup, similarly to C-Nero's 5[C]. | ||
-1 on block, but very high recovery makes it unsafe to whiff. | |||
F-PCiel's primary combo ender, giving enough frame advantage for 624[B] setups. | |||
}} | }} | ||
{{AttackData-MB | {{AttackData-MB | ||
| Line 798: | Line 920: | ||
|cancel= | |cancel= | ||
|guard=LH | |guard=LH | ||
|startup= | |startup=25 | ||
|active=4 | |active=4 | ||
|recovery=30 | |recovery=30 | ||
|frameAdv=13 | |frameAdv=13 | ||
|invuln= | |invuln= | ||
|description= | |description= Charged 236A. Trades twice the startup for twice the range. Blows back into a wallbounce on hit, and deals incredibly high guard bar damage if blocked. | ||
+13 on block, air unblockable, and unshieldable. | |||
}} | }} | ||
{{AttackData-MB | {{AttackData-MB | ||
| Line 816: | Line 938: | ||
|cancel= | |cancel= | ||
|guard=LH | |guard=LH | ||
|startup= | |startup=16 | ||
|active=6 | |active=6 | ||
|recovery=37 | |recovery=37 | ||
|frameAdv=-10 | |frameAdv=-10 | ||
|invuln= | |invuln= | ||
|description= | |description= Slower, upward angled version of 236A. Launches opponents upwards into air tech on hit, and ground tech on counterhit. | ||
Not very useful as an antiair due to its high startup and recovery, and not very useful in combos due to its weak hit properties. | |||
}} | }} | ||
{{AttackData-MB | {{AttackData-MB | ||
| Line 832: | Line 956: | ||
|cancel= | |cancel= | ||
|guard=LH | |guard=LH | ||
|startup= | |startup=24 | ||
|active=6 | |active=6 | ||
|recovery=37 | |recovery=37 | ||
|frameAdv=-25 | |frameAdv=-25 | ||
|invuln= | |invuln= | ||
|description= | |description= Charged 236B. Launches opponents upwards into an uncomboable ground tech. | ||
Arguably F-PCiel's worst move. It's hard to think of a single use for this. | |||
}} | }} | ||
{{AttackData-MB | {{AttackData-MB | ||
| Line 848: | Line 974: | ||
|cancel= | |cancel= | ||
|guard=LH | |guard=LH | ||
|startup=1+ | |startup=1+9 | ||
|active=6 | |active=6 | ||
|recovery=34 | |recovery=34 | ||
|frameAdv=-28 | |frameAdv=-28 | ||
|invuln= | |invuln= | ||
|description= | |description= Highly damaging, sliding hitgrab that gives hard knockdown on hit. | ||
Weaker knockdown than 236A, but can be used to convert OTGs into a hard knockdown that still gives enough frame advantage to pull an uncharged 624B. | |||
236C's startup is invulnerable, but this does not extend into its active frames, limiting its reliability as a reversal. | |||
}} | }} | ||
}} | }} | ||
| Line 862: | Line 990: | ||
{{MoveData | {{MoveData | ||
|image=Cpciel623a.png | |image=Cpciel623a.png | ||
|caption=A | |||
|image2=HPCiel-623AX%2Bj.236AX-1.png | |image2=HPCiel-623AX%2Bj.236AX-1.png | ||
|caption2=623A~X followup | |||
|image3=MBCPCiel623B.png | |image3=MBCPCiel623B.png | ||
|caption3=B | |||
|image4=Cpciel623c.png | |image4=Cpciel623c.png | ||
| | |caption4=EX | ||
|name=Shaft Drive | |name=Shaft Drive | ||
|input=623A/B/C<br>(623A~X) | |input=623A/B/C<br>(623A~X) | ||
| Line 878: | Line 1,009: | ||
|cancel=-CH-, -J- | |cancel=-CH-, -J- | ||
|guard=LH (1), LHA (2-3) | |guard=LH (1), LHA (2-3) | ||
|startup= | |startup=5 | ||
|active={{Tooltip | text=11| hovertext=3 hits. 5, 3, 3}} | |active={{Tooltip | text=11| hovertext=3 hits. 5, 3, 3}} | ||
|recovery=19 | |recovery=19 | ||
|frameAdv= | |frameAdv= | ||
|invuln= | |invuln= | ||
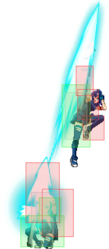
|description= | |description= A very fast, very disjointed rising antiair that launches PCiel into the air. Has three hitboxes, one on the ground which is air unblockable, and two in the air which are air blockable. | ||
Jump cancelable and cancelable into 623A~X on whiff, block or hit. | |||
Does not possess any invulnerability, despite its appearance. | |||
}} | }} | ||
{{AttackData-MB | {{AttackData-MB | ||
| Line 905: | Line 1,029: | ||
|cancel= | |cancel= | ||
|guard=LHA | |guard=LHA | ||
|startup= | |startup=10 | ||
|active={{Tooltip | text=X| hovertext=Active until landing.
Multi-hit. 2 xN
Has a 2f-long hitbox on landing which causes knockdown, but it only takes effect if this attack has hit a grounded opponent before landing.}} | |active={{Tooltip | text=X| hovertext=Active until landing.
Multi-hit. 2 xN
Has a 2f-long hitbox on landing which causes knockdown, but it only takes effect if this attack has hit a grounded opponent before landing.}} | ||
|recovery={{Tooltip | text=15| hovertext=Landing recovery.
17 if counting the landing hitbox.}} | |recovery={{Tooltip | text=15| hovertext=Landing recovery.
17 if counting the landing hitbox.}} | ||
|frameAdv=-4 | |frameAdv=-4 | ||
|invuln= | |invuln= | ||
|description=623A followup. Knocks airborne opponents | |description= 623A followup. A downward, multi-hitting divekick from the air to the ground. Knocks airborne opponents down into the ground on hit. Most hitboxes will allow opponents to ground tech, but it has a final grounded hitbox while landing which will launch into a comboable groundbounce. | ||
Essential combo tool, occasional scramble tool in neutral. | |||
Safe on block to anything with more than 2 frames of startup, meaning that most characters can only punish it with throw. | |||
}} | }} | ||
{{AttackData-MB | {{AttackData-MB | ||
| Line 923: | Line 1,049: | ||
|cancel= | |cancel= | ||
|guard=LH (1), LHA | |guard=LH (1), LHA | ||
|startup= | |startup=11 | ||
|active={{Tooltip | text=14| hovertext=4, 10}} | |active={{Tooltip | text=14| hovertext=4, 10}} | ||
|recovery=27 | |recovery=27 | ||
|frameAdv= | |frameAdv= | ||
|invuln= | |invuln= | ||
|description= | |description= Slower version of Shaft Drive which launches much, much higher into the air. A hitgrab that pulls opponents into an unburstable animation on hit. Grounded hitbox is air unblockable, but aerial hitboxes are air blockable, like 623A. | ||
Leaves PCiel in a neutral state in the air after completing its animation on whiff or block, but forces her to land on hit. | |||
Stronger disjoint and upper body invulnerability than 623A, but significantly slower. | |||
}} | }} | ||
{{AttackData-MB | {{AttackData-MB | ||
| Line 941: | Line 1,069: | ||
|cancel= | |cancel= | ||
|guard=LH | |guard=LH | ||
|startup=1+ | |startup=1+1 | ||
|active=10 | |active=10 | ||
|recovery=(~40) | |recovery=(~40) | ||
|frameAdv= | |frameAdv= | ||
|invuln=Full 1 | |invuln=Full 1 | ||
|description= Fully air unblockable for the entire duration, unlike the non-EX versions. Functions | |description= EX Shaft Drive. Fully air unblockable for the entire duration, unlike the non-EX versions. Functions mostly the same as 623B, but without the initial grounded hitbox. | ||
1 frame of startup, and ascends very quickly, making it a fairly strong defensive tool despite the lack of invulnerability. | |||
In combos, this move does a high amount of damage in a lot of hits very quickly, making it an effective finishing move as it is difficult to reduce. | |||
}} | }} | ||
}} | }} | ||
| Line 957: | Line 1,085: | ||
{{MoveData | {{MoveData | ||
|image=Fpciel-214A.png | |image=Fpciel-214A.png | ||
|caption=A | |||
|image2=MBFPCiel214B.png | |image2=MBFPCiel214B.png | ||
|caption2=B | |||
|image3=MBFPCiel214C.png | |image3=MBFPCiel214C.png | ||
|caption3=EX | |||
|name=Virgin Pain<br>(EX: Oriflame Concert) | |name=Virgin Pain<br>(EX: Oriflame Concert) | ||
|input=214A/B/C | |input=214A/B/C | ||
| Line 971: | Line 1,102: | ||
|cancel=-EX- | |cancel=-EX- | ||
|guard=LHA | |guard=LHA | ||
|startup= | |startup=15 | ||
|active=X | |active=X | ||
|recovery=32 | |recovery=32 | ||
|frameAdv=-6 | |frameAdv=-6 | ||
|invuln= | |invuln= | ||
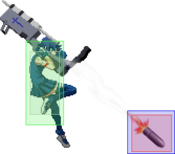
|description= A simple fullscreen horizontal projectile. | |description= Missile. A simple fullscreen horizontal projectile. Launches into air tech on hit. EX cancelable for most of its animation. Fires at a slight downward angle, meaning it cannot be dashed under or low profiled by most characters. | ||
Plus on block at many ranges, making it possible to dash in with 5B afterwards to catch jumps, beat mashing, or begin pressure. | |||
}} | }} | ||
{{AttackData-MB | {{AttackData-MB | ||
| Line 989: | Line 1,120: | ||
|cancel=-EX- | |cancel=-EX- | ||
|guard=LHA | |guard=LHA | ||
|startup= | |startup=24 | ||
|active=X | |active=X | ||
|recovery=41 | |recovery=41 | ||
|frameAdv={{Tooltip | text=-13| hovertext=Worst case advantage.}} | |frameAdv={{Tooltip | text=-13| hovertext=Worst case advantage.}} | ||
|invuln= | |invuln= | ||
|description= | |description= A backwards jump followed by a downward angled aerial missile. Can control a surprising amount of space, and is fairly safe, but generally leads to nothing. Mostly seen as a misinput 624B, and very rarely used intentionally. | ||
}} | }} | ||
{{AttackData-MB | {{AttackData-MB | ||
| Line 1,005: | Line 1,136: | ||
|cancel= | |cancel= | ||
|guard=LHA | |guard=LHA | ||
|startup=3+ | |startup=3+2 | ||
|active=X | |active=X | ||
|recovery=178 | |recovery=178 | ||
|frameAdv= | |frameAdv= | ||
|invuln= | |invuln= | ||
|description= | |description= EX missile. Fires 3 missiles on the ground before becoming airborne and firing 8 additional missiles, ending in one final missile which inflicts a hard knockdown which can be picked up with OTG 236[A] or 236C. | ||
Mostly not a very good move. It is fairly fast, plus on block at many ranges, and can trade into a full combo if the first missile counterhits, but it doesn't possess any invuln, making it unreliable as an abare tool. | |||
}} | }} | ||
}} | }} | ||
| Line 1,019: | Line 1,150: | ||
{{MoveData | {{MoveData | ||
|image=Fpciel-63214A.png | |image=Fpciel-63214A.png | ||
|caption=A | |||
|image2=Fpciel-63214A-chain.png | |image2=Fpciel-63214A-chain.png | ||
|caption2=A followup | |||
|image3=MBFPCiel63214B.png | |image3=MBFPCiel63214B.png | ||
|caption3=B | |||
|image4=MBFPCiel63214C.png | |image4=MBFPCiel63214C.png | ||
| | |caption4=EX | ||
|name=Grand | |name=Grand Zappa | ||
|input=63214A/B/[B]/C<br>(63214A~X) | |input=63214A/B/[B]/C<br>(63214A~X) | ||
|linkname=63214X | |linkname=63214X | ||
| Line 1,035: | Line 1,169: | ||
|cancel= | |cancel= | ||
|guard=LHA | |guard=LHA | ||
|startup= | |startup=20 | ||
|active=X {{Tooltip | text=(33)| hovertext=Rock's active frames.}} | |active=X {{Tooltip | text=(33)| hovertext=Rock's active frames.}} | ||
|recovery=22 | |recovery=22 | ||
|frameAdv=-2 | |frameAdv=-2 | ||
|invuln= | |invuln= | ||
|description= | |description= Rock. 624A launches the rock at a shallow horizontal angle, traveling a few character lengths before exploding on its own. Launches into air tech on hit. EX cancelable for most of its animation. | ||
Sometimes useful for pressure and meterless OTG relaunches, but mostly overshadowed by its B version. | |||
}} | }} | ||
{{AttackData-MB | {{AttackData-MB | ||
| Line 1,051: | Line 1,187: | ||
|cancel=SP, EX | |cancel=SP, EX | ||
|guard=LH | |guard=LH | ||
|startup= | |startup=16 | ||
|active=4 | |active=4 | ||
|recovery=23 | |recovery=23 | ||
|frameAdv=-10 | |frameAdv=-10 | ||
|invuln= | |invuln= | ||
|description= | |description= 624A followup. Kicks the rock with 6B's animation, causing it to explode. Shares many properties with 6B, such as knocking back into a wallbounce on hit. | ||
Special and EX cancelable on hit or block. | |||
}} | }} | ||
{{AttackData-MB | {{AttackData-MB | ||
| Line 1,067: | Line 1,205: | ||
|cancel= | |cancel= | ||
|guard=LHA | |guard=LHA | ||
|startup= | |startup=18 | ||
|active=X {{Tooltip | text=(53)| hovertext=Rock's active frames.}} | |active=X {{Tooltip | text=(53)| hovertext=Rock's active frames.}} | ||
|recovery=16 | |recovery=16 | ||
|frameAdv=4 | |frameAdv=4 | ||
|invuln= | |invuln= | ||
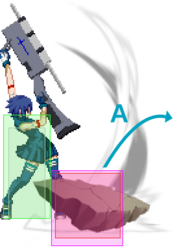
|description= | |description= B Rock. PCiel pulls a rock out of the ground, which launches upwards and lingers in front of her for 53 frames before descending back down to the ground. Launches into air tech on hit. | ||
The character's defining move; an extremely versatile projectile which heavily enables her neutral, combos, pressure, and okizeme. | |||
+4 on block at minimum. | |||
Both the charged and uncharged versions of the rock possess a unique quality which allows F-PCiel to interact with them using her normals. Hitting the rock with any of her B or C normals will send it flying forwards, at slightly different angles depending on the normal used. When this happens, it becomes an entirely new hitbox with unique properties, such as inflicting grounded hitstun instead of launching, having 100% proration instead of 75%, and having dramatically higher blockstun. | |||
}} | }} | ||
{{AttackData-MB | {{AttackData-MB | ||
| Line 1,087: | Line 1,227: | ||
|cancel= | |cancel= | ||
|guard=LHA | |guard=LHA | ||
|startup= | |startup=33 | ||
|active=X {{Tooltip | text=(63)| hovertext=Rock's active frames.}} | |active=X {{Tooltip | text=(63)| hovertext=Rock's active frames.}} | ||
|recovery=14 | |recovery=14 | ||
|frameAdv=14 | |frameAdv=14 | ||
|invuln= | |invuln= | ||
|description= | |description= Charged B rock. Launches the rock at a steeper angle than its uncharged version, causing it to fly higher and travel slightly farther horizontally. Shares most of its properties with 624B, but has almost double the startup and slightly lower recovery. | ||
+14 on block at minimum. | |||
Mostly an okizeme tool, but has some niche advantages over 624B in neutral, such as staying active for slightly longer, and its higher launch trajectory unlocking new angles when hitting it with normals. | |||
}} | }} | ||
{{AttackData-MB | {{AttackData-MB | ||
| Line 1,109: | Line 1,247: | ||
|cancel= | |cancel= | ||
|guard=LHA | |guard=LHA | ||
|startup=6+ | |startup=6+1 | ||
|active=20 (1) {{Tooltip | text=6| hovertext=4 hits.}} | |active=20 (1) {{Tooltip | text=6| hovertext=4 hits.}} | ||
|recovery=25 | |recovery=25 | ||
|frameAdv=9 | |frameAdv=9 | ||
|invuln=Full 6 | |invuln=Full 6 | ||
|description= | |description= EX rock. Pulls a rock, and then automatically follows up with a kick which shatters the rock into a multi-hitting explosion. Sends the opponent flying into a wallbounce on hit. | ||
+9 on block. | |||
Very useful in corner combos as a meter management tool and for OTG relaunches into rock loops. | |||
Not very useful in pressure, despite its frame advantage, due to being very easy to bunker. | |||
}} | }} | ||
}} | }} | ||
| Line 1,126: | Line 1,266: | ||
{{MoveData | {{MoveData | ||
|image=cpcielj236a.png | |image=cpcielj236a.png | ||
|caption=A | |||
|image2=HPCiel-623AX%2Bj.236AX-1.png | |image2=HPCiel-623AX%2Bj.236AX-1.png | ||
|image3=cpcielj236b.png | |image3=cpcielj236b.png | ||
| Line 1,142: | Line 1,283: | ||
|cancel=-CH- | |cancel=-CH- | ||
|guard=LHA | |guard=LHA | ||
|startup= | |startup=10 | ||
|active={{Tooltip | text=6| hovertext=2 hits. 3, 3}} | |active={{Tooltip | text=6| hovertext=2 hits. 3, 3}} | ||
|recovery={{Tooltip | text=12| hovertext=Landing recovery.}} | |recovery={{Tooltip | text=12| hovertext=Landing recovery.}} | ||
|frameAdv= | |frameAdv= | ||
|invuln= | |invuln= | ||
|description= Airborne version of 623A, with a different input. | |description= Airborne version of 623A, with a different input. EX cancelable on hit or block, but cannot be canceled into movement, unlike 623A. | ||
Essential combo tool, as it is F-PCiel's only way to convert non-counter aerial hits due to the unique properties of her air normals. | |||
}} | }} | ||
{{AttackData-MB | {{AttackData-MB | ||
| Line 1,160: | Line 1,301: | ||
|cancel= | |cancel= | ||
|guard=LHA | |guard=LHA | ||
|startup= | |startup=10 | ||
|active={{Tooltip | text=X| hovertext=Active until landing.
Multi-hit. 2 xN
Has a 2f-long hitbox on landing which causes knockdown, but it only takes effect if this attack has hit a grounded opponent before landing.}} | |active={{Tooltip | text=X| hovertext=Active until landing.
Multi-hit. 2 xN
Has a 2f-long hitbox on landing which causes knockdown, but it only takes effect if this attack has hit a grounded opponent before landing.}} | ||
|recovery={{Tooltip | text=15| hovertext=Landing recovery.
17 if counting the landing hitbox.}} | |recovery={{Tooltip | text=15| hovertext=Landing recovery.
17 if counting the landing hitbox.}} | ||
| Line 1,166: | Line 1,307: | ||
|invuln= | |invuln= | ||
|description= Followup divekick. Functions the same as the grounded version, but will often hit in strange ways due to the variable height of airborne opponents. | |description= Followup divekick. Functions the same as the grounded version, but will often hit in strange ways due to the variable height of airborne opponents. | ||
}} | }} | ||
{{AttackData-MB | {{AttackData-MB | ||
| Line 1,182: | Line 1,317: | ||
|cancel= | |cancel= | ||
|guard=LHA | |guard=LHA | ||
|startup= | |startup=10 | ||
|active=5 | |active=5 | ||
|recovery={{Tooltip | text=12| hovertext=Landing recovery.}} | |recovery={{Tooltip | text=12| hovertext=Landing recovery.}} | ||
|frameAdv= | |frameAdv= | ||
|invuln= | |invuln= | ||
|description= Airborne version of 623B. | |description= Airborne version of 623B. No cancel options and high landing recovery. | ||
Can be used as a source of meterless burst damage to end a combo with in the air, but it can be difficult to get all of the hits to connect, often resulting in less damage than desired. | |||
}} | }} | ||
{{AttackData-MB | {{AttackData-MB | ||
| Line 1,198: | Line 1,335: | ||
|cancel= | |cancel= | ||
|guard=LHA | |guard=LHA | ||
|startup=1+ | |startup=1+2 | ||
|active=5 | |active=5 | ||
|recovery={{Tooltip | text=12| hovertext=Landing recovery.}} | |recovery={{Tooltip | text=12| hovertext=Landing recovery.}} | ||
| Line 1,210: | Line 1,347: | ||
{{MoveData | {{MoveData | ||
|image=MBFPCielj214AB.png | |image=MBFPCielj214AB.png | ||
|caption=A/B | |||
|image2=MBFPCielj214C.png | |image2=MBFPCielj214C.png | ||
|caption2=EX | |||
|name=Virgin Pain (Air) <br>(EX: Oriflame Concert) | |name=Virgin Pain (Air) <br>(EX: Oriflame Concert) | ||
|input=j.214A/B/C | |input=j.214A/B/C | ||
| Line 1,223: | Line 1,362: | ||
|cancel=-EX- | |cancel=-EX- | ||
|guard=LHA | |guard=LHA | ||
|startup= | |startup=16 | ||
|active=X | |active=X | ||
|recovery={{Tooltip | text=18| hovertext=Landing recovery.}} | |recovery={{Tooltip | text=18| hovertext=Landing recovery.}} | ||
|frameAdv= | |frameAdv= | ||
|invuln= | |invuln= | ||
|description=Airborne version of F-PCiel's missiles. j.214A fires at a downward angle similar to 214B, while j.214B fires at a shallower angle which covers more horizontal distance. | |description= Airborne version of F-PCiel's missiles. j.214A fires at a downward angle similar to 214B, while j.214B fires at a shallower angle which covers more horizontal distance. | ||
}} | }} | ||
{{AttackData-MB | {{AttackData-MB | ||
| Line 1,239: | Line 1,378: | ||
|cancel= | |cancel= | ||
|guard=LHA | |guard=LHA | ||
|startup=3+ | |startup=3+2 | ||
|active=X | |active=X | ||
|recovery={{Tooltip | text=15| hovertext=Landing recovery.}} | |recovery={{Tooltip | text=15| hovertext=Landing recovery.}} | ||
|frameAdv= | |frameAdv= | ||
|invuln= | |invuln= | ||
|description= | |description= Air EX missile. Shoots 13 aerial missiles, and deals surprisingly high damage, making it a good way to close out rounds while airborne. | ||
}} | }} | ||
}} | }} | ||
| Line 1,268: | Line 1,407: | ||
|frameAdv=-12 | |frameAdv=-12 | ||
|invuln=Full 1-30 | |invuln=Full 1-30 | ||
|description= | |description=PCiel rushes in with the Seventh Holy Scripture. On hit, this finishes with a Rapid Stake-like attack which knocks the opponent down but resets PCiel's position to midscreen. The high damage and long, unburstable animation makes this a practical and stylish way to close out a game-winning round when in MAX. | ||
Fully invincible well beyond startup, making it F-PCiel's only true reversal. | |||
}} | }} | ||
}} | }} | ||
| Line 1,316: | Line 1,457: | ||
|frameAdv= | |frameAdv= | ||
|invuln=Full | |invuln=Full | ||
|description=Fullscreen-type Last Arc that is instant and goes into a cutscene on hit. | |description=Fullscreen-type Last Arc that is instant and goes into a cutscene on hit. PCiel launches the opponent into the sky and summons a 99-hit lightning strike. Donates a lot of meter. | ||
}} | }} | ||
}} | }} | ||
| Line 1,326: | Line 1,467: | ||
[[Category:Melty Blood Actress Again Current Code]] | [[Category:Melty Blood Actress Again Current Code]] | ||
[[Category: | [[Category:Powered Ciel]] | ||
Latest revision as of 16:43, 25 June 2024
Additional Resources
- F-P.Ciel Match Video Database
- OnionLust's Combo Doc (WIP)
- OnionLust's Oki Doc
- TexasTim's F-PCiel Video Guides Playlist. (Disclaimer: Many of TexasTim's routes are more CMV style combos with impractical execution or other significant downsides such as generating large amounts of meter for the opponent. Players interested in more practical or entry-level combos may prefer to learn the routes listed in the combo section further below.)
- m's matchup chart (2024)
Overview
|
|
|
| Pros | Cons |
|
|
Notable Players
| Name | Color | Region | Common Venues | Status | Details |
|---|---|---|---|---|---|
| Hirohiro (ひろひろ) | Japan | Play Spot BIG ONE 2nd | Inactive | Formerly the most prolific arcade F-PCiel main. Very aerial neutral with a focus on proactively putting out large, low commitment hitboxes to control space. Tends to stick with simple, reliable combo routes. Has a remarkable talent for finding gold air throws. | |
| Kouki (コウキ) | Japan | Play Spot BIG ONE 2nd | Active | C-Arc legend with a surprisingly good pocket F-PCiel. Highly aggressive, always looking to force mixups in neutral and bully opponents in close range scrambles. The most optimal F-PCiel by a considerable margin in terms of combos. | |
| m | Europe | Netplay | Inactive | The top F-PCiel outside of Japan. Defensive, grounded neutral gameplan focused on controlling the midscreen and intercepting approaches. Practical combo selection, good meter management, and a robust okizeme flowchart designed to minimize risk. As seen on Will it Kill. | |
| Sunohara (すのはら) | Japan | A-Cho | Inactive | A very old school PCiel player who has tri-mained all three PCiel moons since she was added to the game in version 1.05. Plays a balanced, grounded neutral game, combining zoning with aggression. Does some unique 623AA>2C extensions in midscreen combos. | |
| TSA | Japan | A-Cho | Inactive | C-Kohaku specialist with many strong secondaries, including F-PCiel. Likes to approach from the air. | |
| Wau (わう) | Japan | Port 24 Yagoto | Active | The up and coming arcade F-PCiel main of the modern era, regularly found at Port 24 freeplays on Yume's channel. Confident and aggressive, with consistent hitconfirms and very good pressure. Random colour user. | |
| Zakuro (ザクロ) | Japan | Game Fuji Ichikawa | Inactive | A player with very creative okizeme, showcasing the full variety of setups available to the character. |
General Gameplan
F-PCiel is a slow, somewhat technical zoner, with a high reliance on good positioning and half-circle inputs. She excels at controlling space with her infamous Grand Zappa rock projectile, bullying opponents on the ground with an array of incredible pokes, and shooting them out of the sky with her stellar antiairs. Once she has her opponent pinned down, she can easily beat them into submission with her suffocating okizeme and pressure.
F-PCiel's main grounded pokes are 5B, 2C and 236A, which allow her to outspace the vast majority of the cast. If an opponent approaches her from the air, she can defend herself with 2B, her 623X series, or a well-spaced rising j.C. She also possesses a highly potent fireball style projectile in 214A, and strong jump-in normals in j.B and j.C. On top of all of this, her 624B, the notorious rock, is one of the most versatile and oppressive projectiles in the game, singlehandedly allowing her to dictate the pace of neutral in most matchups.
After securing a knockdown, F-PCiel can pull a 624B rock before attacking to greatly restrict her opponent's defensive options, forcing them to defend against her strong overheads like j.A and 3[B]. During pressure, she can easily obtain frame advantage with plus on block moves like 2A, 236[A], and 624B. Her offense is incredibly difficult to disrespect, and she excels at abusing overly cautious defense with her devastating throw.
To somewhat balance all of this, F-PCiel can struggle somewhat when knocked down in the corner, having fairly low HP and lacking reliable reversals outside of system mechanics. Fortunately, her toolkit synergizes very well with her Full Moon system mechanics, with great options such as 623A out of shield and good pokes to challenge with after EX Guard. Her high meter gain also grants her a fearsome comeback factor, able to easily force herself into MAX to turn the tide of a losing round with Initiative Heat or Circuit Spark.
While an unconventional character by Melty Blood standards due to her limited movement options in the air, F-PCiel is incredibly strong, usually occupying a spot around the top 10 in modern tier lists. Her flaws are significant compared to most other top tiers, but her extreme strengths more than make up for them; in the hands of a skilled player, F-PCiel can feel truly overwhelming to play against. A strong F-PCiel's opponents will find themselves frustrated in neutral, and pulverized into dust in the corner.
Neutral
Long range
624B: Rocks are generally safe to pull at long range. Can be played around aggressively or defensively, to hold your ground or to claim large amounts of space and safely approach.
214A: Quickly and effectively denies grounded approaches, and gives large frame advantage on block if you dash in after it. Use this to force opponents to either jump or shield.
Mid range
624B: Rocks are still strong here, but are a large frame commitment vulnerable to aggressive approaches. Useful against passive, conditioned opponents or as part of a mixup with her other midrange tools.
5B: Very big 8f button, allows F-PCiel to easily outpoke most of the cast. Somewhat difficult to whiff punish, but susceptible to being low profiled.
Dash 5B: Surprisingly fast and long range approach option. Useful for catching passive opponents waiting to bait and whiff punish something else. Good pressure starter.
236A: Extremely strong and fast tool to check grounded opponents and disrupt zoning at mid range. Useful for discouraging grounded aggression as it beats almost anything on the ground and is generally only weak to air approaches.
236[A]: Slower, larger version of 236A. Good in certain situations, but generally not as useful as 236A due to the higher frame cost. Very high reward if it hits near the corner.
214A: Similar in application to 236A, but a little safer in exchange for being slower and less rewarding on non-counterhit. Cannot be whiff punished from the ground, unlike 236A. Good at forcing opponents into the air or trading with other projectiles.
623A: Quickly puts you into an aggressive position in the air, while also acting similarly to a conventional j.9A check against aerial approaches due to its low commitment.
Close range
2A: Big 2A. F-PCiel's fastest move on the ground. Good in most situations where it can reach the opponent, and goes into anything you want on hit or block.
5B: 5B. Still a very good button to press at close range if 2A won't reach.
2C: Higher risk, lower reward version of 5B. Slightly shorter, but is faster, cannot be low profiled, and lacks a hurtbox until active. Very unsafe on whiff.
623A: Antiair/scramble move. Relatively safe to whiff, making it generally a good option to use if you feel scared.
2B: Low risk antiair and counterpoke. Strong hitbox, high active frames, low recovery. Very safe defensive button to check a lot of options without giving up your current position like 623A does.
In the air
j.C: Very large, very disjointed air-to-air, with a jump-in crossup hitbox. Somewhat slow, so it is more effective the earlier you press it. The disjoint extends upwards, making it easy for grounded opponents to antiair at most spacings.
j.B: Deep, disjointed jump-in. Beats most antiairs when spaced, but is vulnerable to antiair shield due to PCiel's inability to jump out of air normals.
j.A: Very fast, very active close range button. Good in aerial scrambles and easily confirmed on non-counterhit with j.236AA.
Airthrow: High risk, high reward callout against opponents looking to exploit PCiel's lack of cancel options on block in the air. Feels amazing to land, but pretty unsafe.
624B>j.B: A good way to attack the ground from the air while staying safe. Useful to pin down aggressive grounded movement and gain solid momentum from the frame advantage.
j.214X: A good way to protect your landings if your opponent is seeking to chase down your air movement. Its high recovery is easy to exploit if the opponent is looking for it, however.
j.236AA: A divekick, kind of. Not very good due to the high landing recovery, but can sometimes be used as an escape option if all other movement options are exhausted.
Pressure
5B>6B>624B: Simple, strong pressure sequence which can be looped into itself indefinitely in the corner. 624B is +4 on block at minimum, and 5B and 6B move forward, allowing the 624B to connect in an airtight string against crouching opponents. Weak to EX guard.
Throw: Extremely rewarding throw. Good to structure your pressure around due to the high risk of many defensive actions that beat throw.
2A/5A: +2 and +3 on block respectively. Fast, low hitting A normals. Good for setting up tick throws and catching people who stand tech.
3[B]: Relatively fast overhead. Forces a high/low mixup at close range, but generally ends pressure if blocked.
236[A]: +13 on block. Large, slow, and unshieldable. One of F-PCiel's highest damage starters in the corner. The frame advantage makes it a useful way to reset pressure after pushing yourself out. Also useful as a highly rewarding callout for many defensive options such as jump or shield.
624A: Sometimes useful for punishing low mashes capable of poking underneath 624B. Forces opponents into pre-block from very far away, so it can be used to prevent people from holding upback.
5C: Low invuln move which combos into 236[A] on counterhit for very high damage in the corner. Can be used in throw mixup scenarios as a high reward way to beat low mash/low shield.
Okizeme
Mixup options:
High: 3[B], falling j.A, late airdash j.A.
Low: 3B half charge>2C, empty jump 2A, late airdash j.6C whiff>2A.
Throw: Throw.
Setups (236A Ender)
624[B]: After 236A, pull a charged rock. The rock will hit with a slight delay, leaving a large window of ambiguity where you can either strike, throw, jump, or do nothing. Meaty 2A into a 3B mixup will be airtight, since the rock will hit at the timing between 2A and 3B.
Delay 624B: After 236A, walk backwards slightly or whiff 5A then pull an uncharged rock. Usually done after a rock loop with too few reps for 624[B] to connect afterwards. The rock will hit earlier than it would uncharged, meaning anti-meaty options such as wakeup shield or bunker are stronger and require more active counterplay.
624B>j.B: After an uncharged 624B setup, jump forwards and hit the rock with j.B. Allows for a very safe meaty as you do not make contact with the enemy yourself. Puts opponents into a lot of blockstun, but certain options within this setup can lose to fuzzy 5A mash.
624A>624A: After 236A, whiff one 624A followed by another 624A. Another safe meaty option, but with less blockstun, allowing you to threaten throw afterwards.
236C Ender Setup
624B: After 236C, pull an uncharged rock. Similar to a normal uncharged 624B setup, but a little tighter due to 236C's weaker knockdown compared to 236A.
Defense
Patience: Recommended. PCiel's low health and large hitstun hurtboxes make it very punishing for her to be hit in the corner, so the risk/reward on many defensive actions is skewed heavily against her.
EX Guard: As a Full moon, F-PCiel has access to EX Guard. Very useful to get into the habit of using, as it pushes opponents away and creates openings in their pressure with essentially no opportunity cost.
j.7>sdj9: Despite PCiel's high jump startup, upback is still a reliable defensive option in many scenarios, and her super double jump is one of her few movement options which covers a similar distance to the rest of the cast, allowing her to return to midscreen with relative safety.
Shield: Arguably the character's most reliable defensive option due to her ability to cancel it into 623A, which, unlike shield counter, is inescapable once the shield has been triggered. PCiel's strong shield makes it rewarding to wait for options that can be shielded on reaction, or as a challenge to attempts to enforce frame advantage.
Bunker: Good, long range bunker. Can be used to escape from multi-hitting pressure reset moves, or as a lower reward, slightly lower risk alternative to shield.
Backdash: Surprisingly good backdash. Very strong for escaping midscreen pressure, but has fairly high recovery, making it vulnerable in the corner.
2A: 4f low mash. Good for disrespecting neutral or +1 frame advantage against characters with 5f A normals, and as a relatively safe way to check dashes.
2C: 6f sweep. High risk, medium reward. Extremely fast for its range, allowing PCiel to challenge opponents in many situations they may not typically expect. Very good for forcing trades due to its lack of a hurtbox on startup. Also very unsafe on whiff, often resulting in full crouching grounded punishes.
623A: 5f bufferable move. Can be a good defensive tool in many situations due to the fast startup and very strong hitbox, and is relatively safe on whiff or block.
623C: 1f EX move that sends you into the sky. Very good at disrespecting gaps in pressure, but has a high cost.
236C: Long range EX move with some invuln in the middle, allowing it to go through projectiles sometimes. Not very reliable, and extremely unsafe if blocked.
Combos
| Combo Notation Help | |
|---|---|
| Disclaimer: Combos are written by various writers, so the actual notation used in pages can differ from the standard one. | |
| X > Y | X input is cancelled into Y. |
| X > delay Y | Must wait for a short period before cancelling X input into Y. |
| X, Y | X input is linked into Y, meaning Y is done after X's recovery period. |
| X+Y | Buttons X and Y must be input simultaneously. |
| X/Y | Either the X or Y input can be used. |
| X~Y | This notation has two meanings.
|
| X(w) | X input must not hit the opponent (Whiff). |
| j.X | X input is done in the air, implies a jump/jump cancel if the previous move was done from the ground. Applies to all air chain sections:
|
| sj.X | X input is done after a super jump. Notated as sj8.X and sj9.X for neutral and forward super jumps respectively. |
| dj.X | X input is done after a double jump. |
| sdj.X | X input is done after a double super jump. |
| tk.X | Stands for Tiger Knee. X motion must be buffered before jumping, inputting the move as close to the ground as possible. (ex. tk.236A) |
| (X) | X is optional. Typically the combo will be easier if omitted. |
| [X] | Input X is held down. Also referred to as Blowback Edge (BE). Depending on the character, this can indicate that this button is held down and not released until indicated by the release notation. |
| ]X[ | Input X is released. Will only appear if a button is previously held down. This type of input is referred to as Negative Edge. |
| {X} | Button X should only be held down briefly to get a partially charged version instead of the fully charged one. |
| X(N) | Attack "X" should only hit N times. |
| (XYZ)xN | XYZ string must be performed N times. Combos using this notation are usually referred to as loops. |
| (XYZ^) | A pre-existing combo labelled XYZ is inserted here for shortening purposes. |
| CH | The first attack must be a Counter Hit. |
| Air CH | The first attack must be a Counter Hit on an airborne opponent. |
| 66 | Performs a ground forward dash. |
| j.66 | Performs an aerial forward dash, used as a cancel for certain characters' air strings. |
| IAD/IABD | Performs an Instant AirDash. |
| AT | Performs an Air Throw. (j.6/4A+D) |
| IH | Performs an Initiative Heat. |
| AD | Performs an Arc Drive. |
| AAD | Performs an Another Arc Drive. |
The below combos are intended primarily as a starting resource for beginner F-PCiel players. I would encourage players interested in learning F-PCiel to think of her combos less as a strict series of inputs from start to finish and more like a series of individual chunks that can be fit together depending on the situation. F-PCiel's combo routes are very flexible, and the ability to adjust them depending on situation will come with experience and watching a lot of Hirohiro and Kouki match footage. Good luck!
Normal Combos
Corner Combos
Move Descriptions
| Frame Data Help | |
|---|---|
| Header | Tooltip |
| Move Box Colors |
Light gray = Collision Box (A move lacking one means it can go through the opponent's own collision box). |
| Damage | Base damage done by this attack.
(X) denotes combined and scaled damage tested against standing V. Sion. |
| Red Damage | Damage done to the recoverable red health bar by this attack. The values are inherently scaled and tested against standing V. Sion.
(X) denotes combined damage. |
| Proration | The correction value set by this attack and the way it modifies the scaling during a string. See this page for more details.
X% (O) means X% Overrides the previous correction value in a combo if X is of a lower percentage. |
| Circuit | Meter gained by this attack on hit.
(X%) denotes combined meter gain. |
| Cancel | Actions this move can be cancelled into.
SE = Self cancelable. |
| Guard | The way this move must be blocked.
L = Can block crouching |
| Startup | Amount of frames that must pass prior to reaching the active frames. Also referred to as "True Startup". |
| Active | The amount of frames that this move will have a hitbox. (x) denotes frame gaps where there are no hitboxes is present. Due to varied blockstuns, (x) frames are difficult to use to determine punish windows. Generally the larger the numbers, the more time you have to punish. |
| Recovery | Frames that this move has after the active frames if not canceled. The character goes into one frame where they can block but not act afterwards, which is not counted here. |
| Advantage | The difference in frames where you can act before your opponent when this move is blocked (assuming the move isn't canceled and the first active frame is blocked). If the opponent uses a move with startup that is at least 2 frames less than this move's negative advantage, it will result in the opponent hitting that move. |
| Invul | Lists any defensive properties this move has.
X y~z denotes X property happening between the y to z frames of the animations. If no frames are noted, it means the invincibility lasts through the entire move. Invicibility:
Hurtbox-Based Properties:
Miscellaneous Properties
|
Normal Moves
Standing Normals
5A
5B
5B
5B~B |
|---|
5C
Named 'Idol Kick' in the game's files. Named 'Idol Kick' in the game's files.
|
|---|
Crouching Normals
2A
2B
2C
Rich white girl sweep. Rich white girl sweep.
|
|---|
Jumping Normals
Notes:
- PCiel's air normals cannot be canceled into other air normals, double jump, air dashes or air throw. They can still be Special/EX canceled on hit or block, however.
- j.A does not recover in midair, P.Ciel must land before recovering if j.A isn't canceled.
- If PCiel's j.B, j.C, or j.6C connect with a 624B rock's active frames, she immediately enters a completely neutral state and can take any action, including blocking.
j.A
j.B
j.C
Command Normals
3B
3B
3[B] |
|---|
6B
3C
j.6C
Universal Mechanics
Ground Throw
Ground Throw
6/4A+D |
|---|
Air Throw
Air Throw
j.6/4A+D |
|---|
Shield Counter
Shield Counter
236D after a successful Shield (Air OK) |
|---|
Shield Bunker
Shield Bunker
214D in neutral or blockstun |
|---|
Blood Heat
Blood Heat
A+B+C during MAX |
|---|
Circuit Spark
Circuit Spark
A+B+C during hitstun/blockstun at MAX |
|---|
Special Moves
Grounded Specials
236X
Rapid Stake 236A/[A]/B/[B]/C A A [A] [A] B B [B] [B] EX EX
|
|---|
623X
A A 623A~X followup 623A~X followup B B EX EX
|
|---|
214X
A A B B EX EX
|
|---|
63214X
A A A followup A followup B B EX EX
|
|---|
Aerial Specials
j.236X
A A j.236A~X followup j.236A~X followup B/EX B/EX
|
|---|
j.214X
Virgin Pain (Air) (EX: Oriflame Concert) j.214A/B/C A/B A/B EX EX
|
|---|
Arc Drive
Seventh Holy Scripture - Impeachment of Original Sin
41236C during Max/Heat |
|---|
Another Arc Drive
Seventh Holy Scripture - Saint's Burial
41236C during Blood Heat |
|---|
Last Arc
Numeral Secret Crest - Heavenly Nest
Grounded EX Shield during Blood Heat |
|---|
