|
|
| Line 47: |
Line 47: |
| is a valid choice after getting pushed out as well. | | is a valid choice after getting pushed out as well. |
|
| |
|
| After establishing respect for your blockstring, it's time for grabs. Assuming Kohaku starts at point blank, 2AA gap 63214C and 2A gap 2A gap 63214C will net you a command grab. Depending on the character other point blank strings that setup into command grab threat without any walking forward, such as 2A gap 5B gap command grab, are possible. At 5B and 2B range, 6563214C (IE, finishing the command grab input less than 12~ frames after a dash input) will give you the fastest possible command grab. Command grabs are untechable, and F Kohaku's can net around 3.5k damage assuming you get the just frame [63214c xx just frame 5c j.BC j.BC AT]. | | After establishing respect for your blockstring, it's time for grabs. Assuming Kohaku starts at point blank, 2AA gap 63214C and 2A gap 2A gap 63214C will net you a command grab. Depending on the character other point blank strings that setup into command grab threat without any walking forward, such as 2A gap 5B gap command grab, are possible. At 5B and 2B range, 6563214C (IE, finishing the command grab input less than 12~ frames after a dash input) will give you the fastest possible command grab. Command grabs are untechable, and F Kohaku's can net around 3.9k damage assuming you get the just frame. |
|
| |
|
| Her ground normals have good priority, so for example doing a 5B after a blocked 5B can work out well, since it creates a frametrap. If you end your blockstring in 2C, then either do 236A, a partially charged 236A (frametrap / anti jumpout), or an IAD reset. | | Her ground normals have good priority, so for example doing a 5B after a blocked 5B can work out well, since it creates a frametrap. If you end your blockstring in 2C, then either do 236A, a partially charged 236A (frametrap / anti jumpout), or an IAD reset. |
Character Page Progress
Additional Resources
F-Kohaku Match Video Database
Melty Bits: F-Kohaku
Players to watch/ask
JP:
- Text goes here after asterisk
- Text goes here after asterisk
NA:
- Text goes here after asterisk
- Text goes here after asterisk
Overview
Strengths / Weaknesses
| Strengths
|
- Text goes here after asterisk
- Text goes here after asterisk
|
| Weaknesses
|
- Place text here be sure to use "*" for each point*
|
General Gameplan
F-Kohaku is primarily a zoning character. Her strong normals allow her to win most neutral situations. Her 236 series can be used to keep the enemy scared to jump- 236A is suitable to catch jump startup and 236B is air-unblockable. While mistiming a 236X is certain to get you hurt, a 236B counterhit can lead into massive (5k meterless) damage, so it's worth learning how to use it in neutral.
Once she gets a hit in, if you're close enough it's usually best to go for launch into aircombo. If you dash after this you can do a meaty 2A / 5B / far 2C, or mix it up with command grab.
If you're too far away to combo into 3C, go for okizeme: either a plant setup or IAD crossup.
Try saving your meter for the metered corner combo, IH combo, or EX cancels to make whiffed specials safe(r). Throwing a cactus after a knockdown near the corner can be good too.
Neutral
From full screen you can shoot a projectile with 5[C]. It's kinda slow, but can surprise your opponent. 236[A] has decent range, but be careful not to charge it if the opponent is too close. It's usually better to get to j.B range however, since that's where F-Kohaku excels.
At j.B range, use j.B in the air, or 2B when on the ground. If you're further away you can anti air with 236B. If you're closer than j.B, j.A is a better choice since j.B will often lose to faster normals. On the ground you can space from half screen distance with 236A, or with 5B and 5C when you're closer. 2C should not be thrown out unless you're sure it won't whiff.
Pressure
Your basic pressure string is 2A(A) 5B (2B) 4B.
Frame traps are possible in between all these moves. If this is entirely blocked, you'll be quite far from the opponent- but this is fine since you'll be able to keep them from going anywhere with 2C, 236A/{A}/[A], and 236B. If they hesitate in the face of these threats you're all good to do a Ground or Air dash reset. After their initial hesitation, some opponents may react to Kohaku's somewhat telegraphed dashes and be ready with 2A/5A when you enter that range. This can be countered with, for example, a preemptive 5B as you move forward on the ground. In addition, Dash > IAD back > j.B can really throw off their abare timing, and possibly get you a knockdown via j.B 5C 236A. Simply letting them cook and reacting to their escape option (via neutral jump drift j.B, etc)
is a valid choice after getting pushed out as well.
After establishing respect for your blockstring, it's time for grabs. Assuming Kohaku starts at point blank, 2AA gap 63214C and 2A gap 2A gap 63214C will net you a command grab. Depending on the character other point blank strings that setup into command grab threat without any walking forward, such as 2A gap 5B gap command grab, are possible. At 5B and 2B range, 6563214C (IE, finishing the command grab input less than 12~ frames after a dash input) will give you the fastest possible command grab. Command grabs are untechable, and F Kohaku's can net around 3.9k damage assuming you get the just frame.
Her ground normals have good priority, so for example doing a 5B after a blocked 5B can work out well, since it creates a frametrap. If you end your blockstring in 2C, then either do 236A, a partially charged 236A (frametrap / anti jumpout), or an IAD reset.
TL;DR Strike throw and being able to take advantage of your great neutral after being pushed out.
Okizeme
At Midscreen, a Three-way mixup (sandoori) is possible after 236D/Air CH 2C 236A, with different side-switch possibilities from forward jump and IAD depending on how far the opponent is from you when hit.
In general, if the opponent is hit by 2C 236A at around 5B range, you'll switch sides after a forward jump, and if hit at around 5c range you'll land sameside. During said forward jump an airdash backwards j.C would catch their attempts to block or shield low, but would lose to fuzzy 5a mash. At 6A+D/6E grab range and 5A range, replace forward jump with neutral jump forward drift for a similar effect.
In addition to the above, at ~5c range You could also do backwards jump > IAD forward to add ambiguity to your landing at slightly further ranges, though naturally you can't IAD back. Meaty 2A is possible from all of these jump variants. For characters with < 50 frame front wakeups (link) you'll want to ensure that 2C 236A hits them high enough to give you time to recover from 236A.
Defense
place text here*
Combos
| Combo Notation Help
|
Disclaimer: Combos are written by various writers, so the actual notation used in pages can differ from the standard one.
For more information, see Glossary and Controls.
|
| X > Y
|
X input is cancelled into Y.
|
| X > delay Y
|
Must wait for a short period before cancelling X input into Y.
|
| X, Y
|
X input is linked into Y, meaning Y is done after X's recovery period.
|
| X+Y
|
Buttons X and Y must be input simultaneously.
|
| X/Y
|
Either the X or Y input can be used.
|
| X~Y
|
This notation has two meanings.
- Use attack X with Y follow-up input.
- Input X then within a few frames, input Y. Usually used for option selects.
|
| X(w)
|
X input must not hit the opponent (Whiff).
|
| j.X
|
X input is done in the air, implies a jump/jump cancel if the previous move was done from the ground.
Applies to all air chain sections:
- Assume a forward jump cancel if no direction is given.
- Air chains such as j.A > j.B > j.C can be shortened to j.ABC.
|
| sj.X
|
X input is done after a super jump. Notated as sj8.X and sj9.X for neutral and forward super jumps respectively.
|
| dj.X
|
X input is done after a double jump.
|
| sdj.X
|
X input is done after a double super jump.
|
| tk.X
|
Stands for Tiger Knee. X motion must be buffered before jumping, inputting the move as close to the ground as possible. (ex. tk.236A)
|
| (X)
|
X is optional. Typically the combo will be easier if omitted.
|
| [X]
|
Input X is held down. Also referred to as Blowback Edge (BE). Depending on the character, this can indicate that this button is held down and not released until indicated by the release notation.
|
| ]X[
|
Input X is released. Will only appear if a button is previously held down. This type of input is referred to as Negative Edge.
|
| {X}
|
Button X should only be held down briefly to get a partially charged version instead of the fully charged one.
|
| X(N)
|
Attack "X" should only hit N times.
|
| (XYZ)xN
|
XYZ string must be performed N times. Combos using this notation are usually referred to as loops.
|
| (XYZ^)
|
A pre-existing combo labelled XYZ is inserted here for shortening purposes.
|
| CH
|
The first attack must be a Counter Hit.
|
| Air CH
|
The first attack must be a Counter Hit on an airborne opponent.
|
| 66
|
Performs a ground forward dash.
|
| j.66
|
Performs an aerial forward dash, used as a cancel for certain characters' air strings.
|
| IAD/IABD
|
Performs an Instant AirDash.
|
| AT
|
Performs an Air Throw. (j.6/4A+D)
|
| IH
|
Performs an Initiative Heat.
|
| AD
|
Performs an Arc Drive.
|
| AAD
|
Performs an Another Arc Drive.
|
Normal Combos
Midscreen BnBs
You can start this combo with the following jump-ins:
- - Crossup j.C
- - Close j.B
Followed by (moves between brackets are optional and/or depend on spacing):
| Condition
|
Notation
|
Damage
vs V.Sion
|
Notes
|
|
| Normal starter, grounded opponent
|
- 2A(AA) > 5B > (2B >) 4B > 2C > 3C > j.BC > (s)dj.(A)BC > AT
|
???
|
???
|
|
| Normal starter, grounded opponent
|
- 2A(AA) > 5B > (2B >) 4B > 2C > 3C > IAD j.B, land j.AAC > sdj.ABC > AT
|
???
|
| |
| Meter Gained: ??? |
Meter Given (vs C-Moon): ??? |
| Harder version (you gain some extra meter) |
|
|
From a low to the ground j.B hit you can do:
| Condition
|
Notation
|
Damage
vs V.Sion
|
Notes
|
|
| Normal starter, grounded opponent
|
|
???
|
???
|
|
Into okizeme or some OTG damage.
Misc. Starters
| Condition
|
Notation
|
Damage
vs V.Sion
|
Notes
|
|
| 63214C starter
|
- 63214C > (sweet spot follow-up) > 2[C] > 3C > j.BC > dj.(A)BC > AT
|
3970
|
| |
| Meter Gained: 75.1% |
Meter Given (vs C-Moon): ??? |
| Outside the corner you will have to dash forward and do a regular 2C > 3C to do the relaunch. |
|
|
| Raw Airthrow starter
|
- Raw AT > j.A(w), land 66 2C > 3C > j.BC > dj.(A)BC > AT
|
3187
|
| |
| Meter Gained: 45.4 |
Meter Given (vs C-Moon): ??? |
| Variations are possible. You can end at 2C to go for okizeme, or follow up with one of the AD / IH combos. |
|
|
| Shield Counter starter
|
- D~236D, 5C > j.BC > dj.(A)BC > AT
|
???
|
| |
| Meter Gained: ??? |
Meter Given (vs C-Moon): ??? |
| Again, variations are possible, this is just the most stable confirm. |
|
|
Metered Combos
Midscreen/Anywhere
- You can use j.236C after (d)j.BC in any of her combos. This will add some extra damage for 100 meter.
- You can airthrow or jump after it, allowing you to do it up to two times in a combo with the right spacing and height.
Corner BnBs
| Condition
|
Notation
|
Damage
vs V.Sion
|
Notes
|
|
Normal starter, grounded opponent
100% meter
|
- (Starter) > 5B > 5C > 236C, 5C > j.BC > dj.(A)BC > AT
|
???
|
???
|
|
Arc Drive Combos
| Condition
|
Notation
|
Damage
vs V.Sion
|
Notes
|
|
Normal starter, grounded opponent
MAX/Heat mode
|
- (anything into 2C/5C) > 236A > AD
|
???
|
| |
| Meter Gained: ??? |
Meter Given (vs C-Moon): ??? |
| Standard AD ender. |
|
|
63214C starter
MAX/Heat mode
|
- 63214C > (whiff follow-up) > AD
|
???
|
???
|
|
Initiative Heat Combos
| Condition
|
Notation
|
Damage
vs V.Sion
|
Notes
|
|
Normal starter, grounded opponent
MAX mode
|
- (anything into 2C/5C) > 236A > IH 2C > 236A > AD
|
???
|
| |
| Meter Gained: ??? |
Meter Given (vs C-Moon): ??? |
| MAX AD ender. |
|
|
Normal starter, grounded opponent
MAX mode
|
- (anything into 2C/5C) > 236A > IH 5C > j.BC > j.236C > dj.BC > j.236C > AT
|
???
|
| |
| Meter Gained: ??? |
Meter Given (vs C-Moon): ??? |
| Double Magical Amber. (requires a high max meter) |
|
|
Move Descriptions
| Frame Data Help
|
| Header
|
Tooltip
|
| Move Box Colors
|
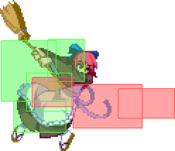
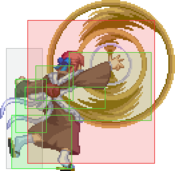
Light gray = Collision Box (A move lacking one means it can go through the opponent's own collision box).
Green: Hurt Boxes.
Red: Hit(/Grab) Boxes.
Yellow: Clash Boxes (When an active hitbox strikes a clash box, the active hitbox stops being active. Multi-hit attacks can beat clash since they will still progress to the next hitbox.)
Magenta: Projectile-reflecting boxes OR Non-hit attack trigger boxes (usually).
Blue: Reflectable Projectile Boxes.
|
| Damage
|
Base damage done by this attack.
(X) denotes combined and scaled damage tested against standing V. Sion.
|
| Red Damage
|
Damage done to the recoverable red health bar by this attack. The values are inherently scaled and tested against standing V. Sion.
(X) denotes combined damage.
|
| Proration
|
The correction value set by this attack and the way it modifies the scaling during a string. See this page for more details.
X% (O) means X% Overrides the previous correction value in a combo if X is of a lower percentage.
X% (M) means the current correction value in a combo will be Multiplied by X%. This can also be referred to as relative proration.
|
| Circuit
|
Meter gained by this attack on hit.
(X%) denotes combined meter gain.
-X% denotes a meter cost.
|
| Cancel
|
Actions this move can be cancelled into.
SE = Self cancelable.
N = Normal cancelable.
SP = Special cancelable.
CH = Cancelable into the next part of the same attack (Chain in case of specials).
EX = EX cancelable.
J = Jump cancelable.
(X) = Cancelable only on hit.
-X- = Cancelable on whiff.
|
| Guard
|
The way this move must be blocked.
L = Can block crouching
H = Can block standing.
A = Can block in the air.
U = Unblockable.
|
| Startup
|
Amount of frames that must pass prior to reaching the active frames. Also referred to as "True Startup".
|
| Active
|
The amount of frames that this move will have a hitbox.
(x) denotes frame gaps where there are no hitboxes is present. Due to varied blockstuns, (x) frames are difficult to use to determine punish windows. Generally the larger the numbers, the more time you have to punish.
X denotes active frames with a duration separate from its origin move's frame data, such as projectile attacks. In this case, the total length of the move is startup+recovery only.
|
| Recovery
|
Frames that this move has after the active frames if not canceled. The character goes into one frame where they can block but not act afterwards, which is not counted here.
|
| Advantage
|
The difference in frames where you can act before your opponent when this move is blocked (assuming the move isn't canceled and the first active frame is blocked).
If the opponent uses a move with startup that is at least 2 frames less than this move's negative advantage, it will result in the opponent hitting that move.
±x~±y denotes a range of possible advantages.
|
| Invul
|
Lists any defensive properties this move has.
X y~z denotes X property happening between the y to z frames of the animations. If no frames are noted, it means the invincibility lasts through the entire move.
Invicibility:
- Strike = Strike invincible.
- Throw = Throw invincible.
Hurtbox-Based Properties:
- Full = No hurtboxes are present.
- High = Upper body lacks a hurtbox.
- Low = Lower body lacks a hurtbox.
Miscellaneous Properties
- Clash = Frames in which clash boxes are active.
- Reflect = Frames in which projectile-reflecting boxes are active.
- Super Armor = Frames in which the character can take hits without going into hit stun.
|
Normal Moves
Standing Normals
|
|
| Damage
|
Red Damage
|
Proration
|
Cancel
|
Guard
|
| 350
|
202
|
78% (O)
|
-SE-, -N-, -SP-, -EX-, (J)
|
LH
|
| First Active
|
Active
|
Recovery
|
Frame Adv
|
Circuit
|
Invuln
|
| 4
|
4
|
5
|
3
|
3.15%
|
-
|
|
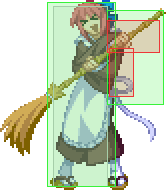
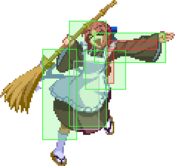
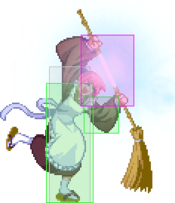
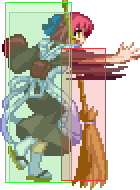
A regular Full moon standing jab. Doesn't reach far, and whiffs on some crouching characters. Does decent damage and can be used a couple times in succession as a combo starter.
|
|
|
|
| Damage
|
Red Damage
|
Proration
|
Cancel
|
Guard
|
| 800
|
505
|
80% (O)
|
N, SP, EX, (J)
|
LH
|
| First Active
|
Active
|
Recovery
|
Frame Adv
|
Circuit
|
Invuln
|
| 6
|
4
|
12
|
-1
|
7.2%
|
-
|
|
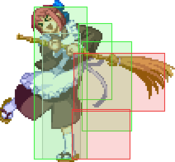
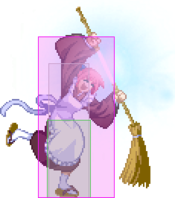
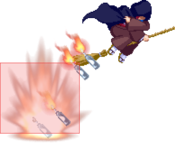
Kohaku sweeps her broom forward. Great poke that moves Kohaku forward a little. Best move for stagger pressure.
|
|
|
|
| 5C
|
Damage
|
Red Damage
|
Proration
|
Cancel
|
Guard
|
| 1200
|
808
|
90% (O)
|
N, SP, EX, (J)
|
LH
|
| First Active
|
Active
|
Recovery
|
Frame Adv
|
Circuit
|
Invuln
|
| 7
|
4
|
14
|
0
|
12.0%
|
-
|
|
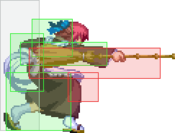
Extends the back of the broom forward. Decent poke and move for staggers. Useful for catching air counterhits or after a shield counter. Also used in corner combos to cancel into 236C.
|
| 5{C}
|
Damage
|
Red Damage
|
Proration
|
Cancel
|
Guard
|
| 1600
|
1010
|
90% (O)
|
N, SP, EX, (J)
|
LH
|
| First Active
|
Active
|
Recovery
|
Frame Adv
|
Circuit
|
Invuln
|
| 18 ~ 27
|
5
|
14
|
-1
|
14.4%
|
-
|
|
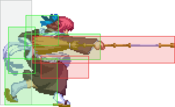
The partially charged version of 5C has a lot futher range despite looking the same. Use this deception to your advantage. Heavy damage on hit and good to use in blockstrings. Charge for 15 frames minimum
|
| 5[C]
|
Damage
|
Red Damage
|
Proration
|
Cancel
|
Guard
|
| 1500
|
1010
|
70% (O)
|
-SP-, -EX-
|
LHA
|
| First Active
|
Active
|
Recovery
|
Frame Adv
|
Circuit
|
Invuln
|
| 29
|
X
|
30
|
-2
|
13.5%
|
-
|
|
A fully charged 5C will fire out a katana that travels horizontally full screen. This move has its own special cancel properties where you can IH/EX or special cancel it to her 236x series even on whiff. Works well as a tech punish or simple guard bar damage after a wallslam. Good followup if you full screen an EX counter. If they don't tech or tech the wrong way, they get hit. Be careful with it, since it is deflectable. Can be used in neutral when the opponent is turtling, as it does good chip damage and gains you a lot of meter. Charge for 25 frames minimum
|
|
Crouching Normals
|
|
| Damage
|
Red Damage
|
Proration
|
Cancel
|
Guard
|
| 350
|
202
|
75% (O)
|
-SE-, -N-, -SP-, -EX-, (J)
|
L
|
| First Active
|
Active
|
Recovery
|
Frame Adv
|
Circuit
|
Invuln
|
| 3
|
4
|
6
|
2
|
3.15%
|
-
|
|
Her fastest normal and typical combo starter. Hits fairly high, short range, and leaves you at +2 frame advantage on block.
|
|
|
|
| Damage
|
Red Damage
|
Proration
|
Cancel
|
Guard
|
| 700
|
404
|
65% (O)
|
N, SP, EX, (J)
|
LH
|
| First Active
|
Active
|
Recovery
|
Frame Adv
|
Circuit
|
Invuln
|
| 9
|
4
|
14
|
-3
|
6.3%
|
Clash 7-13
|
|
Kohaku sweeps upwards her with her broom, hitting opponents above and in front of her. A good anti-air normal due to it's height. Comes with clash frames that come out before the actual hit. Decent poke. Can cancel into 214 series on hit, block, and clash. 2B->214A will catch people whose moves beat out your clash frames.
|
|
|
|
| 2C
|
Damage
|
Red Damage
|
Proration
|
Cancel
|
Guard
|
| 1100
|
707
|
60% (O)
|
N, SP, EX, (J)
|
L
|
| First Active
|
Active
|
Recovery
|
Frame Adv
|
Circuit
|
Invuln
|
| 9
|
4
|
24
|
-10
|
6.3%
|
-
|
|
Low broom sweep with incredible range. This move is great for catching jumpouts. When blocked, it's wise to follow up with a 236A.
|
| 2[C]
|
Damage
|
Red Damage
|
Proration
|
Cancel
|
Guard
|
| 1400
|
1010
|
90% (M)
|
N, SP, EX, (J)
|
L
|
| First Active
|
Active
|
Recovery
|
Frame Adv
|
Circuit
|
Invuln
|
| 21
|
5
|
24
|
-11
|
10.8%
|
-
|
|
Can be charged/half-charged for stagger pressure.
|
|
Aerial Normals
|
|
| Damage
|
Red Damage
|
Proration
|
Cancel
|
Guard
|
| 300
|
202
|
75% (O)
|
SE, N, SP, EX, J
|
HA
|
| First Active
|
Active
|
Recovery
|
Frame Adv
|
Circuit
|
Invuln
|
| 4
|
4
|
10
|
-
|
3.15%
|
-
|
|
Flying jab thats actually an overhead, and useful for this on large characters such as Ries. Not the best anti-air, but good in some combos for that little extra damage/meter. Great for IAD canceling.
|
|
|
|
| Damage
|
Red Damage
|
Proration
|
Cancel
|
Guard
|
| 650
|
404
|
90% (O)
|
N, SP, EX, J
|
HA
|
| First Active
|
Active
|
Recovery
|
Frame Adv
|
Circuit
|
Invuln
|
| 7
|
4
|
-
|
-
|
4.5%
|
-
|
|
Extends your broom forward in the air. One of your best air-to-air and zoning tools. Has just about the same reach as her JC but will hit faster and in a more upward direction.
|
|
|
|
| j.C
|
Damage
|
Red Damage
|
Proration
|
Cancel
|
Guard
|
| 1000
|
808
|
90% (O)
|
SP, EX, J
|
HA
|
| First Active
|
Active
|
Recovery
|
Frame Adv
|
Circuit
|
Invuln
|
| 9
|
4
|
-
|
-
|
9.0%
|
-
|
|
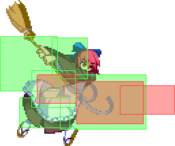
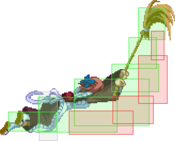
Kohaku sweeps her broom at a down-forward angle, hitting everything in front and below her. Due to the large hitbox you can crossup with this move. Great aerial poke, and her best air-to-ground. Don't overuse it against characters with a good downward jump attack while air to air.
|
| j.[C]
|
Damage
|
Red Damage
|
Proration
|
Cancel
|
Guard
|
| 1300
|
1010
|
80% (O)
|
SP, EX, J
|
HA
|
| First Active
|
Active
|
Recovery
|
Frame Adv
|
Circuit
|
Invuln
|
| 18
|
4
|
-
|
-
|
11.7%
|
-
|
|
Can be charged for extra damage and fake-outs.
|
|
Command Normals
|
|
| Damage
|
Red Damage
|
Proration
|
Cancel
|
Guard
|
| 400, 600 (981)
|
(792)
|
100%, 55% (O)
|
N*, SP, EX, (J)
|
L
|
| First Active
|
Active
|
Recovery
|
Frame Adv
|
Circuit
|
Invuln
|
| 8
|
5 (5) 5
|
14
|
-1
|
3.6%, 5.4% (9.0%)
|
-
|
|
Kohaku attempts to trip the opponent, followed by a second hit. Only really used in combos, not good for poking and blockstrings, as opposed to the version other moons have.
|
|
|
|
| Damage
|
Red Damage
|
Proration
|
Cancel
|
Guard
|
| 1000
|
707
|
70% (O)
|
SP, EX, (J)
|
LH
|
| First Active
|
Active
|
Recovery
|
Frame Adv
|
Circuit
|
Invuln
|
| 10
|
5
|
24
|
-11
|
9.0%
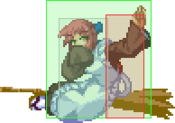
|
Reflect 11-17
|
|
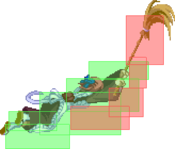
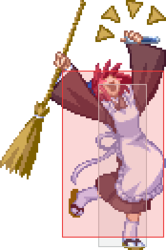
Kohaku uses her broom as a baseball bat to launch the opponent. Used after 2C in close range as a launcher for aircombo. It's EX-cancellable on whiff for some tricks. Can be useful against some vertical fall-ins. This move also reflects most projectiles back to the opponent.
|
|
Universal Mechanics
|
|
| Damage
|
Red Damage
|
Proration
|
Cancel
|
Guard
|
| 1000
|
505
|
100%
|
-
|
U
|
| First Active
|
Active
|
Recovery
|
Frame Adv
|
Circuit
|
Invuln
|
| 2
|
1
|
20
|
-
|
0.0%
|
-
|
|
Syringe hit. Untechable knockdown.
|
|
|
|
| Damage
|
Red Damage
|
Proration
|
Cancel
|
Guard
|
| 1600 (Raw)/1300
|
606
|
30%
|
-
|
U
|
| First Active
|
Active
|
Recovery
|
Frame Adv
|
Circuit
|
Invuln
|
| 1
|
1
|
12
|
-
|
0.0%
|
-
|
|
Ground bounces the opponnent using a 16-ton weight.
|
|
|
|
| Ground
|
Damage
|
Red Damage
|
Proration
|
Cancel
|
Guard
|
| 500 (345)
|
202
|
50%
|
(SP), (EX), (J)
|
LHA
|
| First Active
|
Active
|
Recovery
|
Frame Adv
|
Circuit
|
Invuln
|
| 8
|
4
|
18
|
-4
|
4.5%
|
-
|
|
Same animation as C-Moon 5CC.
|
| Air
|
Damage
|
Red Damage
|
Proration
|
Cancel
|
Guard
|
| 500 (345)
|
202
|
50%
|
-
|
HA
|
| First Active
|
Active
|
Recovery
|
Frame Adv
|
Circuit
|
Invuln
|
| 8
|
4
|
-
|
-
|
4.5%
|
-
|
|
Same animation as j.B.
|
|
|
|
| Bunker
|
Damage
|
Red Damage
|
Proration
|
Cancel
|
Guard
|
| 500
|
202
|
50%
|
-
|
LHA
|
| First Active
|
Active
|
Recovery
|
Frame Adv
|
Circuit
|
Invuln
|
| 25
|
4
|
19
|
-5
|
0.0%
(-50.0% in blockstun)
|
Clash 1-10
|
| (Clash)
|
Damage
|
Red Damage
|
Proration
|
Cancel
|
Guard
|
| 500
|
202
|
50%
|
-
|
LHA
|
| First Active
|
Active
|
Recovery
|
Frame Adv
|
Circuit
|
Invuln
|
| 7
|
4
|
19
|
-5
|
0.0%/-50.0%
|
Strike 1-7
|
|
Flaming battou swipe.
|
|
|
|
| Damage
|
Red Damage
|
Proration
|
Cancel
|
Guard
|
| 100
|
0
|
100%
|
-
|
U
|
| First Active
|
Active
|
Recovery
|
Frame Adv
|
Circuit
|
Invuln
|
| 15
|
7
|
25
|
-
|
uses all
|
Full 1-21
|
|
Decently quick and large hitbox.
|
|
|
|
| Ground
|
Damage
|
Red Damage
|
Proration
|
Cancel
|
Guard
|
| 100
|
0
|
100%
|
-
|
U
|
| First Active
|
Active
|
Recovery
|
Frame Adv
|
Circuit
|
Invuln
|
| 10
|
10
|
20
|
-
|
removes all
|
Full 1-39
|
| Air
|
Damage
|
Red Damage
|
Proration
|
Cancel
|
Guard
|
| 100
|
0
|
100%
|
-
|
U
|
| First Active
|
Active
|
Recovery
|
Frame Adv
|
Circuit
|
Invuln
|
| 11
|
10
|
15
|
-
|
removes all
|
Strike 1-30
|
|
Universal burst mechanic. Unlike Crescent/Full Heat activation, the hitbox and frame data doesn't vary between characters. However, you can be thrown out of this move if you input it in the air.
|
|
Special Moves
Grounded Specials
|
|
| A
|
Damage
|
Red Damage
|
Proration
|
Cancel
|
Guard
|
| 1000
|
808
|
65% (O)
|
-EX-
|
LHA
|
| First Active
|
Active
|
Recovery
|
Frame Adv
|
Circuit
|
Invuln
|
| 10
|
8
|
26
|
-6
|
9.0%
|
-
|
| [A]
|
Damage
|
Red Damage
|
Proration
|
Cancel
|
Guard
|
| 1000
|
808
|
100%
|
-EX-
|
LHA
|
| First Active
|
Active
|
Recovery
|
Frame Adv
|
Circuit
|
Invuln
|
| 21
|
12
|
22
|
-6
|
9.0%
|
-
|
- Kohaku draws her hidden sword and performs a quick strike that unleashes a forcewave. Each version has its own uses, but they're generally used for zoning rather than close combat.
Unleashes a forcewave on the ground. Useful for catching jumpouts when used after a 2C (and safer). Possible to OTG combo after it hits, like with an Arc Drive. The charged version has more range.
|
| B
|
Damage
|
Red Damage
|
Proration
|
Cancel
|
Guard
|
| 1000
|
808
|
80% (O)
|
-EX-
|
LH
|
| First Active
|
Active
|
Recovery
|
Frame Adv
|
Circuit
|
Invuln
|
| 12
|
6
|
33
|
-11
|
9.0%
|
-
|
| [B]
|
Damage
|
Red Damage
|
Proration
|
Cancel
|
Guard
|
| 1000
|
808
|
80% (O)
|
-EX-
|
LH
|
| First Active
|
Active
|
Recovery
|
Frame Adv
|
Circuit
|
Invuln
|
| 24
|
9
|
29
|
-10
|
9.0%
|
-
|
|
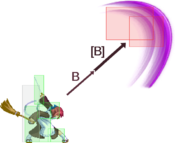
Unleashes a forcewave into the air. Air unblockable, so great for hitting characters that like to jump at you. This is one of Kohaku's best zoning tools. If you land an air counterhit with this, you can dash forward and perform a very damaging combo. The charged version has longer range (starts off higher, completely missing standing VSion). Use sparingly as it's very punishable. Possible to cancel into Cactus if you need extra safety.
|
| EX
|
Damage
|
Red Damage
|
Proration
|
Cancel
|
Guard
|
| 1000
|
808
|
80% (M)
|
-
|
LHA
|
| First Active
|
Active
|
Recovery
|
Frame Adv
|
Circuit
|
Invuln
|
| 6+4
|
16
|
18
|
-6
|
9.0%
|
Full 1-7
|
|
A much faster version that releases a huge wave covering almost the entire stage, and wallslamming on hit. As opposed to 236B, this version can be blocked in the air. Mainly used in corner combos, as you can link 5C after it wallslams. Can also be used after a 5[C] hit for extra damage.
|
|
A/B Counter A/B Counter EX Counter EX Counter
|
| A/B
|
Damage
|
Red Damage
|
Proration
|
Cancel
|
Guard
|
| -
|
-
|
-
|
-
|
-
|
| First Active
|
Active
|
Recovery
|
Frame Adv
|
Circuit
|
Invuln
|
| 2
|
12
|
16
|
-
|
-
|
-
|
| (A Counter)
|
Damage
|
Red Damage
|
Proration
|
Cancel
|
Guard
|
| 1500
|
1010
|
50%
|
-
|
LHA
|
| First Active
|
Active
|
Recovery
|
Frame Adv
|
Circuit
|
Invuln
|
| 13
|
3
|
27
|
3
|
9.0%
|
Full 1-19
|
| (B Counter)
|
Damage
|
Red Damage
|
Proration
|
Cancel
|
Guard
|
| 1500
|
1010
|
50%
|
-
|
LHA
|
| First Active
|
Active
|
Recovery
|
Frame Adv
|
Circuit
|
Invuln
|
| 8
|
3
|
27
|
3
|
9.0%
|
Full 1-14
|
- Kohaku unsheathes her sword for an instant, anticipating an attack. Should anything hit her during this time, she will parry the attack and perform a counterhit. Leaves Kohaku vulnerable if she doesn't get attacked. These counters are generally risky to use, but good against predictable opponents and projectiles.
A: Counters low and mid attacks. Slightly faster than the A version, but Shield Counter is still the better option.
B: Counters high and mid attacks. Has decent startup and the followup isn't guaranteed to hit. Useful against projectiles, but Shield Counter is the better option normally.
|
| EX
|
Damage
|
Red Damage
|
Proration
|
Cancel
|
Guard
|
| -
|
-
|
-
|
-
|
-
|
| First Active
|
Active
|
Recovery
|
Frame Adv
|
Circuit
|
Invuln
|
| 4
|
16
|
12
|
-
|
-100.0%
|
High 5-20
|
| (EX Counter)
|
Damage
|
Red Damage
|
Proration
|
Cancel
|
Guard
|
| 0, 3000 (2640)
|
(2222)
|
50%
|
-
|
U, LHA?
|
| First Active
|
Active
|
Recovery
|
Frame Adv
|
Circuit
|
Invuln
|
| 0
|
1+2 (10) 4
|
31
|
?
|
11.6%
|
Full 1-21
|
|
Counters low, mid and high attacks. Deals a lot of damage and is much faster, but the counter state isn't active until the fifth frame, so it cannot be used as a true reversal. Useful against non-meaty okizeme and predictable pressure. If used at a certain distance to the corner, you can combo off the wallslam with 5C -> aerial for heavy damage.
|
|
|
|
A
(~[X])
|
Damage
|
Red Damage
|
Proration
|
Cancel
|
Guard
|
| 333*N
|
101*N
|
100%
|
-
|
LHA
|
| First Active
|
Active
|
Recovery
|
Frame Adv
|
Circuit
|
Invuln
|
57
(~171)
|
X
|
49
|
-
|
2.7%*N
|
-
|
|
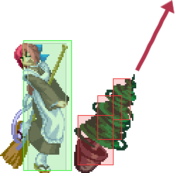
Drop a small spinning tree that will fly diagonally upwards. This plant can be used to combo off a command throw with a whiffed followup if placed in advance. It can also be used for okizeme when you don't have time for 22B or the meter for C. By holding a button, you will automatically keep the plant on the ground up to two seconds. This can cause trouble for characters without projectiles or long range pokes.
|
| B
|
Damage
|
Red Damage
|
Proration
|
Cancel
|
Guard
|
| 280*8 (1724)
|
(802)
|
-4%*8
|
-
|
LHA
|
| First Active
|
Active
|
Recovery
|
Frame Adv
|
Circuit
|
Invuln
|
| 80
|
32
|
53
|
-
|
2.7%*8 (18.3%)
|
-
|
|
Drop a spinning tree that will stay on the ground and hit 8 times. Longer startup than 22A, but doesn't disappear when hit like 22C. Can be used for okizeme, and can be combo'd off.
|
| EX
|
Damage
|
Red Damage
|
Proration
|
Cancel
|
Guard
|
| 500, 250*12 (1986)
|
(1567)
|
-4%*8
|
-
|
LH (1), LHA
|
| First Active
|
Active
|
Recovery
|
Frame Adv
|
Circuit
|
Invuln
|
| 4+23
|
15 (12), 1 (7) 1 (9) x5,
1 (5) 2
|
4+34
|
-
|
-100.0%
|
Full 1-5
|
|
Throw out a cactus that will land on the ground and hit 11 times, slowly moving forward. If the first hit lands in its later active frames, then the subsequent hits are airtight. If it lands too early, there is a considerable gap which can be reversal'd or sometimes even jumped out of. Can be used for corner lockdown or cancelling whiffed forcewaves. Take care though, because if Kohaku takes any damage while the cactus is active, it will disappear. If the cactus hits, you can launch with 3C into aircombo at the end, or command grab them after the last hit.
|
|
|
|
| Damage
|
Red Damage
|
Proration
|
Cancel
|
Guard
|
| 800*4
|
606*4
|
80% (O)
|
-
|
LHA
|
| First Active
|
Active
|
Recovery
|
Frame Adv
|
Circuit
|
Invuln
|
| 3+113
|
X
|
3+46
|
-
|
-150.0%
|
-
|
|
This super costs 150 meter and has long startup. It will summon Johnny the fire-spitting plant. At a certain point during startup it tracks the direction the opponent is at, and will start shooting 6 fireballs in that direction, all of which juggle on hit. Nice to use when you can't get punished for it and have the meter to do so (typically in MAX or Heat). Forces the opponent to jump away or keep blocking for a good period.
|
|
|
|
| Damage
|
Red Damage
|
Proration
|
Cancel
|
Guard
|
| 100
|
50
|
50%
|
-
|
LH
|
| First Active
|
Active
|
Recovery
|
Frame Adv
|
Circuit
|
Invuln
|
| 3+108
|
72
|
3+36
|
-
|
-150.0%
|
-
|
|
Another 150 meter super with decently long startup. Summons a purple plant that will cough out a breath of poisonous gas. If this hits, the opponent loses some health over time. The hit also juggles, allowing for setups such as: command throw -> whiff followup -> 22222C -> command throw -> whiff followup -> *poison breath hits* -> 5{C} -> aerial combo. This super doesn't do a lot of damage, and is rarely worth using.
|
|
|
|
| Grab
|
Damage
|
Red Damage
|
Proration
|
Cancel
|
Guard
|
| 500 (440)
|
(444)
|
80% (O)
|
(CH)
|
U
(Whiffs vs Air.)
|
| First Active
|
Active
|
Recovery
|
Frame Adv
|
Circuit
|
Invuln
|
| 3
|
1
|
22
|
-
|
7.2%
|
-
|
| ~X (Lv 3)
|
Damage
|
Red Damage
|
Proration
|
Cancel
|
Guard
|
| 3500 (2826)
|
(2510)
|
80% (O)
|
-
|
-
|
| First Active
|
Active
|
Recovery
|
Frame Adv
|
Circuit
|
Invuln
|
| 0
|
1
|
30
|
-
|
18.0%
|
-
|
| ~X (Lv 2)
|
Damage
|
Red Damage
|
Proration
|
Cancel
|
Guard
|
| 1500 (1462)
|
(1270)
|
80% (O)
|
-
|
-
|
| First Active
|
Active
|
Recovery
|
Frame Adv
|
Circuit
|
Invuln
|
| 1
|
2
|
28
|
-
|
9.0%
|
-
|
| ~X (Lv 1)
|
Damage
|
Red Damage
|
Proration
|
Cancel
|
Guard
|
| 1000 (1121)
|
(925)
|
70% (O)
|
-
|
-
|
| First Active
|
Active
|
Recovery
|
Frame Adv
|
Circuit
|
Invuln
|
| 3
|
3
|
23
|
-
|
9.0%
|
-
|
|
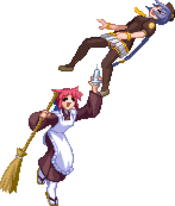
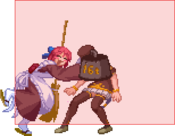
Command throw. 1 frame longer startup than regular throw, but has the usual command throw advantages. This move has a followup attack where she uses her broom as a baseball bat to hit the opponent. This followup can be whiffed by holding down any button, allowing for a 22A setup launch, okizeme, or an OTG Arc Drive. Instead of whiffing you can time C a second time to hit with the broom. A regular hit will do a little extra damage and leads to neutral. If you hit the opponent right before they touch the ground, you'll hit a home run and launch the opponent to the corner, dealing heavy damage and allowing for an OTG relaunch combo. This command throw is a staple in Kohaku's offense, and should be used against opponents who like to block.
|
|
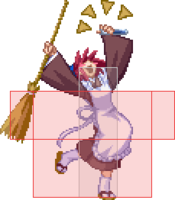
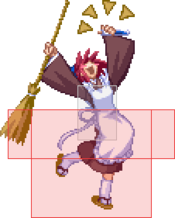
Don't do drugs, kids, as they are a waste of meter. Don't do drugs, kids, as they are a waste of meter.
|
| Damage
|
Red Damage
|
Proration
|
Cancel
|
Guard
|
| -
|
-
|
-
|
-
|
-
|
| First Active
|
Active
|
Recovery
|
Frame Adv
|
Circuit
|
Invuln
|
| -
|
-
|
24+100
|
-
|
-100.0%
|
-
|
|
Kohaku injects herself with drugs, granting her Blood Heat and super armor during its duration. After the long super flash, there is a long startup (100f), and it can only be safely used if the opponent is under cactus lockdown. The Blood Heat lasts 300f (5 seconds), shorter than Full Moon's maximum Blood Heat duration (750f, or 12.5 seconds). The super armor completely ignores normal throws, even if you tech throw it she's still invulnerable to that, however command throws can beat it. The only way to cancel it with a throw is by attacking Kohaku during the animation before the super armor comes, with that it becomes a total waste of meter.
24f of startup, then long super flash, then 100f before it becomes active.
While cool-looking, this move has no real practical uses, unless you want to use it for memes.
|
|
Aerial Specials
|
|
| A
|
Damage
|
Red Damage
|
Proration
|
Cancel
|
Guard
|
| -
|
-
|
-
|
-
|
-
|
| First Active
|
Active
|
Recovery
|
Frame Adv
|
Circuit
|
Invuln
|
| -
|
-
|
38
|
-
|
-
|
Strike 8-13
|
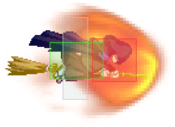
- Command airdash that travels very quickly across the screen. Cannot be cancelled into anything, but you can continue air movement afterwards. Situational moves to get away or gain extra distance.
Fly a short distance forward at great speed. Vulnerable to attacks.
|
| B
|
Damage
|
Red Damage
|
Proration
|
Cancel
|
Guard
|
| -
|
-
|
-
|
-
|
-
|
| First Active
|
Active
|
Recovery
|
Frame Adv
|
Circuit
|
Invuln
|
| -
|
-
|
52
|
-
|
-
|
Strike 11-28
|
|
Same as the A version, but travels twice as far.
|
| EX
|
Damage
|
Red Damage
|
Proration
|
Cancel
|
Guard
|
| 400*6 (1992)
|
(1507)
|
100%
|
(J)
|
LHA
|
| First Active
|
Active
|
Recovery
|
Frame Adv
|
Circuit
|
Invuln
|
| 1+3
|
12
|
11
|
-
|
-100.0%
|
Strike 1-4
|
|
EX version of j.214A. Travels the same distance, but with damaging fire in front of Kohaku. Its only real use is after j.C to add on extra damage. Can be jump cancelled, allowing you to use it twice in an aircombo. Use airthrow after if you've used your jump cancel already.
|
|
|
|
| A
|
Damage
|
Red Damage
|
Proration
|
Cancel
|
Guard
|
| 600*3 (1743)
|
(880)
|
100%*2, 80% (O)
|
-
|
LHA
|
| First Active
|
Active
|
Recovery
|
Frame Adv
|
Circuit
|
Invuln
|
| 19*
|
X
|
-
|
-
|
5.4%*3 (16.2%)
|
Strike 8-40
|
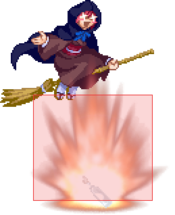
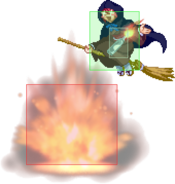
- Kohaku briefly changes into Magical Amber to rain molotov on her opponents. Leaves Kohaku vulnerable to airthrows and hits while dropping bombs, but she can jump cancel the recovery. Can be combo'd after on hit.
Drop one molotov cocktail. Slightly faster than the B version. Invulnerable to hits (but not airthrow) while dropping the bomb.
|
| B
|
Damage
|
Red Damage
|
Proration
|
Cancel
|
Guard
|
| 300*3, 200*3 (1170)
|
(703)
|
-5%*3
|
-
|
LHA
|
| First Active
|
Active
|
Recovery
|
Frame Adv
|
Circuit
|
Invuln
|
| 20*
|
X
|
-
|
-
|
0.9%*3, 0.45%*3 (4.05%)
|
-
|
|
Drop one molotov cocktail, then up to two more by holding down the button. It will leave the opponent in a long blockstun, so drop down at any time to continue pressure. The fire animation can hide her sprite while landing, allowing for a slightly annoying crossup.
|
| EX
|
Damage
|
Red Damage
|
Proration
|
Cancel
|
Guard
|
| (500*3) x4
|
(323*3) x4
|
(100%*2, 75% (M)) x4
|
-
|
LHA
|
| First Active
|
Active
|
Recovery
|
Frame Adv
|
Circuit
|
Invuln
|
| 17+(35 ~ 41)
|
X
|
-
|
-
|
-100.0%
|
Strike 1-59
|
|
Quickly drop 4 molotovs at once, dealing heavy damage if it hits. Long recovery. Invulnerable to hits (but not airthrow) while dropping bombs.
|
|
Arc Drive
|
|
| Damage
|
Red Damage
|
Proration
|
Cancel
|
Guard
|
| 4700 (2176)
|
(885)
|
50% (O)
|
-
|
U
(Whiffs vs Air.)
|
| First Active
|
Active
|
Recovery
|
Frame Adv
|
Circuit
|
Invuln
|
| 2+14
|
X
|
Knockdown*
|
-
|
removes all
|
Full
|
|
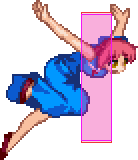
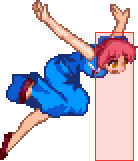
Kohaku dismisses her maid outfit and broom, and puts on a china dress. Afterwards she charges forward, and when hitting an opponent, she will perform three successive attacks dealing moderate damage and Circuit Breaking her opponent. This is a useful AD due to the fact it can hit OTG (for example, after any 236A hit), and meter break. This move is unblockable, and can be used as a reversal. If it whiffs you'll hit the wall and the opponent can combo you.
|
|
Another Arc Drive
|
|
| Damage
|
Red Damage
|
Proration
|
Cancel
|
Guard
|
| 13800 (5238)
|
(3942)
|
50%
|
-
|
U
(Whiffs vs Air.)
|
| First Active
|
Active
|
Recovery
|
Frame Adv
|
Circuit
|
Invuln
|
| 2+17
|
X
|
Knockdown*
|
-
|
removes all
|
Full
|
|
A longer version the Arc Drive that deals more damage, but doesn't circuit break and doesn't hit OTG. Pretty much useless besides catching low jumpin attacks or as a ground reversal.
|
|
Last Arc
|
|
| Damage
|
Red Damage
|
Proration
|
Cancel
|
Guard
|
| 7000 (3500 ~ 7000)
|
3020 ~ 5538
|
50% + 50% * remaining BH time
|
-
|
U
|
| First Active
|
Active
|
Recovery
|
Frame Adv
|
Circuit
|
Invuln
|
| 4+0
|
1+1
|
16+56
|
-
|
removes all
|
Full
|
|
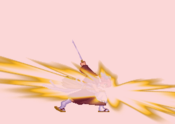
Kohaku draws the sword hidden in her broom to parry the attack and retaliate with her strongest strike. Activates on standing and crouching EX shield during Blood Heat. Heavy damage and hard knockdown. The damage scales with the Blood Heat time left, from 100% at full to 50% when nearly empty.
|
|
MBAACC Navigation
