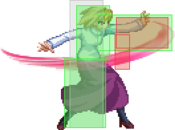
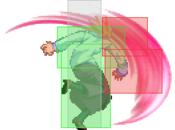
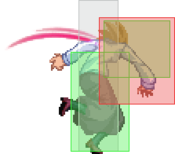
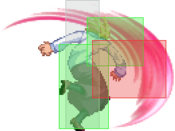
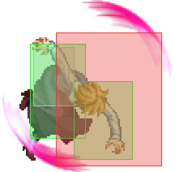
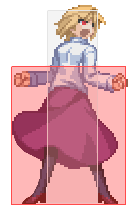
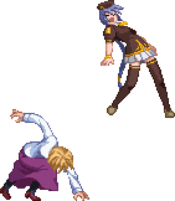
Melty Blood/MBAACC/Arcueid Brunestud/Crescent Moon: Difference between revisions
(→Normal Moves: Frame data & formatting double check) |
|||
| Line 277: | Line 277: | ||
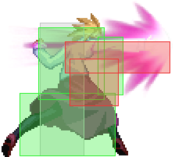
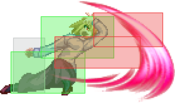
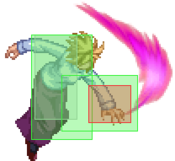
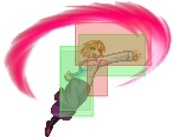
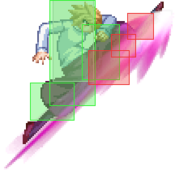
===== <span class="invisible-header">5A</span> ===== | ===== <span class="invisible-header">5A</span> ===== | ||
{{MoveData | {{MoveData | ||
|image=MBCArc5A | |image=MBCArc5A.png | ||
|caption= | |caption= | ||
|name=5A | |name=5A | ||
|linkname=5A | |linkname=5A | ||
|data= | |data= | ||
{{AttackData-MB | {{AttackData-MB | ||
|damage=300 | |damage=300 | ||
|reddamage= | |reddamage=147 | ||
|proration=75%(O) | |proration=75% (O) | ||
|circuit= 3.0% | |circuit=3.0% | ||
|cancel=N, | |cancel=-SE-, -N-, -SP-, -EX-, (J) | ||
|guard=LH | |guard=LH | ||
|startup=4 | |startup=4 | ||
|active=4 | |active=4 | ||
|recovery=7 | |recovery=7 | ||
|frameAdv= | |frameAdv=1 | ||
|invuln= | |invuln= | ||
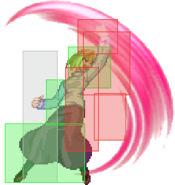
|description=Arcueid does a horizontal swipe. Hits the upper area, but doesn't whiff on | |description=Arcueid does a horizontal swipe. Hits the upper area, but doesn't whiff on crouchers if they're close enough (the visual effect is lying). | ||
}} | }} | ||
}} | }} | ||
| Line 304: | Line 303: | ||
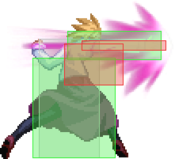
|caption=5B | |caption=5B | ||
|image2=MBCArc5BBE1.png | |image2=MBCArc5BBE1.png | ||
|caption2= | |caption2= | ||
|image3=MBCArc5BBE2.png | |image3=MBCArc5BBE2.png | ||
|caption3= | |caption3=5[B] | ||
|name=5B | |name=5B | ||
|input= | |input=5[B] | ||
|linkname=5B | |linkname=5B | ||
|data= | |data= | ||
{{AttackData-MB | {{AttackData-MB | ||
|version= | |version=5B | ||
|damage=650 | |damage=650 | ||
|reddamage= | |reddamage=392 | ||
|proration=80% | |proration=80% (O) | ||
|circuit= 6.0% | |circuit=6.0% | ||
|cancel=( | |cancel=N, SP, EX, (J) | ||
|guard=LH | |guard=LH | ||
|startup=8 | |startup=8 | ||
| Line 324: | Line 323: | ||
|frameAdv=-4 | |frameAdv=-4 | ||
|invuln= | |invuln= | ||
|description= A punch that moves Arc forward and knocks the | |description=A punch that moves Arc forward and knocks the airborne enemies into a ground techable knockdown on hit, used a lot in pressure and combos. | ||
}} | }} | ||
{{AttackData-MB | {{AttackData-MB | ||
|version=[B] | |version=5[B] | ||
|damage=800 | |damage=800 | ||
|reddamage= | |reddamage=539 | ||
|proration=60% | |proration=60% (O) | ||
|circuit= | |circuit=7.0% | ||
|cancel=( | |cancel=N, SP, EX, (J) | ||
|guard=H | |guard=H | ||
|startup=28 | |startup=28 | ||
| Line 339: | Line 338: | ||
|frameAdv=-10 | |frameAdv=-10 | ||
|invuln= | |invuln= | ||
|description= Charged version of 5B that hits overhead, this move is a key part of her mixup game and can be half charged for a high low mixup | |description=Charged version of 5B that hits overhead, this move is a key part of her mixup game and can be half charged for a high low mixup | ||
}} | }} | ||
}} | }} | ||
| Line 352: | Line 351: | ||
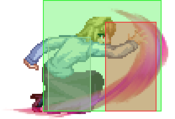
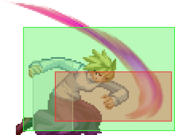
|caption3=5[C] | |caption3=5[C] | ||
|name=5C | |name=5C | ||
|input=5C | |input=5C(Air Hit)~C<br>5[C] | ||
|linkname=5C | |linkname=5C | ||
|data= | |data= | ||
| Line 358: | Line 357: | ||
|version=5C | |version=5C | ||
|damage=1000 | |damage=1000 | ||
|reddamage= | |reddamage=686 | ||
|proration= | |proration=88% (M) | ||
|circuit= 10. | |circuit=10.0% | ||
|cancel=CH | |cancel=SP, {{Tooltip | text=(CH)| hovertext=On air hit.}}, EX | ||
|guard=LH | |guard=LH | ||
|startup=7 | |startup=7 | ||
|active=4 | |active=4 | ||
|recovery= 23 | |recovery=23 | ||
|frameAdv= -9 | |frameAdv=-9 | ||
|invuln= | |invuln= | ||
|description= | |description= | ||
}} | }} | ||
{{AttackData-MB | {{AttackData-MB | ||
|version= | |version=~C | ||
|damage= | |damage= | ||
|reddamage= | |reddamage= | ||
| Line 379: | Line 378: | ||
|guard= | |guard= | ||
|startup=5 | |startup=5 | ||
|active= | |active=X | ||
|recovery=0 | |recovery=0 | ||
|frameAdv= | |frameAdv= | ||
|invuln= | |invuln= | ||
|description= | |description=Wallslams on air hit, which can be followed up by a superjump pursuit by pressing C again. | ||
}} | }} | ||
{{AttackData-MB | {{AttackData-MB | ||
|version=5[C] | |version=5[C] | ||
|damage=2500 | |damage=2500 | ||
|reddamage= | |reddamage=1960 | ||
|proration=100% | |proration=100% | ||
|circuit=18. | |circuit=18.0% | ||
|cancel= | |cancel= | ||
|guard=U | |guard=U | ||
| Line 398: | Line 397: | ||
|frameAdv= | |frameAdv= | ||
|invuln= | |invuln= | ||
|description= Gimmick unblockable that is almost never worth going for. | |description=Gimmick unblockable that is almost never worth going for. | ||
}} | }} | ||
}} | }} | ||
==== | ==== Crouching Normals ==== | ||
===== <span class="invisible-header">2A</span> ===== | ===== <span class="invisible-header">2A</span> ===== | ||
{{MoveData | {{MoveData | ||
| Line 410: | Line 409: | ||
|caption2=Second hit of the 2A chain. | |caption2=Second hit of the 2A chain. | ||
|name=2A | |name=2A | ||
|input=2A | |input=2A~2A | ||
|linkname=2A | |linkname=2A | ||
|data= | |data= | ||
| Line 416: | Line 415: | ||
|version=2A | |version=2A | ||
|damage=350 | |damage=350 | ||
|reddamage= | |reddamage=196 | ||
|proration=75% | |proration=75% (O) | ||
|circuit= 3. | |circuit=3.0% | ||
|cancel= | |cancel=-SE-, -N-, -SP-, CH, -EX-, (J) | ||
|guard=L | |guard=L | ||
|startup=4 | |startup=4 | ||
|active=4 | |active=4 | ||
|recovery= 8 | |recovery=8 | ||
|frameAdv=0 | |frameAdv=0 | ||
|invuln= | |invuln= | ||
|description= Standard jab that hits low. | |description= Standard jab that hits low. Spammable. | ||
}} | }} | ||
{{AttackData-MB | {{AttackData-MB | ||
|version=~2A | |||
|version=2A | |||
|damage=350 | |damage=350 | ||
|reddamage= | |reddamage=147 | ||
|proration=75% | |proration=75% (O) | ||
|circuit= 4. | |circuit=4.0% | ||
|cancel=N,J | |cancel=SE, N, SP, EX, (J) | ||
|guard= | |guard=LA | ||
|startup=4 | |startup=4 | ||
|active=4 | |active=4 | ||
|recovery= 9 | |recovery=9 | ||
|frameAdv=-1 | |frameAdv=-1 | ||
|invuln= | |invuln= | ||
|description= | |description=A longer reach followup if you cancel 2A into itself on block/hit. | ||
}} | }} | ||
}} | }} | ||
| Line 451: | Line 449: | ||
|caption=KICK! | |caption=KICK! | ||
|name=2B | |name=2B | ||
|linkname=2B | |linkname=2B | ||
|data= | |data= | ||
{{AttackData-MB | {{AttackData-MB | ||
|damage=450 | |damage=450 | ||
|reddamage= | |reddamage=294 | ||
|proration=70 | |proration=70% (O) | ||
|circuit= | |circuit=5.0% | ||
|cancel=( | |cancel=N, SP, EX, (J) | ||
|guard=L | |guard=L | ||
|startup=6 | |startup=6 | ||
|active=4 | |active=4 | ||
|recovery= 15 | |recovery=15 | ||
|frameAdv= -4 | |frameAdv=-4 | ||
|invuln= | |invuln= | ||
|description= A decent poke with low | |description= A decent poke with low recovery that advances forward, useful for cross-unders. Low profiles most standing moves | ||
}} | }} | ||
}} | }} | ||
| Line 475: | Line 472: | ||
|caption= | |caption= | ||
|name=2C | |name=2C | ||
|linkname=2C | |||
|linkname= | |||
|data= | |data= | ||
{{AttackData-MB | {{AttackData-MB | ||
|damage=900 | |damage=900 | ||
|reddamage= | |reddamage=686 | ||
|proration=60 | |proration=60% (O) | ||
|circuit= | |circuit=10.0% | ||
|cancel= | |cancel=N, SP, EX, (J) | ||
|guard=L | |guard=L | ||
|startup=9 | |startup=9 | ||
|active=3 | |active=3 | ||
|recovery= 21 | |recovery=21 | ||
|frameAdv= -6 | |frameAdv=-6 | ||
|invuln= | |invuln= | ||
|description= A sweep that reaches pretty far | |description= A sweep that reaches pretty high and far. Long recovery. | ||
}} | }} | ||
}} | }} | ||
| Line 500: | Line 496: | ||
|caption= | |caption= | ||
|name=j.A | |name=j.A | ||
|linkname=j.A | |linkname=j.A | ||
|data= | |data= | ||
{{AttackData-MB | {{AttackData-MB | ||
|damage=300 | |damage=300 | ||
|reddamage= | |reddamage=196 | ||
|proration=75 | |proration=75% | ||
|circuit= | |circuit=3.0% | ||
|cancel= | |cancel=SE, N, SP, EX, J | ||
|guard= | |guard=LHA | ||
|startup=4 | |startup=4 | ||
|active=4 | |active=4 | ||
| Line 515: | Line 510: | ||
|frameAdv= | |frameAdv= | ||
|invuln= | |invuln= | ||
|description=Standard | |description=Standard j.A that hits mid. | ||
}} | }} | ||
}} | }} | ||
| Line 522: | Line 517: | ||
{{MoveData | {{MoveData | ||
|image=MBCarcjb.png | |image=MBCarcjb.png | ||
|caption= | |caption=Where are you going<br>(Rising Hit) | ||
|image2=MBCArcjB2.png | |image2=MBCArcjB2.png | ||
|caption2= | |caption2=(Main hit) | ||
|name=j.B | |name=j.B | ||
|input= | |input= | ||
|linkname=j.B | |linkname=j.B | ||
|data= | |data= | ||
{{AttackData-MB | {{AttackData-MB | ||
|version= | |version=(Rising) | ||
|damage= | |damage=600, 400 | ||
|reddamage= | |reddamage=343, 245 | ||
|proration= | |proration=90% (O) | ||
|circuit= | |circuit=6.0%, 4.0% (10.0%) | ||
|cancel= | |cancel=N, SP, EX, J | ||
|guard= | |guard=HA | ||
|startup=5 | |startup=5 | ||
|active=2 (6) 4 | |active=2 (6) 4 | ||
|recovery= | |recovery= | ||
|frameAdv= | |frameAdv= | ||
|invuln= | |invuln= | ||
|description= | |description= | ||
}} | }} | ||
{{AttackData-MB | {{AttackData-MB | ||
|version=(Falling) | |||
|version= | |damage=400 | ||
|damage= | |reddamage=245 | ||
|reddamage= | |proration=90% (O) | ||
|proration= | |circuit=4.0% | ||
|circuit= | |cancel=N, SP, EX, J | ||
|cancel= | |guard=HA | ||
|guard= | |||
|startup=5 | |startup=5 | ||
|active= | |active=4 | ||
|recovery= | |recovery= | ||
|frameAdv= | |frameAdv= | ||
|invuln= | |invuln= | ||
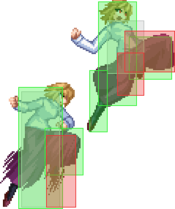
|description=A move that hits twice when rising, and as such often wastes air counter hits. The first part of the move hits upwards, and the second part hits downwards. | |description=A move that hits twice when done rising, and as such often wastes air counter hits. The first part of the move hits upwards, and the second part hits downwards. | ||
}} | }} | ||
}} | }} | ||
| Line 585: | Line 559: | ||
{{MoveData | {{MoveData | ||
|image=MBCArcjC.png | |image=MBCArcjC.png | ||
|caption= | |caption=Do the splits | ||
|name=j.C | |name=j.C | ||
|linkname=j.C | |linkname=j.C | ||
|data= | |data= | ||
{{AttackData-MB | {{AttackData-MB | ||
|damage=1000 | |damage=1000 | ||
|reddamage= | |reddamage=588 | ||
|proration=90 | |proration=90% (M) | ||
|circuit= | |circuit=7.0% | ||
|cancel= | |cancel=N, SP, EX, J | ||
|guard=HA | |guard=HA | ||
|startup=6 | |startup=6 | ||
| Line 602: | Line 575: | ||
|frameAdv= | |frameAdv= | ||
|invuln= | |invuln= | ||
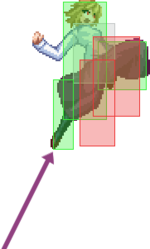
|description=Everyone's favorite move. Lots of active frames, and good recovery when done close to the ground. Used in jump-ins. Used in everything. Rising j.C is good preemptive mash move because of active frames | |description=Everyone's favorite move. Lots of active frames, and good recovery when done close to the ground. Used in jump-ins. Used in everything. Rising j.C is good preemptive mash move because of active frames. | ||
}} | }} | ||
}} | }} | ||
| Line 617: | Line 590: | ||
{{AttackData-MB | {{AttackData-MB | ||
|damage=1000 | |damage=1000 | ||
|reddamage= | |reddamage=686 | ||
|proration=80 | |proration=80% (M) | ||
|circuit= | |circuit=10.0% | ||
|cancel= | |cancel=SP, EX, (J) | ||
|guard= | |guard=LH | ||
|startup=12 | |startup=12 | ||
|active=3 | |active=3 | ||
|recovery=22 | |recovery=22 | ||
|frameAdv=-10 | |frameAdv=-10 | ||
|invuln= | |invuln=Clash 9-12 | ||
|description=A swipe up which launches opponents (grounded or in the air). There are clash frames on her head before the hitboxes come out, and has a disjointed | |description=A swipe up which launches opponents (grounded or in the air). There are clash frames on her head before the hitboxes come out, and has a disjointed hitboxe above her head. Can't rebeat after this move. | ||
}} | }} | ||
}} | }} | ||
| Line 638: | Line 611: | ||
|caption2=4[C] | |caption2=4[C] | ||
|name=4C | |name=4C | ||
|input= | |input=4[C] | ||
|linkname=4C | |linkname=4C | ||
|data= | |data= | ||
{{AttackData-MB | {{AttackData-MB | ||
|version=4C | |version=4C | ||
|damage=300 | |damage=300, 1000 (1108)<br>/ {{Tooltip | text=800| hovertext=2nd hit only.}} | ||
|reddamage=(750)<br>/ {{Tooltip | text=294| hovertext=2nd hit only.}} | |||
|proration=90% (M), 65% (O) | |||
| | |circuit=3.0%, 10.0% (13.0%)<br>/ {{Tooltip | text=8.0%| hovertext=2nd hit only.}} | ||
|cancel=(N), (SP), (EX), (J) | |||
|guard=LH, LHA | |||
}} | |||
| | |||
| | |||
{{ | |||
|cancel= | |||
|guard=LHA | |||
|startup=9 | |startup=9 | ||
|active=2 (2) 9 | |active=2 (2) 9 | ||
| Line 691: | Line 632: | ||
|version=4[C] | |version=4[C] | ||
|damage=900 | |damage=900 | ||
|reddamage= | |reddamage=294 | ||
|proration=50 | |proration=50% (O) | ||
|circuit= | |circuit=8.0% | ||
|cancel= | |cancel=N, SP, EX, J | ||
|guard=H | |guard=H | ||
|startup=34 | |startup=34 | ||
|active=9 | |active=9 | ||
|recovery=36 | |recovery=36 | ||
|frameAdv={{Tooltip |text= | |frameAdv=-27 {{Tooltip |text=(18)|hovertext=On jump cancel.}} | ||
|invuln= | |invuln= | ||
|description= | |description=Becomes cancellable on block and an overhead when charged. | ||
}} | }} | ||
}} | }} | ||
| Line 710: | Line 651: | ||
|caption=divekick | |caption=divekick | ||
|name=j.2B | |name=j.2B | ||
|linkname=j.2B | |linkname=j.2B | ||
|data= | |data= | ||
{{AttackData-MB | {{AttackData-MB | ||
|damage= | |damage=750 | ||
|reddamage= | |reddamage=392 | ||
|proration= | |proration=100% | ||
|circuit= | |circuit=8.0% | ||
|cancel= | |cancel={{Tooltip |text=-SP-, -EX-|hovertext=Cancellable during landing recovery.}} | ||
|guard=LHA | |guard=LHA | ||
|startup=8 | |startup=8 | ||
|active=8 | |active=8 | ||
|recovery= 14 | |recovery={{Tooltip |text=14|hovertext=Landing recovery.}} | ||
|frameAdv= 2(TK) | |frameAdv=2 (TK) | ||
|invuln= | |invuln= | ||
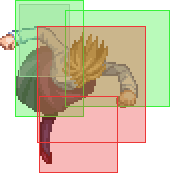
|description= A claw dive with not-so-many active frames. Big recovery, very situational, | |description= A claw dive with not-so-many active frames. Big recovery, very situational, hits mid. If this hits too high, use j.22B~66B > j.63214C > air ender or j.22C as those are the moves that hit the quickest after.<br> | ||
If it hits just before landing, you can barely convert off of it with rekka(2) > 623C > 66 > corner combo, but is a bit impractical. | |||
}} | }} | ||
}} | }} | ||
| Line 737: | Line 677: | ||
|caption2= 2nd hit | |caption2= 2nd hit | ||
|name=j.2C | |name=j.2C | ||
|linkname=j.2C | |linkname=j.2C | ||
|data= | |data= | ||
{{AttackData-MB | {{AttackData-MB | ||
| | |damage=600, 800 (1282) | ||
|reddamage=(627) | |||
|reddamage= | |||
|proration=100% | |proration=100% | ||
|circuit=8. | |circuit=8.0%*2 (16.0%) | ||
|cancel= | |cancel=(J) | ||
|guard= | |guard=LHA | ||
|startup=6 | |startup=6 | ||
|active=2(16)3 | |active=2 (16) 3 | ||
|recovery= | |recovery={{Tooltip |text=3|hovertext=Landing recovery.}} | ||
|frameAdv=-15, 3 (TK) | |||
{{ | |||
|frameAdv= 3(TK) | |||
|invuln= | |invuln= | ||
|description= Changes your trajectory, can be used as a sort of airdash. 2 | |description=Changes your trajectory, can be used as a sort of airdash. 2 hits, the second one having huge priority but coming very late during the move. Can be neutral/positive on block if done at very low height. Hits mid. 2nd hit inflicts ground techable knockdown on airborne opponents. | ||
}} | }} | ||
}} | }} | ||
Revision as of 03:41, 20 March 2021
Character Page Progress
This page is still a work in progress, consider joining as an editor to help expand it. Please update this character's roadmap page when one of the editing goals have been reached.
| In Progress |
|---|
|
Additional Resources
C-Arcueid Match Video Database
Players to watch/ask
JP:
NA:
Overview
| Strengths |
|
| Weaknesses |
|
General Gameplan
The general gameplan of C-arcueid is fairly simple to understand. Get in and overwhelm your opponent with your various amounts of normals and specials. She has very fast dash that helps her move in quickly at a moment's notice. Because of her j.C it can be rather difficult to try to air to air her at times and she has excellent reward from an Anti air 5A unlike a majority of the melty cast since her 5B pulls down instead of popping opponent's into the air, allowing her to go into a full grounded combo route. She's really a character that shines because of her blessed normals and specials and can be taken to the limit once you understand melty's nuances overall.
Neutral
As C-arc your goal being to get in and luckily with your dash speed, you can easily do this at any point in the game. Between dash 5A, dash 2B, dash 2C(if used appropriately), j.C and sanic(j.63214A) which if used for example: j.C > 63214A, it's a very valid and common frame trap in C-arc's kit that can lead to guard break set ups. Now while all your tools are really strong, it is important to know when to use these options to close the gap and in some times, maintaining a spot on the screen keeps the threat of your approach potent due to your dash speed being above average to quickly put opponents at a disadvantageous spot and because of your frame data on your normals and the reward on them being so high.
Making use of varying your approach from dash 5A/2B/Etc and sj, dash jump and double jump airdash options is key to making the most out of C-arcueid's kit and will reward you so.
Pressure
C-arc is a very robust character that takes comfort in being able to not only use rebeats to her pressure but also has a great bit of specials to add on to it. Going over some of the specials you will regularly use:
- 214A/B
Known as elbow. Generally you can use 214A to catch mashes and on the later ends of the active frames you can be +, in some cases if people are trying to shield you can use 214A after 2C for the elbow to whiff and the opponent is now in recovery from failed shield, letting you combo with usually 2B into a combo. 214B is generally used to catch jump outs, also is full untechable that leads into a high reward combo.
- 236A/B
Rekka, usually seen as a combo ender, however in pressure you can use 236A > 236[A] which is an air unblockable and also +. if it catches a jump out it's also full untech and grants a combo by extension. If you just do 236[A] by itself, you produce a sanic which is also +. It's another commonly seen tool and for good reason as it's + on block and pull the opponent inward towards Arcueid. On hit its a combo as well. A very powerful special if done right.
Rekka by itself you either can do 236A > 236A > 214B, 236A > 236A > 214[B](High), 236A > 236A > 236A(low) For the combo ender you want to do 236A > 236A > 214B.
Rekka has a good amount of stagger windows so sometimes people are looking to block the Overhead option(214[b]) you can also mix it up sparingly with 236A which is a low. On block 214[B] has better frames and while 236A is unsafe, if you happen to catch people with it you can either cancel to 624C which is a knowledge check to the opponent on whether they can dodge or use whichever char specific punish it is or ex cancel to 623C for a good reward on the combo.
- 642A/B
Another one of the famous specials, "sanic". this is the grounded version. the 624A one is generally used for pressure particularly like this
- 5A 624A, j.624B, (dash) 5A/2B
the other is 624B which is primarily used for combo extensions that can be learned later.
- j624A/B
this is the air sanic.
j.624B is generally used in combos as a TK and during the sequence listed right above in the 624A/B section. j.624A is used generally in an A2A situation and because it hits behind. you can use it as you are jumping in on someone or when you do j.C which is powerful because its a very good frame trap and also generates a lot of blockstun to set up guard crush situations.
Okizeme
-if you did rekka ender, you can do a safejump by doing 9>descending jC/j2C(delay based on character)
-if you did the spacing right and have a hard knockdown(236[B]), you can do a h/l 50/50 by doing jC(delay is character dependant due to different prone wakeups),land>2a
Defense
wakeup 22b/c(don't use this too often),
shield bunker, ex shield, ex guard, use the air if you really need to get out, or throw. 2B is best used as an offensive low profile move.
Combos
The combos listed here are meant for beginners, if you want to know optimal routes, watch Kouki's video: https://www.youtube.com/watch?v=jXJZ9bz8PPA
| Combo Notation Help | |
|---|---|
| Disclaimer: Combos are written by various writers, so the actual notation used in pages can differ from the standard one. | |
| X > Y | X input is cancelled into Y. |
| X > delay Y | Must wait for a short period before cancelling X input into Y. |
| X, Y | X input is linked into Y, meaning Y is done after X's recovery period. |
| X+Y | Buttons X and Y must be input simultaneously. |
| X/Y | Either the X or Y input can be used. |
| X~Y | This notation has two meanings.
|
| X(w) | X input must not hit the opponent (Whiff). |
| j.X | X input is done in the air, implies a jump/jump cancel if the previous move was done from the ground. Applies to all air chain sections:
|
| sj.X | X input is done after a super jump. Notated as sj8.X and sj9.X for neutral and forward super jumps respectively. |
| dj.X | X input is done after a double jump. |
| sdj.X | X input is done after a double super jump. |
| tk.X | Stands for Tiger Knee. X motion must be buffered before jumping, inputting the move as close to the ground as possible. (ex. tk.236A) |
| (X) | X is optional. Typically the combo will be easier if omitted. |
| [X] | Input X is held down. Also referred to as Blowback Edge (BE). Depending on the character, this can indicate that this button is held down and not released until indicated by the release notation. |
| ]X[ | Input X is released. Will only appear if a button is previously held down. This type of input is referred to as Negative Edge. |
| {X} | Button X should only be held down briefly to get a partially charged version instead of the fully charged one. |
| X(N) | Attack "X" should only hit N times. |
| (XYZ)xN | XYZ string must be performed N times. Combos using this notation are usually referred to as loops. |
| (XYZ^) | A pre-existing combo labelled XYZ is inserted here for shortening purposes. |
| CH | The first attack must be a Counter Hit. |
| Air CH | The first attack must be a Counter Hit on an airborne opponent. |
| 66 | Performs a ground forward dash. |
| j.66 | Performs an aerial forward dash, used as a cancel for certain characters' air strings. |
| IAD/IABD | Performs an Instant AirDash. |
| AT | Performs an Air Throw. (j.6/4A+D) |
| IH | Performs an Initiative Heat. |
| AD | Performs an Arc Drive. |
| AAD | Performs an Another Arc Drive. |
Anywhere
Full Screen
Corner
Notes:
- - During the corner wall bounce combos, almost every component of the loop has to be delayed (where '-' is noted). You need to do this in order to keep your opponent as low as possible, without reaching OTG
- - If having trouble with the j.63214B 5B link, do your best to do the TK as low as possible
- - Aforementioned combos use standard air combo finishers. However, you can do pretty much every finisher after a 2C. Some options are:
| 4C j.(A)BC j.ABC j.6AD | High damage, standard oki |
| 4C j.BC j.ABC j.2C | High damage, techable oki, OTG with j.63214C if no tech |
| 623A | Long oki |
| 236A 236A 214A | Long oki, OTG. 623C OTG if done on an airbone opponent |
| 5C - 236[B] | Long oki and corner space |
Move Descriptions
| Frame Data Help | |
|---|---|
| Header | Tooltip |
| Move Box Colors |
Light gray = Collision Box (A move lacking one means it can go through the opponent's own collision box). |
| Damage | Base damage done by this attack.
(X) denotes combined and scaled damage tested against standing V. Sion. |
| Red Damage | Damage done to the recoverable red health bar by this attack. The values are inherently scaled and tested against standing V. Sion.
(X) denotes combined damage. |
| Proration | The correction value set by this attack and the way it modifies the scaling during a string. See this page for more details.
X% (O) means X% Overrides the previous correction value in a combo if X is of a lower percentage. |
| Circuit | Meter gained by this attack on hit.
(X%) denotes combined meter gain. |
| Cancel | Actions this move can be cancelled into.
SE = Self cancelable. |
| Guard | The way this move must be blocked.
L = Can block crouching |
| Startup | Amount of frames that must pass prior to reaching the active frames. Also referred to as "True Startup". |
| Active | The amount of frames that this move will have a hitbox. (x) denotes frame gaps where there are no hitboxes is present. Due to varied blockstuns, (x) frames are difficult to use to determine punish windows. Generally the larger the numbers, the more time you have to punish. |
| Recovery | Frames that this move has after the active frames if not canceled. The character goes into one frame where they can block but not act afterwards, which is not counted here. |
| Advantage | The difference in frames where you can act before your opponent when this move is blocked (assuming the move isn't canceled and the first active frame is blocked). If the opponent uses a move with startup that is at least 2 frames less than this move's negative advantage, it will result in the opponent hitting that move. |
| Invul | Lists any defensive properties this move has.
X y~z denotes X property happening between the y to z frames of the animations. If no frames are noted, it means the invincibility lasts through the entire move. Invicibility:
Hurtbox-Based Properties:
Miscellaneous Properties
|
Normal Moves
Standing Normals
5A
5B
5B 5[B] 5B 5B 5[B] 5[B]
|
|---|
5C
Falcon Punch! Falcon Punch! Monke roll Monke roll 5[C] 5[C]
|
|---|
Crouching Normals
2A
2A 2A~2A Second hit of the 2A chain. Second hit of the 2A chain.
|
|---|
2B
KICK! KICK!
|
|---|
2C
Aerial Normals
j.A
j.B
Where are you going (Rising Hit) Where are you going (Rising Hit) (Main hit) (Main hit)
|
|---|
j.C
Do the splits Do the splits
|
|---|
Command Normals
3C
3C
3C |
|---|
4C
4C 4[C] 4C 4C 4[C] 4[C]
|
|---|
j.2B
divekick divekick
|
|---|
j.2C
first hit first hit 2nd hit 2nd hit
|
|---|
Universal Mechanics
Mechanic
Heat/Blood Heat
5+A+B+C |
|---|
Mechanic
Throw
4/6A+D(~2) |
|---|
Special Moves
236X
You're in the way! (EX: I'm going to get a little serious...!) 236A/[A]/B/[B]/C > 236A/[A]/B/[B] > 236A/B / 214A/[A]/B/[B] include the distance difference for images with this caption include the distance difference for images with this caption Charged Charged include the distance difference for images with this caption include the distance difference for images with this caption include the arc of the enemy launch. include the arc of the enemy launch. include the distance difference include the distance difference include the distance difference for images with this caption include the distance difference for images with this caption include the distance difference for images with this caption include the distance difference for images with this caption
|
|---|
623X
What are you doing...!
623A/B/C |
|---|
214x
214 214A/B/C different different
|
|---|
22X
Quiet!(Fly!)
22A/B/C, j22A/B/C |
|---|
63214x
it's useless!
63214A/B/C |
|---|
j63214x
It's useless!(Aerial) j63214A/B/C note to editors: create a picture describing the effects of what happens after hit for a and b versions note to editors: create a picture describing the effects of what happens after hit for a and b versions
|
|---|
Arc Drive
From Dream to Reality(Marble Phantasm) 63214C(max or heat only) initial hit initial hit
|
|---|
Another Arc Drive
Melty Blood
Text |
|---|
Last Arc
Shall we play around a bit? Air Ex Shield(in Blood Heat) universal version universal version Tohno/Nanaya variation Tohno/Nanaya variation
|
|---|
