Character Page Progress
This page is still a work in progress, consider joining as an editor to help expand it. Please update this character's roadmap page when one of the editing goals have been reached.
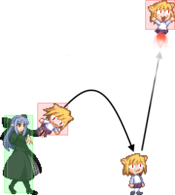
| In Progress |
To-do
|
- Move Descriptions:
- Add descriptions to the moves, specify how they function, cite their uses, add captions where helpful, etc.
- Overview:
- Add a short description of this character.
|
- General Gameplan:
- Do your best to describe how to play this character, change or add subsections based on what you would write as a guide.
- Combos:
- Add tech in the starters, enders, OTG pickup and normal/corner combo sections.
- Add damage, meter gain/given numbers and video links to combos as you add them.
- Adapt the current combos to the new template.
|
Additional Resources
H-Len Match Video Database
H-Len Matchup Learn more about the tools that H-Len uses more and how to apply or play against.
H-Len Tech, Setups and Tools Learn some basic and essential H-Len tech.
Big One 2nd for tournament footage.
Players to watch/ask
Overview
Strengths Weaknesses
| Strengths
|
- Generally stable matchup spread.
- Catwalk (3) - a low-profile crouching walk allowing H-Len to shut down a lot of air approaches, and a decent amount of normals.
- Very strong corner pressure game, having access to good lockdown options, combined with a comboable throw and high/low fuzzy overhead mixups.
- j.236A preserving momentum makes for a strong neutral tool, making her very slippery and hard to catch in the air.
- Arguably some of the strongest aerial moves in the game, being able to dominate both air-to-air and air-to-ground scenarios.
- Strong corner oki and tech-trap. Can throw out Neco (214C) in the corner or set up fuzzy guard mixups.
- Incredibly strong air-tech chase game, which is emphasized by j.B having a long disjointed hitbox with 8 active frames.
- Can be downright oppressive when playing opponents unaware of the matchup, as she requires a lot of specific counterplay to fight against.
- Gains access to damaging, high-meter gain, and spark-locked combos on cornered opponents.
|
| Weaknesses
|
- No (good) reversals. 623C is so bad she might as well not have one.
- Sluggish ground movement, and less-than-stellar ground normals makes her ground game very weak.
- Low HP and lack of good defensive options means she can die very quickly if she is cornered.
- Demands good execution, good understanding of combo gravity, and a lot of character specific knowledge to execute her damaging combos.
- If you play this character, people will threaten to delete this wiki page.
|
General Gameplan
Neutral
H-Len is air-dominant in neutral with strong air buttons, namely j.B, j.C and j.2C, great air mobility and a strong toolkit that compliments her. As such, it's important to be able to utilise her tools and air movement effectively to be able to get in and run your pressure. Her ground mobility isn't really strong but she still has access to strong ground options that will cover her for enough.
j.B and Airdash buffer
j.B is a fantastic spacing air normal with a ridiculous disjointed hitbox with long active frames, meaning it can beat out other air normals that it looks like it shouldn’t with good spacing making it common to land this as a stray hit in an air-to-air situation. By buffering an airdash with j.B, if you get a non-CH you can convert with an air throw after the airdash, or if it counter hits, whiff a j.C to cancel airdash landing recovery to convert. If they block the j.B in the air, you are still at advantage after the airdash, letting you do various things like a tick throw with gold air throw, j.2C to potentially land first and set up a guard crush, etc. If the j.B whiffs in the air, the airdash will not come out.
j.2C
While j.2C is not as powerful as the other air normals like j.B and j.C, it still has its fair share of use in neutral with air scramble situations, chasing down landings and a well timed and spaced jump-in. Another thing that is note-worthy of j2c is how strong it is at catching mid-air blocking low to the ground, in which you can do 5A/5C afterwards to catch them mid-air before they can land on the ground or a j.A or AT to catch them double jumping out. Use this normal sparingly.
214B~4/6
Pressure
Place text here
Fuzzy mixup
623A
623A is only -2 on block which makes it difficult for opponents to actually press their turn after blocking it. This move is useful to get back in during pressure and force a scramble, potentially extending your pressure. It can be used as an additional frame trap after 5A6AA for opponents who expect 5A6AA to be the end of Len's pressure. Pressing A at the end of the move gives you double spin, which is plus on block, but once you are committed to the double spin opponents can shield the last hit for free. Single spin's final kick cannot be shielded, so opponents wanting to shield the single 623A must shield the beginning hit of the move. By pressing B at the end of the move, you can get fake spin and then throw against opponents who are used to blocking the last kick of the single spin. Arc Drive after 623A is also a good way to extend pressure. Use this special sparingly in pressure if you do not have access to Arc Drive.
5A6A
Sj9 TK Ice
catches backdashes mid pressure (wip)
Okizeme
214C Neco Rocket
214C is pretty versatile once you set it up as okizeme in the corner. As the first hit is an overhead, it can immediately catch opponents blocking low on wakeup. After throwing out the cat, you can go for 5B for low, do j.C fuzzy mixups and dash up throw. Be wary that the opponent could potentially shield the second hit of 214C to make it easier to counterplay.
If you do 5B OTG > 214C for oki, opponents may tech forward after the 5B which grants them a punish. To bait this, you can do 5B OTG into nothing (explained below) to bait the tech. Additionally, you can do raw 214C instead of 5B > 214C to throw off opponents looking to tech forward after 5B. If they tech immediately, raw 214C will be punished, but
you can bait this with the 5B tech trap (see below). This is the basic mindgame of the neco rocket setup; 5B > 214C loses to tech forward after 5B, but 5B > nothing punishes the tech. Raw 214C loses to immediate tech forward, but 5B punishes immediate tech.
Microdash 5B OTG
Because Len's AT is not a hard knockdown, opponents can tech after they hit the ground. Fortunately, since H-Len will reach the ground before they can tech on ground, Len can do microdash 5B as OTG in the corner that can also act as tech-trap to catch teching in all directions and lead into a combo. If it OTGs, you can cancel into 214C for okizeme or squeeze out more damage with some OTG string. When the opponents techs after 5B OTG, you can respond to it with 5C which will catch them teching.
TK Ice Tech Trap
If opponents are too far away after AT ender near the corner to set up the microdash 5B tech trap, sj9 (super jump forward) TK j.236A catches all techs for a full conversion after with 5C. Note that this is not a regular TK j.236A, but done with a super jump forward to give the move more forward momentum. Opponents who tech will be punished by the ice into a full conversion, and upon no tech, the ice will either whiff or OTG the opponent (depending on character). Even on whiff, you are plus and can proceed with oki.
236C >236[A] ...
After doing the 236C > 236[A] ender in the corner , whiffing 3C or 2C will give you a left/right mixup. 3C will put you on the same side, and 2C will side switch. You can delay your landing further with air options to do a j.C overhead once the opponent starts respecting the 50/50. It won't be a true 4-way mixup since the opponent can act before j.C hits.
These are some of the options available to use as okizeme.
- ... 2C/3C, empty 9j, 5B
- ... 2C/3C, empty 8j (forward drift), 5B
- ... 2C/3C, 8 IAD > empty j.C > 5B
- ... 2C/3C, 9j > delay j.44> j.C
- ... 2C, 9j > delay dj j.66> j.C
Another thing you can do after 236C > 236[A] ender is ending it into 2B for a hard-knockdown, which allows you to set up her 214C without risk or go for the rare 421x teleport setup.
Defense
Shield Bunker (214D)
HLen doesn't have access to a true reversal and since she is H-moon, she won't be able to EX guard. Luckily, with 100% circuit she can cancel into a strong guard bunker to cancel while in blockstun which when timed correctly, will allow her to get away and avoid pressure safely. H-moon bunker is strike invul but can be thrown. Do know that guard bunker can be baited with delayed buttons or jumps in pressure to catch her since a guard bunker done outside of blockstun will be a slow, non-invul regular bunker like other moons.
3C Abare
HLen's 3C is one of the best abare tools in the game as it is 5f startup (!) and often trades favorably or wins outright against many normals. As it is a command normal, it can be buffered out of blockstun and leads to a full combo with 3C > 5C, making it an incredibly strong gamble option on defense. Do note that it is highly punishable on whiff.
Meter Management
236C
HLen’s main meter dump is 236C, which is used in combos for more damage, better oki, side switch, and so on. It’s important to keep a good eye on your meter and manage it well because you don’t want to hit Heat at a useless time and go back to 0% meter - not only is Hmoon bunker a very valuable tool for HLen, as she lacks a reversal and is an offensive momentum-driven character, Heat can also potentially bring back rounds if you can get a good chunk of red life back from her miniscule HP pool.
Air Dodge
Cancelling air normals into air dodge costs 50 meter, unlike doing air dodge raw which costs none. To micromanage Hmoon meter better, one can do jA > Air Dodge in neutral to burn excess meter relatively risk-free. This can be done on jA whiff by air dodging at any time after the recovery of the move ends; you can also cancel from any air normal into air dodge on block or on hit for the same result, but there is little reason to do so when you have the advantage with a jump in. This can be useful as HLen doesn't have a great EX move to burn meter in neutral.
Other Tech
Combos
| Combo Notation Help
|
Disclaimer: Combos are written by various writers, so the actual notation used in pages can differ from the standard one.
For more information, see Glossary and Controls.
|
| X > Y
|
X input is cancelled into Y.
|
| X > delay Y
|
Must wait for a short period before cancelling X input into Y.
|
| X, Y
|
X input is linked into Y, meaning Y is done after X's recovery period.
|
| X+Y
|
Buttons X and Y must be input simultaneously.
|
| X/Y
|
Either the X or Y input can be used.
|
| X~Y
|
This notation has two meanings.
- Use attack X with Y follow-up input.
- Input X then within a few frames, input Y. Usually used for option selects.
|
| X(w)
|
X input must not hit the opponent (Whiff).
|
| j.X
|
X input is done in the air, implies a jump/jump cancel if the previous move was done from the ground.
Applies to all air chain sections:
- Assume a forward jump cancel if no direction is given.
- Air chains such as j.A > j.B > j.C can be shortened to j.ABC.
|
| sj.X
|
X input is done after a super jump. Notated as sj8.X and sj9.X for neutral and forward super jumps respectively.
|
| dj.X
|
X input is done after a double jump.
|
| sdj.X
|
X input is done after a double super jump.
|
| tk.X
|
Stands for Tiger Knee. X motion must be buffered before jumping, inputting the move as close to the ground as possible. (ex. tk.236A)
|
| (X)
|
X is optional. Typically the combo will be easier if omitted.
|
| [X]
|
Input X is held down. Also referred to as Blowback Edge (BE). Depending on the character, this can indicate that this button is held down and not released until indicated by the release notation.
|
| ]X[
|
Input X is released. Will only appear if a button is previously held down. This type of input is referred to as Negative Edge.
|
| {X}
|
Button X should only be held down briefly to get a partially charged version instead of the fully charged one.
|
| X(N)
|
Attack "X" should only hit N times.
|
| (XYZ)xN
|
XYZ string must be performed N times. Combos using this notation are usually referred to as loops.
|
| (XYZ^)
|
A pre-existing combo labelled XYZ is inserted here for shortening purposes.
|
| CH
|
The first attack must be a Counter Hit.
|
| Air CH
|
The first attack must be a Counter Hit on an airborne opponent.
|
| 66
|
Performs a ground forward dash.
|
| j.66
|
Performs an aerial forward dash, used as a cancel for certain characters' air strings.
|
| IAD/IABD
|
Performs an Instant AirDash.
|
| AT
|
Performs an Air Throw. (j.6/4A+D)
|
| IH
|
Performs an Initiative Heat.
|
| AD
|
Performs an Arc Drive.
|
| AAD
|
Performs an Another Arc Drive.
|
Normal Combos
| Condition
|
Notation
|
Damage
vs V.Sion
|
Notes
|
|
| Normal starter, grounded opponent
|
- (5A/2A) > 5C(4) > 4B > j.BC > sdj.BC > j.66 > AT
|
3936
|
| |
| Meter Gained: ??? |
Meter Given (vs C-Moon): ??? |
Basic bread and butter combo. Works on every character from all distances. Use this if you're not sure what to go for.
If you have too much gravity scaling in the combo, the second j.BC segment will whiff on small characters (Len, WLen, Miyako, Satsuki). Use j.CB instead on those characters for better stability.
The airdash forward before the air throw is for extra corner carry. |
|
|
| Normal starter, grounded opponent
|
- (5A/2A) > 5C(4) > 2B > (delay) 5B > 4B > TK j.236[B], sj9.BC > sdj.BC > AT
|
???
|
| |
| Meter Gained: ??? |
Meter Given (vs C-Moon): ??? |
Better damage, meter gain, and corner carry than the above combo. Doesn't work from far 5C hits, but you should be fine for most distances.
With a little bit of gravity scaling (say, a 5A > 6A or j.C starter), you should be able to airdash before the AT for extra corner carry. |
|
|
| 5B starter, grounded opponent
|
- 5B > 3C > 5C(4) > j.BC > sdj.BC > j.66 > AT
|
???
|
| |
| Meter Gained: ??? |
Meter Given (vs C-Moon): ??? |
Basic combo for 5B starters. The 5C cancel might be a little tricky for beginners, but otherwise very stable.
You usually go for this combo when tech punishing with 5B, or going low with 5B in a fuzzy guard mixup. |
|
|
| Normal starter, grounded opponent, 100% meter
|
- (5A/2A) > 5C(4) > 3C > 236C, 236[A], walk forward 2B > 5B > 5C(4) > j.BC > dj.CB> j.66 > AT
|
???
|
| |
| Meter Gained: ??? |
Meter Given (vs C-Moon): ??? |
Use this if you need to blow meter for extra damage damage and corner carry.
If you feel your opponent is too low after the first j.BC, you can correct the combo by going for j.CB instead in the double jump segment.
5B > 3C > 5C (1) can be used as a starter and leads to the same combo.
It's worth mentioning that you if you skip 236[A], you have enough time to dash to the other side to get a side swap. Very useful for punishing opponents teching out of the corner. |
|
|
Corner Combos
| Condition
|
Notation
|
Damage
vs V.Sion
|
Notes
|
|
| Normal starter, grounded opponent
|
- (5A/2A) > 5C(4) > 623B, 5A(1) > 5C(4) > j.BC > dj9.BC > AT
|
???
|
| |
| Meter Gained: ??? |
Meter Given (vs C-Moon): ??? |
Situational corner combo.
Gets blocked when Len is too far from the opponent.
It is preferred to go for this combo when you land a good unscaled close hit in the corner.
For scaled starters (j.2C, lots of rebeats, etc), the TK j.236[B] combo will outdamage this combo. |
|
|
Move Descriptions
| Frame Data Help
|
| Header
|
Tooltip
|
| Move Box Colors
|
Light gray = Collision Box (A move lacking one means it can go through the opponent's own collision box).
Green: Hurt Boxes.
Red: Hit(/Grab) Boxes.
Yellow: Clash Boxes (When an active hitbox strikes a clash box, the active hitbox stops being active. Multi-hit attacks can beat clash since they will still progress to the next hitbox.)
Magenta: Projectile-reflecting boxes OR Non-hit attack trigger boxes (usually).
Blue: Reflectable Projectile Boxes.
|
| Damage
|
Base damage done by this attack.
(X) denotes combined and scaled damage tested against standing V. Sion.
|
| Red Damage
|
Damage done to the recoverable red health bar by this attack. The values are inherently scaled and tested against standing V. Sion.
(X) denotes combined damage.
|
| Proration
|
The correction value set by this attack and the way it modifies the scaling during a string. See this page for more details.
X% (O) means X% Overrides the previous correction value in a combo if X is of a lower percentage.
X% (M) means the current correction value in a combo will be Multiplied by X%. This can also be referred to as relative proration.
|
| Circuit
|
Meter gained by this attack on hit.
(X%) denotes combined meter gain.
-X% denotes a meter cost.
|
| Cancel
|
Actions this move can be cancelled into.
SE = Self cancelable.
N = Normal cancelable.
SP = Special cancelable.
CH = Cancelable into the next part of the same attack (Chain in case of specials).
EX = EX cancelable.
J = Jump cancelable.
(X) = Cancelable only on hit.
-X- = Cancelable on whiff.
|
| Guard
|
The way this move must be blocked.
L = Can block crouching
H = Can block standing.
A = Can block in the air.
U = Unblockable.
|
| Startup
|
Amount of frames that must pass prior to reaching the active frames. Also referred to as "True Startup".
|
| Active
|
The amount of frames that this move will have a hitbox.
(x) denotes frame gaps where there are no hitboxes is present. Due to varied blockstuns, (x) frames are difficult to use to determine punish windows. Generally the larger the numbers, the more time you have to punish.
X denotes active frames with a duration separate from its origin move's frame data, such as projectile attacks. In this case, the total length of the move is startup+recovery only.
|
| Recovery
|
Frames that this move has after the active frames if not canceled. The character goes into one frame where they can block but not act afterwards, which is not counted here.
|
| Advantage
|
The difference in frames where you can act before your opponent when this move is blocked (assuming the move isn't canceled and the first active frame is blocked).
If the opponent uses a move with startup that is at least 2 frames less than this move's negative advantage, it will result in the opponent hitting that move.
±x~±y denotes a range of possible advantages.
|
| Invul
|
Lists any defensive properties this move has.
X y~z denotes X property happening between the y to z frames of the animations. If no frames are noted, it means the invincibility lasts through the entire move.
Invicibility:
- Strike = Strike invincible.
- Throw = Throw invincible.
Hurtbox-Based Properties:
- Full = No hurtboxes are present.
- High = Upper body lacks a hurtbox.
- Low = Lower body lacks a hurtbox.
Miscellaneous Properties
- Clash = Frames in which clash boxes are active.
- Reflect = Frames in which projectile-reflecting boxes are active.
- Super Armor = Frames in which the character can take hits without going into hit stun.
|
Normal Moves
Standing Normals
1st hit 1st hit 2nd hit 2nd hit 6A 6A 6A~6A 6A~6A
|
| 5A
|
Damage
|
Red Damage
|
Proration
|
Cancel
|
Guard
|
| 350*2
|
200*2
|
78%
|
N, -SP-, -CH-, -EX-, (J)
|
LH
|
| First Active
|
Active
|
Recovery
|
Frame Adv
|
Circuit
|
Invuln
|
| 3
|
1(2)5
|
5
|
2
|
2.8%*2
|
-
|
|
Fastest standing normal. Hits twice. You can cancel the normal into any other move before the 2nd hit. You can reverse beat it with 2A and do 5A again in a blockstring.
|
| 5A~6A
|
Damage
|
Red Damage
|
Proration
|
Cancel
|
Guard
|
| 600
|
400
|
80%
|
N, SP, -CH-, EX, (J)
|
LH
|
| First Active
|
Active
|
Recovery
|
Frame Adv
|
Circuit
|
Invuln
|
| 7
|
4
|
16
|
-5
|
4.2%
|
-
|
|
5A followup. Moves Len forward. This button is going to be important in your blockstrings. You can reverse beat it with 2A and do 5A again in a blockstring.
|
| 5A~6A~6A
|
Damage
|
Red Damage
|
Proration
|
Cancel
|
Guard
|
| 1000
|
800
|
60%
|
(N), SP, EX, (J)
|
LH
|
| First Active
|
Active
|
Recovery
|
Frame Adv
|
Circuit
|
Invuln
|
| 10
|
4
|
16
|
-2
|
7.0%
|
-
|
|
Launches on hit. Moves Len forward. Mostly only used for combos.
|
|
|
|
| Damage
|
Red Damage
|
Proration
|
Cancel
|
Guard
|
| 300, 500*2
|
200, 300*2
|
80%
|
N, SP, (J), EX
|
L
|
| First Active
|
Active
|
Recovery
|
Frame Adv
|
Circuit
|
Invuln
|
| 7
|
8
|
12
|
-3
|
1.75%, 3.15%*2
|
-
|
|
Hits three times, all of which hit low. Mainly used for high/low mixups and tech punishing. As the move retracts her collision box, this can be used to make an opponent's Heat whiff. Larger heats such as Warachia's may still hit her if too close. More minus if the last hit doesn't connect.
|
|
1st cycle 1st cycle 2nd cycle 2nd cycle
|
| Damage
|
Red Damage
|
Proration
|
Cancel
|
Guard
|
| 450, 400, 400*3
|
300, 250, 250*3
|
80%
|
N, SP, EX, (J)
|
LH
|
| First Active
|
Active
|
Recovery
|
Frame Adv
|
Circuit
|
Invuln
|
| 6
|
5, (11), 3, (1), 4
|
16
|
-
|
3.5%, 3.0%, 3.0%*3
|
-
|
|
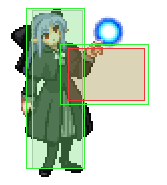
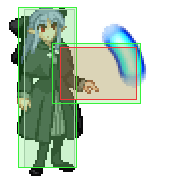
Pretty fast startup for a C normal. Moves Len forward. Hits a total of 5 times. lot of active frames with separated hitboxes from Len and the orb. Sometimes used as a situational anti air. If the opponent is low to the ground after blocking j2C in the air and blockstring filler. This normal can be quite reliable but be cautious if you whiff this move though, as it's very punishable on whiff.
|
|
Crouching Normals
|
|
| Damage
|
Red Damage
|
Proration
|
Cancel
|
Guard
|
| 300
|
120
|
76%
|
N, -SP-, -CH-, -EX-, (J)
|
LH
|
| First Active
|
Active
|
Recovery
|
Frame Adv
|
Circuit
|
Invuln
|
| 3
|
3
|
9
|
0
|
2.1%
|
-
|
|
Fastest crouching normal. Used for poking.
|
|
|
|
| Damage
|
Red Damage
|
Proration
|
Cancel
|
Guard
|
| 650
|
400
|
65%
|
N, SP, EX, (J)
|
L
|
| First Active
|
Active
|
Recovery
|
Frame Adv
|
Circuit
|
Invuln
|
| 7
|
3
|
16
|
-4
|
4.9%
|
-
|
|
Only crouching low. Hard knockdown on hit which you can setup an oki afterwards.
|
|
|
|
| Damage
|
Red Damage
|
Proration
|
Cancel
|
Guard
|
| 750
|
450
|
100%
|
-
|
LH
|
| First Active
|
Active
|
Recovery
|
Frame Adv
|
Circuit
|
Invuln
|
| 13
|
7
|
17
|
-4
|
7.0%
|
-
|
|
Len afterimage has no hurtbox. Cannot be cancelled into anything else. Used for mixing with 3C in pressure. Move is less minus the further away the opponent is when blocking 2C. Used for setting up 4-way corner oki after 236C 236[A].
|
|
Air Normals
|
|
| Damage
|
Red Damage
|
Proration
|
Cancel
|
Guard
|
| 300
|
160
|
75%
|
N, SP, EX, J
|
LHA
|
| First Active
|
Active
|
Recovery
|
Frame Adv
|
Circuit
|
Invuln
|
| 5
|
4
|
8
|
-
|
2.1%
|
-
|
|
Her fastest air normal. Good for air-to-air
|
|
|
|
| Damage
|
Red Damage
|
Proration
|
Cancel
|
Guard
|
| 700
|
400
|
90%
|
N, SP, EX, J
|
HA
|
| First Active
|
Active
|
Recovery
|
Frame Adv
|
Circuit
|
Invuln
|
| 7
|
8
|
-
|
-
|
5.6%
|
-
|
|
Another strong air-to-air button with a very deceptive appearance. Disjointed hitbox and long active frames for an air B, making it a very strong spacing normal.
|
|
SPIKE SPIKE
|
| Damage
|
Red Damage
|
Proration
|
Cancel
|
Guard
|
| 1050
|
700
|
90%
|
N, SP, EX, J
|
HA
|
| First Active
|
Active
|
Recovery
|
Frame Adv
|
Circuit
|
Invuln
|
| 10
|
3
|
-
|
-
|
8.4%
|
-
|
|
Amazing air-to-ground move. Very good coverage below and slightly in front of Len. Also plays a key part of her fuzzy guard mixups in pressure.
|
|
Command Normals
|
|
| Damage
|
Red Damage
|
Proration
|
Cancel
|
Guard
|
| 800
|
500
|
75%
|
N, SP, EX, (J)
|
LH
|
| First Active
|
Active
|
Recovery
|
Frame Adv
|
Circuit
|
Invuln
|
| 9
|
4
|
20
|
-9
|
3.5%
|
-
|
|
Len's standard launcher for combos.
|
|
|
|
| Damage
|
Red Damage
|
Proration
|
Cancel
|
Guard
|
| 1000
|
600
|
78%
|
-
|
LH
|
| First Active
|
Active
|
Recovery
|
Frame Adv
|
Circuit
|
Invuln
|
| 5
|
7
|
24
|
-13
|
10.5%
|
-
|
|
Likely H-Len's most important ground normal. This normal hits very far for only 5 frames of startup, and is usually favorable for Len on trades, given it launches the opponent on counterhit. These properties make this move exceptionally strong for abare and scramble situations. It is also your only way to convert after j2Cs that hit way too far for 5A to connect. Moreover, being able to rebeat in into other normals, such as 5C, can be an useful tool for restablishing pressure in situations where Len ends too far from the opponent to continue pressuring.
|
|
|
|
| Damage
|
Red Damage
|
Proration
|
Cancel
|
Guard
|
| 300*3
|
150*3,
|
80%
|
-
|
HA
|
| First Active
|
Active
|
Recovery
|
Frame Adv
|
Circuit
|
Invuln
|
| 8
|
3,(6),5
|
-
|
-
|
2.8%
|
-
|
|
j.C's partner in crime. Has large disjointed hitboxes and it covers all areas around Len with multi-hits. Is active for as long as Len takes to reach the ground, making it an particularly great jump-in move and what makes H-Len's pressure exceptionally scary in the corner as it can catch bad jump-outs. While falling, inputting 8 right after inputting j.2c causes the move to hop up a bit to extend the move and halt air movement.
|
|
Special Moves
Ground Movement
Best used on grass stages Best used on grass stages
|
| Damage
|
Red Damage
|
Proration
|
Cancel
|
Guard
|
| -
|
-
|
-
|
-
|
-
|
| First Active
|
Active
|
Recovery
|
Frame Adv
|
Circuit
|
Invuln
|
| -
|
-
|
-
|
-
|
-
|
-
|
|
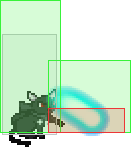
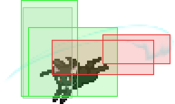
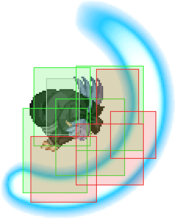
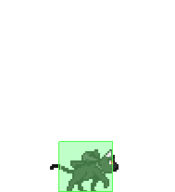
While in a crouching state, she is able to walk forward while crouching with her unique catwalk with low-profile. Turns into a cat with an extremely small hitbox. Allowing her to duck alot of moves. If 3 is released to go back to holding 2, there is a 5f animation before returning to regular crouch animation. This recovery is entirely cancellable. If 3 is released to 6, there is no recovery.
|
|
Ground Specials
A A B B [B] [B] EX EX
|
| A
|
Damage
|
Red Damage
|
Proration
|
Cancel
|
Guard
|
| 800
|
550
|
100%
|
-
|
LA
|
| First Active
|
Active
|
Recovery
|
Frame Adv
|
Circuit
|
Invuln
|
| 18
|
8
|
26
|
-9
|
5.6%
|
-
|
| [A]
|
Damage
|
Red Damage
|
Proration
|
Cancel
|
Guard
|
| 1500
|
-
|
60%
|
-
|
L
|
| First Active
|
Active
|
Recovery
|
Frame Adv
|
Circuit
|
Invuln
|
| 44
|
8
|
8
|
+28
|
8.4%
|
-
|
|
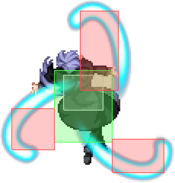
Sends out an icicle facing downwards. Not much use outside of ending pressure safely but it could catch crouching. Charged version is air unblockable and has longer startup. But recovers way faster, more frame advantageous and causes knockdown on hit.
|
| B
|
Damage
|
Red Damage
|
Proration
|
Cancel
|
Guard
|
| 800
|
550
|
100%
|
-
|
LHA
|
| First Active
|
Active
|
Recovery
|
Frame Adv
|
Circuit
|
Invuln
|
| 16
|
8
|
15
|
-8
|
5.6%
|
-
|
| [B]
|
Damage
|
Red Damage
|
Proration
|
Cancel
|
Guard
|
| 800
|
550
|
60%
|
-
|
LH
|
| First Active
|
Active
|
Recovery
|
Frame Adv
|
Circuit
|
Invuln
|
| 32
|
10
|
23
|
+11
|
5.6%
|
-
|
|
B version hits mid. Also not much use outside of ending pressure safely. Charged version has an extra icicle that angled higher and is air unblockable. the top icicle comes out 2f earlier.
|
| EX
|
Damage
|
Red Damage
|
Proration
|
Cancel
|
Guard
|
| 500*8
|
300*8
|
100%
|
(N), (SP), (J), (EX)
|
LH
|
| First Active
|
Active
|
Recovery
|
Frame Adv
|
Circuit
|
Invuln
|
| 16
|
17
|
18
|
+18
|
-100.0%
|
-
|
|
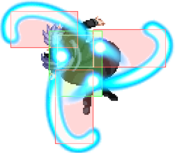
EX version. Sprouts out icicle outwards from Len. The icicle sprites are always generated randomly but it's a solid hitbox. Very good for combos since after 236C hits, you can also go for a sideswap extension or hard knockdown to set up okizeme. Can also catch ground tech and OTG certain characters like Satsuki and Nanaya.
|
|
A A B B EX EX
|
| A
|
Damage
|
Red Damage
|
Proration
|
Cancel
|
Guard
|
| 300*3, 500
|
100*3, 300
|
100%
|
CH
|
LHA
|
| First Active
|
Active
|
Recovery
|
Frame Adv
|
Circuit
|
Invuln
|
| 6
|
17, (7), 3
|
14
|
-2
|
2.1%, 4.2%
|
-
|
|
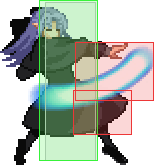
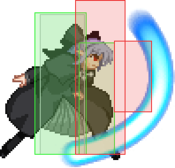
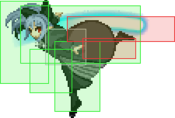
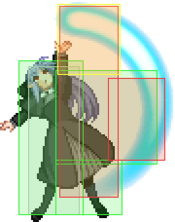
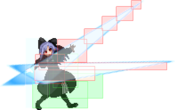
Len does a ballerina spin that ends with a kick. While Len is doing the spin, you can press A to do an additional spin for extension or B to end the spin without doing the kick at the end. This move is can be useful as an occasional pressure tool and how much it brings the opponent closer to the corner when using it in a midscreen blockstring. Double spin is plus on block.
|
| B
|
Damage
|
Red Damage
|
Proration
|
Cancel
|
Guard
|
| 350*3, 1200
|
120*3, 1000
|
100%, 80%
|
CH
|
LHA
|
| First Active
|
Active
|
Recovery
|
Frame Adv
|
Circuit
|
Invuln
|
| 9
|
17, (11), 3
|
24
|
-43, -31
|
2.1%, 8.4%
|
-
|
|
B version starts up and recovers a bit slower than 623A, has more active frames and the kick at the end now does a wallslam. 623B has the same followup buttons as 623A. Rarely ever used over 623A in pressure but is used for corner combos.
|
| EX
|
Damage
|
Red Damage
|
Proration
|
Cancel
|
Guard
|
| 300*8, 1000
|
200*8, 800
|
100%, 70%
|
-
|
LHA
|
| First Active
|
Active
|
Recovery
|
Frame Adv
|
Circuit
|
Invuln
|
| 5
|
24, (11), 9
|
19
|
-30, -16
|
-100%
|
-
|
|
Poor EX move for Len. extremely punishable on block and whiff, air blockable, trades with this move are in favour of the opponent. And does not have any invul frames, making it unsuitable as a reversal.
|
|
A A B B
|
| A
|
Damage
|
Red Damage
|
Proration
|
Cancel
|
Guard
|
| -
|
-
|
-
|
-
|
-
|
| First Active
|
Active
|
Recovery
|
Frame Adv
|
Circuit
|
Invuln
|
| 27
|
1
|
11
|
-
|
-
|
-
|
| (Brown)
|
Damage
|
Red Damage
|
Proration
|
Cancel
|
Guard
|
| -
|
-
|
-
|
-
|
-
|
| First Active
|
Active
|
Recovery
|
Frame Adv
|
Circuit
|
Invuln
|
| -
|
288
|
-
|
-
|
-
|
-
|
| (Tiger)
|
Damage
|
Red Damage
|
Proration
|
Cancel
|
Guard
|
| 100
|
0
|
100%
|
-
|
LHA
|
| First Active
|
Active
|
Recovery
|
Frame Adv
|
Circuit
|
Invuln
|
| 18
|
144
|
-
|
19
|
-
|
-
|
|
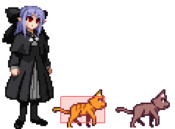
214A summons either a brown or tiger cat. Can have two 214A cats out at a time. The brown cat is the most useless summon for H-Len as it does nothing and takes the longest to disappear. Tiger cat moves the fastest out of all the cats and launches on hit which you can convert into a combo. This move is rarely ever used due to the downside of having a RNG summon between an ok cat and an useless one.
|
| B
|
Damage
|
Red Damage
|
Proration
|
Cancel
|
Guard
|
| -
|
-
|
-
|
-
|
-
|
| First Active
|
Active
|
Recovery
|
Frame Adv
|
Circuit
|
Invuln
|
| 27
|
1
|
11(+16)
|
-
|
-
|
-
|
| (Black)
|
Damage
|
Red Damage
|
Proration
|
Cancel
|
Guard
|
| 100
|
0
|
50%
|
-
|
LHA
|
| First Active
|
Active
|
Recovery
|
Frame Adv
|
Circuit
|
Invuln
|
| 18
|
384
|
-
|
19
|
-
|
-
|
| (Silver)
|
Damage
|
Red Damage
|
Proration
|
Cancel
|
Guard
|
| -
|
-
|
-
|
-
|
-
|
| First Active
|
Active
|
Recovery
|
Frame Adv
|
Circuit
|
Invuln
|
| 18
|
325
|
-
|
-
|
-
|
-
|
|
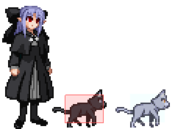
214B summons either a black or silver cat. Can only have one 214B cat out at a time. Black cat is the most useful cat out of the cat summons since it causes a hard knockdown on hit. It can also launch an opponent allowing for combos while having a lower proration than the tiger cat. You can guarantee a black cat summon by inputting 214B~4/6 but you'll recover slower with 27f recovery. Silver cat pushes the opponent towards its direction based on their collision box. Usage for silver cat is limited but it can cause the opponent to drop their combo and pressure while on the ground.
|
|
Nya nya nya... Nya nya nya...
|
| Damage
|
Red Damage
|
Proration
|
Cancel
|
Guard
|
| 222, 850
|
100, 250
|
100%, 50%
|
-
|
LHA
|
| First Active
|
Active
|
Recovery
|
Frame Adv
|
Circuit
|
Invuln
|
| 27
|
22, (30), 6, [(3), 3]xN
|
11
|
-10, 18+26
|
0.70%, 2.10%
|
-
|
|
Important tool with many uses. Len throws out a rocket Neco that launches itself into the air after landing. Can have two Necos out at a time. Len recovers and can act once the Neco touches the ground. Can send out two on-screen. The hitbox of the Neco while Len is throwing it hits high while it's hitbox when flying hits mid. It can be used for space control in neutral, catch people blocking low and bad jump-outs in corner pressure and as an oki tool. The hitbox for the second hit stays active until Neco goes offscreen or it hits the opponent.
|
|
(Hurtbox while held) (Hurtbox while held)
|
| A
|
Damage
|
Red Damage
|
Proration
|
Cancel
|
Guard
|
| -
|
-
|
-
|
-
|
-
|
| First Active
|
Active
|
Recovery
|
Frame Adv
|
Circuit
|
Invuln
|
| 36
|
5~365
|
0
|
-
|
-
|
Full 27-36
|
| B / [B]
|
Damage
|
Red Damage
|
Proration
|
Cancel
|
Guard
|
| -
|
-
|
-
|
-
|
-
|
| First Active
|
Active
|
Recovery
|
Frame Adv
|
Circuit
|
Invuln
|
| 36
|
1~359 / 360*
|
16
|
-
|
-
|
Full 27-36, 38 / 397-398*
|
| C
|
Damage
|
Red Damage
|
Proration
|
Cancel
|
Guard
|
| -
|
-
|
-
|
-
|
-
|
| First Active
|
Active
|
Recovery
|
Frame Adv
|
Circuit
|
Invuln
|
| 36
|
1~360
|
13
|
-
|
-
|
Full 27-36, 38-46*
|
|
Len's teleport series. Len will make herself invisible before reappearing in a different position based on the version used. Holding the button can make the duration before she reappears longer, but will be telegraphed through the sparkling animation that occurs throughout.
A -> Len will reappear in her initial position.
B -> Len will reappear about 3 hitboxes in-front of her initial position. Holding B for the full duration will double the distance.
C -> Len will reappear above in the air from her initial position. Len can move in the air right after reappearing.
|
|
Air Specials
A A B B [B] [B] EX EX
|
| A
|
Damage
|
Red Damage
|
Proration
|
Cancel
|
Guard
|
| 800
|
550
|
100%
|
-
|
LHA
|
| First Active
|
Active
|
Recovery
|
Frame Adv
|
Circuit
|
Invuln
|
| 11
|
8
|
7
|
4*
|
5.6%
|
-
|
|
Text
|
| B
|
Damage
|
Red Damage
|
Proration
|
Cancel
|
Guard
|
| 800
|
550
|
100%
|
-
|
LHA
|
| First Active
|
Active
|
Recovery
|
Frame Adv
|
Circuit
|
Invuln
|
| 12
|
8
|
7
|
0*
|
5.6%
|
-
|
|
Text
|
| [B]
|
Damage
|
Red Damage
|
Proration
|
Cancel
|
Guard
|
| 800
|
550
|
60%
|
-
|
LH
|
| First Active
|
Active
|
Recovery
|
Frame Adv
|
Circuit
|
Invuln
|
| 24
|
8
|
7
|
33*
|
5.6%
|
-
|
|
Text
|
| EX
|
Damage
|
Red Damage
|
Proration
|
Cancel
|
Guard
|
| 500*
|
450*
|
100%
|
-
|
LHA
|
| First Active
|
Active
|
Recovery
|
Frame Adv
|
Circuit
|
Invuln
|
| 1+9~12
|
18
|
6
|
0*
|
-100%
|
Full 1+9~12
|
|
Text
|
|
Arc Drive
Ephemeral Transience
41236C during Heat
|
| Damage
|
Red Damage
|
Proration
|
Cancel
|
Guard
|
| 440*N
|
360*N
|
50%
|
-
|
LHA
|
| First Active
|
Active
|
Recovery
|
Frame Adv
|
Circuit
|
Invuln
|
| 8+10
|
X*
|
41
|
-10~252
|
Removes HEAT
|
Full 1-8
|
|
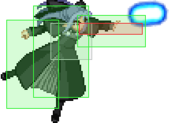
Len creates an orb and throws it out which will travel across the stage. Remains active until the orb goes offscreen. The orb also has clashboxes. Blocking the orb standing for a duration of time will bring in the orb closer until it eventually phase through your hitbox.
|
|
MBAACC Navigation


