Character Page Progress
This page has been merged with translations from the French wiki BasGrosPoing
This page is still a work in progress renovation-wise, consider joining as an editor to help expand it. Please update this character's roadmap page when one of the editing goals have been reached.
| In Progress |
To-do
|
- Overview/General Gameplan:
- Entire section probably needs a total rewrite.
- Move Descriptions:
- Finish updating move descriptions to modern standards.
|
- Combos:
- Probably reformat this section and cut out bloat. Add damage / meter values and vid examples as always
- (Additional Ressources/Players to watch/ask)
- (Add any external links to resources such as video guides or articles.)
|
Additional Resources
C-Ryougi Match Video Database
Players to watch/ask
JP:
Overview
Playstyle
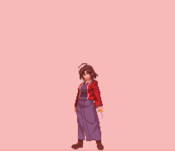
 C-Ryougi is an ape with some tricks. C-Ryougi is an ape with some tricks. |
| Pros |
Cons |
- Good general mobility: Average run speed combined with an absolutely fantastic airdash.
- Strong neutral: Her aerials are incredible, j.B is notable, which absolutely controls the skies, and she can quickly reposition to catch airborne opponents landing. Her grounded buttons are good too, outranging many characters.
- High amount of gimmicks and knowledge checks: Unblockables, rekkas, rebeats, overheads, and a crossup overhead that is safe on block, C-Ryougi is never out of gimmicks to catch you with.
- Menacing in Blood Heat: A fearsome character in BH, her AAD is one of the best reversals and command grabs in the game and her Last Arc does 7k damage unscaled.
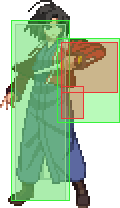
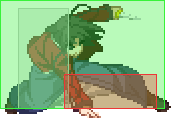
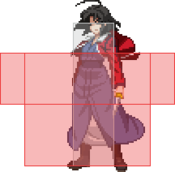
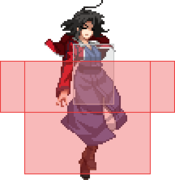
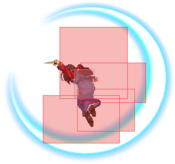
- Weird hurtbox during hitstun: A lot of characters lose routes and confirms on Ryougi, giving her an additional chance at life.
- High meter gain: C-Ryougi gains nearly a full bar from most of her combos.
- Good damage with meter: Using her unique "Genei Jin" super, C-Ryougi can break 6k, damage far above what a character of her tier should be getting.
|
- Poor defense: 5A being tiny, her fastest button you can use in most abare situations is 2A. She also completely lacks meaningful reversals outside of Blood Heat.
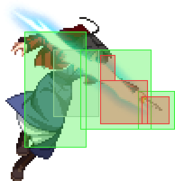
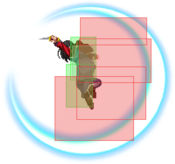
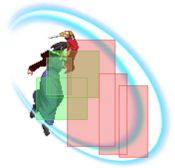
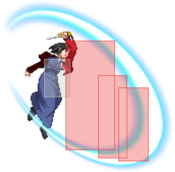
- Extended hurtboxes: C-Ryougi extends a lot of green before and during her active frames on most of her pokes, making it easy to get counter-hit without pristine spacing. In practice, this can make it difficult to antiair a lot of characters.
- Low damage without meter: C-Ryougi's main BnB doesn't even break 4k, coupled with her highly gimmicky offense this can make a clean combo hard to start.
- Frequent returns to neutral: Her airthrow gives her weak to nonexistent okizeme midscreen and mediocre okizeme against most of the cast in the corner, whereas j.236X ender is usually a return to neutral if the opponent doesn't go for risky plays. Her rebeats don't put her at an advantageous position either most of the time.
- Low health: Ryougi has the 5th lowest HP in the game and insignificant guts. She bleeds for her mistakes; F-Ryougi arguably more so than the other moons due to how often she returns to neutral.
- Long recovery on pokes: Her recovery on non-5A moves is at best 17 frames, messing up your spacing can mean game over.
|
General Gameplan
Neutral
Mostly being precise with j.B and 5B.
Use your quick airdashes to get in or retreat.
Retreating is important for C-Ryougi, as it sets up her quick airdash to get in when the moment presents itself.
Offense
C-Ryougi has mediocre pressure and usually ends up giving up on it and falling back to neutral, unless you want to take some risk.
Example blockstring: ...5B > 2C > 5A(whiff) > 5B > 2C...
If you want to take risks, you should go for rekka high/low (236A>214A/214D), frame traps(half charge 5C or 6C), unblockables (use 5C or 6C the others are too slow), or the 421 series for a crossup overhead (preferably B because that one is jump cancellable so you won't die on block)
Unblockables
You have 5 unblockable moves. They are generally weak, but work well vs F-Moon opponents, because they don't have the option to dodge.
Since they cannot dodge, they are forced to shield it, or use some kind of reversal. They usually shield it, as it is easier.
You cannot combo from hitting an unblockable.
- 5[C] is the fastest unblockable. Active on 31st frame. Main drawback of this move is that opponent can tech in the air after getting hit.
- 6[C] is active on 33rd frame. However opponent cannot tech in the air, so you can catch them teching on the ground if you guess right. It also has bigger range than 5[C] and doesn't move you forwards. Range can be important, as even if they shield it, some shield counters will whiff.
- 623[A] is active on 38th frame. This is an unblockable you want to do as a meaty rather than pressure reset. As meaty it is fairly safe to do midscreen, because you will dash behind the opponent even if they shield. It can still be punished by unorthodox means like weird specials, good backdashes.
Sometimes this move is useful to use after ending combo with j.236B. Opponent is going to be high in the air, and will not see where you are on the ground. So this move might catch them off guard.
- 623[B] is active on 45th frame. Useless, same properties as 623[A] just slower.
- 623[C] is active on 40th frame. Same properties as 623[A] just a bit more dmg + screen flash might scare opponents into trying to block it.
One big note about unblockables is that they do big amounts of red hp damage.
- 5[C] and 6[C] do 1500 normal hp dmg, and 3000 red hp dmg.
- 623[A] and 623[B] do 1500 normal hp dmg, and 3500 red hp dmg.
- 623[C] does 1900 normal hp dmg, and a whopping 4500 red hp dmg.
So consider opponents red hp gauge and if you want to clear it.
421 series
C-Ryougi has a unique 421 series that crosses up and hits overhead. The monke flip.
This move pretty good as it can be cancelled from normals, and is not easy to punish.
- 421A is the fast version. Active on frame 30. Big drawback is that it is not jump cancellable, making it risky vs shields. You can still special cancel it with j.236C to punish a shield counter, and it will combo into it on hit.
- 421B is slower. Active on 36th frame. Can be jump cancelled. Has a weird airdash restriction, if you started combo/blockstring off of ground dash cancel e.g. dash > 2A, then you will not be allowed to airdash after this move.
If you fully recover the dash, then do 2A > 421B > jump cancel, then you can airdash.
- 421C, active on 27th frame (there is some flash freeze, so this is very much reactable). Mainly used as an escape tool from the corner, some starting frames are hit invulnerable.
Okizeme/Setups
C-Ryougi has a 50/50 setup in the corner.
It's fairly technical because it's character specific.
The combo string is 2AAA > 2B > 5BB > 5C > 2C > (delay?) 5A > 236C.
Doesn't work on Aoko, Tohno, All Akihas, and Kohaku. Always out of the corner.
Always crosses up on Kouma, Miyako, Len, WLen. Can still be used as a knowledge check.
Works on rest of the characters, however the delay varies to get crossup or not per character.
The lower the opponent(more delay) before 236C, the bigger the odds that they will be pulled out of the corner.
C-Ryougi has universal okizeme options to choose from as well. As long as the opponent is airborne you can use 236A~236A~236A and you can manually time a safe jump on every character mid-screen. If they are in the corner you can manually time a super jump forward(29) to meaty them safely.
Here are some of her okizeme routes from her TKj.236B routes in the corner:
- ...>2C > TKj.236B, 5BB > 214A, 2C > 5C > 236C
This route uses meter but gives full you plenty of time to set up a 50/50 in or out of the corner. The hard part is watching the height as some characters float too high and go over Ryougi, so you need to delay your link of the TKj.236B and the 5BB. Do note that the 2C can change which side the opponent is on so be sure to watch carefully, you should be able to control it if you watch your links and their height.
- ...>2C > TKj.236B, 5BB > 214A, 2C > 2A(w) > (2A) > 236A~236A~236A
Does not use meter nor grants a 50/50 but it is her one of her more damaging corner enders without meter. Due to ending in the 236A rekka ender she can super jump after to safe jump. Be wary of the height and timing as the second 2A can whiff sometimes. If the 2A(w) > 2A is too hard feel free to just do 2A into rekka.
Defense
No invincibility on start up but it gains some soon after so it can be used against certain set ups in pressure to reset back to neutral. If it is shielded it's fine, it can be canceled with jump so you can air block or air dash back to get away. Because it does cross up it does get you out of the corner which can be life saving in some match ups, also the angle it hits at makes it tough to duck under.
Similar to 421C but it has invincibility on start up, but not for very long(frames 1 to 3). Even if shielded you are still able to jump cancel it adding some extra safety. The hitbox is very high and will not hit crouching characters, so if they meaty with a low, long range move you're probably getting punished as their move will recover in time. Can be used to break out similar to 421C as the invincibility on start up is always appreciated.
A rarer but situational reversal option. Due to being a TK input it takes 3 frames minimum before invincibility will activate, and the TK motion can be hard to squeeze out in tight blockstrings, but it is a quick option that is only about -6 with decent push back so not the worst option. It can also be used as a panic option to get someone off of you in the air if they are going to land before you, but do know that while you are strike invincible you are not throw invincible and after the flash you can be gAT out of it still.
Combos
| Combo Notation Help
|
Disclaimer: Combos are written by various writers, so the actual notation used in pages can differ from the standard one.
For more information, see Glossary and Controls.
|
| X > Y
|
X input is cancelled into Y.
|
| X > delay Y
|
Must wait for a short period before cancelling X input into Y.
|
| X, Y
|
X input is linked into Y, meaning Y is done after X's recovery period.
|
| X+Y
|
Buttons X and Y must be input simultaneously.
|
| X/Y
|
Either the X or Y input can be used.
|
| X~Y
|
This notation has two meanings.
- Use attack X with Y follow-up input.
- Input X then within a few frames, input Y. Usually used for option selects.
|
| X(w)
|
X input must not hit the opponent (Whiff).
|
| j.X
|
X input is done in the air, implies a jump/jump cancel if the previous move was done from the ground.
Applies to all air chain sections:
- Assume a forward jump cancel if no direction is given.
- Air chains such as j.A > j.B > j.C can be shortened to j.ABC.
|
| sj.X
|
X input is done after a super jump. Notated as sj8.X and sj9.X for neutral and forward super jumps respectively.
|
| dj.X
|
X input is done after a double jump.
|
| sdj.X
|
X input is done after a double super jump.
|
| tk.X
|
Stands for Tiger Knee. X motion must be buffered before jumping, inputting the move as close to the ground as possible. (ex. tk.236A)
|
| (X)
|
X is optional. Typically the combo will be easier if omitted.
|
| [X]
|
Input X is held down. Also referred to as Blowback Edge (BE). Depending on the character, this can indicate that this button is held down and not released until indicated by the release notation.
|
| ]X[
|
Input X is released. Will only appear if a button is previously held down. This type of input is referred to as Negative Edge.
|
| {X}
|
Button X should only be held down briefly to get a partially charged version instead of the fully charged one.
|
| X(N)
|
Attack "X" should only hit N times.
|
| (XYZ)xN
|
XYZ string must be performed N times. Combos using this notation are usually referred to as loops.
|
| (XYZ^)
|
A pre-existing combo labelled XYZ is inserted here for shortening purposes.
|
| CH
|
The first attack must be a Counter Hit.
|
| Air CH
|
The first attack must be a Counter Hit on an airborne opponent.
|
| 66
|
Performs a ground forward dash.
|
| j.66
|
Performs an aerial forward dash, used as a cancel for certain characters' air strings.
|
| IAD/IABD
|
Performs an Instant AirDash.
|
| AT
|
Performs an Air Throw. (j.6/4A+D)
|
| IH
|
Performs an Initiative Heat.
|
| AD
|
Performs an Arc Drive.
|
| AAD
|
Performs an Another Arc Drive.
|
Normal Combos
| Condition
|
Notation
|
Damage
vs V.Sion
|
Notes
|
|
| Normal starter, grounded opponent
|
- 2AA > 2B > 5BB > 5C > 2C > 6C > j.BC > (airdash j.C) > j.BC j.236B
|
4203
|
| |
| Meter Gained: 101 |
Meter Given (vs C-Moon): 30.3 |
| Basic combo. Airdash j.C is optional, but its a free damage and is not very hard to do. Airdash j.C is height specific, and grounded 2C 6C starter allows for it to be a reliable option. |
|
|
| Normal starter, grounded opponent
|
- 2AA > 2B > 5BB > 5C > 2C > 6C > 22A/B, 2A > 2C > 5C > 5BB > j.BC > j.ABC > j.236B
|
4305
|
| |
| Meter Gained: 136.5 |
Meter Given (vs C-Moon): ??? |
| There is a delay between 2C > 5C, this applies for all combos below. Combo gives good meter, but it's arguable if tossing a knife in this combo is worth it. |
|
|
| Normal starter, grounded opponent
|
- 2A > 2B > 5BB > 5C > 2C > 6C > 22A/B, 2A > 2C > 623B, 2C > 5C > 5BB > j.BC > j.ABC > j.236B
|
4334
|
| |
| Meter Gained: 152.3 |
Meter Given (vs C-Moon): 47.5 |
| Advanced combo for more damage, but is impractical for the damage gained. Does not work with more than 1x 2A, because opponent lands before 623B due to gravity. Might be char specific. |
|
|
| Normal starter, grounded opponent, 100% meter
|
- 2AA > 2B > 5BB > 5C > 236A~236A~236C > 214C > j.A(w), land 2C > 5C > 5BB > j.BC > j.ABC > j.236B
|
4760
|
| |
| Meter Gained: 94.8 - 100 |
Meter Given (vs C-Moon): 42.5 |
| The opponent has to be on the ground when you start the Rekkas, or else "236C" will not hit. |
|
|
| Normal starter, grounded opponent, 100% meter, far from corner
|
- 2AA > 2B > 5BB > 5C > 236A~236A~236C > 22C, 214A > 2C > 5C > 5BB > j.BC > j.ABC > j.236B
|
5142
|
| |
| Meter Gained: 99.1 - 100 |
Meter Given (vs C-Moon): 45.5 |
| Needs to be done far away from the corner. Good damage. Delay between 22C and 214A is key for consistency. Try adding micro walk back before 2C to make it not hit behind and whiff 5C. Otherwise 2C > 5C can be changed to 2C > 2B. |
|
|
| Normal starter, grounded opponent, 150% meter
|
- 2AA > 2B > 5BB > 5C > 63214C~[8 > (delay > 6~8)x3 > 4] > 5BB > j.BC > j.ABC > j.236B
|
6124
|
| |
| Meter Gained: 55.8 - 150 |
Meter Given (vs C-Moon): 49.4 |
| Great damage. Can be used if you started combo with 120 meter |
|
|
| colspan="1"|
| Normal starter, grounded opponent, midscreen or slightly further
|
- 2AA > 2B > 5BB > 5C > 214A, 5BB(tk.236B) > j.BC > j.BC > AT/j236B
|
4014(4202)
|
|
|
| Meter Gained: 90.0(???) |
Meter Given (vs C-Moon): ??? |
| A slightly more damaging BnB with more corner carry and meter gain. Will not work at certain ranges. tk.236B is inconsistent, more research is needed as to who it works on. |
|
|-
Corner Combos
| Condition
|
Notation
|
Damage
vs V.Sion
|
Notes
|
|
| Normal starter, grounded opponent
|
- 2AA > 2B > 5BB > 5C > 214A > 2A > 2C > 5C > 5BB > j.BC > j.ABC > j.236B
|
4577
|
| |
| Meter Gained: 119.5 |
Meter Given (vs C-Moon): 36.9 |
| Corner combo for damage. |
|
|
| Normal starter, grounded opponent, 100% meter
|
- 2AA > 2B > 5BB > 5C > 214A > 2A > 2C > 236C
|
3962
|
| |
| Meter Gained: 53 - 100 |
Meter Given (vs C-Moon): 20.3 |
| Corner combo with meter, less damage but good okizeme. Depending on the delay between 2C and 236C you can force opponent be in the corner, or slightly out of it. So air dashing over them after 236C is a left/right mixup and then land > 2A is a left/right mixup. Might be character specific. |
|
|
Tigerknee Corner Combos
| Condition
|
Notation
|
Damage
vs V.Sion
|
Notes
|
|
| Normal starter, grounded opponent
|
- 2AA > 2B > 5BB > 5C > 2C > 6C > TK j.236B > j.BC > j.ABC > j.236B
|
4449
|
| |
| Meter Gained: 111.5 |
Meter Given (vs C-Moon): 33.4 |
| Basic version, easy to execute. |
|
|
| Normal starter, grounded opponent
|
- 2AA > 2B > 5BB > 5C > 2C > TK j.236B, 5BB > 214A > j.BC > j.BC > j.236B
|
4651
|
| |
| Meter Gained: 115 |
Meter Given (vs C-Moon): 35.6 |
| Advanced version, "5BB" link is tricky. |
|
|
| Normal starter, grounded opponent, 100% meter
|
- 2AA > 2B > 5BB > 5C > 2C > TK j.236B, 5BB > 214A, 2C > 236C
|
4715
|
| |
| Meter Gained: 86 - 100 |
Meter Given (vs C-Moon): 29.1 |
| Meter version, okizeme. Sometimes 2C will hit behind, so will need to do 214C to get 236C, it will still hit. |
|
|
Move Descriptions
| Frame Data Help
|
| Header
|
Tooltip
|
| Move Box Colors
|
Light gray = Collision Box (A move lacking one means it can go through the opponent's own collision box).
Green: Hurt Boxes.
Red: Hit(/Grab) Boxes.
Yellow: Clash Boxes (When an active hitbox strikes a clash box, the active hitbox stops being active. Multi-hit attacks can beat clash since they will still progress to the next hitbox.)
Magenta: Projectile-reflecting boxes OR Non-hit attack trigger boxes (usually).
Blue: Reflectable Projectile Boxes.
|
| Damage
|
Base damage done by this attack.
(X) denotes combined and scaled damage tested against standing V. Sion.
|
| Red Damage
|
Damage done to the recoverable red health bar by this attack. The values are inherently scaled and tested against standing V. Sion.
(X) denotes combined damage.
|
| Proration
|
The correction value set by this attack and the way it modifies the scaling during a string. See this page for more details.
X% (O) means X% Overrides the previous correction value in a combo if X is of a lower percentage.
X% (M) means the current correction value in a combo will be Multiplied by X%. This can also be referred to as relative proration.
|
| Circuit
|
Meter gained by this attack on hit.
(X%) denotes combined meter gain.
-X% denotes a meter cost.
|
| Cancel
|
Actions this move can be cancelled into.
SE = Self cancelable.
N = Normal cancelable.
SP = Special cancelable.
CH = Cancelable into the next part of the same attack (Chain in case of specials).
EX = EX cancelable.
J = Jump cancelable.
(X) = Cancelable only on hit.
-X- = Cancelable on whiff.
|
| Guard
|
The way this move must be blocked.
L = Can block crouching
H = Can block standing.
A = Can block in the air.
U = Unblockable.
|
| Startup
|
Amount of frames that must pass prior to reaching the active frames. Also referred to as "True Startup".
|
| Active
|
The amount of frames that this move will have a hitbox.
(x) denotes frame gaps where there are no hitboxes is present. Due to varied blockstuns, (x) frames are difficult to use to determine punish windows. Generally the larger the numbers, the more time you have to punish.
X denotes active frames with a duration separate from its origin move's frame data, such as projectile attacks. In this case, the total length of the move is startup+recovery only.
|
| Recovery
|
Frames that this move has after the active frames if not canceled. The character goes into one frame where they can block but not act afterwards, which is not counted here.
|
| Advantage
|
The difference in frames where you can act before your opponent when this move is blocked (assuming the move isn't canceled and the first active frame is blocked).
If the opponent uses a move with startup that is at least 2 frames less than this move's negative advantage, it will result in the opponent hitting that move.
±x~±y denotes a range of possible advantages.
|
| Invul
|
Lists any defensive properties this move has.
X y~z denotes X property happening between the y to z frames of the animations. If no frames are noted, it means the invincibility lasts through the entire move.
Invicibility:
- Strike = Strike invincible.
- Throw = Throw invincible.
Hurtbox-Based Properties:
- Full = No hurtboxes are present.
- High = Upper body lacks a hurtbox.
- Low = Lower body lacks a hurtbox.
Miscellaneous Properties
- Clash = Frames in which clash boxes are active.
- Reflect = Frames in which projectile-reflecting boxes are active.
- Super Armor = Frames in which the character can take hits without going into hit stun.
|
Normal Moves
Standing Normals
|
|
| Damage
|
Red Damage
|
Proration
|
Cancel
|
Guard
|
| 350
|
196
|
75% (O)
|
-SE-, -N-, -SP-, -EX-, (J)
|
LH
|
| First Active
|
Active
|
Recovery
|
Frame Adv
|
Circuit
|
Invuln
|
| 4
|
4
|
9
|
-1
|
3.5%
|
-
|
|
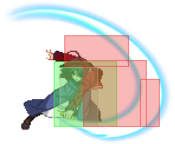
Tied with 2A for Ryougi's fastest normal. Air unblockable. The range is not much, but it's still decent. If you really need to, you can use it as an emergency anti-air, but you'll probably get beat out.
|
|
|
|
| 5B
|
Damage
|
Red Damage
|
Proration
|
Cancel
|
Guard
|
| 500
|
245
|
80% (O)
|
N, SP, CH, EX, (J)
|
LH
|
| First Active
|
Active
|
Recovery
|
Frame Adv
|
Circuit
|
Invuln
|
| 8
|
3
|
18
|
-6
|
5.0%
|
Clash 9-11
|
|
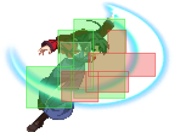
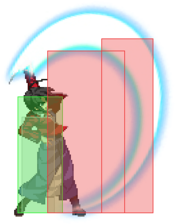
Mid-range knife swipe with excellent horizontal range and clash frames. Moves forward very slightly. Her second best combo starter and best overall standing poke; can be repeated into another delayable 5B. It has terrible lag on whiff however, and is prone to backdash-canceling and dodges.
|
| 5B~B
|
Damage
|
Red Damage
|
Proration
|
Cancel
|
Guard
|
| 600
|
343
|
70%
|
N, SP, EX, (J)
|
LH
|
| First Active
|
Active
|
Recovery
|
Frame Adv
|
Circuit
|
Invuln
|
| 4
|
3
|
18
|
-4
|
6.0%
|
Clash 5-7
|
|
A close range knife swipe follow-up to her 5B. Has good range, but not as long as her 5B. Keeps her in place. Used primarily in combos and pressure strings to add damage/deplete guard meter.
|
|
|
|
| 5C
|
Damage
|
Red Damage
|
Proration
|
Cancel
|
Guard
|
| 850
|
392
|
80% (O)
|
N, SP, EX, (J)
|
LH
|
| First Active
|
Active
|
Recovery
|
Frame Adv
|
Circuit
|
Invuln
|
| 10
|
4
|
17
|
-4
|
8.5%
|
Clash 11-14
|
|
Downward knife swipe with less range than 5B and moves Ryougi forward a bit. Deals a little bit of chip dmg.
|
| 5[C]
|
Damage
|
Red Damage
|
Proration
|
Cancel
|
Guard
|
| 1500
|
2940
|
100%
|
-
|
U
|
| First Active
|
Active
|
Recovery
|
Frame Adv
|
Circuit
|
Invuln
|
| 30
|
4
|
28
|
-
|
15.0%
|
Clash 31-34
|
|
Becomes an unblockable while charged, launching the opponent into an air tech state on hit.
|
|
Crouching Normals
|
|
| Damage
|
Red Damage
|
Proration
|
Cancel
|
Guard
|
| 300
|
147
|
75% (O)
|
-SE-, -N-, -SP-, -EX-, (J)
|
L
|
| First Active
|
Active
|
Recovery
|
Frame Adv
|
Circuit
|
Invuln
|
| 4
|
4
|
9
|
-1
|
3.0%
|
-
|
|
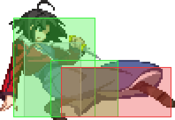
Close ranged crouching low kick. Fastest normal along with 5A. Best combo starter. Best whiff cancel move for pressure and stagger strings. Can be used for off-the-ground pick ups.
|
|
2 frames slower than H-moon 2B for some reason 2 frames slower than H-moon 2B for some reason
|
| Damage
|
Red Damage
|
Proration
|
Cancel
|
Guard
|
| 550
|
392
|
90% (O)
|
N, SP, EX, (J)
|
L
|
| First Active
|
Active
|
Recovery
|
Frame Adv
|
Circuit
|
Invuln
|
| 10
|
3
|
15
|
-1
|
5.5%
|
Clash 11-13
|
|
Mid-range crouching horizontal knife swipe with clash frames. Good range. Highest damage combo starter.
|
|
|
|
| Damage
|
Red Damage
|
Proration
|
Cancel
|
Guard
|
| 900
|
490
|
55% (O)
|
N, SP, EX, (J)
|
L
|
| First Active
|
Active
|
Recovery
|
Frame Adv
|
Circuit
|
Invuln
|
| 13
|
2
|
28
|
-12
|
9.0%
|
-
|
|
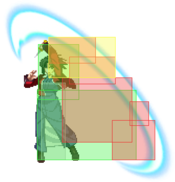
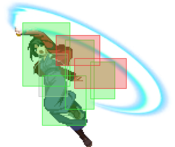
Slow, long-range crouching low slash that also moves Ryougi forward. Gives an untechable knockdown and hits at a very large arc in front, behind, and a little bit above her. Great option after a ground throw, as it will hit exactly on wakeup of most characters. Very useful in blockstrings and staggering combos as it propels Ryougi forward, allowing her to catch any backdash cancels. Had its active frames nerfed from AA to CC, changing the timings on many of her corner combos.
|
|
Aerial Normals
|
|
| Damage
|
Red Damage
|
Proration
|
Cancel
|
Guard
|
| 300
|
147
|
75% (O)
|
SE, N, -SP-, -EX-, (J)
|
LHA
|
| First Active
|
Active
|
Recovery
|
Frame Adv
|
Circuit
|
Invuln
|
| 6
|
4
|
10
|
-
|
3.0%
|
-
|
|
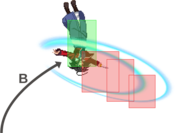
A downward stab. You can cancel this move into commands and EX edges even if you whiff.
|
|
"Why do some people think C is better than H?" "Why do some people think C is better than H?"
|
| Damage
|
Red Damage
|
Proration
|
Cancel
|
Guard
|
| 550
|
294
|
80% (O)
|
N, SP, EX, (J)
|
H
|
| First Active
|
Active
|
Recovery
|
Frame Adv
|
Circuit
|
Invuln
|
| 6
|
4
|
-
|
-
|
5.5%
|
-
|
|
Downward swipe. Good for both air to air and air to ground. Can hit behind on everyone except: Tohno, Sion, Satsuki, Len, WLen
|
|
|
|
| Damage
|
Red Damage
|
Proration
|
Cancel
|
Guard
|
| 850
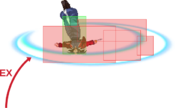
|
392
|
90% (O)
|
N, SP, EX, (J)
|
HA
|
| First Active
|
Active
|
Recovery
|
Frame Adv
|
Circuit
|
Invuln
|
| 7
|
4
|
-
|
-
|
8.5%
|
-
|
|
Upward swipe.
|
|
Command Normals
|
|
| 6C
|
Damage
|
Red Damage
|
Proration
|
Cancel
|
Guard
|
| 850
|
588
|
85% (M)
|
SP, (CH), EX, (J)*
|
L
|
| First Active
|
Active
|
Recovery
|
Frame Adv
|
Circuit
|
Invuln
|
| 14
|
3
|
24
|
-9
|
8.5%
|
-
|
|
Low-hitting standing slash. On hit against a grounded opponent, this will make Ryougi switch sides and allows for an unique EX followup with 214C.
|
| 6[C]
|
Damage
|
Red Damage
|
Proration
|
Cancel
|
Guard
|
| 1500
|
2940
|
100%
|
-
|
U
|
| First Active
|
Active
|
Recovery
|
Frame Adv
|
Circuit
|
Invuln
|
| 32
|
3
|
29
|
-
|
15.0%
|
-
|
|
Becomes an unblockable when charged.
|
|
Universal Mechanics
|
|
| Damage
|
Red Damage
|
Proration
|
Cancel
|
Guard
|
| 1500
|
980
|
100%
|
-
|
U
|
| First Active
|
Active
|
Recovery
|
Frame Adv
|
Circuit
|
Invuln
|
| 2
|
1
|
20
|
13 ~ 18
|
15.0%
|
-
|
|
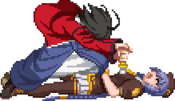
Ryougi pins the opponent to the ground then stabs them in the chest.
One of the trickiest ground throws due to a bug where opponents cannot run their reversal options on wakeup on the neutral frame. So after the throw, if you meaty when with a normal on their neutral frame, they are forced to block it or get hit.
Out of the corner, Ryougi will not jump out far away, and you can also try to time another ground throw. Opponents will be forced to tech it or be put in a loop situation.
|
|
Raw Raw Combo Ender Combo Ender
|
Raw /
Combo Ender
|
Damage
|
Red Damage
|
Proration
|
Cancel
|
Guard
|
1600 (1408)
1000
|
(862)
784
|
35%
100%
|
-
|
U
|
| First Active
|
Active
|
Recovery
|
Frame Adv
|
Circuit
|
Invuln
|
| 1
|
1
|
12
|
-
4 ~ 9
|
0.0%
10.0%
|
-
|
|
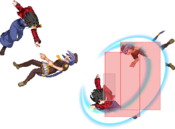
Has completely different animations for whether this is done raw or during a combo. For the former, Ryougi will launch the opponent diagonally downward then slice them, resulting in a ground bounce. For the latter, she will drop the opponent straight below her then stab them like in her ground throw.
|
|
|
|
| Bunker
|
Damage
|
Red Damage
|
Proration
|
Cancel
|
Guard
|
| 500
|
196
|
100%
|
-
|
LHA
|
| First Active
|
Active
|
Recovery
|
Frame Adv
|
Circuit
|
Invuln
|
| 25
|
4
|
19
|
-5
|
0.0%
(-50.0% in blockstun)
|
Clash 1-10
|
| (Clash)
|
Damage
|
Red Damage
|
Proration
|
Cancel
|
Guard
|
| 500
|
196
|
100%
|
-
|
LHA
|
| First Active
|
Active
|
Recovery
|
Frame Adv
|
Circuit
|
Invuln
|
| 7
|
4
|
19
|
-5
|
0.0%/-50.0%
|
Strike 1-7
|
|
A standing-height slash.
|
|
|
|
| Damage
|
Red Damage
|
Proration
|
Cancel
|
Guard
|
| 100
|
0
|
100%
|
-
|
U
|
| First Active
|
Active
|
Recovery
|
Frame Adv
|
Circuit
|
Invuln
|
| 16
|
2
|
29
|
-
|
-100.0% (min)
|
Full 1-18
|
|
Hitbox covers Ryougi completely.
|
|
|
|
| Ground
|
Damage
|
Red Damage
|
Proration
|
Cancel
|
Guard
|
| 100
|
0
|
100%
|
-
|
U
|
| First Active
|
Active
|
Recovery
|
Frame Adv
|
Circuit
|
Invuln
|
| 10
|
10
|
20
|
-
|
removes all
|
Full 1-39
|
| Air
|
Damage
|
Red Damage
|
Proration
|
Cancel
|
Guard
|
| 100
|
0
|
100%
|
-
|
U
|
| First Active
|
Active
|
Recovery
|
Frame Adv
|
Circuit
|
Invuln
|
| 11
|
10
|
15
|
-
|
removes all
|
Strike 1-30
|
|
Universal burst mechanic. Unlike Crescent/Full Heat activation, the hitbox and frame data doesn't vary between characters. However, you can be thrown out of this move if you input it in the air.
|
|
Special Moves
Note: C-Ryougi has two moves where she throws her knife and takes out a second knife. She must retrieve the thrown knife from the ground (with 22A/B/C) before she can throw it again.
Grounded Specials
A/B A/B ~236X ~236X ~214X ~214X ~236A (Ender) ~236A (Ender) ~236B (Ender) ~236B (Ender) ~236C (Ender) ~236C (Ender) ~214D/X (Ender) ~214D/X (Ender) EX EX
|
| A
|
Damage
|
Red Damage
|
Proration
|
Cancel
|
Guard
|
| 750
|
539
|
80% (O)
|
-CH-
|
LH
|
| First Active
|
Active
|
Recovery
|
Frame Adv
|
Circuit
|
Invuln
|
| 9
|
4
|
21
|
-7
|
7.5%
|
-
|
| B
|
Damage
|
Red Damage
|
Proration
|
Cancel
|
Guard
|
| 750
|
539
|
80% (O)
|
-CH-
|
LH
|
| First Active
|
Active
|
Recovery
|
Frame Adv
|
Circuit
|
Invuln
|
| 15
|
3
|
33
|
-18
|
7.5%
|
-
|
- Ryougi's rekka series starter.
A: Ryougi low-profiles and dashes forward with a low knife cut (but it hits mid).
B: Has a slower start-up than the A version, but covers slightly more ground.
|
| ~236X
|
Damage
|
Red Damage
|
Proration
|
Cancel
|
Guard
|
| 900
|
735
|
80% (O)
|
-CH-
|
LH
|
| First Active
|
Active
|
Recovery
|
Frame Adv
|
Circuit
|
Invuln
|
| 4
|
5
|
19
|
-6
|
9.0%
|
-
|
| ~214X
|
Damage
|
Red Damage
|
Proration
|
Cancel
|
Guard
|
| 1200
|
882
|
75% (O)
|
-CH-
|
H
|
| First Active
|
Active
|
Recovery
|
Frame Adv
|
Circuit
|
Invuln
|
| 26 ~ 23
|
3
|
19
|
-7
|
12.0%
|
-
|
| ~214D
|
Damage
|
Red Damage
|
Proration
|
Cancel
|
Guard
|
| 450
|
343
|
50% (O)
|
-EX-
|
L
|
| First Active
|
Active
|
Recovery
|
Frame Adv
|
Circuit
|
Invuln
|
| 10
|
3
|
22
|
-7
|
4.5%
|
-
|
- Second part of the rekka.
236X: Ryougi does a second low knife cut. Still hits mid.
214X: Ryougi does an overhead knife strike. This has a lot of start-up, and does not combo from the previous hit.
214D: Ryougi does a sweep, but you have to be very close to the opponent otherwise it won't connect. This ends the rekka. Hard knockdown on hit.
|
| 236A
|
Damage
|
Red Damage
|
Proration
|
Cancel
|
Guard
|
| 700
|
392
|
50% (O)
|
-
|
LH
|
| First Active
|
Active
|
Recovery
|
Frame Adv
|
Circuit
|
Invuln
|
| 8 ~ 4
|
4
|
20
|
-6
|
7.0%
|
-
|
| 236B
|
Damage
|
Red Damage
|
Proration
|
Cancel
|
Guard
|
| 1200
|
784
|
40% (M)
|
-
|
LH
|
| First Active
|
Active
|
Recovery
|
Frame Adv
|
Circuit
|
Invuln
|
| 12 ~ 8
|
6
|
25
|
-13
|
12.0%
|
-
|
| 236C
|
Damage
|
Red Damage
|
Proration
|
Cancel
|
Guard
|
| 1500
|
980
|
100%
|
-EX-
|
LH
|
| First Active
|
Active
|
Recovery
|
Frame Adv
|
Circuit
|
Invuln
|
| 20 ~ 16
|
10
|
16
|
-10
|
15.0%
|
-
|
| 214X/D
|
Damage
|
Red Damage
|
Proration
|
Cancel
|
Guard
|
| 450
|
343
|
50% (O)
|
-EX-
|
L
|
| First Active
|
Active
|
Recovery
|
Frame Adv
|
Circuit
|
Invuln
|
| 8
|
3
|
22
|
-7
|
4.5%
|
-
|
|
236A: Ryougi ends the rekka with a low horizontal knife cut. Hard knockdown on hit.
236B: Ends the rekka with a knife uppercut. Launches into hard knockdown on hit.
236C: Ends the rekka with a knife thrust. If you're close enough to the opponent, this move can cross-up. Launches high-up into an air-tech state on hit.
214X/D: Ends the rekka with the small sweep.
|
| EX
|
Damage
|
Red Damage
|
Proration
|
Cancel
|
Guard
|
| 3000 (2640)
|
2156
|
100%
|
-
|
LH
|
| First Active
|
Active
|
Recovery
|
Frame Adv
|
Circuit
|
Invuln
|
| 1+9
|
6
|
32
|
-12
|
-100%
|
Full 1-4
|
|
Ryougi dashes forward and covers around 3/4 of the screen. Very good at blowing through a character setting up summons or charged projectiles, but don't overuse it, as you only have 4 invincible frames.
|
|
|
|
| A
|
Damage
|
Red Damage
|
Proration
|
Cancel
|
Guard
|
| 1200
|
1078
|
80% (O)
|
-
|
L
|
| First Active
|
Active
|
Recovery
|
Frame Adv
|
Circuit
|
Invuln
|
| 14
|
4
|
31
|
-7
|
9.8%
|
-
|
| [A]
|
Damage
|
Red Damage
|
Proration
|
Cancel
|
Guard
|
| 1500
|
3430
|
100%
|
-
|
U
|
| First Active
|
Active
|
Recovery
|
Frame Adv
|
Circuit
|
Invuln
|
| 37
|
5
|
35
|
-
|
15.0%
|
-
|
- Ryougi runs forward then perform a low-hitting slash that cross-ups the opponent. All versions can be held to make Ryougi run farther and turn the slash into an unblockable.
Hard knockdown on hit, launches upward when charged.
|
| B
|
Damage
|
Red Damage
|
Proration
|
Cancel
|
Guard
|
| 1200
|
1078
|
55% (O)
|
-
|
L
|
| First Active
|
Active
|
Recovery
|
Frame Adv
|
Circuit
|
Invuln
|
| 21
|
4
|
28
|
-4
|
9.8%
|
-
|
| [B]
|
Damage
|
Red Damage
|
Proration
|
Cancel
|
Guard
|
| 1500
|
3430
|
100%
|
-
|
U
|
| First Active
|
Active
|
Recovery
|
Frame Adv
|
Circuit
|
Invuln
|
| 44
|
5
|
35
|
-
|
15.0%
|
-
|
|
Both uncharged and charged versions launches upward on hit, with the former being air techable.
|
| EX
|
Damage
|
Red Damage
|
Proration
|
Cancel
|
Guard
|
| 1200
|
1078
|
60% (O)
|
-
|
L
|
| First Active
|
Active
|
Recovery
|
Frame Adv
|
Circuit
|
Invuln
|
| 1+17
|
5
|
35
|
-7
|
-100.0%
|
-
|
| [EX]
|
Damage
|
Red Damage
|
Proration
|
Cancel
|
Guard
|
| 1900
|
4410
|
100%
|
-
|
U
|
| First Active
|
Active
|
Recovery
|
Frame Adv
|
Circuit
|
Invuln
|
| 1+38
|
5
|
35
|
-
|
-100.0%
|
-
|
|
Untechable launch on hit.
|
|
|
|
| A
|
Damage
|
Red Damage
|
Proration
|
Cancel
|
Guard
|
| 1000
|
931
|
(90% (M)), 85% (M)
|
-EX-
|
H
|
| First Active
|
Active
|
Recovery
|
Frame Adv
|
Circuit
|
Invuln
|
| 24
|
4
|
20
|
-6
|
10.0%
|
-
|
- Slashing flip. Air-unblockable.
Slash forward. Wallslams on hit.
Has a "hitbox" that extends hitstun on standing opponents during a combo.
|
| B
|
Damage
|
Red Damage
|
Proration
|
Cancel
|
Guard
|
| 1200
|
980
|
50% (O)
|
-EX-
|
H
|
| First Active
|
Active
|
Recovery
|
Frame Adv
|
Circuit
|
Invuln
|
| 26
|
3
|
24
|
-8
|
12.0%
|
-
|
|
Slash downward. Overhead. Knocks opponent up.
|
| EX
|
Damage
|
Red Damage
|
Proration
|
Cancel
|
Guard
|
| 1400
|
980
|
50% (M)
|
N, SP, EX, J
|
LH
|
| First Active
|
Active
|
Recovery
|
Frame Adv
|
Circuit
|
Invuln
|
| 1+13
|
4
|
22
|
-9
|
-100.0%
|
Full 1
|
|
Slash forward. Knocks opponent up. Can cancel on hit or block (e.g. attack or dash).
|
|
A/B A/B EX EX
|
| A
|
Damage
|
Red Damage
|
Proration
|
Cancel
|
Guard
|
| 1200
|
980
|
85% (M)
|
SP, EX
|
H
|
| First Active
|
Active
|
Recovery
|
Frame Adv
|
Circuit
|
Invuln
|
| 29 ~ 59
|
2
|
26
|
-9
|
12.0%
|
-
|
| B
|
Damage
|
Red Damage
|
Proration
|
Cancel
|
Guard
|
| 1200
|
980
|
85% (M)
|
SP, EX, J
|
H
|
| First Active
|
Active
|
Recovery
|
Frame Adv
|
Circuit
|
Invuln
|
| 35 ~ 65
|
2
|
26
|
-9
|
12.0%
|
-
|
| EX
|
Damage
|
Red Damage
|
Proration
|
Cancel
|
Guard
|
| 1200
|
980
|
85% (M)
|
SP, EX, J
|
H
|
| First Active
|
Active
|
Recovery
|
Frame Adv
|
Circuit
|
Invuln
|
| 5+(21 ~ 30)
|
2
|
26
|
-9
|
-100.0%
|
-
|
- Run forward and flipjump to slash the opponent from behind. All versions are downward slashes, overheads, air unblockable.
|
|
|
|
| A
|
Damage
|
Red Damage
|
Proration
|
Cancel
|
Guard
|
| 950
|
735
|
60% (O)
|
-
|
LA
|
| First Active
|
Active
|
Recovery
|
Frame Adv
|
Circuit
|
Invuln
|
| 16
|
11
|
24
|
-3
|
9.5%
|
-
|
| [A]
|
Damage
|
Red Damage
|
Proration
|
Cancel
|
Guard
|
| 1000
|
686
|
100%
|
-
|
LA
|
| First Active
|
Active
|
Recovery
|
Frame Adv
|
Circuit
|
Invuln
|
| 33
|
9
|
22
|
2
|
10.0%
|
-
|
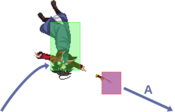
- Ryougi throws her knife, piercing the opponent. If it hits the floor, it will stay in the ground. If it hits the edge of the screen, it will bounce off and spin to the ground.
Ryougi throws the knife at the ground at a low angle, hitting the ground over halfway across the screen. Can be charged for a hard knockdown and to make it unshieldable.
|
| B
|
Damage
|
Red Damage
|
Proration
|
Cancel
|
Guard
|
| 950
|
735
|
60% (O)
|
-
|
LA
|
| First Active
|
Active
|
Recovery
|
Frame Adv
|
Circuit
|
Invuln
|
| 16
|
17
|
18
|
-3
|
9.5%
|
-
|
| [B]
|
Damage
|
Red Damage
|
Proration
|
Cancel
|
Guard
|
| 1000
|
686
|
100%
|
-
|
LA
|
| First Active
|
Active
|
Recovery
|
Frame Adv
|
Circuit
|
Invuln
|
| 33
|
15
|
16
|
2
|
10.0%
|
-
|
|
Ryougi throws the knife at a somewhat higher angle, reaching almost full screen. Can be charged for a hard knockdown and to make it unshieldable.
|
| EX
|
Damage
|
Red Damage
|
Proration
|
Cancel
|
Guard
|
| 1700
|
1372
|
60% (O)
|
-
|
LHA
|
| First Active
|
Active
|
Recovery
|
Frame Adv
|
Circuit
|
Invuln
|
| 1+5
|
X
|
24
|
8
|
-100.0%
|
Full 1
|
|
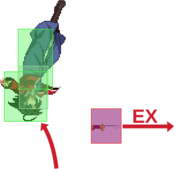
Ryougi throws the knife in a straight line, wallslamming the opponent. Useful for extending pressure during blockstring.
|
~22X
(Pickup)
|
Damage
|
Red Damage
|
Proration
|
Cancel
|
Guard
|
| -
|
-
|
-
|
-
|
-
|
| First Active
|
Active
|
Recovery
|
Frame Adv
|
Circuit
|
Invuln
|
| -
|
-
|
17
|
-
|
-
|
-
|
|
Ryougi picks her knife back up. Can be used to cancel special-cancellable moves near the knife's position.
|
|
Why you play this moon. Why you play this moon. ~5X ~5X ~6X ~6X ~2X ~2X ~4X ~4X ~8X ~8X ~D ~D
|
| 63214C
|
Damage
|
Red Damage
|
Proration
|
Cancel
|
Guard
|
| -
|
-
|
-
|
-CH-
|
-
|
| First Active
|
Active
|
Recovery
|
Frame Adv
|
Circuit
|
Invuln
|
| 1+5
|
X
|
70
|
-
|
-150.0%
|
-
|
| ~5X
|
Damage
|
Red Damage
|
Proration
|
Cancel
|
Guard
|
| 500
|
392
|
90% (M)
|
-CH-
|
LHA
|
| First Active
|
Active
|
Recovery
|
Frame Adv
|
Circuit
|
Invuln
|
| 8
|
4
|
26
|
-12
|
0.0%
|
-
|
| ~6X
|
Damage
|
Red Damage
|
Proration
|
Cancel
|
Guard
|
| 1200
|
980
|
75% (O)
|
-CH-
|
HA
|
| First Active
|
Active
|
Recovery
|
Frame Adv
|
Circuit
|
Invuln
|
| 23
|
3
|
18
|
-6
|
0.0%
|
-
|
| ~2X
|
Damage
|
Red Damage
|
Proration
|
Cancel
|
Guard
|
| 200
|
98
|
50% (O)
|
-CH-
|
LA
|
| First Active
|
Active
|
Recovery
|
Frame Adv
|
Circuit
|
Invuln
|
| 4
|
3
|
30
|
-15
|
0.0%
|
-
|
| ~4X
|
Damage
|
Red Damage
|
Proration
|
Cancel
|
Guard
|
| 400
|
196
|
90% (M)
|
-CH-
|
LHA
|
| First Active
|
Active
|
Recovery
|
Frame Adv
|
Circuit
|
Invuln
|
| 7
|
3
|
17
|
-3
|
0.0%
|
-
|
| ~8X
|
Damage
|
Red Damage
|
Proration
|
Cancel
|
Guard
|
| 700
|
392
|
70% (O)
|
-CH-
|
LHA
|
| First Active
|
Active
|
Recovery
|
Frame Adv
|
Circuit
|
Invuln
|
| 5
|
6
|
29
|
-17
|
0.0%
|
-
|
| D
|
Damage
|
Red Damage
|
Proration
|
Cancel
|
Guard
|
| -
|
-
|
-
|
-
|
-
|
| First Active
|
Active
|
Recovery
|
Frame Adv
|
Circuit
|
Invuln
|
| -
|
-
|
44
|
-
|
-
|
-
|
- Custom combo EX. Nicknamed "Genei Jin" after a similar Street Fighter move. Ryougi runs forward. Pressing a direction and an attack button causes her to attack.
5X:236A/B slash.
6X: 236A/B~214X overhead slash.
2X: 236A/B~214D low sweep.
4X: 236A/B~236X slash.
8X: 236B rekka ender slash. Launches the opponent.
D: Rolls forward, going through the opponent.
|
|
|
|
| Damage
|
Red Damage
|
Proration
|
Cancel
|
Guard
|
| 2500 (2907)
|
(2071)
|
50%
|
-
|
U
|
| First Active
|
Active
|
Recovery
|
Frame Adv
|
Circuit
|
Invuln
|
| 4+1
|
3
|
22
|
-
|
-100.0%
|
-
|
|
Ryougi stabs the opponent from behind after 6C. Meter break the opponent at the cost of 100% meter, for roughly 3k damage.
Can only be used if the 6C successfully moves her behind the opponent (i.e. successful uncharged hit against grounded opponent).
Damage includes the 6C.
|
|
Aerial Specials
|
|
| A
|
Damage
|
Red Damage
|
Proration
|
Cancel
|
Guard
|
| 1500
|
1372
|
75% (O)
|
-
|
HA
|
| First Active
|
Active
|
Recovery
|
Frame Adv
|
Circuit
|
Invuln
|
| 17
|
2
|
15
|
-17 (TK)
|
15.0%
|
-
|
- Rising crescent slash. Wallslams. Can TK.
Slower. Overhead.
|
| B
|
Damage
|
Red Damage
|
Proration
|
Cancel
|
Guard
|
| 1600
|
1470
|
75% (O)
|
-
|
LHA
|
| First Active
|
Active
|
Recovery
|
Frame Adv
|
Circuit
|
Invuln
|
| 10
|
2
|
3
|
-5 (TK)
|
16.0%
|
-
|
|
Faster. Not an overhead.
|
| EX
|
Damage
|
Red Damage
|
Proration
|
Cancel
|
Guard
|
| 2200
|
1960
|
40% (O)
|
-
|
HA
|
| First Active
|
Active
|
Recovery
|
Frame Adv
|
Circuit
|
Invuln
|
| 1+9
|
2
|
6
|
-6 (TK)
|
-100.0%
|
Full 1-14
|
|
Invincible, overhead version.
|
|
|
|
| A / B
|
Damage
|
Red Damage
|
Proration
|
Cancel
|
Guard
|
| 950
|
735
|
90% (M)
|
-
|
LHA
|
| First Active
|
Active
|
Recovery
|
Frame Adv
|
Circuit
|
Invuln
|
| 20 / 19
|
X
|
3
|
-
|
9.5%
|
-
|
|
Ryougi flips then throws the knife at a downward angle. A version goes forward, B goes backward.
|
| EX
|
Damage
|
Red Damage
|
Proration
|
Cancel
|
Guard
|
| 950
|
735
|
50% (M)
|
-
|
LHA
|
| First Active
|
Active
|
Recovery
|
Frame Adv
|
Circuit
|
Invuln
|
| 1+0
|
X
|
17
|
-
|
-100.0%
|
-
|
|
Ryougi flips backward and throws the knife straight forward. Air-untechable knockdown.
|
|
A/B A/B EX EX
|
| A
|
Damage
|
Red Damage
|
Proration
|
Cancel
|
Guard
|
| 1100
|
735
|
50%
|
-
|
LHA
|
| First Active
|
Active
|
Recovery
|
Frame Adv
|
Circuit
|
Invuln
|
| 20
|
2
|
7
|
9
|
11.0%
|
Full 1-3
|
- A command air tech. Attack out of air recovery. The direction determines the direction of the tech. Wallslams.
|
| B
|
Damage
|
Red Damage
|
Proration
|
Cancel
|
Guard
|
| 1100
|
735
|
50%
|
-
|
LHA
|
| First Active
|
Active
|
Recovery
|
Frame Adv
|
Circuit
|
Invuln
|
| 15
|
2
|
15
|
1
|
11.0%
|
Full 1-3
|
|
Faster, but with longer landing recovery.
|
| EX
|
Damage
|
Red Damage
|
Proration
|
Cancel
|
Guard
|
| 1800
|
1176
|
75%
|
-
|
LHA
|
| First Active
|
Active
|
Recovery
|
Frame Adv
|
Circuit
|
Invuln
|
| 6+6
|
2
|
15
|
-4
|
-100.0%
|
Full 1-14
|
|
Fully invincible until end of active frames.
|
|
Arc Drive
|
|
| Damage
|
Red Damage
|
Proration
|
Cancel
|
Guard
|
| 3500 (3080)
|
(4761)
|
100%
|
-
|
U, LHA
|
| First Active
|
Active
|
Recovery
|
Frame Adv
|
Circuit
|
Invuln
|
| 17+3
|
2 (35) 5
|
45
|
-31
|
removes all
|
Full 1-2, 17-70
|
|
A weaker version of Seven Scenic Demise, it acts the same way in that it can OTG and blow through projectiles, but it has a slower startup and does less damage. You can jump out during the super flash.
You can also just block it, as it only becomes unblockable if you're near Ryougi during the startup of the super, and even then you can just mash 88 and you'll be able to jump out of it 80% of the time. If blocked, Ryougi will not be in counterhit state, but have enough time to combo off the recovery.
|
|
Another Arc Drive
|
|
| Damage
|
Red Damage
|
Proration
|
Cancel
|
Guard
|
| 5000 (4400)
|
(7936)
|
100%
|
-
|
U, LHA
|
| First Active
|
Active
|
Recovery
|
Frame Adv
|
Circuit
|
Invuln
|
| 3+20*
|
5
|
45
|
-31
|
removes all
|
Full 1-36
|
|
Ryougi freezes the opponent in place, seeing the lines of death and cutting them apart. Active on frame 1, it is an unblockable super that works as a grab/throw. You have to jump before the super flash, or you'll be caught by it. Can OTG and blow through projectiles. You can't dodge it, as dodge runs out of active frames before the appearance of the lines. Very strong reversal at the cost of BLOOD HEAT.
|
|
Last Arc
|
|
| Damage
|
Red Damage
|
Proration
|
Cancel
|
Guard
|
| 7000
|
6860
|
N/A
|
-
|
U
|
| First Active
|
Active
|
Recovery
|
Frame Adv
|
Circuit
|
Invuln
|
| 0
|
5
|
26
|
-
|
removes all
|
Full 1-8
|
|
The move is akin to a throw/uses the throw animation, so it will whiff/cancel/not activate when shielding DPs. If during BLOOD HEAT, a DP is EX shielded, the screen will flash white as if to signal the activation of the Last Arc, but the throw whiff animation will come out instead. Will activate when shielding any projectile, from Hime pillar to Aoko's Arc Drive.
One of only two Last Arcs (the other being Roa) which ignore Last Arc proration (100% to 50% based on Blood Heat duration).
|
|
MBAACC Navigation

