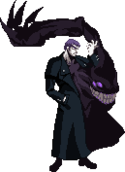
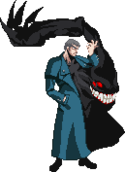
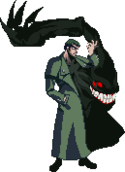
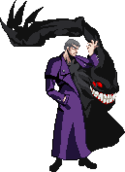
Melty Blood/MBAACC/Nero Chaos/Crescent Moon: Difference between revisions
m (→Neutral) |
|||
| Line 140: | Line 140: | ||
<u>'''CHARACTERS THAT CAN DASH UNDER 236A:'''</u> | <u>'''CHARACTERS THAT CAN DASH UNDER 236A:'''</u> | ||
* Akiha*, V.Akiha*, Seifuku, Aoko*, Arc*, Warc*, Ciel, Kouma*, NAC, Neco-Arc, Nero (lol), Roa*, Ryougi, Satsuki*, Tohno*, Nanaya*, V.Sion, Wara (C/H), W.Len | * Akiha*, V.Akiha*, Seifuku, Aoko*, Arc*, Warc*, Ciel, Kouma*, NAC, Neco-Arc, Nero (lol), Roa*, Ryougi, Satsuki*, Tohno*, Nanaya*, V.Sion, Wara (C/H), W.Len (C/F) | ||
<u>'''CHARACTERS THAT CANNOT DASH UNDER 236A:'''</u> | <u>'''CHARACTERS THAT CANNOT DASH UNDER 236A:'''</u> | ||
* Hime, Hisui, Kohaku, Koha-Mech, Len, Mech-Hisui, Neco-Mech, Miyako, P.Ciel, Ries, Sion, Wara (F) | * Hime, Hisui, Kohaku, Koha-Mech, Len, Mech-Hisui, Neco-Mech, Miyako, P.Ciel, Ries, Sion, Wara (F), W.Len (H) | ||
=== Pressure === | === Pressure === | ||
Revision as of 20:59, 25 February 2022
Character Page Progress
This page is still a work in progress, consider joining as an editor to help expand it. Please update this character's roadmap page when one of the editing goals have been reached.
| In Progress | To-do |
|---|---|
|
Additional Resources
C-Nero Match Video Database
Nero Combo Compilation
Nero's Compendium (has some misinformation)
C-Nero doc (work in progress)
Players to watch/ask
| Name | Color | Region | Common Venues | Status | Details |
|---|---|---|---|---|---|
| MaSa | Japan | Play Spot BIG ONE 2nd | Active | The modern diamond standard for Nero. | |
| SAT | Japan | A-cho, KorewaMelty |
Inactive | The original diamond standard for Nero. Solid, creative, unflinchingly adaptive. When the rust red coat shows, something is about to go down. Plays every moon with absolute competence. | |
| LuckyStar | Japan | A-cho | Inactive | The original MBAACC shark. Often goes for unorthodox and stylish plays but is more than competent when he needs to be. | |
| toku (徳) |
Japan | A-cho, KorewaMelty, Play Spot BIG ONE 2nd, Netplay |
Active | Lab monster, posts a lot of tech to his twitter. c nero poronga | |
| hakujun (白純) |
Japan | Play Spot BIG ONE 2nd | Active | ||
| rondo (ロンド) |
Japan | A-cho, KorewaMelty, Play Spot BIG ONE 2nd, Netplay |
Active | ||
| nekuromanshi- (ネクロマンシー) |
Japan | A-cho | Inactive | ||
| niwatoriyuu (鶏雄) |
Japan | A-cho, KorewaMelty, Kirisugu |
Inactive | ||
| Lain (Awong102300#9981) |
North America | Netplay | Active | Found in main Melty server. | |
| Burning Moon (Web Booby Cop#4605) |
North America | Next Level, Netplay |
Active | Found in every Melty server. Has some consistency and a lot of decision making issues in footage so better asked than watched but knowledgeable on tech, theory, and most matchups. Also always ready to discuss the character with anyone that has questions. | |
| Grungrah | North America | Netplay | Infrequently active |
Found in main Melty server when he's around. | |
| Canceris (Canceris#7506) |
South America | Netplay | Active | Found in main Melty server and Melty Sud. | |
| Donnie | South America | Netplay | Active | Found in Melty Sud. | |
| Receita Federal | South America | Netplay | Active | Found in main Melty server and Melty Brasil. | |
| paddu (paddu#7497) |
Europe | Netplay | Active | Found in main Melty server. |
Overview
General Gameplan
First off, does your opponent know to sweep/launch jump or something similar when summons are nearby?
If no...
Unleash the entire zoo while you sit back not committing and when you finally get hit you get a free combo because your summons bailed you out. Nero alone is not a spectacular character. His summons, however, make him one of the strongest in the game simply for how little you have to commit with them. Has easily the best insurance in the game, enough to be defined by it.
If yes...
Use your summons and large normals to restrict space and force difficult movement/approach decisions from your opponent. At high level it isn't trades you'll see getting Nero players wins as much as the threat of them creating unfavorable situations in conjunction with your strong antiairs and massive air normals. You want to make your opponent feel just as restricted in their movement options as Nero if not more, at which point they will usually lose most of the button to button interactions available to them as long as you maintain good spacing and matchup knowledge.
C-Moon Specifics:
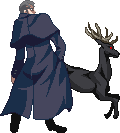
Each of Nero's 3 moons is essentially the same character with slight, but playstyle-defining differences. C-Nero is largely based around offense. Has possibly Nero’s most infamous and iconic tool, the deer (421X). Win neutral, push your opponent into the corner, then bully with 5[C] and deer. Does not have 3C unlike the other 2 moons however, so keep that in mind. Very strong midrange and anti-air game.
Neutral
Movement:
Nero is a slow character. There is no denying that. He lacks a traditional forward dash, and his back dash doesn’t go particularly far back. His air dash is a slow, fully horizontal one that can go for quite long if you hold it, and will be his main movement tool.
Saying that Nero is slow is more of a lack of being able to cover small amounts of ground fast. His air dash still goes fairly far and since everyone gets a forward super jump, he can still cover alarming amounts of space very fast. He cannot, however, adjust his position nearly as well as basically any other character.
Instead of a conventional dash, Nero’s forward dash is a teleport, similar to Slayer’s. It is invulnerable from frame 1, but very slow to recover, although the timing to punish it is also very late, so late that people not accustomed to it might in fact whiff a premature punish. You can also teleport safely if covered by the right summon.
With Nero you'd want to first find a suitable space and time to produce 1-2 summons and use those to approach in a safe manner. Most times the summons will cause the opponent to jump to avoid them and that's where your strong grounded antiairs or large air normals come into play. 5a, 2a, 2c, 5[c], and 421a will favorably cover the majority of angles your opponent has to approach from as long as you choose and time the right one, especially when backed up by even subtle adjustments such as slightly walking back or forwards. All 3 of your air normals are very strong and can be utilized effectively off any of back, forwards, or neutral jump depending how aggressive you intend to be and what matchup/situation you find yourself in.
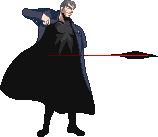
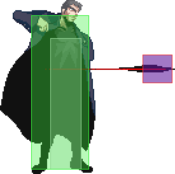
IF you need the time to produce a summon you can hit the opponent with 236A(crow fireball) to gain the time to produce at least one summon against an high mobility opponent and approach from there. Don't feel compelled to immediately try and summon or immediately try and create a situation that might give you a summon if you feel you're in an unfavorable position to do so that could get you punished. There's nothing wrong with playing it patient at first, even without much grounded mobility you still have average enough air movement, C moon mechanics such as ex shield/heat/air dodge, and some of the best normals in the game. Be smart, take it slow, and abuse your big hitboxes until you find a chance to take enough frames to set up or end up already hitting them into the corner.
One thing to note is that for 236A there are characters that can dash under but get hit on startup or have some other caveat will be denoted with an asterisk. So be careful by match up on when to use 236A, especially with its long recovery.
CHARACTERS THAT CAN DASH UNDER 236A:
- Akiha*, V.Akiha*, Seifuku, Aoko*, Arc*, Warc*, Ciel, Kouma*, NAC, Neco-Arc, Nero (lol), Roa*, Ryougi, Satsuki*, Tohno*, Nanaya*, V.Sion, Wara (C/H), W.Len (C/F)
CHARACTERS THAT CANNOT DASH UNDER 236A:
- Hime, Hisui, Kohaku, Koha-Mech, Len, Mech-Hisui, Neco-Mech, Miyako, P.Ciel, Ries, Sion, Wara (F), W.Len (H)
Pressure
With all Neros, pressure via screen control is the name of the game. Use his 214A/B series in conjunction with 421B (if you have time to get it out) to cover your approach and airdash j.A/B/C your way in. Acquaint yourself with all of your air normals, especially j.B, because it's a large 2-hit normal that's quite fast for an aerial of its size with good disjoint. Don't let any one of your air normals overshadow the rest too much though, j.C is very active and can occasionally reach things that j.B can't and j.A is faster while having a more immediate downwards angle making it better in cases where you don't think j.B will prevent something like a rising j.A antiair in time. From there, you can either IAD j.X again, throw, or start your grounded pressure.
Frankly, any positioning outside of the corner his main goal is to obstruct the opponent's path, denying them of invading space, usually forcing mistakes on the opponent who overextends and from there performing the corner carry combo that brings them to the corner where Nero begins to do his pressure/okizeme. While he gets a strong knockdown already off of AT his pressure truly shines in the corner after a 5[C] ender.
Once you successfully condition your opponent to block the probable 5[C] on wake-up you can start to take advantage by not doing 5[C] and pressing on with IAD buttons or summon right away in order to get a better advantage. Do have in mind that while a blocked 5[C] can allow you to summon snakes/A deer or rebeat into frametrap/jump in, it's still not hugely on your favor, you get pushed back a little and the opponent can react and challenge to all these options.
Before we get more into the summoning aspect of C-Nero's pressure it is important to remember that summons, 5[C], and IAD are not all this character has for his strings. You can still create frametraps/staggers like any C/H moon can with reverse beat and 5A/2A(W) and can use this further in conjunction with the things mentioned in the previous sentence. Rebeating into 5A(W) off of 2C, 2B, or 5B(1) will leave you only slightly minus and in conjunction with the threat of 5[C] and 4C in addition with the distance you're often at being in your favor can often allow you to reset pressure off of these. Even 2A despite being -1 is as big as the B and C normals of most characters, allowing you to reset pressure off of it in some situations.
A large part of the pressure game of Nero is to test your opponent's reactions and guessing game with your "frametrap" summons. This will only work out if the opponent you're facing is aware that blocking a summon means that Nero gets to get in for free once again, so they will most likely want to challenge your summons.
You want to vary the spots you summon at in order to test the reactions of your opponent as hard as you can, keeping your special cancel points ambiguous and stealing frames whenever you think the opponent won't expect it in time. Vary between cancelling off of 2A, 5[C](early hits), 5B(1), and 2B(1-2) if you want to stay closer to the opponent and off of 2C/[C], 5[C](full), and 2B(full) if you want to push yourself out more in exchange for usually being easier to react to. You mainly want to use 214B and 421A though you can use your slower summons like 214A too if you feel you've condition your opponent to respect enough.
If the opponent is full-on fuzzy mashing then just 5[C] or rebeat 5A(w) > 4C to check them, same if they jump but with 4C, 2C, or 5A depending how close you are.
An actual challenge where your opponent tried to react and punish your summon would be they either sweep > jump cancel or tried to jump in buttons or jump and get the hell away. You can bait and beat most sweeps with 421A (though the trade will often reset to a scramble) and beat some jump ins, and if they try to double jump away from the corner then chase them with j.C and j.B for a potential guard crush or air throw or use the running away from you as an opportunity to summon more and return to a neutral stacked in your favor. Reacting on time properly is actually not easy. If your opponent is slow and doesn't react to summon on time you can block their mash attempt and since they cant jump cancel your summons will punish them and net you a combo.
Other neat little tips and tricks include things like 214[A] (walk forward) release A into Throw.
Or doing 5[C](1 hit) > 421A to catch potential jump-outs.
Okizeme
All Nero variants have the ability to end their combos in an air throw which gives HKD. C/F Nero both have access to 236C which is important to their pressure and their Oki. Below will be expanding how it's conducted for C-Nero specifically.
AT ender
With C-Nero, 5[C] is commonly used after Air throw ender as it does a ton of guard damage and also checks for mashing, jumping, heat attempts, and most reversals. That is not all since he can then cancel into 236C and essentially still keep his turn during this whole sequence.
You can also go into 236C immediately after Air throw ender if you want to have the maximum frame advantage and from there you can do the following
- 2A > 214[A] IAD Fuzzy(j.B/C > dj.B)
- 2A, 9 late j.B or empty jump 2A
- Walk up Throw/bait
The ones in bolded are to illustrate the importance of doing 2A after 236C as it keeps the opponent in check if they try to dash out. If they try to jump out, you can guard crush them with 2C as it is AUB and go straight into an aerial sequence that is listed in the normal combos. if they try to either ground shield or Air shield the crows, you can ground and air throw them accordingly.
5[C] ender
5[C] > 421B/C
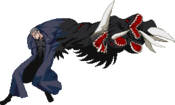
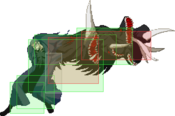
It's important to note the significance between the two. 421B the bambi deer hits two times while 421C hits three times. They never go away even if Nero gets hit which allows him to do more bold actions such as walk up grab/2A5B(1), but here's a few more things that you can do while bambi is running around getting revenge for the fallen.
Here a just a few examples of what you can do with deer oki.
From 421B:
- The deer's first hit is slow so 5[C] is useful to force respect.
- 5[C] > 5A(w) into IAD mixup or j9.BC fuzzy guard mixup.
- IAD j.A/B/C mixup if they respect on wakeup.
From 421C:
- IAD j.C beats slow DPs and you can fuzzy guard with dj.B if you know they wont DP.
- 9 > late j.B or 9, land 2A
- Or you can bully with 5[C] until their guard bar gets dangerously low. 2B(1) 5B(1) 5[C] is your optimal string for racking up guard bar damage in this case.
- 214C into dodge 50/50 or j.A air dash j.A 50/50.
- Throw/bait.
Point is there is lots to do with pressure and oki with C-Nero in particular you just need to be creative, you can use a variety of summons and strings to create mix up options and take into account the match-up
Defense
Make good friends with downback. Nero has slower than average normals, no forward dash, and mediocre airdash. If you cannot commit insurance fraud with an already active summon, you’re going to play the same blocking simulator the rest of the roster has to, except worse. Again, do not be afraid to part with meter. Nero is not a meter-dependent character in the majority of matchups, he simply uses it very well. C has arguably the strongest reversal options to play with out of all of his moons, so make use of them.
C’s 63214C is both decently fast (1+6) and fully invincible into the first, very large active frame, and will always at least trade if a hurtbox is involved. It can be safe at max range, but if airblocked, sidestepped or shielded at any range, expect a full punish. It's best not used on wake up if chances are the opponent is meatying with a jab due to them being able to whiff cancel it into either shield or a reversal on reaction to the superflash but it is fast enough to take care of anything more committal than that that lacks sufficient invulnerability. Its long reach also makes it a good option for disrespecting longer range moves that have a reactable or readable startup.
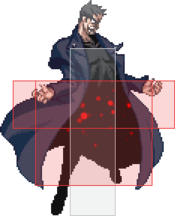
As Crescent Moon you are always entitled to the option of using Heat since it sends them fullscreen and allows you to proceed to send out more summons (especially ex deer) and shift the momentum in your favor. Nero's heat hitbox is wider than average but not very tall (literally shorter than Miyako), so keep that in mind when trying to heat against opponents that might be above you at the time of activation.
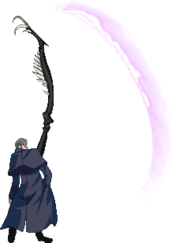
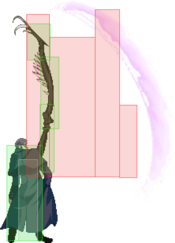
C-Nero's raw abare options while not among the fastest in the game should not be discounted entirely by any means. 2A is a little slow being out on frame 6 but is very large both horizontally and vertically allowing it to tag players from distances they may usually expect to be safe at for pressure or even catch some characters trying to IAD reset. 2A hitting 3 times also means it can burn through some staggers with armor/clash. 5A whiffs crouchers but is a strong fast tool against airborne pressure sequences and its good horizontal reach means it can work well against attempts at slightly distanced standing staggers. 5B(1) is an often slept on move that is out on frame 5, disjointed, sweeps crouchers and gives soft knockdown on trade, and converts into better combos/damage than 2A making it your strongest close up abare option in a lot of situations. If you successfully poke out with 2A/5A against a grounded opponent from a slight distance convert into 4C instead of 2B to ensure you don't drop. 2C is also deceptively fast and effective at sniping opponents trying to hover above you to bait heat.
EX shield into 5A, 5B, 2A, or even 4C in distanced cases is a good way to put a stop sign in front of careless rushdown or for turning the tide against certain telegraphed gaps and moves. C-Nero's options off regular shield are a lot weaker and mostly limited to 63214C and 236A with the former working in the majority of situations where the opponent isn't safejumping and cannot cancel into an invulnerable move on reaction and the latter is your fastest meterless special and should at minimum trade against anything that is in vertical range and isn't immediately getting followed up with a hitbox that is out on frame 4 or faster.
Combos
| Combo Notation Help | |
|---|---|
| Disclaimer: Combos are written by various writers, so the actual notation used in pages can differ from the standard one. | |
| X > Y | X input is cancelled into Y. |
| X > delay Y | Must wait for a short period before cancelling X input into Y. |
| X, Y | X input is linked into Y, meaning Y is done after X's recovery period. |
| X+Y | Buttons X and Y must be input simultaneously. |
| X/Y | Either the X or Y input can be used. |
| X~Y | This notation has two meanings.
|
| X(w) | X input must not hit the opponent (Whiff). |
| j.X | X input is done in the air, implies a jump/jump cancel if the previous move was done from the ground. Applies to all air chain sections:
|
| sj.X | X input is done after a super jump. Notated as sj8.X and sj9.X for neutral and forward super jumps respectively. |
| dj.X | X input is done after a double jump. |
| sdj.X | X input is done after a double super jump. |
| tk.X | Stands for Tiger Knee. X motion must be buffered before jumping, inputting the move as close to the ground as possible. (ex. tk.236A) |
| (X) | X is optional. Typically the combo will be easier if omitted. |
| [X] | Input X is held down. Also referred to as Blowback Edge (BE). Depending on the character, this can indicate that this button is held down and not released until indicated by the release notation. |
| ]X[ | Input X is released. Will only appear if a button is previously held down. This type of input is referred to as Negative Edge. |
| {X} | Button X should only be held down briefly to get a partially charged version instead of the fully charged one. |
| X(N) | Attack "X" should only hit N times. |
| (XYZ)xN | XYZ string must be performed N times. Combos using this notation are usually referred to as loops. |
| (XYZ^) | A pre-existing combo labelled XYZ is inserted here for shortening purposes. |
| CH | The first attack must be a Counter Hit. |
| Air CH | The first attack must be a Counter Hit on an airborne opponent. |
| 66 | Performs a ground forward dash. |
| j.66 | Performs an aerial forward dash, used as a cancel for certain characters' air strings. |
| IAD/IABD | Performs an Instant AirDash. |
| AT | Performs an Air Throw. (j.6/4A+D) |
| IH | Performs an Initiative Heat. |
| AD | Performs an Arc Drive. |
| AAD | Performs an Another Arc Drive. |
The combos in question are based off the assumption you know about the bounce limit. if you didn't know there a grand total of 3 OTG or wall/groundslams can be comboed, after the third the opponent will be fully invincible until they recover. You have two bounces to combo after and a third to end with. Keep that in mind and adjust your combos as you count the amount of wallslams used so far.
Starters
Enders
Normal Combos
Corner Combos
Most of the midscreen combos also work in the corner, however if you want to maximize the most reward out of certain situations consider learning the following combos as well:
Move Descriptions
| Frame Data Help | |
|---|---|
| Header | Tooltip |
| Move Box Colors |
Light gray = Collision Box (A move lacking one means it can go through the opponent's own collision box). |
| Damage | Base damage done by this attack.
(X) denotes combined and scaled damage tested against standing V. Sion. |
| Red Damage | Damage done to the recoverable red health bar by this attack. The values are inherently scaled and tested against standing V. Sion.
(X) denotes combined damage. |
| Proration | The correction value set by this attack and the way it modifies the scaling during a string. See this page for more details.
X% (O) means X% Overrides the previous correction value in a combo if X is of a lower percentage. |
| Circuit | Meter gained by this attack on hit.
(X%) denotes combined meter gain. |
| Cancel | Actions this move can be cancelled into.
SE = Self cancelable. |
| Guard | The way this move must be blocked.
L = Can block crouching |
| Startup | Amount of frames that must pass prior to reaching the active frames. Also referred to as "True Startup". |
| Active | The amount of frames that this move will have a hitbox. (x) denotes frame gaps where there are no hitboxes is present. Due to varied blockstuns, (x) frames are difficult to use to determine punish windows. Generally the larger the numbers, the more time you have to punish. |
| Recovery | Frames that this move has after the active frames if not canceled. The character goes into one frame where they can block but not act afterwards, which is not counted here. |
| Advantage | The difference in frames where you can act before your opponent when this move is blocked (assuming the move isn't canceled and the first active frame is blocked). If the opponent uses a move with startup that is at least 2 frames less than this move's negative advantage, it will result in the opponent hitting that move. |
| Invul | Lists any defensive properties this move has.
X y~z denotes X property happening between the y to z frames of the animations. If no frames are noted, it means the invincibility lasts through the entire move. Invicibility:
Hurtbox-Based Properties:
Miscellaneous Properties
|
Normal Moves
Standing Normals
5A
Toggle Hitboxes Toggle Hitboxes
|
|---|
5B
Toggle Hitboxes Toggle Hitboxes
|
|---|
5C
5C
5[C] |
|
|---|---|
Toggle Hitboxes Toggle Hitboxes
|
Crouching Normals
2A
Toggle Hitboxes Toggle Hitboxes
|
|---|
2B
Toggle Hitboxes Toggle Hitboxes
|
|---|
2C
2C
2[C] |
|
|---|---|
Toggle Hitboxes Toggle Hitboxes
|
Jumping Normals
j.A
Toggle Hitboxes Toggle Hitboxes
|
|---|
j.B
Toggle Hitboxes Toggle Hitboxes
|
|---|
j.C
Toggle Hitboxes Toggle Hitboxes
|
|---|
Command Normals
4C
Toggle Hitboxes Toggle Hitboxes
|
|---|
Universal Mechanics
Ground Throw
Ground Throw
6/4A+D |
|---|
Air Throw
Air Throw
j.6/4A+D |
|---|
Shield Bunker
Shield Bunker
214D in neutral or blockstun |
|
|---|---|
Toggle Hitboxes Toggle Hitboxes
|
Heat
Heat
A+B+C |
|
|---|---|
Toggle Hitboxes Toggle Hitboxes
|
Circuit Spark
Circuit Spark
A+B+C during hitstun/blockstun at MAX |
|
|---|---|
Toggle Hitboxes Toggle Hitboxes
|
Special Moves
Forward Dash
236X
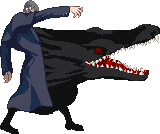
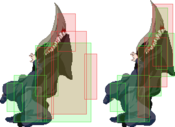
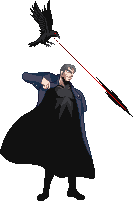
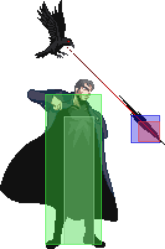
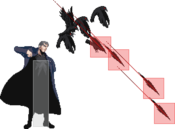
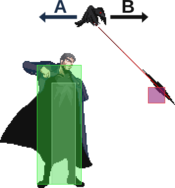
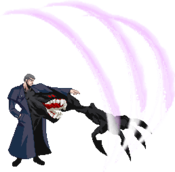
Chaos Release - Black Wings 236A/B/C Straightforward projectile. Straightforward projectile. Delayed birdie. Delayed birdie. Insert "murder of crows" joke here. Insert "murder of crows" joke here.
|
|
|---|---|
Toggle Hitboxes Toggle Hitboxes
|
623X
Toggle Hitboxes Toggle Hitboxes
|
|---|
214X
Toggle Hitboxes Toggle Hitboxes
|
|---|
421X
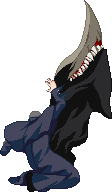
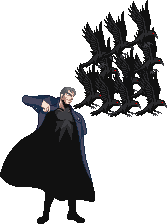
Chaos Release - Horned Beasts
421A/B/C |
|
|---|---|
Toggle Hitboxes Toggle Hitboxes
|
63214C
Toggle Hitboxes Toggle Hitboxes
|
|---|
Arc Drive
Armament 999
41236C during Max/Heat |
|
|---|---|
Toggle Hitboxes Toggle Hitboxes
|
Another Arc Drive
Armament 999
41236C during Blood Heat |
|
|---|---|
Toggle Hitboxes Toggle Hitboxes
|
Last Arc
Number of the Beast
Grounded EX Shield during Blood Heat |
|
|---|---|
Toggle Hitboxes Toggle Hitboxes
|
