|
|
| Line 50: |
Line 50: |
|
| |
|
| '''Midscreen after 623C or 236C:''' | | '''Midscreen after 623C or 236C:''' |
| :*Dash j8. This gives a 4 way. Holding 4 gets a noncrossup, holding 4 gives crossup, air backdash j.C gives noncrossup high, instant air backdash after crossing up gives crossup high. | | :*Dash j8. This gives a 4 way. Holding 4 gets a noncrossup, holding 6 gives crossup, air backdash j.C gives noncrossup high, instant air backdash after crossing up gives crossup high. |
|
| |
|
| Midscreen or corner with gap after 623[B], 236B, or 3C | | Midscreen or corner with gap after 623[B], 236B, or 3C |
Revision as of 15:32, 3 June 2022
Character Page Progress
This page is still a work in progress, consider joining as an editor to help expand it. Please update this character's roadmap page when one of the editing goals have been reached.
| In Progress |
To-do
|
|
|
- Additional Resources/Players to watch/ask
- Combos:
- Add combo routes for non-corner screen positions and situational starters.
- Add damage and meter gain/given values to combos.
- Move Descriptions:
- Expand upon to the shorter descriptions, cite their uses, add captions where helpful, etc.
|
Additional Resources
F-Satsuki Match Video Database
Players to watch/ask
JP:
- Text goes here after asterisk
- Text goes here after asterisk
NA:
- Text goes here after asterisk
- Text goes here after asterisk
Overview
Strengths / Weaknesses
| Strengths
|
- Text goes here after asterisk
- Text goes here after asterisk
|
| Weaknesses
|
- Place text here be sure to use "*" for each point*
|
General Gameplan
Place text here*
Neutral
Place text here*
Pressure
Place text here
Okizeme
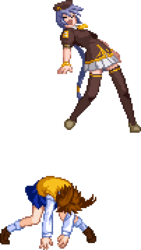
Just like Crescent Moon Satsuki, Full Moon Satsuki revolves around okizeme. Getting one hit in can lead to the opponent eating combo after combo. The crossup instant air backdash that's very important to her okizeme game is done with 4956, where all the directions are given from before you cross up, but are all done after you cross up. So 4 is the direction you jumped from, 9 is up and away from the opponent, 5 is neutral, and 6 is away from the opponent.
Midscreen after 623A throw, 236A, or 63214C:
- Dash j8. This gives a 3 way mixup. Do the 8 as soon as the dash starts. After you're in the air, holding 6 gives crossup, doing nothing doesn't crossup, and holding 6 and doing an air backdash j.C gives high option without crossing up.
- 4A236[B]. This gives ambiguous crossup. Do it early and you'll cross over. Do it late and you won't.
Midscreen after 421A/B:
- sj9. This gives a 4 way mixup. Superjump forward will cross up or not depending on when you whiff an aerial attack. Whiff a j.B early and you won't cross up. Whiff it late and you will. Don't whiff anything for high options. Air backdash j.C for a noncrossup option and instant air backdash after you crossup for a crossup high option.
- 236[B]236[A]. This gives ambiguous crossup. Do it early and you'll cross over. Do it late and you won't.
Midscreen after 623C or 236C:
- Dash j8. This gives a 4 way. Holding 4 gets a noncrossup, holding 6 gives crossup, air backdash j.C gives noncrossup high, instant air backdash after crossing up gives crossup high.
Midscreen or corner with gap after 623[B], 236B, or 3C
- 29. This gives a 2 way mixup. Air backdash j.C for noncrossup and instant air backdash after crossing up for crossup high. You can try to go for lows if you know that they'll respect it, but it's not safe and can be mashed out of.
- 236[A]. Early to cross up, late to not cross up.
Corner with gap after 623C:
- Dash j8. This gives a 4 way mixup. Do the 8 as soon as the dash starts for crossup and do it a bit late after you've pushed their body into the corner for noncrossup. Air backdash j.C for high and instant air backdash j.C after jumping the dash early for crossup high.
Defense
place text here*
Combos
| Combo Notation Help
|
Disclaimer: Combos are written by various writers, so the actual notation used in pages can differ from the standard one.
For more information, see Glossary and Controls.
|
| X > Y
|
X input is cancelled into Y.
|
| X > delay Y
|
Must wait for a short period before cancelling X input into Y.
|
| X, Y
|
X input is linked into Y, meaning Y is done after X's recovery period.
|
| X+Y
|
Buttons X and Y must be input simultaneously.
|
| X/Y
|
Either the X or Y input can be used.
|
| X~Y
|
This notation has two meanings.
- Use attack X with Y follow-up input.
- Input X then within a few frames, input Y. Usually used for option selects.
|
| X(w)
|
X input must not hit the opponent (Whiff).
|
| j.X
|
X input is done in the air, implies a jump/jump cancel if the previous move was done from the ground.
Applies to all air chain sections:
- Assume a forward jump cancel if no direction is given.
- Air chains such as j.A > j.B > j.C can be shortened to j.ABC.
|
| sj.X
|
X input is done after a super jump. Notated as sj8.X and sj9.X for neutral and forward super jumps respectively.
|
| dj.X
|
X input is done after a double jump.
|
| sdj.X
|
X input is done after a double super jump.
|
| tk.X
|
Stands for Tiger Knee. X motion must be buffered before jumping, inputting the move as close to the ground as possible. (ex. tk.236A)
|
| (X)
|
X is optional. Typically the combo will be easier if omitted.
|
| [X]
|
Input X is held down. Also referred to as Blowback Edge (BE). Depending on the character, this can indicate that this button is held down and not released until indicated by the release notation.
|
| ]X[
|
Input X is released. Will only appear if a button is previously held down. This type of input is referred to as Negative Edge.
|
| {X}
|
Button X should only be held down briefly to get a partially charged version instead of the fully charged one.
|
| X(N)
|
Attack "X" should only hit N times.
|
| (XYZ)xN
|
XYZ string must be performed N times. Combos using this notation are usually referred to as loops.
|
| (XYZ^)
|
A pre-existing combo labelled XYZ is inserted here for shortening purposes.
|
| CH
|
The first attack must be a Counter Hit.
|
| Air CH
|
The first attack must be a Counter Hit on an airborne opponent.
|
| 66
|
Performs a ground forward dash.
|
| j.66
|
Performs an aerial forward dash, used as a cancel for certain characters' air strings.
|
| IAD/IABD
|
Performs an Instant AirDash.
|
| AT
|
Performs an Air Throw. (j.6/4A+D)
|
| IH
|
Performs an Initiative Heat.
|
| AD
|
Performs an Arc Drive.
|
| AAD
|
Performs an Another Arc Drive.
|
All corner combos involving 2[C], 2C can be used midscreen by using dash 2C instead. Some characters require dash 2C. 2C(2) > 3C starter works better than 5C > 3C in corners and if you're too far away.
Normal Combos
| Condition
|
Notation
|
Damage
vs V.Sion
|
Notes
|
|
| Corner
|
- 5A > 5B > 5C > 3C > 623[A] , j9.[C] > sj9.[C], land 2[C], 2C > 3C > 623[A], 623A
|
???
|
| |
| Meter Gained: ??? |
Meter Given (vs C-Moon): ??? |
| Corner combo. Sets up midscreen mixup. You can be fairly far from the corner and still have this work. |
|
|
| Corner
|
- 5A > 5B > 5C > 3C > 623[A], j9.[C] > sj9.[C], 2[C] > 5AA > 623[B]
|
???
|
| |
| Meter Gained: ??? |
Meter Given (vs C-Moon): ??? |
| Corner combo. Sets up corner mixup. Leaves gap. |
|
|
Metered Combos
| Condition
|
Notation
|
Damage
vs V.Sion
|
Notes
|
|
| Corner, 100% Meter
|
- 5A > 5B > 5C > 236C, 2C > 3C > 623[A] , j9.[C], land 2[C], 2C > 3C > 623[A], 623A
|
???
|
| |
| Meter Gained: ??? |
Meter Given (vs C-Moon): ??? |
| Corner combo. Sets up midscreen mixup. Standard metered combo. Uses 100 meter. |
|
|
| Corner, 100% Meter
|
- 5A > 5B > 5C > 3C > 623[A], j9.[C] > sj9.[C], 2[C] > 5B > 5[C] > (delay) 623[B], 5AA > 5B > 2C > 623C
|
???
|
| |
| Meter Gained: ??? |
Meter Given (vs C-Moon): ??? |
| Corner combo. Sets up corner mixup. Leaves gap. Delay 623[B] slightly. Uses 100 meter. |
|
|
IH Combos
| Condition
|
Notation
|
Damage
vs V.Sion
|
Notes
|
|
| Max
|
- 5B > 5C > 22B > IH 5[C] > (delay) 623[B], 5C > 623C, 2C > 3C > 623[A] > j9.[C], 2[C], 2C > 3C > 623[A], 623A
|
???
|
| |
| Meter Gained: ??? |
Meter Given (vs C-Moon): ??? |
| Sets up midscreen mixup. Big damage. Delay 623[B]. Also remember to do this with enough meter to do 623C. |
|
|
Move Descriptions
| Frame Data Help
|
| Header
|
Tooltip
|
| Move Box Colors
|
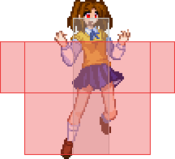
Light gray = Collision Box (A move lacking one means it can go through the opponent's own collision box).
Green: Hurt Boxes.
Red: Hit(/Grab) Boxes.
Yellow: Clash Boxes (When an active hitbox strikes a clash box, the active hitbox stops being active. Multi-hit attacks can beat clash since they will still progress to the next hitbox.)
Magenta: Projectile-reflecting boxes OR Non-hit attack trigger boxes (usually).
Blue: Reflectable Projectile Boxes.
|
| Damage
|
Base damage done by this attack.
(X) denotes combined and scaled damage tested against standing V. Sion.
|
| Red Damage
|
Damage done to the recoverable red health bar by this attack. The values are inherently scaled and tested against standing V. Sion.
(X) denotes combined damage.
|
| Proration
|
The correction value set by this attack and the way it modifies the scaling during a string. See this page for more details.
X% (O) means X% Overrides the previous correction value in a combo if X is of a lower percentage.
X% (M) means the current correction value in a combo will be Multiplied by X%. This can also be referred to as relative proration.
|
| Circuit
|
Meter gained by this attack on hit.
(X%) denotes combined meter gain.
-X% denotes a meter cost.
|
| Cancel
|
Actions this move can be cancelled into.
SE = Self cancelable.
N = Normal cancelable.
SP = Special cancelable.
CH = Cancelable into the next part of the same attack (Chain in case of specials).
EX = EX cancelable.
J = Jump cancelable.
(X) = Cancelable only on hit.
-X- = Cancelable on whiff.
|
| Guard
|
The way this move must be blocked.
L = Can block crouching
H = Can block standing.
A = Can block in the air.
U = Unblockable.
|
| Startup
|
Amount of frames that must pass prior to reaching the active frames. Also referred to as "True Startup".
|
| Active
|
The amount of frames that this move will have a hitbox.
(x) denotes frame gaps where there are no hitboxes is present. Due to varied blockstuns, (x) frames are difficult to use to determine punish windows. Generally the larger the numbers, the more time you have to punish.
X denotes active frames with a duration separate from its origin move's frame data, such as projectile attacks. In this case, the total length of the move is startup+recovery only.
|
| Recovery
|
Frames that this move has after the active frames if not canceled. The character goes into one frame where they can block but not act afterwards, which is not counted here.
|
| Advantage
|
The difference in frames where you can act before your opponent when this move is blocked (assuming the move isn't canceled and the first active frame is blocked).
If the opponent uses a move with startup that is at least 2 frames less than this move's negative advantage, it will result in the opponent hitting that move.
±x~±y denotes a range of possible advantages.
|
| Invul
|
Lists any defensive properties this move has.
X y~z denotes X property happening between the y to z frames of the animations. If no frames are noted, it means the invincibility lasts through the entire move.
Invicibility:
- Strike = Strike invincible.
- Throw = Throw invincible.
Hurtbox-Based Properties:
- Full = No hurtboxes are present.
- High = Upper body lacks a hurtbox.
- Low = Lower body lacks a hurtbox.
Miscellaneous Properties
- Clash = Frames in which clash boxes are active.
- Reflect = Frames in which projectile-reflecting boxes are active.
- Super Armor = Frames in which the character can take hits without going into hit stun.
|
Normal Moves
Standing Normals
|
|
| Damage
|
Red Damage
|
Proration
|
Cancel
|
Guard
|
| 300
|
252
|
75% (O)
|
-SE-, -N-, -SP-, -EX-, (J)
|
L
|
| First Active
|
Active
|
Recovery
|
Frame Adv
|
Circuit
|
Invuln
|
| 4
|
4
|
5
|
3
|
2.25%
|
-
|
|
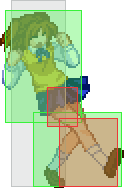
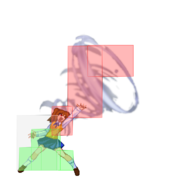
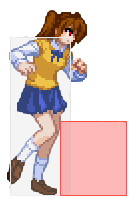
A standing low kick.
|
|
|
|
| Damage
|
Red Damage
|
Proration
|
Cancel
|
Guard
|
| 700
|
505
|
80% (O)
|
N, SP, EX, (J)
|
LH
|
| First Active
|
Active
|
Recovery
|
Frame Adv
|
Circuit
|
Invuln
|
| 6
|
6
|
11
|
-2 ~ 3
|
6.3%
|
-
|
|
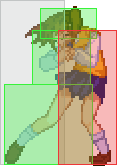
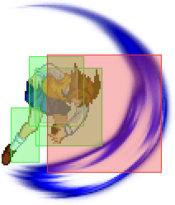
Satsuki pushes forward.
|
|
|
|
| 5C
|
Damage
|
Red Damage
|
Proration
|
Cancel
|
Guard
|
| 1000
|
707
|
90% (O)
|
N, SP, EX, (J)
|
LH
|
| First Active
|
Active
|
Recovery
|
Frame Adv
|
Circuit
|
Invuln
|
| 12
|
5
|
13
|
0
|
7.2%
|
Clash 10-16
|
|
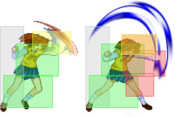
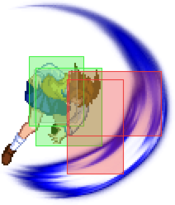
A smash with forward momentum and a clash box on top.
|
| 5[C]
|
Damage
|
Red Damage
|
Proration
|
Cancel
|
Guard
|
| 1700
|
1212
|
85% (O)
|
N, SP, EX, (J)
|
LH
|
| First Active
|
Active
|
Recovery
|
Frame Adv
|
Circuit
|
Invuln
|
| 18
|
5
|
9
|
4
|
10.8%
|
-
|
|
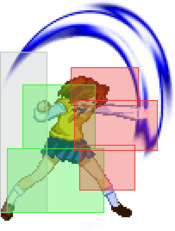
Charged version launches on hit.
|
|
Crouching Normals
|
|
| Damage
|
Red Damage
|
Proration
|
Cancel
|
Guard
|
| 250
|
151
|
72% (O)
|
-SE-, -N-, -SP-, -EX-, (J)
|
L
|
| First Active
|
Active
|
Recovery
|
Frame Adv
|
Circuit
|
Invuln
|
| 3
|
4
|
5
|
3
|
1.8%
|
-
|
|
Fast low 2A.
|
|
|
|
| Damage
|
Red Damage
|
Proration
|
Cancel
|
Guard
|
| 600
|
363
|
100%
|
N, SP, EX, (J)
|
LH
|
| First Active
|
Active
|
Recovery
|
Frame Adv
|
Circuit
|
Invuln
|
| 7
|
4
|
8
|
3
|
6.3%
|
-
|
|
A crouching mid punch.
|
|
|
|
| 2C
|
Damage
|
Red Damage
|
Proration
|
Cancel
|
Guard
|
| 800, 600 (1206)
|
(828)
|
70% (O), 55% (O)
|
N, SP, EX, (J)
|
L
|
| First Active
|
Active
|
Recovery
|
Frame Adv
|
Circuit
|
Invuln
|
| 4
|
6
|
24
|
-15
|
3.6%, 4.5% (8.1%)
|
-
|
|
A 2-hit sweep with fast 4f startup.
|
| 2[C]
|
Damage
|
Red Damage
|
Proration
|
Cancel
|
Guard
|
| 900*2, 950 (2057)
|
(1289)
|
70% (O)
|
N, SP, EX, (J)
|
L
|
| First Active
|
Active
|
Recovery
|
Frame Adv
|
Circuit
|
Invuln
|
| 26
|
10
|
15
|
3
|
5.4%, 3.6%, 2.7% (11.7%)
|
-
|
|
Charged version is a 3-hit with advantage on block.
|
|
Aerial Normals
Notes:
- All of F-Satsuki's air normals except for j.[C] can only be cancelled into Initiative Heat. j.[C] retains regular cancel properties which in F-Satsuki's case are double jump cancel, air throw or IH.
- j.A doesn't recover in mid-air unlike with most characters.
|
|
| Damage
|
Red Damage
|
Proration
|
Cancel
|
Guard
|
| 300
|
202
|
75% (O)
|
-
|
HA
|
| First Active
|
Active
|
Recovery
|
Frame Adv
|
Circuit
|
Invuln
|
| 4
|
4
|
-
|
-
|
2.7%
|
-
|
|
Standard air jab.
|
|
|
|
| Damage
|
Red Damage
|
Proration
|
Cancel
|
Guard
|
| 750
|
454
|
90% (O)
|
-
|
HA
|
| First Active
|
Active
|
Recovery
|
Frame Adv
|
Circuit
|
Invuln
|
| 6
|
4
|
-
|
-
|
7.2%
|
-
|
|
Downward arm swipe.
|
|
|
|
| j.C
|
Damage
|
Red Damage
|
Proration
|
Cancel
|
Guard
|
| 1000
|
707
|
85% (M)
|
-
|
HA
|
| First Active
|
Active
|
Recovery
|
Frame Adv
|
Circuit
|
Invuln
|
| 6
|
4
|
-
|
-
|
9.0%
|
-
|
|
Aerial downward smash. Ground-techable knockdown on air hit.
|
| j.[C]
|
Damage
|
Red Damage
|
Proration
|
Cancel
|
Guard
|
| 1300
|
1212
|
50% (O)
|
J
|
HA
|
| First Active
|
Active
|
Recovery
|
Frame Adv
|
Circuit
|
Invuln
|
| 25
|
4
|
-
|
-
|
6.3%
|
-
|
|
Charged version ground bounces on hit and has proper and can be jump/air throw cancelled.
|
|
Command Normals
|
|
| 3C
|
Damage
|
Red Damage
|
Proration
|
Cancel
|
Guard
|
| 1000
|
707
|
60% (O)
|
SP, EX
|
L
|
| First Active
|
Active
|
Recovery
|
Frame Adv
|
Circuit
|
Invuln
|
| 12
|
12
|
19
|
-13 ~ -2
|
9.0%
|
-
|
|
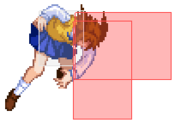
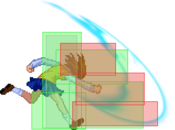
Satsuki slides forward.
|
| 3[C]
|
Damage
|
Red Damage
|
Proration
|
Cancel
|
Guard
|
| 1500
|
1212
|
70% (O)
|
SP, EX, (J)
|
L
|
| First Active
|
Active
|
Recovery
|
Frame Adv
|
Circuit
|
Invuln
|
| 25
|
8
|
11
|
-1 ~ 6
|
13.5%
|
-
|
|
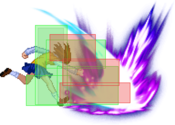
Satsuki slides further forward than 3C. Launches on hit.
|
|
Universal Mechanics
|
|
| Damage
|
Red Damage
|
Proration
|
Cancel
|
Guard
|
| 1400
|
606
|
100%
|
-
|
U
|
| First Active
|
Active
|
Recovery
|
Frame Adv
|
Circuit
|
Invuln
|
| 2
|
1
|
20
|
-
|
0.0%
|
-
|
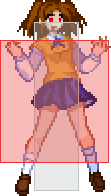
|
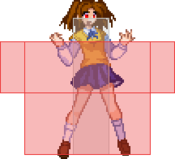
Satsuki launches the opponent into the air. Opponent can air tech just before touching the ground.
|
|
|
|
| Damage
|
Red Damage
|
Proration
|
Cancel
|
Guard
|
1600 (1408, Raw)
1300
|
533
|
30%
|
-
|
U
|
| First Active
|
Active
|
Recovery
|
Frame Adv
|
Circuit
|
Invuln
|
| 1
|
1
|
12
|
-
|
9.0%
|
-
|
|
Satsuki punches the opponent into an untechable knockdown. One of the few airthrows that build meter.
|
|
|
|
| Ground
|
Damage
|
Red Damage
|
Proration
|
Cancel
|
Guard
|
| 500 (345)
|
202
|
50%
|
(SP), (EX), (J)
|
LHA
|
| First Active
|
Active
|
Recovery
|
Frame Adv
|
Circuit
|
Invuln
|
| 8
|
4
|
18
|
-4
|
4.5%
|
-
|
|
Same animation as C-moon 5C.
|
| Air
|
Damage
|
Red Damage
|
Proration
|
Cancel
|
Guard
|
| 500 (345)
|
202
|
50%
|
-
|
HA
|
| First Active
|
Active
|
Recovery
|
Frame Adv
|
Circuit
|
Invuln
|
| 8
|
4
|
-
|
-
|
4.5%
|
Full 1-3
|
|
Same animation as j.C.
|
|
|
|
| Bunker
|
Damage
|
Red Damage
|
Proration
|
Cancel
|
Guard
|
| 500
|
202
|
100%
|
-
|
LHA
|
| First Active
|
Active
|
Recovery
|
Frame Adv
|
Circuit
|
Invuln
|
| 25
|
4
|
19
|
-5
|
0.0%
(-50.0% in blockstun)
|
Clash 1-10
|
| (Clash)
|
Damage
|
Red Damage
|
Proration
|
Cancel
|
Guard
|
| 500
|
202
|
100%
|
-
|
LHA
|
| First Active
|
Active
|
Recovery
|
Frame Adv
|
Circuit
|
Invuln
|
| 7
|
4
|
19
|
-5
|
0.0%/-50.0%
|
Strike 1-7
|
|
A 214A-like shield bunker.
|
|
|
|
| Damage
|
Red Damage
|
Proration
|
Cancel
|
Guard
|
| 100
|
0
|
100%
|
-
|
U
|
| First Active
|
Active
|
Recovery
|
Frame Adv
|
Circuit
|
Invuln
|
| 20
|
5
|
25
|
-
|
uses all
|
Full 1-25
|
|
Wide hitbox, activation startup is on the slower side.
|
|
|
|
| Ground
|
Damage
|
Red Damage
|
Proration
|
Cancel
|
Guard
|
| 100
|
0
|
100%
|
-
|
U
|
| First Active
|
Active
|
Recovery
|
Frame Adv
|
Circuit
|
Invuln
|
| 10
|
10
|
20
|
-
|
removes all
|
Full 1-39
|
| Air
|
Damage
|
Red Damage
|
Proration
|
Cancel
|
Guard
|
| 100
|
0
|
100%
|
-
|
U
|
| First Active
|
Active
|
Recovery
|
Frame Adv
|
Circuit
|
Invuln
|
| 11
|
10
|
15
|
-
|
removes all
|
Strike 1-30
|
|
Universal burst mechanic. Unlike Crescent/Full Heat activation, the hitbox and frame data doesn't vary between characters. However, you can be thrown out of this move if you input it in the air.
|
|
Special Moves
|
|
| A
|
Damage
|
Red Damage
|
Proration
|
Cancel
|
Guard
|
| 1500 (1453)
|
(880)
|
65% (O)
|
-
|
LH
(Whiffs vs Air.)
|
| First Active
|
Active
|
Recovery
|
Frame Adv
|
Circuit
|
Invuln
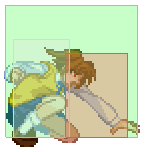
|
| 19
|
2
|
15
|
-2
|
0.0%
|
-
|
| [A]
|
Damage
|
Red Damage
|
Proration
|
Cancel
|
Guard
|
| -
|
-
|
-
|
-
|
-
|
| First Active
|
Active
|
Recovery
|
Frame Adv
|
Circuit
|
Invuln
|
| -
|
-
|
24
|
-
|
-
|
-
|
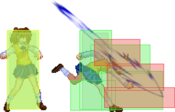
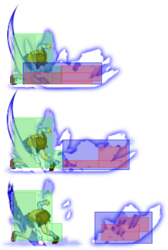
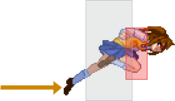
- Satsuki jumps forward and tries to grab the opponent. All versions are hitgrabs. Can be held for a dash-only feint version.
On hit, Satsuki will launch the opponent to the other side. Untechable knockdown.
|
| B
|
Damage
|
Red Damage
|
Proration
|
Cancel
|
Guard
|
| 1300 (1259)
|
(664)
|
100%
|
-
|
LH
(Whiffs vs Air.)
|
| First Active
|
Active
|
Recovery
|
Frame Adv
|
Circuit
|
Invuln
|
| 32
|
2
|
11
|
4
|
0.0%
|
-
|
| [B]
|
Damage
|
Red Damage
|
Proration
|
Cancel
|
Guard
|
| -
|
-
|
-
|
-
|
-
|
| First Active
|
Active
|
Recovery
|
Frame Adv
|
Circuit
|
Invuln
|
| -
|
-
|
33
|
-
|
-
|
-
|
|
Satsuki leaps farther forward. Knocks the opponent down right in front of Satsuki on hit. Very slow startup, actually + on block.
|
| EX
|
Damage
|
Red Damage
|
Proration
|
Cancel
|
Guard
|
| 2000 (1937)
|
(1369)
|
60% (M)
|
-
|
LH
(Whiffs vs Air.)
|
| First Active
|
Active
|
Recovery
|
Frame Adv
|
Circuit
|
Invuln
|
| 3+9
|
2
|
20
|
-4
|
-100.0%
|
Full 3-10
|
|
EX version is invincible during the dash portion and ground bounces on hit.
|
|
A A [A] [A] B B [B] [B] EX EX
|
A (Throw)
(Strike)
|
Damage
|
Red Damage
|
Proration
|
Cancel
|
Guard
|
1500 (1453)
1000
|
880
707
|
100%
80% (O)
|
-
(J)
|
U (Whiffs vs Ground.)
LH
|
| First Active
|
Active
|
Recovery
|
Frame Adv
|
Circuit
|
Invuln
|
| 7
|
6
|
23
|
-8
|
0.0%
9.0%
|
High 1-19
|
[A] (Throw)
(Strike)
|
Damage
|
Red Damage
|
Proration
|
Cancel
|
Guard
|
1300 (1259)
1200
|
664
1010
|
100%
75% (M)
|
-
(J)
|
U (Whiffs vs Ground.)
LH
|
| First Active
|
Active
|
Recovery
|
Frame Adv
|
Circuit
|
Invuln
|
| 13
|
3
|
14
|
2
|
0.0%
10.8%
|
High 1-20
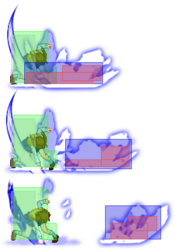
|
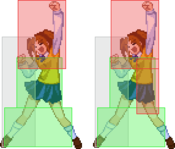
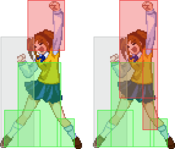
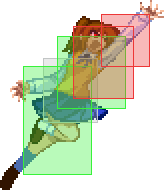
- Satsuki's anti-air grab series.
A version works as both an anti-air grab that launches the opponent to the other side on hit, and a jump-cancelable launcher. Airborne opponents can be hit by the launcher part instead of the grab if the attack connects late enough.
Charged version is used as a launcher as it is much less likely to grab the opponent after 2C/3C. Otherwise the grab causes untechable but non OTG-able knockdown.
|
| B
|
Damage
|
Red Damage
|
Proration
|
Cancel
|
Guard
|
| 1500 (1453)
|
880
|
100%
|
-
|
U
(Whiffs vs Ground.)
|
| First Active
|
Active
|
Recovery
|
Frame Adv
|
Circuit
|
Invuln
|
| 7
|
8
|
16
|
-
|
0.0%
|
High 1-10
|
| [B]
|
Damage
|
Red Damage
|
Proration
|
Cancel
|
Guard
|
| 1300 (1259)
|
664
|
100%
|
-
|
U
(Whiffs vs Ground.)
|
| First Active
|
Active
|
Recovery
|
Frame Adv
|
Circuit
|
Invuln
|
| 13
|
2
|
22
|
-
|
0.0%
|
High 1-15
|
|
Grab only. Uncharged version launches to the other side and is air techable, charged version is an OTG-able untechable knockdown in front of Satsuki.
|
| EX
|
Damage
|
Red Damage
|
Proration
|
Cancel
|
Guard
|
| 2000 (1937)
|
1369
|
60% (M)
|
-
|
U
(Whiffs vs Ground.)
|
| First Active
|
Active
|
Recovery
|
Frame Adv
|
Circuit
|
Invuln
|
| 2+5
|
2
|
34
|
-
|
-100.0%
|
Full 1-3, High 4-9
|
|
Infamously long-ranged anti-air grab. Ground bounces on hit.
|
|
A A B B [B] [B] EX EX
|
| A
|
Damage
|
Red Damage
|
Proration
|
Cancel
|
Guard
|
| 1000
|
505
|
100%
|
-EX-, (J)
|
LH
|
| First Active
|
Active
|
Recovery
|
Frame Adv
|
Circuit
|
Invuln
|
| 10
|
4
|
19
|
-5
|
8.1%
|
-
|
| [A]
|
Damage
|
Red Damage
|
Proration
|
Cancel
|
Guard
|
| -
|
-
|
-
|
-
|
-
|
| First Active
|
Active
|
Recovery
|
Frame Adv
|
Circuit
|
Invuln
|
| -
|
-
|
32
|
-
|
-
|
-
|
- Satsuki warms up and performs a rushing push.
A version is EX cancellable even on whiff, and jump-cancellable on hit. Can be held for a feint.
|
| B (Lv 1)
|
Damage
|
Red Damage
|
Proration
|
Cancel
|
Guard
|
| 700, 800 (1176)
|
(644)
|
70% (O)
|
-
|
H, LH
|
| First Active
|
Active
|
Recovery
|
Frame Adv
|
Circuit
|
Invuln
|
| 28
|
5
|
21
|
-2
|
8.0%, 10.8% (18.8%)
|
-
|
| [B] (Lv 2)
|
Damage
|
Red Damage
|
Proration
|
Cancel
|
Guard
|
| 1400, 800 (2082)
|
(1354)
|
70% (O)
|
-
|
H, LH
|
| First Active
|
Active
|
Recovery
|
Frame Adv
|
Circuit
|
Invuln
|
| 41 (min)*
|
5
|
21
|
-2
|
8.0%, 10.8% (18.8%)
|
-
|
| [B] (Lv 3)
|
Damage
|
Red Damage
|
Proration
|
Cancel
|
Guard
|
| 2000
|
1515
|
100%
|
J
|
H
|
| First Active
|
Active
|
Recovery
|
Frame Adv
|
Circuit
|
Invuln
|
| 53 (min)*
|
3
|
23
|
-8
|
18.0%
|
-
|
| [B] (Lv 4)
|
Damage
|
Red Damage
|
Proration
|
Cancel
|
Guard
|
| 2000
|
2020
|
100%
|
J
|
H
|
| First Active
|
Active
|
Recovery
|
Frame Adv
|
Circuit
|
Invuln
|
| 67*
|
3
|
23
|
-8
|
22.5%
|
-
|
|
Slow overhead, can be charged for different levels of damage. Level 1-2 charge is initially a 2-hit with only the first being an overhead.
Level 3-4 charge is a single-hit which deals a lot of guard damage and is jump cancellable if you manage to land it.
|
| EX
|
Damage
|
Red Damage
|
Proration
|
Cancel
|
Guard
|
| 2400
|
2020
|
45% (M)
|
-
|
LH
|
| First Active
|
Active
|
Recovery
|
Frame Adv
|
Circuit
|
Invuln
|
| 2+6
|
3
|
27
|
-2
|
-100.0%
|
Full 1-6
|
|
Has a few invulnerable frames on startup and is actually pretty safe on block. Wallslams on hit.
|
|
|
|
| A
|
Damage
|
Red Damage
|
Proration
|
Cancel
|
Guard
|
| 1600 (1091)
|
(826)
|
50% (O)
|
-
|
U
(Whiffs vs Ground.)
|
| First Active
|
Active
|
Recovery
|
Frame Adv
|
Circuit
|
Invuln
|
| 6
|
8
|
38
|
-
|
14.4%
|
-
|
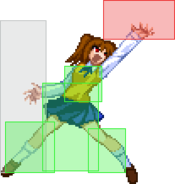
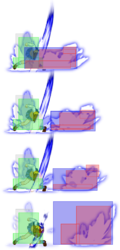
- Satsuki jumps into the air to grab the opponent. All versions cause untechable but non OTG-able ground bounce on hit.
Smashes the opponent like in airthrow if this connects.
|
| B
|
Damage
|
Red Damage
|
Proration
|
Cancel
|
Guard
|
| 1600 (1091)
|
(826)
|
50% (O)
|
-
|
U
(Whiffs vs Ground.)
|
| First Active
|
Active
|
Recovery
|
Frame Adv
|
Circuit
|
Invuln
|
| 10
|
12
|
35
|
-
|
14.4%
|
-
|
|
Varation of 421A which makes Satsuki jump farther.
|
| EX
|
Damage
|
Red Damage
|
Proration
|
Cancel
|
Guard
|
| 2600 (2518)
|
(2152)
|
100%
|
-
|
U
(Whiffs vs Ground.)
|
| First Active
|
Active
|
Recovery
|
Frame Adv
|
Circuit
|
Invuln
|
| 2+5
|
12
|
37
|
-
|
-100.0%
|
Full 2, 4-7
|
|
Satsuki dunks the opponent on hit. This is less likely to leave Satsuki far away from the opponent than the unmetered version.
|
|
A A B B EX (2nd Projectile) EX (2nd Projectile)
|
| A
|
Damage
|
Red Damage
|
Proration
|
Cancel
|
Guard
|
| 1000
|
808
|
100%
|
-
|
LH
|
| First Active
|
Active
|
Recovery
|
Frame Adv
|
Circuit
|
Invuln
|
| 16
|
11
|
9
|
-2
|
8.0%
|
-
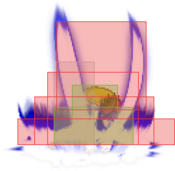
|
- Satsuki punches the ground, spawning a fast ground shockwave projectile which travels a set distance.
Slow startup, safe on block at -2f.
|
| B
|
Damage
|
Red Damage
|
Proration
|
Cancel
|
Guard
|
| 1000
|
808
|
100%
|
-EX-
|
LH
|
| First Active
|
Active
|
Recovery
|
Frame Adv
|
Circuit
|
Invuln
|
| 10
|
11
|
19
|
-12
|
9.0%
|
-
|
|
Fast startup, EX cancellable. Slightly more range than 22A. Terribly unsafe on block anywhere near the opponent at -12f.
|
| EX
|
Damage
|
Red Damage
|
Proration
|
Cancel
|
Guard
|
| 800, 200*3, 650 (1791)
|
(1163)
|
50% (O)
|
-
|
LH
|
| First Active
|
Active
|
Recovery
|
Frame Adv
|
Circuit
|
Invuln
|
| 2+7
|
11 (5) 6 (2) 4
|
19
|
21
|
-100.0%
|
-
|
|
Fast startup, does a 22A wave immediately followed by a larger version. Gives good frame advantage on block. Being too close to the opponent stuck in the corner can lead to this move being punishable on block.
|
|
|
|
| Damage
|
Red Damage
|
Proration
|
Cancel
|
Guard
|
| 2500
|
1467
|
100%
|
-
|
U
(Whiffs vs Air.)
|
| First Active
|
Active
|
Recovery
|
Frame Adv
|
Circuit
|
Invuln
|
| 3+0
|
1
|
28
|
-
|
-100.0%
|
Full 3
|
|
EX Bite. A command grab that is fast and unescapable once superflash starts. Untechable knockdown on hit.
|
|
Arc Drive
|
|
| Damage
|
Red Damage
|
Proration
|
Cancel
|
Guard
|
| 3300
|
2626
|
50% (O)
|
-
|
U
(Whiffs vs Air.)
|
| First Active
|
Active
|
Recovery
|
Frame Adv
|
Circuit
|
Invuln
|
| 4+11
|
1
|
27
|
-
|
removes all
|
Full 1-16, High 17-19
|
|
Satsuki rushes forward to try grabbing the opponent. 11f post-flash startup makes this easy to be jumped away.
|
|
Another Arc Drive
|
|
| Damage
|
Red Damage
|
Proration
|
Cancel
|
Guard
|
| 20600 (5583)
|
(4512)
|
50% (O)
|
-
|
A
|
| First Active
|
Active
|
Recovery
|
Frame Adv
|
Circuit
|
Invuln
|
| 6+7
|
8
|
24
|
-
|
removes all
|
Full 1-21
|
|
Usable in combos, but shieldable and air blockable.
|
|
Last Arc
|
|
| Damage
|
Red Damage
|
Proration
|
Cancel
|
Guard
|
| 11700 (3599~6821)
|
(3002~5665)
|
50% + 50% * remaining BH time
|
-
|
U
|
| First Active
|
Active
|
Recovery
|
Frame Adv
|
Circuit
|
Invuln
|
| 3+24
|
123
|
27
|
-
|
removes all
|
Full
|
|
Circuit breaks the opponent and spawns a fullscreen hitbox active for an extremely long time, making this unescapable.
|
|
MBAACC Navigation
