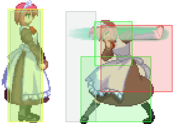
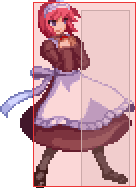
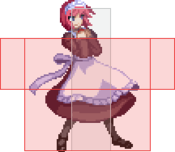
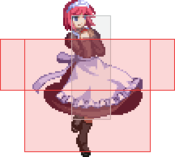
Character Page Progress
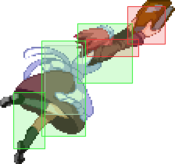
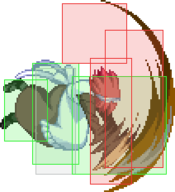
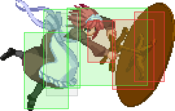
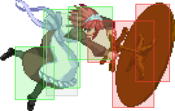
All major goals on this page are complete! Please update this character's roadmap page to update this status if required.
Additional Resources
C-Hisui Match Video Database
C-Hisui Essential combos & Tech Trap set ups
Notable Players
| Name |
Color
|
Region |
Common Venues |
Status |
Details
|
Ktarou
(Kタロー) |

|
Japan |
Kirisugu, KorewaMelty |
Inactive |
|
niboshi
(にぼし) |

|
Japan |
Play Spot BIG ONE 2nd |
Inactive |
Uses various color palettes.
|
shitone
(しとね) |

|
Japan |
A-cho, KorewaMelty, Play Spot BIG ONE 2nd |
Active |
|
waka
(わか) |

|
Japan |
A-cho, KorewaMelty, Play Spot BIG ONE 2nd |
Inactive |
|
Overview
Strengths / Weaknesses
| Strengths
|
- Good movement
- Versatile neutral and specials
- Consistent damage without compromises on damage/knockdown/carry
- Doesn't need to rely on meter much
- Has good meter gain
- Has good cancel windows on her normals and 5[C] to move her forward in pressure
|
| Weaknesses
|
- Lack of mixups on offense, relies on strike/throw primarily
- Below average defense
- Weak air-to-ground
- Weak range on ground normals
- Rebeats alot in her pressure, leading to low damage overall
|
Crescent Hisui is a well rounded character with great movement and many options in neutral that can be applied in a variety of playstyles, from solid and basic air footsies to annoying zoning and backpedaling.
In the air, she has several good aerials to choose from, such as j.A and j.B to attack people above her. Her landing game is also solid, with moves like j.236x, j.2C/j.2[C] divekick, j.6B delayed projectile, dodge, and j.C being used to mixup her landings.
On the ground, C-Hisui has access to her 214x specials (otherwise known as stuffu), a series of random projectiles that she can choose by holding a direction after inputting 214x. Stuffu can be used to beat the opponents' zoning options. It can also be used as an antiair with 214A~2 or 214B~1.
C-Hisui's gameplan revolves heavily around a basic strike/throw game, which is made safer by her extremely strong okizeme. Her 22X series (or bento) are specials which place down explosive bento boxes which explode after a certain amount of time, forcing the opponent to block after they tech her throws.
Her best move in pressure is 5[C], a forward moving normal that can frametrap the opponent at any distance, as well as bringing Hisui closer to her opponent, letting her continue her pressure with 5A rebeats. However, she lacks a strong mixup game, as she does not have good high/low mixups and only has situational left/right mixups after throw against certain characters, leading to average offense overall. Because throws deal little damage compared to her frame trap options, C-Hisui's opponents are incentivized to block most of the time instead of committing to an escape.
Hisui is generally placed on the higher ends of mid tier or the bottom of high tier. She stands out from most mid tiers due to her versatility and flexibility. She can easily confirm into hard knockdowns from anywhere on the stage, either with her corner BnB, which deals around 5k, or with her corner carry confirm, which can carry opponents from one end of the screen to the other. It's often the case that she never has to compromise damage for knockdown frames or vice versa, and none of her best confirms need meter.
C-Hisui is not exactly meter reliant in general, frequently using it for 623C pressure resets, but she does need at least 100 meter for Heat, 623C and bunker in order to supplement her below average defense.
General Gameplan
C-Hisui's gameplan is quite flexible, as she has the tools to control space via 214B or use her dash speed to close the distance quickly. Depending on the MU, it's advisable to use 214B,[1] to control space and to fish for counterhits if the opponent gets impatient. Hisui can also control the air in front of her using 623[B] if you think they'll airdash towards you predictably. If they're giving Hisui enough space, she can do 22A and 22B, and are allowed to set down up to two bentos which will create even more clutter on the screen for the opponent to keep mind of. One of her most commonly seen tools is j.6B which is generally used when she airdashes backwards. It creates a dust cloud that is persistent on block and serves as a wall, and will become a combo on counter hit. On that front, C-Hisui rewards people that bide their time in neutral or create awkward situations with her specials for the opponent to deal with.
Combined with her impressive dash speed and oppressive air normals such as j.B and j.C, she easily controls the air but can also rush the opponent down with either dash 5A (5[C]), dash 2B, dash 5A 6C, etc. She ultimately rewards players that understand Melty's fundamentals and offers maximum flexibility in the player's approaches to many match ups.
For okizeme (which will be covered later in this section), she has the ability to either choose HKD via yayaya loops into 623A/236A~236A ender or perform tech trap set ups that lead into HKD on non tech. Catching any of the opponent's tech options leads to more damage back into HKD as well.
Neutral
C-Hisui has several options in neutral. In some MUs, finding time to use 214B[1] and then running in behind her honey pot projectile allows her to approach safely. Since it requires the opponent to either air block or shield it, it's very good to monitor the opponent's response to pot throw. If it air counter hits, then Hisui gets an air combo. Sometimes they will air block it low enough for Hisui to dash 5A and guard break them while they are airblocking pot as well.
Once Hisui has established a space to maintain via 623[B] and airdash back j.6B/j.B, she can then use her dash and do run up 5A/2B. If the opponent is floating around in the air, Hisui can do rising j.A/B if they're above her. One thing Hisui players want to remember is that j.B can be ducked by many characters and j.C can be low profiled at times so it's important to space yourself well to use j.B, j.C, and j.[C], which are usually used either as the opponent is approaching Hisui or is directly in front of her as she approaches them from the air.
Be sure to use j2C, j.2[C], and j236A/B to throw off people's anti air timing since most people will look for when C-Hisui will attack, and those three moves alter her air momentum and throw the opponent off guard. She can also air dodge to further alter her air movement and reposition herself accordingly. Also, don't be afraid to sometimes throw out j.BB, the 2nd j.B is a book slam that has a good hitbox on it. Note that if j.BB is blocked, Hisui is now put in a vulnerable state and can be punished, for this reason be ready to cancel j.BB on block into j.236B just in case.
On the ground, dash 2B/5[C] is going to be your best button for stuffing ground approaches, while buttons like 5A 6C are better for catching people in the air. You may sometimes use 5A 5C to hit someone out of the air. You can also use 5A 5[C] to catch people backdashing. In some matchups also don't be afraid to use dash 2C, while it does have a good bit of recovery, it's got a deceptively long range than one would expect making it useful in matchups like caoko, nero,etc. There are many more things you'll see in match footage - things like dash 623C allow safe heat set ups in neutral and place a persistent hitbox on the screen that doesn't go away even if Hisui gets hit, making it a very versatile EX move for both neutral, pressure, and okizeme, which will all be covered later.
Pressure
C-Hisui's pressure has a lot of freedom of where to end and where to pick it back up. She is a strike/throw character with several normals that move her forward, as well as good specials and EX moves that allow her to expand her toolkit in pressure. Below is a set of normals Hisui commonly uses in her pressure, followed by specials to use. For reference head to #Normal Moves and #Special Moves
Normals
- 2A
- 2B
- 5A
- 2C
- 5C/5[C]
- 6C
- j2C
- j6B
- j.C
- 4B (Will be explained later)
Specials
- j.236A/B
- 214B, 1 or 6
- 214A, 6
- 236A/B
An important thing to note is that staggering your pressure to frame trap the opponent is key - luckily she has quite a bit in her arsenal to do so. 2A 5C is a natural frame trap, as is 2B 5[C]. 5C and 5[C] both move Hisui forward, and it's very important to learn where to use them. At low level play it's a very strange move to use, but better players may shield, dodge, or backdash it if they have a good option to counter 5C. It's very important to keep both 5C and 5[C] in your back pocket as an extra tool you can use in her pressure. 2B is another common button since it's one of her main lows. 2A is a mid, but is very fast and is generally very good for setting up tick throws. 2C is her 2nd low that's good to use in stagger pressure to open up the opponent.
j.2C is a way to throw off people looking to throw tech vs Hisui, although she has tools like dash 5B to crush OS as well. 6C is an interesting normal, in that you can input 6[C] afterwards and the move will become an overhead, which you can followup by hitting 236C (you can also just rekka 6CC 236C for the non-overhead version). 4B drains meter and trips standing, and works well with 6C[C] since one option is a high and the other option trips on standing making for a niche yet somewhat useful mixup option if the opponent isn't aware. 5A is very good to cancel into at a lot of parts in your offense, making her pressure very fluid and hard to deal with at times, even with EX guard in mind. Here are some strings you may see in her typical pressure with normals only:
- 2A 2A 2A 2B delay 5[C]
- 2A 5[C]/5C
- 2A (w5A), Grab or 2A 2B
- 2A 2A 2B 5[C] (w5A), 5[C]
- 2A 2A 2A 2B delay 5[C] delay 2C (w5A)
- 2A (2A), j2C
- 2A 2A 2B w5A, 2B
- 2B 5[C] 2A dash 2A.
- 2A 2A 2B 6C (w5A)
- 2A 2A 2B 6C[C] or 2C (w5A)
- 2A 2A 2B 5[C] 6C, delay 4B
With these strings, Hisui can incorporate IAD j.6B into grab or do IAD j.C to further her pressure. The following are a few options to reset her pressure with specials.
- Stagger 2A 2A 2B delay 5[C] 236B
- Stagger 2A 2A 2B delay 5[C] 2C 214B,1 or 6
- 2A 2A TK236A or jump, j.236B
You can also use EX dust anytime you need to extend your pressure when you're too far out.
Okizeme
Refer to this for this part, particularly the j.BB ender section that will be covered
#Aircombo Enders
C-Hisui gets her oki from 623A or 236B~B, and each has their unique uses and placements. 623A has a lot of KD timing, so you can cancel into 22A/B/C really late. This greatly helps your oki since the later you set down Bento, the more you play with the timing of your main strike/throw mixup.
One important thing to note about C-Hisui's oki is that while it's still fundamentally strike/throw, throwing as the bento explodes cuts the tech windows by a considerable amount, which means it forces players to respond with much more commital options (throw) in order to escape when they are caught in her oki. This is where C-Hisui is really good at baiting throw techs.
22A oki
This is done off either 2C into 22A or 623A into 22A. It's important that you learn to delay the 22A a bit so that you get more options such as early throw, where if they tech, the bento explodes and it's still your turn. Here are some common options you will see for her corner oki:
- dash w5A, 6E/6A+D
- dash 5A delay 5B/6C(this beats throw tech oses)
- dash 2A dash grab
- dash 2B dash grab
- dash 2B delay 5B/5C(to compliment the option above to beat throw tech OS, jumps and mash)
- dash 6C delay 2C or 6C6[C]
- dash, iad j.C
22C is faster and, unlike 22A, is full untech if they get hit. It also poisons over time and deals more damage, and is a very versatile option that Hisui has. Here are some ways to get 22C out other than 623A or 236A~A (in some routes that use 236A~236A Hisui can only EX cancel in which case you should use 22C) All of these situations listed are specifically corner only unless stated otherwise.
- throw, 623C, 22C (requires to be in max for this to be meter efficient)
- 623A, 22A, dash 5B/2B, 22C
- throw 22A 5B/2B, 22C
The oki with 22C is pretty much the same as the ones for 22A listed above, although with an added set up which is this sequence:
- 623A, 22C/ 236A~236A, 22C, jump j.A airdash j.C vs j.A, 2B
j.BB ender
j.BB enders are unique in that you are able to ground tech the first ground bounce. With this, C-Hisui is able to set up tech trap situations in her favor. This is good since her yayayaya loops not only give her a lot of meter but also a considerable amount to the opponent. You need the opponent to be higher than you and you also need to be descending by the time the 2nd hit of j.B hits. Here are 2 sample combos. one for anything not in the corner and one for specifically the corner. The goal is for Hisui to not be deep in the corner, but rather just right outside the corner.
Corner to corner/Midscreen to corner j.BB route
- 2A 2A 2B 2C 5C 6C > j.B j.C (sdj or j7) j.C airdash j.B ~ j.B.
Corner
2A 2A 2A 2B 2C 5C 6C > j.B j.C > airdash > j.8 > j.A j.C j.B ~ B
For the first sample combo, your tech punishes are
- land, 2B(covers forward tech depending on positioning you can also cover back tech this way as well.)
- (microdash) 5A 2C(covers neutral tech and depending on how far outside of the corner hisui lands, microdash is not needed)
For the 2nd combo in the corner, the same options are still used, and are truly consistent set ups because it sets up the right spacing for either land 2B or land 5A 2C to punish the tech.
On no tech, 5A 2C should have 5A whiff and autotime for 2C to knockdown. You can tack on 623A for more knockdown time and damage.
Defense
As mentioned previously, C-Hisui has below average defense, meaning that she's more reliant on meter than other characters. Luckily though, you're playing Crescent Moon, which means you'll rarely be in a situation without at least 100 meter. You'll need to make use of all universal defensive options in order to protect yourself as C-Hisui. Her defensive options include shielding, blocking, or using your bunker while in blockstun, while more proactive defensive options like jumping and backdashing out of pressure and dodging in neutral are important as well.
C-Hisui in particular can cover a lot of offense with just two options- Heat Activation and EX Dust.
Heat is a slow unblockable reversal that can be mashed with ABC without letting go of down-back, meaning that it's much less risky to mash heat than a DP. This will beat a lot of meaties, frame traps, run up throws and some pressure extenders that involve the opponent getting close to you, but because of its low range,enemies that expect it can simply walk back slightly and whiff punish.
EX Dust is also an excellent defensive option at a 2f startup. Despite it's lack of invincibility, it's an extremely good tool to escape pressure resets and larger frametraps. However, it's 623 input makes it significantly more risky to use and will be counterhit by tighter frametraps, but a successful EX Dust give you your turn back.
There are ways for enemies to beat both options, but both involve giving up certain pressure tools in their kit or allowing you to mash out without meter. Some opponents with large normals (such as Warachia) may choose to stay at a slight distance away from Hisui in order to beat reversal heat, but in doing so they give up stubbier normals like 2A in their pressure and must use more commital dash-ins to reset pressure. Additionally, there are several OSes that can meaty/frametrap and beat Heat at the same time. EX Dust in essence is just a really good mash, and as such enemies can block it, but the frame advantage will allow you to take your turn back anyways. Be careful to not get too predictable with EX Dust as it can be shielded.
In general, if you're not ready to commit to a metered option, you should block and wait. Relying on metered options will not only make you more predictable, it will punish you even harder if you happened to guess wrong. Make sure your responses are varied even if you predict the opponent will do the same thing.
If you happen to be in Heat Mode, however, you have a near broken reversal at your disposal- Arc Drive. AD is a giant DP projectile that is insanely plus on block (+27) and is also air unblockable and unshieldable. The most reliable counter to it is a point blank Dodge. This is available only to C/H moons. The more distance there is between the C-Hisui and the opponent, the more delayed their dodge has to be, which gives Hisui the opportunity to punish their dodge starting from character length.
If you're feeling particularly risky, you can go for 214C on defense. The bottom of C-Hisui's hurtbox disappears at the start of the move until the frame the projectiles are created. If you manage to read their low attack and hit them with the projectiles point blank, they will be counterhit and the hitstun from all the stuffu will stack, giving you a bunch of time to confirm into your strongest combo.
Combos
| Combo Notation Help
|
Disclaimer: Combos are written by various writers, so the actual notation used in pages can differ from the standard one.
For more information, see Glossary and Controls.
|
| X > Y
|
X input is cancelled into Y.
|
| X > delay Y
|
Must wait for a short period before cancelling X input into Y.
|
| X, Y
|
X input is linked into Y, meaning Y is done after X's recovery period.
|
| X+Y
|
Buttons X and Y must be input simultaneously.
|
| X/Y
|
Either the X or Y input can be used.
|
| X~Y
|
This notation has two meanings.
- Use attack X with Y follow-up input.
- Input X then within a few frames, input Y. Usually used for option selects.
|
| X(w)
|
X input must not hit the opponent (Whiff).
|
| j.X
|
X input is done in the air, implies a jump/jump cancel if the previous move was done from the ground.
Applies to all air chain sections:
- Assume a forward jump cancel if no direction is given.
- Air chains such as j.A > j.B > j.C can be shortened to j.ABC.
|
| sj.X
|
X input is done after a super jump. Notated as sj8.X and sj9.X for neutral and forward super jumps respectively.
|
| dj.X
|
X input is done after a double jump.
|
| sdj.X
|
X input is done after a double super jump.
|
| tk.X
|
Stands for Tiger Knee. X motion must be buffered before jumping, inputting the move as close to the ground as possible. (ex. tk.236A)
|
| (X)
|
X is optional. Typically the combo will be easier if omitted.
|
| [X]
|
Input X is held down. Also referred to as Blowback Edge (BE). Depending on the character, this can indicate that this button is held down and not released until indicated by the release notation.
|
| ]X[
|
Input X is released. Will only appear if a button is previously held down. This type of input is referred to as Negative Edge.
|
| {X}
|
Button X should only be held down briefly to get a partially charged version instead of the fully charged one.
|
| X(N)
|
Attack "X" should only hit N times.
|
| (XYZ)xN
|
XYZ string must be performed N times. Combos using this notation are usually referred to as loops.
|
| (XYZ^)
|
A pre-existing combo labelled XYZ is inserted here for shortening purposes.
|
| CH
|
The first attack must be a Counter Hit.
|
| Air CH
|
The first attack must be a Counter Hit on an airborne opponent.
|
| 66
|
Performs a ground forward dash.
|
| j.66
|
Performs an aerial forward dash, used as a cancel for certain characters' air strings.
|
| IAD/IABD
|
Performs an Instant AirDash.
|
| AT
|
Performs an Air Throw. (j.6/4A+D)
|
| IH
|
Performs an Initiative Heat.
|
| AD
|
Performs an Arc Drive.
|
| AAD
|
Performs an Another Arc Drive.
|
Aircombo Enders
| Condition
|
Notation
|
Damage
vs V.Sion
|
Notes
|
|
| Aircombo
|
|
???
|
| |
| Meter Gained: ??? |
Meter Given (vs C-Moon): ??? |
| 2B will punish a neutral or forwards ground tech. Dash 2B will punish neutral or backwards ground tech. Versus no tech, you recover in time to meaty 2A. |
|
|
| corner to corner and midscreen corner
|
|
???
|
| |
| Meter Gained: ??? |
Meter Given (vs C-Moon): ??? |
| In some combos you see on mbaacc.melty.games it full corner carries and sets up a tech trap situation, If they don't tech then you still get a knockdown. It's very important to learn her tech trap options to make the most out of this ender. |
|
|
Aircombo
Opponent in / near corner preferred
|
|
???
|
| |
| Meter Gained: ??? |
Meter Given (vs C-Moon): ??? |
| The situation after j.BB in the corner is a true 50-50. 5A allows you to punish neutral tech or no tech, while 2B punishes forwards and back tech. Depending on spacing you may want to dj8 rather than dj9. |
|
|
Anywhere
| Condition
|
Notation
|
Damage
vs V.Sion
|
Notes
|
|
| Normal starter, grounded opponent
|
- 2A > 2B > 5C(1) > 2C > 623A
|
2399
|
| |
| Meter Gained: 40.0% |
Meter Given (vs C-Moon): 12.0% |
| Simple ground combo to her 623A dust. 623A ender allows Hisui to safely lay out a 22A/b bento or do any oki of her choice. |
|
|
| Normal starter, grounded opponent
|
- 2AA > 2B > 2C > 5C > 6C > j.BC > Ender
|
???
|
| |
| Meter Gained: ??? |
Meter Given (vs C-Moon): ??? |
| Simple BnB. Reasonable for starting out. |
|
|
| Normal starter, grounded opponent
|
- 2A > 2B > 5C > 2C > 6B > j.[C]AB > land > j.(A)BC > Ender
|
???
|
| |
| Meter Gained: ??? |
Meter Given (vs C-Moon): ??? |
| Basic BnB utilizing 2C 6B. Decent corner carry. Learn this. |
|
|
| Normal starter, grounded opponent
|
- 2AA > 2B > 2C > 236B~236B > j.[C]AB > land > j.BC > Ender
|
???
|
| |
| Meter Gained: ??? |
Meter Given (vs C-Moon): ??? |
| Variation BnB using 236B236B instead of 6B. |
|
|
| Normal starter, grounded opponent
|
- 2A > 2B > 5C > 2C > 6C > j.C > j.66 > j.B > Ender
|
???
|
| |
| Meter Gained: ??? |
Meter Given (vs C-Moon): ??? |
| BnB utilizing her Airdash into her combo. Use this if you use 5C in a ground combo and you only have 6C to follow up after 2C. |
|
|
| Normal starter, grounded opponent
|
- 2B > 5C > 2C > 6B > j.[C]B > j.66 > j.BB > j.236A > land > j.AAC > j.66 > j.BB > j.236B > 623A / 236A~236A
|
???
|
| |
| Meter Gained: ??? |
Meter Given (vs C-Moon): ??? |
| Advanced midscreen route. Excellent meter build, solid damage and full corner carry into oki from anywhere. j.[C]B must be delayed slightly to obtain the correct height. Significantly more difficult than other options. |
|
|
| Raw Airthrow
|
- Raw AT > j.BB > j.236A > land > j.ABC > Ender
|
???
|
| |
| Meter Gained: ??? |
Meter Given (vs C-Moon): ??? |
| Basic airthrow combo. |
|
|
| Raw Airthrow
|
- Raw AT > j.6B > land > j.[C]AB > land > j.ABC > Ender
|
???
|
| |
| Meter Gained: ??? |
Meter Given (vs C-Moon): ??? |
| Slightly more difficult airthrow combo. |
|
|
Midscreen to Corner
| Condition
|
Notation
|
Damage
vs V.Sion
|
Notes
|
|
| Normal starter, grounded opponent
|
- 2A > 2B > 5C > 2C > 6B > j.[C]AB > dj.ABB > j.236B > 623A / 236A~236A
|
4524
(2B starter)
|
|
| Meter Gained: +101.5 |
Meter Given (vs C-Moon): +33.4 |
(Video) |
| Single yaya combo. Corner carries from midscreen; if you're not in the corner by the time you get to j.236B do a standard aircombo ender instead. 623A ender has stricter height requirements than 236A~A. |
|
|
| Normal starter, grounded opponent
|
- 2A > 2B > 5C > 2C > 6B > j.[C]AB > dj.ABB > j.236B > land > j.AAC > j.66 > j.ABB > j.236B > 623A / 236A~236A
|
???
|
| |
| Meter Gained: ??? |
Meter Given (vs C-Moon): ??? |
| Yaya loop. Corner carries from midscreen. 623A ender has stricter height requirements. |
|
|
| Raw AT
|
- Raw AT > j.6B > land > j.[C]AB > dj.ABB > j.236B > 623A / 236A~236A
|
???
|
| |
| Meter Gained: ??? |
Meter Given (vs C-Moon): ??? |
| Single yaya from airthrow. Corner carries from round start positioning. Can do an aircombo extension instead of the ender for a bit more damage or to take advantage of Hisui's tech trap game after j.BB. Double yaya might also be possible. |
|
|
Corner
| Condition
|
Notation
|
Damage
vs V.Sion
|
Notes
|
|
| Normal starter, grounded opponent
|
- 2A > 2B > 5C > 6CC > 236C > delay 5A > 6C > j.BC > Ender
|
???
|
| |
| Meter Gained: ??? |
Meter Given (vs C-Moon): ??? |
| Corner BnB using her 6CC236C frying pan series. |
|
|
| Normal starter, grounded opponent
|
- 2A > 2B > 2C > 5C/6C > j.C > j.66 > j.BB > j.236B > land > j.AC > j.66 > j.BB > j.236B > land > 623A / 236A~236A
|
???
|
| |
| Meter Gained: ??? |
Meter Given (vs C-Moon): ??? |
| Basic double yaya combo. Great for meter gain, decent damage, and assuring a bento setup in the corner. For best results, delay the 2nd B of the j.BB. |
|
|
| Normal starter, grounded opponent
|
- 6C[C]~236C > 5A > j.AC > j.66 > j.BB > j.236B > land > j.AC > j.66 > j.BB > j.236B > land > 623A / 236A~236A
|
???
|
| |
| Meter Gained: ??? |
Meter Given (vs C-Moon): ??? |
| Variant of the above from ground overhead. |
|
|
Metered Combos
| Condition
|
Notation
|
Damage
vs V.Sion
|
Notes
|
|
| Normal starter, grounded opponent, Midscreen only
|
- 2A > 2B > 5C(1) > 623C > 2B > 5C > delay 2B > 5C > delay 2B > 5C > 2C > 623A
|
???
|
| |
| Meter Gained: ??? |
Meter Given (vs C-Moon): ??? |
| EX Dust combo, back from AC. |
|
|
| Normal starter, grounded opponent, Midscreen only
|
- 5[C] > 623C > 5B > 5C > 5B > 5C > 5B > 2C > 5C > 6B > j.[C]B > 236A~236A
|
5263
|
| |
| Meter Gained: ??? |
Meter Given (vs C-Moon): ??? |
| Another EX Dust combo. j.[C]B must be delayed. |
|
|
| Shield, grounded opponent
|
- 5D/2D > 214C(ch) > 44 > j.[C] > j.66 > j.AB > 5B > 5C > 2C > 6B > j.[C]AB > land > j.ABC > ender
|
5856
(Airthrow ender)
|
| |
| Meter Gained: ??? |
Meter Given (vs C-Moon): ??? |
| Hisui's best F-Nero impression. |
|
|
| 200% or max required
|
- 2A > 2A > 2B > 2C > 6B > j.[C] > delay j.A > 236C > 2C > 22C > OTG 2AAA2B2C > 22A
|
???
|
| |
| Meter Gained: ??? |
Meter Given (vs C-Moon): ??? |
| Poison bento set up that also allows you to set up one or two 22A as well. |
|
|
Move Descriptions
| Frame Data Help
|
| Header
|
Tooltip
|
| Move Box Colors
|
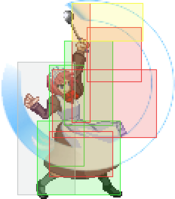
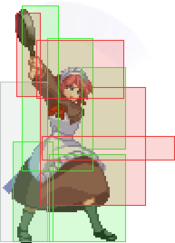
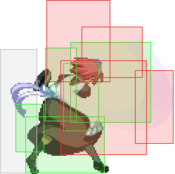
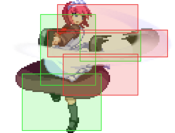
Light gray = Collision Box (A move lacking one means it can go through the opponent's own collision box).
Green: Hurt Boxes.
Red: Hit(/Grab) Boxes.
Yellow: Clash Boxes (When an active hitbox strikes a clash box, the active hitbox stops being active. Multi-hit attacks can beat clash since they will still progress to the next hitbox.)
Magenta: Projectile-reflecting boxes OR Non-hit attack trigger boxes (usually).
Blue: Reflectable Projectile Boxes.
|
| Damage
|
Base damage done by this attack.
(X) denotes combined and scaled damage tested against standing V. Sion.
|
| Red Damage
|
Damage done to the recoverable red health bar by this attack. The values are inherently scaled and tested against standing V. Sion.
(X) denotes combined damage.
|
| Proration
|
The correction value set by this attack and the way it modifies the scaling during a string. See this page for more details.
X% (O) means X% Overrides the previous correction value in a combo if X is of a lower percentage.
X% (M) means the current correction value in a combo will be Multiplied by X%. This can also be referred to as relative proration.
|
| Circuit
|
Meter gained by this attack on hit.
(X%) denotes combined meter gain.
-X% denotes a meter cost.
|
| Cancel
|
Actions this move can be cancelled into.
SE = Self cancelable.
N = Normal cancelable.
SP = Special cancelable.
CH = Cancelable into the next part of the same attack (Chain in case of specials).
EX = EX cancelable.
J = Jump cancelable.
(X) = Cancelable only on hit.
-X- = Cancelable on whiff.
|
| Guard
|
The way this move must be blocked.
L = Can block crouching
H = Can block standing.
A = Can block in the air.
U = Unblockable.
|
| Startup
|
Amount of frames that must pass prior to reaching the active frames. Also referred to as "True Startup".
|
| Active
|
The amount of frames that this move will have a hitbox.
(x) denotes frame gaps where there are no hitboxes is present. Due to varied blockstuns, (x) frames are difficult to use to determine punish windows. Generally the larger the numbers, the more time you have to punish.
X denotes active frames with a duration separate from its origin move's frame data, such as projectile attacks. In this case, the total length of the move is startup+recovery only.
|
| Recovery
|
Frames that this move has after the active frames if not canceled. The character goes into one frame where they can block but not act afterwards, which is not counted here.
|
| Advantage
|
The difference in frames where you can act before your opponent when this move is blocked (assuming the move isn't canceled and the first active frame is blocked).
If the opponent uses a move with startup that is at least 2 frames less than this move's negative advantage, it will result in the opponent hitting that move.
±x~±y denotes a range of possible advantages.
|
| Invul
|
Lists any defensive properties this move has.
X y~z denotes X property happening between the y to z frames of the animations. If no frames are noted, it means the invincibility lasts through the entire move.
Invicibility:
- Strike = Strike invincible.
- Throw = Throw invincible.
Hurtbox-Based Properties:
- Full = No hurtboxes are present.
- High = Upper body lacks a hurtbox.
- Low = Lower body lacks a hurtbox.
Miscellaneous Properties
- Clash = Frames in which clash boxes are active.
- Reflect = Frames in which projectile-reflecting boxes are active.
- Super Armor = Frames in which the character can take hits without going into hit stun.
|
Normal Moves
Standing Normals
|
|
| Damage
|
Red Damage
|
Proration
|
Cancel
|
Guard
|
| 300
|
156
|
78% (O)
|
-SE-, -N-, -SP-, -EX-, (J)
|
LH
|
| First Active
|
Active
|
Recovery
|
Frame Adv
|
Circuit
|
Invuln
|
| 4
|
4
|
8
|
0
|
3.0%
|
-
|
|
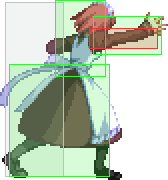
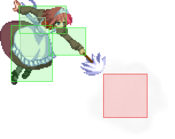
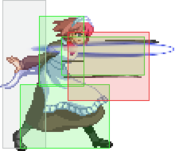
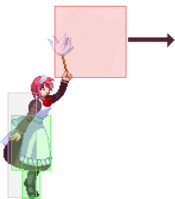
Hisui takes a step forward and sticks out her arm, slapping her opponent at face level. Her 5A has good horizontal and vertical reach, making it decent at catching opponents in the air, or guard breaking opponents who attempt to jump away during blockstrings. It also whiffs against most crouching opponents (it hits Nero, Hime and Wara) so it is useful during blockstrings as a reverse beat reset, especially after 5[C].
|
|
|
|
| Damage
|
Red Damage
|
Proration
|
Cancel
|
Guard
|
| 600
|
539
|
80% (O)
|
N, SP, EX, (J)
|
LH
|
| First Active
|
Active
|
Recovery
|
Frame Adv
|
Circuit
|
Invuln
|
| 8
|
6
|
13
|
-4
|
7.0%
|
-
|
|
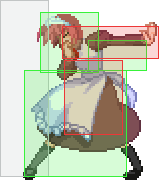
Hisui takes a step forward, extending her arm with an open palm as if she was pushing the opponent off of her. 5B has a lot of recovery and is even shorter horizontally than 5A, so it has marginal use in neutral. Because it deals more damage than 2B, it is a good normal to use as ground filler in combos. It is the lowest priority mid on the gatling chain, so it's effective on offense as a low shield callout. Dash in with 5B instead of 2A as a pressure extender if you think the opponent is likely to use that option, as 2A can be shielded both high and low.
|
|
|
|
| 5C
|
Damage
|
Red Damage
|
Proration
|
Cancel
|
Guard
|
| 400, 700 (1078)
|
(866)
|
100%
|
N, SP, EX, (J)
|
LH
|
| First Active
|
Active
|
Recovery
|
Frame Adv
|
Circuit
|
Invuln
|
| 13
|
6
|
14
|
0
|
7.0%, 8.0% (15.0%)
|
-
|
|
Hisui pulls a chair out of nowhere and hits the opponent over the head with a chair. Mid. Hits twice. 5C is 0 on block and you can rebeat into 5A after either hit, so it has its uses in pressure.
|
| 5{C}
|
Damage
|
Red Damage
|
Proration
|
Cancel
|
Guard
|
| 400*2, 700 (1443)
|
(1132)
|
100%
|
N, SP, EX, (J)
|
LH
|
| First Active
|
Active
|
Recovery
|
Frame Adv
|
Circuit
|
Invuln
|
| 15
|
7~18
|
14
|
0
|
4.0%, 7.0%, 8.0% (19.0%)
|
-
|
|
Hisui rushes forward with the chair, hitting three times. 5{C} doesn't move as far as 5[C], but it has less startup and is +0 on block. Use this normal if you don't have reverse beat options or if you don't want to leave a gap in your blockstring.
|
| 5[C]
|
Damage
|
Red Damage
|
Proration
|
Cancel
|
Guard
|
| 400, 600, 800 (1731)
|
(945)
|
100%
|
N, SP, EX, (J)
|
LH
|
| First Active
|
Active
|
Recovery
|
Frame Adv
|
Circuit
|
Invuln
|
| 15
|
18
|
21
|
-7
|
4.0%, 7.0%, 8.0% (19.0%)
|
-
|
|
Hisui rushes forward with the chair even further. 5[C] is an important tool in Hisui's pressure that lets her both frame trap people and regain distance. It's -7 on block, so you need to not have used 5A/2A earlier in the blockstring in order to stay safe. You can reverse beat after each of the three hits, which is important for changing the frame trap timing or countering players that can EX guard the move.
|
|
Crouching Normals
|
|
| Damage
|
Red Damage
|
Proration
|
Cancel
|
Guard
|
| 300
|
137
|
75% (O)
|
-SE-, -N-, -SP-, -EX-, (J)
|
LH
|
| First Active
|
Active
|
Recovery
|
Frame Adv
|
Circuit
|
Invuln
|
| 4
|
4
|
8
|
0
|
3.0%
|
-
|
|
Hisui quickly chops at the opponent's knees from a crouching position. This is a standard 2A that can whiff cancel into itself or other normals and can be shielded in either stance.
|
|
|
|
| Damage
|
Red Damage
|
Proration
|
Cancel
|
Guard
|
| 550
|
294
|
80% (O)
|
N, SP, EX, (J)
|
L
|
| First Active
|
Active
|
Recovery
|
Frame Adv
|
Circuit
|
Invuln
|
| 7
|
6
|
12
|
-3
|
6.0%
|
-
|
|
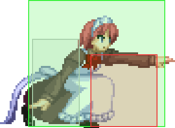
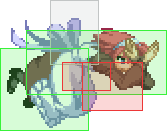
Hisui leans her body forward from a crouching position and palm strikes the opponent's legs. It has 6 active frames, which makes it a good normal to use in tech punishes. It's not as useful as a low poke in neutral due to its short range compared to 2C, but it is more useful at shorter ranges due to the fact that her hurtbox is extended for a shorter time during 2B.
|
|
|
|
| Damage
|
Red Damage
|
Proration
|
Cancel
|
Guard
|
| 1000
|
637
|
60% (O)
|
N, SP, EX, (J)
|
L
|
| First Active
|
Active
|
Recovery
|
Frame Adv
|
Circuit
|
Invuln
|
| 9
|
3
|
23
|
-8
|
11.0%
|
-
|
|
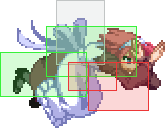
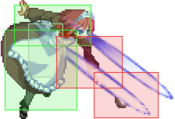
Hisui reaches behind her and drop step swishes at the opponent's feet with a water bucket and a rag, which moves her forward slightly. This is her longest Low move and it has the best speed-to-range ratio out of all the ground normals. This makes it useful for a variety of things, such as grounded approaches, tech chases and pressure.
|
|
Aerial Normals
|
|
| Damage
|
Red Damage
|
Proration
|
Cancel
|
Guard
|
| 300
|
147
|
75% (O)
|
SE, N, SP, EX, J
|
LHA
|
| First Active
|
Active
|
Recovery
|
Frame Adv
|
Circuit
|
Invuln
|
| 5
|
4
|
10
|
-
|
4.0%
|
-
|
|
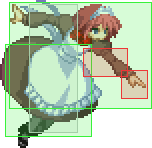
Small air jab, angled downwards. Mid. Good both as a landing option and a rising aerial due to the height at which the hitbox is created.
|
|
|
|
| j.B
|
Damage
|
Red Damage
|
Proration
|
Cancel
|
Guard
|
| 600
|
294
|
90% (O)
|
N, SP, -CH-, EX, J
|
HA
|
| First Active
|
Active
|
Recovery
|
Frame Adv
|
Circuit
|
Invuln
|
| 6
|
5
|
-
|
-
|
5.0%
|
-
|
|
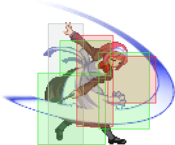
A fast book slash aimed upwards. Good for attacking people above you due to the diagonal angle.
|
| j.B~B
|
Damage
|
Red Damage
|
Proration
|
Cancel
|
Guard
|
| 700
|
392
|
100%
|
SP, EX
|
LHA
|
| First Active
|
Active
|
Recovery
|
Frame Adv
|
Circuit
|
Invuln
|
| 6
|
3
|
-
|
-
|
6.5%
|
-
|
|
Followup to j.B. Stalls your vertical air momentum, making Hisui more punishable in most situations. Slams opponents to the ground, putting them in a ground tech chase or tech trap. Used for yayaya confirms.
|
|
|
|
| j.C
|
Damage
|
Red Damage
|
Proration
|
Cancel
|
Guard
|
| 1000
|
441
|
90% (M)
|
N, SP, EX, J
|
HA
|
| First Active
|
Active
|
Recovery
|
Frame Adv
|
Circuit
|
Invuln
|
| 10
|
4
|
-
|
-
|
11.0%
|
-
|
|
A downward slam with a table pulled out of nowhere. Has the most horizontal range out of all the air normals besides j.[C]. Good for landing, frequently used as an IAD approach. It creates a somewhat transparent table graphic after the active frames, which can make it confusing on how long the move actually is for new players.
|
| j.[C]
|
Damage
|
Red Damage
|
Proration
|
Cancel
|
Guard
|
| 1200
|
588
|
95% (O)
|
N, SP, EX, J
|
HA
|
| First Active
|
Active
|
Recovery
|
Frame Adv
|
Circuit
|
Invuln
|
| 21
|
4
|
-
|
-
|
15.0%
|
-
|
|
Charged version of j.C. Hard knockdown. Has even more range than j.C, but isn't used in neutral often because of its startup. Used in combos.
|
|
Command Normals
|
|
| 4B
|
Damage
|
Red Damage
|
Proration
|
Cancel
|
Guard
|
| 100
|
98
|
100%
|
-
|
U
(Whiffs vs Crouch.)
|
| First Active
|
Active
|
Recovery
|
Frame Adv
|
Circuit
|
Invuln
|
| 16
|
4
|
17
|
-
|
6.0%, 5.0% (11.0%)
|
-
|
| 4[B] (Max)
|
Damage
|
Red Damage
|
Proration
|
Cancel
|
Guard
|
| 100
|
98
|
100%
|
-
|
U
(Whiffs vs Crouch.)
|
| First Active
|
Active
|
Recovery
|
Frame Adv
|
Circuit
|
Invuln
|
| 16
|
4 (13) 3 (13) 3 (13) 3 (13) 3
|
17
|
-
|
6.0%, 5.0%*5 (31.0%)
|
-
|
|
The watering can. Has a massive deadzone in front of Hisui. It only hits where the water hits the ground. On contact, the opponent will lose around 12% meter. Holding this attack will make the meter drain effect happen up to 5 times. Inflicts untechable knockdown unless the opponent is crouching.
|
|
|
|
| Damage
|
Red Damage
|
Proration
|
Cancel
|
Guard
|
| 800
|
441
|
65% (O)
|
N, SP, EX, (J)
|
LH
|
| First Active
|
Active
|
Recovery
|
Frame Adv
|
Circuit
|
Invuln
|
| 15
|
5
|
16
|
-6
|
6.0%
|
Clash 15-19
|
|
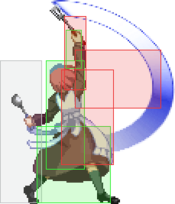
Ladle launcher. It looks like it can be an antiair, but it isn't. Used pretty much exclusively for hard knockdown confirms.
|
|
|
|
| 6C
|
Damage
|
Red Damage
|
Proration
|
Cancel
|
Guard
|
| 750
|
490
|
75% (O)
|
N, SP, -CH-, EX, (J)
|
LH
|
| First Active
|
Active
|
Recovery
|
Frame Adv
|
Circuit
|
Invuln
|
| 15
|
3
|
21
|
-6
|
7.0%
|
-
|
|
Pan uppercut. Rarely used as an antijump. Used as a launcher in yayaya combos. It's possible to use reverse beat after it hits.
|
| 6C~6C
|
Damage
|
Red Damage
|
Proration
|
Cancel
|
Guard
|
| 600
|
392
|
100%
|
-CH-
|
LH
|
| First Active
|
Active
|
Recovery
|
Frame Adv
|
Circuit
|
Invuln
|
| 13
|
4
|
20
|
-6
|
6.0%
|
-
|
|
Second hit of the pan rekka. Can be delayed to frame trap.
|
| 6C~6[C]
|
Damage
|
Red Damage
|
Proration
|
Cancel
|
Guard
|
| 1200
|
784
|
100%
|
-CH-
|
H
|
| First Active
|
Active
|
Recovery
|
Frame Adv
|
Circuit
|
Invuln
|
| 24
|
4
|
20
|
-6
|
10.0%
|
-
|
|
Optional overhead after 6C. Works exclusively as a "chump check" against opponents that don't know she has an overhead after 6C. Can be used to beat opponents mashing short normals after 6C or people timing their mashes with a delay. Hard knockdowns airborne opponents.
|
| 6C~6C/6[C]~236C
|
Damage
|
Red Damage
|
Proration
|
Cancel
|
Guard
|
| 800
|
686
|
50% (O)
|
-
|
LH
|
| First Active
|
Active
|
Recovery
|
Frame Adv
|
Circuit
|
Invuln
|
| 14
|
6
|
21
|
-9
|
6.0%
|
-
|
|
Follow up after 6CC or 6C[C]. Converts into a combo.
|
|
|
|
| Damage
|
Red Damage
|
Proration
|
Cancel
|
Guard
|
| 750
|
392
|
70% (O)
|
-
|
LHA
|
| First Active
|
Active
|
Recovery
|
Frame Adv
|
Circuit
|
Invuln
|
| 25
|
6
|
-
|
-
|
7.5%
|
-
|
|
Hisui creates a small cloud of dust that takes some time to become active. Disappears when Hisui gets hit. Generally used as an alternative landing option and a safe jump, but can be used at higher points to cover Hisui against opponents trying to land on her.
|
|
|
|
| j.2C
|
Damage
|
Red Damage
|
Proration
|
Cancel
|
Guard
|
| 600
|
294
|
100%
|
-
|
LHA
|
| First Active
|
Active
|
Recovery
|
Frame Adv
|
Circuit
|
Invuln
|
| 15
|
X
|
4
|
8 (TK)
|
5.0%
|
-
|
|
Divekick. Hisui launches a Thunder Cross Split Attack without fooling the opponent first. Mid. Due to the extended hurtbox, divekick can be beaten by some characters' ground normals.
|
| j.2[C]
|
Damage
|
Red Damage
|
Proration
|
Cancel
|
Guard
|
| 1000
|
686
|
70% (O)
|
-
|
LHA
|
| First Active
|
Active
|
Recovery
|
Frame Adv
|
Circuit
|
Invuln
|
| 24
|
X
|
4
|
12 (TK)
|
7.0%
|
-
|
|
Charged divekick. Hisui stalls in the air for some time before diving even faster into the ground. Still a mid. Has a better hitbox than uncharged divekick that won't lose to most ground normals.
|
|
Universal Mechanics
|
|
| Damage
|
Red Damage
|
Proration
|
Cancel
|
Guard
|
| 1000
|
490
|
100%
|
-
|
U
|
| First Active
|
Active
|
Recovery
|
Frame Adv
|
Circuit
|
Invuln
|
| 3
|
1
|
20
|
-
|
0.0%
|
-
|
|
Hisui grabs and headbutts the opponent. Untechable knockdown.
|
|
|
|
| Damage
|
Red Damage
|
Proration
|
Cancel
|
Guard
|
| 1600 (Raw)/1200
|
474
|
30%
|
-
|
U
|
| First Active
|
Active
|
Recovery
|
Frame Adv
|
Circuit
|
Invuln
|
| 2
|
1
|
12
|
-
|
0.0%
|
-
|
|
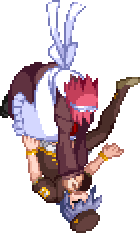
Hisui takes the opponent to the ground with her. Results in a sideswitch. Ground techable if done as a combo ender.
|
|
|
|
| Bunker
|
Damage
|
Red Damage
|
Proration
|
Cancel
|
Guard
|
| 500
|
196
|
50%
|
-
|
LHA
|
| First Active
|
Active
|
Recovery
|
Frame Adv
|
Circuit
|
Invuln
|
| 26
|
4
|
19
|
-5
|
0.0%
(-50.0% in blockstun)
|
Clash 1-10
|
| (Clash)
|
Damage
|
Red Damage
|
Proration
|
Cancel
|
Guard
|
| 500
|
196
|
50%
|
-
|
LHA
|
| First Active
|
Active
|
Recovery
|
Frame Adv
|
Circuit
|
Invuln
|
| 8
|
4
|
19
|
-5
|
0.0%/-50.0%
|
Strike 1-7
|
|
Performs her 5B animation as a shield bunker. Part of an ancient badguy technique.
|
|
|
|
| Damage
|
Red Damage
|
Proration
|
Cancel
|
Guard
|
| 100
|
0
|
100%
|
-
|
U
|
| First Active
|
Active
|
Recovery
|
Frame Adv
|
Circuit
|
Invuln
|
| 16
|
7
|
25
|
-
|
-100.0% (min)
|
Full 1-22
|
|
Hisui leans back and activates Heat.
|
|
|
|
| Ground
|
Damage
|
Red Damage
|
Proration
|
Cancel
|
Guard
|
| 100
|
0
|
100%
|
-
|
U
|
| First Active
|
Active
|
Recovery
|
Frame Adv
|
Circuit
|
Invuln
|
| 11
|
10
|
20
|
-
|
removes all
|
Full 1-39
|
| Air
|
Damage
|
Red Damage
|
Proration
|
Cancel
|
Guard
|
| 100
|
0
|
100%
|
-
|
U
|
| First Active
|
Active
|
Recovery
|
Frame Adv
|
Circuit
|
Invuln
|
| 12
|
10
|
15
|
-
|
removes all
|
Strike 1-30
|
|
Universal burst mechanic.
|
|
Special Moves
Grounded Specials
A/B A/B ~236A ~236A ~236B/C ~236B/C EX EX
|
| A
|
Damage
|
Red Damage
|
Proration
|
Cancel
|
Guard
|
| 320*6 (1770)
|
(538)
|
100%
|
-CH-
|
LHA
|
| First Active
|
Active
|
Recovery
|
Frame Adv
|
Circuit
|
Invuln
|
| 9
|
22
|
10
|
-2
|
2.0%*6 (12.0%)
|
-
|
| B
|
Damage
|
Red Damage
|
Proration
|
Cancel
|
Guard
|
| 250*9 (1965)
|
(766)
|
100%
|
-CH-
|
LHA
|
| First Active
|
Active
|
Recovery
|
Frame Adv
|
Circuit
|
Invuln
|
| 13
|
33
|
4
|
4
|
1.2%*9 (10.8%)
|
-
|
- Ora ora with ladles. Stuff Fu!
A: Hisui ora ora's the opponent with ladles 6 times. 236A is used along with 236x236A followup to hard knockdown opponents at the end of yayaya loops when they're too high for 623A to connect. Weak to bunker.
B: Hisui pulls back before unleashing an 8 hit combo. Because her hurtbox is pulled back before the attack, 236B can be used as a situational whiff punish tool in neutral. It's +4, but it's not that useful in pressure due to how far Hisui gets pushed back on block. Hisui players frequently use the 236B followup after 236B because of its tall vertical hitbox and ex cancel properties. Weak to bunker.
|
| ~236A
|
Damage
|
Red Damage
|
Proration
|
Cancel
|
Guard
|
| 600
|
392
|
100%
|
-EX-
|
LH
|
| First Active
|
Active
|
Recovery
|
Frame Adv
|
Circuit
|
Invuln
|
| 9
|
3
|
19
|
-4
|
4.0%
|
-
|
| ~236B/C
|
Damage
|
Red Damage
|
Proration
|
Cancel
|
Guard
|
| 600
|
392
|
50% (O)
|
-EX-, (J)
|
LH
|
| First Active
|
Active
|
Recovery
|
Frame Adv
|
Circuit
|
Invuln
|
| 7
|
4
|
19
|
-8
|
4.0%
|
-
|
- Follow-ups to her 236X series. Only works from the grounded version.
A: Hard knockdown followup. 623A gives you a better knockdown, but 236x236A is easier to land if the enemy is too high at the end of a combo.
B/C: Launches enemies, allowing for a j[C] confirm. Because of its dijointed upwards hitbox, it can be used like an antiair, which is made more useful through 236B's hurtbox pullback.
|
| EX
|
Damage
|
Red Damage
|
Proration
|
Cancel
|
Guard
|
| 200*12, 600 (2358)
|
(1701)
|
100%, 75% (O)
|
-
|
LHA
|
| First Active
|
Active
|
Recovery
|
Frame Adv
|
Circuit
|
Invuln
|
| 2+6
|
44 (7) 4
|
24
|
-16
|
-100.0%
|
Full 1-5
|
|
Hits 12 times and ends with an uppercut. It's not used often at all, at least intentionally, since it telegraphs itself with the EX flash and is negative on block. It has situational use as an easy corner carry and OTG tool.
|
|
|
|
| A
|
Damage
|
Red Damage
|
Proration
|
Cancel
|
Guard
|
| 650*2 (1279)
|
(578)
|
100%
|
EX
|
LH
|
| First Active
|
Active
|
Recovery
|
Frame Adv
|
Circuit
|
Invuln
|
| 12
|
2 (9) 4
|
10
|
-4
|
5.0%*2 (10.0%)
|
-
|
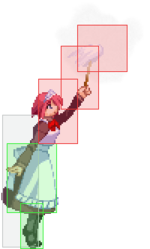
- Hisui waves her duster in front of her. This is your best knockdown tool. Can be EX cancelled into 22C for a bento that explodes almost instantly after they wake up.
|
| B
|
Damage
|
Red Damage
|
Proration
|
Cancel
|
Guard
|
| 800
|
392
|
70% (O)
|
EX
|
LH
|
| First Active
|
Active
|
Recovery
|
Frame Adv
|
Circuit
|
Invuln
|
| 11
|
2 (8) 4
|
17
|
-19, -9
|
8.0%
|
High 1-32
|
|
Dusts above her head. Launches instead of knocking down. It's slow and you can't jump-cancel it, but it has a good disjointed hitbox along with upper body invulnerability.
|
[B]
(Projectile)
|
Damage
|
Red Damage
|
Proration
|
Cancel
|
Guard
|
800
500*3 (1662)
|
392
(1068)
|
70% (O)
|
EX
|
LH
LHA
|
| First Active
|
Active
|
Recovery
|
Frame Adv
|
Circuit
|
Invuln
|
22
23
|
2 (8) 4
45
|
11
|
-13, -3
-
|
8.0%
5.0%*3 (23.0%)
|
High 1-44
|
|
Hisui charges for a bit before releasing a longer-lasting dust cloud. Occasionally useful to stop air approaches, but where this move really shines is in setting up tech traps. After (...) > 2C > 5C > 623[B] near the corner every option the opponent has is reaction punishable. For optimal damage, use a 5B > j.[C]AB starter to punish neutral tech, 6B > j.[C]B starter to punish back tech, and airthrow to punish forwards tech. If the opponent chooses not to tech, they will be caught by the cloud and you can combo them anyway.
|
| EX
|
Damage
|
Red Damage
|
Proration
|
Cancel
|
Guard
|
| 500*N
|
490*N
|
80% (M)
|
-
|
LHA
|
| First Active
|
Active
|
Recovery
|
Frame Adv
|
Circuit
|
Invuln
|
| 1+2
|
152
|
1+31
|
-2 (min)
|
-100.0%
|
Full 1
|
|
Same animation as the A version, but sets up a four hit dustcloud. It has 1+1 startup and is incredibly plus on block, which makes it both a potential best abare option in the game and an excellent metered pressure reset.
|
|
|
|
| A
|
Damage
|
Red Damage
|
Proration
|
Cancel
|
Guard
|
| 500 ~ 1000*
|
196 ~ 588*
|
80% ~ 100%* (O)
|
-
|
LHA
|
| First Active
|
Active
|
Recovery
|
Frame Adv
|
Circuit
|
Invuln
|
| 14
|
X
|
33
|
-8 ~ -12*
|
2.8%
|
-
|
- Hisui throws random items at the opponent. The player can control which projectile is thrown by immediately holding [1], [2], [3], or [6] after the initial input.
- [0] - Random
- [1] - A very slow lamp that flies straight. Typical fireball move.
- [2] - A pot that that arcs upwards at a high angle. Good as an anti-air.
- [3] - A vase that flies upwards slightly, but hits the floor about midscreen.
- [6] - A book that slowly descends onto the floor. Marginally useful as a lazy pressure ender.
You can also get a coat hanger or a tray on random.
- Tray is her fastest horizontal projectile.
- Coat hanger moves slower than the tray but faster then the lamp.
|
| B
|
Damage
|
Red Damage
|
Proration
|
Cancel
|
Guard
|
| Random*
|
Random*
|
Random* (O)
|
-
|
LHA
|
| First Active
|
Active
|
Recovery
|
Frame Adv
|
Circuit
|
Invuln
|
| 23
|
X
|
32
|
Random
|
2.8%*N
|
-
|
|
Hisui throws 1-3 of the same projectiles as the A version at the cost of longer startup. Can be used at the end of blockstrings if you're lazy. Causes a ton of stun if multiple projectiles hit at the same time, especially with a counterhit.
- [0] - Random
- [1] - Pot & Book. Most annoying combination to deal with.
- [2] - Vase & Lamp
- [3] - Vase & Hanger
- [6] - Tray & Book
- Sometimes on random Hisui will throw three items. Other times you'll just get book.
|
| EX
|
Damage
|
Red Damage
|
Proration
|
Cancel
|
Guard
|
| Random*
|
Random*
|
Random* (O)
|
-
|
LHA
|
| First Active
|
Active
|
Recovery
|
Frame Adv
|
Circuit
|
Invuln
|
| 8+8
|
X
|
33
|
Random
|
-100.0%
|
Full 1-3, Low 4-15
|
|
Throws 3-5 of the projectiles, barring a known case of getting just EX-Book. If two hitboxes hit an opponent at the same frame, their hitstun stacks, so if you manage to hit an enemy with 214C point blank, they will be stunned for an incredibly long period of time, letting you set up pretty much any combo you want. Unlike the A and B versions, you have no input over what objects Hisui throws. Hisui lacks a bottom hurtbox at the start of the move, making 214C a very situational "reversal" move on defense.
|
|
|
|
A/B
(Explosion)
|
Damage
|
Red Damage
|
Proration
|
Cancel
|
Guard
|
| 600
|
392
|
50% (O)
|
-
|
LH
|
| First Active
|
Active
|
Recovery
|
Frame Adv
|
Circuit
|
Invuln
|
92
9/93
|
180
2
|
50
|
-
|
8.0%
|
-
|
- Hisui puts down a mat with a Bento box on it. The mat explodes after a short delay.
A: Plunks a mat down right in front of her.
B: Plunks a mat down a distance away from her.
|
EX
(Explosion)
|
Damage
|
Red Damage
|
Proration
|
Cancel
|
Guard
|
| 1800
|
1176
|
50% (O)
|
-
|
LH
|
| First Active
|
Active
|
Recovery
|
Frame Adv
|
Circuit
|
Invuln
|
6+79
80
|
180
2
|
6+29
|
-
|
-100.0%
|
-
|
|
Hisui puts down a BIG mat. The explosion is completely untechable and it poisons on hit.
|
|
Aerial Specials
A/B A/B EX EX
|
| A
|
Damage
|
Red Damage
|
Proration
|
Cancel
|
Guard
|
| 250*8 (1778)
|
(831)
|
100%
|
EX
|
LHA
|
| First Active
|
Active
|
Recovery
|
Frame Adv
|
Circuit
|
Invuln
|
| 9
|
16
|
0
|
10 (TK)
|
1.5%*8 (12.0%)
|
-
|
- Air ladle jabs. Hits 8 times. These don't have follow-ups like the ground version. Useful as a landing mixup, very plus on block like every other j236x if their last hit is close to the ground.
|
| B
|
Damage
|
Red Damage
|
Proration
|
Cancel
|
Guard
|
| 250*12 (2479)
|
(1158)
|
100%
|
EX
|
LHA
|
| First Active
|
Active
|
Recovery
|
Frame Adv
|
Circuit
|
Invuln
|
| 13
|
24
|
0
|
10 (TK)
|
1.5%*12 (18.0%)
|
-
|
|
Hits 12 times. An integral part of her yayaya loops, hence their name. Has more range than j236A and lasts for longer, making it generally more useful for landing than j236A.
|
| EX
|
Damage
|
Red Damage
|
Proration
|
Cancel
|
Guard
|
| 250*N
|
176*N
|
100%
|
-
|
LHA
|
| First Active
|
Active
|
Recovery
|
Frame Adv
|
Circuit
|
Invuln
|
| 3+4
|
X
|
0
|
10 (TK)
|
-100.0%
|
Full 1-6
|
|
Hits plenty of times, going on until Hisui hits the ground in most pratical situations. Can be used to save j236A/B if they're done too high to get a combo or block advantage.
|
|
Arc Drive
Uncharged Uncharged Fully Charged Fully Charged
|
| (Min. Charge)
|
Damage
|
Red Damage
|
Proration
|
Cancel
|
Guard
|
| 1000*3 (2629)
|
(2577)
|
90% (M)*3
|
-
|
LH
|
| First Active
|
Active
|
Recovery
|
Frame Adv
|
Circuit
|
Invuln
|
| 3+1+2
|
X
|
25
|
27
|
removes all
|
Full 1-24
|
| (Max. Charge)
|
Damage
|
Red Damage
|
Proration
|
Cancel
|
Guard
|
| 800*8 (4668)
|
(3392)
|
95% (M)*8
|
-
|
LH
|
| First Active
|
Active
|
Recovery
|
Frame Adv
|
Circuit
|
Invuln
|
| 3+378+379
|
X
|
25
|
92
|
removes all
|
Full 1-3, 375-398
|
|
Hisui charges up a ball of meido energy and dashes into opponents with it. This move is one of the best Arc Drives in the game- it is not only a dp, it's also projectile that is extremely plus on block. The most reliable way to counter this move as a wakeup option is not committing to any move and using Dodge in point blank range. If the C button is held, Hisui delays her invulnerable blast of energy, which grants the projectile more hits once it is released.
|
|
Another Arc Drive
|
|
| Damage
|
Red Damage
|
Proration
|
Cancel
|
Guard
|
| 800*8 (4668)
|
(3392)
|
95% (M)*8
|
-
|
LH
|
| First Active
|
Active
|
Recovery
|
Frame Adv
|
Circuit
|
Invuln
|
| 2+1+2
|
X
|
22
|
95
|
removes all
|
Full 1-25
|
|
Same as Arc Drive, but it is automatically fully charged, which means it cannot be delayed.
|
|
Last Arc
|
|
| Damage
|
Red Damage
|
Proration
|
Cancel
|
Guard
|
| 3000 (1500 ~ 3000)
|
(1225 ~ 2254)
|
50% + 50% * remaining BH time
|
-
|
U
|
| First Active
|
Active
|
Recovery
|
Frame Adv
|
Circuit
|
Invuln
|
| 4+2
|
2
|
54
|
-
|
removes all
|
Full 1-52
|
|
Brainwasher Detective Hisui. It does somewhat low damage, but reverses the controls of the opponent for ten seconds and causes break for a staggering twenty seconds. This is more or less a match ender.
- The lower Hisui's meter, the worse the proration is.
|
|
MBAACC Navigation
