|
|
| Line 59: |
Line 59: |
| Here are some pressure examples: | | Here are some pressure examples: |
|
| |
|
| -2A>5B(fully recover)>2A>5B | | -2A > 5B, 2A > 5B |
|
| |
|
| -2A>5B>5B | | -2A > 5B > 5B |
|
| |
|
| -2A>5B>5A(whiff)>tk 236A | | -2A > 5B > 5A(w), tk 236A |
|
| |
|
| -2A>5B>5A(whiff)>5C/4C>2C | | -2A > 5B > 5A(w) > 5C/4C > 2C |
|
| |
|
| -2A>throw | | -2A, throw |
|
| |
|
| -2A>5B>walk forward>2A/throw | | -2A > 5B walk forward 2A/throw |
|
| |
|
| -2A>5B>(4C>5C)/(5C>4C)>5A(whiff)>2C>(214[B] optional) | | -2A > 5B > 5C > 4C > 5A(w) > 2C > (214[B] optional) |
|
| |
|
| -2A>5B>(4C>5C)/(5C>4C)>5A(whiff)>tk 236A | | -2A > 5B > 5C > 4C > 5A(w), tk 236A |
|
| |
|
| -2A>delay>2A>2A>2A>IAD>jC | | -2A > delay 2AAA, IAD jC |
|
| |
|
| -2A>delay>2A>2A>2A>IAD>jA>airdash>jC | | -2A > delay 2AAA, IAD jA airdash jC |
|
| |
|
|
| |
|
Character Page Progress
This page is still a work in progress, consider joining as an editor to help expand it. Please update this character's roadmap page when one of the editing goals have been reached.
| In Progress |
To-do
|
- Move Descriptions:
- Expand upon the pre-existing move descriptions
- Combos:
- Add damage, meter gain/given numbers and video links to pre-existing combos.
- Overview/General Gameplan:
- Add a short summary of this character with a list of strengths and weaknesses
- Do your best to describe how to play this character, change or add subsections based on what you would write as a guide
|
- Additional Ressources/Players to watch/ask
- Add any external links to ressources such as video guides or articles.
- If you know any players in particular that can be helpful for learning this character, please add them with, if possible a way to contact them (such as a Discord handle) and a name that can be searched in the match video database.
.
|
Additional Resources
C-V. Akiha Match Video Database
Notable Players
Overview
Playstyle
 C-V.Akiha C-V.Akiha |
| Pros |
Cons |
- Top notch mobility, with high and far reaching jump arcs, 2 quick and long airdashes, excellent ground dash and many ways to shift her air momentum, C-VAkiha feels comfortable being and moving anywhere on the screen.
- Versatile neutral gameplan; depending on what the situation might call, C-VAkiha can effectively run away and zone with fat projectiles, or run in aggressively with her strong pokes on both the air and the ground.
- Effective pressure: With a fat 2A, pokes like 5B and 4C with generous cancel windows, fast mobility, strong rebeat, and strong plus tools with TK ribbon. C-VAkiha can keep her turn going for even longer if she has a pit set up in the corner.
|
- HP of a fly with the worst defense and guts in the game, making mistakes can lead to death more harshly then with other characters.
- Resource hungry: Her win-condition (22C), only reversal and most useful conversion tool midscreen (623C) and best pressure rebuy (236C) all rely on meter. In addition, she might find herself needing to Heat more often thanks to her fragility.
- Very enabled in the corner: One of the strongest tools, her 22X series, are much less effective midscreen compared go the corner. In addition, her combos are significantly better there as well.
|
General Gameplan
C.VAkiha is an extremely fast character with a unique gameplan that excels at neutral and pressure. Top class movement with two airdashes and j.236a, solid mid range options with j.236b and 214[a/b], solid anti airs and respectable air and ground buttons means many characters can struggle to get a hit in. She can spend meter to convert into long knockdown with j.22c pit which drains red health and meter over time while providing massive plus frames on detonation. j.236a also gives massive plus frames leading into her long and safe pressure. However, extremely low health and very low damage combined with a gameplan that lends itself to long games and timeouts leaves C.VAkiha very vulnerable to momentum shifts especially vs high damage characters and characters with good meter gain. Overall, C.Vakiha is a respectable mid tier whose set of tools makes her capable of winning vs any character while rewarding strong melty blood fundamentals.
Neutral
C.Vakiha can play the keepaway/stall game thanks to her 2 airdashes, ribbons and occasional pits that stop momentum, carry it and allow for more air options afterwards. Being the frail character that she is, this unmatched air mobility is a surefire way of playing neutral, thankfully she can switch her air options to get close to the opponent when they least expect it. Either through an airdash after A/B ribbon or a ground dash into 5C/4C that greatly move her forward or 2C to catch jump outs, conditioning your opponent and cornering them abusing her stalling moves is the best way to create an opportunity for offense. As mentioned before, her airdash is important due to the relatively good speed and distance it covers, being able to cancel her airdash into yet another airdash can close distance easily and if done correctly this can make her move 3/4 of the screen on only airdashinging. She can equally feint approaches by cancelling airdash into her air backdash or jumping, which can cancel into yet another airdash. Her universal super jump and double superjump are yet other tools that can cover the entire screen, forward superjump, j.29 and forward airdash will go corner to corner with ease while still saving the second airdash. The ground dash is also a tool that is also useable in neutral, since it carries a generous distance, even though it can't be held it still covers space, also being able to jump during it or cancelling into a normal or special adds to its versatility. While it isn`t an actual dashblock in startup, during the entirety of the dash she can block while moving forward at later frames of the dash, to make herself safe.
Movement alone is not the reason why C.Vakiha can become almost uncontested in air movement and stalling, since she has her j.236 (referred to as ribbons/flame tongues) series. These compliment all her previous movement options, it is one of the most versatile moves C.Vakiha has and it shows. Both A and B versions have their own benefits and properties, and even her 22 and 214 specials can be used in more specific neutral situations that assist her gameplan. Her A ribbon has good horizontal reach, being able to poke out occasional air-to-air encounters, as well as creating deadzones the opponent cannot approach recklessly since it can create an opportunity for offense, its interesting property is that it will carry Vakiha's momentum. Using this move, she gains a tool that allows her to fly across the stage. B ribbon has good downard vertical reach, which makes it a good option for situations in which Vakiha is above the opponent. Its most interesting property is that it will stop Vakiha's momentum in place, which adds more options to her aerial movement. Both A/B ribbons can be jumped afterwards as well as forward airdashed, it cannot be air backdashed however. These specials determine the way V.Akiha would play, and it will define matches.
Essentially, all these tools can make C.Vakiha zone the opponent out into frustration, ribbons make this goal achievable as they both compliment her air mobility while posing a threat if the opponent blocks or gets hit by them, since she can use an additional airdash to get the jump on them. Her other air normals especially jB and jC allow for her to prey both on airborne opponents and grounded ones respectively, jB being important as it complements her air dominance with its angled upward hitbox, even doing it as a rising button can help score counterhits or jumpout attempts. Of mention is also her jA, while not exactly a stellar or standout move, its diagonal angle at which it hits give this move useability as a rising jumping button and after any given instant airdash. Being the only air normal that hits at a decent downward angle that she can reverse beat or cancel into other normals, its utility cannot be understated.
Pressure
Once she gets close, C.VAkiha has enough tools to keep herself in and abuse her plus on frame specials, especially once she has set up the Ex Pit (22C) whose detonation makes it a go to pressure/oki tool that is insanely plus on block, and her 236C is abusable to keep herself from ending pressure without having to really on an Ex Pit detonation. Before all that however, meterless pressure is the way C.VAkiha will usually initiate sequences. Out of all the normals perhaps her most important is her long 2A, with good speed, low, generous hitbox and frame advantage. Also pretty good as a combo starter, her 2A does everything it should do, use this to start pressure almost always with a dash since it will carry her momentum. Her 5A not hitting crouchers (at least most of the cast) makes it her go-to rebeat and whiff cancelling button, either making herself safe at the end of a string or whiff canceling it into another move. Incredibly useful.
5B, 4C and 5C are also really oppresive. 5B in particular is fantastic due to it having really good frame data, only -1 at worst, has a large cancel window and will move her slightly forward. With the right spacing its frame data will become even better, letting the move fully recover or late cancel it to catch jumpouts or to catch them by surprise are very good ways to use it. Especially after moves that push her out from the opponent such as 5C, 4C(Both hits) or 2C, using 5B is very useful to space it out just right. Slightly holding 5B will give opportunities which the opponent might think it is a charged 5B, in those cases you can trip them right after with a 2C/4C/5C followup. Otherwise you can let charged 5B rock, but its really slow startup doesn't make it as useful. While gimmicky, it can make oponents make wrong decisions.
5C moves C.VAkiha forward by a lot, and also has a generous cancel window, this move is commonly seen in her pressure since it catches mashing and jumpouts and leads to a good reward on hit. 4C comes with a lot of versatility, being a two-hitting move it opens the door for shenanigans like 4C(1)>whatever, and those can be very effective, with this move being large, moves C.VAkiha forward and gives ample time to hit confirm, it is therefore also useful due to its cancel window. 2C might be an important mention, the usual sweep, and the furthest low C.VAkiha has, used at the end of pressure since it has a long hitbox. On another note, cancelling 5A (whiff) after these C normals will give a great reward and let her rcover quicker than she normally would. Using an occasional IAD to keep the opponent in their toes will give further advantage especially with j.C. If they are standing however, using IAD j.A might be a better option since it can can airdash cancelled again for a second high.
Her specials also give her really useful options to help establish her pressure even further, her tk j.236A is fantastic since it is very plus on block and is very safe to use since it can bait reversals and heats. 2368 and 2367 A are the ones that give more safety in pressure, while 2369A can be used as a way to catch backdashes or be even closer to an opponent when pressuring. Use this when you have conditioned your opponent to respect the late cancels or when there is enough safety for it be used since it recquires C.VAkiha to be neutral to do it, while not performing a blocked move. Both her 214A/B uncharged series is usually a pressure ender, a way to build distance with the opponent or poke them from afar. However, the carged versions of this move make for a very rewarding pressure reset, its use is more limited due to the slow startup, but its safety in range makes it more useable. Use this once, again, the opponent is scared to press a button or dash in, for immense reward.
Here are some pressure examples:
-2A > 5B, 2A > 5B
-2A > 5B > 5B
-2A > 5B > 5A(w), tk 236A
-2A > 5B > 5A(w) > 5C/4C > 2C
-2A, throw
-2A > 5B walk forward 2A/throw
-2A > 5B > 5C > 4C > 5A(w) > 2C > (214[B] optional)
-2A > 5B > 5C > 4C > 5A(w), tk 236A
-2A > delay 2AAA, IAD jC
-2A > delay 2AAA, IAD jA airdash jC
Okizeme
j.C
In most midscreen combos, you can superjump forward and land with j.c for an autotimed and autospaced j.c. Note that j.c will likely crossup. it hits meaty and may even be a safejump against some reversals.
Once they expect you to do the same thing over and over on wakeup, you can mix up to throw reversal/shield/backdash attempts off:
- air dash back j.c. can catch fuzzy mashing, opponents expecting a crossup, many backdash attempts and even might give you time to punish som reversals
- fake out into grab/ground normal, to catch shield attempts and respectful opponents off guard, as well as potentially hit low with 2a/2b.
- air dash back empty into grab/ground normal, to catch opponents responding to the first option specifically.
EX Pit Setups
There are two ways of setting up a pit after a momiji loop, and that's by ending the loop with 2c or 623b. Generally you wanna end with 2c if you don't have EX pit setup, otherwise go for 623b to get a bit more damage. 2C gives you access to these setups:
| Follow-ups |
| xx 22c |
simple setup that gets the job done. should have a generous window to run up and meaty a button. |
| tk7/8.22c j.tk9/8.236a |
More complete setup - you set up EX pit, alone with tk ribbon, which is advantagous and very safe against both reversals and most shields. The double jump j.236a is also TK'ed |
| 8 j.22c j.236a |
Potentially slower alternate way of doing the one above. |
| tk7.22c j.tk7/8.236a j.8 66 {j.a(w) 2a}/{j.c} |
Tricky execution, but offers a high/low mixup after ribbon. Haven't tested it yet so its reliability is dubious. |
Half Momiji Setup and Okizeme Options
Using the Half Momiji let's V. Akiha pull her opponents slightly out of the corner and to set a C Pit allowing for more options for her okizeme.
The video below from TonberryMage shows a bunch (not all) of options that V. Akiha can do from the Half Momiji setup.
Half Momiji Video
-Explanation from Tonberry and an old thread by LordKnight
Defense
place text here*
Combos
| Combo Notation Help
|
Disclaimer: Combos are written by various writers, so the actual notation used in pages can differ from the standard one.
For more information, see Glossary and Controls.
|
| X > Y
|
X input is cancelled into Y.
|
| X > delay Y
|
Must wait for a short period before cancelling X input into Y.
|
| X, Y
|
X input is linked into Y, meaning Y is done after X's recovery period.
|
| X+Y
|
Buttons X and Y must be input simultaneously.
|
| X/Y
|
Either the X or Y input can be used.
|
| X~Y
|
This notation has two meanings.
- Use attack X with Y follow-up input.
- Input X then within a few frames, input Y. Usually used for option selects.
|
| X(w)
|
X input must not hit the opponent (Whiff).
|
| j.X
|
X input is done in the air, implies a jump/jump cancel if the previous move was done from the ground.
Applies to all air chain sections:
- Assume a forward jump cancel if no direction is given.
- Air chains such as j.A > j.B > j.C can be shortened to j.ABC.
|
| sj.X
|
X input is done after a super jump. Notated as sj8.X and sj9.X for neutral and forward super jumps respectively.
|
| dj.X
|
X input is done after a double jump.
|
| sdj.X
|
X input is done after a double super jump.
|
| tk.X
|
Stands for Tiger Knee. X motion must be buffered before jumping, inputting the move as close to the ground as possible. (ex. tk.236A)
|
| (X)
|
X is optional. Typically the combo will be easier if omitted.
|
| [X]
|
Input X is held down. Also referred to as Blowback Edge (BE). Depending on the character, this can indicate that this button is held down and not released until indicated by the release notation.
|
| ]X[
|
Input X is released. Will only appear if a button is previously held down. This type of input is referred to as Negative Edge.
|
| {X}
|
Button X should only be held down briefly to get a partially charged version instead of the fully charged one.
|
| X(N)
|
Attack "X" should only hit N times.
|
| (XYZ)xN
|
XYZ string must be performed N times. Combos using this notation are usually referred to as loops.
|
| (XYZ^)
|
A pre-existing combo labelled XYZ is inserted here for shortening purposes.
|
| CH
|
The first attack must be a Counter Hit.
|
| Air CH
|
The first attack must be a Counter Hit on an airborne opponent.
|
| 66
|
Performs a ground forward dash.
|
| j.66
|
Performs an aerial forward dash, used as a cancel for certain characters' air strings.
|
| IAD/IABD
|
Performs an Instant AirDash.
|
| AT
|
Performs an Air Throw. (j.6/4A+D)
|
| IH
|
Performs an Initiative Heat.
|
| AD
|
Performs an Arc Drive.
|
| AAD
|
Performs an Another Arc Drive.
|
Starters
Enders
OTG Pick ups
| Condition
|
Notation
|
Damage
vs V.Sion
|
Notes
|
|
| Normal starter, grounded opponent
|
- 2A*5 > 5B > 4C > 2B(2) > 5A > 2A > tk8.236A
|
???
|
???
|
|
| Normal starter, grounded opponent, 100% Meter
|
- 2A*5 > 5B > 4C > 2B(2) > 5A > 2A > 2B > 236C
|
???
|
???
|
|
Normal Combos
| Condition
|
Notation
|
Damage
vs V.Sion
|
Notes
|
|
| Normal starter, grounded opponent
|
- 2Ax2 > 5C > 4C > 2C > delay 5BB > j8 > delay j.(A)AB > dj.(A)BC
|
3496
|
| |
| Meter Gained: 76% |
Meter Given (vs C-Moon): ??? |
| Basic j.C knockdown combo. You can do 2A up to four times at point blank. |
|
|
| Normal starter, grounded opponent
|
- 2Ax3 > 5C > 4C > 2C > 5B > 623B
|
2998
|
| |
| Meter Gained: 56.5 |
Meter Given (vs C-Moon): ??? |
| Combo that sacrifices damage for better oki. |
|
|
| Normal starter, grounded opponent
|
- .... > 4C > 2C > 623C, 4C > 2C (> 623B)
|
3396
|
| |
| Meter Gained: -47.3 |
Meter Given (vs C-Moon): ??? |
| Your main conversion with meter in midscreen. This route is used for corner carry. It allows you to convert straight into loops, which can result in stronger oki. Damage calculated with initial string being 2Ax3 5C 4C ..., final 623b included |
|
|
Corner Combos
| Condition
|
Notation
|
Damage
vs V.Sion
|
Notes
|
|
| Normal starter, grounded opponent
|
- 2A > 5C > 4C > Momiji Loop
|
???
|
| |
| Meter Gained: ??? |
Meter Given (vs C-Moon): ??? |
| The biggest corner damage you'll get starting from 2A. |
|
|
| Normal starter, grounded opponent
|
- 2A > 5B > 2C > 5C > 4C > Momiji Loop
|
???
|
| |
| Meter Gained: ??? |
Meter Given (vs C-Moon): ??? |
| Carries more than the previous combo. Goes into Momiji Loop if done from around the middle of the stage or less. If done on crouchers (because 5B trips crouchers) 5C needs a tiny delay. |
|
|
| Normal starter, grounded opponent
|
- 6C, 2C > (2A(w) > 4C) > > Momiji Loop
|
???
|
| |
| Meter Gained: ??? |
Meter Given (vs C-Moon): ??? |
| Standard overhead combo in the corner. 2C is the only required move. |
|
|
| Normal starter, grounded opponent
|
- 2A > 5C > 4C > 2C > 623B > 2C > 5C > 2C "The Half Momiji"
|
???
|
| |
| Meter Gained: ??? |
Meter Given (vs C-Moon): ??? |
| Half Momiji. Pulls the opponent slightly out of the corner. Can also do other routes after 623B like 5B > 2C > w2A > 5C > 2C. The 5C > 2C is what pulls them out. See pressure for applications. |
|
|
Momiji Loop
Your main combo structure in the corner. Great balance of meter build, damage, and versatility.
| Condition
|
Notation
|
Damage
vs V.Sion
|
Notes
|
|
| Normal starter, grounded opponent
|
|
???
|
| |
| Meter Gained: ??? |
Meter Given (vs C-Moon): ??? |
| The most basic one. |
|
|
| Normal starter, grounded opponent
|
- .... > 4C 2C 623B, 4C 2C 623B
|
4150
|
| |
| Meter Gained: 111.5% |
Meter Given (vs C-Moon): ??? |
| A more complete loop. You can default to this if you already have EX pit out. damage calculated with initial string being 2Ax3 5C 4C ... |
|
|
| Normal starter, grounded opponent
|
|
3980
|
| |
| Meter Gained: 102.8% |
Meter Given (vs C-Moon): ??? |
| Similar as above, except you sacrifice damage to get 2C oki. You can then set up EX pit. Damage calculated with initial string being 2Ax3 5C 4C ... |
|
|
Move Descriptions
| Frame Data Help
|
| Header
|
Tooltip
|
| Move Box Colors
|
Light gray = Collision Box (A move lacking one means it can go through the opponent's own collision box).
Green: Hurt Boxes.
Red: Hit(/Grab) Boxes.
Yellow: Clash Boxes (When an active hitbox strikes a clash box, the active hitbox stops being active. Multi-hit attacks can beat clash since they will still progress to the next hitbox.)
Magenta: Projectile-reflecting boxes OR Non-hit attack trigger boxes (usually).
Blue: Reflectable Projectile Boxes.
|
| Damage
|
Base damage done by this attack.
(X) denotes combined and scaled damage tested against standing V. Sion.
|
| Red Damage
|
Damage done to the recoverable red health bar by this attack. The values are inherently scaled and tested against standing V. Sion.
(X) denotes combined damage.
|
| Proration
|
The correction value set by this attack and the way it modifies the scaling during a string. See this page for more details.
X% (O) means X% Overrides the previous correction value in a combo if X is of a lower percentage.
X% (M) means the current correction value in a combo will be Multiplied by X%. This can also be referred to as relative proration.
|
| Circuit
|
Meter gained by this attack on hit.
(X%) denotes combined meter gain.
-X% denotes a meter cost.
|
| Cancel
|
Actions this move can be cancelled into.
SE = Self cancelable.
N = Normal cancelable.
SP = Special cancelable.
CH = Cancelable into the next part of the same attack (Chain in case of specials).
EX = EX cancelable.
J = Jump cancelable.
(X) = Cancelable only on hit.
-X- = Cancelable on whiff.
|
| Guard
|
The way this move must be blocked.
L = Can block crouching
H = Can block standing.
A = Can block in the air.
U = Unblockable.
|
| Startup
|
Amount of frames that must pass prior to reaching the active frames. Also referred to as "True Startup".
|
| Active
|
The amount of frames that this move will have a hitbox.
(x) denotes frame gaps where there are no hitboxes is present. Due to varied blockstuns, (x) frames are difficult to use to determine punish windows. Generally the larger the numbers, the more time you have to punish.
X denotes active frames with a duration separate from its origin move's frame data, such as projectile attacks. In this case, the total length of the move is startup+recovery only.
|
| Recovery
|
Frames that this move has after the active frames if not canceled. The character goes into one frame where they can block but not act afterwards, which is not counted here.
|
| Advantage
|
The difference in frames where you can act before your opponent when this move is blocked (assuming the move isn't canceled and the first active frame is blocked).
If the opponent uses a move with startup that is at least 2 frames less than this move's negative advantage, it will result in the opponent hitting that move.
±x~±y denotes a range of possible advantages.
|
| Invul
|
Lists any defensive properties this move has.
X y~z denotes X property happening between the y to z frames of the animations. If no frames are noted, it means the invincibility lasts through the entire move.
Invicibility:
- Strike = Strike invincible.
- Throw = Throw invincible.
Hurtbox-Based Properties:
- Full = No hurtboxes are present.
- High = Upper body lacks a hurtbox.
- Low = Lower body lacks a hurtbox.
Miscellaneous Properties
- Clash = Frames in which clash boxes are active.
- Reflect = Frames in which projectile-reflecting boxes are active.
- Super Armor = Frames in which the character can take hits without going into hit stun.
|
Normal Moves
Standing Normals
|
|
| Damage
|
Red Damage
|
Proration
|
Cancel
|
Guard
|
| 300
|
117
|
75% (O)
|
-SE-, -N-, -SP-, -EX-, (J)
|
LH
|
| First Active
|
Active
|
Recovery
|
Frame Adv
|
Circuit
|
Invuln
|
| 5
|
3
|
7
|
2
|
3.0%
|
-
|
|
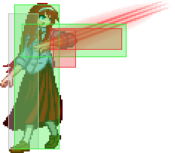
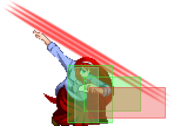
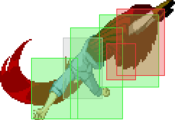
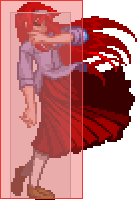
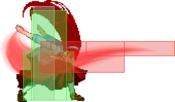
Fast, large horizontal range, and +2 on block, but whiffs on crouchers. It is an excellent tool for rebeats and whiff cancelling; 5c 5a(w), 2c 5a(w), and 4c 5a(w) are +3 on block, so this whiffing on crouchers isn't an issue. One of the key tools for C-V.Akiha pressure.
|
|
5B 5B 5[B] 5[B] 5BB 5BB
|
| 5B
|
Damage
|
Red Damage
|
Proration
|
Cancel
|
Guard
|
| 550
|
392
|
100%
|
N, SP, -CH-, EX, (J)
|
LH
|
| First Active
|
Active
|
Recovery
|
Frame Adv
|
Circuit
|
Invuln
|
| 7
|
4
|
12
|
-1
|
6.0%
|
-
|
|
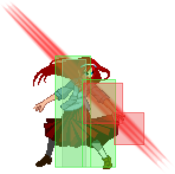
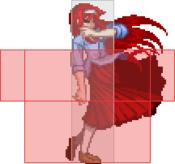
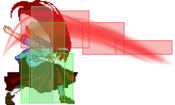
The backbone of C-VAki pressure when you're more pushed out. Moves you forward slightly and has a huge cancel window, in addition to being -1 on block; this allows for extremely ambiguous staggers and pressure resets. Since this move moves you forward while the hitbox is out, it can become neutral or plus on block if you're spaced right and it hits in the later frames. Be sure to tap the button for at most 3 frames when you use it, or you risk getting a longer startup from partially charging the move. Also note that it trips crouchers on hit. This can happen accidentally if you go for higher damage starters like 5b. In that case, you can either follow it 623b for a short finish/combo in the corner or continue with 4c jc --> air combo midscreen
|
| 5[B]
|
Damage
|
Red Damage
|
Proration
|
Cancel
|
Guard
|
| 500, 400*3 (1624)
|
(1168)
|
100%
|
N, SP, -CH-, EX, (J)
|
LH
|
| First Active
|
Active
|
Recovery
|
Frame Adv
|
Circuit
|
Invuln
|
| 30
|
9
|
8
|
3
|
4.0%*4 (16.0%)
|
-
|
|
Slow, charged version of 5B. Plus on block, but the long startup limits its usefulness. You can use it as an air counterhit pickup instead of 5B. The multihit will give you enough time to react whether you should go for a ground corner carry route or an air combo depending on the height it hits. It'll do extra damage this way. The half charged version only sees use as a gimmick where you charge it and then go for a low when the opponent expects 6C.
|
| ~B
|
Damage
|
Red Damage
|
Proration
|
Cancel
|
Guard
|
| 500
|
245
|
70% (O)
|
N, SP, EX, (J)
|
LH
|
| First Active
|
Active
|
Recovery
|
Frame Adv
|
Circuit
|
Invuln
|
| 8
|
3
|
29
|
-14
|
6.0%
|
-
|
|
H-VAki's launcher; mostly used in combos, especially to get a third momiji loop. Sometimes, it's the only option after awkward pickups, like an unexpected 4c on an opponent that just jumped. On hit, hold 8 to get a command superjump to continue your combo. Like 5b, it will slide you forward a bit, although it's not as effective in pressure since it has considerable pushback and its cancel window is very short.
|
|
|
|
| Damage
|
Red Damage
|
Proration
|
Cancel
|
Guard
|
| 1000
|
637
|
90% (O)
|
N, SP, EX, (J)
|
LH
|
| First Active
|
Active
|
Recovery
|
Frame Adv
|
Circuit
|
Invuln
|
| 10
|
6
|
17
|
-5
|
11.0%
|
-
|
|
Big 5C that moves you forward a ton. Good in pressure for catching jumpouts and mash; also sees some use as an antiair, since it's harder to whiff punish than 4c, although it knocks them away and wallslams them on air hit. This moves also sees use as a tech punish.
|
|
Crouching Normals
|
|
| Damage
|
Red Damage
|
Proration
|
Cancel
|
Guard
|
| 350
|
147
|
65% (O)
|
-SE-, -N-, -SP-, -EX-, (J)
|
L
|
| First Active
|
Active
|
Recovery
|
Frame Adv
|
Circuit
|
Invuln
|
| 5
|
3
|
10
|
-1
|
4.0%
|
-
|
|
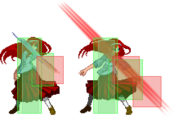
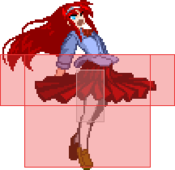
Low-hitting swipe. Good pressure and combo starter thanks to being self-cancellable and only -1 on block. Inferior to 5a as a rebeat tool. Not much else to this normal
|
|
2B 2B 2BB 2BB 2BBB 2BBB
|
| 2B
|
Damage
|
Red Damage
|
Proration
|
Cancel
|
Guard
|
| 250*6 (653)
|
(460)
|
85% (O)
|
N, SP, -CH-, EX, (J)
|
LH
|
| First Active
|
Active
|
Recovery
|
Frame Adv
|
Circuit
|
Invuln
|
| 6
|
9
|
13
|
-2
|
2.0%*3 (6.0%)
|
-
|
|
Big, fast 2B with a lot of pushback on hit or block if most of the hits connect. Although it's a bit hard, you can cancel the move after the first hit to get significantly less pushback. It's a decent abare tool, and can get you to a good spacing fast in pressure. It's also a good button to fight wakeup 5D. However, it doesn't hit low. Since it's so active, it's a good move for catching ground tech attempts.
|
| ~2B
|
Damage
|
Red Damage
|
Proration
|
Cancel
|
Guard
|
| 200*3 (580)
|
(283)
|
100% (O)
|
-CH-
|
LA
|
| First Active
|
Active
|
Recovery
|
Frame Adv
|
Circuit
|
Invuln
|
| 1
|
5
|
20
|
-10 ~ -9
|
1.0%*3 (3.0%)
|
-
|
|
2B's sad followup; hits low, but only cancels into 2BBB and trips on hit, so it's pretty useless. Instantly active if done during 2B's recovery. You can link some normals after it trips, but there are still no known practical use for it.
|
| ~2B~2B
|
Damage
|
Red Damage
|
Proration
|
Cancel
|
Guard
|
| 500
|
588
|
75% (O)
|
J
|
HA
|
| First Active
|
Active
|
Recovery
|
Frame Adv
|
Circuit
|
Invuln
|
| 26
|
5
|
16
|
-3
|
6.0%
|
-
|
|
An overhead with rather slow start-up. Can be jump-cancelled on Hit OR Block so it is safe so long as it doesn't whiff. Very rarely used.
|
|
|
|
| Damage
|
Red Damage
|
Proration
|
Cancel
|
Guard
|
| 900
|
490
|
60% (O)
|
N, SP, EX, (J)
|
L
|
| First Active
|
Active
|
Recovery
|
Frame Adv
|
Circuit
|
Invuln
|
| 9
|
5
|
20
|
-7
|
8.0%
|
-
|
|
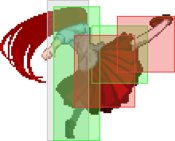
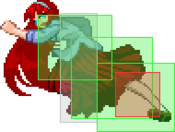
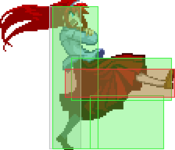
Does everything you'd expect of a sweep. It's situationally useful as an antiair and abare button, and also sees use as a poke, but it's very easy to whiff punish. This move will slightly slide you forward after using it.
|
|
Aerial Normals
|
|
| Damage
|
Red Damage
|
Proration
|
Cancel
|
Guard
|
| 300
|
147
|
72% (O)
|
SE, N, SP, EX, J
|
LHA
|
| First Active
|
Active
|
Recovery
|
Frame Adv
|
Circuit
|
Invuln
|
| 5
|
4
|
10
|
-
|
3.0%
|
-
|
|
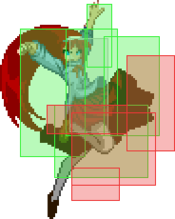
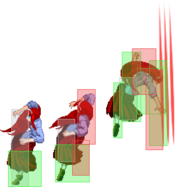
Downward mid-hitting kick. Passable j.a, as the boxes themselves aren't great, but it works for the purposes of a quick air poke and combo filler
|
|
|
|
| Damage
|
Red Damage
|
Proration
|
Cancel
|
Guard
|
| 700
|
343
|
90% (O)
|
N, SP, EX, J
|
HA
|
| First Active
|
Active
|
Recovery
|
Frame Adv
|
Circuit
|
Invuln
|
| 7
|
7
|
-
|
-
|
7.0%
|
-
|
|
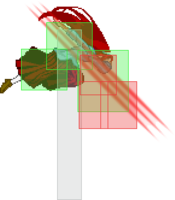
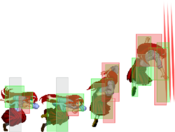
Fantastic, very active air poke. Go-to air-to-air for opponents above or in front of you. Will whiff on most crouchers after an IAD
|
|
|
|
| Damage
|
Red Damage
|
Proration
|
Cancel
|
Guard
|
| 900
|
392
|
80% (M)
|
SP*, EX*
|
HA
|
| First Active
|
Active
|
Recovery
|
Frame Adv
|
Circuit
|
Invuln
|
| 11
|
4
|
-
|
-
|
7.0%
|
-
|
|
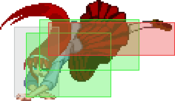
Downward flipping kick with a very big and wide hitbox. Effective as both an air-to-ground and as an air-to air - it even hits crossup very consistently. Has the quirk of sending to a hard knockdown on airborne opponents, from which you can get a safejump/mixup(?), but no pit.
|
|
Command Normals
|
|
| Damage
|
Red Damage
|
Proration
|
Cancel
|
Guard
|
| 500*2 (984)
|
(675)
|
100%
|
N, SP, EX, (J)
|
LH
|
| First Active
|
Active
|
Recovery
|
Frame Adv
|
Circuit
|
Invuln
|
| 8
|
4
|
26
|
-12,-10
|
5.0%*2 (10.0%)
|
-
|
|
This button is large, and fast, but it's very easy to whiff punish due to the long recovery of the move. It's decent as an antiair, but better as a callout in neutral, and best used in pressure, combos and mashing. One of your most useful normals.
|
|
|
|
| Damage
|
Red Damage
|
Proration
|
Cancel
|
Guard
|
| 600
|
294
|
75%
|
(SP), (EX)
|
H
|
| First Active
|
Active
|
Recovery
|
Frame Adv
|
Circuit
|
Invuln
|
| 26
|
4
|
18
|
-4
|
8.0%
|
-
|
|
Slow overhead kick. Wallslams and cancellable into a command ground dash on hit. Furthermore, when used after another C normal in pressure (e.g., the string 2AA > 5C > 6C), it will trade with mashing for a full combo, and beat certain options like dodge and F-Kohaku's counter.
|
|
Universal Mechanics
|
|
| Damage
|
Red Damage
|
Proration
|
Cancel
|
Guard
|
| 170*7 (1076)
|
(474)
|
100%
|
-
|
U
|
| First Active
|
Active
|
Recovery
|
Frame Adv
|
Circuit
|
Invuln
|
| 3
|
1
|
20
|
-
|
0.0%
|
-
|
|
V.Akiha grabs the opponent by the neck and goes into a 7-hit sequence. Untechable knockdown. Has the quirk of restoring health equal to only slightly less then the damage it deals.
|
|
|
|
| Damage
|
Red Damage
|
Proration
|
Cancel
|
Guard
|
1600 (Raw)
1000
|
474
|
100%
|
-
|
U
|
| First Active
|
Active
|
Recovery
|
Frame Adv
|
Circuit
|
Invuln
|
| 2
|
1
|
12
|
-
|
0.0%
|
-
|
|
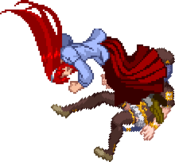
V.Akiha takes the opponent to the ground with the power of her legs. As a combo ender it will be untechable but will leave you at a distance.
|
|
|
|
| Bunker
|
Damage
|
Red Damage
|
Proration
|
Cancel
|
Guard
|
| 500
|
196
|
100%
|
-
|
LHA
|
| First Active
|
Active
|
Recovery
|
Frame Adv
|
Circuit
|
Invuln
|
| 26
|
4
|
19
|
-5
|
0.0%
(-50.0% in blockstun)
|
Clash 1-10
|
| (Clash)
|
Damage
|
Red Damage
|
Proration
|
Cancel
|
Guard
|
| 500
|
196
|
100%
|
-
|
LHA
|
| First Active
|
Active
|
Recovery
|
Frame Adv
|
Circuit
|
Invuln
|
| 8
|
4
|
19
|
-5
|
0.0%/-50.0%
|
Strike 1-7
|
|
V.Akiha's shield bunker is a special slide with low to the ground hitboxes.
|
|
|
|
| Damage
|
Red Damage
|
Proration
|
Cancel
|
Guard
|
| 100
|
0
|
100%
|
-
|
U
|
| First Active
|
Active
|
Recovery
|
Frame Adv
|
Circuit
|
Invuln
|
| 16
|
5
|
25
|
-
|
-100.0% (min)
|
Full 1-20
|
|
Hitbox entirely covers V.Akiha.
|
|
|
|
| Ground
|
Damage
|
Red Damage
|
Proration
|
Cancel
|
Guard
|
| 100
|
0
|
100%
|
-
|
U
|
| First Active
|
Active
|
Recovery
|
Frame Adv
|
Circuit
|
Invuln
|
| 11
|
10
|
20
|
-
|
removes all
|
Full 1-39
|
| Air
|
Damage
|
Red Damage
|
Proration
|
Cancel
|
Guard
|
| 100
|
0
|
100%
|
-
|
U
|
| First Active
|
Active
|
Recovery
|
Frame Adv
|
Circuit
|
Invuln
|
| 12
|
10
|
15
|
-
|
removes all
|
Strike 1-30
|
|
Universal burst mechanic. Unlike Crescent/Full Heat activation, the hitbox and frame data doesn't vary between characters. However, you can be thrown out of this move if you input it in the air.
|
|
Special Moves
Grounded Specials
|
|
|
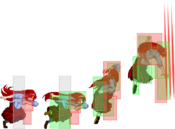
V.Akiha summons multi-hit fire ribbons.
|
| A
|
Damage
|
Red Damage
|
Proration
|
Cancel
|
Guard
|
| 400*3 (932)
|
(684)
|
70% (O)
|
-EX-
|
LHA
|
| First Active
|
Active
|
Recovery
|
Frame Adv
|
Circuit
|
Invuln
|
| 16
|
6
|
20
|
3
|
4.0%*3 (12.0%)
|
-
|
|
Mid-height ribbon, +3 on block. Can use it to go into 236C gapless, and as a blockstring ender in a pinch.
|
| B
|
Damage
|
Red Damage
|
Proration
|
Cancel
|
Guard
|
| 400*3 (932)
|
(684)
|
70% (O)
|
-EX-
|
LHA
|
| First Active
|
Active
|
Recovery
|
Frame Adv
|
Circuit
|
Invuln
|
| 29
|
6
|
12
|
1
|
4.0%*3 (12.0%)
|
-
|
|
Summons a ribbon above V.Akiha with much slower startup, which can make it harder to use.
|
| EX
|
Damage
|
Red Damage
|
Proration
|
Cancel
|
Guard
|
| 200*24 (2876)
|
(1820)
|
70% (O)
|
-EX-
|
LHA
|
| First Active
|
Active
|
Recovery
|
Frame Adv
|
Circuit
|
Invuln
|
| 2+19
|
35
|
15
|
16
|
-100.0%
|
Full 1-4
|
|
Summons multiple large ribbons. Lots of frame advantage on block. 236A(3) > 236C is a gapless string that can let you restart pressure safely, or just keep your opponent stuck in EX pit ((j.)22C) longer. If they shield 236C, they collect a lot of meter but you get a free throw punish so don't let them get away with it!
|
|
|
|
|
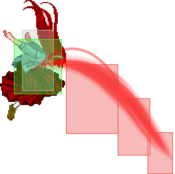
V.Akiha's "Momiji" DP series. Has different types of invulnerability depending on the version.
|
| A
|
Damage
|
Red Damage
|
Proration
|
Cancel
|
Guard
|
| 600, 800 (1282)
|
(545)
|
100%
|
-
|
LH, LHA
|
| First Active
|
Active
|
Recovery
|
Frame Adv
|
Circuit
|
Invuln
|
| 7
|
3 (7) 4
|
23
|
-9
|
6.0%, 8.0% (14.0%)
|
High 1-9
|
|
Quick rising attack. Very effective anti-air with passable reward, a hard knockdown, though not very advantageous.
Only the first hit is air unblockable. Keeps your dash momentum, oddly enough.
|
| B
|
Damage
|
Red Damage
|
Proration
|
Cancel
|
Guard
|
| 300, 200, 500, 400 (1279)
|
(527)
|
70% (O)
|
-
|
LH (1-2), LHA (3-4)
|
| First Active
|
Active
|
Recovery
|
Frame Adv
|
Circuit
|
Invuln
|
| 9
|
32
|
23
|
-9
|
3.5%, 2.0*2, 5.0% (12.5%)
|
Low 1-10
|
|
Akiha runs forward before jumping up. Has ten frames of invincibility on Akiha's lower body, so you could use it after a normal shield or as an anti-low reversal.
That said, it's mostly reserved for combos as it is indeed the Momiji of the Momiji loops. It's also a strong ender, granting a very good knockdown and a suite of okizeme possibilities.
The first hit has minimal hitstun. This means that hitting an extended hurtbox can make the second hit whiff, letting the rest be blocked. 623C shares the same issue.
|
| EX
|
Damage
|
Red Damage
|
Proration
|
Cancel
|
Guard
|
| 200, 300*2, 400 (1089)
|
(589)
|
60% (M)
|
-
|
LH (1-2), LHA (3-4)
|
| First Active
|
Active
|
Recovery
|
Frame Adv
|
Circuit
|
Invuln
|
| 6+3
|
35
|
23
|
-9
|
-100.0%
|
Full 1-10
|
|
As with 623B, Akiha runs forward first, but this time with full invulnerability. This is her only fully invulnerable move except AD and Heat, so worth incorporating occasionally into your defense.
It grants the same ground bounce on hit as 623B, which is important for midscreen combos as it can be used to go into Momiji loops further from the corner.
|
|
|
|
|
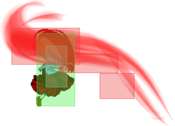
V.Akiha summons an advancing series of ribbon pillars. 3 Pillars when uncharged, 5 pillars charged and which go much farther for a longer period of time. Uncharged, the move is often even on block at best and punishable *on hit* at worst. When charged it can be used as a reset tool from a safe distance and gives a ton of advantage on block. Could be used for oki, but it's outclassed by other setups. B version could be used as a niche zoning tool on the ground.
|
| A/B
|
Damage
|
Red Damage
|
Proration
|
Cancel
|
Guard
|
| 400*3 (1009)
|
(541)
|
80% (O)
|
-
|
LHA
|
| First Active
|
Active
|
Recovery
|
Frame Adv
|
Circuit
|
Invuln
|
| 21
|
22
|
13
|
-14 ~ 0
|
3.0%*3 (9.0%)
|
-
|
| [A]/[B]
|
Damage
|
Red Damage
|
Proration
|
Cancel
|
Guard
|
| 400*5 (1578)
|
(846)
|
80% (O)
|
-
|
LHA
|
| First Active
|
Active
|
Recovery
|
Frame Adv
|
Circuit
|
Invuln
|
| 29
|
X (64)
|
35
|
-14 ~ 42
|
3.0%*5 (15.0%)
|
-
|
|
A version spawns the pillars right on front of V.Akiha, and B version spawns at around the distance uncharged A version ends.
|
| EX
|
Damage
|
Red Damage
|
Proration
|
Cancel
|
Guard
|
| 280*15 (2497)
|
(1745)
|
96% (M)*15
|
-
|
LHA
|
| First Active
|
Active
|
Recovery
|
Frame Adv
|
Circuit
|
Invuln
|
| 2+33
|
X (118)
|
29
|
-8 ~ 90
|
-100.0%
|
Full 1-9
|
|
EX version spawns 15 overlapping pillars, reaching around 3/4ths of the screen. Provides more advantage then 236c, but will leave a gap no matter what you cancel into it from, so opponents can shield/jump/reversal and make this less consistent as a pressure restart
|
|
A/B/EX Pit A/B/EX Pit A/B~22X A/B~22X EX~22X EX~22X
|
|
Crescent's pit series. Summons a burning field on the ground, which will drain the opponent's health meter at intervals, as long they are not in hitstun. Lasts for a very long time (1440 frames/24 seconds), and drains (TBA) amounts of health/meter every 43 frames. Pits need to be ignited by repeating the 22X input, resulting in a multi-hit, advantagous explosion. The pit goes away if V. Akiha gets hit.
You'll usually see the air versions of the pits being used as you can recover in mid-air and continue moving, but the pits themselves have the same properties.
|
| A
|
Damage
|
Red Damage
|
Proration
|
Cancel
|
Guard
|
| -
|
-
|
-
|
-
|
-
|
| First Active
|
Active
|
Recovery
|
Frame Adv
|
Circuit
|
Invuln
|
| 39
|
X (1440)
|
13
|
-
|
~1.28%*32 (40.9%)
|
Low 12-33
|
| B
|
Damage
|
Red Damage
|
Proration
|
Cancel
|
Guard
|
| -
|
-
|
-
|
-
|
-
|
| First Active
|
Active
|
Recovery
|
Frame Adv
|
Circuit
|
Invuln
|
| 44
|
X (1440)
|
13
|
-
|
~1.28%*32 (40.9%)
|
Low 17-41
|
| ~22X
|
Damage
|
Red Damage
|
Proration
|
Cancel
|
Guard
|
| 300*3 (802)
|
(311)
|
100%
|
-
|
LHA
|
| First Active
|
Active
|
Recovery
|
Frame Adv
|
Circuit
|
Invuln
|
| 19
|
3
|
34
|
7
|
3.0%*3 (9.0%)
|
-
|
|
22A and 22B are very similar: 22A is summoned a fixed distance in front of V.Akiha while 22B is summoned under the opponent. 22A also has slightly faster startup. The slower drain rate when left out and modest frame advantage when detonated make the meterless pits a little underwhelming, especially compared to 22C. That said, 22B can be used as a tool to deter opponent stalling/zoning due to the health drain without forcing yourself to throw away meter.
- If you spawn a pit while the previous one is fading out, but hasn't completely disappeared yet, you can summon an additional pit afterwards instead of being forced to detonate it.
|
| EX
|
Damage
|
Red Damage
|
Proration
|
Cancel
|
Guard
|
| -
|
-
|
-
|
-
|
-
|
| First Active
|
Active
|
Recovery
|
Frame Adv
|
Circuit
|
Invuln
|
| 2+35
|
X (1440)
|
13
|
-
|
-100.0%
~1.28%*64 (83.2%)
|
Full 1-9, Low 10-31
|
| ~22X
|
Damage
|
Red Damage
|
Proration
|
Cancel
|
Guard
|
| 300*6 (1492)
|
(973)
|
100%
|
-
|
LHA
|
| First Active
|
Active
|
Recovery
|
Frame Adv
|
Circuit
|
Invuln
|
| 19
|
24
|
13
|
34
|
0.0%
|
-
|
|
The win-condition. Summons a much larger pit under the opponent which will drain health and meter at an alarmingly faster rate (every 20 frames!); around 900hp, 19.2% gained and 36.9% stolen after 5 seconds, for perspective . Has a bigger hitbox on ignition, and significantly more advantage on block.
The idea is to set this up during oki, then go for pressure with this quickly draining the opponent's health and freezing their meter gain in the background. You want to keep this for as long as you can, but once your pressure ends and you don't have meter for 236c, you can detonate this to get a last chance to open the opponent up. This works the best in the corner where escaping the area of the pit is much harder,
|
|
Aerial Specials
|
|
| A
|
Damage
|
Red Damage
|
Proration
|
Cancel
|
Guard
|
| 800
|
490
|
70% (O)
|
-
|
LHA
|
| First Active
|
Active
|
Recovery
|
Frame Adv
|
Circuit
|
Invuln
|
| 25
|
2
|
5
|
17 (TK)
|
6.0%
|
-
|
- Aerial version of V.Akiha's ribbons. Non-EX versions recover in midair.
Summons a horizontal, slightly downward ribbon, maintains V.Akiha's air momentum.. Unlike ground A-ribbon, this move is an excellent option for pressure resets - advances forward, significantly more plus, and can crush lows when TK'ed. Only issue is that you can't cancel into this directly during pressure.
|
| B
|
Damage
|
Red Damage
|
Proration
|
Cancel
|
Guard
|
| 800
|
490
|
70% (O)
|
-
|
LHA
|
| First Active
|
Active
|
Recovery
|
Frame Adv
|
Circuit
|
Invuln
|
| 23
|
2
|
9
|
10 (TK)
|
6.0%
|
-
|
|
Summons a diagonal downward ribbon. Stops V.Akiha's momentum. Mostly better as a neutral tool, an annoying air poke to catch chase attempt and stall your air mobility, since generallt tk.236a is better as a pressure reset then tk.236b
|
| EX
|
Damage
|
Red Damage
|
Proration
|
Cancel
|
Guard
|
| 400*8 (2609)
|
(1262)
|
70% (O)
|
-
|
LHA
|
| First Active
|
Active
|
Recovery
|
Frame Adv
|
Circuit
|
Invuln
|
| 2+18
|
27
|
10
|
21 (TK)
|
-100.0%
|
Full 1-5
|
|
Summons 8 downward ribbons. May seem better then grounded 236c, but not being able to cancel into this makes this much hard to use safely, so usually 236c is used for pressure rebuys, and this doesn't see much use
|
|
A/B/EX Pit A/B/EX Pit A/B~j.22X A/B~j.22X EX~j.22X EX~j.22X
|
| A/B
|
Damage
|
Red Damage
|
Proration
|
Cancel
|
Guard
|
| -
|
-
|
-
|
-
|
-
|
| First Active
|
Active
|
Recovery
|
Frame Adv
|
Circuit
|
Invuln
|
| 37
|
X (1440)
|
4
|
-
|
~1.28%*32 (40.9%)
|
Low 10-X
|
| ~j.22X
|
Damage
|
Red Damage
|
Proration
|
Cancel
|
Guard
|
| 300*3 (802)
|
(311)
|
100%
|
-
|
LHA
|
| First Active
|
Active
|
Recovery
|
Frame Adv
|
Circuit
|
Invuln
|
| 19
|
3
|
31
|
11
|
3.0%*3 (9.0%)
|
-
|
| EX
|
Damage
|
Red Damage
|
Proration
|
Cancel
|
Guard
|
| -
|
-
|
-
|
-
|
-
|
| First Active
|
Active
|
Recovery
|
Frame Adv
|
Circuit
|
Invuln
|
| 1+36
|
X (1440)
|
4
|
-
|
-100.0%
~1.28%*64 (83.2%)
|
Full 1-9, Low 10-X
|
| ~j.22X
|
Damage
|
Red Damage
|
Proration
|
Cancel
|
Guard
|
| 300*6 (1492)
|
(973)
|
100%
|
-
|
LHA
|
| First Active
|
Active
|
Recovery
|
Frame Adv
|
Circuit
|
Invuln
|
| 19
|
24
|
10
|
38
|
0.0%
|
-
|
|
Data on the aerial version of C-VAkiha's pit series. Those let you recover in mid-air, and do si signficantly faster then on the ground, althoguh they have the same startup. In C-vakiha's optimal oki setups, you'll jump cancel into air ex pit, then use the remaining window for an autotimed meaty air ribbon.
|
|
Arc Drive
|
|
| Damage
|
Red Damage
|
Proration
|
Cancel
|
Guard
|
| 650*10 (2813)
|
(1694)
|
50% (O)
|
-
|
LHA
|
| First Active
|
Active
|
Recovery
|
Frame Adv
|
Circuit
|
Invuln
|
| 3+6
|
24
|
62
|
-40
|
removes all
|
Full 1-41
|
|
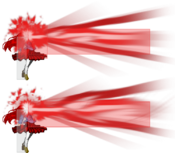
V.Akiha fires an eye laser reaching around 3/4th of the screen. Fully invincible for a while, very long recovery.
|
|
Another Arc Drive
|
|
| Damage
|
Red Damage
|
Proration
|
Cancel
|
Guard
|
| 700*19 (4422)
|
(3696)
|
50% (O)
|
-
|
LHA
|
| First Active
|
Active
|
Recovery
|
Frame Adv
|
Circuit
|
Invuln
|
| 4+5
|
57
|
59
|
-34
|
removes all
|
Full 1-71
|
|
V.Akiha fires an extra wide eye laser, with fullscreen horizontal reach and tall vertical reach.
|
|
Last Arc
|
|
| Damage
|
Red Damage
|
Proration
|
Cancel
|
Guard
|
| 9250 (3420~6509)
|
(2699~5110)
|
50% + 50% * remaining BH time
|
-
|
U
|
| First Active
|
Active
|
Recovery
|
Frame Adv
|
Circuit
|
Invuln
|
| 4+7
|
2
|
22
|
-
|
removes all
|
Full
|
|
Fullscreen command grab LA which goes into a cutscene of V.Akiha spawning a geyser of ribbons onto the opponent on hit.
|
|
MBAACC Navigation
