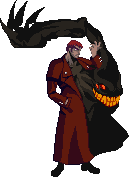
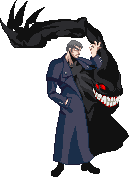
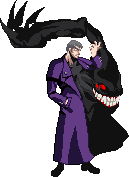
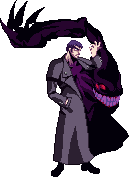
|
|
| Line 364: |
Line 364: |
| |simput= | | |simput= |
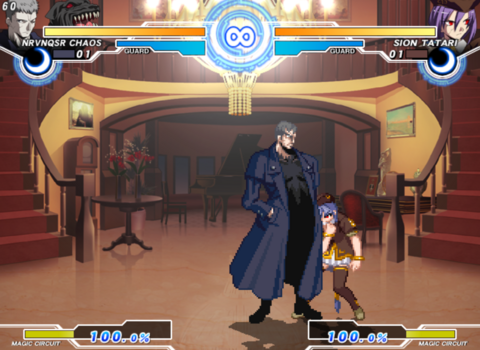
| |note=[[File:Cnero 5c oki from fullscren.mp4|480px|thumb|right]]Corner to corner combo into deer oki. Doesn't work on Necos.<br> | | |note=[[File:Cnero 5c oki from fullscren.mp4|480px|thumb|right]]Corner to corner combo into deer oki. Doesn't work on Necos.<br> |
| Probably the most intricate combo C-Nero can do, as it requires multiple delays and specific timings, this combo can be quite a challenge to master, however the reward for landing it is extremely powerful as you can not only potentially get your win condition from fullscreen, you also turn turn a situation of being cornered into cornering them.<br> | | Probably the most intricate combo C-Nero can do, as it requires multiple delays and specific timings, this combo can be quite a challenge to master, however the reward for landing it is extremely powerful as you can not only potentially get your win condition from fullscreen, you also turn a situation of being cornered into cornering them.<br> |
| All the specific you will need to have in mind for this combo are the following, listed in order from the start of the combo:<br> | | All the specific you will need to have in mind for this combo are the following, listed in order from the start of the combo:<br> |
| * 2{C} half charge as much as possible. | | * 2{C} half charge as much as possible. |
| Line 409: |
Line 409: |
| * After sdj delay j.B as much as possible, use your jumping arc as a point of reference. | | * After sdj delay j.B as much as possible, use your jumping arc as a point of reference. |
| * The j.C after sdj > j.B needs a specific delay, not too fast nor too slow or you will end too high in the air or too low. Use the video listed here as a point of reference. | | * The j.C after sdj > j.B needs a specific delay, not too fast nor too slow or you will end too high in the air or too low. Use the video listed here as a point of reference. |
| * j.66 dl j.C is very big delay, use the video as a reference, but you want to wait until almost at the corner.<br> | | * j.66 dl j.C is a very big delay, use the video as a reference, but you want to wait until almost at the corner.<br> |
| After 624C, if you see that you screwed up the timings and ender too far from the corner you can either combo into 5B(1) > 2B(1) or go directly for 2B(1). | | After 624C, if you see that you screwed up the timings and ender too far from the corner you can either combo into 5B(1) > 2B(1) or go directly for 2B(1). |
| }} | | }} |
Character Page Progress
This page is still a work in progress, consider joining as an editor to help expand it. Please update this character's roadmap page when one of the editing goals have been reached.
| In Progress |
To-do
|
- Combos:
- Add damage, meter gain/given numbers and video links to the pre-existing combos.
|
|
Additional Resources
C-Nero Match Video Database
Nero Combo Compilation (CMV routes, don't do these in matches except for novelty)
Nero's Compendium (has some misinformation)
C-Nero doc (work in progress)
Overview
Playstyle
 C-Nero is an area denial character with strong setplay capabilities that can dominate neutral against much of the cast. C-Nero is an area denial character with strong setplay capabilities that can dominate neutral against much of the cast. |
| Pros |
Cons |
- Great combo game: C-Nero's combo routing is very flexible and most hits easily confirm into corner carry or at least solid advantage with a lot of room for optimization.
- Low commitment: The threat of summon insurance will often make approaching and getting clean hits difficult for the opponent and allow greater safety in a lot of interactions or the denial of them.
- Large, strong normals: Most air and ground normals have good disjoint, active frames, or both with nearly all of them having good reach and functioning well as antiairs.
- Second highest health in the game: C-Nero has the second highest health of the cast, his survivability being enhanced further by crescent moon heat and the difficulty in landing clean hits on him.
- Meter non-management: Combos generate a lot of meter (over a full bar on clean hits) and C-Nero has solid uses for meter during every gamestate.
- Diverse setups: Nero has a wide variety of setplay options for multiple situations that can leave even the most prepared players overwhelmed.
- Strong throw game: Nero has the longest throw range in the game tied with Ries and Hime with increased damage potential when used alongside summons.
- Forces most of the cast to play his game: Few if any members of the cast will demand as much situational awareness and character-specific counterplay as Nero and much of the opponent's matchup knowledge can still be used against them.
|
- Large hurtbox: Nero is the tallest character in the game giving several characters additional pressure options against him such as new fuzzy and pressure opportunities.
- Poor mobility: No ground dash means having to rely on universal air movement options and a harder time making more subtle spacing adjustments or approaching, especially summonless.
- Mediocre defensive options: Nero often has a harder time on defense than much of the cast, having to hold more due to slow abare and wake up timing and no meterless reversal.
- Lacks options off of regular shield: No air specials means timing ex shield in the air is a necessity and normal shield on the ground leaves only gimmick options.
- Limited ability to cancel most of his strongest normals: Essential tools 2A and j.B cannot be cancelled during certain hits making them more vulnerable to shield and drops.
- Specialized toolkit at a cost: Can have a hard time playing if unable to set up due to lack of more conventional tools.
|
General Gameplan
Use your large normals and fireball to create space to setup or summon if given space already to enhance either restricting your opponent's approach or enhancing your own and once you punish your opponent's mistake take them to the corner to either summon or more run your setplay.
Neutral
Movement:
Nero is a slow character. There is no denying that. He lacks a traditional forward dash, and his back dash doesn’t go particularly far back. His air dash is a slow, fully horizontal one that can go for quite long if you hold it, and will be his main movement tool.
Saying that Nero is slow is more of a lack of being able to cover small amounts of ground fast. His air dash still goes fairly far and since everyone gets a forward super jump, he can still cover alarming amounts of space very fast. He cannot, however, adjust his position nearly as well as basically any other character.
Instead of a conventional dash, Nero’s forward dash is a teleport, similar to Slayer’s. It is invulnerable from frame 1, but very slow to recover, although the timing to punish it is also very late, so late that people not accustomed to it might in fact whiff a premature punish. You can also teleport safely if covered by the right summon.
With Nero you'd want to first find a suitable space and time to produce 1-2 summons and use those to approach in a safe manner. Most times the summons will cause the opponent to jump to avoid them and that's where your strong grounded antiairs or large air normals come into play. 5a, 2a, 2c, 5[c], and 421a will favorably cover the majority of angles your opponent has to approach from as long as you choose and time the right one, especially when backed up by even subtle adjustments such as slightly walking back or forwards. All 3 of your air normals are very strong and can be utilized effectively off any of back, forwards, or neutral jump depending how aggressive you intend to be and what matchup/situation you find yourself in.
IF you need the time to produce a summon you can hit the opponent with 236A(crow fireball) to gain the time to produce at least one summon against an high mobility opponent and approach from there. Don't feel compelled to immediately try and summon or immediately try and create a situation that might give you a summon if you feel you're in an unfavorable position to do so that could get you punished. There's nothing wrong with playing it patient at first, even without much grounded mobility you still have average enough air movement, C moon mechanics such as ex shield/heat/air dodge, and some of the best normals in the game. Be smart, take it slow, and abuse your big hitboxes until you find a chance to take enough frames to set up or end up already hitting them into the corner.
One thing to note is that for 236A there are characters that can dash under but get hit on startup or have some other caveat will be denoted with an asterisk. So be careful by match up on when to use 236A, especially with its long recovery.
CHARACTERS THAT CAN DASH UNDER 236A:
- Akiha*, V.Akiha*, Seifuku, Aoko*, Arc*, Warc*, Ciel, Kouma*, Len (F), NAC, Neco-Arc, Nero (lol), Roa*, Ryougi, Satsuki*, Tohno*, Nanaya*, V.Sion, Wara (C/H), W.Len (C/F)
CHARACTERS THAT CANNOT DASH UNDER 236A:
- Hime, Hisui, Kohaku, Koha-Mech, Len (C/H), Mech-Hisui, Neco-Mech, Miyako, P.Ciel, Ries, Sion, Wara (F), W.Len (H)
Pressure
With all Neros, pressure via screen control is the name of the game. Use his 214A/B series in conjunction with 421B (if you have time to get it out) to cover your approach and airdash j.A/B/C your way in. Acquaint yourself with all of your air normals, especially j.B, because it's a large 2-hit normal that's quite fast for an aerial of its size with good disjoint. Don't let any one of your air normals overshadow the rest too much though, j.C is very active and can occasionally reach things that j.B can't and j.A is faster while having a more immediate downwards angle making it better in cases where you don't think j.B will prevent something like a rising j.A antiair in time. From there, you can either IAD j.X again, throw, or start your grounded pressure.
Frankly, any positioning outside of the corner his main goal is to obstruct the opponent's path, denying them of invading space, usually forcing mistakes on the opponent who overextends and from there performing the corner carry combo that brings them to the corner where Nero begins to do his pressure/okizeme. While he gets a strong knockdown already off of AT his pressure truly shines in the corner after a 5[C] ender.
Once you successfully condition your opponent to block the probable 5[C] on wake-up you can start to take advantage by not doing 5[C] and pressing on with IAD buttons or summon right away in order to get a better advantage. Do have in mind that while a blocked 5[C] can allow you to summon snakes/A deer or rebeat into frametrap/jump in, it's still not hugely on your favor, you get pushed back a little and the opponent can react and challenge to all these options.
Before we get more into the summoning aspect of C-Nero's pressure it is important to remember that summons, 5[C], and IAD are not all this character has for his strings. You can still create frametraps/staggers like any C/H moon can with reverse beat and 5A/2A(W) and can use this further in conjunction with the things mentioned in the previous sentence. Rebeating into 5A(W) off of 2C, 2B, or 5B(1) will leave you only slightly minus and in conjunction with the threat of 5[C] and 4C in addition with the distance you're often at being in your favor can often allow you to reset pressure off of these. Even 2A despite being -1 is as big as the B and C normals of most characters, allowing you to reset pressure off of it in some situations.
A large part of the pressure game of Nero is to test your opponent's reactions and guessing game with your "frametrap" summons. This will only work out if the opponent you're facing is aware that blocking a summon means that Nero gets to get in for free once again, so they will most likely want to challenge your summons.
You want to vary the spots you summon at in order to test the reactions of your opponent as hard as you can, keeping your special cancel points ambiguous and stealing frames whenever you think the opponent won't expect it in time. Vary between cancelling off of 2A, 5[C](early hits), 5B(1), and 2B(1-2) if you want to stay closer to the opponent and off of 2C/[C], 5[C](full), and 2B(full) if you want to push yourself out more in exchange for usually being easier to react to. You mainly want to use 214B and 421A though you can use your slower summons like 214A too if you feel you've condition your opponent to respect enough.
If the opponent is full-on fuzzy mashing then just 5[C] or rebeat 5A(w) > 4C to check them, same if they jump but with 4C, 2C, or 5A depending how close you are.
An actual challenge where your opponent tried to react and punish your summon would be they either sweep > jump cancel or tried to jump in buttons or jump and get the hell away. You can bait and beat most sweeps with 421A (though the trade will often reset to a scramble) and beat some jump ins, and if they try to double jump away from the corner then chase them with j.C and j.B for a potential guard crush or air throw or use the running away from you as an opportunity to summon more and return to a neutral stacked in your favor.
Reacting on time properly is actually not easy. If your opponent is slow and doesn't react to summon on time you can block their mash attempt and since they cant jump cancel your summons will punish them and net you a combo.
Other neat little tips and tricks include things like 214[A] (walk forward) release A into Throw.
Or doing 5[C](1 hit) > 421A to catch potential jump-outs.
Okizeme
All Nero variants have the ability to end their combos in an air throw which gives HKD. C/F Nero both have access to 236C which is important to their pressure and their Oki. Below will be expanding how it's conducted for C-Nero specifically.
AT ender
With C-Nero, 5[C] is commonly used after Air throw ender as it does a ton of guard damage and also checks for mashing, jumping, heat attempts, and most reversals. That is not all since he can then cancel into 236C and essentially still keep his turn during this whole sequence.
You can also go into 236C immediately after Air throw ender if you want to have the maximum frame advantage and from there you can do the following
- 2A > 214[A] IAD Fuzzy(j.B/C > dj.B)
- 2A, 9 late j.B or empty jump 2A
- Walk up Throw/bait
The ones in bolded are to illustrate the importance of doing 2A after 236C as it keeps the opponent in check if they try to dash out. If they try to jump out, you can guard crush them with 2C as it is AUB and go straight into an aerial sequence that is listed in the normal combos. if they try to either ground shield or Air shield the crows, you can ground and air throw them accordingly.
5[C] ender
5[C] > 421B/C
It's important to note the significance between the two. 421B the bambi deer hits two times while 421C hits three times. They never go away even if Nero gets hit which allows him to do more bold actions such as walk up grab/2A5B(1), but here's a few more things that you can do while bambi is running around getting revenge for the fallen.
Here a just a few examples of what you can do with deer oki.
From 421B:
- The deer's first hit is slow so 5[C] is useful to force respect.
- 5[C] > 5A(w) into IAD mixup or j9.BC fuzzy guard mixup.
- IAD j.A/B/C mixup if they respect on wakeup.
From 421C:
- IAD j.C beats slow DPs and you can fuzzy guard with dj.B if you know they wont DP.
- 9 > late j.B or 9, land 2A
- Or you can bully with 5[C] until their guard bar gets dangerously low. 2B(1) 5B(1) 5[C] is your optimal string for racking up guard bar damage in this case.
- 214C into dodge 50/50 or j.A air dash j.A 50/50.
- Throw/bait.
Point is there is lots to do with pressure and oki with C-Nero in particular you just need to be creative, you can use a variety of summons and strings to create mix up options and take into account the match-up
Defense
Make good friends with downback. Nero has slower than average normals, no forward dash, and mediocre airdash. If you cannot commit insurance fraud with an already active summon, you’re going to play the same blocking simulator the rest of the roster has to, except worse. Again, do not be afraid to part with meter. Nero is not a meter-dependent character in the majority of matchups, he simply uses it very well. C has arguably the strongest reversal options to play with out of all of his moons, so make use of them.
C’s 63214C is both decently fast (1+6) and fully invincible into the first, very large active frame, and will always at least trade if a hurtbox is involved. It can be safe at max range, but if airblocked, sidestepped or shielded at any range, expect a full punish. It's best not used on wake up if chances are the opponent is meatying with a jab due to them being able to whiff cancel it into either shield or a reversal on reaction to the superflash but it is fast enough to take care of anything more committal than that that lacks sufficient invulnerability. Its long reach also makes it a good option for disrespecting longer range moves that have a reactable or readable startup.
As Crescent Moon you are always entitled to the option of using Heat since it sends them fullscreen and allows you to proceed to send out more summons (especially ex deer) and shift the momentum in your favor. Nero's heat hitbox is wider than average but not very tall (literally shorter than Miyako), so keep that in mind when trying to heat against opponents that might be above you at the time of activation.
C-Nero's raw abare options while not among the fastest in the game should not be discounted entirely by any means. 2A is a little slow being out on frame 6 but is very large both horizontally and vertically allowing it to tag players from distances they may usually expect to be safe at for pressure or even catch some characters trying to IAD reset. 2A hitting 3 times also means it can burn through some staggers with armor/clash. 5A whiffs crouchers but is a strong fast tool against airborne pressure sequences and its good horizontal reach means it can work well against attempts at slightly distanced standing staggers. 5B(1) is an often slept on move that is out on frame 5, disjointed, sweeps crouchers and gives soft knockdown on trade, and converts into better combos/damage than 2A making it your strongest close up abare option in a lot of situations. If you successfully poke out with 2A/5A against a grounded opponent from a slight distance convert into 4C instead of 2B to ensure you don't drop. 2C is also deceptively fast and effective at sniping opponents trying to hover above you to bait heat.
EX shield into 5A, 5B, 2A, or even 4C in distanced cases is a good way to put a stop sign in front of careless rushdown or for turning the tide against certain telegraphed gaps and moves. C-Nero's options off regular shield are a lot weaker and mostly limited to 63214C and 236A, each of which having their fair share of weaknesses, with the former being vulnerable to the opponent reversal cancelling or just upbacking in reaction to the superflash but checkmates against situations where the opponent cannot cancel (Len j.2c for example) and isn't safejumping. The latter is your fastest meterless special and should at minimum trade against anything that is in vertical range and isn't immediately getting followed up with a hitbox that is out on frame 4 or faster but whiffs crouchers. In desperate situations you can also try cancelling regular shield into bunker in an attempt at safety or roll the dice with a second shield, slightly delay the cancel in the latter's case in order to maybe get an ex shield.
Combos
| Combo Notation Help
|
Disclaimer: Combos are written by various writers, so the actual notation used in pages can differ from the standard one.
For more information, see Glossary and Controls.
|
| X > Y
|
X input is cancelled into Y.
|
| X > delay Y
|
Must wait for a short period before cancelling X input into Y.
|
| X, Y
|
X input is linked into Y, meaning Y is done after X's recovery period.
|
| X+Y
|
Buttons X and Y must be input simultaneously.
|
| X/Y
|
Either the X or Y input can be used.
|
| X~Y
|
This notation has two meanings.
- Use attack X with Y follow-up input.
- Input X then within a few frames, input Y. Usually used for option selects.
|
| X(w)
|
X input must not hit the opponent (Whiff).
|
| j.X
|
X input is done in the air, implies a jump/jump cancel if the previous move was done from the ground.
Applies to all air chain sections:
- Assume a forward jump cancel if no direction is given.
- Air chains such as j.A > j.B > j.C can be shortened to j.ABC.
|
| sj.X
|
X input is done after a super jump. Notated as sj8.X and sj9.X for neutral and forward super jumps respectively.
|
| dj.X
|
X input is done after a double jump.
|
| sdj.X
|
X input is done after a double super jump.
|
| tk.X
|
Stands for Tiger Knee. X motion must be buffered before jumping, inputting the move as close to the ground as possible. (ex. tk.236A)
|
| (X)
|
X is optional. Typically the combo will be easier if omitted.
|
| [X]
|
Input X is held down. Also referred to as Blowback Edge (BE). Depending on the character, this can indicate that this button is held down and not released until indicated by the release notation.
|
| ]X[
|
Input X is released. Will only appear if a button is previously held down. This type of input is referred to as Negative Edge.
|
| {X}
|
Button X should only be held down briefly to get a partially charged version instead of the fully charged one.
|
| X(N)
|
Attack "X" should only hit N times.
|
| (XYZ)xN
|
XYZ string must be performed N times. Combos using this notation are usually referred to as loops.
|
| (XYZ^)
|
A pre-existing combo labelled XYZ is inserted here for shortening purposes.
|
| CH
|
The first attack must be a Counter Hit.
|
| Air CH
|
The first attack must be a Counter Hit on an airborne opponent.
|
| 66
|
Performs a ground forward dash.
|
| j.66
|
Performs an aerial forward dash, used as a cancel for certain characters' air strings.
|
| IAD/IABD
|
Performs an Instant AirDash.
|
| AT
|
Performs an Air Throw. (j.6/4A+D)
|
| IH
|
Performs an Initiative Heat.
|
| AD
|
Performs an Arc Drive.
|
| AAD
|
Performs an Another Arc Drive.
|
The combos in question are based off the assumption you know about the bounce limit. If you didn't know there a grand total of 3 OTG or wall/groundslams can be comboed, after the third the opponent will be fully invincible until they recover. You have two bounces to combo after and a third to end with. Keep that in mind and adjust your combos as you count the amount of wallslams used so far.
624C and j.C wallbounce, 5[C] and Gold AT groundbounce, 5[C], Gold AT, and 2B(1) give OTGable knockdowns, and 5[C] and all versions of deer and snake can hit OTG. OTGing after 5[C]/Gold AT will expend both their ground bounce AND an OTG
Starters
| Starter |
Notes
|
| 2A/5A/5B > 2B(1) > 2C |
Normal grounded starter
|
| 2A/j.X > 5B(1) > 2C |
Crouch confirmed grounded starter
|
| 4C |
Starter for long range punishes, pokes, and frametraps
|
| j.X |
Normal air starter
|
| CH AA 2C/2[C]/214B/214C/421X |
Launching CH
|
| AT |
Niche punish and risky jump call out
|
Enders
| Ender |
Notes
|
| AT |
Untechable KD, frame advantage for high AT ender against the normal wake up timing is usually +20
|
| 5[C]/2B(1) |
Special cancelable HKD, gives summon oki of your choice while still giving frames to meaty afterwards
|
| 4C/j.C |
Air Tech ender, gives you the space to heat or summon
|
Normal Combos
| Condition
|
Notation
|
Damage
vs V.Sion
|
Notes
|
|
| Fullscreen BNB
|
- 2A(A) > 2B(1) > 2C > j.B(A) > dj.BC > j.66 j.C, land sj8.C > dj.B(1)C > AT (236C/5[C], 236C)
|
3732
|
|
| Meter Gained: 113.9% |
Meter Given (vs C-Moon): 50.7% |
(Video) |
| Typical midscreen combo. Full corner carry from anywhere except the opposite corner, in which case you can end with (land sj9.C sdj.B AT). j.B does very good damage on its own and a full j.C prorates pretty badly, so doing only j.B is optimal in some combos. j.BA is usually damage optimal here, which is nice given it's much more consistent. If you had to learn one combo and one combo alone for Nero, this is it. |
|
|
| Midscreen BNB, 100% Meter
|
- 2A > 2B(1) > 2C > j.BA > dj.BC, land 63214C, 5B(1) > 2C > 5[C] > 421B/C
|
3989
|
|
| Meter Gained: 80.2% |
Meter Given (vs C-Moon): 31.9% |
(Video) |
| (Can be done from midscreen confirms, last j.B and j.C have to be delayed as much as possible) Midscreen to corner combo that allows you a Regular Deer or EX deer set up of your choosing. You can super double jump to gain more distance if needed. |
|
|
| Air Normal Starter
|
- (j.A/j.B)j.C > j.66 j.C, land sj.C > sdj.C > AT (236C/5[C], 236C)
|
3271/3715
|
| |
| Meter Gained: 57.2%/67.6% |
Meter Given (vs C-Moon): 17.1%/20.2% |
| Basic confirm from j.C, a good starting point for confirming on successful air to air. |
|
|
| 4C starter
|
- 4C, j.C(1) > sdj.C > j.66 j.C
|
2509
|
| |
| Meter Gained: 40.0% |
Meter Given (vs C-Moon): 12.0% |
| A combo for when you hit 4C as a call out against someone that was overextending in their approach. |
|
|
| CH 4C starter
|
- CH 4C > j.B(1) > sdj.BC > j.66 j.C, land sj8.C > sdj.BC > AT (236C/5[C], 236C)
|
3812
|
| |
| Meter Gained: 101.9% |
Meter Given (vs C-Moon): 35.3% |
| A combo for when you hit 4C as a call out against someone that was overextending in their approach. Does a bit more damage and meter gain with this particular combo. |
|
|
| Air CH starter
|
- CH 2C/214B, 2C > 5[C] > 5A, j.B > sdj.BC > j.66 j.C, land sj8.C > sdj.BC > AT (236C/5[C], 236C)
|
5193
|
| |
| Meter Gained: 139.9% |
Meter Given (vs C-Moon): 54.6% |
| Counter hit combo starting with 2C, skip air dash cancel if you're close to the corner. Do j.B(1)C(1-2) after 5A if you think the added stability is needed |
|
|
| AT Starter
|
- Gold AT > j.66 > dl j.B > land 5B(1) > 2C > j.B > dj8.BC > land sj8.C(1-3) > sdj.BC > AT
|
2694
|
|
| Meter Gained: 99.6% |
Meter Given (vs C-Moon): 29.8% |
(Video) |
| Combo off a low (around IAD height) AT midscreen. Remember that AT expends one of your 3 bounces so you cant let the last hit of j.C connect during the 2nd rejump |
|
|
| AT Starter
|
- Gold AT > land 4C > j.C > sdj.C > AT
|
2197
|
|
| Meter Gained: 56.0% |
Meter Given (vs C-Moon): 16.8% |
(Video) |
| Combo off a high (top of your jump arc height) AT midscreen. |
|
|
Corner Combos
Most of the midscreen combos also work in the corner, however if you want to maximize the most reward out of certain situations consider learning the following combos as well:
| Condition
|
Notation
|
Damage
vs V.Sion
|
Notes
|
|
| Corner BNB
|
- 2AA > 2B(1) > 2C > j.BC, land 5[C] - 5B(1) > 2C > 5[C] (> 421B/C)
|
3966
|
|
| Meter Gained: 95.6% |
Meter Given (vs C-Moon): 28.6% |
(Video) |
| Meterless route to end in 5[C] and set up deer Oki. Only do one 2A vs Nero and Wara. |
|
|
| Crouch Confirmed Corner BNB
|
- j.B > 5B(1) > 2C > 5[C] > delay 5A/2A > delay j.BC, land 5[C], 5B(1) > 2C > 5[C] (> 421B/C)
|
5595 (5415)
|
|
| Meter Gained: 123.3% (126.3%) |
Meter Given (vs C-Moon): 36.9% (37.8%) |
(Video) |
| Meterless route to end in 5[C] and set up deer Oki. 5A does slightly more damage but is slightly less consistent |
|
|
| 5[C] Starter
|
- 5[C] > 421A, 5[C] > 421B/C
|
3296
|
| |
| Meter Gained: 35.4% |
Meter Given (vs C-Moon): 14.8% |
| An option to use if someone got hit by 5[C] that loops back into into 421B/C set up. |
|
|
| AT Starter
|
- Gold AT land 5B > 2C > 5[C], 5B > 2C > 5[C] (> 421B/C)
|
2834
|
|
| Meter Gained: 82.0% |
Meter Given (vs C-Moon): 24.6% |
(Video) |
| Gold AT combo into deer oki |
|
|
Advanced Combos
Combos that require finicky delays, are character specific, or have other various factors that require much more work to use effectively
| Condition
|
Notation
|
Damage
vs V.Sion
|
Notes
|
|
| Midscreen Deer Oki
|
- 2AA > 2B(1) > 2C > 5[C](2) > IAD j.A > dj.BC > land 5[C] (> 421B/C)
|
3859
|
| |
| Meter Gained: 83.3% |
Meter Given (vs C-Moon): 25.0% |
 Maximum possible distance from corner where you can land this combo (vs VSion)
Works on everyone but Necos. Very impractical vs Ries, Sion and Satsuki.
As a general rule you want to:
1) do NOT half charge 2C
2) jump cancel IAD as fast as possible
3) delay jA > dj a couple of frames so jB hits twice more reliably.
Points 2 and 3 aren’t required on all characters but it will make it more consistent across all. Have also in mind from farther distances to only do a single 2A, as two 2As will push the opponent too far.
Because of how finicky this combo can be, it is incentivized to only go for this route from a clean confirm on a set distance (e.g. from a IAD jB or empty jump 2A starter) since at larger distances 5[C] will hit a different amount of times and make it really hard to time the dj IAD fast cancel, but with a lot of experience it can become easier to discern the distances + character specific hurtboxes. |
|
|
| Midscreen Deer Oki
|
- 2A > 2B(1) > 2{C} > j.AC > j.66 dl j.C > land 5[C] (> 421B/C)
|
3067
|
| |
| Meter Gained: 54% |
Meter Given (vs C-Moon): 16% |
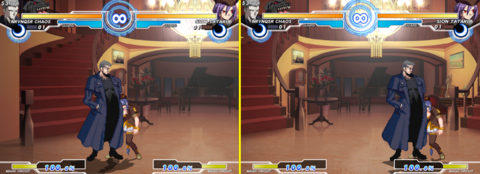
 Left: Maximum possible distance from corner where you can land this combo (vs VSion) Right: Minimum possible distance from corner where you can land this combo (vs VSion)
Doesn't work on Hisui, Mech and NecoMech from the farthest possible distances. |
|
|
| Nearly Fullscreen Deer Oki
|
- 2A > 2B(1) > 2{C} > j.AC > j.66 j.B(1) > j.C(1) > sdj.A dl j.C > land 624C > 5B(1) > 2C > 5[C] (> 421B/C)
|
3646
|
| |
| Meter Gained: -25.3% (74.4% net gain) |
Meter Given (vs C-Moon): 31% |
 Maximum possible distance from corner where you can land this combo (vs VSion)
Doesn't work on Len, WLen, Miyako and Necos. |
|
|
| Nearly Fullscreen Deer Oki
|
- 2A(A) > 2B(1) > 2{C} > dl j.B j.C > j.66 j.B(1) > sdj.B(1) j.C > land 624C > 5B(1) > 2C > 5[C] (> 421B/C)
|
3912
|
| |
| Meter Gained: -12.3% (87.7% net gain) |
Meter Given (vs C-Moon): 34.1% |
 Maximum possible distance from corner where you can land this combo (vs VSion)
On characters with a slim hurtbox while on the air (Len, Satsuki, etc.), an additional slight delay on the sdj is needed.
Can only be done with a single 2A vs VSion, PCiel, Roa, Hisui, Mech and NecoMech.
Doesn't work on Necos. |
|
|
| Fullscreen Deer Oki #1
|
- 2AA > 2B(1) > 2{C} > dl j.B > dl dj.C(2) > land j.AB(1) > sdj dl j.B dl j.C > j.66 dl j.C > land 624C > 5B(1) > 2C > 5[C] (>421B/C)
|
3695
|
| |
| Meter Gained: 5.4% (87.1% before 624C) |
Meter Given (vs C-Moon): 66.5% |
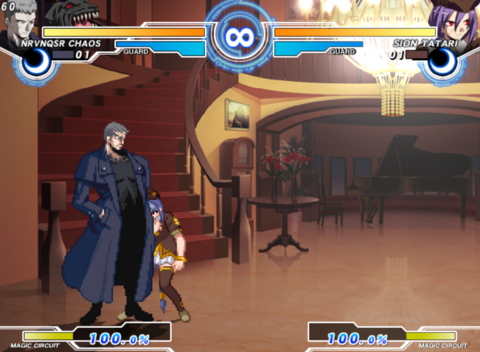
Corner to corner combo into deer oki. Doesn't work on Necos.
Probably the most intricate combo C-Nero can do, as it requires multiple delays and specific timings, this combo can be quite a challenge to master, however the reward for landing it is extremely powerful as you can not only potentially get your win condition from fullscreen, you also turn a situation of being cornered into cornering them.
All the specific you will need to have in mind for this combo are the following, listed in order from the start of the combo:
- 2{C} half charge as much as possible.
- First j.B delay as much as possible, use your jumping arc as a point of reference.
- First j.C has to be exactly delayed in order to hit (2) hits, it's possible to combo with (1) and (3) hits but it's best to target (2) hits.
- After sdj delay j.B as much as possible, use your jumping arc as a point of reference.
- The j.C after sdj > j.B needs a specific delay, not too fast nor too slow or you will end too high in the air or too low. Use the video listed here as a point of reference.
- j.66 dl j.C is a delay of a couple of frames at most, this delay is not necessary vs all characters.
|
|
|
| Fullscreen Deer Oki #2
|
- 2AA > 2B(1) > 2{C} > dl j.B > dl dj.C(2) > land j.AA > sdj dl j.B dl j.C > j.66 dl j.C > land 624C > 5B(1) > 2C > 5[C] (>421B/C)
|
3619
|
| |
| Meter Gained: 1.9% (83.7% before 624C) |
Meter Given (vs C-Moon): 65.4% |
Corner to corner combo into deer oki. Doesn't work on Necos.
A small alteration to Fullscreen Deer Oki #1, with the rejump being j.AA instead of j.AB(1). This variation has less damage and meter but it's more practical and consistent vs the following characters:
Hime - Kouma - Miyako - Wara - Roa - WArc - Ries - Len - Ciel - WLen - Nero
If you don't mind losing a tiny bit of damage and meter generated, then you can stick with this version and forget version #1.
All the specific you will need to have in mind for this combo are the following, listed in order from the start of the combo:
- 2{C} half charge as much as possible.
- First j.B delay as much as possible, use your jumping arc as a point of reference.
- First j.C has to be exactly delayed in order to hit (2) hits, it's possible to combo with (1) and (3) hits but it's best to target (2) hits.
- After sdj delay j.B as much as possible, use your jumping arc as a point of reference.
- The j.C after sdj > j.B needs a specific delay, not too fast nor too slow or you will end too high in the air or too low. Use the video listed here as a point of reference.
- j.66 dl j.C is a delay of a couple of frames at most.
|
|
|
| Fullscreen Deer Oki #3
|
- 2AA > 2B(1) > 2{C} > dl j.B > dl dj.C(2) > land j.A > sdj dl j.B dl j.C > j.66 dl j.C > land 624C > 5B(1) > 2C/2B(1) > 5[C] (>421B/C)
|
3612
|
| |
| Meter Gained: -3.5% (80.5% before 624C) |
Meter Given (vs C-Moon): 54.7% |
Corner to corner combo into deer oki. Doesn't work on Necos.
Another alteration of the previous versions, this one does the least damage and meter generated (to the point of being meter negative) and it's also harder. However this the best version to do vs characters with really annoying hurtboxes that make version #1 and #2 incosistent:
Sion - VSion - Ryougi - Vakiha - Seifuku
This version also works really well vs all the characters that are recommended for version #2 if you still find version #2 too incosistent.
All the specific you will need to have in mind for this combo are the following, listed in order from the start of the combo:
- 2{C} half charge as much as possible.
- First j.B delay as much as possible, use your jumping arc as a point of reference.
- First j.C has to be exactly delayed in order to hit (2) hits, it's possible to combo with (1) and (3) hits but it's best to target (2) hits.
- After sdj delay j.B as much as possible, use your jumping arc as a point of reference.
- The j.C after sdj > j.B needs a specific delay, not too fast nor too slow or you will end too high in the air or too low. Use the video listed here as a point of reference.
- j.66 dl j.C is a very big delay, use the video as a reference, but you want to wait until almost at the corner.
After 624C, if you see that you screwed up the timings and ender too far from the corner you can either combo into 5B(1) > 2B(1) or go directly for 2B(1). |
|
|
Corner Deer Oki
Works On: Everyone except Len, Wlen, Neco Arc, and NAC
|
- 2A > 2B(1) > 2C > 5[C] > delay 5A > delay j.BC, land 5[C], 5B(1) > 2C > 5[C] (> 421B/C)
|
4461
|
|
| Meter Gained: 120.1% |
Meter Given (vs C-Moon): 36.0% |
(Video) |
| Slightly optimized but less universal version of the basic meterless corner combo into deer. Requires you to be very slightly deeper in the corner than the aforementioned combo, and is very finicky on the listed characters (though it does work if point blank and fully in the corner) |
|
|
| Corner CH 2C starter
|
- CH 2C 2[C] > 5[C] > IAD j.B, land 2C > 5[C] > 5B, 2C > 5[C] (> 421B/C)
|
???
|
| |
| Meter Gained: ??? |
Meter Given (vs C-Moon): ??? |
| 2C CH in the corner, the link on the last parts is pretty tight, but the damage is worth it. |
|
|
Summon Combos
Combos that require a certain summon to be out before getting the hit.
| Condition
|
Notation
|
Damage
vs V.Sion
|
Notes
|
|
| Throw Starter, 623A/B Set
|
- Throw > 623]X[ > 63214C > 5B > 2C > 5[C] (microwalk), 5B > 2C > 5[C] (> 421B/C)
|
3925
|
|
| Meter Gained: -59.4% (92% required) |
Meter Given (vs C-Moon): 35.9% |
(Video) |
| Throw combo w/ 623X set into deer oki. On some characters and spacings a microwalk is required to link the 2nd rep of the 5[C] loop, and if not sufficiently deep into the corner a 2nd rep might not be possible at all |
|
|
| EX Crow Set
|
- (AT 236C) walk 2A > (crows hit) 2C > j.BC > land 5[C] > 5B(1) > 2C > 5[C] (> 421B/C)
|
4294
|
|
| Meter Gained: 36.7% |
Meter Given (vs C-Moon): 30.1% |
(Video) |
| Combo for when you bait a throw tech (or just catch them not blocking low) after AT ender into EX crows, leads into deer oki |
|
|
Move Descriptions
| Frame Data Help
|
| Header
|
Tooltip
|
| Move Box Colors
|
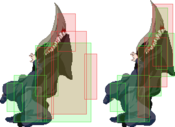
Light gray = Collision Box (A move lacking one means it can go through the opponent's own collision box).
Green: Hurt Boxes.
Red: Hit(/Grab) Boxes.
Yellow: Clash Boxes (When an active hitbox strikes a clash box, the active hitbox stops being active. Multi-hit attacks can beat clash since they will still progress to the next hitbox.)
Magenta: Projectile-reflecting boxes OR Non-hit attack trigger boxes (usually).
Blue: Reflectable Projectile Boxes.
|
| Damage
|
Base damage done by this attack.
(X) denotes combined and scaled damage tested against standing V. Sion.
|
| Red Damage
|
Damage done to the recoverable red health bar by this attack. The values are inherently scaled and tested against standing V. Sion.
(X) denotes combined damage.
|
| Proration
|
The correction value set by this attack and the way it modifies the scaling during a string. See this page for more details.
X% (O) means X% Overrides the previous correction value in a combo if X is of a lower percentage.
X% (M) means the current correction value in a combo will be Multiplied by X%. This can also be referred to as relative proration.
|
| Circuit
|
Meter gained by this attack on hit.
(X%) denotes combined meter gain.
-X% denotes a meter cost.
|
| Cancel
|
Actions this move can be cancelled into.
SE = Self cancelable.
N = Normal cancelable.
SP = Special cancelable.
CH = Cancelable into the next part of the same attack (Chain in case of specials).
EX = EX cancelable.
J = Jump cancelable.
(X) = Cancelable only on hit.
-X- = Cancelable on whiff.
|
| Guard
|
The way this move must be blocked.
L = Can block crouching
H = Can block standing.
A = Can block in the air.
U = Unblockable.
|
| Startup
|
Amount of frames that must pass prior to reaching the active frames. Also referred to as "True Startup".
|
| Active
|
The amount of frames that this move will have a hitbox.
(x) denotes frame gaps where there are no hitboxes is present. Due to varied blockstuns, (x) frames are difficult to use to determine punish windows. Generally the larger the numbers, the more time you have to punish.
X denotes active frames with a duration separate from its origin move's frame data, such as projectile attacks. In this case, the total length of the move is startup+recovery only.
|
| Recovery
|
Frames that this move has after the active frames if not canceled. The character goes into one frame where they can block but not act afterwards, which is not counted here.
|
| Advantage
|
The difference in frames where you can act before your opponent when this move is blocked (assuming the move isn't canceled and the first active frame is blocked).
If the opponent uses a move with startup that is at least 2 frames less than this move's negative advantage, it will result in the opponent hitting that move.
±x~±y denotes a range of possible advantages.
|
| Invul
|
Lists any defensive properties this move has.
X y~z denotes X property happening between the y to z frames of the animations. If no frames are noted, it means the invincibility lasts through the entire move.
Invicibility:
- Strike = Strike invincible.
- Throw = Throw invincible.
Hurtbox-Based Properties:
- Full = No hurtboxes are present.
- High = Upper body lacks a hurtbox.
- Low = Lower body lacks a hurtbox.
Miscellaneous Properties
- Clash = Frames in which clash boxes are active.
- Reflect = Frames in which projectile-reflecting boxes are active.
- Super Armor = Frames in which the character can take hits without going into hit stun.
|
Normal Moves
Standing Normals
|
|
| Damage
|
Red Damage
|
Proration
|
Cancel
|
Guard
|
| 300
|
147
|
78% (O)
|
-SE-, -N-, -SP-, -EX-, (J)
|
LH
|
| First Active
|
Active
|
Recovery
|
Frame Adv
|
Circuit
|
Invuln
|
| 5
|
4
|
10
|
-2
|
3.0%
|
-
|
|
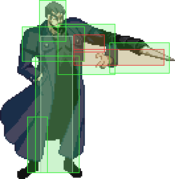
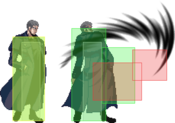
Elbow poke. While high hitting, Nero's even higher hurtboxes during the animation make this move worse than the character's other antiair options for directly contesting jumpins but its speed allows it to work well as a stop sign against instant air dashes and off of ex shield as well as being the most reliable tool for guard breaks to punish the opponent air blocking normals and certain summons close to the ground with.
This move also whiffs crouchers giving access to the 5A6E OS as well as being the go-to reverse beat normal for pressure and its height can allow it to be used to catch jumps in pressure sometimes after a summon.
|
|
Toggle Hitboxes Toggle Hitboxes
|
|
|
| Damage
|
Red Damage
|
Proration
|
Cancel
|
Guard
|
| 300, 200*2, 300*3 (1259)
|
(794)
|
100%, 60% (O)
|
N, SP, EX, (J)
|
LH
|
| First Active
|
Active
|
Recovery
|
Frame Adv
|
Circuit
|
Invuln
|
| 5
|
1 (6) 14
|
18
|
-7
|
3.0%, 2.0%*2, 4.0%*3 (19.0%)
|
-
|
|
Wolf. First hit is as fast as 5A without whiffing crouching opponents making it useful as an up-close abare and scramble tool. The first hit also whiffs crouchers at 100% prorate allowing 2B to be omitted for better combo opportunities and can serve as a rewarding tool for blowing up crouch tech in pressure.
5B should always be cancelled during the first hit in combos to prevent the later hits from pushing the opponent out and worsening damage and is also generally unsafe to let go uncancelled past the first few hits in pressure. In general limited confirmability and high recovery limit 5B's usefulness in neutral though it can sometimes prove effective as a walling normal especially when the opponent is on low health.
|
|
Toggle Hitboxes Toggle Hitboxes
|
|
|
| 5C
|
Damage
|
Red Damage
|
Proration
|
Cancel
|
Guard
|
| 300, 500, 800 (1234)
|
(714)
|
60% (O)
|
N, SP, EX, (J)
|
LH
|
| First Active
|
Active
|
Recovery
|
Frame Adv
|
Circuit
|
Invuln
|
| 10
|
3 (6) 2 (3) 3
|
19
|
-7
|
3.0%*2, 9.0% (15.0%)
|
-
|
|
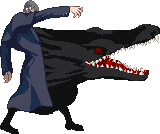
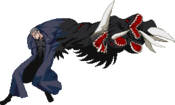
Crocodile. Doesn't see much use due to low blockstun and high recovery but can sometimes still function as a stop sign against approaches that would counterhit 2C or stuff 5[C]'s startup. Launches and cannot be cancelled until the final hit.
|
| 5[C]
|
Damage
|
Red Damage
|
Proration
|
Cancel
|
Guard
|
| 350*4, 2000 (2299)
|
(1377)
|
75% (O), 60% (O)
|
N, SP, EX, (J)
|
LH
|
| First Active
|
Active
|
Recovery
|
Frame Adv
|
Circuit
|
Invuln
|
| 17
|
9 (2) 6
|
11
|
1
|
3.5%*4, 10.0% (24.0%)
|
-
|
|
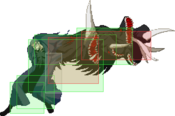
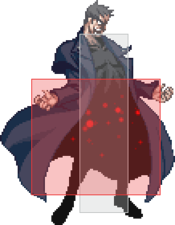
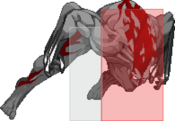
Charged crocodile. Possibly C-Nero's most character defining move, charging 5C deals much more damage to both health and guard bar and has increased advantage on block with a cancel window through the entirety of its recovery.
Cannot be counterhit and retracts Nero's hurtbox with a massive, disjointed hitbox makes this move uncontestable for much of the cast without hitting it out of its 16 frames of startup or attacking from a much more vertical angle to blindspot it.
Deals 2K damage on its own, gives plenty of time to confirm on hit, and as an ender leads to the character's best knockdown for a plethora of oki options, most notably the ability to set 421B/C while retaining ample frame advantage.
|
|
Toggle Hitboxes Toggle Hitboxes
|
Crouching Normals
|
|
| Damage
|
Red Damage
|
Proration
|
Cancel
|
Guard
|
| 200*3 (495)
|
(241)
|
78% (O)
|
-SE-, -N-, -SP-, -EX-, (J)
|
L
|
| First Active
|
Active
|
Recovery
|
Frame Adv
|
Circuit
|
Invuln
|
| 6
|
7
|
10
|
-1
|
2.0%*3 (6.0%)
|
-
|
|
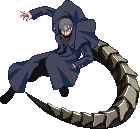
Snakes. Hits low. One of the most unique 2A's, hitting three times with 7 active frames and has a very large hitbox even for a frame 6 jab. Being slower than average makes it a little less reliable for mashing out of pressure where other characters would be able to but its reach makes it more effective than others for contesting at a distance in exchange.
Due to 2A's high reach it works deceptively well as an antiair especially with Nero's height and other grounded and rising options often encouraging the opponent to press their jumpins early. Also usually Nero's best antiair for catching cross up buttons trying to hit 2C and 5[C] from behind.
The recovery can still be cancelled on whiff but only after the third hit just as on block/hit making it less useful for traditional rebeat pressure than 5A and also requires different timing from other 2A's in order to run heat OS.
|
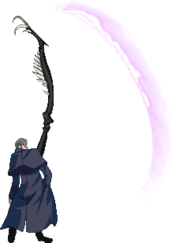
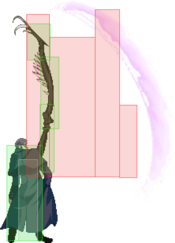
|
Toggle Hitboxes Toggle Hitboxes
|
|
|
| Damage
|
Red Damage
|
Proration
|
Cancel
|
Guard
|
| 350*4 (911)
|
(507)
|
65% (O)
|
N, SP, EX (J)
|
L (1), LH (2-4)
|
| First Active
|
Active
|
Recovery
|
Frame Adv
|
Circuit
|
Invuln
|
| 9
|
12
|
15
|
-2
|
4.0%*4 (16.0%)
|
-
|
|
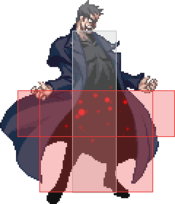
Centipede. An unconventional sweep, hitting low and sweeping on the first hit and then extending into three more mid hitting longer hitboxes. The long active frames on this move make it good for punishing techs and timing meaties with ease as well as an important tool for converting most grounded hits. Should almost always be cancelled on the first hit in combos outside some advanced routes in the corner for height and scaling reasons.
While technically a comfortable -2 on block 2B when not used close to the opponent has a tendency to push back enough for the final hit or two to whiff making it important to cancel it during its early hits in these cases. When used up-close however it does have a very long cancel window extending through the entire recovery.
|
|
Toggle Hitboxes Toggle Hitboxes
|
|
|
| 2C
|
Damage
|
Red Damage
|
Proration
|
Cancel
|
Guard
|
| 900
|
490
|
80% (O)
|
N, SP, EX (J)
|
LH
|
| First Active
|
Active
|
Recovery
|
Frame Adv
|
Circuit
|
Invuln
|
| 11
|
8
|
20
|
-10
|
9.0%
|
-
|
|
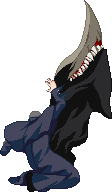
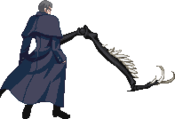
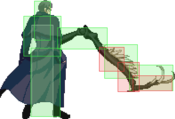
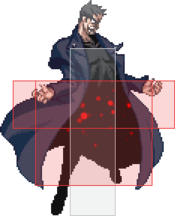
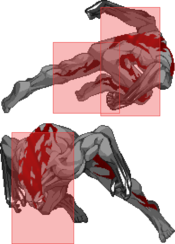
Horn. Hits mid. An active and high hitting antiair that synergizes very well with 5[C], covering the vertical space where it is vulnerable to attack. 2C can also be half charged to stuff air stalls where fully charging it would take too long. While a strong vertical antiair, it does extend a fairly high hurtbox and has a long recovery making it a little more punishable than Nero's other antiairs when misused. Also useful for catching people jumping away to avoid a summon after hitting Nero.
|
| 2[C]
|
Damage
|
Red Damage
|
Proration
|
Cancel
|
Guard
|
| 1600
|
1029
|
90% (O)
|
N, SP, EX (J)
|
LH
|
| First Active
|
Active
|
Recovery
|
Frame Adv
|
Circuit
|
Invuln
|
| 25
|
8
|
20
|
-10
|
12.0%
|
-
|
|
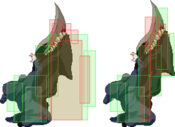
Charged horn. Better hitbox and damage but too slow to see much use an antiair. Mostly used in some advanced combos in the corner thanks to significantly increased untech time on tech and can also be used as an occasional stagger in pressure. Pushes back significantly on block.
|
|
Toggle Hitboxes Toggle Hitboxes
|
Jumping Normals
|
|
| Damage
|
Red Damage
|
Proration
|
Cancel
|
Guard
|
| 350
|
196
|
78% (O)
|
SE, N, J
|
LHA
|
| First Active
|
Active
|
Recovery
|
Frame Adv
|
Circuit
|
Invuln
|
| 7
|
4
|
10
|
-
|
3.2%
|
-
|
|
Nail. Hits mid. Very large for a j.A and hits at a downward angle. A good low commitment scouting and rising antiair move thanks to retaining air options on whiff. Can work as a mixup tool out of IAD followed by land 2A thanks to only hitting once and having lower hitstop than Nero's other air normals. Should also be reverse beated into when using j.B as an air to ground from higher up.
|
|
Toggle Hitboxes Toggle Hitboxes
|
|
|
| Damage
|
Red Damage
|
Proration
|
Cancel
|
Guard
|
| 600, 500 (987)
|
(521)
|
80% (O)
|
N, J
|
HA
|
| First Active
|
Active
|
Recovery
|
Frame Adv
|
Circuit
|
Invuln
|
| 8
|
5
|
-
|
-
|
6.65%, 7.0% (13.65%)
|
-
|
|
Tentacle. Hits high twice. Very good and hard to contest move both in neutral to cover both horizontal and landing space and on offense as a double overhead hitting jumpin. Even has a slight crossup hitbox forcing the opponent to be much more precise when getting behind Nero than most other characters. Despite all of j.B's strengths its second hitbox cannot be cancelled even on hit limiting its conversion ability at its hardest to contest angles.
|
|
Toggle Hitboxes Toggle Hitboxes
|
|
|
| Damage
|
Red Damage
|
Proration
|
Cancel
|
Guard
|
| 300*3, 700
|
196*3, 392
|
100%, 90% (M)
|
N, J
|
HA
|
| First Active
|
Active
|
Recovery
|
Frame Adv
|
Circuit
|
Invuln
|
| 9
|
10
|
-
|
-
|
1.0%, 2.0%, 4.0%*2 (11.0%)
|
-
|
|
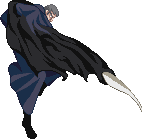
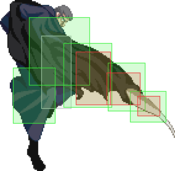
Nightmare. Hits high four times. With 10 active frames, unrivalled horizontal reach, and providing a wallslam on the final hit, j.C is an important preemptive walling tool and option to cover horizontal space when rising and an essential combo tool for corner carry and ensures any hit Nero gets leads to significant frame advantage.
Despite its reach and disjoint at the tip j.C has no vertical disjoint and extends a large hurtbox before active making it vulnerable to getting stuffed sometimes by preemptive normals from multiple angles.
Also has use on the offensive as easy coverage against forward air tech and can safejump shield counter when done out of an IAD or serve as a triple overhead from slightly higher air dashes.
|
|
Toggle Hitboxes Toggle Hitboxes
|
Command Normals
|
|
| Damage
|
Red Damage
|
Proration
|
Cancel
|
Guard
|
| 800, 600 (1106)
|
(689)
|
60% (O)
|
(N), (SP), (EX), (J)
|
LH, LHA
|
| First Active
|
Active
|
Recovery
|
Frame Adv
|
Circuit
|
Invuln
|
| 10
|
7 (6) 4
|
18
|
-17, -4
|
8.0%, 6.0% (14.0%)
|
-
|
|
Mantis. The second hit is air-blockable and whiffs on all crouching opponents (as well as standing Len, WLen, Miyako, and Necos) if the first hit is blocked as well as not being cancellable on block for either hit.
Despite these flaws, 4C sees an important use as a distanced tool for checking the opponent's movement, stopping predictable dash ins and discouraging both dash and jump in pressure when pushed out. Also an important tool for confirming far hits where 2B(1) doesn't reach such as off of max range 2A. Has a small blind spot right in front of Nero.
While safe on block against most of the cast, some characters can straight up punish it and that number increases further the closer it is used.
The following is a (non-exhaustive) list of punishes to be aware of when using 4C:
Meterless Punishes: 			Arc Drive Punishes:	Cannot Punish:
Moons	Character	Punishes	Character		Moons	Character
HF	Hime		236B		Aoko			CH	V. Sion
CF	Nanaya		f.214B		Kouma			F	Wara
CH	Sion		214A		Roa			CF	Warc
F	V. Sion		22C		Hisui/HisuiMaids	C	Satsuki
H	Roa		236A		Akiha			CHF	Len
CHF	KohaMaids	Most Assists	Vaki			H	W. Len
CF	Mech		236A		Neco Arc
C	KohaMech	421A
H	KohaMech	623A/B		150 Meter Punishes:
F	KohaMech	623A		H-Warc	624C
CHF	Tohno		Microdash 2C

100 Meter Punishes:			Can Only Punish Poorly Spaced 4C:
Moons	Character	Punishes	Moons	Character	Punishes
F	Aoko		624C		HF	Kouma		236
CHF	Hime		tk.236C		HF	Miyako		236C
H	Nanaya		623C		CHF	Ries		AD
C	Miyako		236C		CH	Wara		5C
CHF	Ciel		623C		CHF	Koha/KohaMaids	2C
CH	Ciel		236C		CH	Arcueid		236C
CHF	Sion		236C		HF	Arcueid		421C
CH	Roa		236C		CHF	P. Ciel		236A
H	Mech		623C		H	Satsuki		22B/C
CHF	Seifuku		623C		CH	Ryougi		623A
F	Seifuku		214C		F	W. Len		236A
F	Satsuki		214C		C	Nero		624C
CHF	Ryougi		214C/22C	CHF	Nero		4C
C	W. Len		421C		CHF	NAC		3C
F	NecoMech	623C		C	NecoMech	623C
|
|
Toggle Hitboxes Toggle Hitboxes
|
Universal Mechanics
|
|
| Damage
|
Red Damage
|
Proration
|
Cancel
|
Guard
|
| 200*9 (1572)
|
(588)
|
100%
|
-
|
U
|
| First Active
|
Active
|
Recovery
|
Frame Adv
|
Circuit
|
Invuln
|
| 3
|
1
|
22
|
-
|
0.0%
|
-
|
|
Nero lifts the opponent up and lets his pet birds do some damage. Launches the opponent in an air-tech state. Comboable if they choose not to tech or with certain summons out when timed right.
|
|
|
|
| Damage
|
Red Damage
|
Proration
|
Cancel
|
Guard
|
| 1200 (1056)
|
517
|
30%
|
-
|
U
|
| First Active
|
Active
|
Recovery
|
Frame Adv
|
Circuit
|
Invuln
|
| 2
|
1
|
12
|
-
|
10.0%
|
-
|
|
Nero grabs and punches them to the ground for a bounce. OTG-able hard knockdown if done as a combo ender. Nero recovers to slowly to hit OTG here by himself, meaning your only pickup is a deer hit. Causes you to regain your air dash if done raw if it was expended allowing corner carry from anywhere on the screen if not done from too high to combo.
|
|
|
|
| Bunker
|
Damage
|
Red Damage
|
Proration
|
Cancel
|
Guard
|
| 500
|
196
|
100%
|
-
|
LHA
|
| First Active
|
Active
|
Recovery
|
Frame Adv
|
Circuit
|
Invuln
|
| 26
|
4
|
19
|
-5
|
0.0%
(-50.0% in blockstun)
|
Clash 1-10
|
| (Clash)
|
Damage
|
Red Damage
|
Proration
|
Cancel
|
Guard
|
| 500
|
196
|
100%
|
-
|
LHA
|
| First Active
|
Active
|
Recovery
|
Frame Adv
|
Circuit
|
Invuln
|
| 8
|
4
|
19
|
-5
|
0.0%/-50.0%
|
Strike 1-7
|
|
Nero steps to the side and throws some shade. Costs 50.0% meter during blockstun.
|
|
Toggle Hitboxes Toggle Hitboxes
|
|
|
| Damage
|
Red Damage
|
Proration
|
Cancel
|
Guard
|
| 100
|
0
|
100%
|
-
|
U
|
| First Active
|
Active
|
Recovery
|
Frame Adv
|
Circuit
|
Invuln
|
| 20
|
3
|
25
|
-
|
-100.0% (min)
|
Full 1-22
|
|
Wide hitbox but only covers less than 2/3rds of Nero's height.
|
|
Toggle Hitboxes Toggle Hitboxes
|
|
|
| Ground
|
Damage
|
Red Damage
|
Proration
|
Cancel
|
Guard
|
| 100
|
0
|
100%
|
-
|
U
|
| First Active
|
Active
|
Recovery
|
Frame Adv
|
Circuit
|
Invuln
|
| 11
|
10
|
20
|
-
|
removes all
|
Full 1-39
|
| Air
|
Damage
|
Red Damage
|
Proration
|
Cancel
|
Guard
|
| 100
|
0
|
100%
|
-
|
U
|
| First Active
|
Active
|
Recovery
|
Frame Adv
|
Circuit
|
Invuln
|
| 12
|
10
|
15
|
-
|
removes all
|
Strike 1-30
|
|
Universal burst mechanic. Unlike Crescent/Full Heat activation, the hitbox and frame data doesn't vary between characters. However, you can be thrown out of this move if you input it in the air.
|
|
Toggle Hitboxes Toggle Hitboxes
|
Special Moves
|
|
| Damage
|
Red Damage
|
Proration
|
Cancel
|
Guard
|
| -
|
-
|
-
|
-
|
-
|
| First Active
|
Active
|
Recovery
|
Frame Adv
|
Circuit
|
Invuln
|
| -
|
-
|
56
|
-
|
-
|
Full 1-53
|
|
Special forward dash that teleports Nero and is invincible from frame 1.
|
|
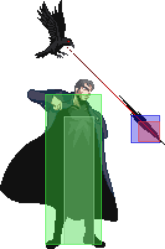
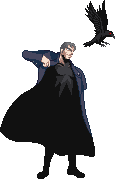
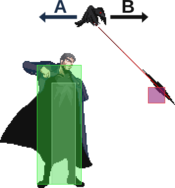
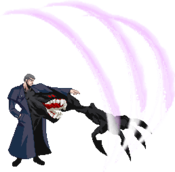
Straightforward projectile. Straightforward projectile. Delayed birdie. Delayed birdie. Insert "murder of crows" joke here. Insert "murder of crows" joke here.
|
| A
|
Damage
|
Red Damage
|
Proration
|
Cancel
|
Guard
|
| 800
|
343
|
100%
|
-
|
LHA
|
| First Active
|
Active
|
Recovery
|
Frame Adv
|
Circuit
|
Invuln
|
| 9
|
X
|
31
|
-3
|
8.0%
|
-
|
|
A crow will travel quickly in a horizontal line. This move has amazing speed but a terrible recovery. This crow may be run underneath by some characters. ~+11 on grounded CH, letting you link into 5A/2A/4C
|
| B
|
Damage
|
Red Damage
|
Proration
|
Cancel
|
Guard
|
| 800
|
245
|
50% (O)
|
-
|
LHA
|
| First Active
|
Active
|
Recovery
|
Frame Adv
|
Circuit
|
Invuln
|
| 122
|
19
|
42
|
-
|
8.0%
|
-
|
|
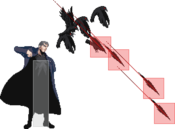
A crow will float above Nero and descend at a 45 degree angle after a bit. This move will not hit until its descent.
|
| EX
|
Damage
|
Red Damage
|
Proration
|
Cancel
|
Guard
|
| 210*13 (1785)
|
(823)
|
90% (O)
|
-
|
LHA
|
| First Active
|
Active
|
Recovery
|
Frame Adv
|
Circuit
|
Invuln
|
| 3+44
|
46
|
3+14
|
-
|
-100.0%
|
Full 1-3
|
|
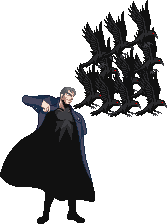
Costs 100% Meter. Summons many 236B crows. Recovery is deceptively fast and is a great tool to for all sorts of situations, such as to keep opponents in place, create distance, force a more restricted approach, or to keep them afraid while you try to throw them.
|
|
Toggle Hitboxes Toggle Hitboxes
|
|
|
| A/B
|
Damage
|
Red Damage
|
Proration
|
Cancel
|
Guard
|
| 800
|
245
|
50%
|
-
|
LHA
|
| First Active
|
Active
|
Recovery
|
Frame Adv
|
Circuit
|
Invuln
|
| 72 ~ 73
|
16
|
42
|
-
|
8.0%
|
-
|
|
Negative edge. A crow will float above Nero and very slowly float backwards (A) or forwards (B) from there until you release the corresponding button, at which point it will descend at a 45 degree angle. Goes away on hit if not released. After setting the crow you can hold any button except D to keep it up, letting you set with 623A, press and hold B or C, and release A so you can still use throw (A+D) for instance.
|
| C
|
Damage
|
Red Damage
|
Proration
|
Cancel
|
Guard
|
| 800
|
245
|
50%
|
-
|
LHA
|
| First Active
|
Active
|
Recovery
|
Frame Adv
|
Circuit
|
Invuln
|
| 289
|
12
|
54
|
-
|
8.0%
|
-
|
|
A crow will float in the air sloppily following the enemy's movements for a few seconds before finally attacking at a 45° angle. Not an EX. Goes away on hit.
|
|
Toggle Hitboxes Toggle Hitboxes
|
|
|
| A
|
Damage
|
Red Damage
|
Proration
|
Cancel
|
Guard
|
| 400, 160*10 (1725)
|
(671)
|
100%
|
-
|
LHA
|
| First Active
|
Active
|
Recovery
|
Frame Adv
|
Circuit
|
Invuln
|
| 68 (min)
|
3
|
39
|
-
|
8.0%, 0.6%*10 (14.0%)
|
-
|
|
A snake will travel slowly across the ground. This snake is controlled by negative edge: releasing the A button will "activate" it. Unlike 623X, you cannot hold 214A up while holding another button down. Upon being hit the opponent will be chewed and then dropped from the top of the screen in a ground-tech state. You can hit the opponent with other attacks while they are being chewed, but you cannot use special moves, command normals, airdash, or super jump for the duration of the animation.
While normally you aren't allowed to summon another snake while one is already out, inputting another 214X immediately after the first will enable you to summon a second snake, including 2 of the same type. If done with two 214A snakes, releasing A will activate both simultaneously.
|
| B
|
Damage
|
Red Damage
|
Proration
|
Cancel
|
Guard
|
| 1000
|
392
|
87% (O)
|
-
|
LHA
|
| First Active
|
Active
|
Recovery
|
Frame Adv
|
Circuit
|
Invuln
|
| 56 (min)
|
3
|
34
|
-
|
11.0%
|
-
|
|
A snake will travel quickly across the ground. This snake automatically activates when it is near an opponent. Air techable on hit, untechable on counter hit.
|
| EX
|
Damage
|
Red Damage
|
Proration
|
Cancel
|
Guard
|
| 1500
|
1176
|
75% (O)
|
-
|
LH
|
| First Active
|
Active
|
Recovery
|
Frame Adv
|
Circuit
|
Invuln
|
| 7+29
|
3
|
2
|
23
|
-100.0%
|
-
|
|
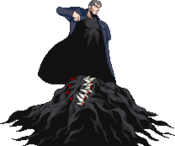
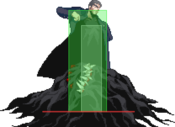
Costs 100% Meter. Summons a mouth that covers most of the screen. Is air unblockable but easily shielded. Tracks fullscreen, making it useful for some long range CH pickups such as far 236A air hit. Sometimes used to cover the screen during deer oki to obscure a mixup.
|
|
Toggle Hitboxes Toggle Hitboxes
|
|
|
| A
|
Damage
|
Red Damage
|
Proration
|
Cancel
|
Guard
|
| 600
|
392
|
75% (O)
|
-
|
LHA
|
| First Active
|
Active
|
Recovery
|
Frame Adv
|
Circuit
|
Invuln
|
| 37
|
10
|
44
|
20-22
|
5.0%
|
-
|
|
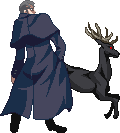
A single deer will jump towards the opponent. There is a blind spot directly in front of Nero when summoned. Useful for surprising opponents who try to jump or airdash behind you. All versions of deer can OTG relaunch and don't require a jump cancel to confirm into an air combo.
|
| B
|
Damage
|
Red Damage
|
Proration
|
Cancel
|
Guard
|
| 800*2
|
392*2
|
75% (O)
|
-
|
LHA
|
| First Active
|
Active
|
Recovery
|
Frame Adv
|
Circuit
|
Invuln
|
| 146
|
4 (61) 4
|
60
|
-
|
8.0%*2 (16.0%)
|
-
|
|
A single deer will take its time jumping towards the opponent twice. This deer takes a while to summon but is useful when you can get it out.
|
| EX
|
Damage
|
Red Damage
|
Proration
|
Cancel
|
Guard
|
| 1500*3
|
980*3
|
75% (O)
|
-
|
LHA
|
| First Active
|
Active
|
Recovery
|
Frame Adv
|
Circuit
|
Invuln
|
| 2+107
|
4 (41) 4 (41) 4
|
2+50
|
-
|
-100.0%
|
Full 1-5
|
|
Costs 100% meter. Summons a deer that will jump towards the opponent three times at a normal speed. The startup invuln ensures this version of deer cannot be stuffed, giving it fringe use as a defensive option
|
|
Toggle Hitboxes Toggle Hitboxes
|
|
|
| Damage
|
Red Damage
|
Proration
|
Cancel
|
Guard
|
| 1000*3 (2675)
|
(1835)
|
100% (O)
|
-
|
LHA
|
| First Active
|
Active
|
Recovery
|
Frame Adv
|
Circuit
|
Invuln
|
| 1+7
|
7
|
36
|
-21
|
-100.0%
|
Full 1-8
|
|
Phantom Hand. Costs 100% meter. Can be used as a reversal, but leaves you in a counter hit state till the move fully recovers. Can be hard to punish due to its range and pushback, but because of its significant post-freeze startup opponents can whiff cancel shield if they meatied with an A normal, or jump and airblock if they didn't commit for an easier punish. Mainly used in combos near the corner to secure a 5[C] knockdown or to tack on a little more damage at the end of a 5[C] combo to secure a kill.
|
|
Toggle Hitboxes Toggle Hitboxes
|
Arc Drive
|
|
| Damage
|
Red Damage
|
Proration
|
Cancel
|
Guard
|
| 3500
|
2254
|
100%
|
-
|
U
|
| First Active
|
Active
|
Recovery
|
Frame Adv
|
Circuit
|
Invuln
|
| 2+60
|
8
|
81
|
-
|
removes all
|
Full
|
|
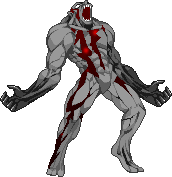
Nero transforms and charges forward. Lengthy startup, but unblockable, unshieldable, and unpunishable.
|
|
Toggle Hitboxes Toggle Hitboxes
|
Another Arc Drive
|
|
| Damage
|
Red Damage
|
Proration
|
Cancel
|
Guard
|
| 3000*2 (5350)
|
(3338)
|
100%
|
-
|
U
|
| First Active
|
Active
|
Recovery
|
Frame Adv
|
Circuit
|
Invuln
|
| 2+40
|
X (78) X
|
86
|
-
|
removes all
|
Full
|
|
Improved version. Nero charges toward to edge of the screen, then charges back to his original position. Faster startup than Arc Drive. Second hit might not connect depending on the situation.
|
|
Toggle Hitboxes Toggle Hitboxes
|
Last Arc
|
|
| Damage
|
Red Damage
|
Proration
|
Cancel
|
Guard
|
| 700*15 (3029 ~ 6145)
|
(2526 ~ 5090)
|
50% + 50% * remaining BH time
|
-
|
U
|
| First Active
|
Active
|
Recovery
|
Frame Adv
|
Circuit
|
Invuln
|
| 1+7
|
100
|
39
|
-
|
removes all
|
Full
|
|
Nero fires an unblockable laser. Very active but can be low profiled or avoided by getting behind Nero.
|
|
Toggle Hitboxes Toggle Hitboxes
|
Notable Players
| Name |
Color
|
Region |
Common Venues |
Status |
Details
|
Alis
(Alis#7576) |

|
North America |
Netplay |
Inactive |
Found in main Melty server. Mid-level player that is slightly newer than the rest listed with a lot of footage often on color 34. Currently more focused on playing C-Arc.
|
amirousu
(アミロース) |

|
Japan |
KorewaMelty |
Inactive |
Old school player with good frame sense when running his offense and tailoring play to specific matchups in the footage available.
|
(The) Burning Moon
(Web Booby Cop#4605) |

|
Europe |
Next Level,
Netplay |
Active |
Found in every Melty server. Slightly inconsistent in footage but has more than anyone else on the character outside arcades and has had more plentiful successful showings at in-person events than any other western Nero player in Current Code. Doesn't compete much anymore but has a lot to say about the character if asked on discord, particularly regarding matchup specifics and Nero's deeper technical aspects and will play most regions if asked. Most footage is NA but currently european. Often tailors play to exploiting player habits in footage moreso than maintaining a formalized gameplan.
|
Canceris
(Canceris#7506) |

|
South America |
Netplay |
Active |
Found in main Melty server, Melty Blood Community server, and Melty Sud. Longest time player on PC that's still active with a lot of experience under his belt. Shows off strong use of 2A, 2C, and rising j.A in antiair situations and is one of the main players in the west to study for low commitment play in neutral.
|
hakujun
(白純) |

|
Japan |
Play Spot BIG ONE 2nd |
Active |
Currently the most active Nero player in Japan, has footage against more of the more recent JP playerbase than anyone else listed and shows off a diverse array of things the character can do such as certain fuzzy setups.
|
Lain
(Awong102300#9981) |

|
North America |
Netplay |
Active |
Found in main Melty server and Melty Blood Community server. The most "basic" Nero player in NA and one of the oldest, emphasizing the frontmost strengths of the character.
|
| LuckyStar |

|
Japan |
A-cho |
Inactive |
The original MBAACC shark. Often goes for unorthodox and stylish plays but is more than competent when he needs to be. Has more footage than any other Nero player against opponents of all skill levels. Fond of not blocking and random selects palette.
|
| MaSa |

|
Japan |
Play Spot BIG ONE 2nd |
Active |
The modern diamond standard for Nero with more consistent results than any other player for the character. Shows off clean and oppressive neutral control with excellent game sense in summoning dynamics into tight and textbook offense when the opponent is in position to get setplayed to death off one or two open ups in addition to a nigh unparalleled conversion game in consistency.
|
nekuromanshi-
(ネクロマンシー) |

|
Japan |
A-cho |
Inactive |
One of the most dominating, high winrate Nero players in the footage he has. One of the few Neros seen using heat OS.
|
paddu
(paddu#7497) |

|
Europe |
Netplay |
Inactive |
Found in main Melty server and Melty Blood Community server. Technical and gameplan-oriented.
|
Receita Federal
(UA Receita Federal#3351) |

|
Brazil |
Netplay |
Active |
Found in main Melty server and Melty Brasil. Secondaries Nero and often picks him in difficult matchups for his main.
|
rondo
(ロンド) |

|
Japan |
A-cho,
KorewaMelty,
Play Spot BIG ONE 2nd,
Netplay |
Active |
One of the few JP Neros who primarily netplays. Plays a more committal game at points where stealing frames with summons may be more risky and has a generally less "ringwide-esque" playstyle.
|
| SAT |

|
Japan |
A-cho,
KorewaMelty |
Inactive |
The original diamond standard for Nero. Some footage is a little dated but also contains some forgotten gems of Nero play.
|
toku
(徳) |

|
Japan |
A-cho,
KorewaMelty,
Play Spot BIG ONE 2nd,
Netplay |
Active |
Lab monster who posts a lot of advanced tech to his twitter. By far the most technical and stylish Nero available, going for combos and setups you won't see anywhere else. Big not blocking enjoyer.
c nero poronga
|
yutori
(ゆとり) |

|
Japan |
Play Spot BIG ONE 2nd |
Active |
Plays default palette often too.
|
MBAACC Navigation
