Melty Blood/MBAACC/Powered Ciel/Crescent Moon: Difference between revisions
m (added related link to Melty Bits) |
|||
| Line 1: | Line 1: | ||
=Combos= | =Combos= | ||
'''Be sure to check this article about C-PCiel:''' https://drunkardshade.com/2015/10/06/melty-bits-c-powerd-ciel/ | |||
'''Normal Combos''' | '''Normal Combos''' | ||
*First normal midscreen combos, the corner combos, then character specific combos | *First normal midscreen combos, the corner combos, then character specific combos | ||
Revision as of 03:53, 23 September 2016
Combos
Be sure to check this article about C-PCiel: https://drunkardshade.com/2015/10/06/melty-bits-c-powerd-ciel/
Normal Combos
- First normal midscreen combos, the corner combos, then character specific combos
- explanation
5C, 6C, 3C, 2C
- Basic combo, you can also start from 5B.
2A, 5B, 2B, 5C, 3C, 6C, 6B, 2C, 3C, 6C, 6B, 2C, 3C, 6C, 4C, jc, j.236A~A
- Very damaging BnB
2A, 5B, 2B, 5C, 3C, 6C, 6B, 2C, 3C, 6C, 4C, jc, j.236A~A, land > 236B~B, 214[A]
- You can see both combos at work in this video http://www.youtube.com/watch?v=TtjyJt2xw84 (this video made from arcade)
Here goes the video from PC version vith various combos - http://www.youtube.com/watch?v=3503jEOCV_c (note that you need to press not 2C after first 5C, but 3C instead in the first combo)
5B, 2B, 5C, 6C, 236 B~C, 3C, 5C, J.C, 236AA
Metered Combos
- ...
5C, 6C, 3C, 2C, 236C
- Deals a decent amount on damage, may whiff on some small characters.
Strategy
Do what you need to do to extrapolate on the character. Here are example categories below.
Crescent
Spacing
Pressure
Move Descriptions
Normal Moves
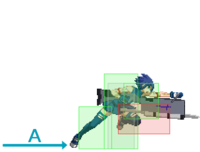
| 2A
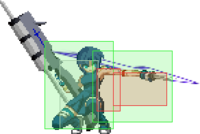
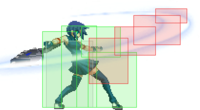
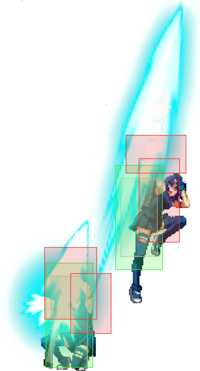
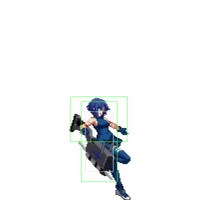
Lookit dat fuckin hitbox. As you can tell this move is quite bad and shouldn't be used unless you're absolutely certain you NEED the extra speed. It has 5 frames of startup so don't get any stupid ideas about poking unless you can REALLY see a big hole. If you try to throw this around like you're playing Nanaya or something you will get your shit pushed in. You have far better choices for poking. |
| 5A
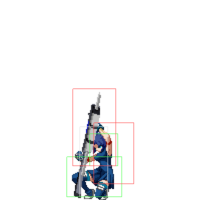
Pretty standard 5a. Some characters might have a use for this kind of 5a, but in C-Pciel's case this move is only 1f faster than 5b which is like the ultimate god-king of poking with this character. Don't ever press this button.
|
| 2B
Bog-standard low poke. Again, while some characters might have a use for this move, C-Pciel has 5b which has the same startup as this move, covers the same area (and more) and doesn't have vulnerable startup like this move does. Pure combo filler.
|
| 5B
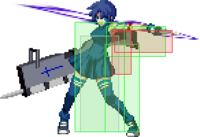
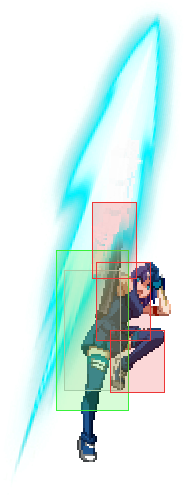
Oh man, here it is. Look at that goddamn hitbox. That massive wall of hurtbox appears on frame 8 and lasts for 3 frames. This is your short-range poke of choice, due to being C-pciel's only non-C button move that doesn't present a massive vulnerable hitbox before its active frames. In layman's terms, you cant poke at this move's hitbox until it's already active. If you space yourself properly it can even make for a workable antiair. A core part of your moveset. Experiment with this move to get yourself a proper feel for how it works and what you can do with it.
|
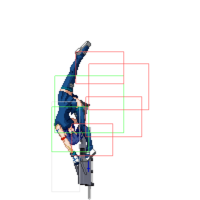
| 2C
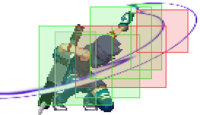
A great little move. The first kick comes out on the 10th frame which would make it a reasonable antiair if you didn't have a dp with 4f startup. If you're feeling funky you can try to AA with this, being a 2-hit move you will get all the time in the world to hitconfirm it into 4c. Throwing this into your pressure strings will mindfuck the opponent a bit because of how weird it looks and the delay between the hits. This move is great for picking up grounded hits which is how the 6b loop works.
|
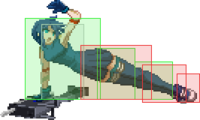
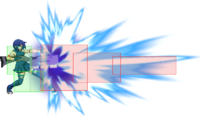
| 5C
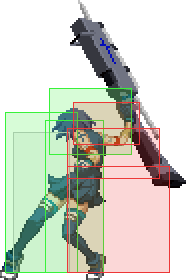
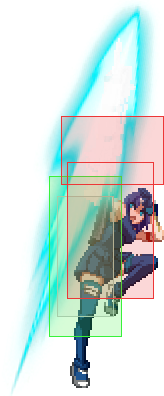
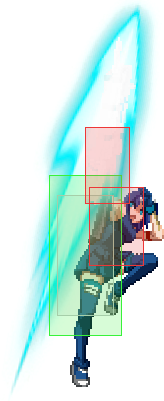
The sprite says it all, really. This is a love/hate move, you'll love slapping people out of their IADs using this and collecting 5k damage off the counterhit, and you'll froth at the mouth with rage when it whiffs on a croucher for the millionth time. The smaller crouching chars like len and kohaku will give you the most grief when trying to poke grounded opponents with this. With 20f recovery, you don't really want to whiff this, but it's not as bad on recovery you think it is. 11f startup may give you the temptation to use this over 5b at closerange due to only being 3f slower, but resist the temptation. What's crucial to note is that the very tip of this move will still combo into 236A, giving c-pciel by far the longest range combo into hard knockdown achievable in the entire game. Be ready to followup if you're poking long range targets with this. Charging it doubles the startup but moves you forward a large amount. It also creates a bigass green vulnerable hitbox in front of you before the active frames so be very cautious. Charged 5[C] will combo into 236[A] at any range but requires awkward timing; in the corner it reqires them to be high enough for the first hit of 236[A] to whiff.
|
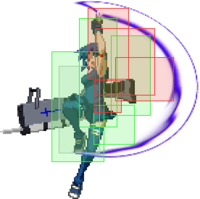
| 6B
Hard knockdown vs any airborne target. Crucial part of the 6b loop. Has a nice big meaty hurtbox but its' slower startup makes it a poor choice for poking when you could just be pressing 5b instead. One of your main uses of this move outside of the 6b loop is to catch air counterhits, 6b 3c will give you a brainless combo starter vs any airborne target. On charge, becomes a 24f startup overhead vs ground targets and will groundbounce airborne targets. You can half-charge this move into 3c for a basic high/low mixup.
|
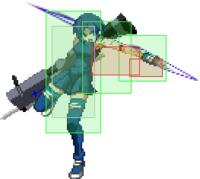
| 4C
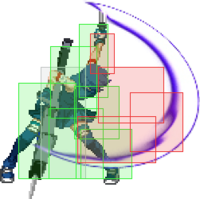
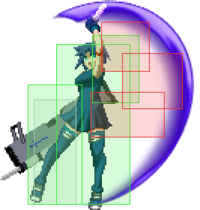
This move is kind of like 2c, it makes for a servicable antiair if you struggle to get your dps out. It puts out a vulnerable box 2f before active and the hitbox isn't even that much better than 5b for ground poking, despite being 4f slower. This move is even slower than your huge enormous 5c which is just retarded. You shouldn't really be ever pressing this button but for some reason it seems to generate air CHs like crazy. YMMV.
|
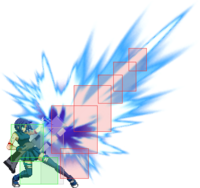
| 6C
Has some low invulnerability from frame 1 and full low invulnerability from frame 5. If you're VS a nanaya or tohno who love to press their sweeps a lot in neutral you can perhaps gimmick them with this. This move combos from 5c at all but the very edges of 5c's hitbox, but if you're working at extreme ranges then timing your 236B~C becomes extremely difficult and you should consider 236A instead. If you're going to be poking with this, you need to be good at adapting your combos since both of c-pciel's bnbs involve comboing into this move. You can either go back to 5c and then 236B~C, which is going to be fairly hard, or start a 6b loop and replace 6c with 5c for the first loop, with no timing adjustment required. If you're unconfident with either method then don't forget you always have the "easy option" of going into 236A and guaranteeing yourself that hard knockdown+corner carry. |
| 3C
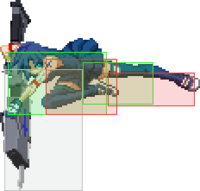
Your sweep is 3c. Yes, this will piss you off a lot until you get used to it. But it's worth the effort since this is one of c-pciel's best normals. It's also your only good low move so you NEED to work a bit of this into your game to not get blown up for free by every shield spamming faggot with half a brain stem. If you hit this naked and want to pick up again, 2c or 5[C] works but you need to be FAST. If you're not some kind of wizard, cut your losses and press 236B~B to get them in the corner.
|
| JA
This move is fucking horrible but you're gonna have to use it cause there's nothing better when you need a jumping normal RIGHT NOW. 4f startup means it's fast, which is the only good thing I can say about it.
|
| JB
The only good thing I can say about this move is that it's 3f faster than j.C. Which still probably isn't a good enough reason to use it. Press j.C instead faggot.
|
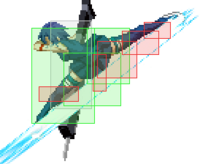
| JC
AW SHIT HERE WE GO. This move, while just above-average in the context of this game's jumping normals, is fucking incredible in the context of c-pciel's otherwise shitawful selection. You can confidently go into air poking wars vs at least half the cast with this thing. It's pertinent to note that this has the same startup as j.236a, which could be a better choice in many situations, especially whenever you're finding yourself below someone. This also has a crossup hitbox so you can do lots of fun bullshit that makes people extremely frustrated. Just remember, this is an extremely poor jumpin. It WORKS, but it isn't good and it will let you down more often than not if you try to jump at most characters with it. Don't even THINK about jumping at someone like h/f-kouma with this move, what the fuck is wrong with you.
|
Special Moves
Name 「JP name」 - 236ABC
|
「」 - 623ABC
|
「」 - 236ABC(airborne)
|
「」 - 214ABC
|
| 「」 - 214ABC(Airborne)
|
「」 - 421ABC
|
「」 - J22ABC
|
「」 - 426ABC
|
「」 - BC
|
Arc Drive
「」
|
Another Arc Drive
「」
|
Last Arc
「」
|
