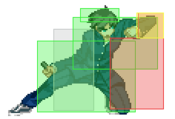
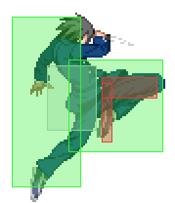
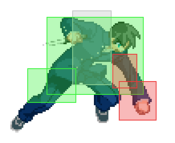
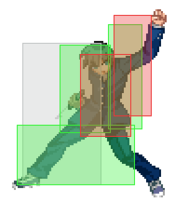
|
|
| Line 58: |
Line 58: |
|
| |
|
| ===Pressure=== | | ===Pressure=== |
| While the unblockable property of Tohno's AD is only in effect when you're close enough, this could situationally serve as a guaranteed unblockable. Though all your meter will be drained for it, a guaranteed 3K unblockable setup given the right setup and spacing. Granted you're F-Moon, you can easily make an inescapable, airtight frametrap for it too. Even better if you can IH into it and get all your red health back beforehand. Not like you'll actually be using the meter for much else.
| | |
| F-Tohno's pressure game is meant to play around hit excellent throw range thanks to his dash. His 22[A] overhead is very slow and only grants him a combo if the opponent is cornered. | | F-Tohno's pressure game is meant to play around hit excellent throw range thanks to his dash. His 22[A] overhead is very slow and only grants him a combo if the opponent is cornered. |
| Your main pressure tool is his low-hitting 2A,which has excellent statistics that are even further elevated by his dash.If performed at the earliest frame after his dash,his 2A into dash 2A pressure reset is an eight frame gap which forces your opponent to take risks with either shielding,pressing buttons or attempting to jump out. | | Your main pressure tool is his low-hitting 2A,which has excellent statistics that are even further elevated by his dash.If performed at the earliest frame after his dash,his 2A into dash 2A pressure reset is an eight frame gap which forces your opponent to take risks with either shielding,pressing buttons or attempting to jump out. |
Character Page Progress
This page is mostly complete, consider joining as an editor to help finish it up. Please update this character's roadmap page when one of the editing goals have been reached. When no main goals are left, please remove this section from this page.
| In Progress |
To-do
|
- Combos:
- Main: Add meter given numbers and video links to the pre-existing combos.
- Move Descriptions:
- Main: Expand upon to the shorter descriptions, cite their uses, add captions where helpful, etc.
|
- (Additional Ressources/Players to watch/ask)
- (Add any external links to ressources such as video guides or articles.)
- (If you know any players in particular that can be helpful for learning this character, please add them with, if possible a way to contact them (such as a Discord handle) and a name that can be searched in the match video database.)
|
Additional Resources
Match Video Database
Players to watch/ask
JP:
tomo (トモ)
- Text goes here after asterisk
NA:
- Text goes here after asterisk
- Text goes here after asterisk
Overview
Full Moon Shiki Tohno is a midrange endurance fighter with a strong defensive and intercept game. His playstyle focuses around choosing the right tool for the job, whether spacing with his dagger, intercepting with sliding and lunging attacks, or avoiding strikes with his invincible backdash. He can also use his large health pool (F.Shiki Tohno is among the hardiest fighters in the game.) and his high base damage to trade blows and outlast his opponent. For these strengths, F.Shiki Tohno lacks reliable aggression, pressure, or mixup tools.
Mechanically, compared to other fighters, F.Shiki Tohno's combos are some of the easiest yet most rewarding to perform.
Strengths Weaknesses
| Strengths
|
- High damage off B and/or C ground starters
- Versatile and powerful air normals
- Amazing ground mobility
- Good mix of preemptive and reactive anti-air normals
- Meterless OTG relaunches thanks to his charged 2C
|
| Weaknesses
|
- Struggles with meter management
- EX combo extensions often result in less damage
- His "dirty" confirms are below average in damage
- Linear pressure
- Air throw ender leads to weak okizeme
- No meterless reversal
|
General Gameplan
Your general gameplan will revolve around using movement (grounded or otherwise) to properly space out your normals.F-Tohno(or any Tohno in general) doesn't have the tools to bypass neutral(his special moves are designed to be narrow but powerful in their niche) so his win condition is reliant on properly analyzing your opponent's pattern/preferences and adapting to their style of play.
Thankfully Tohno's varied and reliable normals will win any engagement so long as they're properly spaced.
Neutral
As outlined above,good usage of normals and movement is key to playing a good neutral game as F-Tohno. Proper spacing of his air normals is key in establishing space control.
Adopting a defensive posture with j.C(be it neutral jump j.C,neutral jump sway(hold forward and/or back during neutral jump)j.C and instant air back dash(IABD)j.C are extremely good deterrents against your opponent's offense.Your backdash also adds to your defensive spacing,giving you excellent backward movement so you can always be at optimal range.
On the other hand j.B is much better when used with offensive movement.While it lacks j.C's range(and looks a bit goofy)it's very much a powerhouse normal,sporting very fast startup for a B normal in addition to a solid amount of active frames and a deceptively good hitbox.
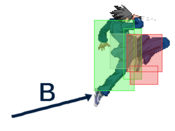
Now let's talk about his ground dash,while statistically weaker than his other moons,it's no less important to his gameplan.The fact that you can act as early as the 6th frame coupled with it's amazing acceleration it can(and should be) viewed as a "stance" of sorts as it adds extra functions and power to your existing moves and your jumps as well!
Most notably his 5B and 5C can be used out of his dash to catch jump-outs from a fair distance away,or simply apply pressure to a grounded opponent with dash 2C. His specials also greatly benefit from his dash,214A can travel further and the range of your 236A and B is nearly doubled when done out of a dash(both 2366~A/B and 236AB(dash macro)~A/B are valid inputs for this technique)
Pressure
F-Tohno's pressure game is meant to play around hit excellent throw range thanks to his dash. His 22[A] overhead is very slow and only grants him a combo if the opponent is cornered.
Your main pressure tool is his low-hitting 2A,which has excellent statistics that are even further elevated by his dash.If performed at the earliest frame after his dash,his 2A into dash 2A pressure reset is an eight frame gap which forces your opponent to take risks with either shielding,pressing buttons or attempting to jump out.
His staggers come into play once resets have made your opponent disrespect your pressure and they have opted to use riskier defensive tools such as shielding and jumping. His 5B/6B and 2B both serve to cover 2A's weakness as an A normal(2A can be shielded either standing or blocking) and their taller hitboxes will naturally catch people jumping out.5C is also great as a deterrent for jumping but it's weakness is that it's harder to confirm since it cannot be cancelled into any other normal but it can be confirmed by itself into an air combo thanks to it's lengthy hitstun and j.B's speed.
However if your opponent has managed to block your B or C staggers,your pressure has lost a lot of it's Steam,but you still have tools to make your opponent respect in the form of 236B/22A(require standing shield) and 214B(requires crouching shield)while being safe on block. 22A and 214B are both air unblockable moves that grant you a combo on hit.
F-Tohno also has a fairly unique pressure option in his charged 2C. It has the rare property of being jump cancellable even on block,and coupled with his low instant airdash and fast j.B can be very difficult to deal with.
All these perks come at a cost however,because of how slow it is,it can always be low shielded if read properly.
If you do manage to connect with it on block though,it becomes a risky mind game for your opponent to play.Naturally IAD j.B loses to any standing shield,but 2[C] is cancelled into his 214B,the latter will counter hit which means both options give you a high damaging combo if your opponent shields incorrectly. 214B also catches jump outs when cancelled into.
Okizeme
While F-Tohno's okizeme is by no means strong, it's up to you if you wish to occasionally go for it to throw off the opponent.
Double Overhead
Using neutral jump, F-Tohno can then follow with j.B into j.C for a double-overhead. This is character specific however.
This trick works on the following characters:
Akiha Tohno, Akiha Vermillion, Akiha (Seifuku), Aoko, Arcueid, Hime, Kohaku, Kouma, Mech Hisui, Riesbyfe, Red Arcueid, Roa, Ryougi, Satsuki, Sion, VSion, Warachia
And does not work on the following:
Ciels, Lens, Nanaya, Nekos, Tohno
Place text here
Defense
Outside of system mechanics,F-Tohno does not have a meterless reversal.
623C is your go to reversal provided you have 100 meter to spend.
Another EX that can serve as a reversal is his 214C.It's slightly faster than 623C however it has less raw invulnerability frames and it tends to trade a lot while also being MORE punishable.
Arc Drive and Another Arc Drive can also be used as reversal,but they aren't as reliable.
Outside of wake-up situations,your go to move for quickly recovering HP with Initiative Heat is 214A due to it's evasive properties and early EX cancel frames.
Combos
. If there are any calculations in parentheses, that means they're calculations showing how much more you gain for tighter confirms (optional normals in the combo that do more damage.) If they're not listed, despite such parenthesized normals being in the transcript, it was omitted because it follows the basic pattern of either:
- A starters resulting in less damage but more meter if you stack them on before B/C starters due to scaling
- j.A always adding more damage and meter in air combo finishers
- j.B/C always adding more damage if used as starters, on top of more meter
There will be no EX/Arc Drive combos listed in this section, as they always lose out in terms of both meter and damage to the more optimal conversions for F-Tohno.
Normal Combos
Beginner-Only Combos
(Damage and meter gain will not be calculated for this subsection due to intentionally being unoptimal conversions)
If you're starting with F-Tohno, chances are someone suggested you this character in order to get the hang of Melty Blood as a complete novice. Fortunately, F-Tohno is very easy to play and fundamentally rewarding on all levels of the game. If you're only starting out, you will not need to know anything else beyond these these two combos.
| Condition
|
Notation
|
Damage
vs V.Sion
|
Notes
|
|
| Normal starter, grounded opponent,
|
(2A(A(A)) ) 5B 2B 6B (5C) j.BC dj.BC Airthrow
|
???
|
| |
| Meter Gained: ??? |
Meter Given (vs C-Moon): ??? |
| Staple beginner combo. |
|
|
| Normal starter, grounded opponent,
|
(2A(A(A))) 5B 2B 5C 623A j.BC dj.BC Airthrow
|
???
|
| |
| Meter Gained: ??? |
Meter Given (vs C-Moon): ??? |
| For when you don't launch with 6B. |
|
|
If you feel up to more optimized conversions, check out the remainder below.
| Condition
|
Notation
|
Damage
vs V.Sion
|
Notes
|
|
| Normal starter, grounded opponent,
|
5B 2B 5C 623B IAD j.C (land) 5B 5C j.BC dj.BC Airthrow
|
5936
|
| |
| Meter Gained: 93.6 |
Meter Given (vs C-Moon): ??? |
| Advanced ground BnB. His best combo in that it's not only the most damaging, but also the most meter gaining, while being meterless. If the IAD into j.C is too hard, refer to the version below. |
|
|
| Normal starter, grounded opponent,
|
5B 2B 5C 623B j.C (land) j.BC dj.BC Airthrow
|
5333
|
| |
| Meter Gained: 77.4 |
Meter Given (vs C-Moon): ??? |
| Unoptimized version of F-Tohno's best combo, but still good if you have execution troubles. |
|
|
Aerial Combos
| Condition
|
Notation
|
Damage
vs V.Sion
|
Notes
|
|
| 623A starter, airborne opponent,
|
623A (j.BC) sdj.BC Airthrow
|
2600
|
| |
| Meter Gained: 26.1 |
Meter Given (vs C-Moon): ??? |
| Basic conversion for 623A, since it is air unblockable. Depending on the height you may or may not be able to j.BC. Super doublejump should be done in either case. |
|
|
| Counterhit starter (623A, Shield Counter, j.A/B/C), airborne opponent,
|
Starter (land) 5B 5C j.BC dj.BC Airthrow
|
4915
|
| |
| Meter Gained: 62.1 |
Meter Given (vs C-Moon): ??? |
(Damage and meter gained calculated off of the j.C confirm)
Your go-to aerial counter-hit confirm
In spite of being extremely simplistic to pull off granted Tohno's combo-flexible moveset, this is actually by far his highest damaging confirm off of an aerial counter-hit (yes, for all those starters in particular.) You will not net more damage doing any other route |
|
|
Corner Combos
| Condition
|
Notation
|
Damage
vs V.Sion
|
Notes
|
|
| 22A/[A] starter,
|
22A/[A], 5B 5C j.BC dj.BC Airthrow
|
4960
|
| |
| Meter Gained: 59.4 |
Meter Given (vs C-Moon): ??? |
Your one and only, corner-specific combo
Note that [A] version in favor of being overhead does less damage as a starter.
Again, much like the aerial counter-hit confirm, your highest-damaging confirm off a particular starter into a particular chain.
Note that in between 22A/[A], you have to delay a little for the height to be proper on the air combo conversion. If this timing is too tricky, remove the 5C from the notation. You'll only shave off about 400 damage for a much easier, second-highest damage guarantee confirm. |
|
|
OTG Pick ups
| Condition
|
Notation
|
Damage
vs V.Sion
|
Notes
|
|
| 22C/Airthrow starter
|
22C/Airthrow 623A j.BC dj.BC Airthrow
|
2807
|
| |
| Meter Gained: 43.2 |
Meter Given (vs C-Moon): ??? |
(Damage and meter calculated from 22C Starter)
Basic but decent conversion off of a 22C starter. |
|
|
| 22C/Airthrow starter
|
22C/Airthrow, 5B 5C j.BC dj.BC Airthrow
|
3526
|
| |
| Meter Gained: 50.4 |
Meter Given (vs C-Moon): ??? |
(Damage and meter calculated from 22C Starter)
Arguably the best conversion off of 22C for F-Tohno, perfect in-between execution viability and damage done. Timing of 5B link is tight, but consistently manageable |
|
|
| 22C/Airthrow starter
|
22C/Airthrow, 2C 623B j.C (land) j.BC dj.BC Airthrow
|
3535
|
| |
| Meter Gained: 63.9 |
Meter Given (vs C-Moon): ??? |
(Damage and meter calculated from 22C Starter)
Meterless, damage-optimized combo off of a 22C starter.
Do this only if you're a complete maniac that cares about the 9 extra damage and 13 extra meter.
Because 2C is no longer 7f startup on F-Tohno, linking into 2C after 22C is much harder. Not to mention the damage increase isn't that significant, considering how rarely used this starter is. Go for either of the easier routes, if you aren't an execution master, or don't care for this particular starter. |
|
|
| 214A/B starter
|
214A/B 2[C] 623B j.C (land) j.BC dj.BC Airthrow
|
3688
|
| |
| Meter Gained: 36.7 |
Meter Given (vs C-Moon): ??? |
(Damage and meter calculated from 214B Starter)
Staple OTG combo from 214A/B
Yep, it's that conversion again. And it's the best in terms of damage you're gonna get, again. |
|
|
| Counterhit 214A/B starter
|
CH.214A/B, 2A 5B 5C j.BC dj.BC Airthrow
|
4435
|
| |
| Meter Gained: 60.7 |
Meter Given (vs C-Moon): ??? |
(Damage and meter calculated from 214B Starter)
For when 214A/B counter hit on the rare occasion and you're ready to react to it. |
|
|
| 100 meter available, 2C 22(B~)D hits in the corner
|
2C/[C] 22(B~)D 214C 22D 5B 5C j.BC dj.BC Airthrow
|
3030
|
| |
| Meter Gained: -82.4 (-100, +18.6) |
Meter Given (vs C-Moon): ??? |
(Damage and meter calculated from 2C Starter)
This is your only conversion off 2C into feint. |
|
|
Move Descriptions
| Frame Data Help
|
| Header
|
Tooltip
|
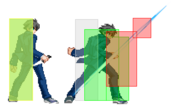
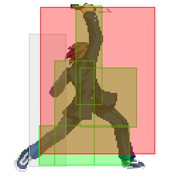
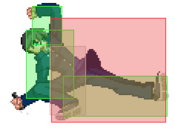
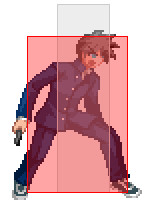
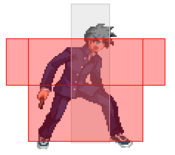
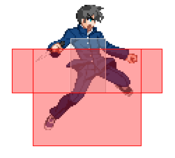
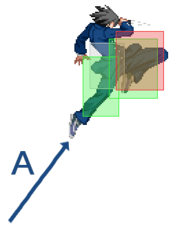
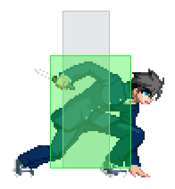
| Move Box Colors
|
Light gray = Collision Box (A move lacking one means it can go through the opponent's own collision box).
Green: Hurt Boxes.
Red: Hit(/Grab) Boxes.
Yellow: Clash Boxes (When an active hitbox strikes a clash box, the active hitbox stops being active. Multi-hit attacks can beat clash since they will still progress to the next hitbox.)
Magenta: Projectile-reflecting boxes OR Non-hit attack trigger boxes (usually).
Blue: Reflectable Projectile Boxes.
|
| Damage
|
Base damage done by this attack.
(X) denotes combined and scaled damage tested against standing V. Sion.
|
| Red Damage
|
Damage done to the recoverable red health bar by this attack. The values are inherently scaled and tested against standing V. Sion.
(X) denotes combined damage.
|
| Proration
|
The correction value set by this attack and the way it modifies the scaling during a string. See this page for more details.
X% (O) means X% Overrides the previous correction value in a combo if X is of a lower percentage.
X% (M) means the current correction value in a combo will be Multiplied by X%. This can also be referred to as relative proration.
|
| Circuit
|
Meter gained by this attack on hit.
(X%) denotes combined meter gain.
-X% denotes a meter cost.
|
| Cancel
|
Actions this move can be cancelled into.
SE = Self cancelable.
N = Normal cancelable.
SP = Special cancelable.
CH = Cancelable into the next part of the same attack (Chain in case of specials).
EX = EX cancelable.
J = Jump cancelable.
(X) = Cancelable only on hit.
-X- = Cancelable on whiff.
|
| Guard
|
The way this move must be blocked.
L = Can block crouching
H = Can block standing.
A = Can block in the air.
U = Unblockable.
|
| Startup
|
Amount of frames that must pass prior to reaching the active frames. Also referred to as "True Startup".
|
| Active
|
The amount of frames that this move will have a hitbox.
(x) denotes frame gaps where there are no hitboxes is present. Due to varied blockstuns, (x) frames are difficult to use to determine punish windows. Generally the larger the numbers, the more time you have to punish.
X denotes active frames with a duration separate from its origin move's frame data, such as projectile attacks. In this case, the total length of the move is startup+recovery only.
|
| Recovery
|
Frames that this move has after the active frames if not canceled. The character goes into one frame where they can block but not act afterwards, which is not counted here.
|
| Advantage
|
The difference in frames where you can act before your opponent when this move is blocked (assuming the move isn't canceled and the first active frame is blocked).
If the opponent uses a move with startup that is at least 2 frames less than this move's negative advantage, it will result in the opponent hitting that move.
±x~±y denotes a range of possible advantages.
|
| Invul
|
Lists any defensive properties this move has.
X y~z denotes X property happening between the y to z frames of the animations. If no frames are noted, it means the invincibility lasts through the entire move.
Invicibility:
- Strike = Strike invincible.
- Throw = Throw invincible.
Hurtbox-Based Properties:
- Full = No hurtboxes are present.
- High = Upper body lacks a hurtbox.
- Low = Lower body lacks a hurtbox.
Miscellaneous Properties
- Clash = Frames in which clash boxes are active.
- Reflect = Frames in which projectile-reflecting boxes are active.
- Super Armor = Frames in which the character can take hits without going into hit stun.
|
Normal Moves
Standing Normals
5A
|
| Damage
|
Red Damage
|
Proration
|
Cancel
|
Guard
|
| 300
|
151
|
70% (O)
|
-SE-, -N-, -SP-, -EX-, (J)
|
LH
|
| First Active
|
Active
|
Recovery
|
Frame Adv
|
Circuit
|
Invuln
|
| 4
|
3
|
7
|
2
|
2.7%
|
-
|
|
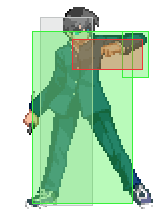
Shoulder hit poke, a higher-hitting jab than C/H-Moons that is plus on block.Whiffs on crouching characters.
|
|
5B
|
| Damage
|
Red Damage
|
Proration
|
Cancel
|
Guard
|
| 800
|
404
|
90% (O)
|
N, SP, EX, (J)
|
LH
|
| First Active
|
Active
|
Recovery
|
Frame Adv
|
Circuit
|
Invuln
|
| 8
|
7
|
9
|
-1
|
7.2%
|
-
|
|
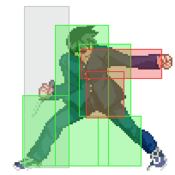
This punch moves Tohno forward a bit. Huge cancel window makes it excellent for stagger pressure.
|
|
5C
|
| Damage
|
Red Damage
|
Proration
|
Cancel
|
Guard
|
| 1000
|
707
|
80% (O)
|
SP, EX, (J)
|
LH
|
| First Active
|
Active
|
Recovery
|
Frame Adv
|
Circuit
|
Invuln
|
| 11
|
8
|
13
|
-3
|
9.0%
|
-
|
|
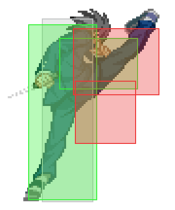
An upward kick that moves Tohno forward considerably. The large amount of active frames comes in handy when chasing down ground techs.
|
|
Crouching Normals
2A
|
| Damage
|
Red Damage
|
Proration
|
Cancel
|
Guard
|
| 300
|
101
|
68% (O)
|
-SE-, -N-, -SP-, -EX-, (J)
|
L
|
| First Active
|
Active
|
Recovery
|
Frame Adv
|
Circuit
|
Invuln
|
| 4
|
4
|
5
|
3
|
3.15%
|
-
|
|
Crouching version of 5A. Shorter ranged than the other moons, but is a fast low that is plus on block.
|
|
2B
|
| Damage
|
Red Damage
|
Proration
|
Cancel
|
Guard
|
| 700
|
353
|
90% (O)
|
N, SP, EX, (J)
|
LH
|
| First Active
|
Active
|
Recovery
|
Frame Adv
|
Circuit
|
Invuln
|
| 10
|
7
|
6
|
2
|
6.3%
|
-
|
|
Another shoulder hit that moves Tohno forward, but isn't a low. Has a small clash hitbox.
|
|
2C
2[C]
|
| 2C
|
Damage
|
Red Damage
|
Proration
|
Cancel
|
Guard
|
| 1000
|
656
|
55% (O)
|
SP, EX, (J)
|
L
|
| First Active
|
Active
|
Recovery
|
Frame Adv
|
Circuit
|
Invuln
|
| 6
|
6
|
26
|
-14
|
9.0%
|
-
|
|
Extremely long range and fast low turn kick. Knocks the opponent down on hit. One of the best sweeps in the game due to its speed and range, but has very bad recovery on whiff, so you have to be careful about poking with it. Weak to shield.
|
| 2[C]
|
Damage
|
Red Damage
|
Proration
|
Cancel
|
Guard
|
| 1100
|
656
|
55% (O)
|
SP, EX, J
|
L
|
| First Active
|
Active
|
Recovery
|
Frame Adv
|
Circuit
|
Invuln
|
| 19
|
6
|
14
|
-2
|
10.8%
|
-
|
|
Being jump-cancellable on block makes it a very safe poking tool.
|
|
Jumping Normals
j.A
|
| Damage
|
Red Damage
|
Proration
|
Cancel
|
Guard
|
| 300
|
151
|
75% (O)
|
SE, N, J
|
HA
|
| First Active
|
Active
|
Recovery
|
Frame Adv
|
Circuit
|
Invuln
|
| 5
|
4
|
-
|
-
|
2.7%
|
-
|
|
Is an actual overhead unlike other moons' j.A
|
|
j.B
|
| Damage
|
Red Damage
|
Proration
|
Cancel
|
Guard
|
| 800
|
505
|
90% (O)
|
N, J
|
HA
|
| First Active
|
Active
|
Recovery
|
Frame Adv
|
Circuit
|
Invuln
|
| 6
|
7
|
-
|
-
|
5.4%
|
-
|
|
A downward slightly disjointed punch.
|
|
j.C
|
| Damage
|
Red Damage
|
Proration
|
Cancel
|
Guard
|
| 1000
|
606
|
90% (O)
|
J
|
HA
|
| First Active
|
Active
|
Recovery
|
Frame Adv
|
Circuit
|
Invuln
|
| 9
|
6
|
-
|
-
|
11.7%
|
-
|
|
A forward knife strike.
|
|
Command Normals
6B
|
| Damage
|
Red Damage
|
Proration
|
Cancel
|
Guard
|
| 700
|
404
|
70% (O)
|
N, SP, EX, (J)
|
LH
|
| First Active
|
Active
|
Recovery
|
Frame Adv
|
Circuit
|
Invuln
|
| 9
|
5
|
15
|
-3
|
6.3%
|
-
|
|
A launcher for F-Tohno.
|
|
Universal Mechanics
Ground Throw
4/6A+D
|
| Damage
|
Red Damage
|
Proration
|
Cancel
|
Guard
|
| 1400
|
489
|
100%
|
-
|
U
|
| First Active
|
Active
|
Recovery
|
Frame Adv
|
Circuit
|
Invuln
|
| 3
|
1
|
20
|
N/A
|
0.0%
|
-
|
|
Tohno rolls and slams the opponent.
|
|
Air Throw
4/6A+D (In Air)
|
| Damage
|
Red Damage
|
Proration
|
Cancel
|
Guard
|
| 1600 (1408)
|
433
|
30%
|
-
|
U
|
| First Active
|
Active
|
Recovery
|
Frame Adv
|
Circuit
|
Invuln
|
| 2
|
1
|
13 (landing)
|
N/A
|
0.0%
|
-
|
|
Tohno grabs then slices the opponent.
|
|
Shield Bunker
214D in neutral or blockstun
|
| Damage
|
Red Damage
|
Proration
|
Cancel
|
Guard
|
| 500
|
202
|
50%
|
-
|
LHA
|
| First Active
|
Active
|
Recovery
|
Frame Adv
|
Circuit
|
Invuln
|
| 26
|
4
|
19
|
-5
|
0.0%, (-50.0% in blockstun)
|
-
|
|
An upwards slash.
|
|
Shield Counter
236D in shield (Air OK)
|
| Ground
|
Damage
|
Red Damage
|
Proration
|
Cancel
|
Guard
|
| 500
|
303
|
50%
|
SP, EX, (J)
|
LHA
|
| First Active
|
Active
|
Recovery
|
Frame Adv
|
Circuit
|
Invuln
|
| 9
|
4
|
18
|
-4
|
4.5%
|
-
|
|
Similar to 5BB
|
| Air
|
Damage
|
Red Damage
|
Proration
|
Cancel
|
Guard
|
| 500
|
303
|
50%
|
-
|
HA
|
| First Active
|
Active
|
Recovery
|
Frame Adv
|
Circuit
|
Invuln
|
| 9
|
4
|
-
|
14
|
4.5%
|
-
|
|
Similar to j.C
|
|
Blood Heat
A+B+C during MAX
|
| Damage
|
Red Damage
|
Proration
|
Cancel
|
Guard
|
| 100
|
0
|
100%
|
-
|
N/A
|
| First Active
|
Active
|
Recovery
|
Frame Adv
|
Circuit
|
Invuln
|
| 16
|
6
|
25
|
N/A
|
uses all
|
Full 1-23
|
|
Circuit Spark
Automatic during hitstun/blockstun in Heat
|
| Ground
|
Damage
|
Red Damage
|
Proration
|
Cancel
|
Guard
|
| 100
|
0
|
100%
|
-
|
U
|
| First Active
|
Active
|
Recovery
|
Frame Adv
|
Circuit
|
Invuln
|
| 11
|
10
|
20
|
N/A
|
removes all
|
Full
|
| Air
|
Damage
|
Red Damage
|
Proration
|
Cancel
|
Guard
|
| 100
|
0
|
100%
|
-
|
U
|
| First Active
|
Active
|
Recovery
|
Frame Adv
|
Circuit
|
Invuln
|
| 12
|
10
|
-
|
N/A
|
removes all
|
Strike
|
|
Special Moves
Trump Card III (Flash Sheath - Eight Flower Mirror)
236A/B/C
|
| A
|
Damage
|
Red Damage
|
Proration
|
Cancel
|
Guard
|
| 250x7 (1583)
|
202x7 (1279)
|
100%
|
N/A
|
LHA
|
| First Active
|
Active
|
Recovery
|
Frame Adv
|
Circuit
|
Invuln
|
| 12
|
15
|
12
|
-3
|
1.35%x7 (9.45%)
|
-
|
|
Tohno performs multiple high-speed slashes. Cannot be EX cancelled.
|
| B
|
Damage
|
Red Damage
|
Proration
|
Cancel
|
Guard
|
| 200x11 (1852)
|
151x11 (1396)
|
100%
|
EX
|
LHA
|
| First Active
|
Active
|
Recovery
|
Frame Adv
|
Circuit
|
Invuln
|
| 12
|
27
|
12
|
-3
|
1.35%x11 (14.85%)
|
-
|
|
Same speed as A version, does more damage and can be EX cancelled.
|
| EX
|
Damage
|
Red Damage
|
Proration
|
Cancel
|
Guard
|
| 250x13 (2635)
|
202x13 (2128)
|
100%,
|
N/A
|
LHA
|
| First Active
|
Active
|
Recovery
|
Frame Adv
|
Circuit
|
Invuln
|
| 8+4
|
27
|
12
|
3
|
-100.0%
|
-
|
|
Meter gets you more damage and frame advantage. Wall bounces in the corner for a follow-up
|
|
Unexpected Kick (Flash Run - Six Deer)
623A/B/C
|
| A
|
Damage
|
Red Damage
|
Proration
|
Cancel
|
Guard
|
| 1005
|
505
|
80% (M)
|
(N), (J)
|
LH
|
| First Active
|
Active
|
Recovery
|
Frame Adv
|
Circuit
|
Invuln
|
| 7
|
8
|
31
|
-21
|
9.0%
|
High 3-6
(Overall small hitbox
during active frames)
|
|
F Moon's anti-air DP, doesn't have full invulnerability but you can easily combo afterwards.
|
| B
|
Damage
|
Red Damage
|
Proration
|
Cancel
|
Guard
|
| 1000
|
505
|
80% (M)
|
N/A
|
HL
|
| First Active
|
Active
|
Recovery
|
Frame Adv
|
Circuit
|
Invuln
|
| 8
|
8
|
27
|
-17
|
9.0%
|
-
|
|
Forward-moving version of A. Staple combo tool.
|
| EX
|
Damage
|
Red Damage
|
Proration
|
Cancel
|
Guard
|
| 1700
|
1212
|
50% (O)
|
N/A
|
LH
|
| First Active
|
Active
|
Recovery
|
Frame Adv
|
Circuit
|
Invuln
|
| 5+6
|
11
|
17
|
-10
|
-100.0%
|
Full 1-13
|
|
Goes the same distance as B and has full invulnerability.
|
|
Trump Card No.2 (Low Scoop)
214A/B/C
|
| A
|
Damage
|
Red Damage
|
Proration
|
Cancel
|
Guard
|
| 1000
|
808
|
50% (O)
|
EX
|
L
|
| First Active
|
Active
|
Recovery
|
Frame Adv
|
Circuit
|
Invuln
|
| 8
|
10
|
13
|
-8
|
7.2%
|
High 1-21
|
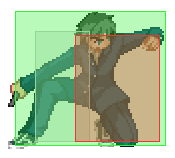
- Low sliding attack. Shrinks his hitbox a lot during the slide, meaning it will go under a lot of attacks, and can even be anti aired with. All versions are air unblockable and hit low.
Has the fastest startup, and shrinks his hitbox the most, but has the worst attack hitbox. Is usually safe on block, but will be punishable if blocked point blank. On counterhit, can combo off it, making it a fairly low risk poke/anti air that can lead to solid damage. Due to it's early EX cancel window,it's the preferred method to activate Initiative Heat without having to come in contact with the opponent.
|
| B
|
Damage
|
Red Damage
|
Proration
|
Cancel
|
Guard
|
| 1000
|
808
|
100%
|
-
|
L
|
| First Active
|
Active
|
Recovery
|
Frame Adv
|
Circuit
|
Invuln
|
| 18
|
10
|
13
|
-8
|
7.2%
|
-
|
|
Has a longer startup and travels a greater distance. Has the least hitbox shrink, but has a solid chunky hitbox at the tip that will beat most attacks. If spaced properly in blockstrings, this move is basically neutral on block. Due to the long startup and vulnerability to people just plain jumping out of your blockstring, this move does not see a lot of use.
|
| EX
|
Damage
|
Red Damage
|
Proration
|
Cancel
|
Guard
|
| 500, 1000 (1351)
|
303, 707 (904)
|
100%, 50% (O)
|
N/A
|
L, LHA
|
| First Active
|
Active
|
Recovery
|
Frame Adv
|
Circuit
|
Invuln
|
| 3+6
|
10 (16) 4
|
10
|
-36, -16
|
-100.0%
|
Full 1-8, High 9-12
|
|
Has startup invulnerability to the first hit. Combines the speed of the A version and the distance of the B version. If the slide connects on hit or block, he will automatically preform a followup similar to standing shield counter except that it wallslams. The first attack has a very good hitbox that is likely to stuff most other attacks despite not being completely invulnerable. This move is unsafe on block but can be annoying to punish properly at specific distances.
|
|
Serious Stance (Flash Run: Full Moon)
22A/[A]/B/[B]/C/D
(Chain 22B~D)
|
A
[A]
|
Damage
|
Red Damage
|
Proration
|
Cancel
|
Guard
|
| 1000
|
505
|
85%
60%
|
N/A
|
HL/H
|
| First Active
|
Active
|
Recovery
|
Frame Adv
|
Circuit
|
Invuln
|
21
30
|
8
|
17
|
-6
-7
|
9.0%
|
-
|
- Shiki poses in a crouching pose before executing one of 4 different attacks. All 4 have the same initial startup animation and are useful for messing with the opponent in blockstrings.
Lunging forward, Shiki donkey kicks the opponent in the groin (ouch). This move wallslams on hit, making it comboable off in the corner, and is relatively safe on block if spaced correctly, making it a very useful tool for ending corner blockstrings with. Air unblockable, hits mid. Can be charged up to become an overhead.
|
B/[B]
~(D)
|
Damage
|
Red Damage
|
Proration
|
Cancel
|
Guard
|
| N/A
|
N/A
|
N/A
|
-CH-
|
N/A
|
| First Active
|
Active
|
Recovery
|
Frame Adv
|
Circuit
|
Invuln
|
| 20
|
12 (Invuln frames)
|
14
~(12)
|
N/A
|
N/A
|
-
|
|
Shiki teleports forward. The teleport goes forward pretty far, but can be canceled at any point by pressing d, where he will instantly reappear again. Is a handy tool for continuing pressure on people respecting your 22a, and lets you punish people trying to shield, dodge, or reversal it if you cancel the teleport quickly. If done on a knocked down opponent midscreen, you can use it to create a mediocre which way mixup.
|
C
(Whiff)
|
Damage
|
Red Damage
|
Proration
|
Cancel
|
Guard
|
| 1200 (1162)
|
284
|
50%
|
N/A
|
U
|
| First Active
|
Active
|
Recovery
|
Frame Adv
|
Circuit
|
Invuln
|
34-41
(23)
|
2
(8)
|
28
(29)
|
N/A
|
0.0%
|
-
|
|
Shiki teleports forward again, but this time he will always attempt to appear behind the opponent, whereupon he will command throw them into a groundbounce situation that can be combo'd off from anywhere (except midscreen on Kouma). Because this move requires you to get behind the opponent, it has a pretty annoying range requirement, and it will not work on a fully cornered enemy. This move is so difficult to use properly that it is very rarely used, but since it is now comboable midscreen on everybody now, it could be a useful trick to cinch out a close match with.
|
| D
|
Damage
|
Red Damage
|
Proration
|
Cancel
|
Guard
|
| N/A
|
N/A
|
N/A
|
N/A
|
N/A
|
| First Active
|
Active
|
Recovery
|
Frame Adv
|
Circuit
|
Invuln
|
| N/A
|
N/A
|
30
|
N/A
|
N/A
|
N/A
|
|
Shiki poses...then does nothing. This move is a feint attack that allows him to stay safe and recover vs nearly anything an opponent could do on reaction to the intial pose. Technically a rapidly executed 22b~d cancel has better recovery than this move alone for use in blockstrings. Whilst this move is not very useful by itself, combined with his other versions it can be used as force respect whiff cancel to lead to more pressure. It's also commonly used in his corner 214c combos, despite not being strictly necessary for them, but it does look cool!
|
|
Arc Drive
Mystic Eyes of Death Perception
41236C during MAX/Heat
|
| Damage
|
Red Damage
|
Proration
|
Cancel
|
Guard
|
| 3200
|
2884
|
100%
|
N/A
|
HLA
(Unblockable on first frame)
|
| First Active
|
Active
|
Recovery
|
Frame Adv
|
Circuit
|
Invuln
|
| 2+22
|
30
|
16
|
-18 ~ 10
|
removes all
|
Full 1-47
|
|
After the superflash, the entire game is slowed down whilst Tohno leaps forward at the opponent. If he connects, he teleports through the opponent and entire screen is cut up whilst they take a lot of damage. The initial part of the attack before he leaves the ground is unblockable, whilst the later parts are blockable. This super has complete invulnerability, but has recovery during the slowmo part at the end if it whiffs. Not very useful overall, because the opponent can always just reaction jump it, unless they were in the middle of an attack. The only real use is as a reversal, and it is not worth comboing into because of the bad damage.
|
|
Another Arc Drive
Seventeen Dissection
41236C during Blood Heat
|
| Damage
|
Red Damage
|
Proration
|
Cancel
|
Guard
|
| 700x17 (4177)
|
606x17 (3592)
|
100%
|
N/A
|
HLA
(Unblockable on first 2 frames)
|
| First Active
|
Active
|
Recovery
|
Frame Adv
|
Circuit
|
Invuln
|
| 2+11
|
12
|
31
|
-14 ~ -5
|
removes all
|
Full 1-79
|
|
Has pretty much all the same properties as the regular Arc Drive, except that he travels a shorter distance, does more damage, and instead of 1 hit, it does 17 hits. Ironically, this super is named after the infamous situation where Tohno dismembered Arcueid into 17 pieces in Tsukihime, but by cutting 17 times in Melty Blood, Tohno will have cut his opponent into at least 18 pieces. Is slightly more practical for comboing into, but any real combo involving meter would net in more damage. As a result, it is again, mostly useless except as a possible reversal.
|
|
Last Arc
Mystic Eyes of Death Perception ・Instant Death
Grounded EX Shield during Blood Heat
|
| Damage
|
Red Damage
|
Proration
|
Cancel
|
Guard
|
| 4200-7000
|
-
|
100%
|
N/A
|
U
|
| First Active
|
Active
|
Recovery
|
Frame Adv
|
Circuit
|
Invuln
|
| 3+1
|
3/1 (whiff)
|
48/49 (whiff)
|
-
|
removes all
|
Full
|
|
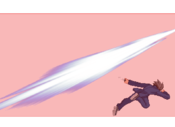
Shiki leaps forward and teleports across the screen, cutting through everything in his wake. Circuit Breaks the opponent on hit (destroys their meter bar for a time). Fullscreen unblockable and instant. There is no way to avoid this once he has successfully shielded you, unless you were already invulnerable during your attack. During this attack, Shiki spouts his famous one liner from the end of Arc's route in Tsukihime.
Kore ga, mono wo korosutte iu koto da - This is, what it means to kill something
|
|
MBAACC Navigation
