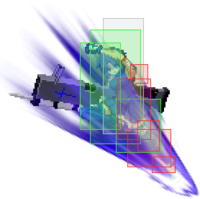
Melty Blood/MBAACC/Powered Ciel/Half Moon

From Mizuumi Wiki
Jump to navigation Jump to search

Character Page Progress

This page is still a work in progress, consider joining as an editor to help expand it. Please update this character's roadmap page when one of the editing goals have been reached.

In Progress To-do
  • Additional Ressources/Players to watch/ask
    • Find additional (potentially untagged?) videos that have useful information
      • Notate & test combos in [video] for inclusion on page
  • Overview/General Gameplan
    • Flesh out Neutral section, potentially linking to a userpage for formatting & readability reasons
  • Move Descriptions:
    • Update combo section to new format(?)


Additional Resource

H-P.Ciel Match Video Database
Melty Bits: H-Powerd Ciel

Players to watch/ask

JP:

  • Text goes here after asterisk
  • Text goes here after asterisk

NA:

  • Text goes here after asterisk
  • Text goes here after asterisk

Overview

Strengths / Weaknesses
Strengths
  • Text goes here after asterisk
  • Text goes here after asterisk
Weaknesses
  • Place text here be sure to use "*" for each point*

General Gameplan

Place text here*

Neutral

Place text here*

Pressure

Place text here

Okizeme

Place text here

Defense

place text here*

Combos

Combo Notation Help
Disclaimer: Combos are written by various writers, so the actual notation used in pages can differ from the standard one.

For more information, see Glossary and Controls.

X > Y X input is cancelled into Y.
X > delay Y Must wait for a short period before cancelling X input into Y.
X, Y X input is linked into Y, meaning Y is done after X's recovery period.
X+Y Buttons X and Y must be input simultaneously.
X/Y Either the X or Y input can be used.
X~Y This notation has two meanings.
  1. Use attack X with Y follow-up input.
  2. Input X then within a few frames, input Y. Usually used for option selects.
X(w) X input must not hit the opponent (Whiff).
j.X X input is done in the air, implies a jump/jump cancel if the previous move was done from the ground.

Applies to all air chain sections:

  • Assume a forward jump cancel if no direction is given.
  • Air chains such as j.A > j.B > j.C can be shortened to j.ABC.
sj.X X input is done after a super jump. Notated as sj8.X and sj9.X for neutral and forward super jumps respectively.
dj.X X input is done after a double jump.
sdj.X X input is done after a double super jump.
tk.X Stands for Tiger Knee. X motion must be buffered before jumping, inputting the move as close to the ground as possible. (ex. tk.236A)
(X) X is optional. Typically the combo will be easier if omitted.
[X] Input X is held down. Also referred to as Blowback Edge (BE). Depending on the character, this can indicate that this button is held down and not released until indicated by the release notation.
]X[ Input X is released. Will only appear if a button is previously held down. This type of input is referred to as Negative Edge.
{X} Button X should only be held down briefly to get a partially charged version instead of the fully charged one.
X(N) Attack "X" should only hit N times.
(XYZ)xN XYZ string must be performed N times. Combos using this notation are usually referred to as loops.
(XYZ^) A pre-existing combo labelled XYZ is inserted here for shortening purposes.
CH The first attack must be a Counter Hit.
Air CH The first attack must be a Counter Hit on an airborne opponent.
66 Performs a ground forward dash.
j.66 Performs an aerial forward dash, used as a cancel for certain characters' air strings.
IAD/IABD Performs an Instant AirDash.
AT Performs an Air Throw. (j.6/4A+D)
IH Performs an Initiative Heat.
AD Performs an Arc Drive.
AAD Performs an Another Arc Drive.

Normal Combos

Condition Notation Damage
vs V.Sion
Notes
Normal starter, grounded opponent
  • 5B > 2B > 5C > 236B~C, 2C > 3C > jc9 delay j.B, land 2C > 5A(w)6AA > delay 6B > 236[A](2nd hit), 2C (> 5C) > 4C > 3C > 214A
???


Meter Gained:  ??? Meter Given (vs C-Moon): ???
Confirm from 2AA, j.B/C or ground throw. Guaranteed to carry your opponent to the corner from anywhere. You have to tap C quickly after 236B in order to have it connect, but not too soon or you'll miss the timing. The first 3C may need to be delayed a bit after 2C in order for j.B to hit; j.B itself needs to be pressed a little after Ciel reaches maximum jump height and starts coming down. Make sure to hit the enemy as soon as you can with 6B while they're floating down, as the first hit of 236[A] has to whiff and will hit if they're too low to the ground. The combo ends in a hard knockdown and if you simply do 2C > 4C > 3C > 214A at the end, it allows you to go for a 4/6 mixup close to the corner.
Normal starter, grounded opponent
  • 5B > 2B > 5C > 6B > 2C > 3C > jc9 delay j.B, land 2C > 5C > 6B > 236[A](2nd hit), 2C (> 5C) > 4C > 3C > 214A
???
Meter Gained:  ??? Meter Given (vs C-Moon): ??? (Video)
Stronger version of above combo, still coming with excellent corner carry. Do the first 2C as soon as possible after 6B or they will get knocked way out of range. As well, delay the second 5C a little after 2C so 6B can connect; otherwise all notes on the previous combo still apply.

Corner Combos

Condition Notation Damage
vs V.Sion
Notes
Normal starter, grounded opponent
  • 5B > 2B > 2C > 5C > 6B > 236[A](2nd hit), 2C > 5C > 6B > 236[A](2nd hit), 2C (> 5C) > 4C > 3C > 214A
???
Meter Gained:  ??? Meter Given (vs C-Moon): ??? (Video)
(Video omits second 5C)

Powerful corner combo, confirm from 2AA, j.B/C or ground throw. Second 5C needs to be delayed a fraction for the second 6B to connect; if you can't get the timing down, try to just go straight to 6B from 2C, but it will whiff on some characters.

KOUMA NOTE: Because Kouma's hitbox is a jerk, the first 6B very often whiffs him entirely even if you delay the 5C as much as you can. To remedy this, get in as many 2A/5As in as you can before beginning the combo so gravity pulls him down fast enough to be hit. The next 6B can also be rather problematic. If this is frustrating, just work on some 6B-less combos for him. The midscreen BnBs will still work fine.
Normal starter, grounded opponent
  • 5B > 2B > 2C > 5C > 6B > 236[A](2nd hit), 2C > 5C > 6B > 236[A](2nd hit), 2C > 5C (> 4C) > 3C > jc8 AT > j.236AA, 236BB
  • (Alternative Ender) ...AT > j.214A/j.236B/j.236C
???


Meter Gained:  ??? Meter Given (vs C-Moon): ???
Slight variation of the above combo, ending in another strong corner knockdown if you finish with j.236AA, 236BB. Mixup possible off of air throwing toward midscreen -> j214A ender due to retaining air movement after j.214A. Ending with 214A is generally a better idea, but if you really want to squeeze out the most damage and possibly end the round, press 8 to super jump cancel the last 3C and hit j.C > j.236B/C.

Move Descriptions

Frame Data Help
Header Tooltip
Move Box Colors

Light gray = Collision Box (A move lacking one means it can go through the opponent's own collision box).
Green: Hurt Boxes.
Red: Hit(/Grab) Boxes.
Yellow: Clash Boxes (When an active hitbox strikes a clash box, the active hitbox stops being active. Multi-hit attacks can beat clash since they will still progress to the next hitbox.)
Magenta: Projectile-reflecting boxes OR Non-hit attack trigger boxes (usually).
Blue: Reflectable Projectile Boxes.

Damage Base damage done by this attack.

(X) denotes combined and scaled damage tested against standing V. Sion.

Red Damage Damage done to the recoverable red health bar by this attack. The values are inherently scaled and tested against standing V. Sion.

(X) denotes combined damage.

Proration The correction value set by this attack and the way it modifies the scaling during a string. See this page for more details.

X% (O) means X% Overrides the previous correction value in a combo if X is of a lower percentage.
X% (M) means the current correction value in a combo will be Multiplied by X%. This can also be referred to as relative proration.

Circuit Meter gained by this attack on hit.

(X%) denotes combined meter gain.
-X% denotes a meter cost.

Cancel Actions this move can be cancelled into.

SE = Self cancelable.
N = Normal cancelable.
SP = Special cancelable.
CH = Cancelable into the next part of the same attack (Chain in case of specials).
EX = EX cancelable.
J = Jump cancelable.
(X) = Cancelable only on hit.
-X- = Cancelable on whiff.

Guard The way this move must be blocked.

L = Can block crouching
H = Can block standing.
A = Can block in the air.
U = Unblockable.

Startup Amount of frames that must pass prior to reaching the active frames. Also referred to as "True Startup".
Active The amount of frames that this move will have a hitbox.

(x) denotes frame gaps where there are no hitboxes is present. Due to varied blockstuns, (x) frames are difficult to use to determine punish windows. Generally the larger the numbers, the more time you have to punish.
X denotes active frames with a duration separate from its origin move's frame data, such as projectile attacks. In this case, the total length of the move is startup+recovery only.

Recovery Frames that this move has after the active frames if not canceled. The character goes into one frame where they can block but not act afterwards, which is not counted here.
Advantage The difference in frames where you can act before your opponent when this move is blocked (assuming the move isn't canceled and the first active frame is blocked).

If the opponent uses a move with startup that is at least 2 frames less than this move's negative advantage, it will result in the opponent hitting that move.
±x~±y denotes a range of possible advantages.

Invul Lists any defensive properties this move has.

X y~z denotes X property happening between the y to z frames of the animations. If no frames are noted, it means the invincibility lasts through the entire move.

Invicibility:

Strike = Strike invincible.
Throw = Throw invincible.

Hurtbox-Based Properties:

Full = No hurtboxes are present.
High = Upper body lacks a hurtbox.
Low = Lower body lacks a hurtbox.

Miscellaneous Properties

Clash = Frames in which clash boxes are active.
Reflect = Frames in which projectile-reflecting boxes are active.
Super Armor = Frames in which the character can take hits without going into hit stun.

Normal Moves

Standing Normals

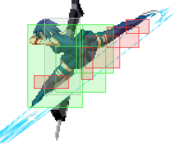
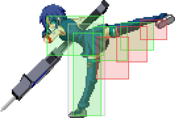
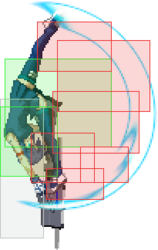
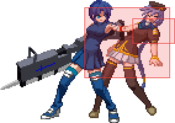
5A
5A
5A~6A~6A
HPCiel-5A.png
HPCiel-5A6A-1.png
HPCiel-5A6AA.png
5A Damage Red Damage Proration Cancel Guard
350 144 72% (O) -SE-, -N-, -SP-, -CH-, -EX-, (J) L
First Active Active Recovery Frame Adv Circuit Invuln
4 2 11 -1 2.45% -

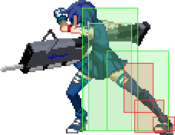
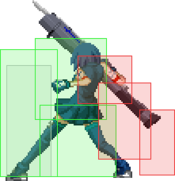
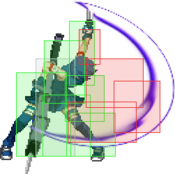
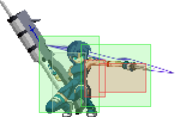
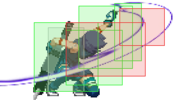
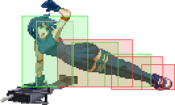
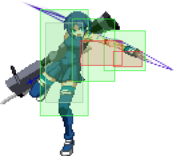
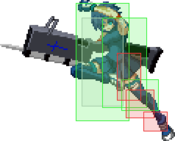
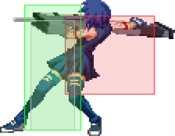
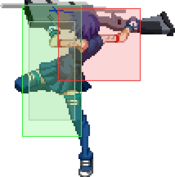
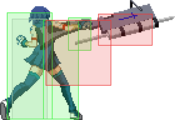
Ciel does a quick kick to the shin. Nothing really remarkable about this normal aside form the fact that it deceptively hits low. You'll only be using this move in combos that you perform with the intent of maxing your meter gain, and even then you'll be whiffing it (5A(w)6AA).

5A~6A Damage Red Damage Proration Cancel Guard
600 384 80% (M) N, SP, -CH-, EX, (J) LH
First Active Active Recovery Frame Adv Circuit Invuln
6 4 19 -8 4.2% -

Ciel follows up with a quick reverse roundhouse. Despite it having two hitboxes, this move only hits once.

5A~6A~6A Damage Red Damage Proration Cancel Guard
1000 768 60% (O) (N), SP, EX, (J) LH
First Active Active Recovery Frame Adv Circuit Invuln
10 4 18 -4 7.0% -

Ciel finishes her target combo by ramming the butt of her pile bunker into the opponent, knocking them up slightly into the air. Like with all Half-moon 5A6AA enders, this move has a resonably long untech time, allowing for many follow-ups after the opponent has fallen a bit after the hit.

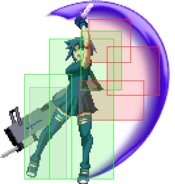
5B
Cpciel5b.png
Damage Red Damage Proration Cancel Guard
600 384 80% (O) N, SP, EX, (J) LH
First Active Active Recovery Frame Adv Circuit Invuln
7 3 17 -5 3.5% -

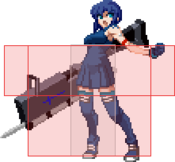
Ciel slashes in front of her with a knife. Look at that hitbox. Just look at it. This is by far one of your best buttons, and you should be hitting it often in matches.

5C
Cpciel5c.png
Damage Red Damage Proration Cancel Guard
1000 672 70% (O) N, SP, EX, (J) LH
First Active Active Recovery Frame Adv Circuit Invuln
12 3 24 -9 3.5% -

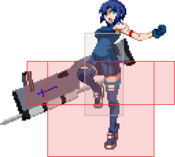
Ciel swipes in front of her with her pile bunker. Amazing long-range poke. As P.Ciel, you're going to love this move and hate it to death at the same time. This move will catch IADs like no other, more often than not netting you some pretty damaging air counterhit combos; however, at long distances where it would normally hit the opponent, it will whiff on them if they're crouching. Let that sink in for a moment. It is worth noting that even at max range, this move will always combo into 236B~C, making it one of the fastest and easiest ways to guarantee a knockdown in the game.

Crouching Normals

2A
Cpciel2a.png
Damage Red Damage Proration Cancel Guard
300 96 72% (O) SE, N, SP, EX, (J) L
First Active Active Recovery Frame Adv Circuit Invuln
5 4 8 0 1.4% -

Ciel does a quick jab straight forward with a knife while crouching. Aside from the fact that it hits low, this is a pretty bad move.

2B
Cpciel2b.png
Damage Red Damage Proration Cancel Guard
700 432 80% (O) N, SP, EX, (J) LH
First Active Active Recovery Frame Adv Circuit Invuln
7 4 17 -6 4.2% -

Ciel slashes the floor in front of her. The range on it isn't as amazing as 5B's, but it stays out for a bit longer.

2C
HPCiel-2C.png
Damage Red Damage Proration Cancel Guard
800 288 65% (O) N, SP, EX, (J) L
First Active Active Recovery Frame Adv Circuit Invuln
5 4 28 -14 3.5% -

Ciel sticks both her legs forward, sweeping the opponent off their feet. Knocks down. Very standard fare for a sweep move, and H-P.Ciel has amazing ways to capitalize off of it. At midscreen, any stray 2C hits lead into 3C j.B 2C (...) combos, and in the corner they lead directly into the 236[A] loop, both of which lead into a guaranteed knockdown and a hefty amount of damage.

Jumping Normals

Notes:

  • P.Ciel's air normals cannot be canceled into other air normals, double jump, air dashes or air throw. They can still be Special/EX canceled on block, however.
  • j.A does not recover in midair, P.Ciel must land before recovering if j.A isn't canceled.
j.A
Cpcielja.png
Damage Red Damage Proration Cancel Guard
300 96 75% (O) SP, EX LHA
First Active Active Recovery Frame Adv Circuit Invuln
5 4 - - 1.4% -

Ciel stabs in front of her with her knife. You should never hit this button. Ever.

j.B
HPCiel-j.B.png
Damage Red Damage Proration Cancel Guard
500 384 90% (M) SP, EX HA
First Active Active Recovery Frame Adv Circuit Invuln
7 6 - - 3.5% -

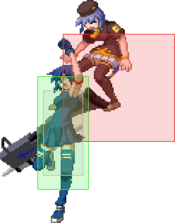
Ciel kicks downwards at an angle. Causes a ground bounce if it hits airborne targets. This move is good as a jump-in, and is a crucial part of your midscreen corner carry combos. Get the timing on those delayed j.Bs down ASAP - you're going to need them.

j.C
Cpcieljc.png
Damage Red Damage Proration Cancel Guard
1000 672 90% (O) SP, EX HA
First Active Active Recovery Frame Adv Circuit Invuln
9 5 - - 4.9% -

Ciel does a split-kick in the air. This move can cross up. There, that's out of the way. You are going to love this move to death - it's an amazing air-to-air, with a pretty good hitbox and decent start-up and active frames. Crossing up with this move is relatively easy

Command Normals

6B
HPCiel-6B.png
Damage Red Damage Proration Cancel Guard
500 288 75% (O) N, SP, EX, (J) LH
First Active Active Recovery Frame Adv Circuit Invuln
11 4 22 -8 2.8% -

Ciel performs a step-kick straight to the opponent's chest. Causes a wallslam on hit. A core part of H-P.Ciel's 236[A] loop. You need to get this move's hitbox down perfectly if you want to land them. Its vertical reach is far from spectacular, so you'll have to delay it almost always.

3C
HPCiel-3C.png
Damage Red Damage Proration Cancel Guard
1000 672 65% (O) N, SP, EX, (J) LH
First Active Active Recovery Frame Adv Circuit Invuln
10 2 35 -19 3.5% -

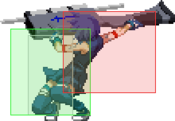
With the pile bunker as a fulcrum, Ciel performs a somersault kick. Launches on hit. Can be superjump-cancelled on hit by holding 8 as the move connects. Frames 11 through 24 have lower-body invulnerability. A surprisingly good anti-air if you can predict your opponent's directly vertical approach. You will very rarely use this move outside of combos.

4C
Cpciel4c.png
Damage Red Damage Proration Cancel Guard
800 672 80% (O) N, SP, EX, (J) LH
First Active Active Recovery Frame Adv Circuit Invuln
11 3 23 -8 3.5% -

Ciel slashes upwards with her knife. Launches on hit (though not nearly as high as 3C). Same as 3C - this move can work as a psychic anti-air; otherwise, you'll only be using it in combos.

Universal Mechanics

Ground Throw
MBCPCielThrow.png
Damage Red Damage Proration Cancel Guard
600 384 30% (Any) U
First Active Active Recovery Frame Adv Circuit Invuln
2 1 20 - 4.2% -

A ground throw that gives no knockdown but acts as a combo starter, much like Miyako's.

Air Throw
Air Throw
j.6/4A+D
MBCPCielThrowAir.png
Damage Red Damage Proration Cancel Guard
1600 (1408, Raw)
1200
1013 30% (Any if Raw)
(SP, EX)
U
First Active Active Recovery Frame Adv Circuit Invuln
1 1 12 - 11.2% (Raw)
8.4%
-

P.Ciel launches the opponent upwards. Hard knockdown if done raw, Air techable but special/EX cancelable if done in a combo.

Shield Counter
Shield Counter
Auto after a successful Shield (Air OK)
MBHPCielSC.png
MBHPCielSCLow.png
MBHPCielSCAir.png
Standing Damage Red Damage Proration Cancel Guard
500 (345) 198 50% (SP), (EX), (J) LHA
First Active Active Recovery Frame Adv Circuit Invuln
8 4 18 -4 3.5% -

Same animation as F-Moon 5B.

Crouching Damage Red Damage Proration Cancel Guard
1500 (1117) 714 50% (SP), (EX) LA
First Active Active Recovery Frame Adv Circuit Invuln
8 4 18 -4 10.5% -

Same animation as F-Moon 2B.

Aerial Damage Red Damage Proration Cancel Guard
500 (345) 198 50% - HA
First Active Active Recovery Frame Adv Circuit Invuln
8 4 - - 3.5% -

Same animation as F-Moon j.6C.

Shield Bunker
Shield Bunker
214D in neutral or blockstun
MBCPCiel214D.png
MBHPCiel214D.png
Neutral Damage Red Damage Proration Cancel Guard
500 192 50% - LHA
First Active Active Recovery Frame Adv Circuit Invuln
25 4 19 -5 0.0% Clash 1-10
(Clash) Damage Red Damage Proration Cancel Guard
500 192 50% - LHA
First Active Active Recovery Frame Adv Circuit Invuln
7 4 19 -5 0.0% Strike 1-7

Big bunker.

Blockstun Damage Red Damage Proration Cancel Guard
0 0 100% - LHA
First Active Active Recovery Frame Adv Circuit Invuln
18 3 22 -7 -100.0% -

H-Moon specific reversal bunker.

Circuit Spark
Circuit Spark
In Heat:
Auto during hitstun
A+B+C during blockstun
MBCPCielCSpark.png
MBCPCielCSparkAir.png
Ground Damage Red Damage Proration Cancel Guard
100 0 100% - U
First Active Active Recovery Frame Adv Circuit Invuln
10 10 20 - removes all Full 1-39
Air Damage Red Damage Proration Cancel Guard
100 0 100% - U
First Active Active Recovery Frame Adv Circuit Invuln
11 10 15 - removes all Strike 1-30

Universal burst mechanic. Unlike Crescent/Full Heat activation, the hitbox and frame data doesn't vary between characters. However, you can be thrown out of this move if you input it in the air.

Special Moves

Rapid Stake 「ラピッドステイク」 - 236ABC
236A
  • Startup: 11, 7
  • Active: 3, 3
  • Recovery: 34
  • Proration: 100, 50R
(65 if airborne)

Ciel lunges forward with her pile bunker, ramming it into the opponent; then, she performs a somersault kick akin to 3C. Both hits hit mid. Second hit can be charged (see 236[A]). Second hit launches on hit. Second hit causes a much longer untech time when it hits grounded opponents (they can only airtech at Ciel's head level if they're hit on the ground, otherwise they can airtech at the apex of the ascent).

On its own accord, this move isn't that spectacular. However, keep in mind that you can combo into this off of 5C, regardless of distance. If you're not sure about what combo you should do, simply default to this. It's not spectacular by any means, but at least it's something.

236[A]
  • Startup: 18
  • Active: 4
  • Recovery: 32
  • Proration: 70

Ciel does the same somersault kick, but more fiercely. Hits overhead. Causes an untechable launch on hit.

The key move to the 236[A] loop (hence why it's named as such). The untechable launch caused by this move happens regardless of the opponent's current state, and since it has amazing scaling to it, you don't need to be afraid of using this move repeatedly in your combos. This move by itself will raise your combos' damage outputs from ~3.5k to close to 6k.

236B
  • Startup: 5
  • Active: ?
  • Recovery: 26

Ciel lunges forward with her pile bunker. Has a clash box during its "active" frames. Pressing A, B or C at any point during the lunge performs a follow-up attack. Does NOT have a hitbox of its own at any point in time.

You will be using this a lot in a few match-ups, and not as much in others. The clash frames help to close the gap against characters that H-PCiel has a hard time getting in on (Nero's MANTIS LEG comes up as an example), however keep in mind that the opponent can hit Ciel around the clash box. This is a really strong tool, but be careful not to use it wrongly - it may cost you the round, if not the entire match.

  >A
  • Startup: 22
  • Active: 4
  • Recovery: 30
  • Proration: 50

Ciel stops dead in her tracks, readies her pile bunker then extends the spike on it whilst aiming straight forward. Hits mid. Causes a wallslam on hit.

This move deals an absolutely insane amount of guard damage (12.5% at blue, 35% at red) and, whilst it may not seem like it, it is surprisingly safe on block. As such, it's not a bad idea to throw this out randomly during pressure every now and then.

  >B
  • Startup: 18
  • Active: 6
  • Recovery: 39
  • Proration: 100

Ciel stops dead in her tracks, readies her pile bunker then extends the spike on it at a 45º angle. Hits mid. Blows the opponent away on hit. Forces an untechable knockdown on hit.

This move, just like 236B~A, deals a large amount of guard damage; however, unlike 236B~A, it is horribly unsafe on block; as such, it can't be used as a gimmick like 236B~A can.

  >C
  • Startup: 8
  • Active: 4
  • Recovery: 30
  • Proration: 70R
(65 if airborne)

Ciel pivots herself on her pile bunker mid-dash and performs a somersault kick on the spot. Hitbox is identical to 236A's. Causes an untechable launch on hit against grounded opponents (against airborne opponents, functions exactly like 236A).

This is your fullscreen punish. You can easily react to an opponent's slow start-up moves (even if airborne) and do this to punish them, netting a large chunk of damage (especially if it lands a counterhit). Like 236A, if you input 236B~C fast enough, you can combo into it off of any 5C hit - use this to your advantage to convert those max range 5C pokes into a full combo, possibly even a 236[A] loop.

236C
  • Startup: ?
  • Active: ?
  • Recovery: ?
  • Proration: 100

Ciel charges forward with her pile bunker, hitting the opponent repeatedly. If the final hit of the charge connects, she then extends the spike on the pile bunker, ramming the opponent into the wall. Last hit causes a wallslam.

This is Ciel's most damaging super, Arc Drive non-withstanding. However, it's still a pretty bad super. It's 236A without the damage and 236B without the follow-ups, all in one move. Save your meter for something else.

Shaft Drive 「シャフトドライブ」 - 623ABC
623A
  • Startup:
  • Active:
  • Recovery:
  • Proration: 100

-

HPCiel-623AX+j.236AX-1.png
  >A/B/C
  • Startup:
  • Active:
  • Recovery:
  • Proration: 90R, then 70

-

623B
  • Startup:
  • Active:
  • Recovery:
  • Proration: 100, 40

-

623C
  • Startup:
  • Active:
  • Recovery:
  • Proration: 100, 40

-

Shaft Drive 「シャフトドライブ」 - j.236ABC
j.236A
  • Startup:
  • Active:
  • Recovery:
  • Proration: 100

-

HPCiel-623AX+j.236AX-1.png
  >A/B/C
  • Startup:
  • Active:
  • Recovery:
  • Proration: 90R, then 70

-

j.236B
  • Startup:
  • Active:
  • Recovery:
  • Proration: 100, 40

-

j.236C
  • Startup:
  • Active:
  • Recovery:
  • Proration: 100, 40

-

Numeral Secret Crest - Lightning Fury/Blue Storm 「数秘紋・雷霆/青嵐」 - 214ABC (air OK)
214A
  • Startup:
  • Active:
  • Recovery:
  • Proration: 50

-

214B
  • Startup:
  • Active:
  • Recovery:
  • Proration: 50

-

214C
  • Startup:
  • Active:
  • Recovery:
  • Proration:

-

Arc Drive

HPCiel-arcDrive.png
Seventh Holy Scripture - Impeachment of Original Sin 「第七聖典・原罪弾劾」

-


MBAACC Navigation

General
FAQ
Advanced
AokoCrescentHalfFull
TohnoCrescentHalfFull
HimeCrescentHalfFull
NanayaCrescentHalfFull
KoumaCrescentHalfFull
MiyakoCrescentHalfFull
CielCrescentHalfFull
SionCrescentHalfFull
RiesbyfeCrescentHalfFull
V.SionCrescentHalfFull
WarachiaCrescentHalfFull
RoaCrescentHalfFull
MaidsCrescentHalfFull
AkihaCrescentHalfFull
ArcueidCrescentHalfFull
Powered CielCrescentHalfFull
Red ArcueidCrescentHalfFull
V.AkihaCrescentHalfFull
Mech-HisuiCrescentHalfFull
SeifukuCrescentHalfFull
SatsukiCrescentHalfFull
LenCrescentHalfFull
RyougiCrescentHalfFull
White LenCrescentHalfFull
NeroCrescentHalfFull
NACCrescentHalfFull
Koha-MechCrescentHalfFull
HisuiCrescentHalfFull
Neco-ArcCrescentHalfFull
KohakuCrescentHalfFull
Neco-MechCrescentHalfFull