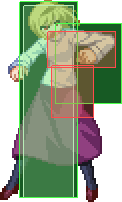
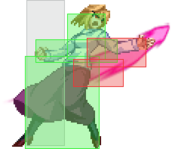
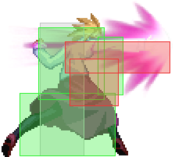
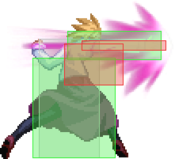
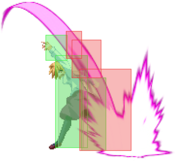
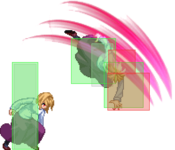
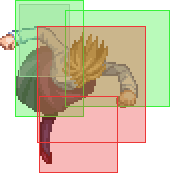
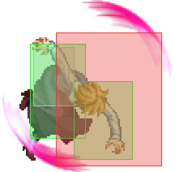
Melty Blood/MBAACC/Arcueid Brunestud/Full Moon
Character Page Progress
This page is still a work in progress, consider joining as an editor to help expand it. Please update this character's roadmap page when one of the editing goals have been reached.
| In Progress | To-do |
|---|---|
|
|
Additional Resources
F-Arcueid Match Video Database
Players to watch/ask
JP:
Overview
| Strengths |
|
| Weaknesses |
|
General Gameplan
Neutral
5B, 2B, and 2C are all phenomenal ground normals that cover large amounts of space. 236A and 236B net great reward on counterhit and cover huge amounts of grounded space. 623B and j.C can deter air approaches, and both have 6 active frames.
Pressure
As a Full Moon Character, F-Arc has A normals that are plus on block. However, none of her other ground normals are plus. This somewhat limits your options to effectively apply stagger pressure, as you can always be mashed against for ending on a B or C normal. Your A normals are also incredibly stubby, so you need to be careful to make sure that they don't whiff. To get around this problem, one option is to use your above average range on 5B, 2B, and 2C to play a longer range game instead of trying to rely on frame advantage. It is also important to master the timing to get fast sliding normals with Arc's dash as this brings you right back in. Closer range waves give you plus frames that you can use to press your advantage. 623A can be used to check people especially after a long range wave, but it's air blockable and -8, so use it sparingly. 623B and 5B can both be used to catch jumps. Pressure is not this character's strong suit, as she lacks powerful mixups or rebuy options.
Defense
Anti-air
F-Arc has no single best anti-air. All of her options work in different ways to cover slightly different angles and must be used in conjunction in order to effectively protect yourself from aerial approaches.
"Help there's too many options what do I do and/or Help I'm new what do i do"
Try 22X, 623B, and the universal options. Every new match/character you play, try using one new option to figure out where it's good and bad and eventually you'll be integrating everything into your gameplan.
- Universal Options
- Shield: Shield beats any attack provided that they actually chose to do one. You can shield into DP or shield into shield counter. If this gets baited you die.
- Dash Under: Arc's dash is good enough that this can be a valid tactic if you start early enough. Depending on the situation, you can do 5A or 5B to try and catch them.
- Rising airthrow/j.A: These must be done preemptively as you are essentially trying to use them to stuff a late jump-in. You should only go for this if your opponent is consistently doing very low air buttons.
- Invincible Options
- 22C/421C: Both of these are good if you know your opponent has committed to something as both will beat out any jump-in. However, both lose to shield with 22C always getting punished and 421C usually getting punished.
Use 22C if you're confident that your opponent will press something and unsure if you'll be able to punish with shield or get something out in time and 421C if they're committing to something from further away.
- 22A/B: Both moves have startup invincibility for a few frames and then upper body through the first active frame. 22B is faster by 1 frame and gets you hard knockdown on non counterhit, but 22A will sometimes clip your opponent with the second and get you a counter that way. These moves are mostly interchangeable and are good when your opponent has no double jump or (especially with 22A which is safer) good when they wouldn't be in position to whiff punish if they baited it. These are also great for ambiguous crossup situations and times when your opponent is right above you.
- High-Hitting Attacks
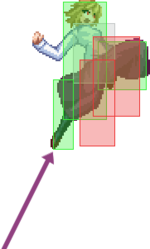
- 623B: this move has 6 active frames, huge disjoint, and comes out on frame 8. However, you extend a huge hurtbox for two frames before the move is active so you need to be careful. This is great preemptively as it lasts for an incredibly long time for an antiair, but if you whiff it or are late you're in danger. It beats most IADs and diagonal approaches if timed correctly however. Additionally, this move hits standing opponents, so it can sometimes stop dashes in.
- Low-Profile Moves
- 2B: This can beat specific problem normals such as C-Arc j.C. However, whether it works in a specific situation is usually not immediately obvious and requires labbing.
- 2C: This move has a massive disjoint right at the end of Arc's hand and will beat many moves if well spaced.
- 236B: Arc slouches down when she throws it so you will beat or trade with any move not spaced to land directly on top of you if your timing is good. However, it's easy for most characters to airdash over this if they predict it, so be careful with throwing this move out when your opponent is in the air or on the ground at the perfect IAD distance.
- Other
- 5A: This is your fastest attack since it takes time to input the 22B motion. This move is small and will lose to anything active but if you whiff it you're probably not dead.
- 5B: This move has a medium sized disjoint in front of you, so depending on spacing it will beat moves. Remember that Arc takes a big step forward so you do need to be far away, but not as far as for 2C.
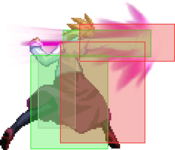
- 236A: This move is very tall and will stop many iads and some other jumpins. However, it has a blind spot right in front of Arc and she also stands up tall during it, so it will often whiff.
- Low Rising j.2B: This move is very niche but it has a large hitbox with some disjoint and will beat/trade with moves. It is additionally whiff cancellable upon landing so you can go into another antiair or anti ground option if you see that you missed. This move can also counterpoke some moves with low hitboxes.
Combos
| Combo Notation Help | |
|---|---|
| Disclaimer: Combos are written by various writers, so the actual notation used in pages can differ from the standard one. | |
| X > Y | X input is cancelled into Y. |
| X > delay Y | Must wait for a short period before cancelling X input into Y. |
| X, Y | X input is linked into Y, meaning Y is done after X's recovery period. |
| X+Y | Buttons X and Y must be input simultaneously. |
| X/Y | Either the X or Y input can be used. |
| X~Y | This notation has two meanings.
|
| X(w) | X input must not hit the opponent (Whiff). |
| j.X | X input is done in the air, implies a jump/jump cancel if the previous move was done from the ground. Applies to all air chain sections:
|
| sj.X | X input is done after a super jump. Notated as sj8.X and sj9.X for neutral and forward super jumps respectively. |
| dj.X | X input is done after a double jump. |
| sdj.X | X input is done after a double super jump. |
| tk.X | Stands for Tiger Knee. X motion must be buffered before jumping, inputting the move as close to the ground as possible. (ex. tk.236A) |
| (X) | X is optional. Typically the combo will be easier if omitted. |
| [X] | Input X is held down. Also referred to as Blowback Edge (BE). Depending on the character, this can indicate that this button is held down and not released until indicated by the release notation. |
| ]X[ | Input X is released. Will only appear if a button is previously held down. This type of input is referred to as Negative Edge. |
| {X} | Button X should only be held down briefly to get a partially charged version instead of the fully charged one. |
| X(N) | Attack "X" should only hit N times. |
| (XYZ)xN | XYZ string must be performed N times. Combos using this notation are usually referred to as loops. |
| (XYZ^) | A pre-existing combo labelled XYZ is inserted here for shortening purposes. |
| CH | The first attack must be a Counter Hit. |
| Air CH | The first attack must be a Counter Hit on an airborne opponent. |
| 66 | Performs a ground forward dash. |
| j.66 | Performs an aerial forward dash, used as a cancel for certain characters' air strings. |
| IAD/IABD | Performs an Instant AirDash. |
| AT | Performs an Air Throw. (j.6/4A+D) |
| IH | Performs an Initiative Heat. |
| AD | Performs an Arc Drive. |
| AAD | Performs an Another Arc Drive. |
Combos are (being) separated into easy, advanced, and situational/character specific within sections. Combos that are definitely worth learning will be bolded.
If you have questions about these combos (or this character in general) you can reach me on discord @adct#9542
(Table format taken from the Bas Gros Poing Wiki)
| Inputs | Damage (on V.Sion) | Meter generation | Meter cost | Video | Commentary |
|---|---|---|---|---|---|
| From anywhere | |||||
| Beginner | |||||
| 2A > 5B > 2B > 2C > 623B > j.ABC > dj.ABC > j.2C | 4319 | 74.7% | 0% | https://streamable.com/5o20r | Generic air combo. Adding 3C reduces damage but gives very slightly more meter. |
| (2A > 5B > 2B) 2C > 236A, 623A, 214B~C~C > j.BC > dj.BC > j.2C | 3856 | 61.3% | 0% | https://streamable.com/8lgjg | Basic corner carry combo, omit the first j.B if near corner. |
| 2A > 5B > 2B > 2C > 3C > 236C > j.ABC > dj.ABC > AT | 4921 | 47.2% | 100% | https://streamable.com/lkeun | If you aren't near the corner and want to avoid going into max mode, do this. 236C can go earlier in the combo if needed. |
| 6C > 623A, 214B~{B} > j.BC > AT | 3217 | 24.8% | 0% | https://streamable.com/2ih1m | Generic route from 6C midscreen. |
| 236A/B 236C jBC sdjBC at | 4548/4481 | 19.9% | 100% | https://streamable.com/bufcx | Hitconfirm from raw ground hit 236x. Reactable, but tight. |
| 236A/B 421c2 | 3116/3016 | 9.9% | 100% | https://streamable.com/do7qd | Hitconfirm from raw ground hit 236x. 421c is less damage but works from max range and whiff 421c is usually safer than whiff wave. Can go into 421c4 near corner for full combo and more damage. |
| Advanced | |||||
| 2A > 5B > 2B > 2C > 236A, 5B > 623B > j.C > dj.BC > j.2C | 4514 | 80.1% | 0% | https://streamable.com/7rpty | 236A, 5B is a 1 frame link, only do this if you don't have meter and it will kill. Shorten your air combo for longer ranged hits. |
| 2A > 5B > 2B > 2C > 236A, 623A > 236C > j9.2B > 22B | 4161 | 42.8% | 100% | todo | The 22B will sideswitch. |
| 2A > 5B > 2B > 5C > 214B~{B} > j.66 > delay j.B, 5C > 623B > j.BC > dj.BC > j.2C | 4383 | 99.9% | 0% | https://streamable.com/sp6jb | Almost full corner to corner with great meter gain and damage. Your best combination of damage, corner carry, and meter gain. Slight charge the knee. |
| 2C > 236B, 2C > 236B, 623B > j.BC > dj.BC > j.2C | 5202 | 84.6% | 0% | https://streamable.com/ao9xh | Great damage from closeish 2C hit. Even if you're a little further, they have a frame to tech out and a whiffed 2c is unpunishable. Whiffs on Hisui. |
| 2C > 236B, 2C > 236B, 623A, 5A > 2C > 236B, 623B > j.BC > dj.BC > j.2C | 5855 | 112.5% | 0% | https://streamable.com/d4vjr | Extension of above combo for more everything. Delay on 2nd 236B varies with character and the 623A, 5A is probably not universal. |
| 2A > 5B > 2B > 2C > 236A, 5B > 623B > j.C > dj.BC > j.2C | 4514 | 80.1% | 0% | https://streamable.com/7rpty | 236A, 5B is a 1 frame link, only do this if you don't have meter and it will kill. Shorten your air combo for longer ranged hits. |
| Situational/Character Specific | |||||
| 5B > 2B > 2C > j.2B > 623A, 5A > 2C > 236B, j.ABC > sdj.ABC > j.2C | 4905 | 98.1% | 0% | todo | Character specific high damage+metergain route. Needs exactly two hits before 2C. You can substitute in 5C~C instead of j.A for less damage and more carry. |
| 2A > 5B > 2B > 5C > 214B~C~C > j.B > delay j.C, land j.ABC > dj.ABC > j.2C | 3897 | 90.0% | 0% | https://streamable.com/01ygj | Alternate corner carry combo off of 214B. Probably not universal. |
| 2A > 5B > 2B > 5C > 214B~C~C > j.A > delay j.B, 5C~C > j.BC > dj.BC > j.2C | 3392 (On Arc) | 90.0% | 0% | todo | Weird character specific carry combo with double superdash. Probably not worth but looks cool. |
| 2A > 5B > 2B > 5C > 623B~6B > delay 623A, 5A > 2C > 236B, 623B > j.BC > dj.ABC > j.2C | 5032 | 112.5% | 0% | https://streamable.com/t1tdp | Higher damage, standing only, character specific combo. More 623A juggles are possibly available and you can do 623A~6A wall combos in the corner. |
| 2A > 5B > 2B > 5C > 214B~{B} > j.66 > delay j.B, 623A, 5A > 2C > 236B, 623B > j.BC > dj.AABC > j.2C | 4682 | 124.2% | 0% | todo | Character specific extension of standard 214B route for more damage and metergain. |
| Impractical | |||||
| 2C > j.AAB rejump aircombo | ? | ?% | ?% | n/a | This probably works but i've never been able to do get it to function. |
| You are in the corner | |||||
| 2A > 5B > 2B > 236A, 623A, 236B > 421C, 2C | 3677 | 52.4% | 100% | https://streamable.com/irpc5 | Side swap into 2C knockdown. Do 2C > 236B, 623B > aircombo if you want j.2C or 2C > 236B, 5A > 3C > 22B for that knockdown. |
| 2A > 5B > 2B > 5C > 214B~B > j.66 > delay j.B, 5C~C > j.BC, land 22B | 3663 | 79.2% | 0% | https://streamable.com/11vcn | Corner to corner carry meterless that ends in 22B knockdown. |
| Your opponent is in the corner | |||||
| 2A > 5B > 2B > 2C > 236A, 623A~delay 6A, 2C > 236B, 623A, 5A > 2C > 236B, 623A~delay 6A, 5A > j.ABC > dj.ABC > j.2C | 5557 | 144.9% | 0% | https://streamable.com/1yvf6 | This is likely the highest damage universal meterless confirm in the corner. Delay 623A followups, the first 2C is a 1f link, and you can replace the aircombo with 3C > 22B. |
| 2A > 5B > 2B > 2C > 236A, 623A~6A, 2C > 236B, 623A, 5A > 2C > 236A, 623A~6A, 5B > j.BC > dj.ABC > j.2C | 5581 | 143.1% | 0% | https://youtu.be/9jrBMRen0gc | Slightly more damaging variant of the route above. Slightly less meter gain. Unsure if universal. 3C > 22B ender still works. |
| CH 623A, 5B > 2C > 623A, 5A > 2C > delay 236B, 623A~delay 6A, 2C > delay 236B, 623A~delay 6A, 5A > j.ABC > dj.ABC > j.2C | 6120 | 134.1% | 0% | https://streamable.com/gra6h | 3 1f links and 4 delays. This is probably not worth doing, but it does exist. Note that distance may make the 2C drop. |
| 2A > 5B > 2B > 2C > 236A, 623A~6A, 2C > 236B, 623A, 2A > 2C > 623C, walk back 2C | 5117 | 83.0 (about 80 before the 623C) | 100% | https://streamable.com/tyy96 | Good way to get optimal knockdown without losing damage. Using 623C removes the need for extra height management and the final 1 frame link. Not walking back causes a side swap. |
| 2A > 5B > 2B > 2C > 236A, 623A~6A, 623A~6A, 623B > j.ABC > dj.ABC, j.2C | 5067 | 104.4% | 0% | https://streamable.com/y2ph2 | This is the basic corner route; omit the second 623A 6A on characters where it drops(idk who atm). |
| After an aerial counter hit | |||||
| CH 236B, 5B > j.ABC > dj.ABC > j.2C | 4572 | 54.0% | 0% | https://streamable.com/1v4sa | Panic route for when you aren't confident in a harder pickup. |
| CH 236B, 5B > 2C > 236B, 623B > j.BC > dj.BC > j.2C | 5795 | 81.9% | 0% | https://streamable.com/a4dqh | Basic air CH route; 5B is optional and 5B > 2C requires specific height. However, I find 5B > 2C to be easier at max range. |
| CH 236B, 5B > 2C > delay 623A, 5A > 2C > 236B, 623B > j.BC > dj.BC > j.2C | 6424 | 99.9% | 0% | https://streamable.com/q17cy | Harder air CH route and likely the best universal route. Delay the 623A to enable the 5A link. |
Check this nico video for more advanced air CH confirms (link). They might not necessarily be optimal, but if you can master the execution for the various links involved, you'll have all the necessary skills to lab out longer combos.
This WIP document will have a more robust list of combo info in the future.
Notes
OTG 214B~C doesn't work on: Nanaya, Sion, Akiha, Seifuku, Len, White Len and Ryougi
623B~6B > 623A is standing only and works on Aoko, Miyako, Riesbyfe, P.Ciel, Len, Ryougi, Nero and Kohaku with at least 4 hits before 623B~6B.
- It works on Nanaya and Kouma with 5 or more hits, i.e. if you add a 2A or replace 5C with j.B > j.2B.
Combo Theory
F-Arc's pressure, damage, meter gain, mixups, and oki are all significantly better if you have your opponent in the corner. In some situations, you might decide to go for an easier combo or go for damage to gain a life lead, but as a general rule, this is your list of priorities.
To maximize damage with F-Arc, it is important to know two facts about her damage scaling: one, that 623A~6A (and 623B~6B) both set the combo proration (referred to as correction value in the attack display of training mode) to 50% if it is not already that low, causing future moves in your combo to do at most 50% of their normal damage; and two, that her power waves, 236A and 236B, have 80% forced proration, meaning that they take whatever the current correction value is and multiply it by .8. For example, if you started a combo with 236A, your correction value would be at 80%, and if you did 623A~6A and followed with a 236A, your value would be at 40%. What this means is that any scaling you do to your combo before a 623A~6A will not have an impact on later damage as long as you don't go below 50%. Also, sometimes you'll have to cut your aircombos short so they dont drop. Usually you can be safe with j.BC > dj.BC ender, but sometimes you have to do j.C > dj.BC or even j.C > dj.C.
Relevant Numbers
Melty has two types of damage proration (called correction value in game): regular and forced. Regular proration sets the damage of future hits in the combo to be at most that value, ie if you were at 100% proration and hit with a move that had 80%, all future moves would be doing at most 80% of their damage, but if you were at 70%, you would keep doing 70%. Forced proration multiplies the current value by the move's value, so if you were at 80% and do a move that has 80%, you would do 64% in the future.
623A~6A (and 623B~6B) have 50% regular proration, so ideally you would get as close to 50% as possible before using them. Waves have 80% forced proration. Combos that set your proration value to under 80% before the first wave let you do a single wave to not go below this threshold, while combos that set it to 80% let you use two. 5A, 2A, 2B, 22B, jA, 214B and its followups, and 623B are all the moves that put you under 80% without using a wallbounce. This is useful to consider if you get an air counterhit near the corner and want to do an extended juggle before your wallbounce. For example, 22A(CH), 5B > 2C > 236B, 2C > 236B will likely work on most characters with appropriate delays and puts you at 51% proration. After a wallbounce, things get way murkier and require a lot more trial and error to see what works or is easy on specific characters.
Move Descriptions
| Frame Data Help | |
|---|---|
| Header | Tooltip |
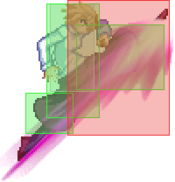
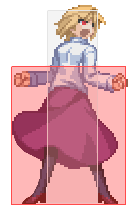
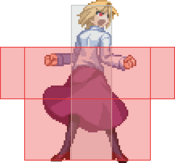
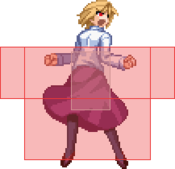
| Move Box Colors |
Light gray = Collision Box (A move lacking one means it can go through the opponent's own collision box). |
| Damage | Base damage done by this attack.
(X) denotes combined and scaled damage tested against standing V. Sion. |
| Red Damage | Damage done to the recoverable red health bar by this attack. The values are inherently scaled and tested against standing V. Sion.
(X) denotes combined damage. |
| Proration | The correction value set by this attack and the way it modifies the scaling during a string. See this page for more details.
X% (O) means X% Overrides the previous correction value in a combo if X is of a lower percentage. |
| Circuit | Meter gained by this attack on hit.
(X%) denotes combined meter gain. |
| Cancel | Actions this move can be cancelled into.
SE = Self cancelable. |
| Guard | The way this move must be blocked.
L = Can block crouching |
| Startup | Amount of frames that must pass prior to reaching the active frames. Also referred to as "True Startup". |
| Active | The amount of frames that this move will have a hitbox. (x) denotes frame gaps where there are no hitboxes is present. Due to varied blockstuns, (x) frames are difficult to use to determine punish windows. Generally the larger the numbers, the more time you have to punish. |
| Recovery | Frames that this move has after the active frames if not canceled. The character goes into one frame where they can block but not act afterwards, which is not counted here. |
| Advantage | The difference in frames where you can act before your opponent when this move is blocked (assuming the move isn't canceled and the first active frame is blocked). If the opponent uses a move with startup that is at least 2 frames less than this move's negative advantage, it will result in the opponent hitting that move. |
| Invul | Lists any defensive properties this move has.
X y~z denotes X property happening between the y to z frames of the animations. If no frames are noted, it means the invincibility lasts through the entire move. Invicibility:
Hurtbox-Based Properties:
Miscellaneous Properties
|
Normal Moves
Standing Normals
5A
5B
5C
5C 5C 5C~C 5C~C 5[C] 5[C]
|
|---|
Crouching Normals
2A
2B
2C
Aerial Normals
j.A
j.B
j.C
Command Normals
3C
6C
j.2B
j.2C
Universal Mechanics
Ground Throw
Ground Throw 4/6A+D(~2) ~2 ~2
|
|---|
Air Throw
Air Throw
j.4/6A+D |
|---|
Shield Counter
Shield Counter
236D after a successful Shield (Air OK) |
|---|
Shield Bunker
Shield Bunker
214D in neutral or blockstun |
|---|
Blood Heat
Blood Heat
A+B+C during MAX |
|---|
Circuit Spark
Circuit Spark
A+B+C during hitstun/blockstun at MAX |
|---|
Special Moves
Special Movement
Forward Dash
Grounded Specials
236X
How's that?!
(EX: Burst!) 236A/B/C |
|---|
623X
A A ~6X ~6X B B ~6X ~6X EX EX
|
|---|
214X
B~A B~A B~B B~B B~[B] B~[B] B~C B~C B~C~C B~C~C
|
|---|
421X
22X
Quiet! (Fly!) 22A/B/C A A B B (Followup on hit) (Followup on hit) EX (Last 2 hitboxes are repeated) EX
(Last 2 hitboxes are repeated) |
|---|
Aerial Specials
j.421X
Over here, over here! (Air)
j.421A/B/C (No EX) |
|---|
Arc Drive
From Dreams to Reality (Marble Phantasm) 41236C during MAX/Heat (Chain textures unavailable) (Chain textures unavailable)
|
|---|
Another Arc Drive
Melty Blood 41236C during Blood Heat (Chain textures unavailable) (Chain textures unavailable)
|
|---|
Last Arc
Shall we play around a bit? Aerial EX Shield during Blood Heat Universal version Universal version Tohno/Nanaya variation Tohno/Nanaya variation
|
|---|
