Character Page Progress
This page is still a work in progress, consider joining as an editor to help expand it. Please update this character's roadmap page when one of the editing goals have been reached.
| In Progress |
To-do
|
- Overview:
- Add a short summary of this character with a list of strengths and weaknesses
- (Additional Ressources)
- (Add any external links to ressources such as video guides or articles.)
|
- Combos:
- Add videos to combos that are missing one.
|
Additional Resources
F-Len Match Video Database
Melty Bits: F-Len
Players to watch/ask
JP:
NA:
SA:
EU:
Overview
Strengths / Weaknesses
| Strengths
|
- Text goes here after asterisk
- Text goes here after asterisk
|
| Weaknesses
|
- Place text here be sure to use "*" for each point*
|
General Gameplan
F-Len is a high damage character and the hardest-hitting of all the Lens. Many F-Len players go for her full-damage combos over her oki setups.
She is however a character who struggles against rushdown and strong oki characters (like C-Seifuku) due to her lack of fast and strong reversal options.
F-Lens should be sure of every commitment they make as committing to a move at the wrong time will end up with her taking a combo. F-Len is a lower health character, so it is essential that she avoids getting hit.
As far as oki goes, F-Len can use her mirrors, meaty 236A/C (provided F-Len is at the correct distance), and a safe jump (provided the safe jump oki setup was used - check the combo section for more information on that).
If the standard AT combo ender is used, go for a tech trap (5B during an opponent's ground tech, if done properly it will catch them during their tech, therefore leading into another combo).
Practice this tech trap. It is very essential to not just F-Len's, but all Len's gameplay.
This tech trap covers the most tech options if F-Len can put her opponent into the corner. If her opponent does not tech the 5B tech trap, there is enough time for Len to set up a 214A/B mirror, giving her some more pressure options.
Note that the opponent can tech after the 5B tech trap so be ready to catch them if they make such a choice.
Many options for combos or oki are only available in corner, so try to force her opponents there.
Fortunately, F-Len has no trouble getting her opponents in corner thanks to her 214A mirrors, not to mention her standard BnB also carries the opponent little over halfway of the stage.
In neutral, F-Len can set up a mirror relatively safely if she cancels it into initiative heat or 236C. Mirrors CANNOT be shielded by an opponent (barring 214C), so take advantage of that property. Also note that mirrors cannot counter hit an opponent.
Meter management is relatively easy with F-Len as she does not get any major combo extensions off of meter.
The times that F-Len usually uses meter are for pressure (236C, meaty 214C) or for Initiative Heat (cancelling + healing) or Blood Heat (reversal + healing), or for burst. It's advisable to save meter for Initiative heat / Blood heat as healing is a solution to the problem of F-Len's low health.
Full
Eating cake makes you full.
Neutral
F-Len is a "control" character with many tools to space and control the neutral, however it is important to think before committing to a move as a lot of her useful moves leave her open to counterhit.
As with all fighting games, it is important to know your opponent's and your own effective ranges.
F-Len is effective within several different ranges (i.e. at the edge of 5B, or within 5A). Take advantages of the several disjoints she has, as well as the special moves she can use.
214A Mirrors can reflect many projectiles which can help when fighting against zoners.
Keep in mind the frame data on F-Len's moves as well because using a move at the wrong timing and spacing can result in F-Len eating a combo.
Pressure
F-Len's pressure is rather linear in that she has only one low and no standing overhead.
Keep varying the moves that are used in a blockstring to avoid becoming predicable. Please note that the lack of reverse beating from a blockstring means that F-Len is limited in how she can reclose the gap to her opponent. Stay creative and unpredictable when you do this. Tick throws, stagger pressure, and fuzzy guard mixups are strong options F-Len has for mixups.
Midscreen, F-Len gets barely anything off of throws outside of character specific midscreen throw combos and poor tech trap situations since not all options are covered.
However, in corner F-Len gets way better options as she choose between high damage throw combos (3k+ damage!) that work on almost every character, or mirror oki setup combos.
These mirror oki setup combos allow F-Len to set up mirrors of her choice with ease. Mirrors are a good pressure tool since they have good amounts of blockstun, they cannot be shielded (punish shield heavy opponents!) and if an opponent blocks a mirror during their jump it leaves them open to an anti-air 5C provided they're low enough.
Defense
Being in disadvantage state is particularly bad for F-Len as she lacks any decent reversal option.
Other escape options that F-Len players should master are "catwalk", and shield counters.
Catwalk is performed by holding 3, and allows F-Len to crawl in cat form with a hurtbox size that almost matches her cat sprite size. Some jumping normals will whiff over this, so use this property to your advantage.
For reversal options, Len either has very weak options or very expensive options:
Her 623C is lower body invuln and propels her into the air, meaning it will beat out some 2A's but if it trades, then Len is in a very bad position and may end up eating a full combo.
Heats and Arc Drives can work as reversal options, but don't be too predicable.
F-Len's AD is significantly better than her AAD as an escape option because it is multihit, has clash, and is generally safe.
In contrast, F-Len's AAD is punishable on block.
Shield and shield followups are decent alternative to F-Len's stronger reversal options.
F-Len's shield counter is a bit slow, so an alternative method of escaping a ready opponent is shield > 236X/623B (236C works pretty well due to multihit properties).
In very specific cases (i.e. F-PCiel's high rock toss), 4B's clash hitbox can be used and will chain into 5C/3C.
When in a situation where mashing is appropriate, 3C can be a good normal to mash out of pressure provided the gap in the opponent's pressure is large enough.
3C will most likely trade, but since it knocks the opponent off the ground, F-Len is in a more advantageous position and may even get a combo off of the trade.
Summary
- Be aware of the trade-off that F-Len faces when going for oki or full damage combos.
- Master the tech trap.
- Mirrors create unique pressure and cannot be shielded.
- Many options open up in corner for F-Len so try to force the opponent into corner.
- Be aware before committing F-Len to a move, her low health makes mistakes extremely punishing.
- Using meter to heal is a way to alleviate the severity of mistakes.
- F-Len struggles to escape a disadvantaged state due to lack of strong options.
- F-Len lacks strong mixups so master tick throws, staggers, and fuzzy guards.
Combos
| Combo Notation Help
|
Disclaimer: Combos are written by various writers, so the actual notation used in pages can differ from the standard one.
For more information, see Glossary and Controls.
|
| X > Y
|
X input is cancelled into Y.
|
| X > delay Y
|
Must wait for a short period before cancelling X input into Y.
|
| X, Y
|
X input is linked into Y, meaning Y is done after X's recovery period.
|
| X+Y
|
Buttons X and Y must be input simultaneously.
|
| X/Y
|
Either the X or Y input can be used.
|
| X~Y
|
This notation has two meanings.
- Use attack X with Y follow-up input.
- Input X then within a few frames, input Y. Usually used for option selects.
|
| X(w)
|
X input must not hit the opponent (Whiff).
|
| j.X
|
X input is done in the air, implies a jump/jump cancel if the previous move was done from the ground.
Applies to all air chain sections:
- Assume a forward jump cancel if no direction is given.
- Air chains such as j.A > j.B > j.C can be shortened to j.ABC.
|
| sj.X
|
X input is done after a super jump. Notated as sj8.X and sj9.X for neutral and forward super jumps respectively.
|
| dj.X
|
X input is done after a double jump.
|
| sdj.X
|
X input is done after a double super jump.
|
| tk.X
|
Stands for Tiger Knee. X motion must be buffered before jumping, inputting the move as close to the ground as possible. (ex. tk.236A)
|
| (X)
|
X is optional. Typically the combo will be easier if omitted.
|
| [X]
|
Input X is held down. Also referred to as Blowback Edge (BE). Depending on the character, this can indicate that this button is held down and not released until indicated by the release notation.
|
| ]X[
|
Input X is released. Will only appear if a button is previously held down. This type of input is referred to as Negative Edge.
|
| {X}
|
Button X should only be held down briefly to get a partially charged version instead of the fully charged one.
|
| X(N)
|
Attack "X" should only hit N times.
|
| (XYZ)xN
|
XYZ string must be performed N times. Combos using this notation are usually referred to as loops.
|
| (XYZ^)
|
A pre-existing combo labelled XYZ is inserted here for shortening purposes.
|
| CH
|
The first attack must be a Counter Hit.
|
| Air CH
|
The first attack must be a Counter Hit on an airborne opponent.
|
| 66
|
Performs a ground forward dash.
|
| j.66
|
Performs an aerial forward dash, used as a cancel for certain characters' air strings.
|
| IAD/IABD
|
Performs an Instant AirDash.
|
| AT
|
Performs an Air Throw. (j.6/4A+D)
|
| IH
|
Performs an Initiative Heat.
|
| AD
|
Performs an Arc Drive.
|
| AAD
|
Performs an Another Arc Drive.
|
Note that the difficulty may be a bit subjective as it factors in personal experience + a non-Len player's experience with the combo.
| Condition
|
Notation
|
Damage
vs V.Sion
|
Notes
|
|
| Anywhere / Easy
|
- 5B > 2B > 3C > 623A > j.BC > j.BC > AT
|
4368
|
| |
| Meter Gained: 72.4% |
Meter Given (vs C-Moon): ??? |
Far range confirm. Effective at the ranges from the middle to the end of 5B's hitbox
- This combo lacks compared to the bnb in every aspect, so only use it at the effective range
|
|
|
| Air CH, Anywhere / Easy-Medium
|
- (Air CH) > land 2B > (etc) > 3C > 623A > j.BC > dj.BC > AT
|
~3600
|
|
| Meter Gained: ~70.2% |
Meter Given (vs C-Moon): ??? |
(Video) |
Standard air-counterhit confirm
- Note that A/B normals (barring 2B and 4B) send the opponent a further trajectory during CH compared to C normals
- If the opponent is not too far from where Len lands, she can use the (5A > 2B) loops before the 5C(2)
|
|
|
| Air CH, Near Corner / Easy
|
- (Air CH) > land 2B > 214A > sj9.C > dj.BC > AT
|
~2027
|
|
| Meter Gained: ~26.0% |
Meter Given (vs C-Moon): ??? |
(Video) |
Air-counterhit corner carry combo.
- 214A must wallslam the opponent.
- Note that A/B normals (barring 2B and 4B) send the opponent a further trajectory during CH compared to C normals.
|
|
|
Corner / Medium
Works On: All except Necos
|
- (5A/2A) > 5B > 5C(4) > 3C > 623A > instant AT, 3C > 623B > j.ABC > dj.BC > AT
|
5635
|
|
| Meter Gained: 99.0% |
Meter Given (vs C-Moon): ??? |
(Video) |
Corner Combo derived from the BnB.
- Delay the 623A as much as possible so the instant air throw can connect. The j.A is necessary as j.B is too slow for the sequence after 623B.
- The 623B may have to be done fast.
- Does not work on Necos.
|
|
|
| Corner / Very Easy
|
- (5A/2A) > 5B > 2B > 214A > (wallbounce) 5B > 2B > 214A
|
2595
|
| |
| Meter Gained: 15.3% |
Meter Given (vs C-Moon): ??? |
Basic mirror oki
- Safe jump if the opponent has a reversal that is 6+ frames startup - Note that safe jumps aren't actually safe if the opponent shields
- Also becomes a safe jump if the 2nd mirror is omitted or if an air dash is used (Len has to manually time these jumps/air dashes, it's very hard)
- The second 214A can be placed instead as a tk. 214B allowing it to be activated in the air, useful for jump in baits and mixups.
|
|
|
| Corner / Medium-Hard
|
- Throw > (5A > 2B)x3 > (etc) > 5C(2) > 3C > 623A > jc > j.BC > j.BC > AT
|
3141
|
|
| Meter Gained: 81.0% ~ 90.9% |
Meter Given (vs C-Moon): ??? |
(Video) |
Corner throw combo with 5A > 2B loop.
- 5A > 2B timings may change depending on the opponent's character.
- The 3rd loop may have to be omitted depending on the opponent's character and whether a dash was used leading into the grab.
- A very minuscule delay may be required for the 5C(2).
- Do this if you struggle with the instant AT version below.
|
|
|
Corner / Hard
Works On: All except Necos
|
- Throw > (5A > 2B)x2 > 3C > 623A > instant AT, 3C > 623B > j.ABC > dj.BC > AT
|
3250
|
|
| Meter Gained: 94.0% |
Meter Given (vs C-Moon): ??? |
(Video) |
Advanced corner throw combo. Harder than lightning loops apparently.
- 5A > 2B timings may change depending on the opponent's character.
- Delay the first 3C so that the opponent is as low as possible to the ground.
- Delay the 623A as much as possible for the instant air throw.
- The 623B may have to be done fast.
- The j.A is necessary as j.B is too slow for the sequence after 623B
- Does not work on Necos
|
|
|
| Corner + Setup (See Notes) / Medium
|
- (5A/2A) > 5B > 5C(4) > 3C > 623A > tk.214B > 214B > j.BC > dj.BC > AT, j.BC > dj.BC > AT
|
6909
|
| |
| Meter Gained: 155.2% |
Meter Given (vs C-Moon): ??? |
Advanced Corner Combo. Required setup is j.214B Mirror 1 jump height (midscreen in air) in corner.
- Jump cancel the tk.214B mirror.
- Time the tk.214B mirror to be placed as the opponent hits the mid air set up mirror (it's placed almost immediately after the 623A)
- Timing may change due to opponent character height.
- The first airthrow should send the opponent into the grounded 214B mirror.
- The 2nd j.BC string timing is a bit awkward.
|
|
|
Corner + Setup (See Notes) / Medium
Works On: (See Notes)
|
- (5A/2A) > 5B > 5C(4) > 3C > 623A > tk.214B > 214B > j.BC > dj.BC > AT, j.BC > dj.BC > AT
|
7309
|
| |
| Meter Gained: 154.0% |
Meter Given (vs C-Moon): ??? |
Advanced Character-Specific Corner Combo. Required setup is j.214B Mirror slightly less than 1 jump height (midscreen in air) in corner.
- Confirmed to work against the Sions, other characters still need testing.
- The j.214B has to be done at the right height (almost as high as possible, see vid)
- The 623A should hit the opponent before they land into the 214B mirror placed.
- The ending sequence of the j.BC is identical to the above combo.
|
|
|
BasGrosPoing Wiki Combos
Original page translated from French.
Basic
| Condition
|
Notation
|
Damage
vs V.Sion
|
Notes
|
|
| Normal starter, grounded opponent
|
- (5A) > 5B > 5C(4) > 3C > 623A > j.BC > dj.BC > AT
|
???
|
| |
| Meter Gained: ??? |
Meter Given (vs C-Moon): ??? |
| Basic BnB. |
|
|
| Air CH j.B starter
|
- CH j.B > (5B > 5C)/(5C > 623A) > j.BC > dj.BC > AT
|
???
|
| |
| Meter Gained: ??? |
Meter Given (vs C-Moon): ??? |
| Air counter combo. |
|
|
| Raw AT starter
|
- Raw AT, 5C(4) > 623A > j.BC > dj.BC > AT
|
???
|
| |
| Meter Gained: ??? |
Meter Given (vs C-Moon): ??? |
| Golden Air Throw combo. |
|
|
Advanced
| Condition
|
Notation
|
Damage
vs V.Sion
|
Notes
|
|
| Normal starter, grounded opponent, Corner
|
- (5A) > 5B > 5C(4) > 623B > 3C > 623A > instant AT, 5A > 2B
|
???
|
| |
| Meter Gained: ??? |
Meter Given (vs C-Moon): ??? |
| Corner combo. |
|
|
| Normal starter, grounded opponent
|
- (5A) > 5B(3) > 5C(4) > 623B > 214X > 2B > 5C(2) > 3C > 623A > j.BC > dj.BC > AT
|
???
|
| |
| Meter Gained: ??? |
Meter Given (vs C-Moon): ??? |
| 214A mirror placed at the opposite end of the screen. |
|
|
| Normal starter, grounded opponent
|
- (5A) > 5B > 5C(4) > 3C > 623A > j.BC > dj.BC > j.214X > dash j.BC > dj.BC > AT
|
???
|
| |
| Meter Gained: ??? |
Meter Given (vs C-Moon): ??? |
| j.214B mirror placed half a screen away and above the opponent. |
|
|
| Normal starter, grounded opponent
|
- (5A) > 5B(3) > 2B > 4B > 214B > j.214B > 214B > (Before Mirror Hits) 5B(3) > j.BC > dj.BC > AT > j.214X, sj.BC > dj.BC > AT
|
???
|
| |
| Meter Gained: ??? |
Meter Given (vs C-Moon): ??? |
| j.214B mirror placed half a screen away and above the opponent. |
|
|
| Raw AT starter
|
- Raw AT, 2B > 5C(2) > 3C > 623A > j.BC > dj.BC > AT
|
???
|
| |
| Meter Gained: ??? |
Meter Given (vs C-Moon): ??? |
| Raw AirThrow combo. |
|
|
| Normal starter, grounded opponent, Corner
|
- (5A) > 5B > 5C(4) > instant AT, (3C > 623B > instant AT)x3 > 5A > 2B
|
???
|
| |
| Meter Gained: ??? |
Meter Given (vs C-Moon): ??? |
| Corner combo. |
|
|
| Shield Counter starter
|
- 236D > 214B, 2B > (5A > 2B)xN > 5C(2) > 3C > j.BC > dj.BC > AT
|
???
|
| |
| Meter Gained: ??? |
Meter Given (vs C-Moon): ??? |
| After-shield combo, to be confirmed |
|
|
Move Descriptions
| Frame Data Help
|
| Header
|
Tooltip
|
| Move Box Colors
|
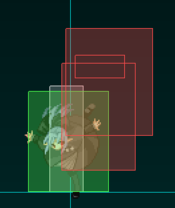
Light gray = Collision Box (A move lacking one means it can go through the opponent's own collision box).
Green: Hurt Boxes.
Red: Hit(/Grab) Boxes.
Yellow: Clash Boxes (When an active hitbox strikes a clash box, the active hitbox stops being active. Multi-hit attacks can beat clash since they will still progress to the next hitbox.)
Magenta: Projectile-reflecting boxes OR Non-hit attack trigger boxes (usually).
Blue: Reflectable Projectile Boxes.
|
| Damage
|
Base damage done by this attack.
(X) denotes combined and scaled damage tested against standing V. Sion.
|
| Red Damage
|
Damage done to the recoverable red health bar by this attack. The values are inherently scaled and tested against standing V. Sion.
(X) denotes combined damage.
|
| Proration
|
The correction value set by this attack and the way it modifies the scaling during a string. See this page for more details.
X% (O) means X% Overrides the previous correction value in a combo if X is of a lower percentage.
X% (M) means the current correction value in a combo will be Multiplied by X%. This can also be referred to as relative proration.
|
| Circuit
|
Meter gained by this attack on hit.
(X%) denotes combined meter gain.
-X% denotes a meter cost.
|
| Cancel
|
Actions this move can be cancelled into.
SE = Self cancelable.
N = Normal cancelable.
SP = Special cancelable.
CH = Cancelable into the next part of the same attack (Chain in case of specials).
EX = EX cancelable.
J = Jump cancelable.
(X) = Cancelable only on hit.
-X- = Cancelable on whiff.
|
| Guard
|
The way this move must be blocked.
L = Can block crouching
H = Can block standing.
A = Can block in the air.
U = Unblockable.
|
| Startup
|
Amount of frames that must pass prior to reaching the active frames. Also referred to as "True Startup".
|
| Active
|
The amount of frames that this move will have a hitbox.
(x) denotes frame gaps where there are no hitboxes is present. Due to varied blockstuns, (x) frames are difficult to use to determine punish windows. Generally the larger the numbers, the more time you have to punish.
X denotes active frames with a duration separate from its origin move's frame data, such as projectile attacks. In this case, the total length of the move is startup+recovery only.
|
| Recovery
|
Frames that this move has after the active frames if not canceled. The character goes into one frame where they can block but not act afterwards, which is not counted here.
|
| Advantage
|
The difference in frames where you can act before your opponent when this move is blocked (assuming the move isn't canceled and the first active frame is blocked).
If the opponent uses a move with startup that is at least 2 frames less than this move's negative advantage, it will result in the opponent hitting that move.
±x~±y denotes a range of possible advantages.
|
| Invul
|
Lists any defensive properties this move has.
X y~z denotes X property happening between the y to z frames of the animations. If no frames are noted, it means the invincibility lasts through the entire move.
Invicibility:
- Strike = Strike invincible.
- Throw = Throw invincible.
Hurtbox-Based Properties:
- Full = No hurtboxes are present.
- High = Upper body lacks a hurtbox.
- Low = Lower body lacks a hurtbox.
Miscellaneous Properties
- Clash = Frames in which clash boxes are active.
- Reflect = Frames in which projectile-reflecting boxes are active.
- Super Armor = Frames in which the character can take hits without going into hit stun.
|
Normal Moves
Standing Normals
|
|
| Damage
|
Red Damage
|
Proration
|
Cancel
|
Guard
|
| 350
|
202
|
75% (O)
|
-SE-, -N-, -SP-, -EX-, (J)
|
LH
|
| First Active
|
Active
|
Recovery
|
Frame Adv
|
Circuit
|
Invuln
|
| 4
|
4
|
5
|
3
|
3.6%
|
-
|
|
Fastest standing normal. Useful for pokes, frame traps, and setting up tick throws.
|
|
|
|
| Damage
|
Red Damage
|
Proration
|
Cancel
|
Guard
|
| 500*3 (1261)
|
(764)
|
80% (O)
|
N, SP, EX, (J)
|
LH
|
| First Active
|
Active
|
Recovery
|
Frame Adv
|
Circuit
|
Invuln
|
| 8
|
8
|
8
|
-2, 1
|
4.05%*3 (12.15%)
|
-
|
|
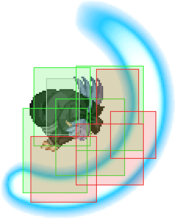
Further range compared to Len's H and C moons, but does not hit low. Good normal for controlling the neutral. Decent for ranged poking due to disjoint. Long active frames makes 5B great for tech traps and meaties
|
|
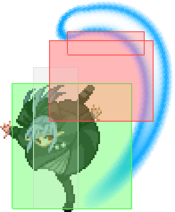
1st cycle 1st cycle 2nd cycle 2nd cycle
|
| Damage
|
Red Damage
|
Proration
|
Cancel
|
Guard
|
| 450, 400, 400*3 (1700)
|
(1090)
|
85% (O)
|
N, SP, EX, (J)
|
LH
|
| First Active
|
Active
|
Recovery
|
Frame Adv
|
Circuit
|
Invuln
|
| 6
|
5 (11) 3 (1) 4
|
16
|
-25 ~ -5
|
4.5%, 2.7%*3, 4.5% (17.1%)
|
-
|
|
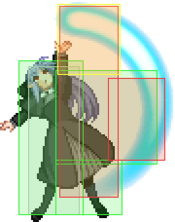
Can be used to ground confirm air counter hits. Hitbox travels relatively high about Len, becoming a disjoint.
Coupled with the fact that 5C hits frame 7 allows the move to be used as a fast anti-air. Note that trades are likely to happen if 5C is used as such.
Also note that 5C anti-airs can be baited out and punished with another jump or air shield. The gap during the move can be used as a frametrap with 236X.
|
|
Crouching Normals
|
|
| Damage
|
Red Damage
|
Proration
|
Cancel
|
Guard
|
| 300
|
121
|
76% (O)
|
-SE-, -N-, -SP-, -EX-, (J)
|
LH
(Whiffs vs Air.)
|
| First Active
|
Active
|
Recovery
|
Frame Adv
|
Circuit
|
Invuln
|
| 3
|
3
|
6
|
3
|
2.7%
|
-
|
|
Fastest crouching normal. Since 2A's hitbox is really low it will lose to any lower body invulnerability moves that the opponent may have.
|
|
|
|
| Damage
|
Red Damage
|
Proration
|
Cancel
|
Guard
|
| 650
|
404
|
65% (O)
|
N, SP, EX, (J)
|
L
|
| First Active
|
Active
|
Recovery
|
Frame Adv
|
Circuit
|
Invuln
|
| 7
|
3
|
14
|
-2
|
6.3%
|
-
|
|
F-Len's only low. Good for poking due to disjoint. Forces knockdown on the opponent.
|
|
|
|
| Damage
|
Red Damage
|
Proration
|
Cancel
|
Guard
|
| 750
|
454
|
100%
|
-
|
LH
|
| First Active
|
Active
|
Recovery
|
Frame Adv
|
Circuit
|
Invuln
|
| 13
|
7
|
17
|
-4 ~ 2
|
9.0%
|
-
|
|
2C cannot be cancelled into any other move. Pretty much only useful for mixing up blockstring with 3C. 2C becomes less minus on block the further away it hits an opponent.
|
|
Aerials Normals
|
|
| Damage
|
Red Damage
|
Proration
|
Cancel
|
Guard
|
| 300
|
161
|
75% (O)
|
SE, N, SP, EX, J
|
LHA
|
| First Active
|
Active
|
Recovery
|
Frame Adv
|
Circuit
|
Invuln
|
| 5
|
4
|
8
|
-
|
2.7%
|
-
|
|
Fastest and best air-to-air normal. Use this move to fish for counter hits.
|
|
|
|
| Damage
|
Red Damage
|
Proration
|
Cancel
|
Guard
|
| 700
|
404
|
90% (O)
|
N, SP, EX, J
|
HA
|
| First Active
|
Active
|
Recovery
|
Frame Adv
|
Circuit
|
Invuln
|
| 7
|
8
|
-
|
-
|
7.2%
|
-
|
|
Decent air-to-air normal due to disjoint, and active frames.
|
|
|
|
| Damage
|
Red Damage
|
Proration
|
Cancel
|
Guard
|
| 1050
|
707
|
90% (M)
|
N, SP, EX, J
|
HA
|
| First Active
|
Active
|
Recovery
|
Frame Adv
|
Circuit
|
Invuln
|
| 10
|
3
|
-
|
-
|
10.8%
|
-
|
|
Excellent normal for jump ins.
Can cross up (keep in mind that there's cross up protection in MBAACC). Fast enough to use out of an IAD (Instant Air Dash). Can set up fuzzy block scenarios.
11 frame startup allows this normal to be used as a feint. 10 frame startup leaves Len open to counter hits.
|
|
Command Normals
|
|
| Damage
|
Red Damage
|
Proration
|
Cancel
|
Guard
|
| 800
|
505
|
75% (O)
|
N, SP, EX, (J)
|
LH
|
| First Active
|
Active
|
Recovery
|
Frame Adv
|
Circuit
|
Invuln
|
| 9
|
4
|
20
|
-9
|
7.2%
|
Clash 10-13
|
|
Situational anti-air with clash hitbox. Launches the opponent.
|
|
|
|
| Damage
|
Red Damage
|
Proration
|
Cancel
|
Guard
|
| 1000
|
606
|
78% (O)
|
SP, EX, (J)
|
LH
|
| First Active
|
Active
|
Recovery
|
Frame Adv
|
Circuit
|
Invuln
|
| 5
|
7
|
24
|
-13
|
9.0%
|
-
|
|
Launches the opponent off the ground. Useful for ground confirming air counter hits if a (5A > 2B) loop cannot be performed.
Use in conjunction with 2C for blockstring pressure. Note that this move can only cancel into specials.
|
|
|
|
| Damage
|
Red Damage
|
Proration
|
Cancel
|
Guard
|
| 300*4 (849)
|
(426)
|
80% (M)*4
|
-
|
HA
|
| First Active
|
Active
|
Recovery
|
Frame Adv
|
Circuit
|
Invuln
|
| 9
|
4 (6) 4
|
-
|
-
|
3.6%*4 (14.4%)
|
-
|
|
If j.2C is pressed while falling, Len can press 8 just before landing; this will cause the move to hop up a tiny bit, extending the move. This in turn causes the move to be able to be guarded mid.
|
|
Universal Mechanics
|
|
| Damage
|
Red Damage
|
Proration
|
Cancel
|
Guard
|
| 1200
|
505
|
30%
|
-
|
U
|
| First Active
|
Active
|
Recovery
|
Frame Adv
|
Circuit
|
Invuln
|
| 2
|
1
|
20
|
-
|
0.0%
|
-
|
|
Len launches the opponent in the air. Comboable when close enough to the corner. Ground techable otherwise.
|
|
|
|
| Damage
|
Red Damage
|
Proration
|
Cancel
|
Guard
|
1600 (1440, Raw)
1100
|
454
|
30%
|
-
|
U
|
| First Active
|
Active
|
Recovery
|
Frame Adv
|
Circuit
|
Invuln
|
| 1
|
1
|
12
|
-
|
0.0%
|
-
|
|
Launches the opponent upwards again. As a combo ender, this is ground techable and can actually be combo'd from in the corner if done low enough to the ground.
|
|
|
|
| Standing
|
Damage
|
Red Damage
|
Proration
|
Cancel
|
Guard
|
| 500 (345)
|
202
|
45%
|
(SP), (EX), (J)
|
LHA
|
| First Active
|
Active
|
Recovery
|
Frame Adv
|
Circuit
|
Invuln
|
| 8
|
4
|
18
|
-4
|
4.5%
|
-
|
|
Same animation as 4B.
|
| Aerial
|
Damage
|
Red Damage
|
Proration
|
Cancel
|
Guard
|
| 500 (345)
|
202
|
45%
|
-
|
HA
|
| First Active
|
Active
|
Recovery
|
Frame Adv
|
Circuit
|
Invuln
|
| 8
|
4
|
-
|
-
|
4.5%
|
-
|
|
Same animation as j.B.
|
|
|
|
| Bunker
|
Damage
|
Red Damage
|
Proration
|
Cancel
|
Guard
|
| 500
|
202
|
100%
|
-
|
LHA
|
| First Active
|
Active
|
Recovery
|
Frame Adv
|
Circuit
|
Invuln
|
| 25
|
4
|
19
|
-5
|
0.0%
(-50.0% in blockstun)
|
Clash 1-10
|
| (Clash)
|
Damage
|
Red Damage
|
Proration
|
Cancel
|
Guard
|
| 500
|
202
|
100%
|
-
|
LHA
|
| First Active
|
Active
|
Recovery
|
Frame Adv
|
Circuit
|
Invuln
|
| 7
|
4
|
19
|
-5
|
0.0%/-50.0%
|
Strike 1-7
|
|
Upward shield bunker.
|
|
|
|
| Damage
|
Red Damage
|
Proration
|
Cancel
|
Guard
|
| 100
|
0
|
100%
|
-
|
U
|
| First Active
|
Active
|
Recovery
|
Frame Adv
|
Circuit
|
Invuln
|
| 18
|
3
|
25
|
-
|
uses all
|
Full 1-21
|
|
Forward heat hitbox.
|
|
|
|
| Ground
|
Damage
|
Red Damage
|
Proration
|
Cancel
|
Guard
|
| 100
|
0
|
100%
|
-
|
U
|
| First Active
|
Active
|
Recovery
|
Frame Adv
|
Circuit
|
Invuln
|
| 10
|
10
|
20
|
-
|
removes all
|
Full 1-39
|
| Air
|
Damage
|
Red Damage
|
Proration
|
Cancel
|
Guard
|
| 100
|
0
|
100%
|
-
|
U
|
| First Active
|
Active
|
Recovery
|
Frame Adv
|
Circuit
|
Invuln
|
| 11
|
10
|
15
|
-
|
removes all
|
Strike 1-30
|
|
Universal burst mechanic. Unlike Crescent/Full Heat activation, the hitbox and frame data doesn't vary between characters. However, you can be thrown out of this move if you input it in the air.
|
|
Special Moves
Special Movement
|
|
| Damage
|
Red Damage
|
Proration
|
Cancel
|
Guard
|
| -
|
-
|
-
|
-
|
-
|
| First Active
|
Active
|
Recovery
|
Frame Adv
|
Circuit
|
Invuln
|
| -
|
-
|
-
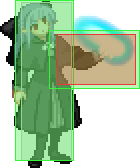
|
-
|
-
|
-
|
|
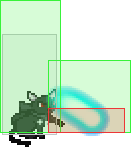
Len can walk foward while crouching with her unique catwalk. Turns into a cat with an extremely small hitbox, allowing her to duck alot of moves. If 3 is released to go back to holding 2, there is a 5f animation before returning to regular crouch animation. This recovery is entirely cancellable. If 3 is released to 6, there is no recovery.
|
|
Grounded Specials
|
|
| A
|
Damage
|
Red Damage
|
Proration
|
Cancel
|
Guard
|
| 1000
|
808
|
80% (O)
|
-EX-
|
LHA
|
| First Active
|
Active
|
Recovery
|
Frame Adv
|
Circuit
|
Invuln
|
| 11
|
X (60)
|
31
|
-5
|
9.0%
|
-
|
- Len throws a fire(snow)ball that travels in a straight path close to and parallel to the ground. All versions are used for pressure of some form.
Slow moving, and reaches only half the screen's distance. Best used in pressure/resetting pressure. In certain scenarios, it can be used as an anti air that will usually trade.
|
| B
|
Damage
|
Red Damage
|
Proration
|
Cancel
|
Guard
|
| 1000
|
808
|
80% (O)
|
-EX-
|
LHA
|
| First Active
|
Active
|
Recovery
|
Frame Adv
|
Circuit
|
Invuln
|
| 8
|
X (60)
|
36
|
-10
|
9.0%
|
-
|
|
Fast moving, reaches almost the whole screen's distance. Used in mixing up with the A version, or if immediate distance pressure is required.
|
| EX
|
Damage
|
Red Damage
|
Proration
|
Cancel
|
Guard
|
| 400*4 (1298)
|
(983)
|
80% (O)
|
-
|
LHA
|
| First Active
|
Active
|
Recovery
|
Frame Adv
|
Circuit
|
Invuln
|
| 3+6
|
X
|
30
|
3
|
-100.0%
|
-
|
|
Travels until it hits or moves offscreen. Has 4 hits, 1298 damage total. Best used to keep pressure up or for safely placing a mirror in neutral. Also can be used in conjunction with a shield to escape pressure.
|
|
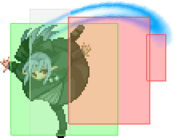
A A B B EX EX
|
| A
|
Damage
|
Red Damage
|
Proration
|
Cancel
|
Guard
|
| 1000
|
707
|
70% (O)
|
-EX-, (J)
|
LH
|
| First Active
|
Active
|
Recovery
|
Frame Adv
|
Circuit
|
Invuln
|
| 10
|
7
|
18
|
-7
|
9.0%
|
Low 1
|
- Len winds up and does a kick.
Launches the opponent upward. This move is a situational anti air due to the startup time. Mainly used in combos.
|
| B
|
Damage
|
Red Damage
|
Proration
|
Cancel
|
Guard
|
| 950
|
707
|
80% (M)
|
-EX-, (J)
|
LH
|
| First Active
|
Active
|
Recovery
|
Frame Adv
|
Circuit
|
Invuln
|
| 10
|
5
|
19
|
-6
|
8.55%
|
Low 1
|
|
Launches the opponent horizontally, causing a wallbounce if they impact a wall. Used in pressure and in certain combos.
|
| EX
|
Damage
|
Red Damage
|
Proration
|
Cancel
|
Guard
|
| 300*8, 1000 (2884)
|
(1987)
|
70% (M)
|
(J)
|
LHA (1-8), LH (9)
|
| First Active
|
Active
|
Recovery
|
Frame Adv
|
Circuit
|
Invuln
|
| 2+2
|
24 (11) 9
|
22
|
-13
|
-100.0%
|
Full 1-4, Low 5-28
|
|
Len hops and spins, then does a high reaching kick. Has lower body invuln. Goes into the standard air combo ender if it connects.
|
|
|
|
| A
|
Damage
|
Red Damage
|
Proration
|
Cancel
|
Guard
|
| 1000
|
808
|
70% (O)
|
-EX-
|
LHA
|
| First Active
|
Active
|
Recovery
|
Frame Adv
|
Circuit
|
Invuln
|
| 34
|
X (1600)
|
3
|
-
|
9.0%
|
Reflect dur. Active
|
| B
|
Damage
|
Red Damage
|
Proration
|
Cancel
|
Guard
|
| 1500
|
1212
|
70% (O)
|
-EX-
|
LHA
|
| First Active
|
Active
|
Recovery
|
Frame Adv
|
Circuit
|
Invuln
|
| 37
|
X (1600)
|
0
|
-
|
13.5%
|
-
|
| ~214X
|
Damage
|
Red Damage
|
Proration
|
Cancel
|
Guard
|
| -
|
-
|
-
|
-
|
-
|
| First Active
|
Active
|
Recovery
|
Frame Adv
|
Circuit
|
Invuln
|
| 12
|
X (80)
|
23
|
5
|
-
|
-
|
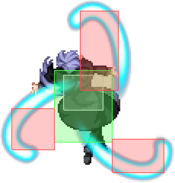
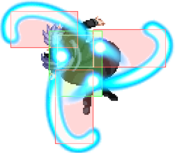
- Len deploys a mirror which is activated upon opponent contact in a combo'd state or activated manually. F-Len is allowed up to 1 grounded mirror, 1 air mirror and 1 EX mirror at a time. A and EX reflect most projectiles. Offers a unique style of pressure as they have a lot of blockstun and the A and B versions cannot be shielded.
A: Len places a mirror horizontally (standing tall, moves horizontally towards the opponent when activated). Reflects most projectiles. Wallslams on hit. Can OTG an opponent if deployed fast enough. Best used for pressure as it only becomes a combo extender in certain placements.
B: Len places a mirror vertically (lying down, moves upward when activated). Does not reflect projectiles. Launches on hit. Grounded 214B is best used as a combo extender after an AT as it is hard to combo an opponent if the mirror is used for pressure.
|
| EX
|
Damage
|
Red Damage
|
Proration
|
Cancel
|
Guard
|
| 300*6 (1496)
|
(1256)
|
96% (M)*6
|
-
|
LHA
|
| First Active
|
Active
|
Recovery
|
Frame Adv
|
Circuit
|
Invuln
|
| 6+43
|
X (160)
|
14
|
4 ~ 44
|
-100.0%, 1.8%*6
|
Reflect dur. Active
|
|
Len places a 6 hit mirror that very slowly moves towards the opponent. Reflects most projectiles. Wallslams on hit. Best used as a meaty or for pressure.
|
|
Aerial Specials
|
|
| A
|
Damage
|
Red Damage
|
Proration
|
Cancel
|
Guard
|
| 1000
|
808
|
70% (O)
|
-EX-
|
LHA
|
| First Active
|
Active
|
Recovery
|
Frame Adv
|
Circuit
|
Invuln
|
| 38
|
X (1600)
|
35
|
-
|
9.0%
|
Reflect dur. Active
|
| B
|
Damage
|
Red Damage
|
Proration
|
Cancel
|
Guard
|
| 1500
|
1212
|
70% (O)
|
-EX-
|
LHA
|
| First Active
|
Active
|
Recovery
|
Frame Adv
|
Circuit
|
Invuln
|
| 41
|
X (1600)
|
35
|
-
|
13.5%
|
-
|
| ~j.214X
|
Damage
|
Red Damage
|
Proration
|
Cancel
|
Guard
|
| -
|
-
|
-
|
-
|
-
|
| First Active
|
Active
|
Recovery
|
Frame Adv
|
Circuit
|
Invuln
|
| 6
|
X (80)
|
6
|
4 (TK)
|
-
|
-
|
- Data on aerial mirror series. A/B versions recover in midair right before mirrors become active.
A: Air version has the same applications as grounded one.
B: Goes downward instead of upward when activated, bouncing the opponent off the ground into airtech state on hit. Best used in pressure as well as a combo extender.
|
| EX
|
Damage
|
Red Damage
|
Proration
|
Cancel
|
Guard
|
| 300*6 (1496)
|
(1256)
|
96% (M)*6
|
-
|
LHA
|
| First Active
|
Active
|
Recovery
|
Frame Adv
|
Circuit
|
Invuln
|
| 1+40
|
X (160)
|
6
|
-
|
-100.0%, 1.8%*6
|
Reflect dur. Active
|
|
Functions the same as grounded version.
|
|
Arc Drive
|
|
| Damage
|
Red Damage
|
Proration
|
Cancel
|
Guard
|
| 440*N
|
363*N
|
50% (O)
|
-
|
LHA
|
| First Active
|
Active
|
Recovery
|
Frame Adv
|
Circuit
|
Invuln
|
| 8+10
|
X
|
41
|
-10 (min)
|
removes all
|
Full 1-16, Clash 19-X
|
|
Len casts a ball of energy that accelerates forwards. Travels infinitely. Multihit, and has clash hitbox. This move is very safe and is mainly used as a reversal, or in pressure.
|
|
Another Arc Drive
|
|
| Damage
|
Red Damage
|
Proration
|
Cancel
|
Guard
|
| 250, 850*14, 1000 (4765)
|
(3416)
|
50% (O)
|
-
|
LHA
|
| First Active
|
Active
|
Recovery
|
Frame Adv
|
Circuit
|
Invuln
|
| 4+1
|
X
|
86
|
-35 (min)
|
removes all
|
Full 1-13
|
|
Len casts forth a ball of loli energy, which travels relatively fast forwards and infinitely. Len is very vulnerable after casting this move. Mainly used as a reversal or combo ender.
Len can change the outfit she wears if either A, B, C or D is held when the move hits. This has no effect on the move.
|
|
Last Arc
|
|
| Damage
|
Red Damage
|
Proration
|
Cancel
|
Guard
|
| 750*12, 500 (3772 ~ 7169)
|
(3416 ~ 6451)
|
50% + 50% * remaining BH time
|
-
|
U
|
| First Active
|
Active
|
Recovery
|
Frame Adv
|
Circuit
|
Invuln
|
| 1+0
|
16*
|
36
|
-
|
removes all
|
Full 1-X, High (on Landing)
|
|
A large and delicious cake falls on top of the opponent followed by various cutlery stabbing the cake, dealing heavy damage and also causing a meter break.
|
|
MBAACC Navigation
