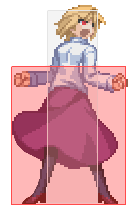
Character Page Progress
This page is still a work in progress, consider joining as an editor to help expand it. Please update this character's roadmap page when one of the editing goals have been reached.
| In Progress
|
- Combos:
- Add missing combo damage.
- Move Descriptions:
- Expand on the move descriptions, cite their uses, add captions where helpful, etc.
- Additional Resources/Players to watch/ask
- Add any external links to resources such as video guides or articles.
- If you know any players in particular that can be helpful for learning this character, please add them with, if possible a way to contact them (such as a Discord handle) and a name that can be searched in the match video database.
|
Additional Resources
C-Arcueid Match Video Database
C-arc combo compilation
Overview
Strengths / Weaknesses
| Strengths
|
- High damage.
- Large health pool and Guts rating.
- Combos have extremely high meter gain.
- Extremely strong all-purpose normals.
- Good movement in all aspects.
- Has an invincible reversal on a 22 input, which can be special canceled into a knockdown.
- Extremely potent corner pressure.
- Has access to frightening mixups off of most confirms.
|
| Weaknesses
|
- Relatively high execution.
- Lack of a meterless projectile can make matchups against some zoners a bit difficult.
- Relatively subpar midscreen pressure, lacking in safe ways to reset pressure.
- Is only as good as your execution.
|
General Gameplan
C-Arcueid's general gameplan revolves around using her above average movement to maneuver around the opponents offense, and overwhelm them in the close range with her high performance tools.
Her quick to accelerate dash allows her to control the ground, allowing her to slip into her effective range at a moment's notice.
Her air mobility may seem rather generic, but she has a slew of dominating air tools which make engaging with her in air-to-air exchanges rather risky for the opponent, allowing her to effectively control her airspace with threat alone.
Lastly, her ability to convert almost any hit into corner carry with above average damage is one of her more defining traits. The sheer damage output combined with the positional advantage makes taking risks with her much more rewarding should they work out in your favor.
Overall, C-Arcueid is a character with exceptional strengths, possessing essentially every option a rushdown character would want. She only lacks in ranged options, and as a result she needs to use her movement and tools with care against opponents who can keep her at bay.
Neutral
As C-arc your goal is to get in. With her dash speed and buttons, this shouldn't be too much of a problem. Some common grounded options include 5A, 5B, and 2B.
5A is a top class A normal, having both a tall hitbox while still hitting crouching opponents, and also retracts her lower body hitbox, allowing it to beat other low grounded pokes rather cleanly at times.
5B is slower, but has a significantly disjointed hitbox, allowing it to cleanly counterpoke some normals, and the forward movement helps in whiff punishing.
2B is an absolutely godlike normal with a myriad of uses. Has a disjoint at the tip of her foot, and brings her hurtbox extremely low to the ground, allowing her to low profile with ease. Very versatile, can be used to anti air, poke, abare, etc. Extremely good normal.
In the air, she has jA, jB j2B and jC.
jA is a pretty typical jumping A normal, nothing especially noteworthy.
jB on the other hand, is blisteringly fast for how large it's hitbox is, making it especially good in quick air battles. Whiffing it is not advised though.
jC is godlike. Period. Absolutely dominating, the only thing keeping it from being any more broken is it's relatively average speed. with 10f of activity, and a disjoint all along her leg, this will be your primary method of controlling the skies and bullying those on the ground. Mixing up your timings is key to making the most of this move, pressing it preemptively against those trying to air to air you on reaction is a common tactic, but experiment with this button, it will rarely steer you wrong.
j2B isnt an ordinary divekick as you stay in place(on startup) before diving in a set angle.(insert comment about j2B here)
Making use of varying your approach from dash 5A/2B/Etc and sj, dash jump and double jump airdash options is key to making the most out of C-arcueid's kit and will reward you so.
Pressure
C-arc is a very robust character that takes comfort in not only her ability to use rebeats in her pressure, but also a great bit of specials to add on to it. Going over some of the specials you will regularly use:
Known as elbow. Generally you can use 214A to catch mashes and on the later ends of the active frames you can be +, in some cases if people are trying to shield you can use 214A after 2C for the elbow to whiff and the opponent is now in recovery from failed shield, letting you combo with usually 2B into a combo. 214B is generally used to catch jump outs, can lead to an air combo.
Rekka, usually seen as a combo ender, however in pressure you can use 236A > 236[A] which is an air unblockable and is a solid frametrap to catches jumps or mashes. If it connects it will launch the opponent, granting a combo opportunity.
If you just do 236[A] by itself, it will vacuum the opponent towards you and grant you ample plus frames. On hit/trade it will lead into a combo as well. A very powerful special when used properly.
With rekka by itself you can either do 236A > 236A > 214B, 236A > 236A > 214[B](High), or 236A > 236A > 236A(low).
For the combo ender you want to do 236A > 236A > 214B.
Rekka has a good amount of stagger windows so sometimes people are looking to block the Overhead option(214[b]) you can also mix it up sparingly with 236A which is a low. On block 214[B] has better frames and while 236A is unsafe, if you happen to catch people with it you can either cancel to 624C which is a knowledge check to the opponent on whether they can dodge or use whichever char specific punish it is or ex cancel to 623C for a good reward on the combo.
The mindgame of her rekkas because of 236A 236[A] allows her to stop at the first rekka and reset her pressure once you establish that fear into your opponent.
Sonic. This special sees most of its use in corner pressure, as it recovers earlier than it seems, allowing for double jumps, or continuing pressure by going into an aerial special move, namely its aerial version. Due to Arcueids backwards movement, it is also capable to punishing some defensive options such as Heat and Shield Bunker.
One of her most notorious special moves, Air Sonic.
j.624B is generally used in combos as a TK and during the sequence listed right above in the 624A/B section. j.624A is used generally in an air to air (A2A) situation and because it hits behind. You can use it as you are jumping in on someone or when you do j.C which is powerful because its a very good frame trap and also generates a lot of blockstun to set up guard crush situations.
Now on to her pressure in general. C-arc is one of the most robust characters that can choose to rebeat for fluidity in her pressure sequences and also use her specials such as 236[A], 214A, 214B, tk. 624B at her disposal. One important thing you need to remember about C-arc is that she cannot rebeat from 5C ever. Here are some sample things to her pressure listed below.
- 2A Stagger 2A, 5{B} 2B, 5A(rebeat)
- 2A 2A 5B, stagger 2B 5C 236[A]
- 2A 2A 2B stagger 2C 236A
- 2A 2A 2B stagger 2C 236A 236[A]
- 2A 2A 5B stagger 2C, dl.214A/214B *2C, 214A at this point should make the 214A whiff, this is for making people whiff shield attempts on the elbow and you can now punish with 2B)
- 2A 2B 5B 2B, w5A. Iad j.C/j.624A
These are fairly basic strings that you can use but the main important thing again to remember is that 236[A] is massively plus and while you can jump out of it during its start up you can sneak in 236[A] by using her rebeats to throw off the timing on their defensive responses and reset pressure via rebeat whiffs, letting your A normals fully recover since you have blessed frame data on your normals or by using 236[A].
Okizeme
With C-arc you have three enders that give different options
The first being airthrow ender, which you don't get much except a 2A meaty.
the next ones you have are 236[B] and Rekka ender.
The rekka ender is a safe jump and here are the safe jumps listed below
Post rekka ender safe jump:
- Jump forward, j.C: Ryougi, Miyako, Sion, Vsion, Roa, Mech, Koha, Neco, Hisui, Vakiha, Seifuku, Arc, Ciel, Akiha, Hime
- Delayed Rekka, 9, j.C: Nanaya, Tohno, Wara, Satsuki, Wlen
- sjf j.C: Warc, PCL(PCiel)
- Delayed Rekka, sjf, j.C: Aoko, Nero, Len
- Delayed Rekka, slightly walk forward, 9, j.C: Kouma, Ries
now you can take this even further vs. Cmoon players that really like to use heat as their defensive decision by doing the safe jump j.C and then inputting 44, backdash. if it j.C hits, you do not backdash and you can still combo if they heat you will backdash and avoid heat and can punish it. of course cmoon can ex shield and counter your safe jump but you can blow it up by doing empty jump low, or delay airdash j.C, etc. other anti-heat OSs such as "meaty j.c, land, 4A+B" and "meaty j.c, land, 2E" can be used as well
236[B] can used as long in any point of your combo in the corner as long as you didn't use 3 wall slams. since 236[B] pulls them out of the corner you can now perform left/right mixups. the side is determined by an array of things. the most common sequence you see to set this up is:
the side is determined by knowing if the the body is touching the corner or not and carc and mess with various things such as delaying the normal sequence above, Microwalk the body before doing the following ways to throw off your sense of recognizing if carc will land in the corner or not.
- microwalk iad j2C/j.C(whiff) into l/r mixup
- microwalk jump, double jump j.C
The good part other than it being a left/right is that you have the option to blow up high/low shield rps with either 5B or 2B. Some cmoon players will choose to heat in that situation since they don't know which side to defend but you can os that with 2AA 5B+D or 2AA 5[D]~B.
With this in hand it can be really potent to her offense depending on which ender you decide to do.
Defense
C-arc, once again being a robust character, also have a quite an array of things that opponent has to keep count of.
22B is a fully invuln DP that can't be crossed up at all. The follow up, 66B, is cancellable into j.624C for good damage with AT ender for oki. There is also 22C, which is a bit faster and harder to safe jump but isn't really used much compared to 22B.
She also has heat. When C-arc heats at around 25% health she gets the best damage modifier, making her a fast mobile tank with even more health to get back into the fight. Other than that she has Ex shield, Bunker, dodge and in some cases you can backdash but make sure to use these options appropriately. In some other situations you also have 236C but that's for very niche situations e.g typically oki situations from some characters so be sure to use it sparingly. It's usually recommended to block, ex guard and jump out when it's appropriate.
Homing
Arcueid has access to the 'Homing' movement on some of her moves, most notably her 5CC, and it is integral to many of her midscreen combos. Due to it's nuances, it will have its own section.
Arcueid's homing is accessible from her 5C and her 214B~C followup. In most cases you'll be using 5C. Do take mind that homing takes trajectory based on when the button is pressed meaning after 5CC if you press j.C or j.A as soon as possible, your airheight is lower while delay j.B you will be higher in the air. Shown is an example combos displayed below.
- 2C 5CC (delay) jB 5A 5B 2B 2C...
- 2C 5CC (j.A delay j.C or j.C delay j.B) 5B 2B 2C....
While those combos appear similar, the context you'll use them in will change depending on what area of the screen you are in.
If you are too close to a corner, the j.B will drop, or will not grant you enough time to land and complete the combo, causing it to drop.
Conversely, if you are too far from a corner, the j.A j.C routing won't carry you far enough, and will cost you in damage, meter, and knockdown.
The easiest way to plan your routing is to check what area of the screen you are on. Of you were to split the entire stage in half, alter your routing based on what half you are on relative to the corner you're facing.
If you are on the FAR side of the screen, it's best to use j.B. If you're on the NEAR side of the screen, it's best to use the j.A delay j.C and sometimes j.C delay j.B since max range 2B 2C starter makes j.A j.C whiff at points.
A third scenario which can arise is the fullscreen variant, in which j.B will not be able to carry you completely fullscreen. In this case, there are a myriad of available combos, and they will be addressed in the combos section.
Lastly, homing combos may seem like the best choice of action in almost any scenario, but keep in mind that homing has its own damage scaling applied to it, so in cases where you need more damage to kill the opponent, it would be better to perform others, such as Knee (4C) combos, instead.
Combos
For optimal routes, watch Kouki's video: https://www.youtube.com/watch?v=jXJZ9bz8PPA
Please, watch this video. It contains all the information you need to become half decent with this character.
| Combo Notation Help
|
Disclaimer: Combos are written by various writers, so the actual notation used in pages can differ from the standard one.
For more information, see Glossary and Controls.
|
| X > Y
|
X input is cancelled into Y.
|
| X > delay Y
|
Must wait for a short period before cancelling X input into Y.
|
| X, Y
|
X input is linked into Y, meaning Y is done after X's recovery period.
|
| X+Y
|
Buttons X and Y must be input simultaneously.
|
| X/Y
|
Either the X or Y input can be used.
|
| X~Y
|
This notation has two meanings.
- Use attack X with Y follow-up input.
- Input X then within a few frames, input Y. Usually used for option selects.
|
| X(w)
|
X input must not hit the opponent (Whiff).
|
| j.X
|
X input is done in the air, implies a jump/jump cancel if the previous move was done from the ground.
Applies to all air chain sections:
- Assume a forward jump cancel if no direction is given.
- Air chains such as j.A > j.B > j.C can be shortened to j.ABC.
|
| sj.X
|
X input is done after a super jump. Notated as sj8.X and sj9.X for neutral and forward super jumps respectively.
|
| dj.X
|
X input is done after a double jump.
|
| sdj.X
|
X input is done after a double super jump.
|
| tk.X
|
Stands for Tiger Knee. X motion must be buffered before jumping, inputting the move as close to the ground as possible. (ex. tk.236A)
|
| (X)
|
X is optional. Typically the combo will be easier if omitted.
|
| [X]
|
Input X is held down. Also referred to as Blowback Edge (BE). Depending on the character, this can indicate that this button is held down and not released until indicated by the release notation.
|
| ]X[
|
Input X is released. Will only appear if a button is previously held down. This type of input is referred to as Negative Edge.
|
| {X}
|
Button X should only be held down briefly to get a partially charged version instead of the fully charged one.
|
| X(N)
|
Attack "X" should only hit N times.
|
| (XYZ)xN
|
XYZ string must be performed N times. Combos using this notation are usually referred to as loops.
|
| (XYZ^)
|
A pre-existing combo labelled XYZ is inserted here for shortening purposes.
|
| CH
|
The first attack must be a Counter Hit.
|
| Air CH
|
The first attack must be a Counter Hit on an airborne opponent.
|
| 66
|
Performs a ground forward dash.
|
| j.66
|
Performs an aerial forward dash, used as a cancel for certain characters' air strings.
|
| IAD/IABD
|
Performs an Instant AirDash.
|
| AT
|
Performs an Air Throw. (j.6/4A+D)
|
| IH
|
Performs an Initiative Heat.
|
| AD
|
Performs an Arc Drive.
|
| AAD
|
Performs an Another Arc Drive.
|
Starters
CArc can combo from most hits. Examples include, but are not limited to:
| Condition
|
Notation
|
Damage
vs V.Sion
|
Notes
|
|
| Grounded opponent, midscreen/back to corner
|
- (2A > 5B > 2B >) 2C > 5C~C
|
???
|
???
|
|
|
|
|
|
| Anywhere
|
- 236X~236X~236X 623C > 66 2A
|
???
|
???
|
|
Enders
| Condition
|
Notation
|
Damage
vs V.Sion
|
Notes
|
|
| Anywhere
|
|
???
|
| |
| Meter Gained: ??? |
Meter Given (vs C-Moon): ??? |
| Standard hard knockdown ender, can safejump after. Your primary ending route. |
|
|
| Anywhere
|
|
???
|
| |
| Meter Gained: ??? |
Meter Given (vs C-Moon): ??? |
| HKD ender for extended combos. Safejump with sj9 jC; requires manual timing on some characters. |
|
|
| Anywhere
|
|
???
|
| |
| Meter Gained: ??? |
Meter Given (vs C-Moon): ??? |
| HKD into left/right mixup. More risky than the safejump setup; consider using this when in Max mode for insurance. |
|
|
| Anywhere
|
- (4C) > j.(A)BC > dj.ABC > AT
|
???
|
| |
| Meter Gained: ??? |
Meter Given (vs C-Moon): ??? |
| Airthrow ender. Worse oki than above enders; mainly used to kill or timerscam. Add 4C if the preceding hit is 2C (may need to delay), add first jA as needed given height/proration. |
|
|
| Corner
|
- (4C) > j.(A)BC > dj.ABC > j.2C
|
???
|
| |
| Meter Gained: ??? |
Meter Given (vs C-Moon): ??? |
| Similar to airthrow ender, but ends with a 50/50 tech trap. Can OTG no-tech with j63214C for more damage, or wait and catch their tech. Only use this in the corner. |
|
|
OTG Pick ups
| Condition
|
Notation
|
Damage
vs V.Sion
|
Notes
|
|
| OTG starter, corner
|
- 2AAAA(A) > 5CC > j.AAAB > j.63214A > 2AAAA > 5CC > j.AAAB > j.63214A > 2AA > 2B
|
???
|
| |
| Meter Gained: 125 |
Meter Given (vs C-Moon): 50 |
| 5A catches all techs after 2B, doesnt work on wlen, len, neco arc and neco arc chaos |
|
|
Anywhere
| Condition
|
Notation
|
Damage
vs V.Sion
|
Notes
|
|
| Normal starter, grounded opponent
|
- 2A > 5B > 2B > 2C > 5C > 623B~6B > ender
|
4044
|
|
| Meter Gained: 77% |
Meter Given (vs C-Moon): ??? |
(Video) |
| Day 1 C-Arc BnB. Pretty easy to do. |
|
|
| Normal starter, grounded opponent
|
- 2A > 5B > 2B > 2C > 4{C} > j.66 > j.C > 5B > 2B > 2C > ender
|
4445
|
| |
| Meter Gained: 104% |
Meter Given (vs C-Moon): ??? |
| Combo with 1 knee. A good start should you want to learn better combos, but I personally feel it's a bit redundant to just settle with one knee. |
|
|
| Normal starter, grounded opponent
|
- 2A > 5B > 2B > 2C > 4{C} > j.66 > dl j.C > 2C > dl 4C > j.66 > j.C > j.63214A > 5B > 2B > 2C > 5{C} > 623B~6B > j.BC > j.ABC > AT/j.2C
|
5082
|
|
| Meter Gained: 158% |
Meter Given (vs C-Moon): ??? |
(Video) |
| Midscreen BnB. Really good damage, and corner to corner carry. Charge the first 4C slightly for lower pickups and better range. |
|
|
| Normal starter, grounded opponent
|
- 2A > 5B > 2B > 2C > 4{C} > j.66 > dl j.C > 2C > dl 4C > j.2AB > j.63214A > 5B > 2B > 2C > 5{C} > 623B~6B > j.BC > j.ABC > AT/j.2C
|
5115
|
| |
| Meter Gained: 59.9% |
Meter Given (vs C-Moon): ??? |
| Spend 50% meter for an easier and more consistent combo. Also VERY SLIGHTLY more damage than meterless version, but you're not gonna do this combo for damage. |
|
|
Full Screen
| Condition
|
Notation
|
Damage
vs V.Sion
|
Notes
|
|
| Normal starter, grounded opponent
|
- 2A > 5B > 2B > 2C > 5CC > j.B(2nd hit) > j.63214A > ender
|
3636
|
| |
| Meter Gained: 80% |
Meter Given (vs C-Moon): ??? |
| Possible to convert into corner combo with 5A > 5B > 2B > 2C > 5C. Omit 2B > 2C if too far away from corner, and follow up with aerial string instead if done with your back facing the corner. |
|
|
| Normal starter, grounded opponent
|
- 2A > 5B > 2B > 2C > dl4C > j.66 > j.C > 2C > 5C > j.B(2nd hit) > land > 5A > 5B > 2B > 2C > ender
|
4254
|
| |
| Meter Gained: 110% |
Meter Given (vs C-Moon): ??? |
|
|
Corner
| Condition
|
Notation
|
Damage
vs V.Sion
|
Notes
|
|
| Normal starter, grounded opponent
|
- 2A > 5B > 2B > 2C > dl5C > dl236[B] > 2A > 5B > 2B > 2C > dl5C > dl236[B] > 2A > 5B > 2B > 2C > ender
|
4995
|
|
| Meter Gained: 154% |
Meter Given (vs C-Moon): ??? |
(Video) |
Inconsistencies for certain characters:
2C Whiffs: Ciel, Kohaku, Warc.
Solution: Delay 2C slightly.
Crossup after 236[B]: Aoko, Nanaya, Kouma, Miyako, Kohaku
Solution: Delay 5C even more. |
|
|
| Normal starter, grounded opponent
|
- 2A > 5B > 2B > 2C > dl5C > dl236[B] > dlj.63214B > 5B > 2B > 2C > dlj.63214B > 5B > 2B > 2C > dl5C > dl236[B] > dlj.63214B > 5B > 2B > 2C > ender
|
5698
|
|
| Meter Gained: 194% |
Meter Given (vs C-Moon): ??? |
(Video) |
If the pickup(236[B]>tk624b>5b) after the 15th hit is too difficult for you, omit the TK 624B and use 236{B]>2A>5B>...
Note: It's possible to do a 50/50 if you cut off everything after the second 236[B], and instead do 9>delay jC, land 2A, partial charge 5C to choose left and no partial charge to go right.
Inconsistencies for certain characters:
2C Whiffs: Ciel, Kohaku, Warc.
Solution: Delay 2C slightly.
Crossup after 236[B]: Aoko, Nanaya, Kouma, Miyako, Kohaku
Solution: Delay 5C even more. |
|
|
| Normal starter, grounded opponent
|
- 2A > 5B > 2B > 2C > 5C > dl236[B] > dlj.63214B > 5B > 2B > 2C > dlj.63214B > 5B > 2B > 2C > dl5C > dl236[B] > dlj.63214B > 5B > 2B > 2C > dl214B > 5A > 5B > 2B > 2C > dl4C > j.66 > j.C > j.63214A > 5B > 2B > 2C > 623A
|
5705
|
| |
| Meter Gained: 214% |
Meter Given (vs C-Moon): ??? |
(Video) |
|
|
| Normal starter, grounded opponent
|
- 2A > 5B > 2B > 2C > dlj.63214C > 6/66 > 5B > 2B > 2C > dl5C > dl236[B] > dlj.63214B > 5B > 2B > 2C > dl5C > dl236[B] > dlj.63214B > 5B > 2B > 2C > ender
|
5842
|
| |
| Meter Gained: 147.2% (47.2%) |
Meter Given (vs C-Moon): ??? |
|
|
Miscellaneous combos
| Condition
|
Notation
|
Damage
vs V.Sion
|
Notes
|
|
| j.2B starter, grounded opponent
|
- j.2B > 22B~66B > j.63214C > j.66 > j.C > j.BC > AT
|
3873
|
| |
| Meter Gained: 142.8% (42.8%) |
Meter Given (vs C-Moon): 20.1% |
|
|
| j.2B starter, grounded opponent
|
- j.2B > 236X~236X~236X > 623C > 66 > 2A > 5B > 2B > 2C > dlj.63214B > 5B > 2B > 2C > dl5C > dl236[B] > dlj.63214B > 5A > 5B > 2B > 2C > ender
|
5623
|
| |
| Meter Gained: 206.8% (106.8%) |
Meter Given (vs C-Moon): 81.9% |
| does not work if j.2B is hit too high |
|
|
| CH j.2B starter, grounded opponent, full screen
|
- j.2B (CH) > 2B > 2C > 5CC > j.B(2nd hit) > 5A > 5B > 2B > 2C > dl5C > dl236[B] > dlj.63214B > 5B > 2B > 2C > dlj.63214B > 5B > 2B > 2C > dl5C > dl236[B] > dlj.63214B > 5A > 5B > 2B > 2C > ender
|
4859
|
| |
| Meter Gained: 192.3% |
Meter Given (vs C-Moon): 92.3% |
| does not work if j.2B is hit too high |
|
|
| CH j.2B starter, grounded opponent, corner
|
- j.2B (CH) > 2B > 2C > dl5C > dl236[B] > dlj.63214B > 5B > 2B > 2C > dlj.63214B > 5B > 2B > 2C > dl5C > dl236[B] > dlj.63214B > 5A > 5B > 2B > 2C > ender
|
5763
|
| |
| Meter Gained: 178.0% |
Meter Given (vs C-Moon): 56.0% |
| does not work if j.2B is hit too high |
|
|
| Condition
|
Notation
|
Damage
vs V.Sion
|
Notes
|
|
| throw starter, corner
|
- 6AD > 22A > 623C > 2A > 5B > 2B > 2C > dlj.63214B > 5B > 2B > 2C > 4C > j.66 > j.B > j.63214A > 5B > 2B > 2C > 4C > j.66 > j.B > j.63214A > 5B > 2B > 2C > 4C > j.66 > j.B > j.C > j.63214A > j.AABC > j.AABC > AT
|
???
|
| |
| Meter Gained: ??? |
Meter Given (vs C-Moon): ??? |
| lasts for the duration of c-moon MAX if started at around 280% meter or more, unburstable, delay/half charge 4C |
|
|
Notes:
- During the corner wall bounce combos, almost every component of the loop has to be delayed (where 'dl' is noted). This is needed to keep the opponent as low as possible without hitting the ground.
- If having trouble with the j.63214B 5B link, make sure to input the TK as low to the ground as possible.
Move Descriptions
| Frame Data Help
|
| Header
|
Tooltip
|
| Move Box Colors
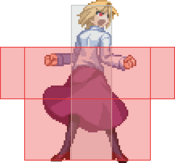
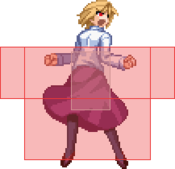
|
Light gray = Collision Box (A move lacking one means it can go through the opponent's own collision box).
Green: Hurt Boxes.
Red: Hit(/Grab) Boxes.
Yellow: Clash Boxes (When an active hitbox strikes a clash box, the active hitbox stops being active. Multi-hit attacks can beat clash since they will still progress to the next hitbox.)
Magenta: Projectile-reflecting boxes OR Non-hit attack trigger boxes (usually).
Blue: Reflectable Projectile Boxes.
|
| Damage
|
Base damage done by this attack.
(X) denotes combined and scaled damage tested against standing V. Sion.
|
| Red Damage
|
Damage done to the recoverable red health bar by this attack. The values are inherently scaled and tested against standing V. Sion.
(X) denotes combined damage.
|
| Proration
|
The correction value set by this attack and the way it modifies the scaling during a string. See this page for more details.
X% (O) means X% Overrides the previous correction value in a combo if X is of a lower percentage.
X% (M) means the current correction value in a combo will be Multiplied by X%. This can also be referred to as relative proration.
|
| Circuit
|
Meter gained by this attack on hit.
(X%) denotes combined meter gain.
-X% denotes a meter cost.
|
| Cancel
|
Actions this move can be cancelled into.
SE = Self cancelable.
N = Normal cancelable.
SP = Special cancelable.
CH = Cancelable into the next part of the same attack (Chain in case of specials).
EX = EX cancelable.
J = Jump cancelable.
(X) = Cancelable only on hit.
-X- = Cancelable on whiff.
|
| Guard
|
The way this move must be blocked.
L = Can block crouching
H = Can block standing.
A = Can block in the air.
U = Unblockable.
|
| Startup
|
Amount of frames that must pass prior to reaching the active frames. Also referred to as "True Startup".
|
| Active
|
The amount of frames that this move will have a hitbox.
(x) denotes frame gaps where there are no hitboxes is present. Due to varied blockstuns, (x) frames are difficult to use to determine punish windows. Generally the larger the numbers, the more time you have to punish.
X denotes active frames with a duration separate from its origin move's frame data, such as projectile attacks. In this case, the total length of the move is startup+recovery only.
|
| Recovery
|
Frames that this move has after the active frames if not canceled. The character goes into one frame where they can block but not act afterwards, which is not counted here.
|
| Advantage
|
The difference in frames where you can act before your opponent when this move is blocked (assuming the move isn't canceled and the first active frame is blocked).
If the opponent uses a move with startup that is at least 2 frames less than this move's negative advantage, it will result in the opponent hitting that move.
±x~±y denotes a range of possible advantages.
|
| Invul
|
Lists any defensive properties this move has.
X y~z denotes X property happening between the y to z frames of the animations. If no frames are noted, it means the invincibility lasts through the entire move.
Invicibility:
- Strike = Strike invincible.
- Throw = Throw invincible.
Hurtbox-Based Properties:
- Full = No hurtboxes are present.
- High = Upper body lacks a hurtbox.
- Low = Lower body lacks a hurtbox.
Miscellaneous Properties
- Clash = Frames in which clash boxes are active.
- Reflect = Frames in which projectile-reflecting boxes are active.
- Super Armor = Frames in which the character can take hits without going into hit stun.
|
Normal Moves
Standing Normals
|
|
| Damage
|
Red Damage
|
Proration
|
Cancel
|
Guard
|
| 300
|
147
|
75% (O)
|
-SE-, -N-, -SP-, -EX-, (J)
|
LH
|
| First Active
|
Active
|
Recovery
|
Frame Adv
|
Circuit
|
Invuln
|
| 4
|
4
|
7
|
1
|
3.0%
|
-
|
|
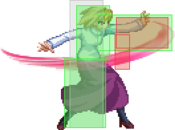
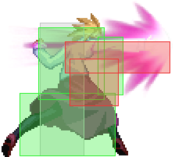
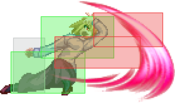
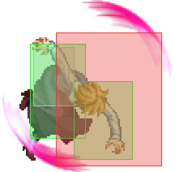
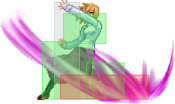
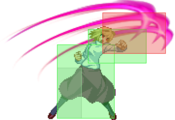
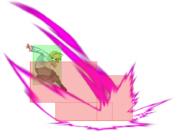
Arcueid does a horizontal swipe. Hits the upper area, but doesn't whiff on crouchers if they're close enough (the visual effect is lying).
|
|
5B 5B 5[B] 5[B]
|
| 5B
|
Damage
|
Red Damage
|
Proration
|
Cancel
|
Guard
|
| 650
|
392
|
80% (O)
|
N, SP, EX, (J)
|
LH
|
| First Active
|
Active
|
Recovery
|
Frame Adv
|
Circuit
|
Invuln
|
| 8
|
4
|
15
|
-4
|
6.0%
|
-
|
|
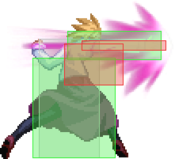
A punch that moves Arc forward and knocks airborne enemies into a ground techable knockdown on hit, used a lot in pressure and combos.
|
| 5[B]
|
Damage
|
Red Damage
|
Proration
|
Cancel
|
Guard
|
| 800
|
539
|
60% (O)
|
N, SP, EX, (J)
|
H
|
| First Active
|
Active
|
Recovery
|
Frame Adv
|
Circuit
|
Invuln
|
| 28
|
6
|
19
|
-10
|
7.0%
|
-
|
|
Charged version of 5B that hits overhead, this move is a key part of her mixup game and can be half charged for a high low mixup
|
|
5[C] 5[C]
|
| 5C
|
Damage
|
Red Damage
|
Proration
|
Cancel
|
Guard
|
| 1000
|
686
|
88% (M)
|
SP, (CH), EX
|
LH
|
| First Active
|
Active
|
Recovery
|
Frame Adv
|
Circuit
|
Invuln
|
| 7
|
4
|
23
|
-9
|
10.0%
|
-
|
| ~C
|
Damage
|
Red Damage
|
Proration
|
Cancel
|
Guard
|
| -
|
-
|
-
|
-
|
-
|
| First Active
|
Active
|
Recovery
|
Frame Adv
|
Circuit
|
Invuln
|
| 5
|
X
|
0
|
-
|
-
|
-
|
|
Wallslams on air hit, which can be followed up by a superjump pursuit by pressing C again.
|
| 5[C]
|
Damage
|
Red Damage
|
Proration
|
Cancel
|
Guard
|
| 2500
|
1960
|
100%
|
-
|
U
|
| First Active
|
Active
|
Recovery
|
Frame Adv
|
Circuit
|
Invuln
|
| 38
|
2
|
27
|
-
|
18.0%
|
-
|
|
Gimmick unblockable that is almost never worth going for.
|
|
Crouching Normals
Second hit of the 2A chain. Second hit of the 2A chain.
|
| 2A
|
Damage
|
Red Damage
|
Proration
|
Cancel
|
Guard
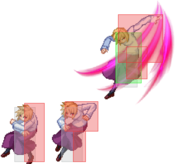
|
| 350
|
196
|
75% (O)
|
-SE-, -N-, -SP-, CH, -EX-, (J)
|
L
|
| First Active
|
Active
|
Recovery
|
Frame Adv
|
Circuit
|
Invuln
|
| 4
|
4
|
8
|
0
|
3.0%
|
-
|
|
Standard jab that hits low. Spammable.
|
| ~2A
|
Damage
|
Red Damage
|
Proration
|
Cancel
|
Guard
|
| 350
|
147
|
75% (O)
|
SE, N, SP, EX, (J)
|
LA
|
| First Active
|
Active
|
Recovery
|
Frame Adv
|
Circuit
|
Invuln
|
| 4
|
4
|
9
|
-1
|
4.0%
|
-
|
|
A longer reach followup if you cancel 2A into itself on block/hit.
|
|
|
|
| Damage
|
Red Damage
|
Proration
|
Cancel
|
Guard
|
| 450
|
294
|
70% (O)
|
N, SP, EX, (J)
|
L
|
| First Active
|
Active
|
Recovery
|
Frame Adv
|
Circuit
|
Invuln
|
| 6
|
4
|
15
|
-4
|
5.0%
|
-
|
|
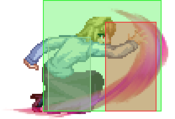
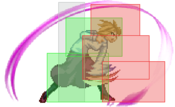
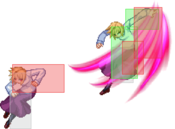
A decent poke with low recovery that advances forward, useful for cross-unders. Low profiles most standing moves
|
|
|
|
| Damage
|
Red Damage
|
Proration
|
Cancel
|
Guard
|
| 900
|
686
|
60% (O)
|
N, SP, EX, (J)
|
L
|
| First Active
|
Active
|
Recovery
|
Frame Adv
|
Circuit
|
Invuln
|
| 9
|
3
|
21
|
-6
|
10.0%
|
-
|
|
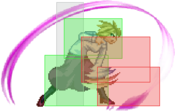
A sweep that reaches pretty high and far. Long recovery.
|
|
Aerial Normals
|
|
| Damage
|
Red Damage
|
Proration
|
Cancel
|
Guard
|
| 300
|
196
|
75%
|
SE, N, SP, EX, J
|
LHA
|
| First Active
|
Active
|
Recovery
|
Frame Adv
|
Circuit
|
Invuln
|
| 4
|
4
|
10
|
-
|
3.0%
|
-
|
|
Standard j.A that hits mid.
|
|
(Rising Hit) (Rising Hit) (Main hit) (Main hit)
|
| (Rising)
|
Damage
|
Red Damage
|
Proration
|
Cancel
|
Guard
|
| 600, 400
|
343, 245
|
90% (O)
|
N, SP, EX, J
|
HA
|
| First Active
|
Active
|
Recovery
|
Frame Adv
|
Circuit
|
Invuln
|
| 5
|
2 (6) 4
|
-
|
-
|
6.0%, 4.0% (10.0%)
|
-
|
| (Falling)
|
Damage
|
Red Damage
|
Proration
|
Cancel
|
Guard
|
| 400
|
245
|
90% (O)
|
N, SP, EX, J
|
HA
|
| First Active
|
Active
|
Recovery
|
Frame Adv
|
Circuit
|
Invuln
|
| 5
|
4
|
-
|
-
|
4.0%
|
-
|
|
A move that hits twice when done rising, and as such often wastes air counter hits. The first part of the move hits upwards, and the second part hits downwards.
|
|
|
|
| Damage
|
Red Damage
|
Proration
|
Cancel
|
Guard
|
| 1000
|
588
|
90% (M)
|
N, SP, EX, J
|
HA
|
| First Active
|
Active
|
Recovery
|
Frame Adv
|
Circuit
|
Invuln
|
| 6
|
10
|
-
|
-
|
7.0%
|
-
|
|
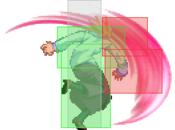
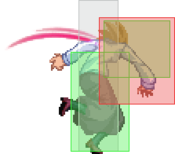
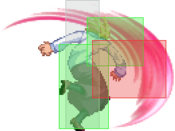
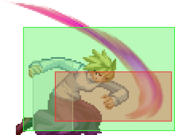
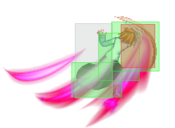
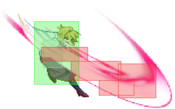
Everyone's favorite move. Lots of active frames, and good recovery when done close to the ground. Used in jump-ins. Used in everything. Rising j.C is good preemptive mash move because of active frames.
|
|
Command Normals
(Clash Boxes) (Clash Boxes)
|
| Damage
|
Red Damage
|
Proration
|
Cancel
|
Guard
|
| 1000
|
686
|
80% (M)
|
SP, EX, (J)
|
LH
|
| First Active
|
Active
|
Recovery
|
Frame Adv
|
Circuit
|
Invuln
|
| 12
|
3
|
22
|
-10
|
10.0%
|
Clash 9-12
|
|
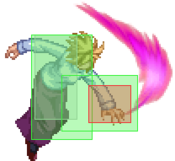
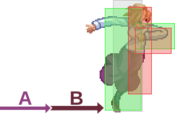
A swipe up which launches opponents (grounded or in the air). There are clash frames on her head before the hitboxes come out, and has a disjointed hitboxe above her head. Can't rebeat after this move.
|
|
4C 4C 4[C] 4[C]
|
| 4C
|
Damage
|
Red Damage
|
Proration
|
Cancel
|
Guard
|
300, 1000 (1108)
/ 800
|
(750)
/ 294
|
90% (M), 65% (O)
|
(N), (SP), (EX), (J)
|
LH, LHA
|
| First Active
|
Active
|
Recovery
|
Frame Adv
|
Circuit
|
Invuln
|
| 9
|
2 (2) 9
|
33
|
-24
|
3.0%, 10.0% (13.0%)
/ 8.0%
|
-
|
|
Arcueid does a rising knee strike. Thrusts the enemy upward on hit. It does not thrust in combo.
|
| 4[C]
|
Damage
|
Red Damage
|
Proration
|
Cancel
|
Guard
|
| 900
|
294
|
50% (O)
|
N, SP, EX, J
|
H
|
| First Active
|
Active
|
Recovery
|
Frame Adv
|
Circuit
|
Invuln
|
| 34
|
9
|
36
|
-27 (18)
|
8.0%
|
-
|
|
Becomes cancellable on block and an overhead when charged.
|
|
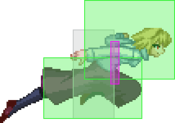
divekick divekick
|
| Damage
|
Red Damage
|
Proration
|
Cancel
|
Guard
|
| 750
|
392
|
100%
|
-SP-, -EX-
|
LHA
|
| First Active
|
Active
|
Recovery
|
Frame Adv
|
Circuit
|
Invuln
|
| 8
|
8
|
14
|
2 (TK)
|
8.0%
|
-
|
|
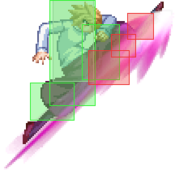
A claw dive with not-so-many active frames. Big recovery, very situational, hits mid. If this hits too high, use j.22B~66B > j.63214C > air ender or j.22C as those are the moves that hit the quickest after.
If it hits just before landing, you can barely convert off of it with rekka(2) > 623C > 66 > corner combo, but is a bit impractical.
|
|
first hit first hit 2nd hit 2nd hit
|
| Damage
|
Red Damage
|
Proration
|
Cancel
|
Guard
|
| 600, 800 (1282)
|
(627)
|
100%
|
(J)
|
LHA
|
| First Active
|
Active
|
Recovery
|
Frame Adv
|
Circuit
|
Invuln
|
| 6
|
2 (16) 3
|
3
|
-15, 3 (TK)
|
8.0%*2 (16.0%)
|
-
|
|
Changes your trajectory, can be used as a sort of airdash. 2 hits, the second one having huge priority but coming very late during the move. Can be neutral/positive on block if done at very low height. Hits mid. 2nd hit inflicts ground techable knockdown on airborne opponents.
|
|
Universal Mechanics
~2 ~2
|
| Ground Throw
|
Damage
|
Red Damage
|
Proration
|
Cancel
|
Guard
|
| 700
|
474
|
40%
|
-
|
U
|
| First Active
|
Active
|
Recovery
|
Frame Adv
|
Circuit
|
Invuln
|
| 2
|
1
|
20
|
-
|
0.0%
|
-
|
|
Wall splats in the corner and is convertible to an unburstable combo(example combo is throw(close to corner)22a(2nd hit only) 623C(reverse the input to be 421C) 5B 2b 2C 4C 66 jC 5B 2B 2C 4C jC j624A jabc jabc AT)
|
| ~2
|
Damage
|
Red Damage
|
Proration
|
Cancel
|
Guard
|
| 1500
|
379
|
40%
|
-
|
U
|
| First Active
|
Active
|
Recovery
|
Frame Adv
|
Circuit
|
Invuln
|
| 2
|
1
|
20
|
-
|
0.0%
|
-
|
|
Hold 2 to slam them next to you with a hard knockdown.
|
|
|
|
| Damage
|
Red Damage
|
Proration
|
Cancel
|
Guard
|
1600 (Raw)
1200 (Ender)
|
474
|
30%
|
-
|
U
|
| First Active
|
Active
|
Recovery
|
Frame Adv
|
Circuit
|
Invuln
|
| 1
|
1
|
12
|
-
5~13(ender)
|
0.0%
|
-
|
|
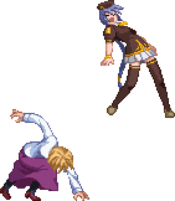
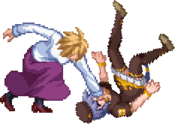
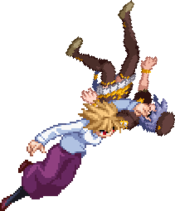
Arc grabs the opponent by the neck and slams them to the ground just before landing. Switches sides if not touching the corner wall(assuming there is enough space). Ground bounces and can immediatly be followed up by any attack if done Raw, untechable knockdown with Arc landing at a further distance from the opponent as a combo ender. 2B>2C>... is the preferred follow up.
)/
|
|
|
|
| Bunker
|
Damage
|
Red Damage
|
Proration
|
Cancel
|
Guard
|
| 500
|
196
|
100%
|
-
|
LHA
|
| First Active
|
Active
|
Recovery
|
Frame Adv
|
Circuit
|
Invuln
|
| 25
|
4
|
19
|
-5
|
0.0%
(-50.0% in blockstun)
|
Clash 1-10
|
| (Clash)
|
Damage
|
Red Damage
|
Proration
|
Cancel
|
Guard
|
| 500
|
196
|
100%
|
-
|
LHA
|
| First Active
|
Active
|
Recovery
|
Frame Adv
|
Circuit
|
Invuln
|
| 7
|
4
|
19
|
-5
|
0.0%/-50.0%
|
Strike 1-7
|
|
Downward swipe. Moves arc slightly forward.
|
|
|
|
| Damage
|
Red Damage
|
Proration
|
Cancel
|
Guard
|
| 100
|
0
|
100%
|
-
|
U
|
| First Active
|
Active
|
Recovery
|
Frame Adv
|
Circuit
|
Invuln
|
| 15
|
6
|
25
|
-
|
-100.0% (min)
|
Full 1-21
|
|
Standard heat but quite short. Cannot kill.
|
|
|
|
| Ground
|
Damage
|
Red Damage
|
Proration
|
Cancel
|
Guard
|
| 100
|
0
|
100%
|
-
|
U
|
| First Active
|
Active
|
Recovery
|
Frame Adv
|
Circuit
|
Invuln
|
| 10
|
10
|
20
|
-
|
removes all
|
Full 1-39
|
| Air
|
Damage
|
Red Damage
|
Proration
|
Cancel
|
Guard
|
| 100
|
0
|
100%
|
-
|
U
|
| First Active
|
Active
|
Recovery
|
Frame Adv
|
Circuit
|
Invuln
|
| 11
|
10
|
15
|
-
|
removes all
|
Strike 1-30
|
|
Universal burst mechanic. Unlike Crescent/Full Heat activation, the hitbox and frame data doesn't vary between characters. However, you can be thrown out of this move if you input it in the air.
|
|
Special Moves
Special Movement
|
|
| Crossup
|
Damage
|
Red Damage
|
Proration
|
Cancel
|
Guard
|
| -
|
-
|
-
|
-
|
-
|
| First Active
|
Active
|
Recovery
|
Frame Adv
|
Circuit
|
Invuln
|
| 7 (min)
|
15
|
1
|
-
|
-
|
Full 8-22
|
|
Special forward dash that makes Arc jump up behind the opponent on contact. Does not trigger if the opponent is in the corner, with no space inbetween them and the wall. If you input an action (like a jump) immediately after the crossup, the direction will be reversed as if done while still on the pre-crossup side.
Can be used as an extra layer of mixups on okizeme on most characters (can't be used on knockdown vs. Sion, VSion, Ciel and Ryougi).
|
|
Grounded Specials
A/B A/B [A/B] [A/B] ~236A/B ~236A/B ~236[A/B] ~236[A/B] ~236A/B Ender ~236A/B Ender ~214A/B Ender ~214A/B Ender ~214[A/B] Ender ~214[A/B] Ender EX EX
|
| A/B
|
Damage
|
Red Damage
|
Proration
|
Cancel
|
Guard
|
| 600
|
294
|
100%
|
-CH-, -EX-
|
LHA
|
| First Active
|
Active
|
Recovery
|
Frame Adv
|
Circuit
|
Invuln
|
| 11
|
5
|
18
|
-5
|
6.0%
|
-
|
|
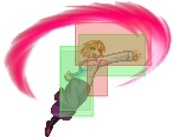
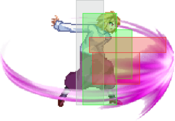
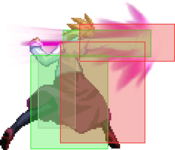
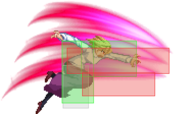
A: Arcueid swings her arm forward, with a pinkish-purple aura following it. Moves forward.
B: Same as above, but the attack pushes Arcueid slightly further.
|
| [A/B]
|
Damage
|
Red Damage
|
Proration
|
Cancel
|
Guard
|
| 1000
|
686
|
70% (O)
|
-EX-
|
LH
|
| First Active
|
Active
|
Recovery
|
Frame Adv
|
Circuit
|
Invuln
|
| 29
|
3
|
12
|
13 / 8
|
10.0%
|
-
|
- Charged first hit. Does not go into the rest of the rekka.
[A]: Pulls the opponent towards you on ground hit, pulls them upward on air hit. Hitbox is separate from Arcueid herself. Used during blockstrings for resets.
[B]: Sweeps the enemy, pulls less upward than [A] version on air hit. Hitbox is separate from Arcueid herself. Core combo tool for BnB and 50/50 setups.
|
| ~236A/B
|
Damage
|
Red Damage
|
Proration
|
Cancel
|
Guard
|
| 300
|
196
|
100%
|
-CH-, -EX-
|
LHA
|
| First Active
|
Active
|
Recovery
|
Frame Adv
|
Circuit
|
Invuln
|
| 11
|
5
|
17 / 25
|
-4 / -12
|
3.0%
|
-
|
|
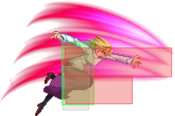
A: Arcueid swings again, moving her even further.
B: Same as above, but she moves further.
|
| ~236[A/B]
|
Damage
|
Red Damage
|
Proration
|
Cancel
|
Guard
|
| 1000
|
686
|
70%
|
-
|
LH
|
| First Active
|
Active
|
Recovery
|
Frame Adv
|
Circuit
|
Invuln
|
| 21
|
5
|
18
|
-5
|
10.0%
|
-
|
- Second hit, charged. Does not go into the rest of the rekka.
[A]: Shoots enemy in a steep arc, shoots further on air hit.
[B]: Same, but moves less forward.
|
| ~236A/B (Ender)
|
Damage
|
Red Damage
|
Proration
|
Cancel
|
Guard
|
| 900
|
392
|
100%
|
(EX)
|
LA
|
| First Active
|
Active
|
Recovery
|
Frame Adv
|
Circuit
|
Invuln
|
| 11
|
3
|
37
|
-28
|
7.0%
|
-
|
- Last hit, cannot be charged.
A: Arcueid swings one more time. Low-positioned hitbox.
B: Same as above. Goes further.
|
| ~214A/B (Ender)
|
Damage
|
Red Damage
|
Proration
|
Cancel
|
Guard
|
| 1500
|
686
|
100%
|
-
|
LHA
|
| First Active
|
Active
|
Recovery
|
Frame Adv
|
Circuit
|
Invuln
|
| 11
|
2
|
23
|
-7
|
10.0%
|
-
|
|
A: Downward swing, hits mid. Hard knockdown on hit.
B: Same as above, but goes slightly further.
|
| ~214[A/B] (Ender)
|
Damage
|
Red Damage
|
Proration
|
Cancel
|
Guard
|
| 1500
|
686
|
100%
|
-
|
HA
|
| First Active
|
Active
|
Recovery
|
Frame Adv
|
Circuit
|
Invuln
|
| 26
|
2
|
23
|
-7
|
10.0%
|
-
|
- Charged version of the above.
[A]: Hits overhead. Hard knockdown on hit.
[B]: Same, but moves further.
|
| EX
|
Damage
|
Red Damage
|
Proration
|
Cancel
|
Guard
|
| 600, 120, 150*3, 600, 120*4, 800, 300 (2716)
|
(2423)
|
100%
|
-
|
LHA (1-10, 12), LA (11)
|
| First Active
|
Active
|
Recovery
|
Frame Adv
|
Circuit
|
Invuln
|
| 2+7
|
69
|
53
|
-32
|
-100.0%
|
Full 1-14
|
|
Automated version of Arcueid's rekka. Hits low at the beginning of the last part (11th hit). Unsafe on block.
|
|
A A ~6X ~6X B B ~6X ~6X EX EX
|
| A
|
Damage
|
Red Damage
|
Proration
|
Cancel
|
Guard
|
| 700
|
490
|
90% (O)
|
-CH-
|
LA
|
| First Active
|
Active
|
Recovery
|
Frame Adv
|
Circuit
|
Invuln
|
| 12
|
4
|
19
|
-9
|
7.0%
|
-
|
|
Low-hitting claw strike, hard knockdown on hit.
|
| B
|
Damage
|
Red Damage
|
Proration
|
Cancel
|
Guard
|
| 1000
|
784
|
75% (O)
|
-CH-, -EX-, (J)
|
LH
|
| First Active
|
Active
|
Recovery
|
Frame Adv
|
Circuit
|
Invuln
|
| 7
|
6
|
17
|
-5
|
10.0%
|
-
|
|
Air-unblockable upper claw strike.
|
| A~6X
|
Damage
|
Red Damage
|
Proration
|
Cancel
|
Guard
|
| 700
|
490
|
50% (O)
|
(J)
|
LH
|
| First Active
|
Active
|
Recovery
|
Frame Adv
|
Circuit
|
Invuln
|
| 14
|
1
|
27
|
-10
|
4.0%
|
-
|
| B~6X
|
Damage
|
Red Damage
|
Proration
|
Cancel
|
Guard
|
| 700
|
490
|
50% (O)
|
(SP), (EX), (J)
|
LH
|
| First Active
|
Active
|
Recovery
|
Frame Adv
|
Circuit
|
Invuln
|
| 15
|
2
|
23
|
-7
|
4.0%
|
-
|
|
6X followup, can be done even on whiff. Arcueid advances for a launching claw strike. Jump cancellable on hit, and if done from 623B you can also cancel into any special on hit.
|
| EX
|
Damage
|
Red Damage
|
Proration
|
Cancel
|
Guard
|
| 500, 300*6, 600 (2316)
|
(1644)
|
70% (O)
|
-
|
LHA
|
| First Active
|
Active
|
Recovery
|
Frame Adv
|
Circuit
|
Invuln
|
| 4+5
|
13 (15) 1
|
25
|
-14
|
-100.0%
|
-
|
|
Multihit EX version similar to 623A~6X. Wallslams on hit.
|
|
B~A B~A B~B B~B B~[B] B~[B] B~C B~C B~C~C B~C~C
|
| A
|
Damage
|
Red Damage
|
Proration
|
Cancel
|
Guard
|
| 800
|
392
|
100%
|
-EX-
|
LH
|
| First Active
|
Active
|
Recovery
|
Frame Adv
|
Circuit
|
Invuln
|
| 15
|
5
|
12
|
1
|
10.0%
|
-
|
| B
|
Damage
|
Red Damage
|
Proration
|
Cancel
|
Guard
|
| 700
|
490
|
60% (O)
|
-CH-, -EX-
|
LH
|
| First Active
|
Active
|
Recovery
|
Frame Adv
|
Circuit
|
Invuln
|
| 13
|
8
|
15
|
-5
|
7.0%
|
-
|
|
Arcueid charges in.
A: Goes a short distance. Plus on block.
B: Goes about double A's distance. Has multiple followups performable even on whiff, see below:
|
| B~A
|
Damage
|
Red Damage
|
Proration
|
Cancel
|
Guard
|
| -
|
-
|
-
|
-
|
-
|
| First Active
|
Active
|
Recovery
|
Frame Adv
|
Circuit
|
Invuln
|
| -
|
-
|
29
|
-
|
-
|
Full 6-20
|
| B~B
|
Damage
|
Red Damage
|
Proration
|
Cancel
|
Guard
|
| 300, 800
|
196, 294
|
80% (M), 65% (O)
|
(N), (SP), (EX), (J)
|
LHA*
|
| First Active
|
Active
|
Recovery
|
Frame Adv
|
Circuit
|
Invuln
|
| 9
|
2 (2) 9
|
33
|
-24
|
3.0%, 8.0% (11.0%)
|
-
|
| B~[B]
|
Damage
|
Red Damage
|
Proration
|
Cancel
|
Guard
|
| 900
|
294
|
50% (O)
|
N, SP, EX, J
|
H
|
| First Active
|
Active
|
Recovery
|
Frame Adv
|
Circuit
|
Invuln
|
| 34
|
9
|
36
|
-27
|
8.0%
|
-
|
| B~C
|
Damage
|
Red Damage
|
Proration
|
Cancel
|
Guard
|
| 700
|
392
|
100%
|
(CH), EX
|
LHA
|
| First Active
|
Active
|
Recovery
|
Frame Adv
|
Circuit
|
Invuln
|
| 8
|
5
|
26
|
-13
|
7.0%
|
-
|
| B~C~C
|
Damage
|
Red Damage
|
Proration
|
Cancel
|
Guard
|
| -
|
-
|
-
|
-
|
-
|
| First Active
|
Active
|
Recovery
|
Frame Adv
|
Circuit
|
Invuln
|
| 5
|
X
|
0
|
-
|
-
|
-
|
|
214B Followups:
~A: Performs a dash teleport similar to H/F-Arc's 421A, but with shorter distance. Not a very useful tool.
~B/[B]: Performs 4C/[C].
~C: Performs a 5C which wallslams even if the opponent is grounded. 5C~C superjump pursuit usable on hit. can be comboed off of after homing/pursuit.
|
| EX
|
Damage
|
Red Damage
|
Proration
|
Cancel
|
Guard
|
| 800, 600*2, 1000 (2602)
|
(1877)
|
100%
|
-
|
LH
|
| First Active
|
Active
|
Recovery
|
Frame Adv
|
Circuit
|
Invuln
|
| 6+6
|
8
|
18
|
-11
|
-100.0%
|
Clash 2-8
|
|
Arcueid charges, and follows with an automatic air combo if the first hit lands. Finishes on a hard knockdown. Has a clash box before going forward for reversal purposes.
|
|
A A B B ~66A/B ~66A/B ~66C ~66C EX
(2nd last hitboxes are repeated) EX
(2nd last hitboxes are repeated)
|
| A
|
Damage
|
Red Damage
|
Proration
|
Cancel
|
Guard
|
| 700, 500 (1125)
|
(543)
|
100%
|
CH
|
LH
|
| First Active
|
Active
|
Recovery
|
Frame Adv
|
Circuit
|
Invuln
|
| 5
|
2 (1) 7
|
36
|
-25
|
7.0%, 5.0% (12.0%)
|
-
|
|
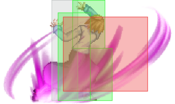
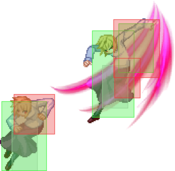
Arcueid rises up in the air with an upward slash. Air unblockable, no invicibility, 2 hits.
|
| B
|
Damage
|
Red Damage
|
Proration
|
Cancel
|
Guard
|
| 600*2, 300*2 (1666)
|
(992)
|
100%
|
CH
|
LH
|
| First Active
|
Active
|
Recovery
|
Frame Adv
|
Circuit
|
Invuln
|
| 4
|
4 (1) 7
|
47
|
-36
|
6.0%*2, 4.0%*2 (20.0%)
|
Full 1-8
|
|
Arcueid jumps up much higher. 4 hits. Meterless reversal, invincible until after the 2nd hit.
|
| A~66A
|
Damage
|
Red Damage
|
Proration
|
Cancel
|
Guard
|
| 500
|
294
|
50% (O)
|
-EX-
|
LHA
|
| First Active
|
Active
|
Recovery
|
Frame Adv
|
Circuit
|
Invuln
|
| 14
|
6
|
3
|
-13
|
5.0%
|
-
|
| B~66B
|
Damage
|
Red Damage
|
Proration
|
Cancel
|
Guard
|
| 500
|
294
|
50% (O)
|
(EX)
|
LHA
|
| First Active
|
Active
|
Recovery
|
Frame Adv
|
Circuit
|
Invuln
|
| 13
|
6
|
3
|
-40
|
5.0%
|
-
|
|
Forward slash followup.
|
X~66C
(EX)
|
Damage
|
Red Damage
|
Proration
|
Cancel
|
Guard
|
| 1800
|
980
|
100%
|
-
|
LHA
|
| First Active
|
Active
|
Recovery
|
Frame Adv
|
Circuit
|
Invuln
|
| 4+9
|
6
|
3
|
-16 (Best)
|
-100.0%
|
-
|
|
Metered followup. Wallslams on hit.
|
| EX
|
Damage
|
Red Damage
|
Proration
|
Cancel
|
Guard
|
| 600*2, 500*2, 300, 500*2, 300 (3134)
|
(2122)
|
100%
|
-
|
LH
|
| First Active
|
Active
|
Recovery
|
Frame Adv
|
Circuit
|
Invuln
|
| 2+1
|
35
|
40
|
-45 ~ -54
|
-100.0%
|
Full 1-11
|
|
EX reversal. Performs 2 slashes in succession. No followup.
|
|
A/B A/B EX EX
|
| A
|
Damage
|
Red Damage
|
Proration
|
Cancel
|
Guard
|
| 1000
|
686
|
70% (O)
|
-N-, -SP-, -EX-, -J-
|
L
|
| First Active
|
Active
|
Recovery
|
Frame Adv
|
Circuit
|
Invuln
|
| 15
|
9
|
23 (9)
|
-6 (8)
|
10.0%
|
-
|
|
Arc jumps back and sends a low-hitting energy wave to the ground. Cancelable into anything just before landing.
|
| B
|
Damage
|
Red Damage
|
Proration
|
Cancel
|
Guard
|
| 1000
|
686
|
70% (O)
|
-N-, -SP-, -EX-, -J-
|
L
|
| First Active
|
Active
|
Recovery
|
Frame Adv
|
Circuit
|
Invuln
|
| 15
|
9
|
29 (9)
|
-12 (8)
|
10.0%
|
-
|
|
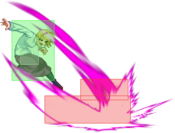
B version sends Arc much further back. About the same as A version otherwise. You probably misinputed this while doing TK 624B.
|
| EX
|
Damage
|
Red Damage
|
Proration
|
Cancel
|
Guard
|
| 1000*2, 1500 (2460)
|
(1658)
|
70% (O)
|
-
|
L
|
| First Active
|
Active
|
Recovery
|
Frame Adv
|
Circuit
|
Invuln
|
| 3+16
|
9
|
32
|
1
|
-100.0%
|
-
|
|
A bigger, 3-hit version.
|
|
Aerial Specials
A A B B ~66A/B ~66A/B ~66C ~66C EX
(2nd last hitboxes are repeated) EX
(2nd last hitboxes are repeated)
|
| A
|
Damage
|
Red Damage
|
Proration
|
Cancel
|
Guard
|
| 600*2 (1111)
|
(543)
|
100%
|
CH
|
LHA
|
| First Active
|
Active
|
Recovery
|
Frame Adv
|
Circuit
|
Invuln
|
| 2
|
3 (1) 4
|
18
|
-
|
6.0%*2 (12.0%)
|
Full 1-5
|
|
Very fast, invincible air upward slash.
|
| B
|
Damage
|
Red Damage
|
Proration
|
Cancel
|
Guard
|
| 500*2, 400*2 (1632)
|
(894)
|
100%
|
CH
|
LHA
|
| First Active
|
Active
|
Recovery
|
Frame Adv
|
Circuit
|
Invuln
|
| 2
|
4 (1) 4 (3) 4
|
15
|
-
|
4.0%, 5.0%, 4.0%*2 (17.0%)
|
Full 3-6
|
|
Jumps up much higher, 4 hits. Startup is just as fast but not invincible.
|
| A~66A
|
Damage
|
Red Damage
|
Proration
|
Cancel
|
Guard
|
| 500
|
294
|
50% (O)
|
-EX-
|
LHA
|
| First Active
|
Active
|
Recovery
|
Frame Adv
|
Circuit
|
Invuln
|
| 14
|
6
|
3
|
-
|
5.0%
|
-
|
| B~66B
|
Damage
|
Red Damage
|
Proration
|
Cancel
|
Guard
|
| 500
|
294
|
50% (O)
|
(EX)
|
LHA
|
| First Active
|
Active
|
Recovery
|
Frame Adv
|
Circuit
|
Invuln
|
| 13
|
6
|
3
|
-
|
5.0%
|
-
|
|
Forward slash followup.
|
X~66C
(EX)
|
Damage
|
Red Damage
|
Proration
|
Cancel
|
Guard
|
| 1800
|
980
|
100%
|
-
|
LHA
|
| First Active
|
Active
|
Recovery
|
Frame Adv
|
Circuit
|
Invuln
|
| 4+9
|
6
|
3
|
-
|
-100.0%
|
-
|
|
Metered followup. Wallslams on hit.
|
| EX
|
Damage
|
Red Damage
|
Proration
|
Cancel
|
Guard
|
| 700, 500, 600, 500, 600 (3134)
|
(1775)
|
100%
|
-
|
LHA
|
| First Active
|
Active
|
Recovery
|
Frame Adv
|
Circuit
|
Invuln
|
| 1+2
|
28
|
9
|
-
|
-100.0%
|
Full 1-6
|
|
EX reversal. Performs 2 slashes in succession. No followup.
|
|
A/B A/B EX EX
|
| A/B
|
Damage
|
Red Damage
|
Proration
|
Cancel
|
Guard
|
| 1000
|
686
|
70% (O)
|
-EX-
|
LHA
|
| First Active
|
Active
|
Recovery
|
Frame Adv
|
Circuit
|
Invuln
|
| 6
|
4
|
17
|
1 (TK)
/ 1, 2 (TK)
|
10.0%
|
-
|
|
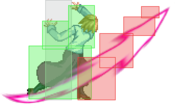
Air sonic. Arc swipes in the air. Recovers while airborne.
A: Launches Arc upward if done rising/TK'd, launches downward if done falling. Horizontal direction of that launch is dependent on your previous air momentum.
B: Arc instead moves lightly back and downwards when performed, making her land quickly when TK'd. Other properties are the same as A version.
|
| EX
|
Damage
|
Red Damage
|
Proration
|
Cancel
|
Guard
|
| 900*3 (1954)
|
(1703)
|
70% (O), 95% (M)
|
-
|
LHA
|
| First Active
|
Active
|
Recovery
|
Frame Adv
|
Circuit
|
Invuln
|
| 2+4
|
4
|
17
|
-
|
-100.0%
|
-
|
|
Hits 3 times. Launches Arc back upwards, recovers in the air.
|
|
Arc Drive
(Chain textures unavailable) (Chain textures unavailable)
|
| Damage
|
Red Damage
|
Proration
|
Cancel
|
Guard
|
| 0, 350*10, 700 (3310)
|
(2299)
|
100%
|
-
|
LH
|
| First Active
|
Active
|
Recovery
|
Frame Adv
|
Circuit
|
Invuln
|
| 15+0
|
2
|
54
|
-37
|
removes all
|
Full 1-19
|
|
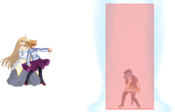
Fullscreen-wide chain attack, hitbox as tall as the highest horizontal chain. Air unblockable hitgrab. Can be used as a whiff punish or a reversal if the situation desires. Hard knockown on hit.
|
|
Another Arc Drive
(Chain textures unavailable) (Chain textures unavailable)
|
| Damage
|
Red Damage
|
Proration
|
Cancel
|
Guard
|
| 0, 350*10, 700*8 (5352)
|
(4069)
|
100%
|
-
|
LH
|
| First Active
|
Active
|
Recovery
|
Frame Adv
|
Circuit
|
Invuln
|
| 14+0
|
2
|
61
|
-44
|
removes all
|
Full 1-25
|
|
Works the same as arc drive, but ends in more damage and a ground-techable wallslam.
|
|
Last Arc
Universal version (it tracks) Universal version (it tracks) Tohno/Nanaya variation Tohno/Nanaya variation
|
| Universal
|
Damage
|
Red Damage
|
Proration
|
Cancel
|
Guard
|
| 1400*7 (3800 ~ 7500)
|
(3200 ~ 6100)
|
50% + 50% * remaining BH time
|
-
|
U
|
| First Active
|
Active
|
Recovery
|
Frame Adv
|
Circuit
|
Invuln
|
| 1+6
|
-
|
-
|
-
|
removes all
|
Full 1-?
|
|
Full Screen. Light from heaven strikes the opponent from above. Requires EX Shield in the air during blood heat, damage varies on time left for blood heat. Breaks opponents meter for 220f. only use this if you know it will kill.
|
| Nanaya/Tohno
|
Damage
|
Red Damage
|
Proration
|
Cancel
|
Guard
|
| 600*18 (3450 ~ 6700)
|
(2800 ~ 5450)
|
50% + 50% * remaining BH time
|
-
|
U
|
| First Active
|
Active
|
Recovery
|
Frame Adv
|
Circuit
|
Invuln
|
| -
|
-
|
-
|
-
|
removes all
|
Full 1-?
|
|
The LA variation for Tohno and Nanaya. Different visual effect as well. Damage numbers taken from Nanaya.
|
|
Players to watch/ask
JP:
NA:
MBAACC Navigation
