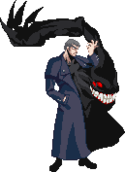
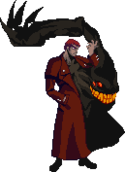
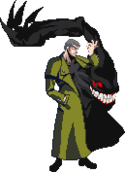
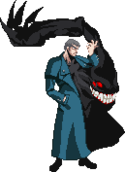
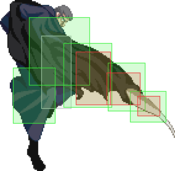
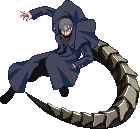
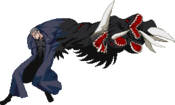
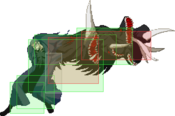
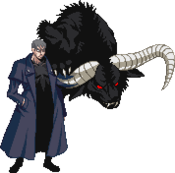
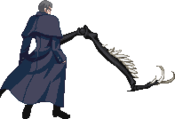
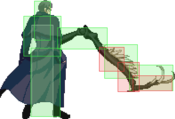
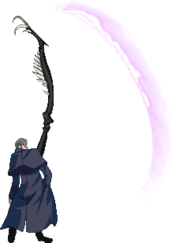
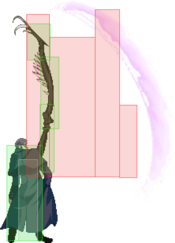
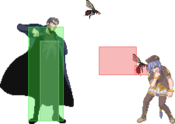
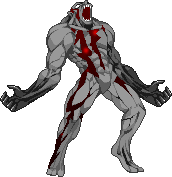
Character Page Progress
This page is still a work in progress, consider joining as an editor to help expand it. Please update this character's roadmap page when one of the editing goals have been reached.
| In Progress |
To-do
|
- Combos:
- Add video links to the pre-existing combos.
|
|
Additional Resources
H-Nero Match Video Database
Nero Combo Compilations
Nero's Compendium
Players to watch/ask
| Name |
Color
|
Region |
Common Venues |
Status |
Details
|
| LuckyStar |

|
Japan |
A-cho |
Inactive |
The original MBAACC shark. Often goes for unorthodox and stylish plays but is more than competent when he needs to be.
|
| SAT |

|
Japan |
A-cho,
KorewaMelty |
Inactive |
The original diamond standard for Nero. Solid, creative, unflinchingly adaptive. When the rust red coat shows something is about to go down. Plays every moon with absolute competence.
|
| MaSa |

|
Japan |
Play Spot BIG ONE 2nd |
Active |
The modern diamond standard for Nero.
|
| Misty |

|
Japan |
KorewaMelty |
Inactive |
|
| alicecolor |

|
Japan |
Play Spot BIG ONE 2nd |
Active |
|
| WATERWORKS(NO PAIN NO GAIN on discord) |

|
North America |
Netplay |
Infrequently
active |
Found in main Melty server.
|
| Sen |

|
North America |
Netplay |
Active |
Found in main Melty server.
|
| Grungrah |

|
North America |
Netplay |
Infrequently
active |
THE H Nero player NA. Found in main Melty server when he's around.
|
Canceris
(Canceris#7506) |

|
South America |
Netplay |
Active |
Found in main Melty server and Melty Sud.
|
General Gameplan
Strengths Weaknesses
| Strengths
|
- Good corner carry combos.
- Low commitment, summons will almost always cover you.
- Big, overall very good buttons.
- Fourth highest health in the game.
- Decent (not great) reversal options.
- Arc Drive can go into unblockable setups.
- Good anti airs.
- Has a standard forward dash for ground mobility.
- Frightening pressure with tons of advantage and guard bar damage.
- Helps combat the other moons' polarizing matchups.
- Can play more with frame traps, staggers and pressure resets due to his ground mobility.
|
| Weaknesses
|
- Some summons go away on hit and even one goes away if Nero blocks.
- Really tall, opens up Nero-specific pressure on him.
- Polarizing match ups such as H-Roa, Hime, C-Ciel's 236C, etc.
- Because of H moon, not as many opportunities to use the meter he gains.
- Loss of 236C (from C/F respectively) and no longer has C's 5[C].
- 421X is a weaker non-tracking form of C's 421X.
- No EX Guard or Heat and has to rely on Bunker to get out of pressure.
|
CHARACTER IN ONE SENTENCE: Unfair, insurance-based brute force space denial character.
General Gameplan
Unleash the entire zoo while you sit back not committing and when you finally get hit you get a free combo because your summons bailed you out. Nero alone is not a spectacular character. His summons, however, make him one of the strongest in the game simply for how little you have to commit with them. Has easily the best insurance in the game, enough to be defined by it.
H-Moon Specifics
H is easily the weakest of Nero’s moons. H trades 5[C] as well as the significantly better variants of 421X and 236C for something unique, a regular dash. This, coupled with his very big 2A and 214X gives him a fairly strong ground poke and tick throw/frametrap game. H’s unique tools unfortunately go away if you get hit, and one even if you block, so H has to play the most “honest” out of the Neros. This moon can work out in matchups where you might need the extra mobility but is generally outdone by the good moons. By no means weak as a character but significantly weaker than Nero generally is.
Neutral
MOVEMENT:
Nero is a slow character. There is no denying that. His air dash is a slow, fully horizontal one that can go for quite long if you hold it, and it will be his main movement tool.
Saying that Nero is slow is more of a lack of being able to cover small amounts of ground fast. His air dash still goes fairly far and since everyone gets a forward super jump, he can still cover alarming amounts of space very fast. He cannot, however, adjust his position nearly as well as basically any other character.
With Nero you'd want to first find a suitable space and time to produce 1-2 summons and use those to approach in a safe manner. Most times the summons will cause the opponent to jump to avoid them and that's where your super jump j.C/j.B comes into play. IF you need the time to produce a summon you can hit the opponent with 236A (crow fireball) to gain the time to produce at least one summon against an high mobility opponent and approach from there.
One thing to note about this Nero is that since he has a proper forward dash it does allow him to be a bit more aggressive in terms of his pressure by being able to induce staggers and pressure reset by dashing back in.
Pressure
With all Neros, pressure via screen control is the name of all Nero's game. Mainly 214B a to cover your approach and airdash j.C or j.B your way in. All Neros want to be acquainted with both j.C and j.B, especially j.B because it's a two hit large normal that is fast for an aerial of its caliber. From there you can either IAD j.B again or do 2A pressure.
Frankly, in any positioning outside of the corner Nero's main goal is to obstruct the opponent's path, denying them of invading space, usually forcing mistakes on opponents who overextend and from there perform the corner carry combo to brind them to the corner where you can begin to perform his pressure/okizeme.
With H-Nero, things are a bit different since he now has a proper ground dash. This does let him take advantage of his rather large 2A and lets him stagger accordingly. A few ideas should help illustrate a few points:
- 2A2A dash 2AA
- 2AA dash 2A > 5C > 22X/421A
- 2AA dash 5B > 5A(w) walk up Throw
- 2AA dash 5B > 5A(w) > 2C/5C
- 2AA IAD j.B
Okizeme
Oki in H-Nero's case is unique in that he has a ground dash and the lack of the aforementioned tools that C or F have, 236C, C's 421X is not there for H. Despite that, H-Nero does have ways to sneak in a summon during his pressure listed above and allows so some mixups to happen such as:
- 22X, jump late j.B
- 22X, empty jump 2AA
- 22X, 2A jump j.C/j.B
The challenge now is that either from AT ender, his pressure can be challengend by jumps if he tries to summon during a blockstring. Fortunately that's where j7.C, 3C and 2[C] to counter jump outs will come in handy. It is advised that you establish H-Nero's fundamental melty pressure with 2A staggers and pressure resets via dash before attempting to use summons during blockstrings otherwise the opponent will see right through you and attempt to escape.
Defense
H-Nero doesn’t have a character specific reversal per se, but H-Moon’s universal out of blockstun bunker is easily the best in the game and one of the stronger universal reversals around. Barely safe on block, fully invincible and hard knockdown, this is what you use when you need something to turn things around Right Now. Not doable on wakeup, for obvious reasons, but still a very strong option. Besides, wakeup is when most things are baited anyway.
Combos
| Combo Notation Help
|
Disclaimer: Combos are written by various writers, so the actual notation used in pages can differ from the standard one.
For more information, see Glossary and Controls.
|
| X > Y
|
X input is cancelled into Y.
|
| X > delay Y
|
Must wait for a short period before cancelling X input into Y.
|
| X, Y
|
X input is linked into Y, meaning Y is done after X's recovery period.
|
| X+Y
|
Buttons X and Y must be input simultaneously.
|
| X/Y
|
Either the X or Y input can be used.
|
| X~Y
|
This notation has two meanings.
- Use attack X with Y follow-up input.
- Input X then within a few frames, input Y. Usually used for option selects.
|
| X(w)
|
X input must not hit the opponent (Whiff).
|
| j.X
|
X input is done in the air, implies a jump/jump cancel if the previous move was done from the ground.
Applies to all air chain sections:
- Assume a forward jump cancel if no direction is given.
- Air chains such as j.A > j.B > j.C can be shortened to j.ABC.
|
| sj.X
|
X input is done after a super jump. Notated as sj8.X and sj9.X for neutral and forward super jumps respectively.
|
| dj.X
|
X input is done after a double jump.
|
| sdj.X
|
X input is done after a double super jump.
|
| tk.X
|
Stands for Tiger Knee. X motion must be buffered before jumping, inputting the move as close to the ground as possible. (ex. tk.236A)
|
| (X)
|
X is optional. Typically the combo will be easier if omitted.
|
| [X]
|
Input X is held down. Also referred to as Blowback Edge (BE). Depending on the character, this can indicate that this button is held down and not released until indicated by the release notation.
|
| ]X[
|
Input X is released. Will only appear if a button is previously held down. This type of input is referred to as Negative Edge.
|
| {X}
|
Button X should only be held down briefly to get a partially charged version instead of the fully charged one.
|
| X(N)
|
Attack "X" should only hit N times.
|
| (XYZ)xN
|
XYZ string must be performed N times. Combos using this notation are usually referred to as loops.
|
| (XYZ^)
|
A pre-existing combo labelled XYZ is inserted here for shortening purposes.
|
| CH
|
The first attack must be a Counter Hit.
|
| Air CH
|
The first attack must be a Counter Hit on an airborne opponent.
|
| 66
|
Performs a ground forward dash.
|
| j.66
|
Performs an aerial forward dash, used as a cancel for certain characters' air strings.
|
| IAD/IABD
|
Performs an Instant AirDash.
|
| AT
|
Performs an Air Throw. (j.6/4A+D)
|
| IH
|
Performs an Initiative Heat.
|
| AD
|
Performs an Arc Drive.
|
| AAD
|
Performs an Another Arc Drive.
|
Starters
| Condition
|
Notation
|
Damage
vs V.Sion
|
Notes
|
|
| Normal starter, grounded opponent
|
|
1743
|
| |
| Meter Gained: 9.4% |
Meter Given (vs C-Moon): ??? |
| Common H/F-Nero ground starter. |
|
|
| Normal starter, grounded opponent
|
|
1106
|
| |
| Meter Gained: 9.8% |
Meter Given (vs C-Moon): ??? |
| A starter that is seen among new Nero players. Best used to call out something since it's fast but very - on block. |
|
|
| Normal starter, airborne opponent
|
|
1853
|
| |
| Meter Gained: ??? |
Meter Given (vs C-Moon): ??? |
| This can be seen usually when you are meeting the opponent in the air if they are trying to jump out or to avoid the summon approaching them from the ground. |
|
|
Enders
| Condition
|
Notation
|
Damage
vs V.Sion
|
Notes
|
|
| Normal starter, grounded opponent
|
|
???
|
| |
| Meter Gained: ??? |
Meter Given (vs C-Moon): ??? |
| Usually your ender after your last j.C rep in your combo. In the corner it then leads to your Okizeme. |
|
|
Normal Combos
| Condition
|
Notation
|
Damage
vs V.Sion
|
Notes
|
|
| Normal starter, grounded opponent
|
- 2A(A) > 2B(1) > 2C > 3C > j.B > dj.BC > j.66 j.C, land sj8.C > dj.B(1)C > AT
|
3379
|
| |
| Meter Gained: 45.6 |
Meter Given (vs C-Moon): ??? |
| Very much like C-nero's combos, the BnB. |
|
|
| 4C starter, grounded opponent
|
- 4C, j.C(1) > sdj.C > j.66 j.C
|
???
|
???
|
|
| CH 4C starter, grounded opponent
|
- CH 4C > j.B(1) > sdj.BC > j.66 j.C, land sj8.C > sdj.BC > AT
|
???
|
| |
| Meter Gained: ??? |
Meter Given (vs C-Moon): ??? |
| a combo for when you hit 4C as a call out against someone that was overextending in their approach. Does a bit more damage and meter gain with this particular combo. |
|
|
| CH starter, airborne opponent
|
- CH 2C, 2C > 3C > j.B > dj.BC > j.66 j.C, land sj8.C > sdj.BC > AT
|
???
|
| |
| Meter Gained: ??? |
Meter Given (vs C-Moon): ??? |
| Counter hit combo starting with 2C, skip air dash cancel if you're close to the corner. |
|
|
| Normal starter, airborne opponent
|
- (j.A/j.B)j.C(1-2) > j.66 j.C, land sj.C > sdj.C > AT
|
???
|
| |
| Meter Gained: ??? |
Meter Given (vs C-Moon): ??? |
| Basic air-to-air confirm. |
|
|
Corner Combos
| Condition
|
Notation
|
Damage
vs V.Sion
|
Notes
|
|
| Normal starter, standing opponent
|
- 2A > 5A6AA > 2[C] > j.B > dj.BC > j.66 j.C, land sj8.C > dj.B(1)C > AT
|
???
|
| |
| Meter Gained: ??? |
Meter Given (vs C-Moon): ??? |
| Slightly more damaging twist on the typical BnB. Only works in the corner on standing opponents. |
|
|
Move Descriptions
| Frame Data Help
|
| Header
|
Tooltip
|
| Move Box Colors
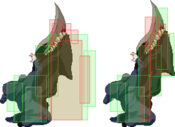
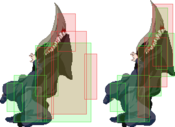
|
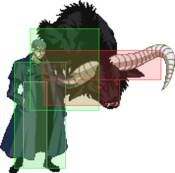
Light gray = Collision Box (A move lacking one means it can go through the opponent's own collision box).
Green: Hurt Boxes.
Red: Hit(/Grab) Boxes.
Yellow: Clash Boxes (When an active hitbox strikes a clash box, the active hitbox stops being active. Multi-hit attacks can beat clash since they will still progress to the next hitbox.)
Magenta: Projectile-reflecting boxes OR Non-hit attack trigger boxes (usually).
Blue: Reflectable Projectile Boxes.
|
| Damage
|
Base damage done by this attack.
(X) denotes combined and scaled damage tested against standing V. Sion.
|
| Red Damage
|
Damage done to the recoverable red health bar by this attack. The values are inherently scaled and tested against standing V. Sion.
(X) denotes combined damage.
|
| Proration
|
The correction value set by this attack and the way it modifies the scaling during a string. See this page for more details.
X% (O) means X% Overrides the previous correction value in a combo if X is of a lower percentage.
X% (M) means the current correction value in a combo will be Multiplied by X%. This can also be referred to as relative proration.
|
| Circuit
|
Meter gained by this attack on hit.
(X%) denotes combined meter gain.
-X% denotes a meter cost.
|
| Cancel
|
Actions this move can be cancelled into.
SE = Self cancelable.
N = Normal cancelable.
SP = Special cancelable.
CH = Cancelable into the next part of the same attack (Chain in case of specials).
EX = EX cancelable.
J = Jump cancelable.
(X) = Cancelable only on hit.
-X- = Cancelable on whiff.
|
| Guard
|
The way this move must be blocked.
L = Can block crouching
H = Can block standing.
A = Can block in the air.
U = Unblockable.
|
| Startup
|
Amount of frames that must pass prior to reaching the active frames. Also referred to as "True Startup".
|
| Active
|
The amount of frames that this move will have a hitbox.
(x) denotes frame gaps where there are no hitboxes is present. Due to varied blockstuns, (x) frames are difficult to use to determine punish windows. Generally the larger the numbers, the more time you have to punish.
X denotes active frames with a duration separate from its origin move's frame data, such as projectile attacks. In this case, the total length of the move is startup+recovery only.
|
| Recovery
|
Frames that this move has after the active frames if not canceled. The character goes into one frame where they can block but not act afterwards, which is not counted here.
|
| Advantage
|
The difference in frames where you can act before your opponent when this move is blocked (assuming the move isn't canceled and the first active frame is blocked).
If the opponent uses a move with startup that is at least 2 frames less than this move's negative advantage, it will result in the opponent hitting that move.
±x~±y denotes a range of possible advantages.
|
| Invul
|
Lists any defensive properties this move has.
X y~z denotes X property happening between the y to z frames of the animations. If no frames are noted, it means the invincibility lasts through the entire move.
Invicibility:
- Strike = Strike invincible.
- Throw = Throw invincible.
Hurtbox-Based Properties:
- Full = No hurtboxes are present.
- High = Upper body lacks a hurtbox.
- Low = Lower body lacks a hurtbox.
Miscellaneous Properties
- Clash = Frames in which clash boxes are active.
- Reflect = Frames in which projectile-reflecting boxes are active.
- Super Armor = Frames in which the character can take hits without going into hit stun.
|
Normal Moves
Standing Normals
|
|
| 5A
|
Damage
|
Red Damage
|
Proration
|
Cancel
|
Guard
|
| 300
|
144
|
78% (O)
|
-SE-, -N-, -SP-, -EX-, (J)
|
LH
|
| First Active
|
Active
|
Recovery
|
Frame Adv
|
Circuit
|
Invuln
|
| 4
|
4
|
10
|
-2
|
2.1%
|
-
|
|
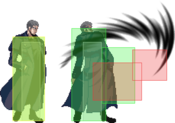
Elbow poke. Will whiff on most crouching characters but is a very quick anti-air.
|
| 5A~6A
|
Damage
|
Red Damage
|
Proration
|
Cancel
|
Guard
|
| 600
|
384
|
80% (M)
|
N, SP, EX (J)
|
LH
|
| First Active
|
Active
|
Recovery
|
Frame Adv
|
Circuit
|
Invuln
|
| 7
|
4
|
16
|
-5
|
4.2%
|
-
|
| 5A~6A~6A
|
Damage
|
Red Damage
|
Proration
|
Cancel
|
Guard
|
| 1000
|
768
|
60% (O)
|
(N), SP, EX (J)
|
LH
|
| First Active
|
Active
|
Recovery
|
Frame Adv
|
Circuit
|
Invuln
|
| 9
|
6
|
17
|
-5
|
7.0%
|
Clash 10-15
|
|
Combination - Nero uses three summons with increasing range ending with the opponent airborne, You can use 2[C] to launch.
|
|
Toggle Hitboxes Toggle Hitboxes
|
|
|
| Damage
|
Red Damage
|
Proration
|
Cancel
|
Guard
|
| 300, 200*2, 300*3 (1259)
|
(778)
|
100%, 60% (O)
|
N, SP, EX, (J)
|
LH
|
| First Active
|
Active
|
Recovery
|
Frame Adv
|
Circuit
|
Invuln
|
| 4
|
1 (6) 14
|
18
|
-7
|
2.1%, 1.4%*2, 2.8%*3 (13.3%)
|
-
|
|
Wolf. Has a startup that is equally as fast as 5A but a very long recovery time. Has a very slight blind spot underneath, Ciel's dash can go underneath it. The number of hits in this move make it very difficult to shield.
|
|
Toggle Hitboxes Toggle Hitboxes
|
|
|
| Damage
|
Red Damage
|
Proration
|
Cancel
|
Guard
|
| 300, 500, 800 (1234)
|
(700)
|
60% (O)
|
N, SP, EX, (J)
|
LH
|
| First Active
|
Active
|
Recovery
|
Frame Adv
|
Circuit
|
Invuln
|
| 9
|
3 (6) 2 (3) 3
|
19
|
-7
|
2.1%*2, 6.3% (10.5%)
|
-
|
|
Crocodile. Recovers quicker than it used to in MBAC. EX cancellable.
|
|
Toggle Hitboxes Toggle Hitboxes
|
Crouching Normals
|
|
| Damage
|
Red Damage
|
Proration
|
Cancel
|
Guard
|
| 170*2 (293)
|
(165)
|
75% (O)
|
-SE-, -N-, -SP-, -EX-, (J)
|
L
|
| First Active
|
Active
|
Recovery
|
Frame Adv
|
Circuit
|
Invuln
|
| 5
|
5
|
9
|
0
|
1.19%*2 (2.38%)
|
-
|
|
Lobster claw. Hits low. Two-hit poke with longer range than C-Moon 2A but less vertical range.
|
|
Toggle Hitboxes Toggle Hitboxes
|
|
|
| Damage
|
Red Damage
|
Proration
|
Cancel
|
Guard
|
| 350*4 (911)
|
(498)
|
65% (O)
|
N, SP, EX (J)
|
L (1), LH (2-4)
|
| First Active
|
Active
|
Recovery
|
Frame Adv
|
Circuit
|
Invuln
|
| 8
|
12
|
15
|
-2
|
2.8%*4 (11.2%)
|
-
|
|
Centipede. First hit is low. Hits 4 times. Even though this move has a lot of hits, most of the time you will want to only hit with the first hit due to very high proration.
|
|
Toggle Hitboxes Toggle Hitboxes
|
|
|
| 2C
|
Damage
|
Red Damage
|
Proration
|
Cancel
|
Guard
|
| 900
|
480
|
80% (O)
|
N, SP, EX (J)
|
LH
|
| First Active
|
Active
|
Recovery
|
Frame Adv
|
Circuit
|
Invuln
|
| 10
|
8
|
20
|
-10
|
6.3%
|
-
|
|
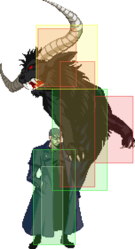
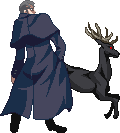
Horn. Hits mid. The angle on this is nearly vertical and is a great anti-air.
|
| 2[C]
|
Damage
|
Red Damage
|
Proration
|
Cancel
|
Guard
|
| 1600
|
1008
|
90% (O)
|
N, SP, EX (J)
|
LH
|
| First Active
|
Active
|
Recovery
|
Frame Adv
|
Circuit
|
Invuln
|
| 24
|
8
|
20
|
-10
|
8.4%
|
-
|
|
Charged horn. Launches on standing hit and better proration.
|
|
Toggle Hitboxes Toggle Hitboxes
|
Jumping Normals
|
|
| Damage
|
Red Damage
|
Proration
|
Cancel
|
Guard
|
| 350
|
192
|
78% (O)
|
SE, N, J
|
LHA
|
| First Active
|
Active
|
Recovery
|
Frame Adv
|
Circuit
|
Invuln
|
| 6
|
4
|
10
|
-
|
2.24%
|
-
|
|
Nail. Hits mid. Has good air to ground reach.
|
|
Toggle Hitboxes Toggle Hitboxes
|
|
|
| Damage
|
Red Damage
|
Proration
|
Cancel
|
Guard
|
| 600, 500 (987)
|
(511)
|
80% (O)
|
N, J
|
HA
|
| First Active
|
Active
|
Recovery
|
Frame Adv
|
Circuit
|
Invuln
|
| 7
|
5
|
-
|
-
|
4.65%, 4.9% (9.55%)
|
-
|
|
Tentacle. Hits high. Has potential to cross up if you are above the enemy, good horizontal range. Your go to air button for creating space against airborne and grounded opponents.
|
|
Toggle Hitboxes Toggle Hitboxes
|
|
|
| Damage
|
Red Damage
|
Proration
|
Cancel
|
Guard
|
| 300*3, 700
|
192*3, 384
|
100%, 90% (M)
|
N, J
|
HA
|
| First Active
|
Active
|
Recovery
|
Frame Adv
|
Circuit
|
Invuln
|
| 8
|
10
|
-
|
-
|
0.7%, 1.4%, 2.8%*2 (7.7%)
|
-
|
|
Nightmare. Hits high. Four hits. You can combo this move into itself but only three times due to wallslam count (Only counted when the last hit connects). Its reach is very deceptive.
|
|
Toggle Hitboxes Toggle Hitboxes
|
Command Normals
|
|
| Damage
|
Red Damage
|
Proration
|
Cancel
|
Guard
|
| 1000, 500 (1363)
|
(977)
|
75% (O)
|
SP, EX, (J)
|
LH
|
| First Active
|
Active
|
Recovery
|
Frame Adv
|
Circuit
|
Invuln
|
| 8
|
3 (9) 3
|
20
|
-17, -5
|
7.0%, 3.5% (10.5%)
|
Clash 21-23
|
|
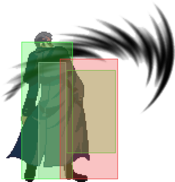
Bull. Both hits are air-unblockable, hits past the top of the screen. Jump cancellable. Second hit will most likely not reach if done on a grounded opponent.
|
|
Toggle Hitboxes Toggle Hitboxes
|
|
|
| 4C
|
Damage
|
Red Damage
|
Proration
|
Cancel
|
Guard
|
| 800, 600 (1106)
|
(676)
|
60% (O)
|
(N), (SP), (EX), (J)
|
LH, LHA
|
| First Active
|
Active
|
Recovery
|
Frame Adv
|
Circuit
|
Invuln
|
| 9
|
7 (6) 4
|
18
|
-17, -4
|
5.6%, 4.2% (9.8%)
|
-
|
|
Mantis. The second hit is air-blockable. Safer than it appears.
|
| 4[C]
|
Damage
|
Red Damage
|
Proration
|
Cancel
|
Guard
|
| 800, 600 (1106)
|
(676)
|
60% (O)
|
(N), SP, EX, (J)
|
LH, LHA
|
| First Active
|
Active
|
Recovery
|
Frame Adv
|
Circuit
|
Invuln
|
| 24
|
7 (6) 4
|
22
|
-21, -8
|
5.6%, 4.2% (9.8%)
|
-
|
|
Charged Mantis. The first hit becomes special cancelable. Why though.
|
|
Toggle Hitboxes Toggle Hitboxes
|
Universal Mechanics
|
|
| Damage
|
Red Damage
|
Proration
|
Cancel
|
Guard
|
| 200*9 (1572)
|
(573)
|
100%
|
-
|
U
|
| First Active
|
Active
|
Recovery
|
Frame Adv
|
Circuit
|
Invuln
|
| 2
|
1
|
22
|
-
|
0.0%
|
-
|
|
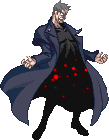
Nero lifts the opponent up and lets his pet birds do some damage. Launches the opponent in an air-tech state.
|
|
|
|
| Damage
|
Red Damage
|
Proration
|
Cancel
|
Guard
|
| 1200 (1056)
|
506
|
30%
|
-
|
U
|
| First Active
|
Active
|
Recovery
|
Frame Adv
|
Circuit
|
Invuln
|
| 1
|
1
|
12
|
-
|
7.0%
|
-
|
|
Nero grabs and punches them to the ground for a bounce. Hard knockdown if done as a combo ender.
|
|
|
|
| Standing
|
Damage
|
Red Damage
|
Proration
|
Cancel
|
Guard
|
| 500 (345)
|
198
|
50%
|
(SP), (EX), (J)
|
LHA
|
| First Active
|
Active
|
Recovery
|
Frame Adv
|
Circuit
|
Invuln
|
| 8
|
4
|
18
|
-4
|
3.5%
|
-
|
|
Same animation as Shield Bunker.
|
| Crouching
|
Damage
|
Red Damage
|
Proration
|
Cancel
|
Guard
|
| 1500 (1117)
|
714
|
50%
|
(SP), (EX)
|
LA
|
| First Active
|
Active
|
Recovery
|
Frame Adv
|
Circuit
|
Invuln
|
| 8
|
4
|
18
|
-4
|
10.5%
|
-
|
|
Same animation as 2B.
|
| Aerial
|
Damage
|
Red Damage
|
Proration
|
Cancel
|
Guard
|
| 500 (345)
|
198
|
50%
|
-
|
HA
|
| First Active
|
Active
|
Recovery
|
Frame Adv
|
Circuit
|
Invuln
|
| 8
|
4
|
-
|
-
|
3.5%
|
-
|
|
Same animation as j.B.
|
|
Toggle Hitboxes Toggle Hitboxes
|
|
|
| Neutral
|
Damage
|
Red Damage
|
Proration
|
Cancel
|
Guard
|
| 500
|
192
|
50%
|
-
|
LHA
|
| First Active
|
Active
|
Recovery
|
Frame Adv
|
Circuit
|
Invuln
|
| 25
|
4
|
19
|
-5
|
0.0%
|
Clash 1-10
|
| (Clash)
|
Damage
|
Red Damage
|
Proration
|
Cancel
|
Guard
|
| 500
|
192
|
50%
|
-
|
LHA
|
| First Active
|
Active
|
Recovery
|
Frame Adv
|
Circuit
|
Invuln
|
| 7
|
4
|
19
|
-5
|
0.0%
|
Strike 1-7
|
|
Nero steps to the side and throws some shade.
|
| Blockstun
|
Damage
|
Red Damage
|
Proration
|
Cancel
|
Guard
|
| 0
|
0
|
100%
|
-
|
LHA
|
| First Active
|
Active
|
Recovery
|
Frame Adv
|
Circuit
|
Invuln
|
| 18
|
3
|
22
|
-7
|
-100.0%
|
-
|
|
H-Moon specific reversal bunker.
|
|
Toggle Hitboxes Toggle Hitboxes
|
|
|
| Ground
|
Damage
|
Red Damage
|
Proration
|
Cancel
|
Guard
|
| 100
|
0
|
100%
|
-
|
U
|
| First Active
|
Active
|
Recovery
|
Frame Adv
|
Circuit
|
Invuln
|
| 10
|
10
|
20
|
-
|
removes all
|
Full 1-39
|
| Air
|
Damage
|
Red Damage
|
Proration
|
Cancel
|
Guard
|
| 100
|
0
|
100%
|
-
|
U
|
| First Active
|
Active
|
Recovery
|
Frame Adv
|
Circuit
|
Invuln
|
| 11
|
10
|
15
|
-
|
removes all
|
Strike 1-30
|
|
Universal burst mechanic. Unlike Crescent/Full Heat activation, the hitbox and frame data doesn't vary between characters. However, you can be thrown out of this move if you input it in the air.
|
|
Toggle Hitboxes Toggle Hitboxes
|
Special Moves
|
|
| A
|
Damage
|
Red Damage
|
Proration
|
Cancel
|
Guard
|
| 800
|
336
|
100%
|
-
|
LHA
|
| First Active
|
Active
|
Recovery
|
Frame Adv
|
Circuit
|
Invuln
|
| 8
|
X (16)
|
31
|
-6
|
5.6%
|
-
|
|
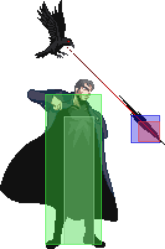
A crow will travel diagonally downward. This move is better in some ways than the standard A crow of the other moons because opponents cannot dash under it. It will not reach all the way across the screen.
|
| B
|
Damage
|
Red Damage
|
Proration
|
Cancel
|
Guard
|
| 800
|
240
|
40% (O)
|
-
|
LHA
|
| First Active
|
Active
|
Recovery
|
Frame Adv
|
Circuit
|
Invuln
|
| 121
|
19
|
42
|
-
|
5.6%
|
-
|
|
A crow will float above Nero and descend at a 45 degree angle after a bit. This move will not hit until its descent.
|
| EX
|
Damage
|
Red Damage
|
Proration
|
Cancel
|
Guard
|
| 230*12 (2070)
|
(1463)
|
90% (O)
|
-
|
LHA
|
| First Active
|
Active
|
Recovery
|
Frame Adv
|
Circuit
|
Invuln
|
| 4+5
|
X
|
81
|
7
|
-100.0%
|
-
|
|
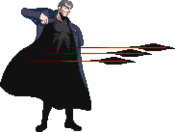
Costs 100% Meter. Summons crows that fly horizontally. Untechable in the air, can be comboed from upon air hit.
|
|
Toggle Hitboxes Toggle Hitboxes
|
"hmm today I will jump in on H-Nero" "hmm today I will jump in on H-Nero"
|
| A
|
Damage
|
Red Damage
|
Proration
|
Cancel
|
Guard
|
| 400, 160*10 (1725)
|
(659)
|
100%
|
-
|
LHA
|
| First Active
|
Active
|
Recovery
|
Frame Adv
|
Circuit
|
Invuln
|
| 67 (min)
|
3
|
39
|
-
|
5.6%, 0.42%*10 (9.8%)
|
-
|
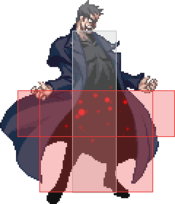
|
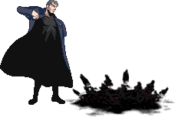
A snake will travel slowly across the ground. This snake is controlled by negative edge: releasing the A button will "activate" it. Upon being hit the opponent will be chewed and then dropped from the top of the screen in a ground-tech state. You can hit the opponent with other attacks while he is being chewed. Important note: A nice knowledge check is that if you have the snake out, it won't disappear on hit. That means if you're hit by an IAD or dash button with snake out, you could end up winning the trade. Against unknowing opponents, this might get you games.
You can't do a floor summon (214X, 22X) when another is already out. However, there is a delay before a floor summon is counted as being "out", so you can do two summons in quick succession.
|
| B
|
Damage
|
Red Damage
|
Proration
|
Cancel
|
Guard
|
| 1000
|
384
|
87% (O)
|
-
|
LHA
|
| First Active
|
Active
|
Recovery
|
Frame Adv
|
Circuit
|
Invuln
|
| 55 (min)
|
3
|
34
|
-
|
7.7%
|
-
|
|
A snake will travel quickly across the ground. This snake automatically activates when it is near an opponent. Air techable on hit, untechable on counter hit.
|
| EX
|
Damage
|
Red Damage
|
Proration
|
Cancel
|
Guard
|
| 1500
|
1152
|
75% (O)
|
-
|
LH
|
| First Active
|
Active
|
Recovery
|
Frame Adv
|
Circuit
|
Invuln
|
| 7+28
|
3
|
2
|
23
|
-100.0%
|
-
|
|
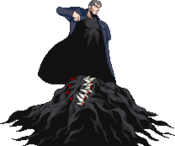
Costs 100% Meter. Summons a mouth that covers most of the screen. Is air unblockable but easily shielded.
|
|
Toggle Hitboxes Toggle Hitboxes
|
|
|
| A
|
Damage
|
Red Damage
|
Proration
|
Cancel
|
Guard
|
| 600
|
384
|
75% (O)
|
-
|
LHA
|
| First Active
|
Active
|
Recovery
|
Frame Adv
|
Circuit
|
Invuln
|
| 30
|
10
|
4
|
14
|
3.5%
|
-
|
|
A single deer will jump towards the opponent. There is a blind spot directly in front of Nero when summoned. Useful for surprising opponents who try to jump or airdash behind you. All versions of Deers have faster startup in than C-Moon, but B/EX Deers won't change the direction they are facing when behind the opponent.
|
| B
|
Damage
|
Red Damage
|
Proration
|
Cancel
|
Guard
|
| 800*3
|
384*3
|
75% (O)
|
-
|
LHA
|
| First Active
|
Active
|
Recovery
|
Frame Adv
|
Circuit
|
Invuln
|
| 80
|
10 (39) 10 (39) 10
|
52
|
-
|
5.6%*3 (16.8%)
|
-
|
|
A single deer will take its time jumping forwards for three attacks and then disappear. This deer takes a while to get out.
|
| EX
|
Damage
|
Red Damage
|
Proration
|
Cancel
|
Guard
|
| 800*5
|
384*5
|
75% (O)
|
-
|
LHA
|
| First Active
|
Active
|
Recovery
|
Frame Adv
|
Circuit
|
Invuln
|
| 2+60
|
10 (39) x5
|
2+50
|
-
|
-100.0%
|
Full 1-5
|
|
Costs 100% meter. Quickly summons a deer that will hop its way to the opposite end of the screen and will cover more ground than the B deer. Attacks 5 times.
|
|
Toggle Hitboxes Toggle Hitboxes
|
|
|
| Damage
|
Red Damage
|
Proration
|
Cancel
|
Guard
|
| 400*4 (1074)
|
(773)
|
60% (O)
|
-
|
LHA
|
| First Active
|
Active
|
Recovery
|
Frame Adv
|
Circuit
|
Invuln
|
| 52 (min)
|
320*
|
43
|
-
|
2.8*4 (11.2%)
|
-
|
|
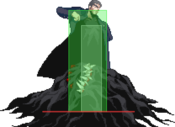
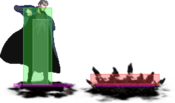
A snake will travel across the ground for as long that player holds the corresponding button. The button choice only affects the snake's travelling speed, with A being the slowest and C the fastest. Upon releasing the button, a trap will be set at that location. When the enemy steps on it, it will be triggered and will do a total of four hits. The trap disappears if Nero is hit.
Note: Once the trap has been triggered, it only disappears if any of the following conditions hold:
- It does 4 consecutive attacks (including blocked and whiffed).
- Half a second has elapsed since the last attack connected, and the trap was not retriggered.
If it hasn't done four attacks in a row, and it gets retriggered, the hitcount resets. This can be used for an infinite blockstring: Crouching hitboxes are larger than standing hitboxes, so if the opponent crouchblocks three hits, is forced to stand up before the fourth is triggered, and is then forced to crouch again, it will reset the trap's attacks.
Note: You can't do a floor summon (214X, 22X) when another is already out. However, there is a delay before a floor summon is counted as being "out", so it is possible to summon twice in quick succession.
|
|
Toggle Hitboxes Toggle Hitboxes
|
|
|
| Damage
|
Red Damage
|
Proration
|
Cancel
|
Guard
|
| 500*4
|
384*N
|
70% (O)
|
-
|
LHA
|
| First Active
|
Active
|
Recovery
|
Frame Adv
|
Circuit
|
Invuln
|
| 12+193
|
16 (106) 16 (106)
16 (106) 16
|
12+26
|
-
|
-100.0%
|
-
|
|
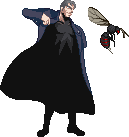
Costs 100% meter. Summons a poisonous flying creature with needle that follows the enemy around and stings occasionally for 4 hits. The hornet flies away if Nero is hit. Not a reversal.
|
|
Toggle Hitboxes Toggle Hitboxes
|
Arc Drive
|
|
| Damage
|
Red Damage
|
Proration
|
Cancel
|
Guard
|
| 3500
|
2208
|
100%
|
-
|
U
|
| First Active
|
Active
|
Recovery
|
Frame Adv
|
Circuit
|
Invuln
|
| 2+59
|
8
|
81
|
-
|
removes all
|
Full
|
|
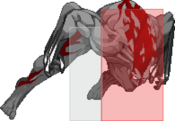
Nero transforms and charges forward. Lengthy startup, but unblockable and unshieldable.
|
|
Toggle Hitboxes Toggle Hitboxes
|
MBAACC Navigation
