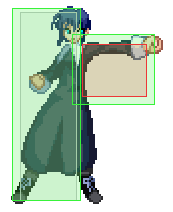
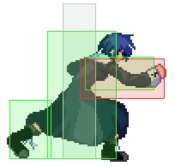
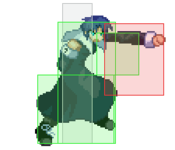
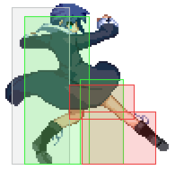
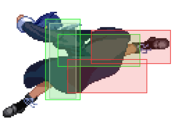
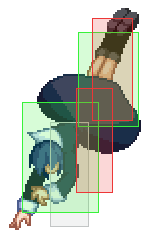
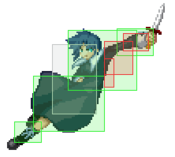
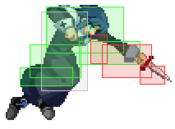
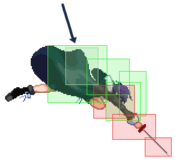
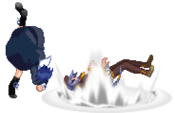
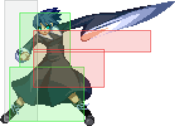
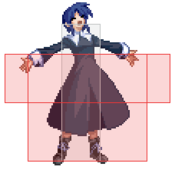
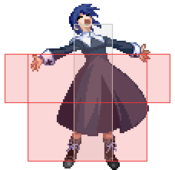
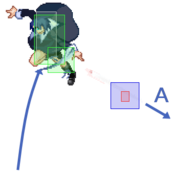
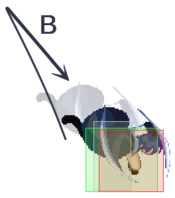
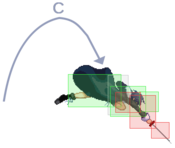
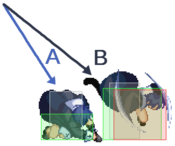
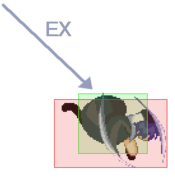
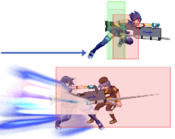
Character Page Progress
This page is still a work in progress, consider joining as an editor to help expand it. Please update this character's roadmap page when one of the editing goals have been reached.
Additional Resources
H-Ciel Match Video Database
H-Ciel Canceris's spanish guide, on which this page is based upon and trimmed down
Players to watch/ask
JP:
SA:
- Canceris (Canceris#7506)
Main editor of the page, has a large knowledge about the character.
Overview
Strengths / Weaknesses
| Strengths
|
- Fullscreen invincible punish
- Low profile dash
- Faster movement than other moons
- Decent pressure and stagger options
- Great projectiles
- Extended combo routes allows for better corner carry and meter gain with oki options
- Can go for decent okizeme without sacrificing damage
|
| Weaknesses
|
- Less damage overall than other moons
- Several of useless/hard to use specials
- Unless in midscreen, her mix-ups are not hard to block and fuzzies can be EX-Guarded
- No big/crossup air move means she commits heavily when jumping-in
- H-Moon meter limits hurts her badly in neutral (236C) and defense
- Extended combo routes are finicky with distances, opponent state and hit count
- Technical character that demands solid fundamentals, awareness and execution
|
General Gameplan
H-Ciel is an often ignored character and categorized as “C-Ciel but worse”, granting her dark character status. They are fundamentally the same character, sharing almost all of the main normals and commands and how she deals in neutral. Where things start to change is how H-Ciel pressures and the opportunities to extend combos into corner carry and respectable Okizeme without losing damage. Any technical player who wants to spend time in the lab can find in H-Ciel a character, just be ready to do your homework.
Neutral
- Dash: Extremely useful for all Ciels as it can low profile a lot of air buttons and even several on the ground. But especially useful in H-Ciel due to its lack of air normals that hit from behind; It is important to learn to love the floor and abuse the dash as much as possible. Try to dash under very jumpy opponents and clap them with 5C/2C, and get in the habit of dash-stopping with 5A/2A for when you want to create space or are unsure of your approach.
- 214B~4A: Ciel 101. Use it mostly when the opponent is on the ground mid screen or full screen to force them to come up in the air, you're going to use this window to dash under them or preemptively interrupt them.
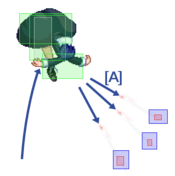
- 236[A]: Incredibly good command to zone and similar to 214B (just as punishable when jumping it, and same confirms), the difference being the little jump that Ciel does, making it possible for her to now win the projectile war without worrying about having 236C in hand. Reppukens, lasers, snakes, keys, etc are some examples. In fullscreen hit it can be confirmed into 236C.
- 236C: Another important tool for C and H-Ciel, the option to punish any mistake anywhere on the screen is very strong. But H-Ciel suffers from not being able to freely use 236C by having the Half moon bar.
The rest of H-Ciel's normals/commands are not very strong and are in-theme with her jack-of-all-trades:
Air-to-air use the jB disjointed box, and jA preemptively, if you find yourself stuck in the air use j2C, j214A and j236A to reposition yourself or bait anti-airs, after j214A remember to jump cancel, air dodge (to burn 50% of bar), or cancel in j236A/B. When you approach the opponent through the air and are almost close to the corner be especially reserved, if you spent all your air options and the opponent dashed under, then you are now locked in the corner with no buttons to hit from behind, try to save your air dash as a last ditch option to get extra air and space, we can easily reset a bad position to a neutral one with the air dash.
Don't kill yourself by throwing too many normals on the ground, situationally use 5B/3B for footsies and 5C for more range, after 5B/3B buffer 5C 623B for hit confirming. Only use 5A to interrupt IADs and for fuzzy 5A, H-Ciel's 5A doesn't hit as high as it looks.
Don't be too defensive/passive on the ground neither, occasionally rush with dash rising jA if the opponent likes to hang around in the air, and when the opponent starts throwing preemptive buttons in the air try instead to punish/take your turn in their landing recovery or dash under it if you have the time.
Pressure
H-Ciel's pressure isn't really super strong, but at what excels is the good amount of stagger options, reset pressure, and knowledge checks. H-Ciel gains new commands that leaves us positive on block but they all have the problem of being situational by distance and/or reactive. We're going to rely mostly on reverse beat strings positive on whiff or block to do the dirty work, similar to C-Ciel. And while our only major change is 5A, this is enough to open up new opportunities for us and it's important to exploit them in our gameplan.
It is very important that you do not start your strings with 5A or waste 5A early, not only is it the best button by far to reverse beat that leaves us at +1 on block and +3 on whiff from a C normal, it can also be used to stagger into 6AA. Still, 5A is a common starter for its usefulness in neutral, so don't be shy about not using it, in okizeme you ideally always start with 2A. The best situation from 5A on block for us is close enough so that 2A connects on crouchers and frame traps thanks to the +1 on block.
If the opponent pushed us away with EX guard or blocked well and we're out of normals, it's best to go for 5Aw from any C normal (5C, 5[C], 2C, 4C). +3 on whiff sounds very strong, but the problem is that at the distance that 5A whiffs our only normal that connects is 5C, so I strongly recommend that you only use 4C and 2C into 5Aw , then with the 5C reserved we can catch people mash or jumping and confirm with 623B or half-charge it to 5{C} against delayed mash/jump. When you have conditioned the opponent to block, don't do 5C and instead go for dash resets or air dash/jump-in.
Resetting with jump-in or air dash can be pretty good, as H-Ciel has access to 2 kind of Fuzzy setups that can be done in our pressure if the opponent respect us a lot.
Once the opponent learns to respect our pressure and stagger, you will obviously want to throw, but unfortunately H-Ciel's throwing game is very poor: low damage and mediocre oki. Still, it's important to give your opponent a reason not to block all day. Understanding how Melty's defensive option-selects work is going to be very essential if you want to open up the best defensive players. In Ciel's case, j2C is a good option to kill the most basic option-selects, the jump makes us avoid a variety of options and gives us more reward than just using 5B.
623B is +1 on block vs crouching opponents, as long as it's not done at close range. It can be even +3 from greater distances. Still negative on block vs tall characters crouching (Tohno, Nanaya, Hime, Wara, Nero, WLen). Our replacement for C-Ciel's 5CC, being our main tool for hit confirming 5C from afar and leaves us in a good position if it gets blocked. Although if the opponent blocks it standing you are negative but not punishable, its not possible to block it standing on reaction, so you can clip them with lows (2C, 5B) if they preemptively block standing. The opponent has to stand block only the first hit to make it negative on block, if they block the last 2 you are still positive on block, you can realize if they blocked the first one because Ciel "floats" for longer. EX Guard mash kills it entirely sadly. Because of all these weaknesses we cannot trust 623B as a pure reset pressure tool and it should be left as a last option in your blockstrings. Although on an ignorant opponent with no EX-Guard, 623B can be abused.
624C is another popular pressure reset tool. Very easy to react to with dozens of ways to kill it (dash under, shield, upback, rising jA, etc) although unlike H-Ciel's other commands it doesn't require any specific distance to work, and leaves you next to the opponent. My recommendation is actually to not use it on our strings because of how slow it is, instead try to use it in Abare situations where the opponent may be mashing or looking into your other options like re dash or block standing 623B. Still, be very reserved with 624C.
Basic strings for every day
Our BNB string that we will use almost always in the opponent's wake up, easy to hitconfirm into full combo if they don't block, and thanks to the fact that it leaves us next to the opponent and +1, we can frame trap with 2A and reset the string. Very easy to make it be respected and take the opportunity to reset into whatever we want (dash, neutral jump, walk). If you do go for the 2A frame trap, then adjust the following string taking into account the greater distance, you can do the following >
- 2A 2B(1hit) 3B (1hit) 2C 5Aw >> 5C 623B
On block we can take advantage of the +3 from 2C 5Aw and reset with dash; to force them to respect us we cancel the whiff recovery from 5Aw to 5C to beat mash and jumps, and in case they do respect 5C 623B then it leaves us at +1 on block if they are blocking crouching, although this weakness can be exploited by an opponent who knows the match-up, since at this range we don't have lows to force them to crouch block.
One of the weaknesses of this 2A frame trap is that it can't hit characters in the air and the short range doesn't connect if they're standing still, this means people can easily jump off. To keep your opponent honest, from time to time you're going to have to go for 5AA to clip them if they want to jump. Unfortunately we lose our best button by starting the string with 5A, we can still use 2Aw to apply the same uses, but being +1 instead of +3 is not as threatening. Instead you can go for this string too >
- 5AA 2B(1hit) 3B(1hit) 5{C} 623B/2C
Half-charging 5{C} brings us considerably closer to the opponent, to the point that after they block 623B crouching it leaves us +1 and at distance of a 2A, BUT with the greater risk that if they do block standing then we will get punished for being very close and at -5 minimum. Lucky for us we have our low 2C available and ready to punish them if they try to block it standing, if they continue to keep blocking crouching we can indefinitely keep pressuring them. Normally I wouldn't recommend going for such a high risk RPS in our own pressure, but in the case that they do block standing and we have meter at hand, we can cancel the last part of 623B into j236C to make it safe on block. Just don't use this string all the time or you will starve to death using your meter.
Specific MUs: against characters that have normals with low profile on frame 1 our 5A can be beaten clean (C-Arc’s 2B, F-Vaki’s 2B, etc), this only complicates our lives with an unnecessary RPS on our pressure. Another option that covers both mashing and jumping is 5B 5C instead of 5AA, done well you should clip people jumping, but leaves us limited on our choices if they do block.
Fairly safe option to apply in re dashes to reset pressure or offensive dash in neutral, covers well up-backing and shield/bunker attempts. Thanks to the fact that we cannot jump on the first hit of 4C on hit, we can input 7 for a brief moment in this time and on hit we are not going to jump, and in case they shield/bunker us, the extra hitstop makes us jump and block the follow up.
All these examples are basic, easy and effective. You can get very creative with all of H-Ciel's options and put together quite complicated strings, experiment a lot in the lab and find what you are most comfortable with based on these examples. You don't have to be super rigid with these strings, the more we vary our options, the more difficult it will be for our opponent to react and use the appropriate options to get out of our pressure.
Okizeme
H-Ciel has similar oki options to C-Ciel, but unlike C, H-Ciel doesn't need to sacrifice damage or meter to get this oki thanks to its 5A6AA combo routes. The ender you choose for your oki is of your preference, in the advanced combos section you can see examples that end in these enders:
- 4B236B ender (Midscreen only): Kamone decided to bless us and reduce 4B236B's recovery with 4f less, and while it sounds great on paper I actually recommend avoiding going for this oki, as the hard knockdown is greatly affected by the gravity scaling of the combo, basically losing any benefit it gives us. Still, in midscreen against 2/3 of the cast you can do a midscreen L/R with >hfj empty jump 2A for sideswitch and >small delay hfj jC for same side. hfj never crosses up Aoko, Ciel, all Akihas, Satsuki, Warachia, Roa, Wlen.
- 624B ender (Midscreen only): In OTG it causes ground bounce, it has better frame data than 4B236B but is still affected by gravity scaling. If you use all the OTGs previously in the combo you can't go for this oki, but in midscreen it gives an excellent L/R with IAD j2C - You choose the side by changing the timing of the j2C, and it gives you the time to make a meaty 2A. It even gives the time to do 2B anti standing shield, but the timing is tight.
- 2C 2Aw ender: The best frame advantage of all hard knockdowns and is not affected by gravity scaling, but at the cost of losing a bit of damage, and best of all, you can use it anywhere on the screen. The frame advantage is enough to do dash > neutral jump > stuff, winning the dash drift and giving us new options. It doesn't give us top tier oki, but what is strong about it is the number of options, and you can vary it according to your player match-up needs, or whatever mood you feeling like.
- In Midscreen we have 2 options, go for drift mix-up L/R, or walk backwards > forward jump L/R, I do not recommend abusing drift mix-up as a trained eye can recognize the tell of the side change and react to the back air dash overhead, the L/R from walk backwards > forward jump is almost impossible to see and the high option is not masheable but the timing of cross-up and meaties changes per character and it's easy to screw up. The important thing is that we use the variety of options so as not to leave the opponent comfortable.
- In the corner we have the best okizeme option compared to 4B236B and 624B, it is more reliable and easier to go for safe jumps or Fuzzy Guard/Yuuhi Fuzzy, because we always have the same knockdown time.
Fuzzy guard setups: Most of the time H-Ciel is a very honest character in her gameplan, implementing these Fuzzy Guard setups can really boost our offense, unfortunately they can be killed with EX guard, but this is H-Ciel's only true corner mix.
- Deep jC > land > 8 jC fuzzy - You can set it from a safe jump or from iad jB jC
- Yuuhi Fuzzy from jC > adc > jB - The minimum height and cancel window to get the fuzzy right is strict, but it has a higher reward than the regular fuzzy and can land on more characters.
Please note that fuzzy guards do not apply to all characters:
- There characters can’t be fuzzied by Deep jC 8 jC fuzzy: Nanaya, Tohno, PCiel, Satsuki, Aoko, Len, WLen, Miyako, Necos
- There characters can’t be fuzzied by Yuuhi Fuzzy from jC adc jB: Miyako and Necos
When you don't have a clean confirm and you have no choice but to go for BnB with AT ender, play it safe and solid with dash 2A/5A, the timing to make it meaty is strict so train it with the dummy doing recovery 2A. If you're stuck in the middle of the screen just drop back to neutral, or build up some bar by doing j214A > j214B4BB if you need it.
Defense
H-Ciel defensive options are all the same from C-Ciel, but she is overall more fragile as it's more likely you can find yourself with less than 100% meter and not having her EX reversals at hand.
- 22C: This is a 3f reversal, due to the nature of landing recovery, C and H moon characters cannot safejump this move unless they make the first hit whiff. This move hits on the same frame as the superflash, so opponents cannot whiff cancel their A normal into shield upon seeing the superflash. Also being a 22 input makes this reversal very relevant against left/right mixups, this move can invalidate some mixups due to the nature of the 22 input alongside C/H characters not being able to safejump against it.
- 22B: This is Ciel’s meterless reversal, it is programmed to whiff crouchers even if the hitboxes line up making it relatively easy to bait. It can be useful against H-moon heat though as it will avoid the H-moon autoburst, and Ciel will be + in the resulting situation.
- 214C: This reversal is safe on block, but loses to the opponent jumping on reaction to the superflash.
- 236C: This move is a reversal, it basically beats everything but block or an A normal, however it a relatively slow startup compared to the other listed moves. A couple examples of uses for 236C are against F-Akiha/F-VAkiha’s 4C, Nero’s 4C, Satsuki’s 3C and FHime 236A/B, any of these moves can be punished on block by 236C, the opponent will need to cancel into a move which jails if they can, in which case the 236C won’t come out due to blockstun. Having these options available will require that the opponent must play around them to some degree, which will provide opportunities for challenges such as 2A or Jump, or just allow you to block longer to try and gain an understanding of your opponent’s pressure tendencies.
Combos
| Combo Notation Help
|
Disclaimer: Combos are written by various writers, so the actual notation used in pages can differ from the standard one.
For more information, see Glossary and Controls.
|
| X > Y
|
X input is cancelled into Y.
|
| X > delay Y
|
Must wait for a short period before cancelling X input into Y.
|
| X, Y
|
X input is linked into Y, meaning Y is done after X's recovery period.
|
| X+Y
|
Buttons X and Y must be input simultaneously.
|
| X/Y
|
Either the X or Y input can be used.
|
| X~Y
|
This notation has two meanings.
- Use attack X with Y follow-up input.
- Input X then within a few frames, input Y. Usually used for option selects.
|
| X(w)
|
X input must not hit the opponent (Whiff).
|
| j.X
|
X input is done in the air, implies a jump/jump cancel if the previous move was done from the ground.
Applies to all air chain sections:
- Assume a forward jump cancel if no direction is given.
- Air chains such as j.A > j.B > j.C can be shortened to j.ABC.
|
| sj.X
|
X input is done after a super jump. Notated as sj8.X and sj9.X for neutral and forward super jumps respectively.
|
| dj.X
|
X input is done after a double jump.
|
| sdj.X
|
X input is done after a double super jump.
|
| tk.X
|
Stands for Tiger Knee. X motion must be buffered before jumping, inputting the move as close to the ground as possible. (ex. tk.236A)
|
| (X)
|
X is optional. Typically the combo will be easier if omitted.
|
| [X]
|
Input X is held down. Also referred to as Blowback Edge (BE). Depending on the character, this can indicate that this button is held down and not released until indicated by the release notation.
|
| ]X[
|
Input X is released. Will only appear if a button is previously held down. This type of input is referred to as Negative Edge.
|
| {X}
|
Button X should only be held down briefly to get a partially charged version instead of the fully charged one.
|
| X(N)
|
Attack "X" should only hit N times.
|
| (XYZ)xN
|
XYZ string must be performed N times. Combos using this notation are usually referred to as loops.
|
| (XYZ^)
|
A pre-existing combo labelled XYZ is inserted here for shortening purposes.
|
| CH
|
The first attack must be a Counter Hit.
|
| Air CH
|
The first attack must be a Counter Hit on an airborne opponent.
|
| 66
|
Performs a ground forward dash.
|
| j.66
|
Performs an aerial forward dash, used as a cancel for certain characters' air strings.
|
| IAD/IABD
|
Performs an Instant AirDash.
|
| AT
|
Performs an Air Throw. (j.6/4A+D)
|
| IH
|
Performs an Initiative Heat.
|
| AD
|
Performs an Arc Drive.
|
| AAD
|
Performs an Another Arc Drive.
|
Because H-Ciel's 5B and 5C cause crouching characters to knock down on hit, her optimal combos involve confirming whether enemy state is crouching or not.
Normal Combos
| Condition
|
Notation
|
Damage
vs V.Sion
|
Notes
|
|
| Anywhere
|
- 2A > 2B > 3B > 5C > 623B > j.B > land > j.BC > j.BC > air dash > j.B(A) > j.22B > AT
|
4211
|
| |
| Meter Gained: 71.4% |
Meter Given (vs C-Moon): 30.6% |
| Works on everyone, very forgiving in terms of routing. Works from basically any ground hit normal, standing or crouching. |
|
|
| Crouching anywhere
|
- 2AA > 2B > 3B > 5A6AA > 4[B] > 2C > delay > 5C > 4C > j.BC > j.BC > air dash > j.B > j.22B > AT
|
5055
|
| |
| Meter Gained: 94.5% |
Meter Given (vs C-Moon): 41.1% |
| Works on everyone. |
|
|
Standing, Anywhere, Character Specific
Works On: Hime, Kouma, Miyako, Ries, Wara, Roa, P.Ciel, Seifuku, Nero, NAC, Hisui, Neco
|
- 2AA > 2B > 3B(1) > 5C > 5A6AA > 4[B] > 2C > delay > 5C > 4C > j.BC > j.BC > air dash > j.B > j.22B > AT
|
5199
|
| |
| Meter Gained: 97.3% |
Meter Given (vs C-Moon): 42.3% |
| Damage tested on Hime. |
|
|
Standing, Midscreen Only, Character Specific
Works On: Nanaya, Ciel, Sion, V.Sion, Akiha, V.Akiha
|
- 2AA > 2B > 3B(1) > 5C > 5A6AA > 4[B] > 2C > delay > 5C > 4C > j.BC > j.BC > air dash > j.B > j.22B > AT
|
5199
|
| |
| Meter Gained: 97.3% |
Meter Given (vs C-Moon): 42.3% |
| Damage tested on Nanaya. |
|
|
| Standing or Crouching, Anywhere
|
- 2AA > 2B > 3B(1) > 5A6AA > 4[B] > 2C > delay > 5C > 4C > j.BC > j.BC > air dash > j.B > j.22B > AT
|
4831
|
| |
| Meter Gained: 91.7% |
Meter Given (vs C-Moon): 39.3% |
| Works on everyone. |
|
|
| Corner
|
- 2AAA > 2B > 3B(1) > 5A6AA > 4[B] > 2C > 236B > 2C > 236B > delay > 5A6AA > delay > 4[B] > 5A6AA > 4[B] > 2C > 5C > 4B~236B
|
3882
|
| |
| Meter Gained: 72.3% |
Meter Given (vs C-Moon): 65.3% |
| Corner meterless loop into oki. Delays are character specific. The more buttons you press the easier delays become. |
|
|
| Air CH
|
- j.B (CH) > 4[B] > 624A > 2C > 5C > 2B > j.BC > j.BC > 66 > j.B > 22B > AT
|
4969
|
| |
| Meter Gained: 72.8% |
Meter Given (vs C-Moon): 31.2% |
| Optimized air ch pickup. omit the 4[B] and 624A if you don't have time. |
|
|
Basic Combo Series!
Family friendly combos for all to enjoy, they have their uses, some being more practical than others, but they will add that extra bit of flare to your gameplay.
https://youtube.com/playlist?list=PLPOsEjaPOBYOzUzkuQfveQLGBpsy4stK_
| Condition
|
Notation
|
Damage
vs V.Sion
|
Notes
|
|
| Anywhere
|
- 2A > 2B(2) > 3B(1) > 5A6A > 5C > 2C > 4C > j.BC > j.BC > air dash > j.B > j.22B > AT
|
???
|
| |
| Meter Gained: ??? |
Meter Given (vs C-Moon): ??? |
(Video) |
|
|
| Anywhere
|
- 2A > 2B(2) > 3B(1) > 5A6AA > 4[B], 2C > TK.236B > (5B) > 4B~236B
|
3897
|
|
| Meter Gained: 51.8% |
Meter Given (vs C-Moon): 24.4% |
(Video) |
An actual viable combo from the Basic Combo series and gives you oki with a little bit of style on the side.
- You can only land the 5B in the corner
|
|
|
| Anywhere
|
- 2A > 2B(2) > 3B(2) > 5C > 2C > 236[A], 2C > 5C > j.BC > j.BC > air dash > j.B > j.22B > AT
|
???
|
| |
| Meter Gained: ??? |
Meter Given (vs C-Moon): ??? |
(Video) |
|
|
| Corner
|
- 2A > 2B(2) > 3B(1) > 5A6AA > 4[B], 2C > 236B > 4[B], 2C > 236B > 4[B], 2C > 2A(w) > 5A6AA > 4[B], 2C > 2A(w) > 5A6AA > 4[B], 2C > 5C > 4B~236B
|
4075
|
|
| Meter Gained: 76.8% |
Meter Given (vs C-Moon): 84% |
(Video) |
| H-Ciel's Basic Combo #4, a legendary combo that does okay damage and gives you and your opponent a good chunk of meter and gives you oki. |
|
|
| Anywhere
|
- 2A > 2B(2) > 3B(1) > 5A6AA > 4[B], 2C > 5C > 4B~236B
|
3650
|
|
| Meter Gained: 47.4% |
Meter Given (vs C-Moon): 22.6% |
(Video) |
| Basic Combo #6, the most basic of the combos in this series, gives oki |
|
|
Advanced Combos
All of these routes depend heavily on hit count for the added gravity decay in order to work, they can be quite hard vs some slim characters even on high hit count, or really easy on wider characters. These routes can also be extended with more reps, but the intent is to optimize damage without over extending combos and not give a lot of meter to our opponent, however, sometimes you might want to over extend the combos if you desperately need the meter to enter heat or force your opponent into max mode too.
Video example: https://www.youtube.com/watch?v=0-jkAjxNc0E
| Condition
|
Notation
|
Damage
vs V.Sion
|
Notes
|
|
| Standing, Anywhere
|
- 2AA > 2B > 3B(1) > 5{C} > 5A6AA > 4[B] > 2C > 236B4 > 4[B] > 2C > 2Aw > 5A6AA > 4[B] > 2C > 2Aw or 63214B or 4B236B
|
4317
|
| |
| Meter Gained: 63.5% |
Meter Given (vs C-Moon): 36.3% |
| Works on everyone but len, very hitcount dependent, requires to be next to the opponent or late normals in the string will whiff. For the midscreen combo to work after 236B4 you must plink A into B for Ciel to autocorrect to the correct side, the input would be 4A~4[B]. It is possible to add another rep of 236B4 4[B], this works for some characters that require as much hit count as possible, or if you are close to the corner and prefer to have corner oki. 236B4 4A~[B] extensions don't work midscreen on Miyako |
|
|
Crouching, Anywhere
Works On: Everyone but Len and WLen
|
- 2AA > 2B > 3B > 4C > dl.5C > 2C > 5Aw6AA > 4[B] > 2C > 2Aw > 5A6AA > 4[B] > 2C > 2Aw or 63214B or 4B236B
|
4510
|
| |
| Meter Gained: 82.6% |
Meter Given (vs C-Moon): 35.4% |
| In some characters it is necessary to add delay in 5Aw, requires to be next to the opponent or late normals in the string will whiff. It is possible to add a 236B4 4A~[B] before the 2nd rep of 5A6AA in case you find it difficult vs some characters and require more hitcount. |
|
|
| Anywhere, 2A Max Range
|
- 2A > 2B(1) > 3B(1) > 5A6AA > 4[B] > 2C > 236B4 > 4[B] > 2C > 236B4 > 4[B] > 2C > 2Aw > 5A6AA > 4[B] > 2C > 2Aw or 4B236B
|
3605
|
| |
| Meter Gained: 57.6% |
Meter Given (vs C-Moon): 36.9% |
For the midscreen combo to work after 236B4 you must plink A into B for Ciel to autocorrect to the correct side, the input would be 4A~4[B] . Against some characters the hitcount is still going to be short and the combo becomes very hard to complete on the final 5A6AA and 4[B], generally you want to do 5A6AA as low to the ground as possible and delay 4[C], or alternatively cut early the combo on 2C before the final 5A6AA rep. 236B doesn't OTG Miyako midscreen, but the route can be adapted: after the first 5A6AA 4[B] 2C go straight into 2Aw 5A6AA 2C 2Aw loops.
The damage lost for not having a clean hit is considerably higher on this route comparing with a normal BNB of 4.6k damage, it's up to you if you prefer damage or okizeme. |
|
|
Crouching, Anywhere, 2A Max Range
Works On: Everyone but Len and WLen
|
- 2A > 2B(1) > 3B(1) > 4C(1) > 5C > 2C > 5Aw6AA > 4[B] > 2C > 236B4 > 4[B] > 2C > 2Aw > 5A6AA > 4[B] > 2C > 2Aw or 4B236B
|
3994
|
| |
| Meter Gained: 65.6% |
Meter Given (vs C-Moon): 37.2% |
| For the midscreen combo to work after 236B4 you must plink A into B for Ciel to autocorrect to the correct side, the input would be 4A~4[B]. Against some characters the hitcount is still going to be short and the combo becomes very hard to complete on the final 5A6AA and 4[B], in those match-ups you can add another rep of 236B4 2C in the middle at the cost of losing some damage. 236B doesn't OTG Miyako midscreen, but the route can be adapted: after the first 5A6AA 4[B] 2C go straight into 2Aw 5A6AA 2C 2Aw loops. |
|
|
| Anywhere, 5A Starter / lack of normals
|
- 5A > 2B(1) > 2A > 5A6AA > 4[B] > 2C > 236B4 > 4[B] > 2C > 236B4 > 4[B] > 2C > 2Aw > 5A6AA >4[B] > 2C > 2Aw or 4B236B
|
3607
|
| |
| Meter Gained: 57.6% |
Meter Given (vs C-Moon): 36.9% |
Different route, useful when finding a random hit with 5A or after staggering your pressure and you dont have normals available to cancel into. For the midscreen combo to work after 236B4 you must plink A into B for Ciel to autocorrect to the correct side, the input would be 4A~4[B] . Against some characters the hitcount is still going to be short and the combo becomes very hard to complete on the final 5A6AA and 4[B], generally you want to do 5A6AA as low to the ground as possible and delay 4[C], or alternatively cut early the combo on 2C before the final 5A6AA rep. 236B doesn't OTG Miyako midscreen, but the route can be adapted: after the first 5A6AA 4[B] 2C go straight into 2Aw 5A6AA 2C 2Aw loops.
The damage lost for not having a clean hit is considerably higher on this route comparing with a normal BNB of 4.6k damage, it's up to you if you prefer damage or okizeme. |
|
|
Crouching, Anywhere, Character specific
Works On: Len, WLen (others characters too)
|
- 2AA > 2B > 3B > 4C > dl.5C > 2C > 236[A] > 2C > 5Aw6AA > 4[B] > 2C > 2Aw > 5A6AA > 4[B] > 2C > 2Aw or 63214B or 4B236B
|
4621 (vs Len)
|
| |
| Meter Gained: 61.4% |
Meter Given (vs C-Moon): 40.2% |
| Mostly useful route to vs Len, since the basic routes doesn't work on her, thanks to her weird hurtbox after getting tripped by 2C. You don't need to go for this route vs Wlen though, as she is easy to juggle with 5A6AA. Between 236[A] and 2C you have to walk backwards for a couple of frames in order to create space and make 5A whiff. |
|
|
Move Descriptions
| Frame Data Help
|
| Header
|
Tooltip
|
| Move Box Colors
|
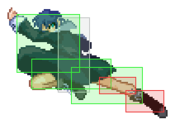
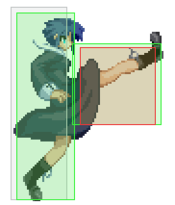
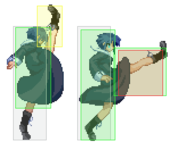
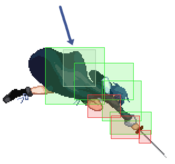
Light gray = Collision Box (A move lacking one means it can go through the opponent's own collision box).
Green: Hurt Boxes.
Red: Hit(/Grab) Boxes.
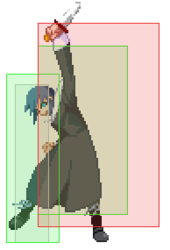
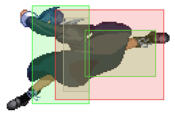
Yellow: Clash Boxes (When an active hitbox strikes a clash box, the active hitbox stops being active. Multi-hit attacks can beat clash since they will still progress to the next hitbox.)
Magenta: Projectile-reflecting boxes OR Non-hit attack trigger boxes (usually).
Blue: Reflectable Projectile Boxes.
|
| Damage
|
Base damage done by this attack.
(X) denotes combined and scaled damage tested against standing V. Sion.
|
| Red Damage
|
Damage done to the recoverable red health bar by this attack. The values are inherently scaled and tested against standing V. Sion.
(X) denotes combined damage.
|
| Proration
|
The correction value set by this attack and the way it modifies the scaling during a string. See this page for more details.
X% (O) means X% Overrides the previous correction value in a combo if X is of a lower percentage.
X% (M) means the current correction value in a combo will be Multiplied by X%. This can also be referred to as relative proration.
|
| Circuit
|
Meter gained by this attack on hit.
(X%) denotes combined meter gain.
-X% denotes a meter cost.
|
| Cancel
|
Actions this move can be cancelled into.
SE = Self cancelable.
N = Normal cancelable.
SP = Special cancelable.
CH = Cancelable into the next part of the same attack (Chain in case of specials).
EX = EX cancelable.
J = Jump cancelable.
(X) = Cancelable only on hit.
-X- = Cancelable on whiff.
|
| Guard
|
The way this move must be blocked.
L = Can block crouching
H = Can block standing.
A = Can block in the air.
U = Unblockable.
|
| Startup
|
Amount of frames that must pass prior to reaching the active frames. Also referred to as "True Startup".
|
| Active
|
The amount of frames that this move will have a hitbox.
(x) denotes frame gaps where there are no hitboxes is present. Due to varied blockstuns, (x) frames are difficult to use to determine punish windows. Generally the larger the numbers, the more time you have to punish.
X denotes active frames with a duration separate from its origin move's frame data, such as projectile attacks. In this case, the total length of the move is startup+recovery only.
|
| Recovery
|
Frames that this move has after the active frames if not canceled. The character goes into one frame where they can block but not act afterwards, which is not counted here.
|
| Advantage
|
The difference in frames where you can act before your opponent when this move is blocked (assuming the move isn't canceled and the first active frame is blocked).
If the opponent uses a move with startup that is at least 2 frames less than this move's negative advantage, it will result in the opponent hitting that move.
±x~±y denotes a range of possible advantages.
|
| Invul
|
Lists any defensive properties this move has.
X y~z denotes X property happening between the y to z frames of the animations. If no frames are noted, it means the invincibility lasts through the entire move.
Invicibility:
- Strike = Strike invincible.
- Throw = Throw invincible.
Hurtbox-Based Properties:
- Full = No hurtboxes are present.
- High = Upper body lacks a hurtbox.
- Low = Lower body lacks a hurtbox.
Miscellaneous Properties
- Clash = Frames in which clash boxes are active.
- Reflect = Frames in which projectile-reflecting boxes are active.
- Super Armor = Frames in which the character can take hits without going into hit stun.
|
Normal Moves
Standing Normals
|
|
| 5A
|
Damage
|
Red Damage
|
Proration
|
Cancel
|
Guard
|
| 350
|
172
|
75% (O)
|
-SE-, -N-, -SP-, -CH-, -EX-, (J)
|
LH
|
| First Active
|
Active
|
Recovery
|
Frame Adv
|
Circuit
|
Invuln
|
| 4
|
3
|
8
|
1
|
2.8%
|
-
|
|
This 5A is a bit lower than the others, so that it can hit other characters and not just characters with huge crouch animations.
|
| 5A~6A
|
Damage
|
Red Damage
|
Proration
|
Cancel
|
Guard
|
| 600
|
384
|
80% (M)
|
N, SP, -CH-, EX, (J)
|
LH
|
| First Active
|
Active
|
Recovery
|
Frame Adv
|
Circuit
|
Invuln
|
| 8
|
4
|
16
|
-5
|
4.2%
|
-
|
|
You can use this move even if 5A does not hit, and you can even use the next 6A as well on whiff.
|
| 5A~6A~6A
|
Damage
|
Red Damage
|
Proration
|
Cancel
|
Guard
|
| 1000
|
768
|
60% (O)
|
(N), SP, EX, (J)
|
LH
|
| First Active
|
Active
|
Recovery
|
Frame Adv
|
Circuit
|
Invuln
|
| 10
|
4
|
14
|
0
|
7.0%
|
-
|
|
This move is special and normal cancellable on hit and special cancellable on block. Usually for combos.
Being +0 with a big and fast 5A means you can loop 5A6AA to generate meter. It's also very easy to bully characters with no fast 5A/2A normal using this. Because of the loop it is also good as a tick throw setup, as opponents will be scared to press button/jump out.
|
|
|
|
| Damage
|
Red Damage
|
Proration
|
Cancel
|
Guard
|
| 500
|
288
|
90% (O)
|
N, SP, EX, (J)
|
L
|
| First Active
|
Active
|
Recovery
|
Frame Adv
|
Circuit
|
Invuln
|
| 5
|
4
|
15
|
-4
|
3.5%
|
-
|
|
A standing low kick. If you hit a crouching opponent with this, they will be swept.
|
|
|
|
| 5C
|
Damage
|
Red Damage
|
Proration
|
Cancel
|
Guard
|
| 800
|
480
|
90% (O)
|
N, SP, EX, (J)
|
LH
|
| First Active
|
Active
|
Recovery
|
Frame Adv
|
Circuit
|
Invuln
|
| 10
|
4
|
20
|
-6
|
5.6%
|
-
|
|
This is much like C-Moon's 5C, but you cannot use the follow up to it anymore (the key throw). Floats crouching opponent on hit.
|
| 5[C]
|
Damage
|
Red Damage
|
Proration
|
Cancel
|
Guard
|
| 1600
|
1372
|
80% (O)
|
N, SP, EX, (J)
|
LH
|
| First Active
|
Active
|
Recovery
|
Frame Adv
|
Circuit
|
Invuln
|
| 24
|
4
|
20
|
-6
|
9.8%
|
-
|
|
Since MBAA, this move has a ton on blockstun on it now and adds quite a bit to damage. The charge time is also lower. Floats crouching opponent on hit.
|
|
Crouching Normals
|
|
| Damage
|
Red Damage
|
Proration
|
Cancel
|
Guard
|
| 300
|
147
|
72% (O)
|
-SE-, -N-, -SP-, -EX-, (J)
|
L
|
| First Active
|
Active
|
Recovery
|
Frame Adv
|
Circuit
|
Invuln
|
| 4
|
3
|
10
|
-1
|
2.8%
|
-
|
|
A low kick that is much like C-Moon's. Range is average. You'll be using this a lot to start either a combo, ground blockstring, or tick throw attempt. You can also use it in whiff cancel strings.
|
|
|
|
| 2B
|
Damage
|
Red Damage
|
Proration
|
Cancel
|
Guard
|
| 400, 700 (942)
|
(527)
|
80% (O)
|
N, SP, -CH-, EX, (J)
|
LH
|
| First Active
|
Active
|
Recovery
|
Frame Adv
|
Circuit
|
Invuln
|
| 8
|
3 (2) 5
|
19
|
-9
|
3.5%x2 (7.0%)
|
-
|
|
A crouching uppercut. The hit box is pretty shallow so if you are not close enough to the opponent, you may not land both hits. The second hit has a pretty large clash box on it though.
|
| ~2B
|
Damage
|
Red Damage
|
Proration
|
Cancel
|
Guard
|
| 700
|
480
|
100%
|
SP, EX, (J)
|
LHA
|
| First Active
|
Active
|
Recovery
|
Frame Adv
|
Circuit
|
Invuln
|
| 11
|
4
|
19
|
-11
|
4.2%
|
-
|
|
A spin jump kick follow up for 2B.
|
|
|
|
| 2C
|
Damage
|
Red Damage
|
Proration
|
Cancel
|
Guard
|
| 1000
|
480
|
60% (O)
|
N, SP, -CH-, EX, (J)
|
L
|
| First Active
|
Active
|
Recovery
|
Frame Adv
|
Circuit
|
Invuln
|
| 8
|
7
|
25
|
-14
|
7.0%
|
-
|
|
A sweep using both her feet and the second hit is a handstand kick.
|
| ~2C
|
Damage
|
Red Damage
|
Proration
|
Cancel
|
Guard
|
| 700
|
343
|
60% (O)
|
SP, EX, (J)
|
LH
|
| First Active
|
Active
|
Recovery
|
Frame Adv
|
Circuit
|
Invuln
|
| 9
|
8
|
23
|
-13
|
3.5%
|
-
|
|
You are completely airborne after using this move this move now, so you can no longer do high low mixups off this on block.
|
|
Aerial Normals
|
|
| Damage
|
Red Damage
|
Proration
|
Cancel
|
Guard
|
| 300
|
115
|
75% (O)
|
SE, N, SP, EX, J
|
LHA
|
| First Active
|
Active
|
Recovery
|
Frame Adv
|
Circuit
|
Invuln
|
| 6
|
5
|
10
|
-
|
1.4%
|
-
|
|
This move is like C-moon's j.A... plus a knife. The reach is decently long (a bit longer than C-Moon's) but be careful, the knife part doesn't actually have a hitbox...
|
|
|
|
| Damage
|
Red Damage
|
Proration
|
Cancel
|
Guard
|
| 700
|
480
|
90% (O)
|
N, SP, EX, J
|
HA
|
| First Active
|
Active
|
Recovery
|
Frame Adv
|
Circuit
|
Invuln
|
| 7
|
6
|
-
|
-
|
4.9%
|
-
|
|
Ciel thrusts the knife out diagonally, the hit box is like C-Moon's but at a lower angle. It has a pretty strong horizontal hit box so this is what you want for air-to-air.
|
|
|
|
| Damage
|
Red Damage
|
Proration
|
Cancel
|
Guard
|
| 1000
|
480
|
90% (M)
|
N, SP, EX, J
|
HA
|
| First Active
|
Active
|
Recovery
|
Frame Adv
|
Circuit
|
Invuln
|
| 8
|
4
|
-
|
-
|
7.0%
|
-
|
|
A downward angled kick. Hits pretty hard and it's great as a jump in. It also works well when the opponent is below you in air-to-air situations.
|
|
Command Normals
|
|
| Damage
|
Red Damage
|
Proration
|
Cancel
|
Guard
|
| 400*2 (709)
|
(445)
|
80% (O)
|
N, SP, EX, (J)
|
LH
|
| First Active
|
Active
|
Recovery
|
Frame Adv
|
Circuit
|
Invuln
|
| 11
|
2 (8) 8
|
12
|
-5
|
2.8%*2 (5.6%)
|
-
|
|
This is a 2-hit handstand kick. It moves further than 2B and can be canceled into pretty much anything. This attack works very well in combos and staggers so use this move often.
|
|
4B4[B]
(On Hit) 4B/[B]~236B
|
| 4B
|
Damage
|
Red Damage
|
Proration
|
Cancel
|
Guard
|
| 600
|
384
|
100%
|
SP, (CH), EX
|
LH
|
| First Active
|
Active
|
Recovery
|
Frame Adv
|
Circuit
|
Invuln
|
| 11
|
2
|
15
|
-2 (vs Stand.)
1 (vs Crouch.)
|
4.2%
|
Clash 4
Low 6-10
|
|
The first hit is an axe kick that can be followed up with the 236B command throw if it hits the opponent. The 4B is now special cancelable even if it is blocked.
|
| 4[B]
|
Damage
|
Red Damage
|
Proration
|
Cancel
|
Guard
|
| 900
|
672
|
100%
|
SP, (CH), EX
|
H
|
| First Active
|
Active
|
Recovery
|
Frame Adv
|
Circuit
|
Invuln
|
| 26
|
2
|
15
|
-2
|
4.2%
|
Clash 2-17
Low 8-25
|
|
This is H-Ciel's standing overhead. This is special cancellable.
|
| ~236B
|
Damage
|
Red Damage
|
Proration
|
Cancel
|
Guard
|
| 800 (1375/1675)
|
(1872/2160)
|
100%
|
-
|
U
|
| First Active
|
Active
|
Recovery
|
Frame Adv
|
Circuit
|
Invuln
|
| 0
|
1
|
14
|
-
|
0.0%
|
-
|
|
The above will cancel into 236B for guaranteed knock down.
|
|
|
|
| Damage
|
Red Damage
|
Proration
|
Cancel
|
Guard
|
| 400, 500 (738)
|
(483)
|
70% (O)
|
N, SP, EX, (J)
|
LH
|
| First Active
|
Active
|
Recovery
|
Frame Adv
|
Circuit
|
Invuln
|
| 10
|
7
|
23
|
-10
|
4.2%*2 (8.4%)
|
Clash 12-16
|
|
An upward slash with her knife. Even though it is smaller than before, it still has a nice nice hitbox; 2 hits. The end of the move still has clash frames on it.
|
|
|
|
| j.2C
|
Damage
|
Red Damage
|
Proration
|
Cancel
|
Guard
|
| 1000
|
480
|
70% (O)
|
-
|
LHA
|
| First Active
|
Active
|
Recovery
|
Frame Adv
|
Circuit
|
Invuln
|
| 15
|
10
|
8
|
8 (TK)
|
7.0%
|
-
|
|
A downward lunging stab from the air. If you hit with this very low to the ground, you can combo into 2A.
|
| j.2[C]
|
Damage
|
Red Damage
|
Proration
|
Cancel
|
Guard
|
| 1300
|
960
|
50% (O)
|
SP, EX
|
HA
|
| First Active
|
Active
|
Recovery
|
Frame Adv
|
Circuit
|
Invuln
|
| 26
|
10
|
7
|
10 (TK)
|
10.5%
|
-
|
|
This is like the normal version, but slower and an overhead. The hit box will last all the way to the ground, but there is not much of a hitbox on the Black Key so it is not fit for air to air at all.
|
|
Universal Mechanics
|
|
| Damage
|
Red Damage
|
Proration
|
Cancel
|
Guard
|
| 1500
|
768
|
50%
|
-
|
U
|
| First Active
|
Active
|
Recovery
|
Frame Adv
|
Circuit
|
Invuln
|
| 3
|
1
|
20
|
-
|
0.0%
|
-
|
|
Standard ground throw. Untechable knockdown.
|
|
|
|
| Damage
|
Red Damage
|
Proration
|
Cancel
|
Guard
|
| 1600 (Raw)/1300
|
511
|
30%
|
(Any if Raw)
|
U
|
| First Active
|
Active
|
Recovery
|
Frame Adv
|
Circuit
|
Invuln
|
| 2
|
1
|
12
|
-
|
0.0%
|
-
|
|
Front-flip air throw. Ground bounces the opponent when done raw, causes an untechable knockdown and leaves you at a far distance as a combo ender.
|
|
|
|
| Standing
|
Damage
|
Red Damage
|
Proration
|
Cancel
|
Guard
|
| 500 (345)
|
198
|
50%
|
(SP), (EX), (J)
|
LHA
|
| First Active
|
Active
|
Recovery
|
Frame Adv
|
Circuit
|
Invuln
|
| 9
|
4
|
18
|
-4
|
3.5%
|
-
|
|
Same animation as 4C.
|
| Crouching
|
Damage
|
Red Damage
|
Proration
|
Cancel
|
Guard
|
| 1500 (1117)
|
714
|
50%
|
(SP), (EX)
|
LA
|
| First Active
|
Active
|
Recovery
|
Frame Adv
|
Circuit
|
Invuln
|
| 9
|
4
|
18
|
-4
|
10.5%
|
-
|
|
Same hitboxes as F-Moon's 2B.
|
| Aerial
|
Damage
|
Red Damage
|
Proration
|
Cancel
|
Guard
|
| 500 (345)
|
198
|
50%
|
-
|
HA
|
| First Active
|
Active
|
Recovery
|
Frame Adv
|
Circuit
|
Invuln
|
| 9
|
4
|
-
|
-
|
3.5%
|
-
|
|
Same animation as F-Moon's j.C.
|
|
|
|
| Neutral
|
Damage
|
Red Damage
|
Proration
|
Cancel
|
Guard
|
| 500
|
192
|
50%
|
-
|
LHA
|
| First Active
|
Active
|
Recovery
|
Frame Adv
|
Circuit
|
Invuln
|
| 26
|
2
|
21
|
-5
|
0.0%
|
Clash 1-10
|
| (Clash)
|
Damage
|
Red Damage
|
Proration
|
Cancel
|
Guard
|
| 500
|
192
|
50%
|
-
|
LHA
|
| First Active
|
Active
|
Recovery
|
Frame Adv
|
Circuit
|
Invuln
|
| 8
|
2
|
21
|
-5
|
0.0%
|
Strike 1-7
|
|
A Shield Bunker with some good reach, similar to F-Moon's 236X.
|
| Blockstun
|
Damage
|
Red Damage
|
Proration
|
Cancel
|
Guard
|
| 0
|
0
|
100%
|
-
|
LHA
|
| First Active
|
Active
|
Recovery
|
Frame Adv
|
Circuit
|
Invuln
|
| 19
|
2
|
23
|
-7
|
-100.0%
|
-
|
|
H-Moon specific reversal bunker.
|
|
|
|
| Ground
|
Damage
|
Red Damage
|
Proration
|
Cancel
|
Guard
|
| 100
|
0
|
100%
|
-
|
U
|
| First Active
|
Active
|
Recovery
|
Frame Adv
|
Circuit
|
Invuln
|
| 11
|
10
|
20
|
-
|
removes all
|
Full 1-39
|
| Air
|
Damage
|
Red Damage
|
Proration
|
Cancel
|
Guard
|
| 100
|
0
|
100%
|
-
|
U
|
| First Active
|
Active
|
Recovery
|
Frame Adv
|
Circuit
|
Invuln
|
| 12
|
10
|
15
|
-
|
removes all
|
Strike 1-30
|
|
Universal burst mechanic. Unlike Crescent/Full Heat activation, the hitbox and frame data doesn't vary between characters. However, you can be thrown out of this move if you input it in the air.
|
|
Special Moves
Grounded Specials
|
|
| A
|
Damage
|
Red Damage
|
Proration
|
Cancel
|
Guard
|
| 500
|
336
|
70%
|
-EX-
|
LHA
|
| First Active
|
Active
|
Recovery
|
Frame Adv
|
Circuit
|
Invuln
|
| 28
|
X
|
29
|
-1
|
3.5%
|
-
|
| [A]
|
Damage
|
Red Damage
|
Proration
|
Cancel
|
Guard
|
| 600*3 (1459)
|
(817)
|
80%
|
-
|
LHA
|
| First Active
|
Active
|
Recovery
|
Frame Adv
|
Circuit
|
Invuln
|
| 33
|
X
|
28
|
-3
|
2.8%*3 (8.4%)
|
-
|
|
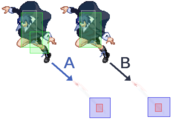
Jumps forward and throws a single key. May whiff depending on distance and if the opponent is crouching. Has an EX cancel right when she starts the throw.
Charging this makes her jump up and throw 3 keys spread out to cover a 90 degree area. Loses the cancel but it is worth using to set things to neutral or to bait out most things.
|
| B
|
Damage
|
Red Damage
|
Proration
|
Cancel
|
Guard
|
| 400*3 (932)
|
(672)
|
70%
|
(N), SP, EX, (J)
|
LHA
|
| First Active
|
Active
|
Recovery
|
Frame Adv
|
Circuit
|
Invuln
|
| 40
|
3
|
16
|
1
|
2.1%*3 (6.3%)
|
-
|
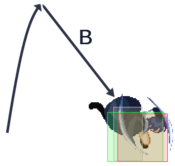
|
Jumps forward then does a dive down like j.236B. Holding forward, back, or neutral will influence the trajectory and distance travelled. This move can cancel to anything on hit and specials on block. Quite slow but does well in blockstrings if respected.
|
| EX
|
Damage
|
Red Damage
|
Proration
|
Cancel
|
Guard
|
| 380*20, 300 (2902)
|
(2203)
|
50% (O)
|
-
|
LHA
|
| First Active
|
Active
|
Recovery
|
Frame Adv
|
Circuit
|
Invuln
|
| 4+5
|
120
|
12
|
-20
|
-100.0%
|
-
|
|
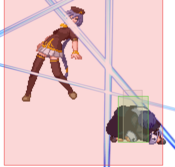
Known as EX hiero/halo. She does a jump to the back wall on superflash and slashes fill the whole screen, she will appear right behind the opponent on hit or block. Due to its fast startup, it can be used to punish slow moves or whiffed moves. This gets a knockdown if it hits, but due to adding so many hits it is recommended to not be used in long combos as it will give the opponent a ridiculous amount of meter.
|
|
|
|
| A
|
Damage
|
Red Damage
|
Proration
|
Cancel
|
Guard
|
| 500*2 (984)
|
(756)
|
100%
|
-EX-
|
LH
|
| First Active
|
Active
|
Recovery
|
Frame Adv
|
Circuit
|
Invuln
|
| 15
|
10
|
15
|
-6
|
3.5%*2 (7.0%)
|
-
|
- Ciel does a dashing key thrust.
Hits 2 times but doesn't knockdown or launch opponent. However this move can be EX canceled.
|
| B
|
Damage
|
Red Damage
|
Proration
|
Cancel
|
Guard
|
| 500*2 (721)
|
(547)
|
50% (O)
|
-EX-
|
LH
|
| First Active
|
Active
|
Recovery
|
Frame Adv
|
Circuit
|
Invuln
|
| 14
|
12
|
14
|
-7 ~ -1
|
3.5%*2 (7.0%)
|
-
|
|
Hopping version. Safe on block if spaced and launches on hit. On hit it can be canceled into air normals, air commands and jump. On block it can only be canceled into EX air commands. The first hitbox whiffs on most crouchers, making the frame advantage -5 point blank, +1 at mid distance and +3 at maximum distances.
|
| EX
|
Damage
|
Red Damage
|
Proration
|
Cancel
|
Guard
|
| 800*2, 1200 (2700)
|
(2130)
|
100%
|
-
|
LH
|
| First Active
|
Active
|
Recovery
|
Frame Adv
|
Circuit
|
Invuln
|
| 1+11
|
9
|
26
|
-11
|
-100.0%
|
Full 1
|
| [EX] (2nd Flash)
|
Damage
|
Red Damage
|
Proration
|
Cancel
|
Guard
|
| 1200*3 (3487)
|
(2716)
|
100%
|
-
|
LH
|
| First Active
|
Active
|
Recovery
|
Frame Adv
|
Circuit
|
Invuln
|
| 1+29
|
9
|
27
|
-11
|
-100.0%
|
Full 1
|
[EX] (3rd Flash)
(Close)
|
Damage
|
Red Damage
|
Proration
|
Cancel
|
Guard
|
1000*3 (2675)
1200*2, 1000 (3299)
|
(2055)
(2500)
|
100%
|
-
|
U
|
| First Active
|
Active
|
Recovery
|
Frame Adv
|
Circuit
|
Invuln
|
| 1+50
|
1 (1) 9
|
26
|
-
|
-100.0%
|
Full 1
|
|
Unlike Crescent and Full, this is her old MBAC EX version. Not as fast as her other moons make this move not worth using.
Charging until after the 2nd flash does the most damage but it's still blockable.
If charged until after the 3rd flash, it becomes unblockable and goes into more damage if the first hitbox connects.
|
|
(B variation tree) (B variation tree)
|
| A
|
Damage
|
Red Damage
|
Proration
|
Cancel
|
Guard
|
| 600
|
480
|
80% (O)
|
-
|
LHA
|
| First Active
|
Active
|
Recovery
|
Frame Adv
|
Circuit
|
Invuln
|
| 12
|
X
|
31
|
-6
|
3.5%
|
-
|
- Ciel throws black keys horizontally across the screen.
On hit, the opponent will be launched but can not be capitalized in damage unless you used it at a relatively far range where you can do 236C right after. On block at close ranges you will be safe if you block.
|
| B
|
Damage
|
Red Damage
|
Proration
|
Cancel
|
Guard
|
| 500
|
336
|
100%
|
-CH-
|
LHA
|
| First Active
|
Active
|
Recovery
|
Frame Adv
|
Circuit
|
Invuln
|
| 12
|
X
|
33
|
-11
|
3.5%
|
-
|
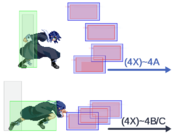
| ~4A
|
Damage
|
Red Damage
|
Proration
|
Cancel
|
Guard
|
| 500*2 (984)
|
(661)
|
100%
|
-CH-
|
LHA
|
| First Active
|
Active
|
Recovery
|
Frame Adv
|
Circuit
|
Invuln
|
| 14
|
X
|
36
|
-12
|
3.5%*2 (7.0%)
|
-
|
| ~4B/C
|
Damage
|
Red Damage
|
Proration
|
Cancel
|
Guard
|
| 500*2 (984)
|
(661)
|
100%
|
-CH-
|
LHA
|
| First Active
|
Active
|
Recovery
|
Frame Adv
|
Circuit
|
Invuln
|
| 18
|
X
|
44
|
-22
|
3.5%*2 (7.0%)
|
-
|
| ~4X~4A
|
Damage
|
Red Damage
|
Proration
|
Cancel
|
Guard
|
| 500*4 (1905)
|
(1280)
|
100%
|
-CH-
|
LHA
|
| First Active
|
Active
|
Recovery
|
Frame Adv
|
Circuit
|
Invuln
|
| 38
|
X
|
38
|
-13
|
3.5%*4 (14.0%)
|
-
|
| ~4X~4B/C
|
Damage
|
Red Damage
|
Proration
|
Cancel
|
Guard
|
| 500*3 (802)
|
(513)
|
100%
|
N/A
|
LHA
|
| First Active
|
Active
|
Recovery
|
Frame Adv
|
Circuit
|
Invuln
|
| 15
|
X
|
40
|
-18
|
1.4%*3 (4.2%)
|
-
|
| ~4X~4A~4B/C (Kick)
|
Damage
|
Red Damage
|
Proration
|
Cancel
|
Guard
|
| 350
|
-
|
100%
|
-
|
LHA
|
| First Active
|
Active
|
Recovery
|
Frame Adv
|
Circuit
|
Invuln
|
| 20
|
2
|
12
|
4
|
0.0%
|
-
|
| ~4X~4A~4B/C (Projectile)
|
Damage
|
Red Damage
|
Proration
|
Cancel
|
Guard
|
| 450
|
-
|
100%
|
-
|
LHA
|
| First Active
|
Active
|
Recovery
|
Frame Adv
|
Circuit
|
Invuln
|
| 20
|
14
|
0
|
11
|
4.05%
|
-
|
|
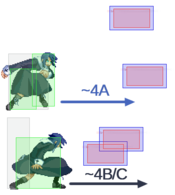
After the initial throw she can go into a flow chart of different variations of key throwing. In part 2, 4A or 4B may be used. 4A will make her throw a key forward with another key a lot higher at the same time. 4B will throw 2 keys just straight forward. In part 3, 4A or 4B may be used again. This time 4A will be a lot slower but does the same thing as part with 2 more keys in between the gap. 4B will make her throw 3 keys straight forward really fast instead. And if you used 4A in part 3, there is a 4B followup after it where she does a jump spin kick key throw.
|
| EX
|
Damage
|
Red Damage
|
Proration
|
Cancel
|
Guard
|
| 230*22, 400 (3431)
|
(2704)
|
100%
|
-
|
LHA
|
| First Active
|
Active
|
Recovery
|
Frame Adv
|
Circuit
|
Invuln
|
| 1+8
|
X
|
207
|
-12
|
-100.0%
|
Full 1-10
|
|
Does a backdash before throwing keys which will leave her safe if the opponent is on the ground. Decent if used sometimes since it just puts both players in neutral game if blocked. Be careful when using this as if it is whiffed then the opponent is allowed to do their most damaging combos on you free.
|
|
|
|
| A
|
Damage
|
Red Damage
|
Proration
|
Cancel
|
Guard
|
| 1000/1200
|
384/480
|
70% (O)
|
-EX-
|
LH
|
| First Active
|
Active
|
Recovery
|
Frame Adv
|
Circuit
|
Invuln
|
| 4
|
2 (2) 3
|
35
|
-27/-23
|
7.0%
|
High 1-3
|
- Ciel does a somersault. These are all air unblockable.
Doesn't go very high but is fast and has an EX cancel at the end. Has upper body invincibility.
|
| B
|
Damage
|
Red Damage
|
Proration
|
Cancel
|
Guard
|
| 1000, 800 (1682)
|
(903)
|
70% (O)
|
-
|
H
(Whiffs vs Crouch.)
|
| First Active
|
Active
|
Recovery
|
Frame Adv
|
Circuit
|
Invuln
|
| 8
|
5
|
41
|
-30
|
5.6%, 4.2% (9.8%)
|
Full 1-8
|
|
Does 2 hits and goes higher than A version but whiffs crouchers point blank. Has some invincibility startup.
|
| EX
|
Damage
|
Red Damage
|
Proration
|
Cancel
|
Guard
|
| 800, 500*2, 500, 600*2 (3112)
|
(2001)
|
100%
|
-
|
LH
|
| First Active
|
Active
|
Recovery
|
Frame Adv
|
Circuit
|
Invuln
|
| 2+0
|
2 (2) 2 (12) 2 (2) 2
|
44
|
-30
|
-100.0%
|
Full 1-7
|
|
Does 2 somersaults in succession. Her best reversal for being fast, having invincibility startup, input can not be crossed up, and hits crouchers.
|
|
|
|
| A
|
Damage
|
Red Damage
|
Proration
|
Cancel
|
Guard
|
| 1000
|
480
|
55%
|
(N), (SP), (EX), (J)
|
HA
|
| First Active
|
Active
|
Recovery
|
Frame Adv
|
Circuit
|
Invuln
|
| 31
|
3
|
14
|
-5
|
7.0%
|
-
|
- Ciel does a flip forward or back depending on which version then does a move.
Flips low forward and does j.C. This move is an overhead. When using this move during blockstrings and it hits, make sure you keep track of what moves you have used since this move cancels into anything on hit as soon as you land, making it count as part of the string instead of resetting it causing her not to be able to use the ones before going into this. (ie. 2A 2B 3B 63214A hit, can not use 2A/2B/3B after)
|
| B
|
Damage
|
Red Damage
|
Proration
|
Cancel
|
Guard
|
| 400*3 (932)
|
(672)
|
70%
|
-
|
LH
|
| First Active
|
Active
|
Recovery
|
Frame Adv
|
Circuit
|
Invuln
|
| 21
|
6
|
16
|
0
|
2.1*3 (6.3%)
|
-
|
|
Flips back and does j.236B. Unlike (j.)236B, it can not cancel into anything on hit. Though it does not cancel, if the 3rd hit hits then you can link 2C after it.
|
| C
|
Damage
|
Red Damage
|
Proration
|
Cancel
|
Guard
|
| 1500
|
960
|
80%
|
-
|
HA
|
| First Active
|
Active
|
Recovery
|
Frame Adv
|
Circuit
|
Invuln
|
| 31
|
8
|
4
|
4
|
10.5%
|
-
|
|
Flips high forward and does j.2C. Advantageous on block, hits overhead, and on hit can link into 5A or 2A.
|
|
Aerial Specials
|
|
| A
|
Damage
|
Red Damage
|
Proration
|
Cancel
|
Guard
|
| -
|
-
|
-
|
-EX-
|
-
|
| First Active
|
Active
|
Recovery
|
Frame Adv
|
Circuit
|
Invuln
|
| 12
|
X
|
10
|
-
|
-
|
High
(Recovery 1-10)
|
|
Ciel dives downward at a 30 degree angle. This move does not do damage at all. It is a fastfall.
|
| B
|
Damage
|
Red Damage
|
Proration
|
Cancel
|
Guard
|
| 400*3 (1162)
|
(747)
|
100%
|
(N), (SP), (EX), (J)
|
LHA
|
| First Active
|
Active
|
Recovery
|
Frame Adv
|
Circuit
|
Invuln
|
| 10 ~ X
|
6
|
17
|
-5 ~ -1
|
2.1%*3 (6.3%)
|
-
|
|
Ciel dives downward at a 50 degree angle. It does 3 hits and can cancel any hit to anything on hit.
|
| EX
|
Damage
|
Red Damage
|
Proration
|
Cancel
|
Guard
|
| 500*3 (1452)
|
(1024)
|
100% (2), 50% (O)
|
(SP), (EX), (J)
|
LHA
|
| First Active
|
Active
|
Recovery
|
Frame Adv
|
Circuit
|
Invuln
|
| 3+4 ~ 3+X
|
6
|
17
|
-4
|
-100.0%
|
Full 1-6
|
|
Looks exactly the same as the B version but will launch on the 3rd hit. It can be EX canceled on hit.
|
|
|
|
| A
|
Damage
|
Red Damage
|
Proration
|
Cancel
|
Guard
|
| 500
|
336
|
70%
|
-EX-, (J)
|
LHA
|
| First Active
|
Active
|
Recovery
|
Frame Adv
|
Circuit
|
Invuln
|
| 11
|
X
|
12
|
-7 (TK)
|
3.5%
|
-
|
- Ciel throws black keys down at a 45 degree angle. All versions stop momentum.
Can jump cancel the recovery. Very useful for certain blockstrings to stay on the opponent.
|
| B
|
Damage
|
Red Damage
|
Proration
|
Cancel
|
Guard
|
| 500
|
336
|
100%
|
-CH-
|
LHA
|
| First Active
|
Active
|
Recovery
|
Frame Adv
|
Circuit
|
Invuln
|
| 15
|
X
|
15
|
-8 (TK)
|
3.5%
|
-
|
| ~4B
|
Damage
|
Red Damage
|
Proration
|
Cancel
|
Guard
|
| 500
|
336
|
100%
|
-CH-
|
LHA
|
| First Active
|
Active
|
Recovery
|
Frame Adv
|
Circuit
|
Invuln
|
| 4
|
X
|
15
|
-
|
3.5%
|
-
|
| ~4B (2)
|
Damage
|
Red Damage
|
Proration
|
Cancel
|
Guard
|
| 500*4
|
376*4
|
100%
|
-
|
LHA
|
| First Active
|
Active
|
Recovery
|
Frame Adv
|
Circuit
|
Invuln
|
| 13
|
X
|
18
|
-
|
3.5%*4 (14.0%)
|
-
|
|
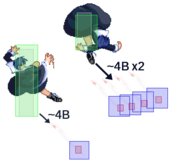
Has a 4B follow-up to throw a 2nd key. Also has a 4BB follow-up part that throws 3 extra keys. You may delay any part of it. No movement until landing after this move.
|
| EX
|
Damage
|
Red Damage
|
Proration
|
Cancel
|
Guard
|
| 300*18 (~4200)
|
(~3400)
|
100%
|
-
|
LHA
|
| First Active
|
Active
|
Recovery
|
Frame Adv
|
Circuit
|
Invuln
|
| 1+16
|
X
|
119
|
-
|
-100.0%
|
-
|
|
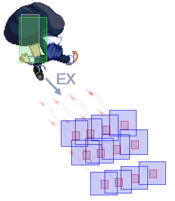
She throws 6 keys seperately in succession then 12 keys altogether for the last throw. Any movement can be used after this move.
|
|
|
|
| A
|
Damage
|
Red Damage
|
Proration
|
Cancel
|
Guard
|
| 1000
|
192
|
100% (O)
|
(J)
|
LHA
|
| First Active
|
Active
|
Recovery
|
Frame Adv
|
Circuit
|
Invuln
|
| 6
|
2
|
10
|
-25 (TK)
|
7.0%
|
-
|
- Ciel does a somersault in the air.
Has a jump cancel on the recovery. Not used often unless you want to stay in the air longer.
|
| B
|
Damage
|
Red Damage
|
Proration
|
Cancel
|
Guard
|
| 600*2 (1111)
|
(355)
|
100%
|
EX, (J)
|
LHA
|
| First Active
|
Active
|
Recovery
|
Frame Adv
|
Circuit
|
Invuln
|
| 6
|
2
|
10
|
-30 (TK)
|
4.2%*2 (8.4%)
|
-
|
|
2 hits and also has the jump cancel on recovery. Often used in combos.
|
| EX
|
Damage
|
Red Damage
|
Proration
|
Cancel
|
Guard
|
| 500*3, 400*3, 350*3 (3149)
|
(1400)
|
100%
|
-
|
LHA
|
| First Active
|
Active
|
Recovery
|
Frame Adv
|
Circuit
|
Invuln
|
| 1+0
|
39
|
10
|
-54 (TK)
|
-100.0%
|
Full 1-2, 15, 28
(Full dur. Landing 9-10)
|
|
3 somersaults are done. Not used for anything except killing the opponent if they are left with some health that airthrow will not kill them.
|
|
Arc Drive
|
|
| Damage
|
Red Damage
|
Proration
|
Cancel
|
Guard
|
| 700x9, 2200 (3706)
|
(4885)
|
50%
|
-
|
LH
|
| First Active
|
Active
|
Recovery
|
Frame Adv
|
Circuit
|
Invuln
|
| 3+3
|
26
|
40
|
-24
|
removes all
|
Full 1-3, 31-32
Super Armor ?~?
|
|
Ciel's Arc Drive. Opponent will be knockdown on hit.
|
|
MBAACC Navigation
