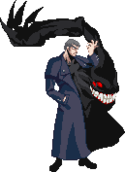
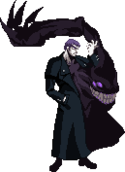
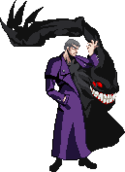
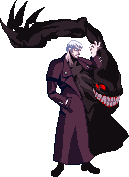
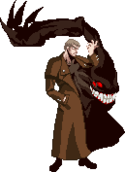
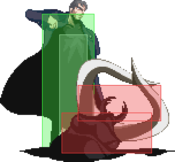
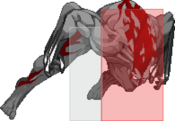
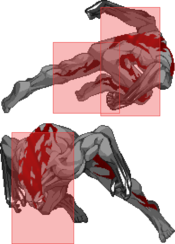
Character Page Progress
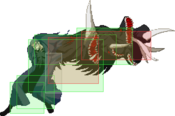
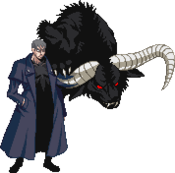
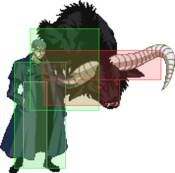
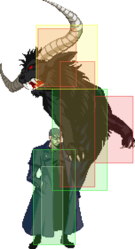
This page is still a work in progress, consider joining as an editor to help expand it. Please update this character's roadmap page when one of the editing goals have been reached.
| In Progress |
To-do
|
- Combos:
- Add video links to the pre-existing combos.
|
|
Additional Resources
F-Nero Match Video Database
Nero Combo Compilations
Nero's Compendium
F-nero Essential combos
Notable Players
| Name |
Color
|
Region |
Common Venues |
Status |
Details
|
| Asciux |

|
Europe |
Netplay |
Inactive |
|
ambaa
(アンバー) |

|
Japan |
A-cho,
KorewaMelty |
Inactive |
|
| bear |

|
North America |
Netplay |
Inactive |
Fond of shield.
|
Donnie
(Donnie#7878) |

|
South America |
Dream Match,
Netplay |
Active |
Found in Melty Sud.
|
| Grungrah |

|
North America |
Netplay |
Inactive |
|
hakujun
(白純) |

|
Japan |
Play Spot BIG ONE 2nd |
Active |
Currently the most active Nero player in Japan, has footage against more of the more recent JP playerbase than anyone else listed.
|
| Jbelanger |

|
North America |
Netplay |
Active |
Strong pocket Nero.
|
| LuckyStar |

|
Japan |
A-cho |
Inactive |
The original MBAACC shark. Often goes for unorthodox and stylish plays but is more than competent when he needs to be. Has more footage than any other Nero player against opponents of all skill levels. Fond of not blocking and random selects palette.
|
| Sen |

|
North America |
Netplay |
Active |
Found in main Melty server, more specifically connecting to your ip.
|
WATERWORKS
(NO PAIN NO GAIN#6847) |

|
North America |
Netplay |
Infrequently active |
No longer plays this character.
|
yu-ki
(ゆーき) |

|
Japan |
Play Spot BIG ONE 2nd,
A-cho,
KorewaMelty |
Active |
|
Overview
Playstyle
 F-Nero Is a setplay-proficient zoner that can deny even the most robust of approach games. F-Nero Is a setplay-proficient zoner that can deny even the most robust of approach games. |
| Pros |
Cons |
- Great combo game: F-Nero's combo routing is very flexible and most hits easily confirm into corner carry or at least solid advantage with decent room for optimization.
- Area denial: Has some of the absolute best ability to deny approaches in all of Melty Blood, sealing the ground with summons and possessing very complementary antiairs.
- Large, strong normals: Most air and ground normals have good disjoint, active frames, or both with most of them having good reach and functioning well as antiairs.
- Fourth highest health in the game: F-Nero has the fourth highest health of the cast, allowing him to take more hits than other characters.
- Good meter gain: Combos generate a lot of meter (over a 100 on clean hits) and F-Nero has good meter dump options to avoid going into max needlessly.
- High reward gambles: Landing shield counter with meter can lead to breaking 5K and F-Nero's metered reversal can lead to high damage on trade.
- Forces most of the cast to play his game: Few if any members of the cast will demand as much situational awareness and character-specific counterplay as Nero and much of the opponent's matchup knowledge can still be used against them.
|
- Large hurtbox: Nero is the tallest character in the game giving several characters additional pressure options against him such as new fuzzy and pressure opportunities.
- Poor mobility: No ground dash means having to rely on universal air movement options and a harder time making more subtle spacing adjustments or approaching, especially summonless.
- Unreliable defensive options: While guessing right can reward handsomely, slow abare and an even slower (only metered) reversal can still make getting put on the backfoot a challenge.
- Limited IH options: No specials can be whiff cancelled with initiative heat forcing F-Nero to interact with the opponent to IH unlike other full moon characters.
- Specialized toolkit at a cost: Can have a hard time playing if unable to set up due to lack of more conventional tools.
|
General Gameplan
Unleash the entire zoo while you sit back not committing and when you finally get hit you get a free combo because your summons bailed you out. Nero alone is not a spectacular character. His summons, however, make him one of the strongest in the game simply for how little you have to commit with them. Has easily the best insurance in the game, enough to be defined by it.
F-Moon Specifics
Where C is the unstoppable force, F is the immovable object. 421X replaces deer with filth, a different and equally important tool to keep people still and a big factor in making people approaching you a huge risk. Also has a significantly larger 2C, so he has an easier time hitconfirming from longer range. 236B lets you cover yourself fairly well in neutral, and coupled with 6C it lets you bully people for days. F is also capable of getting very high damage from the right situations, thanks to 6C and 214C. Better set of normals overall for playing a longer range than C.
No landing recovery on j.B only makes the button stronger.
Neutral
MOVEMENT:
Nero is a slow character. There is no denying that. He doesn't have traditionnal ground dashes at all. His air dash is a slow, fully horizontal one that can go for quite long if you hold it, and will be his main movement tool.
Saying that Nero is slow is more of a lack of being able to cover small amounts of ground fast. His air dash still goes fairly far and since everyone gets a forward super jump, he can still cover alarming amounts of space very fast. He cannot, however, adjust his position nearly as well as basically any other character.
Instead of a conventional dash, Nero’s dash is a teleport, similar to Slayer’s. It is invulnerable from frame 1, but very slow to recover, although the timing to punish it is also very late, so late that people not accustomed to it might in fact whiff a premature punish.
In F-moon this also becomes his back dash, with identical properties.
The teleport is useful as either a reversal, (be very sure that your opponent is committing to the wrong direction and hard or you will likely get punished) or moving to a safe position covered by one of your summons, usually EX Crows.
With Nero you'd want to first find a suitable space and time to produce 1-2 summons and use those to approach in a safe manner. Most times the summons will cause the opponent to jump to avoid them and that's where your super jump j.C/j.B comes into play. IF you need the time to produce a summon you can hit the opponent with 236A (crow fireball) to gain the time to produce at least one summon against an high mobility opponent and approach from there.
Pressure
With all Neros, pressure via screen control is the name of all Nero's game. Using his 214A/B series in conjuction with 236B for F-Nero to cover your approach and airdash j.C or j.B your way in. All Neros want to be acquainted with both j.C and j.B, especially j.B because its a two hit large normal that fast for an aerial of its caliber. From there you can either IAD j.B again or do 2A pressure.
Frankly, in any positioning outside of the corner Nero's main goal is to obstruct the opponent's path, denying them of invading space, usually forcing mistakes on opponents who overextend and from there perform the corner carry combo to brind them to the corner where you can begin to perform his pressure/okizeme. His pressure truly shines in the corner after either an AT ender or a j.C ender as the last wallslam to be used. where he can freely land and plant a 421A to cover forward tech
Pressure is simple to understand with F-Nero as he has stagger 2A, IAB j.B, IAD j.C, 6[C] that is +10 on block, and 6C that is +7 on block and is commonly special cancelled into 236B which is +15. with all of this at your disposal you also have one of the larger grabs in the game to boot that deals a good deal of damage for a throw, even with reduce taken into account. Now moving on to what to do for Okizeme or post j.C ender.
Okizeme
Any time with F-Nero that you score a AT ender and have 100% meter minimum you can so very similar things to what C-Nero does. Your initial options are listed below:
There are reasons to doing one over the other: the former option is to get maximum frame advantage while the latter option is for a meaty 5[C] to keep people in check, such as using 5[C] against characters that have good sweep options like Tohno with 214X or Satsuki with 2C.
After that point you got a few ideas from there and they are also listed below.
- (2A/2B >) 214[A] IAD fuzzy(j.C dj j.B) Use 2B generally just to be on the safe side
- 2A, 9 late j.B or empty jump 2A
- walk up Throw/bait
The ones in bolded are to illustrate the important of doing 2A/2B after 236C as it keeps the opponent in check if they try to dash out. If they try to jump out, you can guard crush them with 2C as it is air unblockable and go straight into an aerial sequence that is listed in the normal combos. if they try to either ground shield or Air shield the crows, you can ground and air throw them accordingly.
Next is j.C ender used for the last wall slam ender so if you look at the sequence below this is how it follows
- j.BC > dj.BC, land j.C, (land 421A)
From here, this is where F-Nero places his trap, filth (421A) to monopolize the space behind him. If the opponent happens to tech forward, they are now sandwiched between Nero and filth and you can do the following:
- 2AA, empty jump low
- 2AA > 6[C]
- 2AA, late j.B
- 2AA, 2AA, Throw
This is just a short list of things he is able to do with the former option leaving him +10 and close enough for a 2A to follow up among other options. If they neutral or back tech, depending on how many air options they used up or have left are put into a dangerous spot of getting AUB by 3B, 5B or just face another round of pressure into 5[C] > 236C if resources permits you to do so.
With his simple yet robust its encouraged to try and be creative with how you apply this information based on the MU to prioritize j.C ender or Air throw ender
A rule of thumb
if the character has moves that let them stall in the air such as Hime's float you don't want to go for the 421A ender
if the opponent can rps you post 236C ender meterless such as satsuki 2C you'd rather not go for that.
Defense
Make good friends with downback. Nero has slower than average normals, no dashes, a mediocre airdash . If you cannot commit insurance fraud with an already active summon, you’re going to play the same blocking simulator the rest of the roster has to, except worse. Again, do not be afraid to part with meter. Nero is not a meter-dependent character, he simply uses it very well. He has some very strong reversals to play with in every moon, so make use of them.
F’s own reversal, the insect swarm (63214C), is an interesting case. It is invincible very slightly into active and will, again, always at least trade. Notable traits however are the fact that it is plus on block and hit, and the insects keep going even if Nero himself is hit, meaning it acts as a very strong starter, netting you upwards of 4-5k on trade. However, it is also tiny vertically and easy to clear with a strong jumpin. However, opponents actively baiting this now risk getting shielded or even mashed out, so don’t underestimate the psychological power of simply having 100 meter. Has no pushback on shield, but is only punishable up close as the insects getting shielded so late into recovery means you will recover possibly even before your opponent. A strong reversal, and at its strongest when simply threatened, rather than used. If your opponent doesn’t respect the threat of it, however, feel free to make them.
F’s shield deserves its own paragraph. The shield counter is nothing special in itself, being identical to H. What is special, however, is the sheer reward of landing one. For the low low price of 100 meter, you can easily break 4k on lower defense characters with little effort from one. On high enough air hits you can even get this damage meterless if you’re quick. Keep this in mind, and combined with the threat of insect swarm, intimidate any potential offense with simply the fact that you have 100 meter in stock. A single slipup is going to hurt much more when you can mix up between having to eat 4k from a shield, a high reward trade-oriented reversal or bait shields and possibly give you your turn. 5B is an absolutely divine antiair, especially up close and can catch sloppy aerial approaches which are very much a possibility with how unnerving playing around your defensive options already is.
Also keep in mind that you can IH shielding, giving you what’s essentially a real, extremely expensive parry if you’re in MAX.
Combos
| Combo Notation Help
|
Disclaimer: Combos are written by various writers, so the actual notation used in pages can differ from the standard one.
For more information, see Glossary and Controls.
|
| X > Y
|
X input is cancelled into Y.
|
| X > delay Y
|
Must wait for a short period before cancelling X input into Y.
|
| X, Y
|
X input is linked into Y, meaning Y is done after X's recovery period.
|
| X+Y
|
Buttons X and Y must be input simultaneously.
|
| X/Y
|
Either the X or Y input can be used.
|
| X~Y
|
This notation has two meanings.
- Use attack X with Y follow-up input.
- Input X then within a few frames, input Y. Usually used for option selects.
|
| X(w)
|
X input must not hit the opponent (Whiff).
|
| j.X
|
X input is done in the air, implies a jump/jump cancel if the previous move was done from the ground.
Applies to all air chain sections:
- Assume a forward jump cancel if no direction is given.
- Air chains such as j.A > j.B > j.C can be shortened to j.ABC.
|
| sj.X
|
X input is done after a super jump. Notated as sj8.X and sj9.X for neutral and forward super jumps respectively.
|
| dj.X
|
X input is done after a double jump.
|
| sdj.X
|
X input is done after a double super jump.
|
| tk.X
|
Stands for Tiger Knee. X motion must be buffered before jumping, inputting the move as close to the ground as possible. (ex. tk.236A)
|
| (X)
|
X is optional. Typically the combo will be easier if omitted.
|
| [X]
|
Input X is held down. Also referred to as Blowback Edge (BE). Depending on the character, this can indicate that this button is held down and not released until indicated by the release notation.
|
| ]X[
|
Input X is released. Will only appear if a button is previously held down. This type of input is referred to as Negative Edge.
|
| {X}
|
Button X should only be held down briefly to get a partially charged version instead of the fully charged one.
|
| X(N)
|
Attack "X" should only hit N times.
|
| (XYZ)xN
|
XYZ string must be performed N times. Combos using this notation are usually referred to as loops.
|
| (XYZ^)
|
A pre-existing combo labelled XYZ is inserted here for shortening purposes.
|
| CH
|
The first attack must be a Counter Hit.
|
| Air CH
|
The first attack must be a Counter Hit on an airborne opponent.
|
| 66
|
Performs a ground forward dash.
|
| j.66
|
Performs an aerial forward dash, used as a cancel for certain characters' air strings.
|
| IAD/IABD
|
Performs an Instant AirDash.
|
| AT
|
Performs an Air Throw. (j.6/4A+D)
|
| IH
|
Performs an Initiative Heat.
|
| AD
|
Performs an Arc Drive.
|
| AAD
|
Performs an Another Arc Drive.
|
Video examples
Here below is a playlist detailing all of the combos you will need visually to play this character
Starters
| Condition
|
Notation
|
Damage
vs V.Sion
|
Notes
|
|
| Normal starter, grounded opponent
|
- 2A(A) > 2B(1) > 2C > 3C(1)
|
1831
|
| |
| Meter Gained: 27.9% |
Meter Given (vs C-Moon): 9.3% |
| Common F-Nero ground starter. |
|
|
| Normal starter, grounded opponent
|
|
700
|
| |
| Meter Gained: 6.3% |
Meter Given (vs C-Moon): 2.1% |
| A starter that is seen when F-Nero AA's an opponent or guard crushes them after an IAD j.B is blocked in some cases. |
|
|
| Normal starter, grounded opponent
|
|
1106
|
| |
| Meter Gained: 12.6% |
Meter Given (vs C-Moon): 4.2% |
| A starter that is seen among new nero players. Best used to call out something since its fast but very - on block. |
|
|
| Overhead starter, grounded opponent
|
|
1996
|
| |
| Meter Gained: 27.0% |
Meter Given (vs C-Moon): 9.0% |
| A +10 on block overhead that is unshieldable and also has clash to absorb heat hitboxes, very common to use this when in the corner or after a j.C ender into 421A and they happened to be sandwiched between Nero and Filth after they air tech. |
|
|
| Normal starter, airborne opponent
|
|
1853
|
| |
| Meter Gained: 22.1% |
Meter Given (vs C-Moon): 7.3% |
| This can be seen usually when you are meeting the opponent in the air if they are trying to jump out or to avoid the summon approaching them from the ground. |
|
|
| Normal starter, airborne opponent
|
|
2182
|
| |
| Meter Gained: 23.4% |
Meter Given (vs C-Moon): 7.8% |
| CH 2C starter if you anti air'd an opponent with this. |
|
|
Enders
| Condition
|
Notation
|
Damage
vs V.Sion
|
Notes
|
|
| Normal starter, grounded opponent
|
|
1200
|
| |
| Meter Gained: 7.0% |
Meter Given (vs C-Moon): 3.0% |
| Usually your ender after your last j.C rep in your combo. In the corner it then leads to your Okizeme. Otherwise if F-Nero doesn't end in air throw it lets Nero set up a 421B/A to cover spaces where the opponent techs upon landing. |
|
|
Normal Combos
| Condition
|
Notation
|
Damage
vs V.Sion
|
Notes
|
|
| Normal starter, grounded opponent
|
- 2A(AA) > 2B(1) > 2C > 3C(1) > j.BC > dj.AAC, land sj8/9.C > dj.B(1)C, (land 421A)
|
4069
|
| |
| Meter Gained: 94.2% |
Meter Given (vs C-Moon): 39.6% |
| Normally the combo F-Nero players will use along with the other one below. The part in parenthesis is that you land on the ground still facing the corner, 421A goes behind nero then comes back to his original position. If you want to get an Air throw ender you need to sdj.C instead of dj.B(1)j.C |
|
|
| Normal starter, grounded opponent
|
- 2A > 2B(1) > 2C > 3C(1) > j.BC > dj IAD j.C, land sj8/9.C > dj.B(1)C, (land 421A)
|
3953
|
| |
| Meter Gained: 83.0% |
Meter Given (vs C-Moon): 29.0% |
| Another variation other combo F Nero players will use along with the other one above. The part in parenthesis is that you land on the ground still facing the corner, 421A goes behind nero then comes back to his original position. If you want to get an Air throw ender you need to sdj8/9 j.C instead of dj j.(B(1)j.C |
|
|
| Normal starter, grounded opponent
|
- (6C >) 236B > 3C(1) > j.BC > dj.BC, (rejump/sj) j.C, (land 421A)
|
3201
|
| |
| Meter Gained: 70.4% |
Meter Given (vs C-Moon): 23.4% |
| A conversion from doing 6C 236B string, usually seen in the corner but can work anywhere. |
|
|
| Normal starter, airborne opponent
|
- (j.A/B >) j.C > dj IAD j.C, land sj.C (> sdj.C AT/ dj.B(1)C, land 421A)
|
3185
|
| |
| Meter Gained: 48.4% |
Meter Given (vs C-Moon): 16.1% |
| a simple air-to-air confirm. |
|
|
| CH Shield Counter starter, grounded opponent, 100% Meter
|
- D~236D > 214C, 2C > 214A, 6[C], 6C > j.BC > dj.BC, land sj.C > sdj j.C, (land 421A)
|
5021
|
| |
| Meter Gained: 87% |
Meter Given (vs C-Moon): 53.95% |
| A high damaging shield counter combo. |
|
|
| CH Shield Counter starter, grounded opponent, 100% Meter
|
- D~236D > 214C, 6C > 214A, (walk under) 5B > 3C(1) > j.B > dj8.BC, land sj.C > sdj.BC, (land 421A)
|
4409
|
| |
| Meter Gained: 75% |
Meter Given (vs C-Moon): 42.5% |
| A side switch variant. Looks like this. |
|
|
Corner Combos
There's not much in terms of corner specifics outside of 5[C] starters, but here are some below:
| Condition
|
Notation
|
Damage
vs V.Sion
|
Notes
|
|
| Overhead starter, grounded opponent
|
- 6[C], 5[C] > 6[C], 6C > j.BC, land sj8.C(3) > sdj.B(1)C > AT
|
5369
|
| |
| Meter Gained: 138.8% |
Meter Given (vs C-Moon): 55.7% |
| Your damaging 6[C] combo. |
|
|
| Normal starter, grounded opponent, 100% Meter
|
- 5[C] > 236C, 3C > j.BC > dj.BC > AT
|
4739
|
| |
| Meter Gained: 50.1% |
Meter Given (vs C-Moon): 43.9% |
| Simple conversion from 5[C] meaty, below are more. |
|
|
| Normal starter, grounded opponent, 100% Meter
|
- 5[C] > 236C, walk up 6C, 6[C] > j.BC > dj.BC, (land 421A)
|
5280
|
| |
| Meter Gained: 56.3% |
Meter Given (vs C-Moon): 39.8% |
| More damage from your corner meaty. Don’t try this at max range. |
|
|
Corner Steal combo setups
Specific combos to setup a corner steal after jC wallbounce ender into 421A, disabling air options to the opponent and making the normal 421A setup even more oppresive.
| Condition
|
Notation
|
Damage
vs V.Sion
|
Notes
|
|
| Normal starter, grounded opponent, corner
|
- 2A(AA) > 2B(1) > 2C > j.B > j.C(1) > dj8.B > j.C, land sj8.C > dj8 > {6} j.C, land 421A
|
3733
|
| |
| Meter Gained: 74.0% |
Meter Given (vs C-Moon): 24.6% |
Essentialy a normal corner combo, but in order to setup the corner steal we require a certain distance, this setup works only on a cornered opponent or very close to it, farther away from it it's not possible, have in mind the next points:
- We can't launch the opponent too high in the air on the ground string, so we skip 3C (you can do 3C instead of 2C, but never do both)
- Can't dj9, if you're too far away from the corner and can't continue the combo without dj9 then it's very likely that you won't meet the specific distance for the setup. (Check video for reference of distance)
- After sj8.C > dj8 you have to drift forward by holding 6 as much as possible before continuing the combo into j.C
If done correctly, Nero should 421A while still facing the corner, meaning the puddle will still cover behind Nero into the middle of the stage, but thanks to the wall bounce of our j.C the opponent is going to be moved away from the corner behind us. When the opponent can air tech they will now face into the corner instead of away. This setup can be more oppresive than the normal 421A setup, as it disables the opponent air dash and super double jump, and only having air back dash and air double jump to escape away, both of those 2 options generally don't cover as much ground as the forward options. |
|
|
| Normal starter, grounded opponent
|
- 2AA(A) > 2B(1) > 2C > j.B > j.C > sdj9.AA > j.C, land sj9.C > sdj9.B > j.C, land 421A
|
3792
|
| |
| Meter Gained: 90.6% |
Meter Given (vs C-Moon): 36.0% |
Essentialy a normal corner carry combo, but in order to setup the corner steal we require a certain distance, this setup works in midscreen albeit not as consistent, in that case you have to do (land sj8.C > dj8 > {6} j.C), have in mind the next points:
- We can't launch the opponent too high in the air on the ground string, so we skip 3C (you can do 3C instead of 2C, but never do both)
- On (land sj9.C) hit j.C as soon as possible, as well as the following sdj9.B . Getting the all the specific timings can be very finicky, but they are neccesary to meet the specific distance. (Check video for reference of distance)
If done correctly, Nero should 421A while still facing the corner, meaning the puddle will still cover behind Nero into the middle of the stage, but thanks to the wall bounce of our j.C the opponent is going to be moved away from the corner behind us. When the opponent can air tech they will now face into the corner instead of away. This setup can be more oppresive than the normal 421A setup, as it disables the opponent air dash and super double jump, and only having air back dash and air double jump to escape away, both of those 2 options generally don't cover as much ground as the forward options. |
|
|
Move Descriptions
| Frame Data Help
|
| Header
|
Tooltip
|
| Move Box Colors
|
Light gray = Collision Box (A move lacking one means it can go through the opponent's own collision box).
Green: Hurt Boxes.
Red: Hit(/Grab) Boxes.
Yellow: Clash Boxes (When an active hitbox strikes a clash box, the active hitbox stops being active. Multi-hit attacks can beat clash since they will still progress to the next hitbox.)
Magenta: Projectile-reflecting boxes OR Non-hit attack trigger boxes (usually).
Blue: Reflectable Projectile Boxes.
|
| Damage
|
Base damage done by this attack.
(X) denotes combined and scaled damage tested against standing V. Sion.
|
| Red Damage
|
Damage done to the recoverable red health bar by this attack. The values are inherently scaled and tested against standing V. Sion.
(X) denotes combined damage.
|
| Proration
|
The correction value set by this attack and the way it modifies the scaling during a string. See this page for more details.
X% (O) means X% Overrides the previous correction value in a combo if X is of a lower percentage.
X% (M) means the current correction value in a combo will be Multiplied by X%. This can also be referred to as relative proration.
|
| Circuit
|
Meter gained by this attack on hit.
(X%) denotes combined meter gain.
-X% denotes a meter cost.
|
| Cancel
|
Actions this move can be cancelled into.
SE = Self cancelable.
N = Normal cancelable.
SP = Special cancelable.
CH = Cancelable into the next part of the same attack (Chain in case of specials).
EX = EX cancelable.
J = Jump cancelable.
(X) = Cancelable only on hit.
-X- = Cancelable on whiff.
|
| Guard
|
The way this move must be blocked.
L = Can block crouching
H = Can block standing.
A = Can block in the air.
U = Unblockable.
|
| Startup
|
Amount of frames that must pass prior to reaching the active frames. Also referred to as "True Startup".
|
| Active
|
The amount of frames that this move will have a hitbox.
(x) denotes frame gaps where there are no hitboxes is present. Due to varied blockstuns, (x) frames are difficult to use to determine punish windows. Generally the larger the numbers, the more time you have to punish.
X denotes active frames with a duration separate from its origin move's frame data, such as projectile attacks. In this case, the total length of the move is startup+recovery only.
|
| Recovery
|
Frames that this move has after the active frames if not canceled. The character goes into one frame where they can block but not act afterwards, which is not counted here.
|
| Advantage
|
The difference in frames where you can act before your opponent when this move is blocked (assuming the move isn't canceled and the first active frame is blocked).
If the opponent uses a move with startup that is at least 2 frames less than this move's negative advantage, it will result in the opponent hitting that move.
±x~±y denotes a range of possible advantages.
|
| Invul
|
Lists any defensive properties this move has.
X y~z denotes X property happening between the y to z frames of the animations. If no frames are noted, it means the invincibility lasts through the entire move.
Invicibility:
- Strike = Strike invincible.
- Throw = Throw invincible.
Hurtbox-Based Properties:
- Full = No hurtboxes are present.
- High = Upper body lacks a hurtbox.
- Low = Lower body lacks a hurtbox.
Miscellaneous Properties
- Clash = Frames in which clash boxes are active.
- Reflect = Frames in which projectile-reflecting boxes are active.
- Super Armor = Frames in which the character can take hits without going into hit stun.
|
Normal Moves
Standing Normals
|
|
| Damage
|
Red Damage
|
Proration
|
Cancel
|
Guard
|
| 300
|
151
|
78% (O)
|
-SE-, -N-, -SP-, -EX-, (J)
|
LH
|
| First Active
|
Active
|
Recovery
|
Frame Adv
|
Circuit
|
Invuln
|
| 6
|
5
|
6
|
1
|
2.7%
|
-
|
|
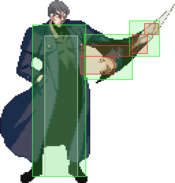
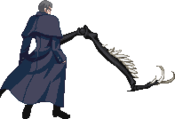
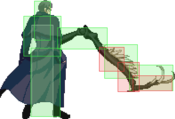
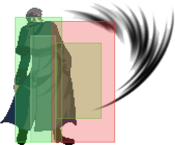
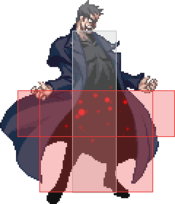
Elbow poke. Slightly slower than average but functions as a decent anti-air thanks to it sporting greater vertical and horizontal range than most 5As. Cannot be whiff cancelled by like most other A normals.
|
|
Toggle Hitboxes Toggle Hitboxes
|
|
|
| Damage
|
Red Damage
|
Proration
|
Cancel
|
Guard
|
| 700
|
606
|
70% (O)
|
N, SP, EX (J)
|
LH
|
| First Active
|
Active
|
Recovery
|
Frame Adv
|
Circuit
|
Invuln
|
| 6
|
6
|
23
|
-14
|
6.3%
|
Clash 6-11
|
|
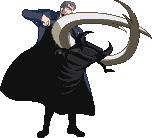
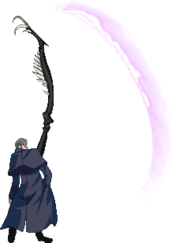
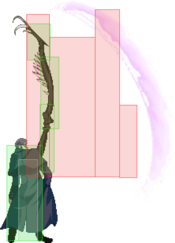
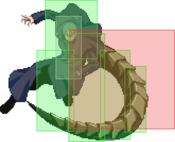
Antlion. Shrinks Nero's hurtbox considerably and functions as one of the best anti-airs in his kit sporting a solid hitbox and good active frames to boot, as well as having a very generous cancel window in pressure and quick startup to make it reliable for reactive use. Sports fairly long recovery on whiff however.
|
|
Toggle Hitboxes Toggle Hitboxes
|
|
|
| 5C
|
Damage
|
Red Damage
|
Proration
|
Cancel
|
Guard
|
| 600*2 (1122)
|
(755)
|
90% (O)
|
N, SP, EX (J)
|
LH
|
| First Active
|
Active
|
Recovery
|
Frame Adv
|
Circuit
|
Invuln
|
| 12
|
9
|
18
|
-6
|
5.4%*2 (10.8%)
|
-
|
|
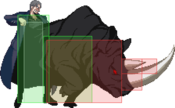
Rhino. Hits very far out in front, limited vertical range. Hits twice and cannot be cancelled until the second hit. Pushes out more than the charged version making it the safer option when trying to create distance to summon.
|
| 5[C]
|
Damage
|
Red Damage
|
Proration
|
Cancel
|
Guard
|
| 600*4 (2115)
|
(1424)
|
90% (O)
|
N, SP, EX (J)
|
LH
|
| First Active
|
Active
|
Recovery
|
Frame Adv
|
Circuit
|
Invuln
|
| 19
|
15
|
18
|
-6
|
5.4%*4 (21.6%)
|
-
|
|
Charged Rino. Wallslams the opponent on hit and yields high damage in the corner. Hits four times and cannot be cancelled until the fourth hit.
|
|
Toggle Hitboxes Toggle Hitboxes
|
Crouching Normals
|
|
| Damage
|
Red Damage
|
Proration
|
Cancel
|
Guard
|
| 300
|
202
|
78% (O)
|
-SE-, -N-, -SP-, -EX-, (J)
|
L
|
| First Active
|
Active
|
Recovery
|
Frame Adv
|
Circuit
|
Invuln
|
| 6
|
4
|
6
|
2
|
2.7%
|
-
|
|
Elbow spike. Hits low. Single hit poke with decent horizontal range.
|
|
Toggle Hitboxes Toggle Hitboxes
|
|
|
| Damage
|
Red Damage
|
Proration
|
Cancel
|
Guard
|
| 350*4 (911)
|
(522)
|
65% (O)
|
N, SP, EX (J)
|
L (1), LH (2-4)
|
| First Active
|
Active
|
Recovery
|
Frame Adv
|
Circuit
|
Invuln
|
| 9
|
12
|
15
|
-2
|
3.6%*4 (14.4%)
|
-
|
|
Centipede. An unconventional sweep, hitting low and sweeping on the first hit and then extending into three more mid hitting longer hitboxes. The long active frames on this move make it good for punishing techs and timing meaties with ease as well as an important tool for converting most grounded hits. Should almost always be cancelled on the first hit in combos outside some advanced routes in the corner for height and scaling reasons.
While technically a comfortable -2 on block, 2B when not used close to the opponent has a tendency to push back enough for the final hit or two to whiff making it important to cancel it during its early hits in these cases. When used up-close however it does have a very long cancel window extending through the entire recovery.
|
|
Toggle Hitboxes Toggle Hitboxes
|
|
|
| 2C
|
Damage
|
Red Damage
|
Proration
|
Cancel
|
Guard
|
| 1000
|
808
|
80% (O)
|
N, SP, EX (J)
|
LH
|
| First Active
|
Active
|
Recovery
|
Frame Adv
|
Circuit
|
Invuln
|
| 13
|
4
|
18
|
-4
|
9.9%
|
Clash 13-16
|
|
Needlenose. Neco-Arc Chaos's old 2C. Covers a large amount of space but a little slow to reliably anti-air with. F-Nero's longest range normal for checking opponents from a distance but can't confirm grounded hits from max range.
|
| 2[C]
|
Damage
|
Red Damage
|
Proration
|
Cancel
|
Guard
|
| 1500
|
1414
|
80% (O)
|
N, SP, EX (J)
|
LH
|
| First Active
|
Active
|
Recovery
|
Frame Adv
|
Circuit
|
Invuln
|
| 25
|
4
|
18
|
-4
|
9.9%
|
-
|
|
Charged Needlenose. Reaches out far and launches on hit. Pushes out on block more than the uncharged version making it safer for creating distance to summon.
|
|
Toggle Hitboxes Toggle Hitboxes
|
Jumping Normals
|
|
| Damage
|
Red Damage
|
Proration
|
Cancel
|
Guard
|
| 350
|
202
|
78% (O)
|
SE, N, J
|
LHA
|
| First Active
|
Active
|
Recovery
|
Frame Adv
|
Circuit
|
Invuln
|
| 7
|
4
|
10
|
-
|
2.88%
|
-
|
|
Nail. Hits mid. Very large for a j.A and hits at a downward angle. A good low commitment scouting and rising antiair move thanks to retaining air options on whiff. Can work as a mixup tool out of IAD followed by land 2A thanks to only hitting once and having lower hitstop than Nero's other air normals.
Can safejump shield counters when done out of an IAD thanks to Full Moon landing mechanics.
|
|
Toggle Hitboxes Toggle Hitboxes
|
|
|
| Damage
|
Red Damage
|
Proration
|
Cancel
|
Guard
|
| 600, 500 (987)
|
(537)
|
80% (O)
|
N, J
|
HA
|
| First Active
|
Active
|
Recovery
|
Frame Adv
|
Circuit
|
Invuln
|
| 8
|
5
|
-
|
-
|
5.98%, 6.3% (12.28%)
|
-
|
|
Tentacle. Hits high twice. Very good and hard to contest move both in neutral to cover both horizontal and landing space and on offense as a double overhead hitting jumpin. Even has a slight crossup hitbox forcing the opponent to be much more precise when getting behind Nero than most other characters. Despite all of j.B's strengths its second hitbox cannot be cancelled even on hit limiting its conversion ability at its hardest to contest angles.
Can safejump shield counters when done out of an IAD thanks to Full Moon landing mechanics.
|
|
Toggle Hitboxes Toggle Hitboxes
|
|
|
| Damage
|
Red Damage
|
Proration
|
Cancel
|
Guard
|
| 300*3, 700
|
202*3, 404
|
100%, 90% (M)
|
J
|
HA
|
| First Active
|
Active
|
Recovery
|
Frame Adv
|
Circuit
|
Invuln
|
| 9
|
10
|
-
|
-
|
0.9%, 1.8%, 3.6%*2 (9.9%)
|
-
|
|
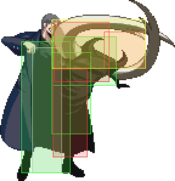
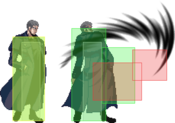
Nightmare. Hits high four times. With 10 active frames, unrivalled horizontal reach, and providing a wallslam on the final hit, j.C is an important preemptive walling tool and option to cover horizontal space when rising and an essential combo tool for corner carry and ensures any hit Nero gets leads to significant frame advantage.
Despite its reach and disjoint at the tip j.C has no vertical disjoint and extends a large hurtbox before active making it vulnerable to getting stuffed sometimes by preemptive normals from multiple angles.
Also has use on the offensive as easy coverage against forward air tech and can safejump shield counter when done out of an IAD or serve as a triple overhead from slightly higher air dashes.
|
|
Toggle Hitboxes Toggle Hitboxes
|
Command Normals
|
|
| Damage
|
Red Damage
|
Proration
|
Cancel
|
Guard
|
| 1000, 500 (1319)
|
(1000)
|
75% (O)
|
SP, EX, (J)
|
LH
|
| First Active
|
Active
|
Recovery
|
Frame Adv
|
Circuit
|
Invuln
|
| 9
|
3 (9) 3
|
20
|
-17, -5
|
9.0%, 4.5% (13.5%)
|
Clash 21-23
|
|
Bull. Both hits are air-unblockable, second hit reaches past the top of the screen. Launches on hit making it useful both for standard combos and for immediately confirming into when getting off the ground fast is necessary such as in the mirror.
Should be cancelled on the first hit in combos and pressure for height reasons on hit as well as the second hit whiffing most crouchers on block. Can also be used as a more horizontal anti-air where 5B won't quite reach or for catching jumps when a summon is nearby.
|
|
Toggle Hitboxes Toggle Hitboxes
|
|
|
| Damage
|
Red Damage
|
Proration
|
Cancel
|
Guard
|
| 800, 600 (1106)
|
(710)
|
60% (O)
|
(SP), (EX), (J)
|
LH, LHA
|
| First Active
|
Active
|
Recovery
|
Frame Adv
|
Circuit
|
Invuln
|
| 10
|
7 (6) 4
|
18
|
-17, -4
|
7.2%, 5.4% (12.6%)
|
-
|
|
Mantis. The second hit is air-blockable and whiffs on all crouching opponents (as well as standing Len, WLen, Miyako, and Necos) if the first hit is blocked as well as not being cancellable on block for either hit.
Despite these flaws, 4C sees an important use as a distanced tool for checking the opponent's movement, stopping predictable dash ins and discouraging both dash and jump in pressure when pushed out. Also an important tool for confirming far hits where 2B(1) doesn't reach such as off of max range 2A. Has a small blind spot right in front of Nero.
While safe on block against most of the cast, some characters can straight up punish it and that number increases further the closer it is used.
The following is a (non-exhaustive) list of punishes to be aware of when using 4C:
Meterless Punishes: 			Arc Drive Punishes:	Cannot Punish:
Moons	Character	Punishes	Character		Moons	Character
HF	Hime		236B		Aoko			CH	V. Sion
CF	Nanaya		f.214B		Kouma			F	Wara
CH	Sion		214A		Roa			CF	Warc
F	V. Sion		22C		Hisui/HisuiMaids	C	Satsuki
H	Roa		236A		Akiha			CHF	Len
CHF	KohaMaids	Most Assists	Vaki			H	W. Len
CF	Mech		236A		Neco Arc
C	KohaMech	421A
H	KohaMech	623A/B		150 Meter Punishes:
F	KohaMech	623A		H-Warc	624C
CHF	Tohno		Microdash 2C

100 Meter Punishes:			Can Only Punish Poorly Spaced 4C:
Moons	Character	Punishes	Moons	Character	Punishes
F	Aoko		624C		HF	Kouma		236
CHF	Hime		tk.236C		HF	Miyako		236C
H	Nanaya		623C		CHF	Ries		AD
C	Miyako		236C		CH	Wara		5C
CHF	Ciel		623C		CHF	Koha/KohaMaids	2C
CH	Ciel		236C		CH	Arcueid		236C
CHF	Sion		236C		HF	Arcueid		421C
CH	Roa		236C		CHF	P. Ciel		236A
H	Mech		623C		H	Satsuki		22B/C
CHF	Seifuku		623C		CH	Ryougi		623A
F	Seifuku		214C		F	W. Len		236A
F	Satsuki		214C		C	Nero		624C
CHF	Ryougi		214C/22C	CHF	Nero		4C
C	W. Len		421C		CHF	NAC		3C
F	NecoMech	623C		C	NecoMech	623C
|
|
Toggle Hitboxes Toggle Hitboxes
|
|
|
| 6C
|
Damage
|
Red Damage
|
Proration
|
Cancel
|
Guard
|
| 1100
|
888
|
80% (O)
|
SP, EX, (J)
|
LH
|
| First Active
|
Active
|
Recovery
|
Frame Adv
|
Circuit
|
Invuln
|
| 11
|
8
|
12
|
7
|
9.9%
|
-
|
|
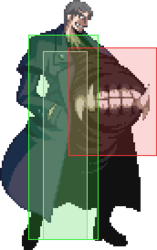
Mouth. Extremely short range but one of F-Nero's defining pressure tools. High plus frames and lack of hurtbox make this move very abusable on offense, leading to easy and safe pressure resets, flexible staggers, and better frame advantage when cancelled into summons than any other normal that isn't its own charged variant.
Cannot be shielded or bunkered in most cases, but interacts with clash frames as normal. Can only be shielded if shielding the very tip of the hitbox, in which case it would be whiffing a non-committing opponent anyway.
|
| 6[C]
|
Damage
|
Red Damage
|
Proration
|
Cancel
|
Guard
|
| 1400*2 (1996)
|
1871
|
50% (O)
|
SP, EX, (J)
|
H
|
| First Active
|
Active
|
Recovery
|
Frame Adv
|
Circuit
|
Invuln
|
| 32
|
8
|
14
|
10
|
13.5%*2 (27.0%)
|
Clash 24-30
|
|
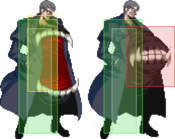
Charged Mouth. Becomes an overhead that's air untechable on grounded hits leading to high damage combos as well as being even more plus on block but pushes out slightly more than the uncharged version. Has better frame advantage when summon cancelled on block than any other normal and does considerable guard damage. Now completely ignores shield and bunker.
|
|
Toggle Hitboxes Toggle Hitboxes
|
Universal Mechanics
|
|
| Damage
|
Red Damage
|
Proration
|
Cancel
|
Guard
|
| 200*9 (1572)
|
(605)
|
100%
|
-
|
U
|
| First Active
|
Active
|
Recovery
|
Frame Adv
|
Circuit
|
Invuln
|
| 3
|
1
|
22
|
-
|
0.0%
|
-
|
|
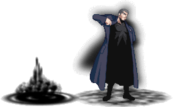
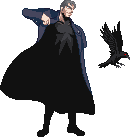
Nero lifts the opponent up and lets his pet birds do some damage. Launches the opponent in an air-tech state. Comboable if they choose not to tech. 421A is a safe follow up against most tech options.
|
|
|
|
| Damage
|
Red Damage
|
Proration
|
Cancel
|
Guard
|
| 1200 (1056)
|
533
|
30%
|
-
|
U
|
| First Active
|
Active
|
Recovery
|
Frame Adv
|
Circuit
|
Invuln
|
| 2
|
1
|
12
|
-
|
9.0%
|
-
|
|
Nero grabs and punches the target to the ground. Ground bounces and comboable when done raw, giving Nero his air dash back if it was used already allowing for corner carry combos to still be done. When used as a combo ender tends to give +20 frame advantage minimum against standard wake up timings.
|
|
|
|
| Ground
|
Damage
|
Red Damage
|
Proration
|
Cancel
|
Guard
|
| 500 (345)
|
202
|
50%
|
(SP), (EX), (J)
|
LHA
|
| First Active
|
Active
|
Recovery
|
Frame Adv
|
Circuit
|
Invuln
|
| 9
|
4
|
18
|
-4
|
4.5%
|
-
|
|
Same animation as Shield Bunker.
|
| Air
|
Damage
|
Red Damage
|
Proration
|
Cancel
|
Guard
|
| 500 (345)
|
202
|
50%
|
-
|
HA
|
| First Active
|
Active
|
Recovery
|
Frame Adv
|
Circuit
|
Invuln
|
| 9
|
4
|
-
|
-
|
4.5%
|
-
|
|
Same animation as j.B.
|
|
Toggle Hitboxes Toggle Hitboxes
|
|
|
| Bunker
|
Damage
|
Red Damage
|
Proration
|
Cancel
|
Guard
|
| 500
|
202
|
100%
|
-
|
LHA
|
| First Active
|
Active
|
Recovery
|
Frame Adv
|
Circuit
|
Invuln
|
| 26
|
4
|
19
|
-5
|
0.0%
(-50.0% in blockstun)
|
Clash 1-10
|
| (Clash)
|
Damage
|
Red Damage
|
Proration
|
Cancel
|
Guard
|
| 500
|
202
|
100%
|
-
|
LHA
|
| First Active
|
Active
|
Recovery
|
Frame Adv
|
Circuit
|
Invuln
|
| 8
|
4
|
19
|
-5
|
0.0%/-50.0%
|
Strike 1-7
|
|
Nero steps to the side and throws some shade. Costs 50.0% meter during blockstun.
|
|
Toggle Hitboxes Toggle Hitboxes
|
|
|
| Damage
|
Red Damage
|
Proration
|
Cancel
|
Guard
|
| 100
|
0
|
100%
|
-
|
U
|
| First Active
|
Active
|
Recovery
|
Frame Adv
|
Circuit
|
Invuln
|
| 20
|
3
|
25
|
-
|
uses all
|
Full 1-22
|
|
Wide hitbox but only covers less than 2/3rds of Nero's height. Sometimes necessary due to F-Nero not having IH options on whiff.
|
|
Toggle Hitboxes Toggle Hitboxes
|
|
|
| Ground
|
Damage
|
Red Damage
|
Proration
|
Cancel
|
Guard
|
| 100
|
0
|
100%
|
-
|
U
|
| First Active
|
Active
|
Recovery
|
Frame Adv
|
Circuit
|
Invuln
|
| 11
|
10
|
20
|
-
|
removes all
|
Full 1-39
|
| Air
|
Damage
|
Red Damage
|
Proration
|
Cancel
|
Guard
|
| 100
|
0
|
100%
|
-
|
U
|
| First Active
|
Active
|
Recovery
|
Frame Adv
|
Circuit
|
Invuln
|
| 12
|
10
|
15
|
-
|
removes all
|
Strike 1-30
|
|
Universal burst mechanic. Unlike Crescent/Full Heat activation, the hitbox and frame data doesn't vary between characters. Can be air thrown if used predictably and has punishable landing recovery if baited while airborne.
|
|
Toggle Hitboxes Toggle Hitboxes
|
Special Moves
|
|
| Forward
|
Damage
|
Red Damage
|
Proration
|
Cancel
|
Guard
|
| -
|
-
|
-
|
-
|
-
|
| First Active
|
Active
|
Recovery
|
Frame Adv
|
Circuit
|
Invuln
|
| -
|
-
|
56
|
-
|
-
|
Full 1-53
|
| Back
|
Damage
|
Red Damage
|
Proration
|
Cancel
|
Guard
|
| -
|
-
|
-
|
-
|
-
|
| First Active
|
Active
|
Recovery
|
Frame Adv
|
Circuit
|
Invuln
|
| -
|
-
|
60
|
-
|
-
|
Full 1-51
|
|
Special ground dashes that teleport Nero and are invincible from frame 1. Despite immediate invulnerability the recovery is long enough that it's punishable even after the opponent whiffs most moves. Can be used to avoid most last arcs and to reposition if covered by a summon properly.
|
|
|
|
| A
|
Damage
|
Red Damage
|
Proration
|
Cancel
|
Guard
|
| 800
|
353
|
100%
|
-
|
LHA
|
| First Active
|
Active
|
Recovery
|
Frame Adv
|
Circuit
|
Invuln
|
| 9
|
X
|
31
|
-3
|
7.2%
|
-
|
|
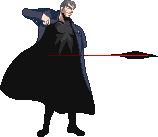
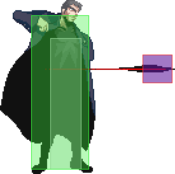
A crow will travel quickly in a horizontal line. A fast fireball but with long recovery that cannot be cancelled making it risky to throw out against characters that can dash under it or are keen on jumping over it. Can link into most uncharged normals on counterhit.
|
| B
|
Damage
|
Red Damage
|
Proration
|
Cancel
|
Guard
|
| 800
|
252
|
50% (O)
|
-
|
LHA
|
| First Active
|
Active
|
Recovery
|
Frame Adv
|
Circuit
|
Invuln
|
| 24*
|
X (154)
|
15
|
15 (min)
|
7.2%
|
-
|
|
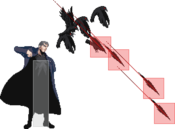
A crow will float in front of Nero, activating an immediately shooting forward if it comes close to an opponent. A major component of F-Nero's ground control, throwing a wrench in many character's approaches. Sees use in pressure too due to activating faster than other summons when used up close and yielding high frame advantage on block as well as being safe against shield in almost all cases.
Despite its many strengths 236B does go away on hit unlike most other summons making it less effective against enemy zoners and characters that can poke underneath it.
|
| EX
|
Damage
|
Red Damage
|
Proration
|
Cancel
|
Guard
|
| 210*13 (1785)
|
(849)
|
90% (O)
|
-
|
LHA
|
| First Active
|
Active
|
Recovery
|
Frame Adv
|
Circuit
|
Invuln
|
| 3+44
|
46
|
3+14
|
-
|
-100.0%
|
Full 1-3
|
|
Costs 100% Meter. Summons many 236B crows. Extremely versatile super with low recovery, finding many places of use on offense be it during oki or from a blockstring, or even in order to control space in neutral to restrict approaches and possibly get the frame advantage to set up or heat. When blocked allows for a safe summon or for a harder to see high/low mixup. Brief invul at the start guarantees the crows come out.
|
|
Toggle Hitboxes Toggle Hitboxes
|
|
|
| A
|
Damage
|
Red Damage
|
Proration
|
Cancel
|
Guard
|
| 1200
|
707
|
70% (O)
|
-
|
LH
|
| First Active
|
Active
|
Recovery
|
Frame Adv
|
Circuit
|
Invuln
|
| 62 (min)
|
4
|
39
|
-
|
10.8%
|
-
|
|
A snake will travel slowly across the ground. This snake is controlled by negative edge and is activated by releasing the A button. The button however does not need to be held until the snake appears on the ground allowing a short period where one can press other A moves such as 236A. Launches on hit and is air-unblockable, making it possible to even set up guard break scenarios with this move.
During the summon animation of 214A/B, another one of either can be summoned if the first hasn't reached the ground yet. If done with two 214A snakes, releasing A will activate both simultaneously.
|
| B
|
Damage
|
Red Damage
|
Proration
|
Cancel
|
Guard
|
| 1200
|
707
|
70% (O)
|
-
|
LH
|
| First Active
|
Active
|
Recovery
|
Frame Adv
|
Circuit
|
Invuln
|
| 62 (min)
|
4
|
39
|
-
|
10.8%
|
-
|
|
A snake will travel quickly across the ground. This move automatically activates when it is near an opponent, sharing the same launching and air-unblockable properties when active. Some characters are fast enough to dash through 214B before it is active making it weaker than 214A for controlling ground approaches but its speed makes it better for disrupting enemy zoning.
|
| EX
|
Damage
|
Red Damage
|
Proration
|
Cancel
|
Guard
|
| 2000
|
1818
|
80% (O)
|
-
|
LH
|
| First Active
|
Active
|
Recovery
|
Frame Adv
|
Circuit
|
Invuln
|
| 7+59
|
4
|
7+26
|
-
|
-100.0%
|
-
|
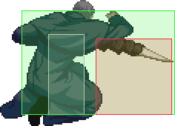
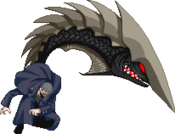
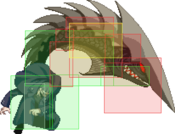
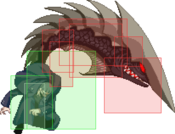
|
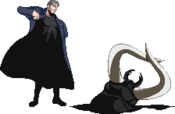
Costs 100% Meter. Summons a gigantic crocodile that is air-unblockable and takes a while to come out. Used in shield counter combos to rack up significant damage and can be used off of some other launching counterhits too. Fully air untechable on ground or air hit.
|
|
Toggle Hitboxes Toggle Hitboxes
|
|
|
| A
|
Damage
|
Red Damage
|
Proration
|
Cancel
|
Guard
|
| 300*5, 500*10
|
202*5, 404*10
|
80% (O)*5, 100%
|
-
|
LHA
|
| First Active
|
Active
|
Recovery
|
Frame Adv
|
Circuit
|
Invuln
|
| 13
|
20 (18) [2 (8~10) 2]x10
|
47
|
-
|
0.9%*5, 2.7%*10
|
-
|
|
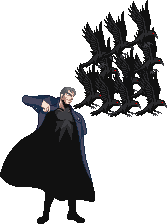
A dark cloud will appear in front of Nero before traveling behind him for a half screen distance and then coming back to where it was originally summoned. An integral tool for protecting the space behind Nero that his anti-airs don't cover and being his go-to option after ending combos on a j.C wallslam. Has a hitbox when first coming out from the front and can be plus on block if used point blank.
|
| B
|
Damage
|
Red Damage
|
Proration
|
Cancel
|
Guard
|
| 505*N
|
404*N
|
100%
|
-
|
LHA
|
| First Active
|
Active
|
Recovery
|
Frame Adv
|
Circuit
|
Invuln
|
| 47
|
-
|
57
|
-
|
2.7%*N
|
-
|
|
A dark cloud will go in front of Nero and travel across the ground until it hits the edge of the screen where it will disappear. This version of Premature Egg will not hit upon summoning and will not return.
|
| EX
|
Damage
|
Red Damage
|
Proration
|
Cancel
|
Guard
|
| 400*24
|
303*24
|
70% (O)
|
-
|
LHA
|
| First Active
|
Active
|
Recovery
|
Frame Adv
|
Circuit
|
Invuln
|
| 7+40
|
[2 (8~10) 2]x24
|
7+56
|
-
|
-100.0%
|
-
|
|
A dark cloud will travel back and forth across from one side of the screen to the other three times. This version of Premature Egg will disappear upon Nero getting hit. Has more startup than the A version but can still be used off of j.C enders, especially when either in MAX or to keep from entering it. Restricts a lot of space and leads to very enhanced pressure opportunities on block if one isn't hit out of it.
|
|
Toggle Hitboxes Toggle Hitboxes
|
|
|
| Damage
|
Red Damage
|
Proration
|
Cancel
|
Guard
|
| 450*8 (2372)
|
(1327)
|
70% (O)
|
-
|
LHA
|
| First Active
|
Active
|
Recovery
|
Frame Adv
|
Circuit
|
Invuln
|
| 7+8
|
80
|
7+84
|
-42 ~ 8
|
-100.0%
|
Full 1-12
|
|
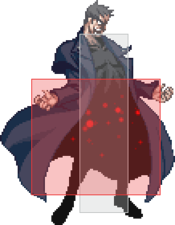
Costs 100% meter. Nero summons a swarm of bees to attack opponents directly in front of him. Can be used as a reversal, hits eight times. Plus on block in most instances but very slow and easy to shield in response to the superflash, leading to a counterhit punish. Can also be thrown before active if the opponent is close and can still be unsafe on hit if it hits the opponent while airborne.
Despite these risks, this move can also yield higher damage than nearly any other reversal in the game if it trades, leaving Nero actionable and free to do a full combo with a chunk of extra damage tacked on.
|
|
Toggle Hitboxes Toggle Hitboxes
|
Arc Drive
|
|
| Damage
|
Red Damage
|
Proration
|
Cancel
|
Guard
|
| 3500
|
2323
|
100%
|
-
|
U
|
| First Active
|
Active
|
Recovery
|
Frame Adv
|
Circuit
|
Invuln
|
| 2+60
|
8
|
81
|
-
|
removes all
|
Full
|
|
Nero transforms and charges forward. Unblockable, unshieldable, unclashable and invul through the entire recovery but easily dodged or backdashed and lengthy startup makes it generally easy to maneuver around if just thrown out. Both AD and AAD have niche use in unblockable setups usually in conjunction with 236C but generally aren't the most reliable to implement.
|
|
Toggle Hitboxes Toggle Hitboxes
|
Another Arc Drive
|
|
| Damage
|
Red Damage
|
Proration
|
Cancel
|
Guard
|
| 3000*2 (5350)
|
(3442)
|
100%
|
-
|
U
|
| First Active
|
Active
|
Recovery
|
Frame Adv
|
Circuit
|
Invuln
|
| 2+40
|
X (78) X
|
86
|
-
|
removes all
|
Full
|
|
Improved version. Nero charges toward to edge of the screen, then charges back to his original position. Faster startup than Arc Drive. Second hit might not connect depending on the situation.
|
|
Toggle Hitboxes Toggle Hitboxes
|
Last Arc
|
|
| Damage
|
Red Damage
|
Proration
|
Cancel
|
Guard
|
| 700*15 (3029 ~ 6145)
|
(2640 ~ 5219)
|
50% + 50% * remaining BH time
|
-
|
U
|
| First Active
|
Active
|
Recovery
|
Frame Adv
|
Circuit
|
Invuln
|
| 1+7
|
100
|
39
|
-
|
removes all
|
Full
|
|
Nero fires an unblockable laser. Very active but can be low profiled or avoided by getting behind Nero.
|
|
Toggle Hitboxes Toggle Hitboxes
|
MBAACC Navigation
