Melty Blood/MBAACC/Shiki Nanaya/Full Moon
Combos
Be sure to check this article about F-Nanaya: https://drunkardshade.com/2015/09/20/melty-bits-f-nanaya/
Normal Combos
- Midscreen
- (2A) > 5B > 2B > 5C > 236 B x3
- Basic full Rekka combo. On characters like Akiha, Len/White Len, you need to slightly delay the last Rekka so that the whole combo connects, or else the final hit will pass through them and you'll get punished.
- (2A) > 5B > 2B > 2C > delay > 623B~2B~82 > land > 623B~B > sj9.BC > air throw
- The double DP combo all F-Nanaya players should master. Great damage and meter gain. The hardest part is getting the fastfall to come out fast and clean. You have a bit of time to get the second 623B out so don't fret or else you won't get the execution down consistently. Delay the second flip kick and super double jump (flick down once and then up-forward) to get maximum height to do j.BC. You can omit the j.B if you feel like you can't get the air throw because the opponent is too high. Works in the corner too, just omit 2B so that you're not pushed too far away (the first 623B won't fully connect if you do).
- Raw airthrow > 5[C] > IAD (slight delay) j.C > 623B~2B~82 > land > 623BB > sj9.C > air throw
- Does around 3k and is a corner carry. On the second DP, you want to mash B to get the flip kick out since the 623B won't connect cleanly most of the time.
- Raw airthrow > 5[C] > IAD j.C > 623B~B > sj9.BC > air throw
- Does a little less damage than the above combo but is much easier.
- Shield counter > 2C > delay > 623B~2B~82 > land > 623B~B > sj9.BC > air throw
- Double DP from a shield counter - you have plenty of time to adjust your spacing on the 2C after the counter so just take it easy.
- Corner
- (2A) > 5B > 2B > 2C > delay > 623B~2B~82 > j.B > j.C > sj9.B > j.C > air throw
- A corner variant of the original double DP combo where you fastfall into aerials instead. Does a little less damage, but since it keeps Nanaya closer to the ground, you get a bit more frame advantage after the air throw.
- (2A) > 5B > 2B > 2C > 214A
- Okizeme set-up on cornered opponents. It's better than using Rekkas as 214A will pop the opponent out a bit, giving you both sides to work with for oki.
- Raw airthrow > 5[C] > 2C > delay > 623B~2B~82 > land > 623BB > sj9.BC > air throw
- Does upwards of 3k and looks kinda cool as well. Will give you a good chunk of meter afterward also.
- Approaching the corner
- (2A) > 5B > 2B > 2C > (slight delay; watch Nanaya lean forward) > 214B (close version) > 2C > 236 A/B x3 OR 214A
- Ground combo extension you can do if you're nearing the corner. The close 214B will launch the opponent up and the corner will stop you short the normal distance you lunge so you can link the 2C into standard Rekkas or 214A for okizeme. After the 2C, you can also go for double DP to end the round, if necessary.
Metered Combos
- Midscreen
- (2A) > 5B > 2B > 5C > 236C
- Basic ground combo into EX Rekka. Does around the same damage as the double DP combo and sets up for okizeme as well.
Initiative Heat Combos
- (2A) > 5B > 2B > 5C > 236B x2 IH > dash 2A > 5B > 2B > 2C -> 623B~2B~82 > land > 623B~B > sj9.BC > air throw
- Almost always does 5k damage and up (does around 6k if you get a j.C starter). Essentially a full-screen corner carry.
Strategy
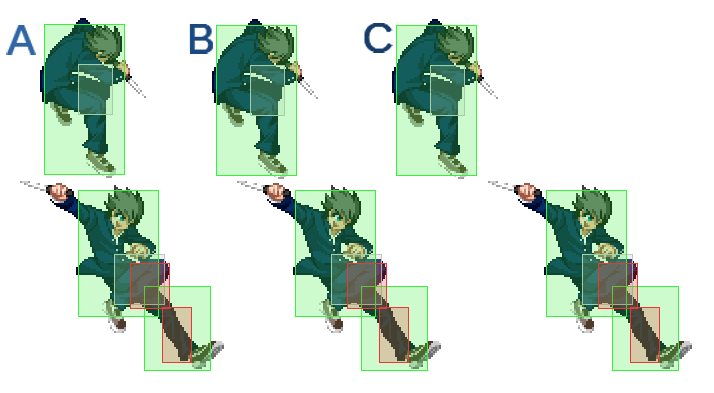
F-Nanaya loses out on very versatile ranged tools in exchange for normals with excellent frame advantage, a quick and lengthy air dash, and crazy ambiguous pressure. You'll essentially struggle against most of the cast to get in - be patient and use your air dash combined with moves like 2B and 2C to slowly close in space. If the opponent has no reliable anti-air moves though - choose your dive kick wisely to thwart Shield attempts and get to work. Your dive kicks yield great frame advantage, cross-up, and beat-out a good number of moves. However, with Current Code's Counter system, if your opponent trades with a dive kick, you're gonna eat a fat combo.
Once in, your 2A alone can be used as your blockstring due to its insane frame advantage. Stagger it into dash 2A, tick throw, 5A fake-outs into more 2As or a tick throw, or try to meaty frametrap by going into a jump -> dive kick, 2B or 2C. Partially charged 5Cs work fine too in tandem with fully charged ones to beat out mash attempts. Your two teleport series also keep your opponent guessing. While his pressure is very strong, it can get very predictable, so keep your opponent guessing or else they'll disrespect and send you back into neutral or into the next round.
Learn the double 623BB combos as the damage output on it combined with your meter gain makes F-Nanaya a pain to deal with if left to his own devices. It also makes every successful reversal of yours very aggravating - it'll likely win a few rounds for you due to it usually breaking 3k damage raw. Outside of 623BB combos, your 236 Rekka series will give you tons of time to set-up creative and sadistic okizeme. Unfortunately, F-Nanaya's okizeme set-up combos net him poor damage, but your options off of it are too good to pass up unless you understand neutral well enough to just disrespect with 623BB the whole game and abuse your huge 1-frame air throw into some more double 623BB's.
Meter management is pretty simple. In neutral, use your Full Moon meter charge if it's safe to do so while you figure out how to approach. Double 623BB combos net you around 70 meter per go, so keep hitting people and you'll get into MAX eventually. You'll mostly be Initiative Heat cancelling whiffed dive kicks to heal your red health and keep your flimsy self alive, or just holding it to Circuit Spark if things turn sour. If you have good health but extraneous meter, you can go for the EX Rekka (236C) which does hard knockdown on standing foes and an impressive amount of damage too. If you're feeling confident, you can activate Blood HEAT in max, and your Rekka series is actually a frame trap for your Another Arc Drive (which will ALWAYS guarantee you 5k+ damage). Due to Full's insanely momentum-dependent gameplan, saving meter so you can Circuit Spark once you reach 300 or Max to save your behind and your positional advantage is probably best, though.
Move Descriptions
Normal Moves
| 2A [Low]
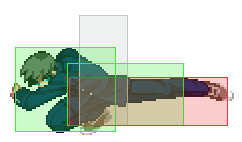
Startup: 4f | Active: 4f | Recovery: 5f Terrible horizontal range so don't think about using this to try to mash out of decent pressure. However, it's insanely fast and advantageous on block, making it the cornerstone of your blockstrings and frametrap pressure. Use this to mix-up into tick throws, dive kick, more 2As, and a lot of other stuff. The key to F-Nanaya is making sure you stagger 2A effectively and strike fear into your opponent's heart with it. Can also be used to confirm air counters since it stabilizes quite nicely, but it will take away a good bit of damage if used this way.
|
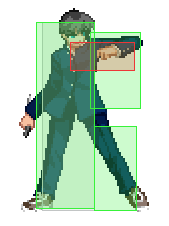
| 5A [Mid]
Startup: 5f | Active: 4f | Recovery: 5f Horrid range - not really much use for it besides breaks in 2A staggers into tick throws (it whiffs on crouchers) or catching air counter-hits. It is advantageous on block and could be used as an anti-jump move against cornered opponents once in a full moon. |
| 2B [Low]
Startup: 8f | Active: 4f | Recovery: 15f Slightly different from Crescent's and Half's as it has less active frames and therefore slightly less horizontal range. Furthermore, it has less raw cooldown and is still easily staggered into your C normals, making it useful for blockstrings. This has the furthest horizontal reach in F-Nanaya's moveset and is fundamental for poking and keeping pressure. If you're fishing for a hit, remember you need to account for the distance from you and your opponent. To play it safe when attacking from afar, you can hit confirm with the first hit of 236B then fall back or finish the Rekka. |
| 5B [Mid]
Startup: 8f | Active: 2f | Recovery: 15f Has good horizontal range but isn't too fast. Moves forward a bit and is +1 on block. Aside from poking for a Rekka set-up at max range, you'll be using this to catch air counter-hits into the standard air combo (j.BC j.BC airthrow). Only use this sparingly in blockstrings since you can't stagger this and it usually pushes F-Nanaya too far away to do anything threatening. |
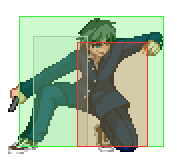
| 2C [Low]
Startup: 8f | Active: 8f | Recovery: 12f The movement is negligible compared to Crescent's and Half's 2C slides but this makes his hitbox smaller, allowing you to duck under some projectiles and moves. The start-up is on par with your B normals, has very nice active meaty active frames, and good frame advantage - using it to poke is acceptable.
|
| 5C [Mid]
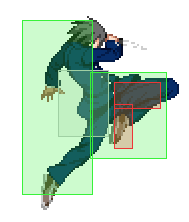
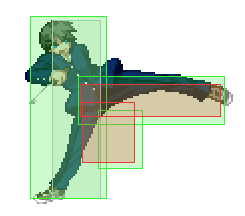
Startup: 9f | Active: 4f | Recovery: 16f A forward-moving axe kick. Has decent horizontal range and surprisingly good vertical range. You can use this to maximize damage off of air counter-hit hit confirms, and under some situations, can be used as an anti-air. Due to its arc, it's not really effective in catching jump-outs. Counter hits from this usually garner good damage combos, so mix this in with 5[C] sometimes. Safe on block on its own and you can special cancel it as well. |
| 5[C] [High]
Startup: 28f | Active: 4f | Recovery: 16f Chargeable overhead variant of the kick. The cancel window is right as it hits, so be prepared to hit confirm - it combos into any non-teleport special including 623BB into aircombo. On airborne opponents (usually in a combo), it ground bounces, so you can instant air dash an air normal or buffer a 2C to extend combos. Best used when you mix it up with partially charged 5Cs. Safe on block. |
| JA [High]
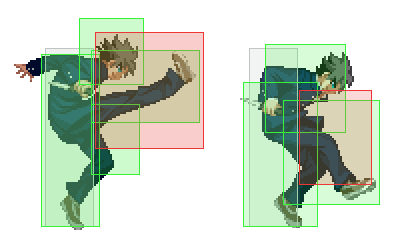
Startup: 5f | Active: 4f | Recovery: 41f Tiger Knee kick in the air. Very fast and chains into itself but has poor range. Full Moon characters can cancel j.A's into an airdash, and so this is good for the occasional air poke. Use it sparingly for pressure while in the air to mix it up with other aerials otherwise it's rather easy to mash out of. Since you can chain it close to the ground from an instant air dash, you can actually use this to imitate a fuzzy guard string in tandem with your divekicks and fastfall. |
| JB [High]
Startup: 8f | Active: 2f | Recovery: 41f Nearly identical to H-Nanaya's j.B but with less horizontal range below. It's a horizontal slash that hits once. Decent air-to-ground move and is really your only option if an airborne opponent is on-level with you. That said, it's not especially effective in air-air situations. |
| JC [High]
Startup: 10f | Active: 6f | Recovery: 35f The downward stab shared by all Nanaya moons. It has notable start-up but its hitbox is respectable and is key to Nanaya's zoning and pressure game. Once the hitbox is out, it won't lose to much in air-to-air combat so as long as the opponent is below you. |
| J2ABC
Startup: 6f | Active: Until landing | Recovery: 2f
|
Special Moves
Sensa・Yotsuji 「閃鞘・四辻」 - 236ABC
|
Sensou・Rikuto 「閃走・六兎」 - 623ABC
|
Sensou・Suigetsu 「閃走・水月」 - 22ABC
|
Sensa~ 「閃鞘~」 - 214ABC
|
Kyuukouka/Fastfall 「急降下」 - J22
|
Arc Drive
Sensa・Meigokushamon 「閃鞘・迷獄沙門」 - 41236C
|
Another Arc Drive
Sensa・Meigokushamon 「閃鞘・迷獄沙門」 - 41236C
|
Last Arc
Kyokushi・Nanaya 「極死・七夜」
|
![5[C]](/images/2/2a/FnanayaBE5c.png)
