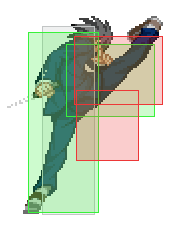
Melty Blood/MBAACC/Shiki Nanaya/Half Moon
Combos
Of all three Nanayas, Half Moon is the absolute simplest in terms of both combo theory and execution. You shouldn't be concerned with scoring the most optimal numbers you can. The best damage you can earn as this character comes through very specific routes on his normals and specials. Because of this, constantly optimized damage an impractical pipe dream, as you'll be using Reverse Beats often. Yet unlike Crescent Nanaya, his moves also don't prorate in a way which lets you squeeze out more in some alternative way. Furthermore, H-Nanaya is the anti-jump Nanaya. His most damaging combos will not usually align with his main method for damage dealing.
To compensate for all these negatives, Half-Moon Nanaya tends to score higher damage at a more consistent rate than the other two; even with Reverse Beat Penalty accounted for. His most practical combos in this sense, ARE his most damaging combos (go ahead and lab if you wish, see if you'll find anything new. You won't. And no, double-stacking 214A in a combo never deals more than just one.) This makes it easier to keep the focus on conversions, which are also very simple. They are always the typical Melty Blood air combo BnB (j.BC > dj.BC > AT) with very little variety or trickery to them, making him an easy character to understand, pick up, and use for players on all levels.
Because H-Nanaya combos are so generic and streamlined, there will not be much to this section. There will be no corner, midscreen, etc. or other such divisions. Everything you can do midscreen (save for one AT combo) you can do in the corner as well, regardless of where anyone is. __________________________________________________________________________________________________________________________________________________
IMPORTANT NOTICE REGARDING THE BELOW SECTION:
The entire combo list below will only list AT enders. AT enders are interchangeable with j.214B or j.214C. Use j.214B as an ender if you want a tech-chase situation (which H-Nanaya is rather good at thanks to his good anti-airing ability), an extra 10 meter, and/or if airdashing to your AT ender won't reach in time; it does the same damage anyway. Use j.214C for extra damage to get some extra damage IF you haven't exceeded the bounce-count per combo. Otherwise the last part of the super will pass through, and you'll have wasted 100 meter for less damage than usual.
If you find the 214A links too difficult, then replace them with typical sweep-into-launch routes instead (2C > 5C (> 5B)). 214A links are optimal, but don't add any truly significant amount of meter or damage (in fact only about 100 more.) So mastering them is by all means optional in the grand scheme of things. __________________________________________________________________________________________________________________________________________________
(2A) 2B 5C 2C 5B j.BC dj.BC Airthrow(AT)/j.214B/j.214C
(2A) 5B 5C 2C 2B J.BCA DJ.BC AT/j.214B/j.214C
(2A) 5B 2B 5C 2C 236A 5A 5C J.BC J.BC AT/j.214B/j.214C (the 5C after 5A is character specific)
- j.A/B/C (CH) > land > 5B > 5C > j.(B)C > dj.BC > AT
- Staple conversion off of an air-to-air counter hit situation
- Deals the most damage by a significant margin, without losing any noticeable amount of meter by not instead opting for other routes
- Always do 5B > 5C. If you misjudge the height and if the opponent ends up too high for j.BC, omit the first j.B and go right into j.C before doing the rest of the aerial finisher. Unlike the other two Moons, 5B > 5C > j.C > etc. nets greater damage than if you were to do 5C > aircombo.
- Raw Air Throw > Dash ~ 2C > 214A, 5A > 5C > j.BC > dj.BC > AT
- The best combo you can possibly do off a raw airthrow, anywhere
- Keep the height of the opponent just low enough so that by the time you do 5A > 5C, they don't go too high for the air combo finisher
- Raw Air Throw > 214[B], 2C > 214A, 5A > 5C > j.BC > dj.BC > AT
- Strictly corner-only air throw starting combo
- Same as the above, except you add a 214[B] to it
- Based on the character, they might have odd collision boxes, which may cause them to bounce out from the corner. In which case, walk away from the corner a little after 214[B] before landing 2C, so they end up where they're supposed to.
2C > 214A, 5A > 5C > j.BC > dj.BC > AT
Strategy
H-Nanaya is an extremely basic character that will test players' proficiency in stagger pressure, understanding of neutral, and ability to hit confirm. Even though Half has the best normals suited for neutral play, a significant number of the cast can still out-range and overwhelm. H-Nanaya is best on the ground as his air normals aren't exactly abusable and easily beaten out in most air-air situations. H-Nanaya excels at close-to-mid-range, which you can judge as the distance where 5B can link into 2C in a combo and closer. At this range, you have all your relevant options available to you - any further and it's essentially playing neutral again.
At long range, you have your 236A/B for zoning, but they're easily countered if you recklessly throw them out preemptively. If you smell a jump, you can use 214A to confirm into 5A -> air combo string. The 214A will only link into 5A if you confirm at max distance (where you essentially hit with his shoe and then begin to descend back onto the ground) so it's likely you'll only use this a few times before your opponent tries to bait it out and punish or respects your anti-jump measures altogether. Other than that, you have to weave through whatever tactics your opponent uses to try to keep you out using H-Nanaya's limited air mobility, dash, and selective use of his dash-momentum normals. Competent opponents will always make your job as Nanaya difficult because they know Nanaya is at his worst in neutral, but once you get in on them...
It's your turn! Remembering the optimal range where all of Half's normals can realistically reach, your stagger pressure is among the best in the game. Staggering - delaying normals to make deceptive frame pockets for foes to "escape" (but ultimately fail) - is key to winning with H-Nanaya. Your B and C normals will almost always beat out attempts to mash out cleanly, and 2C and 5C, due to their start-up frames, can beat out both mashing and jump-outs. You'll also want to stagger to get the most forward momentum out of your normals, making pressure seem endless to your opponent. The minimum range where 2A whiffs is also where you can frame trap your foe with any of your B or C normals. Let's not forget your teleports and fastfall can be incorporated for maximum frustration.
As almost all of your normals will be used in blockstrings, it's important to remember that you master the concept of hit confirming. 236A -> 5A links from 2C if you don't have any normals to pick up the opponent after, and does good damage too. Against jump-outs with 5C, you have to train your reflexes to instinctively jump forward and use either j.A/B/C to confirm and double jump into j.BC air throw or whatever variant you find necessary. j.A will hit at all ranges, even on opponents who were able to jump very high before getting swatted by 5C, but you lose a lot of damage. j.B is the most realistic and doesn't hurt the damage as much. j.C handles ranges below and near your level, yielding the highest damage, but as it's slow on start-up, it's risky to try to hit confirm with it.
At the end of an air combo, you either use j.214B to get +10 meter, a wall bounce, and an opportunity to anti-air a possibly careless foe, or air throw. Almost always you want to use j.214B, although in the corner, air throw is best as you make it a guessing game to whether you'll stuff out their jump with dash-in 5A/5C, dash-in tick throw, or anticipate a jump-out from max 214A range and punish. If you think they'll mash, dash-in 2A, 2B, 5B, etc. will beat out most efforts and you rinse and repeat into combos into air throw until they're dead or escape (in which case back to neutral for you).
Meter management is pretty straightforward with this character. If you need to recover red health (Nanaya bleeds so you usually do), just hold enough meter until you reach 200% and don't get hit. HEAT in Half also augments your inherently amazing pressure game, so it's a good idea to usually aim for HEAT mode. However, if you have too much meter early in the round where you're at near-full health, a blockstring into 236C is acceptable as 236C is advantageous on block. Some opponents will want to bunker the 236C - regardless if you're doing it with normal meter or HEAT meter (the latter would almost always cause you to auto-Circuit Spark), so look at your opponent's meter before committing to the entirety of 236C. Otherwise, save meter for the j.214C ender on your air combos. It does AMAZING damage and you'll need it to end rounds most of the time. j.214C alone is what makes H-Nanaya's damage output so sublime, so always keep it in your thoughts.
When you're pressured, there's not much to do. Your 2A is too slow to mash out of much, and your 623B can be baited very easily. Just block and when you have 100% or more meter, 214D Shield Bunker a blocked attack. Half Moon Shield Bunkers are silly, invincible from start-to-finish, and if they hit - forced hard knockdown for your opponent. That gives you enough time to reset the situation, as well as do which-way fastfalls if you know what you're doing. On certain meaty set-ups, you can use 623C and punish foes with 3k damage for giving you trouble, but you need to understand how those set-ups and characters work before you gamble it all like that.
Move Descriptions
Normal Moves
| 2A [Low]
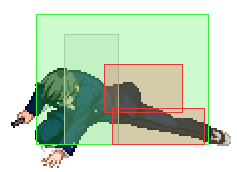
Startup: 6f | Active: 4f | Recovery: 8f Nanaya drops down and does his morning leg stretch. It's slightly slower than other 2A's but the extra vertical hitbox can allow you to stabilize some combos or catch jump-outs from the corner. |
| 5A [Mid]
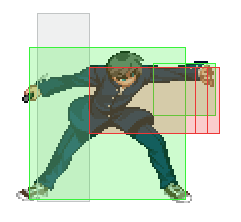
Startup: 4f | Active: 4f | Recovery: 9f Standing knife-hand. Doesn't hit crouchers, so it's great for setting up tick throws. Also good for twitch anti-air. |
| 6A [Mid]
Startup: 8f | Active: 4f | Recovery: 16f Second part of the 5A 6AA chain - a palm thrust to the opponent. Moves him forward; this move is a good to use sometimes to stay in during blockstrings. Can also catch jump-outs similar to 2a. |
| 6AA [Mid]
Startup: 10f | Active: 4f | Recovery: 17f Third part of the 5A 6AA chain - a slice that moves far forward. Air untechable on hit. It's unsafe on block, but since the window to cancel it into a special is unusually long, you could do some gimmicky frametraps every once in a while. This move makes Nanaya's character box disappear for a few frames so if done close to the opponent mid-screen, it will cross-up. |
| 2B [Low]
Startup: 8f | Active: 6f | Recovery: 18f Long reaching leg shank that also gains a bit of momentum from a dash. It is a staple low to use for its range, speed, and that it moves him forward. At max range, you can really only hit confirm to 236B 214C though. |
| 5B [Mid]
Startup: 8f | Active: 2f | Recovery: 15f A very good-ranged poke that also moves forward a bit. This and 2B are your usual mid-range pokes, but note that the active frames aren't great. It's +1 on block though, so you'll be safe even if you don't chain or Reverse Beat into something else. The window to cancel into another move is very small though, so it's not very good for staggered blockstrings. Use it to end blockstrings every now and then to gauge reactions from your opponent - best used to set Nanaya back into optimal mid-range after a blockstring. |
| 2C [Low]
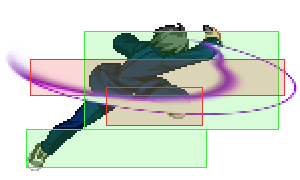
Startup: 11f | Active: 9f | Recovery: 15f Overall one of his best moves - a slide sweep kick. It moves very far and goes under a good number of projectiles. Be sure to hit confirm this to make the best of it. Use this in blockstrings to keep in and beat out jump-outs. This and 5C make H-Nanaya's staggered blockstrings truly deadly. |
| 5C [Mid]
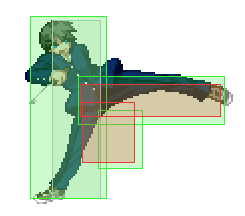
Startup: 11f | Active: 8f | Recovery: 13f A roundhouse kick that has a huge hit box and extends to parts above him. Moves him forward a good amount to keep on the offensive during blockstrings - it also beats mashing out of blockstrings and jump-outs; the latter situation being something H-Nanaya players must learn to hit confirm from on command. Prorates very nicely and has an absurd amount of stun on counter hits - usually leading to very damaging combos. 5C moves forward a crazy amount from a dash, but it's a bit on the slow side so be weary of using it too liberally as an anti-air or approach. |
| JA [Mid]
Startup: 6f | Active: 4f | Recovery: 30f Your prime air-air move considering how fast it is coupled with how Nanaya pales in comparison to most of the cast while airborne. Be sure to confirm counter hits off this. |
| JB [High]
Startup: 8f | Active: 2f | Recovery: 41f A downward horizontal slash. Unlike Crescent, this move only hits once. The horizontal range makes it okay to use for opponents on-level with you in the air, but the active frames are unimpressive. It's better used sparingly as an air-ground move. |
| JC [High]
Startup: 10f | Active: 6f | Recovery: 35f An angled downward stab. The hitbox on this move is massive, making it great as an air-ground, as well as a sparingly used air-air if the opponent is under you. It's a little slow so be careful about aimlessly throwing it out. The start-up can be used to do whiff mix-ups to bait out Shields sometimes. |
Special Moves
Sensa・Hattenshou 「閃鞘・八点衝」 - 236ABC
|
Sensou・Rikuto 「閃走・六兎」 - 623ABC
|
Sensou・Ikka 「閃走・一鹿」 - 214ABC
|
Sensou・Suigetsu 「閃走・水月」 - 22ABC
|
Sensou・Ikka 「閃走・一鹿」 - J214ABC
|
Kyuukouka/Fastfall 「急降下」 - J22
|
Arc Drive
Sensa・Meigokushamon 「閃鞘・迷獄沙門」 - 41236C
|
