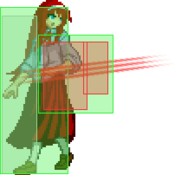
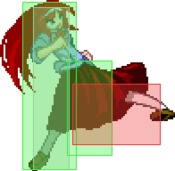
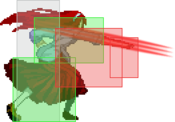
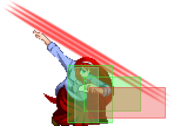
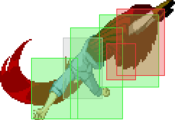
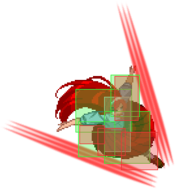
Be sure to check this article about H-VAkiha: https://drunkardshade.com/2015/08/03/melty-bits-h-v-akiha/
Overview
Players to look for
| Romanization |
Japanese name
|
| Hato |
はと
|
| Tsubasa |
翼
|
| Shizuoka |
しずおか/静岡
|
| Shuu |
しゅう
|
| Kata |
かた
|
| Satoken |
さとけん
|
| Yukichi |
ゆきち
|
Combos
- This video serves as a reference for people learning this character, if you're interested in learning her please check it out: https://youtu.be/SqYOXf0Xh-Q (Courtesy of dare/veoid)
All damage values were calculated on V.Sion using the third momiji loop where applicable. For 6aa combos, damage 1 values are calculated starting with 2a 5c 4c while damage 2 values are calculated using j.c 5b 5c 4c
You should always go for the okizeme ender unless you want to end the round.
- Stands for a link
- A dash cancel
- Whiffed normal
- Optional move
Non situational combos
| Inputs |
Damage / Meter 1 |
Damage / Meter 2 |
Notes |
| Basic |
| 2a 5c 4c 5b 2c 623b -> momiji loop |
4641 / 85% |
N/A |
Basic corner combo from 2a. |
| etc -> 5a 6aa 4c 2c 623b -> momiji loop |
4564 / 103.2% |
6116 / 111.5% |
Its range is about 1/2 of the stage to the corner |
| etc -> 5a 6aa 6c 66 delay 4c 2c 623b -> momiji loop |
4449 / 114% |
|
Corner carry from anywhere except near the corner |
| Optimized |
| etc -> 5a 6aa xx 5b 2c 2a(w) delay 4c 623b -> momiji loop |
4657 / 107.3% |
6226 / 115.7% |
It carries significantly farther than its respective basic version |
| etc -> 5a 6aa xx 5b 2c delay 5c 4c 623b -> momiji loop |
4896 / 115% |
6327 / 123.4% |
Does not work near the corner |
| etc -> 5a 6aa 6c 66 wait 5b 2c delay 5c 4c 623b -> momiji loop |
4486 / 120.6% |
6059 / 129% |
Requires more space to the corner than its basic version |
| 6aa loops (NOT recommended) |
| etc -> 5a 6aa 4c 5c 2c 5a(w) 6aa xx 2c 623b -> momiji loop |
4546 / 127.7% |
6108 / 136.1% |
Does not work near the corner. 6aa should hit as late as possible |
| etc -> 5a 6aa 6c 66 delay 4c 5c 2c 5a(w) 6aa xx 2c 623b -> momiji loop |
4388 / 133.3% |
6119 / 141.7% |
Requires a lot of space |
| etc -> 5a 6aa xx 5b/4c 5c 2c 5a(w) 6aa xx 2c { delay 5c or a non-delayed 2a(w) } 4c 623b -> momiji loop |
4847 / 142.3% |
6392 / 150.7% |
Probably worth practicing for the meter and damage. If you end up too close omit the 5c at the end.
https://www.youtube.com/watch?v=PBX77TaQAAE |
The momiji loop
If you miss one hit of 623b while doing these (i.e you started it too far away) following up with 4c won't work. Use 5b or 2b instead.
| Inputs |
Meter |
Notes |
| 4c 623b 4c 623b |
31.4% |
The most basic one |
| 4c delay 2c 623b 4c 2c delay 5bb 623b |
46.5% |
You can do 5bb 623b twice but it will prorate a lot |
| 5b 2c 2a(w) 4c 623b 5b 2c 2a(w) 4c 623b |
51% |
Whiffing 2a is optional. It doesn't change anything but the timing |
| 5b 2c 5a(w) xx 2a 2c delay 4c 623b 5b 2c 5a(w) 6aa 2c 4c 5bb 623b |
80.1% |
Requires low gravity. The second rep is very finnicky regarding gravity. The 5a whiff doesn't work on everyone.
You may replace 5a(w) with 2a(w) but it becomes a 1f link and it works only once |
Situational combos
| Inputs |
Damage / Meter |
Notes |
High shield counter / Air counter hits
The damage was calculated starting from shield counter instead of an air CH. |
| 2c 5bb hold 8 j.b j.c 9 j.b j.c AT |
2633 / 45.5% |
Easy if you do j.c j.b 9 j.b j.c instead, otherwise it's not worth it. |
| (2c) 5b (5c) 4c 9 (j.a) bc 9 (j.a) j.bc AT |
3056 / 60.1% |
j.a's are not doable if you decide to use 5c. |
| 4c 5c 2c 5a(w) 6aa xx 2c (delay 5c 4c) 623b -> momiji loop |
|
Only do the optional moves if you aren't close enough to the corner |
| 5c 4c 2c 5a(w) 6aa delay 6c 66 2c 623b -> momiji loop |
|
Full corner carry version |
| 5b 2c delay 4c -> momiji loop |
3311 / 77.3% |
Only possible near the corner. You can omit everything but 2c |
| Low shield counter |
| 2d -> 623b -> momiji loop |
3670 / 69.7% |
If you aren't near the corner prefer the 2d knockdown instead. |
| 2d -> delay 623c 5b 2c 5c 4c 623b -> momiji loop (1 rep) |
|
Metered fullscreen corner carry |
| 2d -> 41236c |
3419 |
Very situational but it's the biggest damage you can get from a low shield counter if you can't go for the loop. |
| Golden/Raw air throw |
| 2a 2c 5bb sj8 j.b j.c 9 (j.b) j.c AT |
2988 / 36.4% |
Basic damage confirm that works everywhere. |
| 2a delay 2c 623b -> momiji loop |
3292 / 64% |
Works only near the corner. |
| 2a 5c 2c 5a(w) 6aa delay 6c 66 2c 623b -> momiji loop |
|
Easy, but doesn't work on some characters. |
| 5a 2c 2a(w) xx 2a 2c 5a(w) 6aa delay 6c 66 2c 623b -> momiji loop |
|
https://www.youtube.com/watch?v=jiEEQD2y4ec |
| 5a 2c 2a(w) xx 2a 2c 5a(w) 6aa xx 2c 2a(w) 2a 5c IADc j.c land 9 j.b j.c 9 j.b j.c AT |
3601 / 79.8% |
Damage variation of the one above. |
| Standing overhead in the corner |
| 2c 2a(w) 4c 623b -> momiji loop |
|
|
| 66 cross under sideswitch 2a(w) 5c 2c 5a 6aa 6c 66 2c 623b -> momiji loop |
|
|
| 2bbb |
| 2bbb j.IAD cancel j.c land 9 j.b j.c 9 j.c AT |
3185 / 28.0% |
I hope you aren't planning to hit anyone with this. |
| Reversal 623c |
| 623c 4c 2c 623b -> momiji loop (1 rep) |
3448 / 18% |
Unstable. Not full corner carry. |
| 623c 4c 2c 5a(w) 6aa 2c 623b -> momiji loop (1 rep) |
|
Unstable. Full corner carry. 6aa should hit as late as possible |
| 623c j.66 delay j.c(w) land 5b 2c 5c 4c 623b -> momiji loop (1 rep) |
|
Full corner carry. Recommended |
| Air pit confirms |
| 5b delay 5c 4c 9 j.b j.c 9 j.b j.c AT |
5020 |
Let the pit hit fully before starting the combo. If you can't confirm immediately then go straight to 5c |
| (5b/4c) 5c 2c 5(w) 6aa (delay 6c 66) 2c 623b -> momiji loop |
3448 / 18% |
|
| j.66 j.c land (5c) 4c 9 j.b j.c 9 j.b j.c |
5263 / 52.6% |
Avoid double super jumps. |
| Far j.a (uncomboable without j.66) |
| j.a j.66 j.a sj9 delay j.aa j.66 (j.a) AT |
|
https://www.youtube.com/watch?v=84LLhL-TPYs |
| j.a j.66 j.a j.b land rejump 8 j.b sj9 j.c AT |
|
|
OTG
I don't really know what would you use these for, but I guess it's good to know. You can put a 623c somewhere if you want to relaunch them for better oki.
- 2aaaaa 5bb 4c 5c 5a 6a 2b
- Probably the longest OTG string possible.
Setplay
Knockdown times
This data was collected manually using framestep.
The height of the opponent affects the frame advantage. More height equals more advantage.
The following are your untechable knockdowns and their frame advantage against a standing V.Akiha.
Please, take this as a ROUGH estimate and not as fixed absolute values.
| Move |
Frame advantage
|
| 2c |
45f or 71f if jump cancelled.
|
| 623b |
63f
|
| 623c |
71f or 109f if jump cancelled.
|
| 623a |
18f
|
| Throw |
39f
|
| Combo AT |
12f
|
| Golden AT |
57f or 80f if jump cancelled
|
| 2d |
47f
|
| Guard cancel bunker |
55f
|
Move Descriptions
Normal Moves
2A
|
| Damage
|
Red Damage
|
Proration
|
Cancel
|
Guard
|
| 350
|
150
|
Absolute: 65%
|
SE, SP, EX, (J), N
|
L
|
| First Active
|
Active
|
Recovery
|
Frame Adv
|
Circuit
|
Invuln
|
| 4
|
-
|
-
|
-
|
4.0%
|
-
|
|
description
|
|
5A
|
| Damage
|
Red Damage
|
Proration
|
Cancel
|
Guard
|
| 300
|
120
|
Absolute: 75%
|
SE, SP, EX, (J), N
|
HL
|
| First Active
|
Active
|
Recovery
|
Frame Adv
|
Circuit
|
Invuln
|
| 4
|
3
|
8
|
+12 Hit
+1 Block
|
3.0%
|
-
|
|
description
|
|
5A
|
| Damage
|
Red Damage
|
Proration
|
Cancel
|
Guard
|
| 300
|
120
|
Absolute: 75%
|
SE, SP, EX, (J), N
|
HL
|
| First Active
|
Active
|
Recovery
|
Frame Adv
|
Circuit
|
Invuln
|
| 4
|
3
|
8
|
+12 Hit
+1 Block
|
3.0%
|
-
|
|
description
|
|
5A
|
| Damage
|
Red Damage
|
Proration
|
Cancel
|
Guard
|
| 300
|
120
|
Absolute: 75%
|
SE, SP, EX, (J), N
|
HL
|
| First Active
|
Active
|
Recovery
|
Frame Adv
|
Circuit
|
Invuln
|
| 4
|
3
|
8
|
+12 Hit
+1 Block
|
3.0%
|
-
|
|
description
|
|
2B
|
| Damage
|
Red Damage
|
Proration
|
Cancel
|
Guard
|
| 500
|
260
|
Absolute: 85%
|
SP, EX, (J), N
|
L
|
| First Active
|
Active
|
Recovery
|
Frame Adv
|
Circuit
|
Invuln
|
| 6
|
4
|
15
|
+15 Hit
-4 Block
|
5.0%
|
-
|
|
description
|
|
2BB
|
| Damage
|
Red Damage
|
Proration
|
Cancel
|
Guard
|
| 400
|
400
|
100%
|
SP, EX, (J), N
|
LA
|
| First Active
|
Active
|
Recovery
|
Frame Adv
|
Circuit
|
Invuln
|
| 9
|
3
|
14
|
+17 Hit
+2 Block
|
4.0%
|
-
|
|
description
|
|
2BBB
|
| Damage
|
Red Damage
|
Proration
|
Cancel
|
Guard
|
| 500
|
600
|
Absolute: 75%
|
J
|
HA
|
| First Active
|
Active
|
Recovery
|
Frame Adv
|
Circuit
|
Invuln
|
| 26
|
4
|
51
|
Launch on Hit
Varies on Block
|
+6.0%
|
-
|
|
An overhead with rather slow start-up. Can be jump-cancelled on Hit OR Block so it is safe so long as it doesn't whiff. Very rarely used.
|
|
5B
|
| Damage
|
Red Damage
|
Proration
|
Cancel
|
Guard
|
| 650
|
400
|
100%
|
SP, EX, (J), N
|
HL
|
| First Active
|
Active
|
Recovery
|
Frame Adv
|
Circuit
|
Invuln
|
| 10
|
4
|
11
|
+15 Hit
-3 on Block
|
6.0%
|
-
|
|
description
|
|
5BB
|
| Damage
|
Red Damage
|
Proration
|
Cancel
|
Guard
|
| 400
|
200
|
Absolute: 70%
|
SP, EX, (J), N
|
HL
|
| First Active
|
Active
|
Recovery
|
Frame Adv
|
Circuit
|
Invuln
|
| 7
|
4
|
20
|
+17 Hit
+2 Block
|
2.0%
|
-
|
|
description
|
|
5[B]
|
| Damage
|
Red Damage
|
Proration
|
Cancel
|
Guard
|
| 650 x3
|
400 x3
|
100%
|
SP, EX, (J), N
|
HL
|
| First Active
|
Active
|
Recovery
|
Frame Adv
|
Circuit
|
Invuln
|
| 20
|
1, 4, 4
|
9
|
+15 Hit
+3 Block
|
3.0% x3
|
-
|
|
description
|
|
2C
|
| Damage
|
Red Damage
|
Proration
|
Cancel
|
Guard
|
| 900
|
500
|
Relative: 55%
|
SP, EX, (J), N
|
L
|
| First Active
|
Active
|
Recovery
|
Frame Adv
|
Circuit
|
Invuln
|
| 11
|
6
|
23
|
Hard Knockdown
-11 Block
|
7.0%
|
-
|
|
description
|
|
5C
|
| Damage
|
Red Damage
|
Proration
|
Cancel
|
Guard
|
| 1000
|
700
|
Relative: 90%
|
SP, EX, (J), N
|
HL
|
| First Active
|
Active
|
Recovery
|
Frame Adv
|
Circuit
|
Invuln
|
| 10
|
6
|
15
|
+18 Hit
-3 Block
|
8.0%
|
-
|
|
description
|
|
4C
|
| Damage
|
Red Damage
|
Proration
|
Cancel
|
Guard
|
| 1000
|
700
|
Relative: 80%
|
SP, EX, (J), N
|
HL
|
| First Active
|
Active
|
Recovery
|
Frame Adv
|
Circuit
|
Invuln
|
| 7
|
4
|
26
|
+17 Hit
-12 Block
|
16.0%
|
-
|
|
description
|
|
6C
|
| Damage
|
Red Damage
|
Proration
|
Cancel
|
Guard
|
| 600
|
400
|
Relative: 80%
|
SP, EX, (J), N
|
HL
|
| First Active
|
Active
|
Recovery
|
Frame Adv
|
Circuit
|
Invuln
|
| 7
|
4
|
22
|
+13 Hit
-8 Block
|
8.0%
|
-
|
|
description
|
|
j.A
j.A
|
| Damage
|
Red Damage
|
Proration
|
Cancel
|
Guard
|
| 600
|
400
|
Relative: 80%
|
SP, EX, (J), N
|
HL
|
| First Active
|
Active
|
Recovery
|
Frame Adv
|
Circuit
|
Invuln
|
| 7
|
4
|
22
|
+13 Hit
-8 Block
|
8.0%
|
-
|
|
description
|
|
j.B
j.B
|
| Damage
|
Red Damage
|
Proration
|
Cancel
|
Guard
|
| 600
|
400
|
Relative: 80%
|
SP, EX, (J), N
|
HL
|
| First Active
|
Active
|
Recovery
|
Frame Adv
|
Circuit
|
Invuln
|
| 7
|
4
|
22
|
+13 Hit
-8 Block
|
8.0%
|
-
|
|
description
|
|
j.C
j.C
|
| Damage
|
Red Damage
|
Proration
|
Cancel
|
Guard
|
| 600
|
400
|
Relative: 80%
|
SP, EX, (J), N
|
HL
|
| First Active
|
Active
|
Recovery
|
Frame Adv
|
Circuit
|
Invuln
|
| 7
|
4
|
22
|
+13 Hit
-8 Block
|
8.0%
|
-
|
|
description
|
|
Special Moves
Plucking Birds 「」 - 236ABC
- (Description) - Akiha will jump and spew some short range flame tongues. These are mostly used as resets or at foe's wakeup. You can't combo into or out of (except the EX one) any of these.
- (A version) - Auto TK tongue. Akiha jumps a little and throws a flame tongue.
- Goes over low normals. It's very plus on block allowing you to continue pressure. You can meaty do it after throwing an opponent, although dp beats it. Also it moves her a tiny bit forward.
- (B version) - It's kind of like a super backward jump that leaves a tongue.
- It won't hit anyone unless they mash big normals. It baits and beats some dps that go upwards. Leaves you with a jump cancel and 2 airdashes. Usable on neutral.
- (EX version) - Akiha jumps high enough so that most normals won't even touch her and shots a lot of flame tongues.
- Pretty slow to come out so you're better doing this in after a hard knockdown. If they chicken block you get a combo for free. I don't think this is ever worth the meter.
|
Brilliant Impetus - Temporary String「」 - J.236ABC
- (Description) - Spawns a red web that explodes after a set time. It's unshieldable but not very active. A and B versions are pretty much identical except for the momentum.
- (A version) - Stops you in the air before leaving a mine, then akiha's drop in a fixed angle and speed. Mostly TK'd although it has some uses in neutral.
- Not jump cancellable so don't do it high in the air.
- (B version) - Keeps your momentum in the startup. After leaving the mine you'll drop in a fixed angle that goes back. Not seen very much.
- You keep your air options after doing it so it's kind of usable in neutral.
- (EX version) - Same as A, except more damaging and faster. Not worth the meter.
|
「」 - 214ABC
- (Description) - Spawns a slowly advancing row of pillars. Its got a long recovery so you have to be careful about using it. Used mostly to stop air advances as a zoning tool. B
Punishable on reaction if the opponent has the tools for it. The charged versions are faster to come out than your pits or 236a.
- (A version) - Spawns the pillars just in front of you. 0 on block if spaced correctly. When charged it covers more space as the pillars are spaced widely. When charged the first pillar is -5, the second one is 0, third pillar and beyond is very plus.
- (B version) - Exactly the same as A except the pillars start spawning just after the range of A.
- (EX version) - This one is the odd one from the group. The startup is slow and the pillars spawn very close to you, moving very slowly. It has some invincible frames at the startup but it's not a true reversal. Really easy to hit confirm.
- It's not useless in neutral as one may think.
|
「」 - 623ABC
- (Description) - Not your standard DP. These are very punishable on block/whiff. These don't see much use in neutral and their usage as a reversal tool is limited. All of them give a hard knockdown.
- (A version) - This one is a upper body invincibility short range tall anti-air. Fast to come out. Doesn't give much reward.
- It keeps your dash momentum for some reason. Its usage is pretty much matchup specific.
- (B version) - Has some lower body invincibility. Pretty much a combo tool.
- Its usage as reversal is risky.
- (EX version) - An actual full body invincibility reversal. Its last hit is cancellable into whatever. Has high proration. Massively punishable on whiff and block.
- Nonetheless, it's not a good reversal as it is easy to avoid.
|
「」 - (J)22ABC
- (Description) - An auto-detonating pit that is massively plus on block. Used for zoning, setups and pressure resets. They are not very active. Jump pits are jump/dash cancellable and have a lot less recovery than the ground pits when TK'd. The ground pits aren mostly unseen.
- (A version) - Appears near the opponent and hits 3 times. The last hit on block drains some small amount of meter. The air version keeps your momentum.
- (B version) - Exactly the same as A but it appears where the A pit ends. The ground version has visibly more startup than any other version. The air version resets your momentum.
- (EX version) - Exactly the same as B but hits 5 times and comes out faster.
|
Arc Drive
Crimson Lord: Uncountable Pureness 「赤主・遍生」 - 41236C
- (Description) - Akiha shoots an almost, but not quite, fullscreen laser from her eyes. Has some invincible frames at the startup so it can be used as a reversal, but it's easily punishable on block done up close and it'll end your heat. Also used as a fullscreen punish.
- Believe it or not, this move whiffs on most crouchers.
|
MBAACC Navigation

