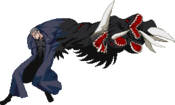
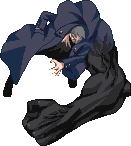
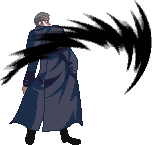
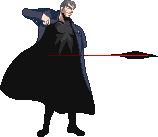
Melty Blood/MBAACC/Nero Chaos/Full Moon

From Mizuumi Wiki
Jump to navigation Jump to search

Additional Resources

Nero's Compendium
Match Video Database
Nero combo compilations

Players to watch/ask

JP:

  • Luckystar: Plays mostly C/F. Technically a solid player, if for all the wrong reasons. His entire playstyle is unorthodox and optimized for style.
  • Yuuki: A sort of rising star F-Nero player. Has been improving a lot lately and should be a go-to player to look for mid-high-level F play.
  • Masa
  • Amber

EU

  • Asciux - Found in main melty server

Overview

Strengths Weaknesses
*Strengths
  • Good corner carry combos
  • Low commitment, summons will almost always cover you
  • Decent damage overall, and F can get a lot of it in the right situations
  • Big, overall very good buttons
  • Second highest defense
  • High damaging reward off of shield counter
  • Decent(not great) reversal options
  • Arc drive can go into unblockable setups
  • Good anti airs
  • Very solid, few unfavorable match ups
  • Uses Meter very well for pressure and Okizeme
  • Frightening pressure with tons of advantage and guard bar damage
Weaknesses
  • Really tall, opens up nero specific pressure on him
  • Poor ground mobility, F only teleports from either forward dash or back dash
  • Needs meter for his pressure/Okizeme to be threatening
  • Jump startup is double average
  • Polarizing match ups such as H roa, Hime, Cciel's 236c etc.

CHARACTER IN ONE SENTENCE: Unfair, insurance based brute force space denial character.

General Gameplan

Unleash the entire zoo while you sit back not committing and when you finally get hit you get a free combo because your summons bailed you out. Nero alone is not a spectacular character. His summons, however, make him one of the strongest in the game simply for how little you have to commit with them. Has easily the best insurance in the game, enough to be defined by it. Each of his 3 moons is essentially the same character with slight, but playstyle-defining differences.

F-Moon

Where C is the unstoppable force, F is the immovable object. 421x replaces deer with filth, a different and equally important tool to keep people still and a big factor in making people approaching you a huge risk. Also has a significantly larger 2C, so has an easier time hitconfirming from longer range. 236B lets you cover yourself fairly well in neutral, and coupled with 6C lets you bully people for days. F is also capable of getting very high damage from the right situations, thanks to 6C and crocodile. Better set of normals overall for playing a longer range than C.

No landing recovery on j.B only makes the button stronger.


Neutral

MOVEMENT: Nero is a slow character. There is no denying that. He lacks a traditional forward dash, and his back dash doesn’t go particularly far back. His air dash is a slow, fully horizontal one that can go for quite long if you hold it, and will be his main movement tool. Saying that Nero is slow is more of a lack of being able to cover small amounts of ground fast. His air dash still goes fairly far and since everyone gets a forward super jump, he can still cover alarming amounts of space very fast. He cannot, however, adjust his position nearly as well as basically any other character.

Instead of a conventional dash, Nero’s forward dash is a teleport, similar to Slayer’s. It is invulnerable from frame 1, but very slow to recover, although the timing to punish it is also very late, so late that people not accustomed to it might in fact whiff a premature punish.

In F-moon this also becomes his back dash, with identical properties. The teleport is useful as either a reversal, (be very sure that your opponent is committing to the wrong direction and hard or you will likely get punished) or moving to a safe position covered by one of your summons, usually EX Crows.

With Nero you'd want to first find a suitable space and time to produce 1-2 summons and use those to approach in a safe manner. Most times the summons will cause the opponent to jump to avoid them and that's where your super jump j.C/j.B comes into play. IF you need the time to produce a summon you can hit the opponent with 236A(crow fireball) to gain the time to produce at least one summon against an high mobility opponent and approach from there.

Pressure

With all neros, pressure via screen control is the name of all nero's game.using his 214A/B series in conjuction with cnero's 421B and fnero's 236B to cover your approach and airdash j.C or j.B your way in. All neros want to be acquainted with both j.C and j.B, especially j.B because its a two hit large normal that fast for an aerial of its caliber. From there you can either IAD j.B again or do 2A pressure.

Frankly, any positioning outside of the corner his main goal is to obstruct the opponent's path, denying them of invading space, usually forcing mistakes on the opponent who overextends and from there performs the corner carry combo that bring them to the corner where nero begins to do his pressure/okizeme. His pressure truly shines in the corner after either an AT ender or a j.C ender as the last wallslam to be used. where he can freely land and plant a 421A to cover forward tech

Pressure is simple to understand with F-nero as he has stagger 2A, IAB j.B, IAD j.C, 6[C] that is +10 on block, and 6C that is +7 on block and is commonly special cancelled into 236B which is +15. with all of this at your disposal you also have one of the larger grabs in the game to boot that deals a good deal of damage for a throw, even with reduce taken into account. Now moving on to what to do for Okizeme or post j.C ender.

Okizeme

Any time with F nero that you score a AT ender and have 100% meter minimum you can so very similar things to what C nero does. Your initial options are listed below

  • Air throw, 236C
  • Air throw, 5[C] 236C

There are reasons to doing one over the other the former option is to get maximum frame advantage while the latter option is for a meaty 5[C] to keep people in check After that point you got a few ideas from there and they are also listed below.

  • 2A 214[A] iad fuzzy(j.C dj j.B)
  • 2A, 9 late j.B or empty jump 2A
  • walk up throw/bait

the ones in bolded are to illustrate the important of doing 2A after 236C as it keeps the opponent in check if they try to dash out. If they try to jump out, you can guard crush them with 2C as it is AUB and go straight into an aerial sequence that is listed in the normal combos. if they try to either ground shield or Air shield the crows, you can ground and air throw them accordingly.

Next is j.C ender used for the last wall slam ender so if you look at the sequence below this is how it follows j.B j.C dj j.B j.C,(land) j.C, (land, 421A)

From here, is where F Nero places trap, filth behind him and monopolizes the space behind if the opponent happens to tech forward and is now sandwiched between nero and filth he can do the following

  • 2AA, empty jump low
  • 2AA 6[C]
  • 2AA, late j.B
  • 2AA, 2AA, throw

this is just a short list of things he is able to do with the former option leaving him +10 and close to nero for a 2A to follow up among other options. If they neutral or back tech, depending on how many air options they used up or have left are put into a dangerous spot of getting AUB by 3B, 5B or just face another round of pressure into 5[C] 236C if resources permits you to do so. With his simple yet robust its encouraged to try and be creative with how you apply this information based on the MU to prioritize j.C ender or Air throw ender

Defense

Make good friends with downback. Nero has slower than average normals, no forward dash, a mediocre airdash and longer than average jump startup. If you cannot commit insurance fraud with an already active summon, you’re going to play the same blocking simulator the rest of the roster has to, except worse. Again, do not be afraid to part with meter. Nero is not a meter-dependent character, he simply uses it very well. He has some very strong reversals to play with in every moon, so make use of them.

F’s own reversal, the insect swarm, is an interesting case. It is invincible very slightly into active and will, again, always at least trade. Notable traits however are the fact that it is plus on block and hit, and the insects keep going even if Nero himself is hit, meaning it acts as a very strong starter, netting you upwards of 4-5k on trade. However, it is also tiny vertically and easy to clear with a strong jumpin. However, opponents actively baiting this now risk getting shielded or even mashed out, so don’t underestimate the psychological power of simply having 100 meter. Has no pushback on shield, but is only punishable up close as the insects getting shielded so late into recovery means you will recover possibly even before your opponent. A strong reversal, and at its strongest when simply threatened, rather than used. If your opponent doesn’t respect the threat of it, however, feel free to make them.

F’s shield deserves its own paragraph. The shield counter is nothing special in itself, being identical to H. What is special, however, is the sheer reward of landing one. For the low low price of 100 meter,you can easily break 4k on lower defense characters with little effort from one. On high enough air hits you can even get this damage meterless if you’re quick. Keep this in mind, and combined with the threat of insect swarm, intimidate any potential offense with simply the fact that you have 100 meter in stock. A single slipup is going to hurt much more when you can mix up between having to eat 4k from a shield, a high reward trade-oriented reversal or bait shields and possibly give you your turn. 5B is an absolutely divine antiair, especially up close and can catch sloppy aerial approaches which are very much a possibility with how unnerving playing around your defensive options already is.

Also keep in mind that you can IH shielding, giving you what’s essentially a real, extremely expensive parry if you’re in MAX.

Combos

Video examples

Puts most characters in a bad position in back tech forward tech is the best option against this OS but it's basically a 50/50 (since he can just jump back jC to catch forward tech) and you still have to use either double jump or airdash to not go into the 5B 421A is also an ok option after throw

Starters

Condition Notation Damage
vs V.Sion
Notes
Normal starter, grounded opponent,
  • 2A (2A) 2B(1) 2C 3C
???


Meter Gained:  ??? Meter Given (vs C-Moon): ???
Common ground stater across the Nero's. H/F tack on a 3C after 2C usually
Normal starter, Air opponent
  • j.B j.C
???


Meter Gained:  ??? Meter Given (vs C-Moon): ???
This can be seen usually when you are meeting the opponent in the air if they are trying to jump out or to avoid the summon approaching them from the ground.
Normal starter, grounded opponent,
  • 5B
???


Meter Gained:  ??? Meter Given (vs C-Moon): ???
A starter that is seen when F-Nero AA's an opponent or guard crushes them after an iad j.B is blocked in some cases
Normal starter, Airborne opponent,
  • 2C 3C
???


Meter Gained:  ??? Meter Given (vs C-Moon): ???
CH 2C starter if you anti air'd an opponent with this starter.
Normal starter, grounded opponent,
  • 4C
???


Meter Gained:  ??? Meter Given (vs C-Moon): ???
A starter that is seen among new nero players. best used to call out something since its fast but very - on block
Overhead starter, grounded opponent,
  • 6[C]
???


Meter Gained:  ??? Meter Given (vs C-Moon): ???
a +10 on block overhead that is unshieldable and also has clash to absorb heat hitboxes, very common to use this when in the corner or after a j.C ender into 421A and they happened to be sandwiched between nero and Filth after they air tech

Enders

Condition Notation Damage
vs V.Sion
Notes
Normal starter, grounded opponent,
  • Air throw
???


Meter Gained:  ??? Meter Given (vs C-Moon): ???
usually your ender after your last j.C rep in your combo. In the corner it then leads to your Okizeme. Otherwise if C-Nero doesn't end in air throw it lets Nero set up a 421B/A for both C/F to cover spaces where the opponent techs upon landing.

Normal Combos

Condition Notation Damage
vs V.Sion
Notes
Normal starter, grounded opponent,
  • 2A(AA) 2B(1) 2C 3C, j.B j.C dj.AAC sj8/9 j.C dj B(1)C (land, 421A)
???


Meter Gained:  ??? Meter Given (vs C-Moon): ???
Normally the combo F nero players will use along with the other one below. the part in parenthesis is that you land on the ground still facing the corner, 421A goes behind nero then comes back to his original position. If you want to get an Air throw ender you need to sdj8/9 j.C instead of dj j.(B(1)j.C
Normal starter, grounded opponent,
  • 2A(AA) 2B(1) 2C 3C j.BC djiad j.C sj8/9 j.C dj j.(B(1)j.C,(land, 421A)
???


Meter Gained:  ??? Meter Given (vs C-Moon): ???
Another variation other combo F Nero players will use along with the other one above. The part in parenthesis is that you land on the ground still facing the corner, 421A goes behind nero then comes back to his original position. If you want to get an Air throw ender you need to sdj8/9 j.C instead of dj j.(B(1)j.C
Normal starter, grounded opponent,
  • (j.A/J.B) j.C djiad j.C, sj j.C (sdj j.C Air throw/ dj j.B(1) j.C, land 421A)
???


Meter Gained:  ??? Meter Given (vs C-Moon): ???
a simple air to air confirm.
Normal starter, grounded opponent,
  • D~236D 214C 2C 214A, 6[C] 6C, j.B j.C dj j.B j.C sj j.C sdj j.C, (land 421A)
???


Meter Gained:  ??? Meter Given (vs C-Moon): ???
A high damaging shield counter combo looks like this
Normal starter, grounded opponent,
  • D~236D 214C 6C 214A, (walk under) 5B 3C(1), j.B dj8 j.B j.C (rejump) j.C, sdj

j.B j.C (land 421A)

???


Meter Gained:  ??? Meter Given (vs C-Moon): ???
A side switch variant looks like this
Normal starter, grounded opponent,
  • (6C) 236B 3C(1), j.B j.C dj j.B j.C, (rejump/sj) j.C (421A)
???


Meter Gained:  ??? Meter Given (vs C-Moon): ???
A conversion from doing 6C 236B string, usually seen in the corner but can work anywhere.

Corner Combos

There's not much in terms of corner specifics outside of 5[C] starters, but here are some below

Condition Notation Damage
vs V.Sion
Notes
Overhead starter, grounded opponent,
  • 6[C] ,5[C] 6[C],6C jBjC sj28 jC(3hits) sdj jB(1hit) jC at
???


Meter Gained:  ??? Meter Given (vs C-Moon): ???
your damaging 6[c] combo
Normal starter, grounded opponent,
  • 5[C] 236C 3C j.B j.C dj j.B j.C, (land, 421A)
???


Meter Gained:  ??? Meter Given (vs C-Moon): ???
Simple conversion from 5[C] meaty, below are more.
Normal starter, grounded opponent,
  • 5[C] 236C walk up 6C 6[C] j.B j.C dj j.B j.C (land, 421A)
???


Meter Gained:  ??? Meter Given (vs C-Moon): ???
More damage from your corner meaty. Don’t try at max range.

Normal Moves

5A
MBCC F-Nero 5A.png
Damage Red Damage Proration Cancel Guard
300 - - - HL
First Active Active Recovery Frame Adv Circuit Invuln
6 5 6 +1 - -

Elbow poke. Has greater horizontal range and hits a little higher than the other 5As.


5B
MBCC F-Nero 5B.png
Damage Red Damage Proration Cancel Guard
700 - - - HL
First Active Active Recovery Frame Adv Circuit Invuln
6 6 23 -11 - -

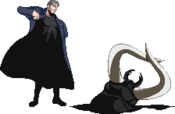
Antlion. Antlion angles up and is a 1-hit anti-air.


5C
MBCC F-Nero 5C.png
Damage Red Damage Proration Cancel Guard
600*2 - - - HL
First Active Active Recovery Frame Adv Circuit Invuln
7 3,6 18 -6 - -

Rhino. Hits very far out in front, no vertical range. EX cancelable.


5[C]
MBCC F-Nero 5C.png
Damage Red Damage Proration Cancel Guard
600*4 - - - HL
First Active Active Recovery Frame Adv Circuit Invuln
19 3*3,6 18 -7 - -

Charged Rino. Extra hits and launches.


2A
MBCC F-Nero 2A.png
Damage Red Damage Proration Cancel Guard
300 - - - L
First Active Active Recovery Frame Adv Circuit Invuln
6 4 6 +2 - -

Elbow spike. Hits low. Single hit poke with decent horizontal range.


2B
MBCC C-Nero 2B.png
Damage Red Damage Proration Cancel Guard
350*4 - - - L,HL*3
First Active Active Recovery Frame Adv Circuit Invuln
9 4,2,4,2 15 -2 - -

Centipede. First hit is low. Hits multiple times and may clash at odd moments.


2C
MBCC F-Nero 2C.png
Damage Red Damage Proration Cancel Guard
1100 - - - HL
First Active Active Recovery Frame Adv Circuit Invuln
14 4 18 -4 - -

Needlenose. Neco-Arc Chaos's old 2C. Is chargeable, hits at a curve. Hits mid. This move is much easier to combo with than other version's 2C.


2[C]
MBCC F-Nero 2C.png
Damage Red Damage Proration Cancel Guard
1500 - - - HL
First Active Active Recovery Frame Adv Circuit Invuln
25 4 18 -4 - -

Charged Needlenose. Reaches out far and launches on hit.


6C
MBCC F-Nero 6C.png
Damage Red Damage Proration Cancel Guard
1100 - - - HL
First Active Active Recovery Frame Adv Circuit Invuln
14 8 12 +7 - -

Mouth. Extremely short range, seems to deal quite a bit to the guard bar. Very plus, but is not used as much as charged version.


6[C]
MBCC F-Nero 6C.png
Damage Red Damage Proration Cancel Guard
1400 - - - H
First Active Active Recovery Frame Adv Circuit Invuln
31 8 14 +10 - -

Charged Mouth. Becomes an overhead that gives a great damage combo.


4C
MBCC C-Nero 4C.png
MBCC C-Nero 4C2.png
Damage Red Damage Proration Cancel Guard
800, 600 - - - HL, HLA
First Active Active Recovery Frame Adv Circuit Invuln
10 7(6)4 18 -4 - -

Mantis - The second hit is air-blockable. Has a lot of clash frames and is more safe than it appears.


3C
MBCC F-Nero 3C.png
MBCC F-Nero 3C2.png
Damage Red Damage Proration Cancel Guard
1000, 500 - - - HL
First Active Active Recovery Frame Adv Circuit Invuln
9 3(9)3 20 -17 - -

Bull. Both hits are air-unblockable, hits past the top of the screen. Jump cancellable. Only hit non-airbone opponents once.


j.A
MBCC C-Nero j.A.png
Damage Red Damage Proration Cancel Guard
350 - - - HLA
First Active Active Recovery Frame Adv Circuit Invuln
7 4 12 - - -

Nail. Hits mid. Has good air to ground reach.


j.B
MBCC C-Nero j.B.png
Damage Red Damage Proration Cancel Guard
600, 500 - - - HA
First Active Active Recovery Frame Adv Circuit Invuln
8 3,2 18 - - -

Tentacle. Hits high. Has potential to cross up if you are above the enemy, good horizontal range.


j.C
MBCC C-Nero j.C.png
Damage Red Damage Proration Cancel Guard
300*3, 700 - - - HA
First Active Active Recovery Frame Adv Circuit Invuln
9 2*3,4 22 - - -

Nightmare. Hits high. Four hits. You can combo this move into itself but only three times. (Only counted when the last hit connects) Its reach is very deceptive.

Universal Mechanics

Throw
6 or 4+QA
MBCC Nero Throw.png
Damage Red Damage Proration Cancel Guard
400*9 - - - -
First Active Active Recovery Frame Adv Circuit Invuln
3 1 22 - - -

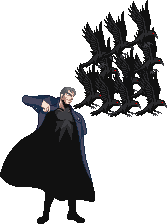
Nero lifts the opponent up and lets his pet birds do some damage. Launches the opponent.


Air Throw
j.6 or j.4+QA
MBCC Nero AirThrow.png
Damage Red Damage Proration Cancel Guard
1200 - - - -
First Active Active Recovery Frame Adv Circuit Invuln
2 1 10 - - -

Nero grabs and punches them to the ground for a bounce.


Guard Bunker
214D
MBCC Nero 214D.png
Damage Red Damage Proration Cancel Guard
500 - - - HLA
First Active Active Recovery Frame Adv Circuit Invuln
26 4 22 -5 - -

Nero steps to the side and throws some shade. Costs 50.0% meter during blockstun.

Special Moves

Chaos Release - Black Wings
236X
MBCC C-Nero 236A.png
MBCC F-Nero 236B.png
MBCC C-Nero 236C.png
A Damage Red Damage Proration Cancel Guard
800 - - - HLA
First Active Active Recovery Frame Adv Circuit Invuln
9 Till Offscreen 39 Total - - -

A crow will travel quickly in a horizontal line. This move has amazing speed but a terrible recovery. This crow may be run underneath by some characters.

B Damage Red Damage Proration Cancel Guard
800 - - - HLA
First Active Active Recovery Frame Adv Circuit Invuln
27~257 Till Offscreen 39 Total - - -

A crow will float in front of Nero acting as a "mine." When approached, the crow will activate and travel horizontally. Goes away if Nero gets hit. One of F-Nero's more abusable moves.

EX Damage Red Damage Proration Cancel Guard
210*13 - - - HLA
First Active Active Recovery Frame Adv Circuit Invuln
3+44 47 17 Total - - -

Costs 100% Meter. Summons many 236B crows. Recovery is deceptively fast and is a great tool to keep opponents in place or to keep them afraid while you try to throw them.


Chaos Exposure - Neuropteran Form
214A/B
MBCC F-Nero 214A.png
A Damage Red Damage Proration Cancel Guard
1200 - - - HL
First Active Active Recovery Frame Adv Circuit Invuln
62 4 39 Total - - -

A snake will travel slowly across the ground. This snake is controlled by negative edge: releasing the A button will "activate" it. Upon being hit the opponent will be launched similar to the B antlion.

B Damage Red Damage Proration Cancel Guard
1200 - - - HL
First Active Active Recovery Frame Adv Circuit Invuln
62 4 39 Total - - -

A snake will travel quickly across the ground. This snake automatically activates when it is near an opponent. Untechable on counter hit.


Chaos Exposure - Reptile Form
214C
MBCC F-Nero 214C.png
Damage Red Damage Proration Cancel Guard
2000 - - - HL
First Active Active Recovery Frame Adv Circuit Invuln
7+58 4 40 Total - - -

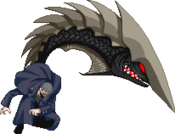
Costs 100% Meter. Summons a gigantic crocodile that is air-unblockable and takes a while to come out. Don't use it.


Chaos Exposure - Premature Egg
421X
MBCC F-Nero 421X.png
A Damage Red Damage Proration Cancel Guard
300*2 - - - HLA
First Active Active Recovery Frame Adv Circuit Invuln
13 20(18)[2(8~10)2]*N 47 Total - - -

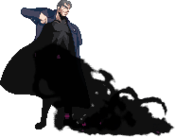
A dark cloud will appear in front of Nero before traveling behind him for a half screen distance. It will then travel back to where you were standing when you summoned it and then disappear.

B Damage Red Damage Proration Cancel Guard
500*N - - - HLA
First Active Active Recovery Frame Adv Circuit Invuln
48 [2(8~10)2]*N 63 Total - - -

A dark cloud will go in front of Nero and travel across the ground until it hits the edge of the screen where it will disappear. This version of Unripe Egg will not hit upon summoning and will not return.

EX Damage Red Damage Proration Cancel Guard
400*2 - - - HLA
First Active Active Recovery Frame Adv Circuit Invuln
7+40 [2(8~10)2]*N 63 Total - - -

A dark cloud will travel back and forth across the ground three times. This version of Unripe Egg will disappear upon Nero getting hit. The startup of this move is high but it is a useful tool to prevent an opponent from going anywhere.


Chaos Exposure - Compound-Eye Swarm
63214C
MBCC F-Nero 63214C.png
Damage Red Damage Proration Cancel Guard
450*6 - - - HLA
First Active Active Recovery Frame Adv Circuit Invuln
7+8 79 91 total - - -

Costs 100% meter. Nero summons a swarm of bees to attack opponents directly in front of him. Can be used as a reversal, hits four times. If the opponents move is fast enough they can block the bees after you summon them. Is safe on block, mostly.

Arc Drive

Armament 999
41236C
MBCC C-Nero 41236C.png
Damage Red Damage Proration Cancel Guard
3500 - - - -
First Active Active Recovery Frame Adv Circuit Invuln
2+60 8 81 - - -

Can only be used in Max or Heat. Lengthy startup, but unblockable and unshieldable.

Another Arc Drive

Armament 999
41236C
MBCC C-Nero 41236C.png
Damage Red Damage Proration Cancel Guard
3000*2 - - - -
First Active Active Recovery Frame Adv Circuit Invuln
2+40 Till edge of screen (78) Till edge of screen 86 - - -

Improved version. Startup is a bit faster, and Chaos comes back around for a second tackle.

Last Arc

Number of the Beast
MBCC C-Nero LastArc.png
Damage Red Damage Proration Cancel Guard
700*15 - - - -
First Active Active Recovery Frame Adv Circuit Invuln
1+6 100 39 - - -

Can be standing or low shield. The laser that Nero fires is unblockable.

MBAACC Navigation

General
FAQ
Advanced
AokoCrescentHalfFull
TohnoCrescentHalfFull
HimeCrescentHalfFull
NanayaCrescentHalfFull
KoumaCrescentHalfFull
MiyakoCrescentHalfFull
CielCrescentHalfFull
SionCrescentHalfFull
RiesbyfeCrescentHalfFull
V.SionCrescentHalfFull
WarachiaCrescentHalfFull
RoaCrescentHalfFull
MaidsCrescentHalfFull
AkihaCrescentHalfFull
ArcueidCrescentHalfFull
Powered CielCrescentHalfFull
Red ArcueidCrescentHalfFull
V.AkihaCrescentHalfFull
Mech-HisuiCrescentHalfFull
SeifukuCrescentHalfFull
SatsukiCrescentHalfFull
LenCrescentHalfFull
RyougiCrescentHalfFull
White LenCrescentHalfFull
NeroCrescentHalfFull
NACCrescentHalfFull
Koha-MechCrescentHalfFull
HisuiCrescentHalfFull
Neco-ArcCrescentHalfFull
KohakuCrescentHalfFull
Neco-MechCrescentHalfFull