Melty Blood/MBAACC/Akiha Tohno (Seifuku)/Crescent Moon

From Mizuumi Wiki
Jump to navigation Jump to search

Additional Resources

Older C-seifuku guide
Match Video Database

Players to watch/ask

JP:

  • Sola
  • Niiya
  • Kou


NA:

  • Cadenza - found in Main melty discord server


Overview

Strengths Weaknesses
*Strengths
  • Stable match-up spread
  • Great ground mobility
  • Great specials
  • Good normals
  • one of the lows on block 2A
  • four lows
  • powerful rewards from neutral
  • Fastest jump start up among the casts
  • Any hit leads to the same combo that corner carries
  • Had a command grab that also corner carries
  • Only need to learn one combo to get started
  • Stable setplay in the corner
  • Paradigm shifts from defense to offense is near seamless
Weaknesses
  • No repeating A normals
  • Pressure can be a bit linear at times
  • No meterless reversal, except for heat the other reversals are poor to use most of the times.
  • A bit weird to confirm from clipping jump outs with normals
  • Abare options are a bit on the slow side as her 2A is active on frame 6

Introducing C-seifuku Akiha, One of the top tiers to exist in MBAACC. The character by nature can be played however you would like, but rewards those who gravitate towards a defensive zoning style. One of the main reasons is that she has the incredible tool at her fingertips(literally) Called "Soko De". a move that materializes a flame pillar that is AUB and what's more is that it can be jump cancelled on Whiff, Hit, and block. Its a move that minimizes and sort of risk on C-seifuku's part to great lengths. With that in mind, it means that she can fish for a hit with j214A/B and then can corner carry off of any stray hit at any point in time. She quickly turns from a zoning, defensive styled character to an oki setplay in the corner. She has a total of 4 lows that all have to be correctly shielded and one of the lows is +1. Her normals overall are great as 2C is a decent poke against hyper aggressive players that dash in mindlessly, j.A is a multipurpose tool for dealing with foes that are in A2A and overall just an excellent rising normal option, j.B is an excellent move to use if someone is clearly above you where your specials won't reach and is also good as a rising button to fish for counter hits if you feel the opponent is trying to approach you from the air.

Sadly(or thankfully depending on what side you're on) her main weakness is that while j214A/B is powerful if the opponent knows the vectors in how she will apply the special it becomes more of a detriment if you use it too liberally without paying attention to the screen. SO while your particular special is that powerful that it can quickly turns the tables in your favor, blade as any, is better when its in its sheath. if you can get over the quirk of the char's lack of repeatable A normals, the character is a robust, strong top tier that has very little problems with answering to the issues that the cast throws at her.

General Gameplan

Her gameplan is very straight forward. She bides her time being defensive in neutral and poking with her special move j214B and otherwise obstructing the opponent's path to get to her. That's not to say she doesn't have up close to fight either. j.A is a very good button for using an A2A and as a rising button in general for CH fishing. It can also set up air tick throws and on Non counter hit goes into her combo sequence. It is important to learn to TKj214X, when to do it and when to not use j214 but j236B as those two specials combined in your gameplan really makes fighting Csei a nightmare for a lot of characters.


Neutral

In neutral, you have plenty of tools at your disposal. Lets go over the important ones that C-seifuku will use a lot.

j214A/B

Soko de, a versatile special that allows for incredible + frames to start your offense. It is also AUB and jump cancellable on whiff, block, hit. In neutral though you will primarily use j214B and think of it like its fishing. if j214B catches you can reel in your reward, a combo from halfscreen! This is all without actually having to interact with opponent up close a very strong special.

j214A is generally used whenever you need to cover your landing after a double jump use or to get more + frames in your pressure. one thing to note is the one important thing to note

If you used up your two jumps then j214X, you are in helpless state until you land

Generally the logic behind using j214B is using it as the opponent either committed to a special that is grounded, for example ciel's 214X or when the opponent is approaching from fullscreen to halfscreen range. Times you can also use j214B is when the opponent is retreating via backdash or air backdash. When using j214B its important to know when to TK it or not. TK214B allows for a safer poke in neutral and you are not as prone to predictable placements as much. Of course when you land a hit you can then confirm and corner carry into setplay!

As powerful as that move is you may want to alternate your choices in the air. such as using j236B, a horizontal ribbon that is perfect to balance out using j214B. Think of it like this in a lot of match ups where characters thrive off of playing the ground game, use j214B, but there are characters with privileged air options that's where your j236B comes into play. its essential that you learn the importance of j236B that while it doesn't grant a combo like j214X, it does make it harder to approach C-seifuku from the air and is safer to throw out if you noticed your opponent's approaches are becoming aggressive. If they are a bit too close for j236B to use safely, you can also use rising j.A and overall use it whenever you scouting in the air other than using j214B whenever someone is approaching predictably. Converting from j.A counterhit is a common thing as well for C.Seifuku and also corner carries.

Now that isn't to say that she doesn't have good ground game either! She is incredibly fast given the nature of her dash and if you feel as though the opponent is hesitant or even in some match ups like nero or c roa you can then quickly switch from a defensive play style into an aggressive one using dash 5A into combo or dash jump j.A CH or dash jump j.AAAAAAA for an air tick throw set up. If someone is also approaching from the air you can attempt to do a dash under 2C.

Play according by the match up or player, these are just a few common rule of thumb to play by.


Pressure

For the basics, C-seifuku's pressure isn't like your typical melty blood character in that you can utilize whiffs to enforce frame traps or throw off the offense pattern, however what you do have at your disposal is j214A, 214A, 2A,6B and 63214C when used properly is really really strong. starting with this basic string here.

  • 5A 5B 5C 2C 2A

2A is +1 and if you let it fully recover it frame traps into either 2B or 6B and you can loop it by doing 6B/2B 5C 2C 2A X N this is just one of the basic formats that teaches you that 2A is really really valuable so don't start your pressure with 2A. When doing this basic string on a non ex guard scenario you may find that people will either mash normals after 2A into 6B/2B which is a counter hit and you get to do your combo, however there are people that will jump to make conversions harder there are two ways to deter this. People usually jump because they don't want to deal with 63214C, her command grab. here's one idea you can do

  • 5A 5B 6B 2A 214A

214A is an easy check for catching jumpouts and you can convert by doing 6B after to go into the same air combo sequences listed in Normal combos. Its -1 and frametraps to counter hit mashing as well. you can continue pressure generally by hitting 6B on block since command normals have a buffer or you can jump j214A if you think their mash is committed and faster than your 6B for continued pressure. Very important special in her arsenal to use along with the following two below. Another idea if that if you know they are eager to jump you can do delay jump if you are doing 6B after your 2A fully recovers in your pressure. the idea is to delay jumping to visually confirm if they are airborne or on the ground. Not the easiest thing to do, but if you can do this it becomes just another opportunity to get damage when the opponent gets hasty to escape

j214A This special is really good when you established the fear of catching jump outs and getting hit by frame traps and staggers. so say you do this as your blockstring

  • 5A (slight delay) 5B (slight delay) 2A

This is a chance to do TK214A. its AUB and on block you are really plus that you can do the following

  • j214A dj airdash j.A, 63214C
  • j214A dj airdash j.C, 5A
  • j214A dj airdash j.[C]j.B slight delay j.A (fuzzy overhead mix up)
  • j214A dj, delay j214A
  • j214A dj, empty jump command grab
  • j214A dj, j.C j214A

If you think the opponent is respectful of your pressure you can try to fit in command grab either have the last bullet point(just have to wait a bit) or after a 2A. Its important to note that her pressure pushes her out of command grab range easily by any B normal so practically you will command grab with having having them block j214A or 2A or during okizeme which will be covered shortly. The idea in her pressure is to abuse her 2A being +1 and once that is established you can then use j214A for mix up opportunities. 63214C makes people try to fuzzy jump and 214A and 6B beats fuzzy jump.

While Csei's pressure is a bit strange from the cast and a bit linear in terms of variety its important to stagger your B normals, its also ok to stop at 5B since its -1 and has a long special/normal cancel window. since people are looking for Csei go to into C normals you can sneak in a TK214A if you let it fully recover or you can go into 2A, let it fully recover and then continue with either 2B or 6B depending on what you think is fit for the course. here's some blockstrings to look at and try out. Be sure to lab out some others as in melty its always good to do something new, you can also incorporate 5[C] if you think the opponent is really content with downback but do so sparingly since it can be blocked on reaction, shield on reaction or dodged. there is also 236C which makes you +9, very rarely is it used for pressure extensions since 5C moves her forward that it goes into 2A a majority of the time even against ex guard but it is an option. Other ways to add onto your pressure is not immediately igniting pit and activating it during your blockstrings for a meterless way and more efficient way to remain plus to do more pressure on the opponent, that will be covered more thoroughly in the okizeme portion.

  • 5A (delay) 5B (delay) 5C, 2A, 6B delay 5C 2C 2A
  • 5A 5B (delay) 2A, 2C (delay) 5C 214A
  • 5A 5B, (TK 214A into airdash options above)
  • 5A 5B (slight delay) 2B, (slight delay) 6B, 5C 2C 2A, (TK j214A or dash 63214C)
  • 5A/2A, (delay) 63214C (have to be up close for this to work)
  • 5A (slight delay) 5B, 5C 2A, 214A, 6B/2B or j214A
  • 5A/2A 5B 2A 2C (delay) 5C 236C, dash 5A

Its very important to establish your command throw threat as listed in bolded because if you do then the opponent will have more incentive to mash or jump out which is where 6B will come into play as will 214A.


Okizeme

So after j.[C] ender j22A/B/C is set you have quite a bit of options but the most common option that people immediately pick is to ignite it as a meaty. Its a safe way to do your oki since the opponent cannot do much except for either character specific tactics or a specific moon tactic (ex shield jump, ex shield, double jump). Here are your options for oki. j22A/B uncharged ignite is only one pillar while charged is two. Usually you want to have it charged.

J22[A/B] charged ignite

  • empty sj 5A
  • dash 5[C] 2C 6C 214A
  • dash 5{C} 2A 2C 6C 214A
  • sj delay airdash j.C
  • sj j.C airdash j.C
  • sj j.C j.B
  • sj j.[C] j.B slight delay j.A(careful doing this on smaller characters and Pciel's hitboxes, do the above for more stable results)
  • SJ j.C, 5A
  • dash empty jump command grab.

these are the list of oki options you have at your disposal for j22A/B. You can quickly inspect how your opponent not only deal with pit but also with these mixups listed. if they are good at blocking high/lows then mix in command grabs. if you delay the empty jump command grab with empty jump 5A it becomes harder for the opponent to fuzzy jump it nor can they mash out of it as easily.

j22C Ex pit when ignited non charged gives two pillar ticks while charged gives 3. in situations you want to recover health and keep pressure or do a 5[C] mix up you end a combo in j22C then charge ignite it by doing j22[A/B/C] then immediately input the command for heat when you land and you can either 5[C] immediately or dash 5A into either command grab or staggers. There is one more mix up that you can do

  • sj, double jump drift airdash j.C or land 5A or j.A airdash j.C

If you know people get hit by pit on wake up you do this

  • Super jump, Neutral dj or super double jump forward j.[C]
  • neutral dj: j.[C], j.A(whiff) j214A, TK j214A dj j.C, j.B j.C dj j.[C] j22A/C
  • Super double jump: j.[C] otg 214A, 6B, j.B j.C dj j.[C] j22A/C or j214C(usually on small characters) j.B j.C dj j.[C] j22A/B/C

Now these are examples to use whenever you ignite pit, however you don't always have to ignite pit. you can use it to remain plus in blockstrings and enforce the threat of Command grab, 5A into command grab, or 5A into staggers. In order to keep the pit set and remain advantageous you can do the following after j22X is set

  • j22X(sets pit), airdash j214A Air throw(whiff)
  • j.[C], slight delay j22x(pit set), airdash j.[C] j.B slight delay j.A
  • j.[C], slight delay j22x(pit set), airdash j.C(safejumps), 5A
  • j22X, j214B, TK j214B, dj airdash j.A command grab or 5A
  • j22X, j214B, dash 5A into command grab or stagger
  • j22X, 5[C] 2C 6C (corner combo route)
  • j22x 5{C} 2C 6C (corner combo route)
  • j22x dash 5A into command grab or stagger 5B
  • j22x dash j214A(to beat mashing heat or normals)

The benefit of not igniting pit immediately is that if you open up someone and have pit set up then you can use corner combo routes listed that use pit ignition in your combos. So not only does it throw off the opponent by not immediately igniting the pit but you get a reward for more damage for opening up people and using the pit ignition during your combo route.

Additional Notes'

the following ignites pit, 22X and j22X, Shield, and command throw. The first two are straight forward to understand, the other two are a bit more specific.

Shield

Activates any of pits set. the reason you would use this is after a j22A/B/C is set and you chose to not ignite, and the opponent successfully mashed out and air throw back into the corner with the pit underneath you. You can wake up crouch shield to ignite the pit and if the opponent pressed a button its a counter hit and also is your combo although its more likely for the combo to happen if you crouch shield A or B pit set since its a one tick while j22C will be two tick.

Command grab

when the opponent is directly under the pit and is command thrown, it ignites the pit and allows for a side switch combo to keep the corner, refer to corner combos for that route. The thing is, unless its directly below them then it will never ignite which is why j22C will guarantee ignition of the pit on even wara and all of the casts except ryougi which never activates the pit when you command throw her with any pit, even j22C. In short its by the location of the opponent and the pit when they get command grab. J22A/B works on the cast if they are directly in the corner except for ryougi and wara. For wara specifically you need to use j22C which generally is preferred in a lot of cases anyways for this little info down below.

Pit ignition notes

Pit ignition other than granting stable, safe oki also has additional benefits. One of them covered earlier is that you get more damage meterlessly tacked on to your combo with the correct routing. The second most important thing is that she gains meter for having you block the pit ignition whether its EX, or A/B set. This means C-sei is never really starved for meter since she gains it from making you block pit ignition among other things. That's why most of the time if you are at 200% and you spent 100% for ex pit, chances are you will end up at 200% again. There's very few reasons why you would go for j22A/B unless you wanted the optimal combo involving it. Other times you are forced to do j22A/B because you used heat to escape pressure. Otherwise feel free to use j22C whenever you can, especially if you're in max.

With that in mind, experiment with the knowledge here and apply your own logic!

Defense

Defense wise like many melty characters you're better off blocking, ex guarding and jumping but let's list the following options you have

  • dodge
  • heat
  • Ex shield
  • Backdash
  • 623C
  • Mash


Going from bottom to top, mashing can be done if enough space is allowed, beware that her 2A is active on the 6th frame and is not repeatable. This basically means you're more prone to getting IAD reset because you have to chain into a B normal instead of other characters being able to 2AA before going into a B normal where they can do this and recover in time from an IAD reset, Csei cannot. 623C is a common option among Csei players that just started melty and want out the reason why 623C isn't particularly good is that it loses to throws since its strike invuln and post flash its so slow that allows all of the cast to meaty 2A and then 5[D] on reaction. On block its punishable and after shielding its punishable. Backdash is fairly decent midscreen but can be OS'D while backdashing in the corner is very specific to the situation. Ex shield does give the most reward and can be good to use if someone is predictably doing 2A meaties or likes doing safe jumps as C moon characters ruin safe jumps that characters have, but don't get used to it too often. Heat is a very good defensive maneuver, but is highly expensive. While csei can operate without meter it never hurts to have some so you can end combos in j22C whenever possible. Dodge is very specific but generally used to dodge B or C normals. The point I do want to make is that Csei is 1f faster than any of the cast when forward jumping. That makes block and jumping when the opportunity arises really strong. if they are looking to Air throw you cause you're jumping you can stay on the ground and dash out or rising j.A to CH them if need be. As long as you ex guard and jump accordingly you will be fine as Csei since she doesn't have any particularly good reversals except for heat

Combos

Starters

Condition Notation Damage
vs V.Sion
Notes
Normal starter, grounded opponent,
  • 5A 5B 6B 2C 6C 214A
???


Meter Gained:  ??? Meter Given (vs C-Moon): ???
A basic starter for C-seifuku. if you don't remember anything else
Normal starter, grounded opponent,
  • 5A 5B (2B) 6B 6C 5C 214A, 5C
???


Meter Gained:  ??? Meter Given (vs C-Moon): ???
this is the optimal starter, more common if you land a jump in j.C.
Normal starter, grounded opponent,
  • 214A 6B
???


Meter Gained:  ??? Meter Given (vs C-Moon): ???
This is used whenever you frame trap with 214A in your pressure
Command grab starter, grounded opponent,
  • 63214C
???


Meter Gained:  ??? Meter Given (vs C-Moon): ???
Command grab starter that leads into the same combo.
Normal starter, grounded opponent,
  • j214B Airdash j.C/j.[C]
???


Meter Gained:  ??? Meter Given (vs C-Moon): ???
This is the conversion whenever j214B. Depending on the height at which they got hit by j214B, you need to use j.[C] to guarantee the conversion. refer to OTG pick ups in how to continue the combo.
Normal starter, grounded opponent,
  • j214A double jump j.C/j.[C]
???


Meter Gained:  ??? Meter Given (vs C-Moon): ???
This is the conversion whenever j214A. Depending on the height at which they got hit by j214A, you need to use j.[C] to guarantee the conversion. refer to OTG pick ups in how to continue the combo.
Normal starter, grounded opponent,
  • j214B/A air throw(whiff) 6B
???


Meter Gained:  ??? Meter Given (vs C-Moon): ???
This is the conversion whenever you use your two jumps and hit someone with j214A or j214B. be warned if you whiff j214A/B and air throw whiffed you are now in counter hit state and almost guaranteed to be punished.
Normal starter, grounded opponent,
  • 5[C]
???


Meter Gained:  ??? Meter Given (vs C-Moon): ???
Overhead. typically used in the corner but can be used midscreen.

Enders

Condition Notation Damage
vs V.Sion
Notes
Ender
  • j.[C] j22A/B/C
???


Meter Gained:  ??? Meter Given (vs C-Moon): ???
The #1 ender that all C-sei players should look to do.
Ender
  • j.B j.C dj j.B j.C AT
???


Meter Gained:  ??? Meter Given (vs C-Moon): ???
Not a common ender but it does give more damage.
Ender
  • j.B j.C dj j.B j.C j236C
???


Meter Gained:  ??? Meter Given (vs C-Moon): ???
Only use this ender if you need to kill, does the most damage

OTG Pick ups

Condition Notation Damage
vs V.Sion
Notes
OTG
  • 214A
???


Meter Gained:  ??? Meter Given (vs C-Moon): ???
The only otg pick up you need.
OTG
  • j214C
???


Meter Gained:  ??? Meter Given (vs C-Moon): ???
Another OTG pickup if in the event you are too far in the corner for 214A to connect. Use if you're completely unsure of the spacing after j.[C] j.A (whiff).

Normal Combos

In parenthesis for the dj. you dj8 whenever you're in the corner in order for the combos to work

Condition Notation Damage
vs V.Sion
Notes
Normal starter, grounded opponent,
  • 5A 5B 6B 2C 6C 214A j.B j.C dj(8) j.[C] j.A(whiff), j214A, dash 214A, j.B j.C dj.[C], j22A/B/C
???


Meter Gained:  ??? Meter Given (vs C-Moon): ???
This is the basic version of the universal combo that you can use. later on you may want to use the 2nd or 3rd combo but if you are unsure of your abilities then use this one
Normal starter, grounded opponent,
  • 5A 5B 6B 2C 6C 214A j.B j.C dj(8) j.[C] j.A(whiff), j214A, TK j214A (double jump) j.C, j.B j.C dj j.[C], j22A/B/C
???


Meter Gained:  ??? Meter Given (vs C-Moon): ???
The primary combo you should be using as it is the most stable one by far.
Normal starter, grounded opponent,
  • 5A 5B 6B 2C 6C 214A j.B j.C dj(8) j.[C] j.A(whiff), j214A, TK j214A (double jump) dj j.[C], j22C
???


Meter Gained:  ??? Meter Given (vs C-Moon): ???
This combo route is used if you are close to exiting max. Gives ex pit and a meaty with j214A.
Normal starter, grounded opponent,
  • 5A 5B 6B 2C 6C 214A j.B j.C dj(8) j.[C] j.A(whiff), j214A, TK j214A dj airdash j.[C] j.AAB, (rejump), j.A j.C dj j.[C], j22A/B/C
???


Meter Gained:  ??? Meter Given (vs C-Moon): ???
The optimal combo but not for damage. its for meter gain and 100% guaranteed corner carry, if you feel as though you can do this 100% of the time then by all means there are some adjustments you may have to do depending on when your height for j.[C] j.AAB and character's aerial hitboxes.
Normal starter, grounded opponent,
  • 5A 5B 6B 6C 5C 214A 5C j.A j.C airdash j.C dj(8) j.[C] j.A(whiff), j214A, TK j214A (double jump) j.C, j.B j.C dj j.[C], j22A/B/C
???


Meter Gained:  ??? Meter Given (vs C-Moon): ???
Same combo with the optimal starter
Normal starter, grounded opponent,
  • 63214C 5A 5B 6B 2C 6C 214A j.B j.C dj(8) j.[C] j.A(whiff), j214A, TK j214A (double jump) j.C, j.B j.C dj j.[C], j22A/B/C
???


Meter Gained:  ??? Meter Given (vs C-Moon): ???
Command grab combo
Normal starter, grounded opponent,
  • j214B Airdash j.C, (rejump), j.B j.C dj(8) j.[C] j.A(whiff), j214A, TK j214A dj j.C, (rejump) j.B j.C dj j.[C] j22A/B/C
???


Meter Gained:  ??? Meter Given (vs C-Moon): ???
your confirm for j214A or j214B, for j214A please refer to the Starters for what to do if you need but instead of doing airdash, you just double jump into the same sequence. At certain heights this route will not work. Below is the other route
Normal starter, grounded opponent,
  • j214B Airdash j.[C], (land), 214A 6B,j.B j.C dj j.[C] j22A/B/C
???


Meter Gained:  ??? Meter Given (vs C-Moon): ???
your confirm for j214A or j214B, for j214A if they at a height where the first route would drop
Normal starter, grounded opponent,
  • j214B Airdash j.[C], j.A(whiff), j214A, TK 214A dj j.C, j.A j.C dj j.[C]
???


Meter Gained:  ??? Meter Given (vs C-Moon): ???
If you're a lot higher during your j.[C] you can now whiff j.A to get more soko de in your combos and get more damage and meter. this is the optimal route if the situation calls for it.
Normal starter, grounded opponent,
  • j214A/B, Air throw (whiff), 6B/5C, j.B j.C dj(8) j.[C] j.A(whiff), j214A, TK j214A dj j.C, (rejump) j.B j.C dj j.[C] j22A/B/C
???


Meter Gained:  ??? Meter Given (vs C-Moon): ???
This is whenever you caught someone after using your double jump. Air throw whiff is to land faster to then press 6B or 5C to convert
Overhead starter, grounded opponent,
  • 5[C] 2C 6C (slight delay) (j.A) j.C dj j.[C] j.A(whiff), j214A, TK j214A dj j.C, (rejump) j.B j.C dj j.[C] j22A/B/C
???


Meter Gained:  ??? Meter Given (vs C-Moon): ???
if you manage to land 5[C] overhead midscreen then try this combo. does not work on ryougi. for miyako instead use j.B in place of j.A
Normal starter, grounded opponent,
  • 5[C] 2C (jump forward) j214A dj j.C, j.B j.C dj j.[C]
???


Meter Gained:  ??? Meter Given (vs C-Moon): ???
Easier combo, not as much corner carry or damage but is universal.

Corner Combos

some requires pit already set

Condition Notation Damage
vs V.Sion
Notes
Normal starter, grounded opponent, 100% required
  • 5A 5B 6B 5C 236C 6B 5C 2B 2C 6C 214A j.B j.C dj8 j.[C] j.A(whiff) j214A TK214A j.[C], j22A/C
???


Meter Gained:  ??? Meter Given (vs C-Moon): ???
The corner combo that you do if you want to front load damage.
Normal starter, grounded opponent, Needs j22A/B/C set
  • 5A 5B 6B 5C 2C 6C 22A/B/C(Pit activation), j9[C] j214A dj j.C, j.B j.C dj j.[C] j22A/B/C
???


Meter Gained:  ??? Meter Given (vs C-Moon): ???
The corner combo to do if you have a pit set down. Below is the optimal extension if you feel your execution is pretty up to par for the course
Normal starter, grounded opponent, Needs j22A/B set
  • 5A 5B 6B 5C 2C 6C 214A, j.B j.C dj j.[C] j22[X](ignite), j.C, (rejump) j9[C] j214A, dj, j.C, (rejump) j.B j.C dj j.[C] j22A/C
???


Meter Gained:  ??? Meter Given (vs C-Moon): ???
This corner combo is one of her highest damaging ones. Absolutely needs j.22A/B set since their charge ignite hits OTG properly while j22C does not.
Normal starter, grounded opponent, Needs j22A/B/C set
  • 5A 5B 6B 5C 2C 6C 22A/B/C(Pit activation), j9[C] j214A dj j.C, j.A j.B j.C dj j.[C] delay j214A, Airthrow (whiff), 5A 5C, j.B j.C dj j.[C]
???


Meter Gained:  ??? Meter Given (vs C-Moon): ???
The corner combo optimal route
Overhead starter, grounded opponent, Needs j22A/B/C set
  • 5[C] 2C 6C 22A/B/C(Pit activation), j9[C] j214A dj j.C, j.A j.B j.C dj j.[C] delay j214A, Airthrow (whiff), 5A 5C, j.B j.C dj j.[C]
???


Meter Gained:  ??? Meter Given (vs C-Moon): ???
5[C] combo. this is the optimal route same as the two above. you can choose to do the easier version if you're not confident in the airthrow whiff extension.
Command grab starter, grounded opponent, Needs j22A/B/C set
  • 63214C, (pit activates) j.[C] j214B (dj airdash) j.C, j.B j.C dj j.[C] j22B/C
???


Meter Gained:  ??? Meter Given (vs C-Moon): ???
Command grab route that keeps the corner

Normal Moves

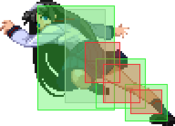
2A
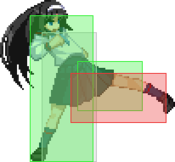
CSeifuku2a.png
Damage Red Damage Proration Cancel Guard
350 200 75% - L
First Active Active Recovery Frame Adv Circuit Invuln
6 4 9 1 3.5% -

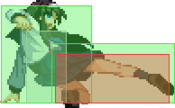
Decent low poke. Unlike most 2As, cannot be cancelled into itself, meaning you can't spam this move a couple of times to hitconfirm. The only normal that's plus on block


5A
CSeifuku5a.png
Damage Red Damage Proration Cancel Guard
350 200 75% - L
First Active Active Recovery Frame Adv Circuit Invuln
5 4 12 -4 3.5% -

Another low poke very similar to 2A. Hits low (!).


2B
CSeifuku2b.png
Damage Red Damage Proration Cancel Guard
600 350 85% - HL
First Active Active Recovery Frame Adv Circuit Invuln
8 4 16 -5 6.0% -

Hits mid and moves forward. Use in combos and pressure strings.


5B
CSeifuku5b.png
Damage Red Damage Proration Cancel Guard
600 300 80% - L
First Active Active Recovery Frame Adv Circuit Invuln
8 4 12 1 6.0% -

Hits low. Good poke after j.C for 50/50 mixup.


6B
CSeifuku6b.png
Damage Red Damage Proration Cancel Guard
- - - - -
First Active Active Recovery Frame Adv Circuit Invuln
8 4 16 -5 - -

Hits mid. A good poke with more range than 5B. Good in pressure to stuff jump out attempts.


2C
CSeifuku2c.png
Damage Red Damage Proration Cancel Guard
850 500 55% - L
First Active Active Recovery Frame Adv Circuit Invuln
11 6 14 -2 8.5% -

Standard sweep. Good range, decent speed. Can cancel into 6C. If the move isn't canceled S.Akiha retreats and is pushed back quite a bit making the safe on block


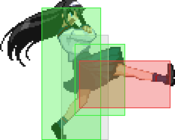
5C
CSeifuku5c.png
Damage Red Damage Proration Cancel Guard
800 500 90% - HL
First Active Active Recovery Frame Adv Circuit Invuln
15 4 20 -6 8.0% -

Forward kick that hits mid. Good ground zoning tool and combo filler. Can be charged to become a wall-slamming overhead instead. Forward kick that hits mid. Good ground zoning tool and combo filler. Can be charged to become a wall-slamming overhead instead. The overhead is fairly slow, but the move can be half-charged to hit mid, which you can then cancel into a quick low. Reverse beating into 5A or a similar low is very effective.


5[C]
CSeifukuBE5c.png
Damage Red Damage Proration Cancel Guard
1100 700 60% - H
First Active Active Recovery Frame Adv Circuit Invuln
30 4 19 -9 11.0% -

The charged version has a little more disjoint.


6C
CSeifuku6c.png
Damage Red Damage Proration Cancel Guard
- - - - -
First Active Active Recovery Frame Adv Circuit Invuln
10 4 23 -10 - -

Very similar to 5C, but with slightly more range. Do not cancel this into 5C, as this will reverse beat.


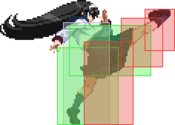
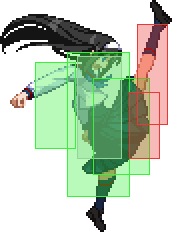
j.A
CSeifukuja.png
Damage Red Damage Proration Cancel Guard
300 200 75% - HL
First Active Active Recovery Frame Adv Circuit Invuln
6 4 - - 3.0% -

Short range downward air kick. Used for air counter hitting, air to ground, and whiff cancelling. The move cancels into itself on hit and block, though it hits mid like many j.As


j.B
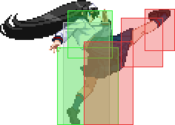
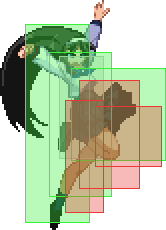
CSeifukujb.png
Damage Red Damage Proration Cancel Guard
600 350 90% - H
First Active Active Recovery Frame Adv Circuit Invuln
7 5 - - 6.0% -

Upward aerial kick. Great for hitting people above you in the air, but loses to many downward air attacks.


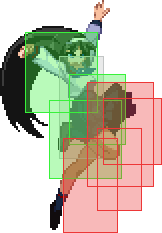
j.C
CSeifukujc.png
Damage Red Damage Proration Cancel Guard
800 500 85% - H
First Active Active Recovery Frame Adv Circuit Invuln
10 4 - - 8.0% -

Strong downward jump attack. Crosses up, so great for jump-ins.


j.[C]
CSeifukuBEjc.png
Damage Red Damage Proration Cancel Guard
1200 1000 85% - H
First Active Active Recovery Frame Adv Circuit Invuln
18 7 - - 12.0% -

The charged version of this move hits with an untechable groundslams. This gives S.Akiha time to set down a 22X trap. The charged version also raises S.Akiha after it hits or is blocked, which can let S.Akiha which opens up more mixup potential for her. For example: Reverse beating into j.B will work. The charged version also has a little more disjoint.

Special Moves

Suigetsu wo Ugatsu「水月を穿つ」 - 22ABC
  • (Description) - Akiha summons a flame pit. Her flame pits last for 10 seconds and are not cancelled when she is hit. Input 22x/j.22x while a pit is active to ignite flame pillars from the pits. Flame pillars are capable of OTG relaunching. Note that her flamepits are also automatically ignited when she command throws (63214c) the opponent while standing above a pit.
  • (A version) - Akiha summons a flame pit where she is standing and hops backwards. Sends 1 pillar when ignited uncharged, 2 pillars when charged. Use this version when in the corner.
  • (B version) - Akiha summons a flame pit that moves about two characters forwards. Sends 1 pillar when ignited uncharged, 2 pillars when charged.
  • (EX version) - Akiha summons a flame pit that follows the opponent around. Sends 2 pillars when ignited uncharged, 3 pillars when charged. Use this one the most if you have the meter.
Tori wo Uzukiru「鳥を渦切る」 - 236ABC
  • (Description) - Akiha calls forth a fiery spell that extends forward. Similar to V.Akiha's flametongue, but faster and with more recovery. Air unblockable, so it can catch badly positioned jump-ins, or even cause a favorable Counter Hit trade (not always, as it hits several times).
  • (A version) - Very fast flametongue that can be used as a blockstring ender or zoning tool. Hits far and wide, but leaves you in a long uncancellable recovery state. Don't overuse, if the opponent reads it and jumps over it you'll get punished.
  • (B version) - Slower version. No reason to ever use this, might as well delay the A version.
  • (EX version) - Typical EX version. Faster, more damage, and safe if you're close. Can be combo'd into 6B on hit. OTG relaunches.
Tsuki ni Egaku「月に画く」 - 623ABC
  • (Description) - Akiha casts a spike of fire into the air at a forward angle. Air unblockable.
  • (A version) - Fast startup, long recovery. Somewhat useful as anti air, but has a weird hitbox and long recovery. Useful after a dash to catch jumpers and large characters (such as Nero summoning stuff). It does only 1 hit, so can be combo'd after on Counter Hit.
  • (B version) - Slower version. Can be used in combos, not much reason to otherwise.
  • (EX version) - This version has invulnerability, and can be used as a reversal. However, grab beats it on wakeup, and it's very easily avoidable if read. Not as good as real DPs, but hits very far and high.
 ? - J.623ABC


Kemono wo Seisuru「獣を征する」 - 214ABC
  • (Description) - Akiha points forward and summons a flame pillar. Pillars are air unblockable and are capable of OTG relaunching.
  • (A version) - Akiha summons a pillar right in front of her. Not very safe, don't rely on this too much outside of a combo.
  • (B version) - Akiha summons a pillar mid-screen. This is a pretty handy special to use for zoning.
  • (EX version) - Akiha summons a flame pillar right on the opponent. Appears quite fast enough that you can even punish heat activations. The pillar has a larger vertical hitbox than the A/B versions, making this a good full-screen punisher.
 ? - J.214ABC
  • (Description) - Aerial version of 214. Arguably her best special, as it can be jumpcancelled on whiff. Landing cancels the recovery, allowing you to combo after hitting with it low to the ground. Be wary of the opponent though, you're vulnerable during startup.
  • (A version) - Same as 214A, but cast from the air. Used a lot in combos, pressure, and zoning. TK J.214A is a great tool in many situations.
  • (B version) - Similar to J.214A, but hits further ahead. Amazing for catching characters using projectiles or summons.
  • (EX version) - Same as 214C. Use it to punish heat and people in the air with no movement options left.
Suigetsu wo Ugatsu「水月を穿つ」 - J22ABC
  • (Description) - An air version of her 22 series. Akiha summons a flame pit on the ground that can be ignited with either 22x or j.22x. Note that Akiha remains in the air while igniting her flame pits.
  • (A version) - Akiha summons a flame pit directly below her and moves back. Sends 1 pillar when ignited uncharged, 2 pillars when charged. You can jump, airdash or even ignite right after using this move, giving Akiha more mobile options than her ground version. Use this after a j.[C] knockdown in the corner.
  • (B version) - Akiha summons a flame pit a couple characters in front of her and moves back. Similar to her A version, the only difference being the position of the flame pit. Sends 1 pillar when ignited uncharged, 2 pillars when charged. You can use this and ignite it right after as keep-away.
  • (EX version) - Akiha summons a flame pit that tracks the opponent and moves back. Sends 2 pillars when ignited uncharged, 3 pillars when charged. Strongest version in her 22 series. Use this after a j.[C] knockdown or to force your opponent to haul ass.


Arc Drive

「」
  • (Description) - Akiha grabs the opponent and assaults it with fiery might. Command grab that only grabs grounded targets when they're close, but aerial targets much easier, even when they're almost above her. A useful tool to scare your opponent with when he's blocking a lot. Almost any combo can be ended in this AD, but most of the time it doesn't do much damage. Raw airthrow straight into AD is stylish and does 3k+ damage. Also useful as ender to overhead combos.

Another Arc Drive

「」
  • (Description) - Similar to AD, but with a longer animation and more damage. Very bad move due to the amount of hits. It will almost always provide the opponent with so much meter they'll enter MAX.

Last Arc

「」
  • (Description) - On ground shield Akiha levitates the opponent in front of her, and casts a powerful version of 623C.

MBAACC Navigation

General
FAQ
Advanced
AokoCrescentHalfFull
TohnoCrescentHalfFull
HimeCrescentHalfFull
NanayaCrescentHalfFull
KoumaCrescentHalfFull
MiyakoCrescentHalfFull
CielCrescentHalfFull
SionCrescentHalfFull
RiesbyfeCrescentHalfFull
V.SionCrescentHalfFull
WarachiaCrescentHalfFull
RoaCrescentHalfFull
MaidsCrescentHalfFull
AkihaCrescentHalfFull
ArcueidCrescentHalfFull
Powered CielCrescentHalfFull
Red ArcueidCrescentHalfFull
V.AkihaCrescentHalfFull
Mech-HisuiCrescentHalfFull
SeifukuCrescentHalfFull
SatsukiCrescentHalfFull
LenCrescentHalfFull
RyougiCrescentHalfFull
White LenCrescentHalfFull
NeroCrescentHalfFull
NACCrescentHalfFull
Koha-MechCrescentHalfFull
HisuiCrescentHalfFull
Neco-ArcCrescentHalfFull
KohakuCrescentHalfFull
Neco-MechCrescentHalfFull