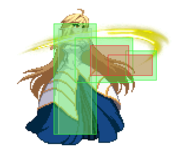
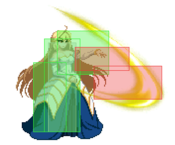
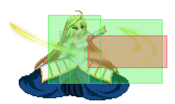
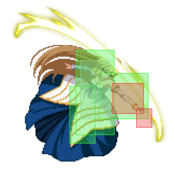
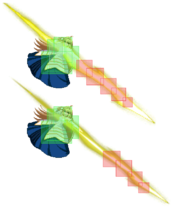
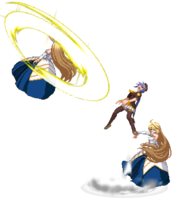
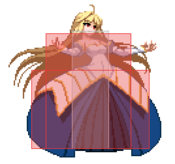
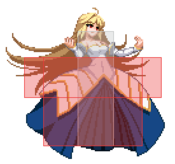
Character Page Progress
All major goals on this page are complete!
Additional Resources
Match Video Database
Players to watch/ask
JP:
- Text goes here after asterisk
- Text goes here after asterisk
NA:
- Text goes here after asterisk
- Text goes here after asterisk
Overview
Strengths Weaknesses
| Strengths
|
- Text goes here after asterisk
- Text goes here after asterisk
|
| Weaknesses
|
- Place text here be sure to use "*" for each point*
|
General Gameplan
C-Hime is a character that thrives on shutting down the opponents movement through her obnoxious normals and special moves. 214A/B is primarily used in neutral to keep your opponents out of the air, and once they're conditioned to not leave the ground, she can start abusing her large (yet very lateral) normals. As 214x and 623x are effectively her only real 'anti airs', oftentimes she'll be forced to reposition herself using her quick walk speed to avoid opponents approaching her at angles which she can't cover effectively. She also struggles with escaping pressure, as her fastest normal is 6f, making mashing quite risky.
As a Crescent moon character, she's blessed with an abundance of meter, which benefits her greatly as j236C, AD, and AAD are some of the most obscene supers to bless this game. By just holding on to meter, her threat range becomes the entire screen, and any whiff can turn into ample damage -> tech trap situation, or worse yet, she'll tell you you're not allowed to play with the meter anymore and also make you hold her extremely degenerate okizeme.
Not quite as oppressive as F-Hime, but C has her own set of tricks.
Neutral
Press buttons hit that 214A/B button people will be tilted.
Pressure
Place text here
Okizeme
Place text here
Defense
place text here*
Combos
Starters
Enders
OTG Pick ups
Normal Combos
| Condition
|
Notation
|
Damage
vs V.Sion
|
Notes
|
|
| Normal starter, grounded opponent,
|
- 2A 5B 2B 2C 5C jBjC djBjC (22D jAjC) Airthrow/236C/41236C
|
???
|
| |
| Meter Gained: ??? |
Meter Given (vs C-Moon): ??? |
| Babies first combo, does good damage, bracketed part is optional but recommended as it leaves Hime more mobile post Airthrow, but costs a decent chunk of meter as it drains until she either reaches the ground or airdashes, so be aware. |
|
|
| Normal starter, grounded opponent,
|
- 2A 5B 2B 5C 2C 6C~236a jC djC 22D jA Airthrow/236C/41236C
|
???
|
| |
| Meter Gained: ??? |
Meter Given (vs C-Moon): ??? |
| Use this combo instead, does great damage, builds a decent chunk of meter, flight ender is usually necessary for Airthrow ender as Hime wont have the right height without it. Can omit for other enders generally, but use your own discretion. |
|
|
| Crossup j214B starter, grounded opponent,
|
- j214B 669 jB(2) j6B jA jC sdj jC 22D jA j6B 214A j6[B] 66 AT
|
???
|
| |
| Meter Gained: ??? |
Meter Given (vs C-Moon): ??? |
| Confirm off of crossup air wind mine, looks cool. |
|
|
| 236B Starter, grounded opponent,
|
|
???
|
| |
| Meter Gained: ??? |
Meter Given (vs C-Moon): ??? |
| Confirm into knockdown off of stray far geyser with 100 meter. Can hold up in any direction to option select, otherwise can use 22D. |
|
|
| Crossup j214B starter, grounded opponent,
|
|
???
|
| |
| Meter Gained: ??? |
Meter Given (vs C-Moon): ??? |
| Stray confirm off of AA 214B with 100 meter. |
|
|
Corner Combos
| Condition
|
Notation
|
Damage
vs V.Sion
|
Notes
|
|
| Normal starter, grounded opponent,
|
- 2A 5B 2B 5C 2C 6C~236a j6B jA jC djC 22D jA jC Airthrow/236C/41236C
|
???
|
| |
| Meter Gained: ??? |
Meter Given (vs C-Moon): ??? |
| Corner BNB. Omit flight to conserve meter if necessary. |
|
|
Move Descriptions
| Frame Data Help
|
| Header
|
Tooltip
|
| Move Box Colors
|
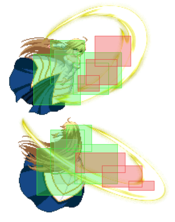
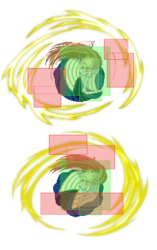
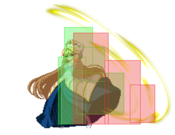
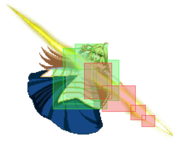
Light gray = Collision Box (A move lacking one means it can go through the opponent's own collision box).
Green: Hurt Boxes.
Red: Hit(/Grab) Boxes.
Yellow: Clash Boxes (When an active hitbox strikes a clash box, the active hitbox stops being active. Multi-hit attacks can beat clash since they will still progress to the next hitbox.)
Magenta: Projectile-reflecting boxes OR Non-hit attack trigger boxes (usually).
Blue: Reflectable Projectile Boxes.
|
| Damage
|
Base damage done by this attack.
(X) denotes combined and scaled damage tested against standing V. Sion.
|
| Red Damage
|
Damage done to the recoverable red health bar by this attack. The values are inherently scaled and tested against standing V. Sion.
(X) denotes combined damage.
|
| Proration
|
The correction value set by this attack and the way it modifies the scaling during a string. See this page for more details.
X% (O) means X% Overrides the previous correction value in a combo if X is of a lower percentage.
X% (M) means the current correction value in a combo will be Multiplied by X%. This can also be referred to as relative proration.
|
| Circuit
|
Meter gained by this attack on hit.
(X%) denotes combined meter gain.
-X% denotes a meter cost.
|
| Cancel
|
Actions this move can be cancelled into.
SE = Self cancelable.
N = Normal cancelable.
SP = Special cancelable.
CH = Cancelable into the next part of the same attack (Chain in case of specials).
EX = EX cancelable.
J = Jump cancelable.
(X) = Cancelable only on hit.
-X- = Cancelable on whiff.
|
| Guard
|
The way this move must be blocked.
L = Can block crouching
H = Can block standing.
A = Can block in the air.
U = Unblockable.
|
| Startup
|
Amount of frames that must pass prior to reaching the active frames. Also referred to as "True Startup".
|
| Active
|
The amount of frames that this move will have a hitbox.
(x) denotes frame gaps where there are no hitboxes is present. Due to varied blockstuns, (x) frames are difficult to use to determine punish windows. Generally the larger the numbers, the more time you have to punish.
X denotes active frames with a duration separate from its origin move's frame data, such as projectile attacks. In this case, the total length of the move is startup+recovery only.
|
| Recovery
|
Frames that this move has after the active frames if not canceled. The character goes into one frame where they can block but not act afterwards, which is not counted here.
|
| Advantage
|
The difference in frames where you can act before your opponent when this move is blocked (assuming the move isn't canceled and the first active frame is blocked).
If the opponent uses a move with startup that is at least 2 frames less than this move's negative advantage, it will result in the opponent hitting that move.
±x~±y denotes a range of possible advantages.
|
| Invul
|
Lists any defensive properties this move has.
X y~z denotes X property happening between the y to z frames of the animations. If no frames are noted, it means the invincibility lasts through the entire move.
Invicibility:
- Strike = Strike invincible.
- Throw = Throw invincible.
Hurtbox-Based Properties:
- Full = No hurtboxes are present.
- High = Upper body lacks a hurtbox.
- Low = Lower body lacks a hurtbox.
Miscellaneous Properties
- Clash = Frames in which clash boxes are active.
- Reflect = Frames in which projectile-reflecting boxes are active.
- Super Armor = Frames in which the character can take hits without going into hit stun.
|
Note: FL in the cancel section denotes that a move is a flight cancellable
Normal Moves
Standing Normals
5A
|
| Damage
|
Red Damage
|
Proration
|
Cancel
|
Guard
|
| 300
|
147
|
75% (O)
|
-SE-, -N-, -SP-, -EX-, (J), -FL-
|
LH
|
| First Active
|
Active
|
Recovery
|
Frame Adv
|
Circuit
|
Invuln
|
| 7
|
4
|
8
|
0
|
3.5%
|
-
|
|
Neutral on block can be used to tick throw and pressure, has decent range for a 5A.
|
|
5B
|
| Damage
|
Red Damage
|
Proration
|
Cancel
|
Guard
|
| 300x2 (532)
|
(347)
|
80% (O)
|
N, SP, EX, (J), FL
|
LH
|
| First Active
|
Active
|
Recovery
|
Frame Adv
|
Circuit
|
Invuln
|
| 9
|
6
|
9
|
0, 1
|
3.0%x2
|
-
|
|
+1 on block and hits multiple times, making it a good general purpose pressure/hitconfirm tool.
Can be used as a ghetto anti-air sometimes, as the hitbox is slightly higher than it seems.
|
|
5C
|
| Damage
|
Red Damage
|
Proration
|
Cancel
|
Guard
|
| 800
|
490
|
90%
|
N, SP, EX, (J), FL
|
LH
|
| First Active
|
Active
|
Recovery
|
Frame Adv
|
Circuit
|
Invuln
|
| 13
|
4
|
18
|
-4
|
7.0%
|
-
|
|
The 5C Powerd Ciel wishes she had. Amazing poke, great whiff punisher, virtually incontestable from further ranges, can easily hitconfirm into 2C 6C 236A for a full combo, great pressure tool when used from a range alongside her specials. just be wary of opponents air dashing over it, as its hitbox doesn't reach especially high.
Just press it sometimes, it's a good button.
|
|
Crouching Normals
2A
|
| Damage
|
Red Damage
|
Proration
|
Cancel
|
Guard
|
| 300
|
98
|
75% (O)
|
SE, N, SP, EX, (J), FL
|
L
|
| First Active
|
Active
|
Recovery
|
Frame Adv
|
Circuit
|
Invuln
|
| 7
|
4
|
9
|
-1
|
3.0%
|
-
|
|
Low hitting 2A. Has decent range, but has 6F start-up, so be wary when trying to use this to mash out of pressure.
Also one of her better reverse beat options for pressure strings.
|
|
2B
|
| Damage
|
Red Damage
|
Proration
|
Cancel
|
Guard
|
| 500
|
382
|
80% (O)
|
N, SP, EX, (J), FL
|
LH
|
| First Active
|
Active
|
Recovery
|
Frame Adv
|
Circuit
|
Invuln
|
| 10
|
4
|
12
|
-1
|
4.0%
|
-
|
|
-1 on block, hits mid. Nothing especially noteworthy about her 2B, the range is nothing spectacular, combo/blockstring fodder.
|
|
2C
|
| Damage
|
Red Damage
|
Proration
|
Cancel
|
Guard
|
| 900
|
637
|
65% (O)
|
N, SP, EX, (J), FL
|
L
|
| First Active
|
Active
|
Recovery
|
Frame Adv
|
Circuit
|
Invuln
|
| 12
|
4
|
15
|
-1
|
7.0%
|
-
|
|
Not quite as degenerate as F-Hime's 2C, but it's still pretty good, and unlike F-Hime's, it hits low!
Reaches quite far, can be hitconfirmed into 5C 214B/236A for a combo, is only -1 on block, overall a solid ground poke.
Should take care to avoid whiffing it, but with 15f recovery, it can be rather difficult for the opponent to punish it with an IAD/Jump in.
|
|
Aerial Normals
j.A
|
| Damage
|
Red Damage
|
Proration
|
Cancel
|
Guard
|
| 250
|
98
|
75% (O)
|
N, SP, EX, J, -FL-
|
LHA
|
| First Active
|
Active
|
Recovery
|
Frame Adv
|
Circuit
|
Invuln
|
| 5
|
4
|
-
|
-
|
3.0%
|
-
|
|
Regular girl jA. teeny hitbox, not great as a jump in but can be used to make IAD strings tighter.
Can whiff cancel the recovery into more air options (jump air dash, buttons, flight) but once she begins her descent animation she loses that opportunity.
|
|
j.B
|
| Damage
|
Red Damage
|
Proration
|
Cancel
|
Guard
|
| 350, 600 (872)
|
(537)
|
90%
|
N, SP, EX, J, -FL-
|
HA
|
| First Active
|
Active
|
Recovery
|
Frame Adv
|
Circuit
|
Invuln
|
| 6
|
2 (8) 4
|
-
|
-
|
3.0%, 4.0%
|
-
|
|
Huge (sorta). Great air to air, decent air to ground, hits twice and will beat out a good number of opposing air to airs. Only downside is it's rather suspect hitboxes, as sometimes characters will appear to phase through its active frame, so get a good feel for how it hits.
|
|
j.C
|
| Damage
|
Red Damage
|
Proration
|
Cancel
|
Guard
|
| 850
|
588
|
75% (O)
|
N, SP, EX, J, -FL-
|
HA
|
| First Active
|
Active
|
Recovery
|
Frame Adv
|
Circuit
|
Invuln
|
| 14
|
4
|
-
|
-
|
7.0%
|
-
|
|
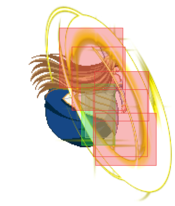
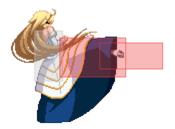
Savage. Hime claws your face off with an omnidirectional swipe. Really really big, but also quite slow, so don't be surprised if you get counter hit out of it. Good air to air, great air to ground, just be wary that it can be low profiled if coming down from too high.
Used during flight oki to get some fun mixups!
Probably one of your favourite buttons.
|
|
Command Normals
6C
6[C]
|
| 6C
|
Damage
|
Red Damage
|
Proration
|
Cancel
|
Guard
|
| 800
|
392
|
70% (O)
|
SP, EX, (J), FL
|
LH
|
| First Active
|
Active
|
Recovery
|
Frame Adv
|
Circuit
|
Invuln
|
| 13
|
5
|
23
|
-10
|
5.0%
|
-
|
|
Blockstring and combo filler. Launches and is jump cancelable on hit, can be used as a ghetto anti air but it's not recommended.
|
| 6[C]
|
Damage
|
Red Damage
|
Proration
|
Cancel
|
Guard
|
| 1000
|
490
|
70%
|
N, SP, EX, (J), FL
|
LH
|
| First Active
|
Active
|
Recovery
|
Frame Adv
|
Circuit
|
Invuln
|
| 20
|
5
|
19
|
-6
|
10.0%
|
-
|
|
6[C] also serves a similar function, but theres nothing especially noteworthy about it, besides having slightly better frame advantage.
|
|
j.6B
j.6[B]
|
| j.6B
|
Damage
|
Red Damage
|
Proration
|
Cancel
|
Guard
|
| 700
|
392
|
90% (O)
|
N, SP, EX, J, -FL-
|
HA
|
| First Active
|
Active
|
Recovery
|
Frame Adv
|
Circuit
|
Invuln
|
| 12
|
6
|
-
|
-
|
4.0%
|
-
|
|
Big stab, can be held to become even larger and halt air momentum. The regular version is generally used as combo filler.
|
| j.6[B]
|
Damage
|
Red Damage
|
Proration
|
Cancel
|
Guard
|
| 900
|
686
|
50%
|
N, SP, EX, J, -FL-
|
HA
|
| First Active
|
Active
|
Recovery
|
Frame Adv
|
Circuit
|
Invuln
|
| 25
|
4
|
-
|
-
|
10.0%
|
-
|
|
The held variant for occasional mixups post air throw ender, or as a cheeky long ranged overhead in neutral, though it can only be confirmed into j.236C.
|
|
Universal Mechanics
Ground Throw
4/6A+D
|
| Damage
|
Red Damage
|
Proration
|
Cancel
|
Guard
|
| 1300
|
980
|
30%
|
-
|
U
|
| First Active
|
Active
|
Recovery
|
Frame Adv
|
Circuit
|
Invuln
|
| 3
|
1
|
20
|
N/A
|
0.0%
|
-
|
|
Hime levitates the opponent the slams them.
|
|
Air Throw
4/6A+D (In Air)
|
| Damage
|
Red Damage
|
Proration
|
Cancel
|
Guard
|
| 1600
|
490
|
30%
|
-
|
U
|
| First Active
|
Active
|
Recovery
|
Frame Adv
|
Circuit
|
Invuln
|
| 2
|
1
|
13 (landing)
|
N/A
|
0.0%
|
-
|
|
Switches sides post-throw.
|
|
Shield Bunker
214D in neutral or blockstun
|
| Damage
|
Red Damage
|
Proration
|
Cancel
|
Guard
|
| 500
|
196
|
50%
|
-
|
LHA
|
| First Active
|
Active
|
Recovery
|
Frame Adv
|
Circuit
|
Invuln
|
| 26
|
4
|
19
|
-5
|
0.0% (-50.0% in blockstun)
|
-
|
|
A bigger-hitbox shield bunker.
|
|
Heat
A+B+C
|
| Damage
|
Red Damage
|
Proration
|
Cancel
|
Guard
|
| 100
|
0
|
100%
|
-
|
U
|
| First Active
|
Active
|
Recovery
|
Frame Adv
|
Circuit
|
Invuln
|
| 16
|
6
|
25
|
N/A
|
-100.0% (min)
|
Full 1-23
|
|
Circuit Spark
A+B+C during hitstun/blockstun at MAX
|
| Ground
|
Damage
|
Red Damage
|
Proration
|
Cancel
|
Guard
|
| 100
|
0
|
100%
|
-
|
U
|
| First Active
|
Active
|
Recovery
|
Frame Adv
|
Circuit
|
Invuln
|
| 11
|
10
|
20
|
N/A
|
removes all
|
Full
|
| Air
|
Damage
|
Red Damage
|
Proration
|
Cancel
|
Guard
|
| 100
|
0
|
100%
|
-
|
N/A
|
| First Active
|
Active
|
Recovery
|
Frame Adv
|
Circuit
|
Invuln
|
| 12
|
10
|
-
|
N/A
|
removes al
|
Strike
|
|
Special Moves
Sky (Flight)
22D (Air OK)
(Cancel 22)
|
| Damage
|
Red Damage
|
Proration
|
Cancel
|
Guard
|
| -
|
-
|
-
|
-
|
-
|
| First Active
|
Active
|
Recovery
|
Frame Adv
|
Circuit
|
Invuln
|
| 12 (16)
|
-
|
26 (30)
|
-
|
-0.1% per frame
|
-
|
|
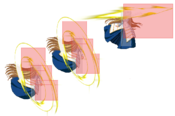
Flight. Hime decides the ground is for losers and spends some meter to take to the skies. Upon activation, Hime can glide in either direction, but slightly descends as she glides. Resets her airdash upon activation, effectively giving her two airdashes, and she can fast-fall to the ground with 22, allowing her to quickly descend to the ground if necessary. Counts as an EX move, so you can whiff cancel into it off of practically every move imaginable, allowing for some very freeform (obnoxious) neutral and pressure strings. Drains meter as she floats, but it can be activated with any amount of meter, and the duration is fixed, and is not tied to the amount of meter drained. Ignores Melty crossup protection, allowing for some incredibly disgusting mixups, aand her hurtbox is mysteriously shrunk as she floats(confirm?), because why not. Abuse this move, can make some matchups absolute hell.
|
|
Grounded Specials
Wave
(EX: Avalanche)
236A/B/C
|
| A
|
Damage
|
Red Damage
|
Proration
|
Cancel
|
Guard
|
| 500, 800x2 (1431)
|
(847)
|
65% (O)
|
-FL-
|
L
|
| First Active
|
Active
|
Recovery
|
Frame Adv
|
Circuit
|
Invuln
|
| 18
|
4
|
25
|
-12
|
5.0%, 4.0%x2 (13.0%)
|
-
|
|
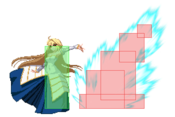
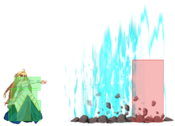
Geyser series. They hit low and are air unblockable, making them pretty good for harassing the opponent at a range.
Hime summons a Geyser in front of her that launches the opponent into the air. can be jump canceled on hit, and flight canceled on block and whiff. Mostly combo filler, but can make a nice relatively safe poke too.
|
| B
|
Damage
|
Red Damage
|
Proration
|
Cancel
|
Guard
|
| 500, 800x2 (1434)
|
(847)
|
65% (O)
|
-FL-
|
L
|
| First Active
|
Active
|
Recovery
|
Frame Adv
|
Circuit
|
Invuln
|
| 18
|
4
|
25
|
-12
|
5.0%, 4.0%x2 (13.0%)
|
-
|
|
Hime summons a Geyser even further away from her. generally used as a poke, can be confirmed into j.236c for quick damage and a knockdown/tech trap when flight canceled.
|
| EX
|
Damage
|
Red Damage
|
Proration
|
Cancel
|
Guard
|
500x8 (2687)
(Max Hits)
|
300x8 (1576)
(Max Hits)
|
95% (M)
|
N/A
|
LH
|
| First Active
|
Active
|
Recovery
|
Frame Adv
|
Circuit
|
Invuln
|
| 11+5
|
48
|
82 (Total Duration)
|
-40 ~ 1
|
-100.0%
|
-
|
|
Please refrain from using this.
|
|
Bird
(EX: Big Bird)
623A/B/C
|
| A
|
Damage
|
Red Damage
|
Proration
|
Cancel
|
Guard
|
| 700, 250x2 (1147)
|
(468)
|
100%
|
N/A
|
LH
|
| First Active
|
Active
|
Recovery
|
Frame Adv
|
Circuit
|
Invuln
|
| 8
|
6
|
23
|
-13
|
4.0%, 1.0%x2 (6.0%)
|
-
|
|
DP series. It's a DP lol.
It's a functional anti air sometimes, pretty decent if you have a read on their air approach.
|
| B
|
Damage
|
Red Damage
|
Proration
|
Cancel
|
Guard
|
| 700x2, 400x2 (1944)
|
(1041)
|
100%
|
N/A
|
LH
|
| First Active
|
Active
|
Recovery
|
Frame Adv
|
Circuit
|
Invuln
|
| 6
|
3, 4 (12) 7
|
29
|
-17 (-33 vs crouch)
|
4.0%x2, 2.0%x2 (12.0%)
|
Full 1-8
|
|
Invincible. Has regrettably small initial hitboxes, and the 2nd set only emerge when she loses her invincibility, use with caution, if they block this you will die.
|
| EX
|
Damage
|
Red Damage
|
Proration
|
Cancel
|
Guard
|
| 500x5, 700 (2637)
|
(1950)
|
100%
|
N/A
|
LH
(Last hit: LHA)
|
| First Active
|
Active
|
Recovery
|
Frame Adv
|
Circuit
|
Invuln
|
| 1+5
|
7 (8) 6 (18) 6
|
82 (Total duration)
|
-83
(-97 vs crouch)
|
-100.0%
|
Full
|
|
Fully invincible and knocks down at the end.
|
|
Wind
(EX: Big Wind)
214A/B/C
(Chain 214A~214A/[A])
|
A
~214A
~214[A]
|
Damage
|
Red Damage
|
Proration
|
Cancel
|
Guard
|
400x3 (867)
1000
(779)
|
(424)
392
(507)
|
70% (O)
65% (O)
65% (O)
|
-FL-
N/A
N/A
|
LH
LH
LH
|
| First Active
|
Active
|
Recovery
|
Frame Adv
|
Circuit
|
Invuln
|
16
11
~23
|
12
9
9
|
18
21
19
|
-2
-8
0
|
2.5%x3 (7.5%)
4.0%
2.0%x4 (8.0%)
|
-
|
|
Wind Mine series. Air unblockable initial hitbox, does ample chip damage and guard damage.
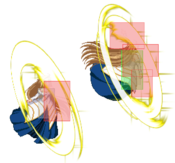
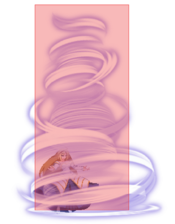
Hime spins gracefully, and places a projectile which turns into a lingering wind mine. The mine can be activated at any time with 214A or j214A/B, and can be held to create a bigger explosion. Can flight cancel on hit, whiff or block, but cannot flight cancel the mine activation input. Both the initial projectile and the activation are air unblockable. Only -2 on block, so can be used rather liberally from a distance. Note that the mine activation itself is punishable if used too close, unless held.
|
| B
|
Damage
|
Red Damage
|
Proration
|
Cancel
|
Guard
|
| 400x2, 1000 (1213)
|
(537)
|
70% (O)
|
(J), -FL-
|
LHA (Last Hit: LHA)
|
| First Active
|
Active
|
Recovery
|
Frame Adv
|
Circuit
|
Invuln
|
| 15
|
6 (6) 9
|
9
|
-3
|
2.5%x2, 4.0% (9.0%)
|
-
|
|
Hime spins even more elegantly, and creates a projectile which places explodes a wind mine instantly. The initial projectile is air unblockable, but the 'explosion' is air blockable. Is jump cancelable on hit, and flight cancelable on whiff and block. Only -3 on block, so can also be used to harass the opponent from just outside their effective range, catch jump outs, shark techs, the list goes on.
|
| EX
|
Damage
|
Red Damage
|
Proration
|
Cancel
|
Guard
|
| 200x18 (2337)
|
(1712)
|
100%
|
N/A
|
LHA
|
| First Active
|
Active
|
Recovery
|
Frame Adv
|
Circuit
|
Invuln
|
| 1+15
|
62
|
58
|
-20
|
-100.0%
|
Full 1-114
|
|
Waste of meter. Hitbox disappears partway through the animation, so the opponent can just waltz in, and ponder how they're going to kill you while they wait for you to land. Please don't use this.
|
|
Light
(EX: Radiance)
22A/B/C
|
| A/B
|
Damage
|
Red Damage
|
Proration
|
Cancel
|
Guard
|
| 500x3 (1127)
|
(662)
|
75% (O)
|
-EX-, -FL-
|
LHA
|
| First Active
|
Active
|
Recovery
|
Frame Adv
|
Circuit
|
Invuln
|
| 51/52
|
-
|
80/81
(Total Duration)
|
6
(After all projectiles)
|
3.0x3, 2.5%x3 (19.5%)
|
-
|
|
Hikari series. Slow startup fireballs, angle they fly is dependant on the button press.
Hime takes her sweet time and summons up to 3 star-shaped fireballs which fly forwards and gradually drifts upwards. Can be cancelled into flight at any time, giving her some decently strong neutral and pressure tools.
(B): Ditto, but they fly downwards, so they can be used to tag croucher's trying to duck under the A version.
|
| EX
|
Damage
|
Red Damage
|
Proration
|
Cancel
|
Guard
|
| 500x7
|
-
|
75% (O)
|
N/A
|
LHA
|
| First Active
|
Active
|
Recovery
|
Frame Adv
|
Circuit
|
Invuln
|
| 1+22
|
-
|
64
(Total Duration)
|
41
(After all projectiles)
|
-100.0%
|
-
|
|
Hime summons a ton of stars, not much use as the startup is still quite long and there are better ways to to tie opponents down.
|
|
Aerial Specials
Sigh
(EX: Breath)
j.236A/B/C tactical nuke inbound tactical nuke inbound
|
| A/B
|
Damage
|
Red Damage
|
Proration
|
Cancel
|
Guard
|
| 800x3 (1470)
|
(899)
|
50% (O)
|
-EX-, -FL-
|
LHA
|
| First Active
|
Active
|
Recovery
|
Frame Adv
|
Circuit
|
Invuln
|
| 34
|
-
|
19
|
7
(Lowest Height TK)
|
5.0%x3 (15.0%)
|
-
|
|
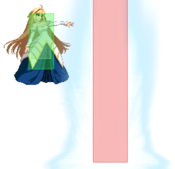
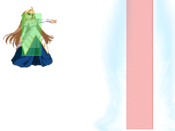
Laser series. Homegirl summons a gun to smite her opponents. Can cancel into flight at any time, and when used during flight, Hime retains her flight state, allowing her to retain her air options and heckle her opponents with more lasers (max of 3?). overall decent move to annoy and zone people with.
Hime summons a column of light ~1 character length in front of her. Comes out a tad slow, but has an expanding and contracting hitbox, so it can often times clip people from slightly farther than it appears (at its maximum it's as wide as C version!).
(B): Ditto, except it appears further away from Hime.
|
| EX
|
Damage
|
Red Damage
|
Proration
|
Cancel
|
Guard
|
| 450x13 (2329)
|
(1776)
|
50% (O)
|
N/A
|
HLA
|
| First Active
|
Active
|
Recovery
|
Frame Adv
|
Circuit
|
Invuln
|
| 6+3
|
-
|
28
|
11
(Lowest Height TK)
|
-100.0%
|
-
|
|
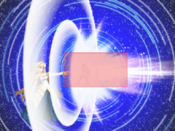
The fear. Hime decides she wants you dead and whips out her gun. Tracks, comes out instantly post super flash, so it can be used to whiff punish practically everything on reaction. Leads to tech trap situations when it hits in close proximity, Does obscene damage, grants her plus frames when performed in flight, allows for her to hitconfirm off of random 236x/214x hits. Totally broken move, changes the way opponents need to approach her when she builds 100 meter. Piss people off with this move.
|
|
Wind (Air)
(EX: Big Wind)
j.214A/B/C
(Chain j214A/B~j214A/B)
|
| A
|
Damage
|
Red Damage
|
Proration
|
Cancel
|
Guard
|
| 400x3 (864)
|
(424)
|
70% (O)
|
N/A
|
LH
|
| First Active
|
Active
|
Recovery
|
Frame Adv
|
Circuit
|
Invuln
|
| 22
|
12
|
-
|
20 (Lowest Height TK)
|
2.5%x2, 4.0% (9.0%)
|
-
|
|
Hime dashes backwards and sets a wind mine. Useful when TK'd to bait DP's while still retaining frame advantage for okizeme.
|
| B
|
Damage
|
Red Damage
|
Proration
|
Cancel
|
Guard
|
| 400x3 (864)
|
(424)
|
70% (O)
|
N/A
|
LH
|
| First Active
|
Active
|
Recovery
|
Frame Adv
|
Circuit
|
Invuln
|
| 29
|
12
|
-
|
16 (Lowest Height TK)
|
2.5%x2, 4.0% (9.0%)
|
-
|
|
Forward dash version of the above. Useful when TK'd to crossup the opponent during pressure/okizeme, which can be confirmed into a full combo. Also has ample frame advantage.
|
~214A/B
~214[A/B]
|
Damage
|
Red Damage
|
Proration
|
Cancel
|
Guard
|
1000
300x4 (779)
|
392
(507)
|
65% (O)
65% (O)
|
N/A
|
LH
LH
|
| First Active
|
Active
|
Recovery
|
Frame Adv
|
Circuit
|
Invuln
|
11
23
|
9
9
|
18
219
|
-8
0
|
4.0%
2.0%x4 (8.0%)
|
-
|
|
~214B Only detonates when airborne.
|
| EX
|
Damage
|
Red Damage
|
Proration
|
Cancel
|
Guard
|
| 200x18 (2337)
|
(1712)
|
100%
|
N/A
|
LHA
|
| First Active
|
Active
|
Recovery
|
Frame Adv
|
Circuit
|
Invuln
|
| 1+16
|
64
|
-
|
-11 (Lowest Height TK)
|
-100.0%
|
Full 1-95
|
|
Similar to the grounded version.
|
|
Take This!
j.63214C
|
| Damage
|
Red Damage
|
Proration
|
Cancel
|
Guard
|
| 700x6 (2415)
|
(1591)
|
60% (O)
|
-
|
H
|
| First Active
|
Active
|
Recovery
|
Frame Adv
|
Circuit
|
Invuln
|
| 1+9
|
4
|
0
|
-
|
-150.0%
|
Full 1-62
|
|
Big Kick. EX move that costs 150% meter. Does decent damage, but more importantly allows her to setup up her flight okizeme easily off of air combos. Has a cool animation and rebounds the opponent off the walls, usually dropping them close to the corner. Follow up with Arc Drive into 22D or 2C22D and make them guess.
|
|
Arc Drive / Another Arc Drive
Memory
41236C during Max/Heat (AD)
41236C during Blood Heat (AAD) The enemy’s hard-earned meter is now just a memory. The enemy’s hard-earned meter is now just a memory.
|
| AD
|
Damage
|
Red Damage
|
Proration
|
Cancel
|
Guard
|
| 0, 275x25, 250 (3960)
|
0, 275x26 (2809)
|
100%
|
-
|
LHA
|
| First Active
|
Active
|
Recovery
|
Frame Adv
|
Circuit
|
Invuln
|
| 3+2 (3+22)
|
3
|
80
(Total duration)
|
-
|
removes all
|
Full 7-68
|
| AAD
|
Damage
|
Red Damage
|
Proration
|
Cancel
|
Guard
|
| 0, 375x40, 250 (5545)
|
(4317)
|
100%
|
-
|
LHA
|
| First Active
|
Active
|
Recovery
|
Frame Adv
|
Circuit
|
Invuln
|
| 2+2 (2+17)
|
3
|
75
(Total duration)
|
-
|
removes all
|
Full 6-68
|
|
A combo ender. Extremely high hit count (27 for AD, 42 for AAD) triggers the protection system to give the opponent meter; afterwards inflicts a special circuit break that removes 100 meter in addition to sealing their meter (for 5 seconds with AD, 10 seconds with AAD). If your generous donation put the opponent in MAX, or they were already in it, the 100 deduction becomes an elimination, setting enemy meter to zero.
In addition to ruining the enemy’s meter, both versions give a lengthy untechable knockdown that allows you to either set up midscreen flight oki, or charge your meter back above 100% and still throw out something meaty.
Has two hitboxes. The first, beginning frame 5 (AD) / 4 (AAD), only hits people in and makes it easy to combo into. The second, beginning frame 25 (AD) / 19 (AAD), tries to hit again if the cinematic hasn’t already begun. Because of this, it’s easy to combo into, but more difficult to punish things with. Though, it gets inv shortly after the combo hit, so it can work against some projectiles and long-range setup moves.
Donating the opponent meter is affected by moon-specific meter generation; full-moon gets 10% less than C, and half-moon gets 30% less.
Because AAD donates much more meter, it is usually preferred to go for as a combo ender after hime kick with the hime kick > blood heat > AAD link; generally, you’d only prefer AD if combo count is low and the opponent has little meter, or you lack the time to AD after hime kick. There’s a lot of specifics to the data, but numbers to keep in your head are that AAD donates 135% vs C / 121% vs F directly out of throw, and 300% after a 14 hit combo vs C / 16 hit combo F, with meter growing more or less linearly with hit count between those points (note that hime kick only counts as 1 for this in spite of adding 5 to the displayed hit count). Throw > 2C > 236A/B > AAD is less damage than throw > AAD, but ends up donating 199.6% vs C / 179.4% vs F, zeroing if they’re at least at 100.4% / 120.6 to start.
AAD also does more damage and circuit breaks for 10 seconds to AD’s 5, but zeroing their meter is the more relevant thing most of the time.
Most of your opponents will likely be Crescent or Full-Moon, but take note vs Half Moon opponents that they do not automatically enter HEAT after hitting 200%, they only hit it after the combo would end, meaning that taking away 100% puts them at 100%, not 0%. So, if the opponent is below around 90% meter as half-moon, it’s generally better to just go with AD rather than AAD because it will give them less afterward, and if they’re really low and your combo has been long you may just want to just go for hime kick 2C oki, since the seal matters little if they’re H moon with low meter.
For more specifics:
https://docs.google.com/spreadsheets/d/1rjS-P3kCN7ziQOnuiqzX9J6jT__KzAoMXFGKPFBtqxE/edit?usp=sharing
|
|
Last Arc
The End
Grounded EX Shield during Blood Heat Well, they’re dead now Well, they’re dead now
|
| Damage
|
Red Damage
|
Proration
|
Cancel
|
Guard
|
| 5000-9000
|
4500-7000
|
50% + 50% * remaining BH time
|
-
|
-
|
| First Active
|
Active
|
Recovery
|
Frame Adv
|
Circuit
|
Invuln
|
| 1
|
3
|
29
(Total duration)
|
-
|
-all
|
Full
|
|
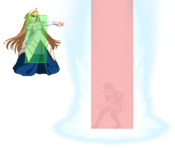
Opponents scared of you sealing their meter with any hit or throw may try to pressure you when you’re in blood heat; unfortunately for them, your last arc hits everywhere on the screen and has a base damage of 9000 (minimum 4500 with no BH time remaining), delivered all in one chunk so as to completely ignore increased defense at lower life values. If that doesn’t kill them outright, it gets you midscreen flight oki, too. (You can charge your meter back too, but the kd isn’t quite as good as off arc drive, so you can’t reach 100% and still meaty.)
If the opponent manages to invuln through the hit, your recovery is fairly short, and you are invuln during the entire recovery period, so you may be able to punish whatever they went inv with and a true punish against you is literally impossible.
|
|
MBAACC Navigation
