Character Page Progress
This page is still a work in progress, consider joining as an editor to help expand it. Please update this character's roadmap page when one of the editing goals have been reached.
| In Progress |
To-do
|
|
|
- General Gameplan:
- Do your best to describe how to play this character, change or add subsections based on what you would write as a guide.
|
Overview
Playstyle
 F-White Len is a runaway zoner who controls the ground. F-White Len is a runaway zoner who controls the ground. |
| Pros |
Cons |
- Strong runaway zoning: She is able to out-camp a lot of characters that usually shine through zoning, with a strong fireball game, a small height and an uncommon set of tools like the teleport dash, j.[C], j.214X and 22X making her hard to catch.
- Great control of the ground: 2B allows her to outpoke a lot of characters, 2C is a good low-profiling option and 214X can force the opponent to approach in unsafe ways.
- Reliable knockdown from airthrow: In the corner, her airthrow leads to a great knockdown where she can either opt to land into 236A > 236C to be reversal safe, or airdash before landing to setup a mixup or safejump.
- High health: White Len has the 6th best total health value in the game, sporting the lowest damage modifier at 25-50% HP among the cast. Combined with Initiative Heat, this makes F-WLen very tanky.
- Scary throw: In the corner, F-WLen can get 2B loops from her throw, and either go into a knockdown for a 214X okizeme setup, or go into air combo for damage and meter.
- Versatile metered options: 236C is a strong pressure reset tool, 214C is a good gap reversal option and j.214C lets you get oki off of more damaging air enders.
|
- Hurtbox extensions: She extends a lot of green on her normals, making it risky for her to throw out a lot of otherwise good moves, especially 5B.
- Low average damage: Her damage output is fairly low off of non-counter hit starters, usually needing a full ground sequence to get good damage.
- Poor approach options: Because most of her buttons are oriented towards precise defensive play, she has a hard time forcing her way in when she needs to, usually needing to take risks or spend meter with 236C.
- Linear pressure: After the initial oki situation, F-WLen pushes herself out extremely easily during pressure, which combines awfully with her inability to properly redash.
- Weak mobility: While her forward airdash isn't bad, her backward airdash has more vertical than horizontal movement, and her ground movement relies on an okay walk and a teleport dash. As such, she has to rely on options such as j.[C] and j.236B to keep her air movement ambiguous.
- Mediocre meter gain: Her meter gain off of non-2B loopable starters is far from great. As a result, she often needs to choose between spending meter for good okizeme or for damage.
|
Move Descriptions
| Frame Data Help
|
| Header
|
Tooltip
|
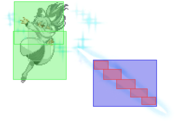
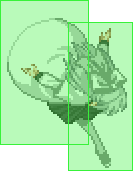
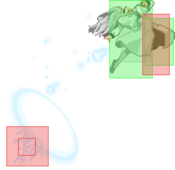
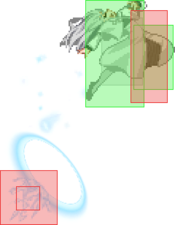
| Move Box Colors
|
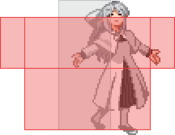
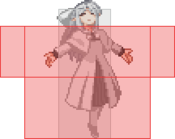
Light gray = Collision Box (A move lacking one means it can go through the opponent's own collision box).
Green: Hurt Boxes.
Red: Hit(/Grab) Boxes.
Yellow: Clash Boxes (When an active hitbox strikes a clash box, the active hitbox stops being active. Multi-hit attacks can beat clash since they will still progress to the next hitbox.)
Magenta: Projectile-reflecting boxes OR Non-hit attack trigger boxes (usually).
Blue: Reflectable Projectile Boxes.
|
| Damage
|
Base damage done by this attack.
(X) denotes combined and scaled damage tested against standing V. Sion.
|
| Red Damage
|
Damage done to the recoverable red health bar by this attack. The values are inherently scaled and tested against standing V. Sion.
(X) denotes combined damage.
|
| Proration
|
The correction value set by this attack and the way it modifies the scaling during a string. See this page for more details.
X% (O) means X% Overrides the previous correction value in a combo if X is of a lower percentage.
X% (M) means the current correction value in a combo will be Multiplied by X%. This can also be referred to as relative proration.
|
| Circuit
|
Meter gained by this attack on hit.
(X%) denotes combined meter gain.
-X% denotes a meter cost.
|
| Cancel
|
Actions this move can be cancelled into.
SE = Self cancelable.
N = Normal cancelable.
SP = Special cancelable.
CH = Cancelable into the next part of the same attack (Chain in case of specials).
EX = EX cancelable.
J = Jump cancelable.
(X) = Cancelable only on hit.
-X- = Cancelable on whiff.
|
| Guard
|
The way this move must be blocked.
L = Can block crouching
H = Can block standing.
A = Can block in the air.
U = Unblockable.
|
| Startup
|
Amount of frames that must pass prior to reaching the active frames. Also referred to as "True Startup".
|
| Active
|
The amount of frames that this move will have a hitbox.
(x) denotes frame gaps where there are no hitboxes is present. Due to varied blockstuns, (x) frames are difficult to use to determine punish windows. Generally the larger the numbers, the more time you have to punish.
X denotes active frames with a duration separate from its origin move's frame data, such as projectile attacks. In this case, the total length of the move is startup+recovery only.
|
| Recovery
|
Frames that this move has after the active frames if not canceled. The character goes into one frame where they can block but not act afterwards, which is not counted here.
|
| Advantage
|
The difference in frames where you can act before your opponent when this move is blocked (assuming the move isn't canceled and the first active frame is blocked).
If the opponent uses a move with startup that is at least 2 frames less than this move's negative advantage, it will result in the opponent hitting that move.
±x~±y denotes a range of possible advantages.
|
| Invul
|
Lists any defensive properties this move has.
X y~z denotes X property happening between the y to z frames of the animations. If no frames are noted, it means the invincibility lasts through the entire move.
Invicibility:
- Strike = Strike invincible.
- Throw = Throw invincible.
Hurtbox-Based Properties:
- Full = No hurtboxes are present.
- High = Upper body lacks a hurtbox.
- Low = Lower body lacks a hurtbox.
Miscellaneous Properties
- Clash = Frames in which clash boxes are active.
- Reflect = Frames in which projectile-reflecting boxes are active.
- Super Armor = Frames in which the character can take hits without going into hit stun.
|
Normal Moves
Standing Normals
|
|
| Damage
|
Red Damage
|
Proration
|
Cancel
|
Guard
|
| 350
|
202
|
78% (O)
|
-SE-, -N-, -SP-, -EX-, (J)
|
LH
|
| First Active
|
Active
|
Recovery
|
Frame Adv
|
Circuit
|
Invuln
|
| 4
|
4
|
5
|
3
|
3.6%
|
-
|
|
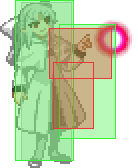
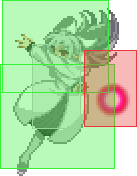
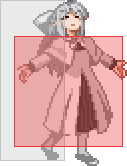
A finger poke with her orb. Hits mid and has less reach than 2A, so its applications are limited. This move is primarily used for relaunches after a throw in the corner.
|
|
|
|
| 5B
|
Damage
|
Red Damage
|
Proration
|
Cancel
|
Guard
|
| 500*2 (887)
|
(537)
|
80% (O)
|
N, SP, EX, (J)
|
LH
|
| First Active
|
Active
|
Recovery
|
Frame Adv
|
Circuit
|
Invuln
|
| 9
|
8
|
9
|
-2, 3 (vs Stand.)
-5, -3 (vs Crouch.)
|
4.05%*2 (8.1%)
|
-
|
|
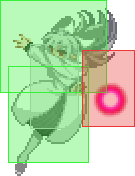
A forward-stepping swipe with her orb at a slightly upwards angle. It is an integral part of her combos and pressure game, and can be used to keep people away and catch jumpouts. Though it is plus on standing opponents, it's actually better for White Len if the opponent blocks this low, as she suffers less pushback; go directly into 2B in your blockstrings if your opponent blocks it standing. This move will lose against longer-ranged lows, so use carefully when going against characters that have one.
|
| 5[B]
|
Damage
|
Red Damage
|
Proration
|
Cancel
|
Guard
|
| 600*2 (906)
|
(762)
|
60% (O)
|
N, SP, EX, (J)
|
LH
|
| First Active
|
Active
|
Recovery
|
Frame Adv
|
Circuit
|
Invuln
|
| 26
|
8
|
8
|
-1, 4 (vs Stand.)
-4, -2 (vs Crouch.)
|
4.95%*2 (9.9%)
|
-
|
|
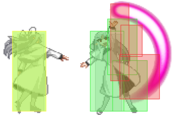
Same as 5B, but wallslams and moves about double the distance. It has a fair amount of startup, but can be useful to stay in during pressure. Can be sparingly used in neutral to catch the opponent by surprise, as this significantly outranges all of her other normals.
|
|
|
|
| 5C
|
Damage
|
Red Damage
|
Proration
|
Cancel
|
Guard
|
| 700*2 (1208)
|
(871)
|
75% (O)
|
SP, EX, (J)
|
LH
|
| First Active
|
Active
|
Recovery
|
Frame Adv
|
Circuit
|
Invuln
|
| 9
|
9
|
10
|
-2, 1
|
5.4%*2 (10.8%)
|
-
|
|
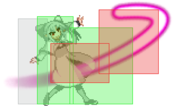
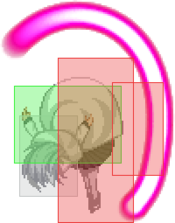
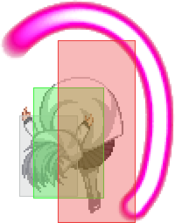
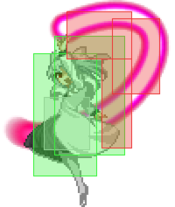
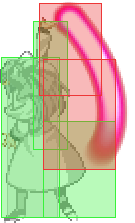
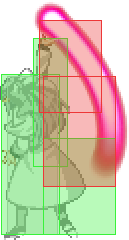
An upward swipe with her pink orb in an arc above her head. While it can be used as an anti-air, the hitbox is smaller than the arc; it only hits in front of her, so use it carefully. It also lacks horizontal range, limiting its uses in pressure situations. It is an integral part of her combos.
|
| 5[C]
|
Damage
|
Red Damage
|
Proration
|
Cancel
|
Guard
|
| 1200
|
1010
|
65% (O)
|
SP, EX, (J)
|
LH
|
| First Active
|
Active
|
Recovery
|
Frame Adv
|
Circuit
|
Invuln
|
| 30
|
9
|
7
|
-1
|
8.1%
|
-
|
|
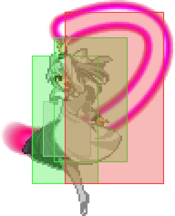
A single-hit version of 5C that moves White Len forward and launches the opponent. It is a more practical anti-air than the uncharged version because of its added range, but its bad proration and lack of normal cancels gives it weak follow-ups. Its sub-par frame advantage and limited cancel opportunities make it very niche in pressure, despite moving her forward.
|
|
Crouching Normals
|
|
| Damage
|
Red Damage
|
Proration
|
Cancel
|
Guard
|
| 350
|
202
|
75% (O)
|
-SE-, -N-, -SP-, -EX-, (J)
|
L
|
| First Active
|
Active
|
Recovery
|
Frame Adv
|
Circuit
|
Invuln
|
| 4
|
4
|
5
|
3
|
3.15%
|
-
|
|
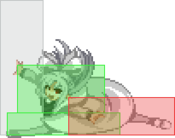
A tiny standing kick. It's fast and hits low, but it has mediocre range, to the point it can often not reach after her air normals get blocked.
|
|
Get ready to use this a lot. Get ready to use this a lot.
|
| Damage
|
Red Damage
|
Proration
|
Cancel
|
Guard
|
| 600
|
404
|
80% (O)
|
N, SP, EX, (J)
|
L
|
| First Active
|
Active
|
Recovery
|
Frame Adv
|
Circuit
|
Invuln
|
| 9
|
5
|
12
|
1
|
4.5%
|
-
|
|
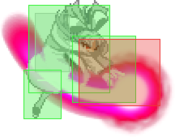
A low, far-reaching sweep with her orb. Knocks down. It has decent vertical range for a low, and is this character's best poke. Is used in virtually every combo this character has, and as a mixup option in blockstrings. It's also a decent option for abare.
|
|
2C2C(Whiff/Block)~2C
OR
2C(Hit)~2C 2C 2C 2CC (2C/[C] Whiff/Block) 2CC (2C/[C] Whiff/Block) 2CC (2C/[C] Hit) 2CC (2C/[C] Hit)
|
| 2C
|
Damage
|
Red Damage
|
Proration
|
Cancel
|
Guard
|
| 1100
|
909
|
60% (O)
|
SP, EX, (J), -CH-
|
L
|
| First Active
|
Active
|
Recovery
|
Frame Adv
|
Circuit
|
Invuln
|
| 10
|
8
|
18
|
-8
|
9.9%
|
-
|
|
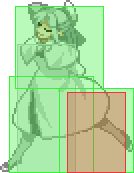
A forward-moving low sweep that knocks down. Note that it will whiff after hitting 2B at max range. Does good guard damage, but is massively minus on block, so be sure to always cancel it.
|
~2C
(2C Whiff/Block)
|
Damage
|
Red Damage
|
Proration
|
Cancel
|
Guard
|
| 800
|
606
|
60% (O)
|
-
|
H
|
| First Active
|
Active
|
Recovery
|
Frame Adv
|
Circuit
|
Invuln
|
| 29
|
5
|
13
|
-6
|
11.7%
|
-
|
|
A front flipkick follow-up to 2C. This version of the move happens when 2C whiffs or is blocked, and hits overhead. Hard knockdown.
|
~2C
(2C Hit)
|
Damage
|
Red Damage
|
Proration
|
Cancel
|
Guard
|
| 600
|
404
|
50% (O)
|
(J)
|
LHA
|
| First Active
|
Active
|
Recovery
|
Frame Adv
|
Circuit
|
Invuln
|
| 14
|
2
|
29 (14)
|
-19 (-3)
|
9.0%
|
-
|
|
A front flipkick follow-up to 2C when 2C hits or guard breaks. Only launches airborne opponents, so do not use the followup after a guard break. Favor 4B > 5C combos when in range, because this move's proration tanks your damage. Has special jump cancel properties, allowing White Len to use a jump cancel earlier in a combo before ending with this for an air combo finisher. Recovery and frame advantage numbers under parentheses are for the earliest possible jump cancel.
|
|
Aerial Normals
|
|
| Damage
|
Red Damage
|
Proration
|
Cancel
|
Guard
|
| 350
|
202
|
70% (O)
|
SE, N, SP, EX, J
|
HA
|
| First Active
|
Active
|
Recovery
|
Frame Adv
|
Circuit
|
Invuln
|
| 6
|
4
|
10
|
-
|
3.6%
|
-
|
|
A forward finger poke with her orb. It's a decent air to air option, and can be used for okizeme as a setup into grab because it whiffs most crouching opponents. It has a fair amount of recovery on whiff, so be careful with it.
|
|
|
|
| j.B
|
Damage
|
Red Damage
|
Proration
|
Cancel
|
Guard
|
| 700
|
303
|
95% (O)
|
N, SP, EX, J
|
HA
|
| First Active
|
Active
|
Recovery
|
Frame Adv
|
Circuit
|
Invuln
|
| 7
|
9
|
-
|
-
|
7.2%
|
-
|
|
A downwards swipe with her orb. The range on this move is short, but it can sometimes crossup a crouching opponent, which widens their hurtbox. This is mostly a filler move for her air combos, while being an essential component to her fuzzy guard game.
|
| j.[B]
|
Damage
|
Red Damage
|
Proration
|
Cancel
|
Guard
|
| 700
|
303
|
95% (O)
|
N, SP, EX, J
|
HA
|
| First Active
|
Active
|
Recovery
|
Frame Adv
|
Circuit
|
Invuln
|
| 15
|
X
|
-
|
-
|
7.2%
|
-
|
|
Delayed version of j.B. Lasts until landing, and notably reduces the size of White Len's hurtbox, making it harder to anti-air her.
|
|
|
|
| j.C
|
Damage
|
Red Damage
|
Proration
|
Cancel
|
Guard
|
| 900
|
606
|
90% (M)
|
N, SP, EX, J
|
HA
|
| First Active
|
Active
|
Recovery
|
Frame Adv
|
Circuit
|
Invuln
|
| 8
|
3
|
-
|
-
|
9.0%
|
-
|
|
An upwards swipe with her orb. Important component of her combos. Can be used after an IAD to counter-hit opponents trying to interrupt your air zoning.
|
| j.[C]
|
Damage
|
Red Damage
|
Proration
|
Cancel
|
Guard
|
| 550
|
202
|
95% (O)
|
-
|
LHA
|
| First Active
|
Active
|
Recovery
|
Frame Adv
|
Circuit
|
Invuln
|
| 26
|
X
|
14
|
-
|
4.5%
|
-
|
|
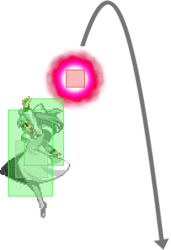
Orb throw / basketball. Upward momentum gained on frame 20. The projectile is active until it lands or touches something. Recovers during active frames. Can act or block after recovery.
|
|
Command Normals
|
|
| 4B
|
Damage
|
Red Damage
|
Proration
|
Cancel
|
Guard
|
| 800
|
555
|
65% (O)
|
N, SP, EX, (J)
|
LH
|
| First Active
|
Active
|
Recovery
|
Frame Adv
|
Circuit
|
Invuln
|
| 11
|
3
|
23
|
-8
|
7.2%
|
-
|
|
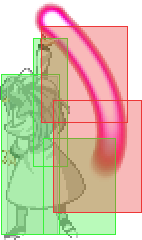
A straight upward swipe with her pink orb. Moves White Len forward. It's a launcher with good vertical range, which allows it to anti-air a lot of jump-ins, but it has bad proration.
|
| 4[B]
|
Damage
|
Red Damage
|
Proration
|
Cancel
|
Guard
|
| 1000
|
707
|
65% (O)
|
N, SP, EX, (J)
|
LH
|
| First Active
|
Active
|
Recovery
|
Frame Adv
|
Circuit
|
Invuln
|
| 22
|
4
|
19
|
-5
|
7.2%
|
-
|
|
Stronger version of 4B. It is noticeably more disjointed and moves her forward even more. Hitbox-wise, this is her best anti-air.
|
|
|
|
| Damage
|
Red Damage
|
Proration
|
Cancel
|
Guard
|
| 1050
|
656
|
85% (M) / 40% (O)
|
SP, EX, J
|
HA
|
| First Active
|
Active
|
Recovery
|
Frame Adv
|
Circuit
|
Invuln
|
| 9
|
3
|
-
|
-
|
8.1%
|
-
|
|
A down-angled strike with her orb. A strong component of White Len's fuzzy game, sometimes used in combos to rack in one last hit. Not very active, so be careful approaching with it.
|
|
Universal Mechanics
|
|
| Damage
|
Red Damage
|
Proration
|
Cancel
|
Guard
|
| 1400
|
505
|
30%
|
-
|
U
|
| First Active
|
Active
|
Recovery
|
Frame Adv
|
Circuit
|
Invuln
|
| 3
|
1
|
20
|
-
|
0.0%
|
-
|
|
Over-the-shoulder throw that can be used to combo in the corner. Important part of her pressure game.
|
|
|
|
| Damage
|
Red Damage
|
Proration
|
Cancel
|
Guard
|
1600 (1408, Raw)
1200
|
430
|
30%
|
-
|
U
|
| First Active
|
Active
|
Recovery
|
Frame Adv
|
Circuit
|
Invuln
|
| 2
|
1
|
12
|
-
|
0.0%
|
-
|
|
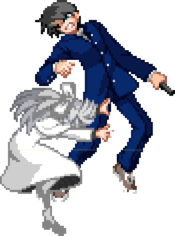
Classic dunk that leads to a hard knockdown. Raw air throws let you follow up with 5B. White Len can act before hitting the ground.
|
|
|
|
| Standing
|
Damage
|
Red Damage
|
Proration
|
Cancel
|
Guard
|
| 500 (345)
|
202
|
45%
|
(SP), (EX), (J)
|
LHA
|
| First Active
|
Active
|
Recovery
|
Frame Adv
|
Circuit
|
Invuln
|
| 9
|
4
|
18
|
-4
|
4.5%
|
-
|
|
Same animation as 4B.
|
| Aerial
|
Damage
|
Red Damage
|
Proration
|
Cancel
|
Guard
|
| 500 (345)
|
202
|
45%
|
-
|
HA
|
| First Active
|
Active
|
Recovery
|
Frame Adv
|
Circuit
|
Invuln
|
| 9
|
4
|
-
|
16 (Max)
|
4.5%
|
-
|
|
Same animation as j.C.
|
|
|
|
| Bunker
|
Damage
|
Red Damage
|
Proration
|
Cancel
|
Guard
|
| 500
|
202
|
100%
|
-
|
LHA
|
| First Active
|
Active
|
Recovery
|
Frame Adv
|
Circuit
|
Invuln
|
| 26
|
4
|
19
|
-5
|
0.0%
(-50.0% in blockstun)
|
Clash 1-10
|
| (Clash)
|
Damage
|
Red Damage
|
Proration
|
Cancel
|
Guard
|
| 500
|
202
|
100%
|
-
|
LHA
|
| First Active
|
Active
|
Recovery
|
Frame Adv
|
Circuit
|
Invuln
|
| 8
|
4
|
19
|
-5
|
0.0%/-50.0%
|
Strike 1-7
|
|
Shield bunker similar to 4B.
|
|
|
|
| Damage
|
Red Damage
|
Proration
|
Cancel
|
Guard
|
| 100
|
0
|
100%
|
-
|
U
|
| First Active
|
Active
|
Recovery
|
Frame Adv
|
Circuit
|
Invuln
|
| 19
|
3
|
25
|
-
|
Uses all
|
Full 1-21
|
|
Forward positioned Heat hitbox.
|
|
|
|
| Ground
|
Damage
|
Red Damage
|
Proration
|
Cancel
|
Guard
|
| 100
|
0
|
100%
|
-
|
U
|
| First Active
|
Active
|
Recovery
|
Frame Adv
|
Circuit
|
Invuln
|
| 11
|
10
|
20
|
-
|
removes all
|
Full 1-39
|
| Air
|
Damage
|
Red Damage
|
Proration
|
Cancel
|
Guard
|
| 100
|
0
|
100%
|
-
|
U
|
| First Active
|
Active
|
Recovery
|
Frame Adv
|
Circuit
|
Invuln
|
| 12
|
10
|
15
|
-
|
removes all
|
Strike 1-30
|
|
Universal burst mechanic. Unlike Crescent/Full Heat activation, the hitbox and frame data doesn't vary between characters. However, you can be thrown out of this move if you input it in the air.
|
|
Special Moves
Special Movement
|
|
Forward /
(Held)
|
Damage
|
Red Damage
|
Proration
|
Cancel
|
Guard
|
| -
|
-
|
-
|
-
|
-
|
| First Active
|
Active
|
Recovery
|
Frame Adv
|
Circuit
|
Invuln
|
| -
|
-
|
30 /
21
|
-
|
-
|
Full 6-26 /
Full 6-15, High 16-X
|
|
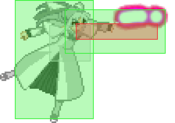
Spawns an illusion of several WLens walking forward while the real one goes through an invulnerable teleport. Holding forward makes WLen appear earlier, in which she runs indefinitely in an upper body invulnerable state.
|
| Back
|
Damage
|
Red Damage
|
Proration
|
Cancel
|
Guard
|
| -
|
-
|
-
|
-
|
-
|
| First Active
|
Active
|
Recovery
|
Frame Adv
|
Circuit
|
Invuln
|
| -
|
-
|
29
|
-
|
-
|
Strike 1-5, Full 6-24
|
|
Spawns the same illusion as forward dash, with WLen just walking back a short distance away after teleporting.
|
|
Grounded Specials
|
|
| A
|
Damage
|
Red Damage
|
Proration
|
Cancel
|
Guard
|
| 1000
|
808
|
100%
|
-EX-
|
LHA
|
| First Active
|
Active
|
Recovery
|
Frame Adv
|
Circuit
|
Invuln
|
| 11
|
X
|
31
|
-9 ~ 19
|
9.0%
|
-
|
|
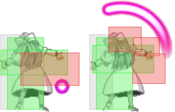
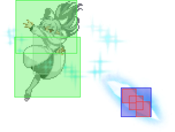
An ice shard projectile shot straight forward. Good for conditioning your opponent to jump. EX cancellable, so you can follow it up with 236C on block.
|
| B
|
Damage
|
Red Damage
|
Proration
|
Cancel
|
Guard
|
| 1000
|
808
|
100%
|
-EX-
|
LHA
|
| First Active
|
Active
|
Recovery
|
Frame Adv
|
Circuit
|
Invuln
|
| 15
|
X
|
31
|
-9 ~ 11
|
9.0%
|
-
|
|
Same as 236A, but comes out slower, goes faster and launches the opponent. Good for catching landings and jump outs. Goes through opponents at point blank.
|
| EX
|
Damage
|
Red Damage
|
Proration
|
Cancel
|
Guard
|
| 400*5 (1691)
|
(1280)
|
95% (M)*5
|
-
|
LHA
|
| First Active
|
Active
|
Recovery
|
Frame Adv
|
Circuit
|
Invuln
|
| 8+11
|
X
|
28
|
-6 ~ 38
|
-100.0%
|
-
|
|
A five-hit ice shard that goes the same speed as 236B. It's unfortunate scaling makes it situational for combos, but it's an amazing tool for getting in and for oki. A lot of your meter will be spent on this. OTG relaunches.
|
|
|
|
| A
|
Damage
|
Red Damage
|
Proration
|
Cancel
|
Guard
|
| 300*3, 500 (1324)
|
(566)
|
70% (O)
|
-EX-
|
LHA (1-3), LH (4)
|
| First Active
|
Active
|
Recovery
|
Frame Adv
|
Circuit
|
Invuln
|
| 7
|
17 (6) 3
|
14
|
-2
|
2.7%*3, 5.4% (13.5%)
|
Low 4-27
|
|
A toe loop jump followed by a roundhouse kick. Can be held for frametraps between the spin and the kick. Super jump cancelable after she lands and before the kick, including during the charge. Good tool to get in when canceled into 236C, 214C or IAD. If the second to last hit is EX Guarded as soon as possible, the opponent has a 1f window where they can act before the last hit. When SJC'd before the kick, it's -2 (SJ9) and -6 (SJ8) on block normally. May be 1-3 frames more advantageous when the last hit is tippered.
|
| [A]
|
Damage
|
Red Damage
|
Proration
|
Cancel
|
Guard
|
| 300*3, 500 (1324)
|
(566)
|
70% (O)
|
-EX-, (J)
|
LHA (1-3), H (4)
|
| First Active
|
Active
|
Recovery
|
Frame Adv
|
Circuit
|
Invuln
|
| 7
|
17 (22) 3
|
14
|
2
|
2.7%*3, 5.4% (13.5%)
|
Low 4-27
|
|
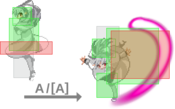
Charged version of 623A. Can be mashed out of on block before the kick, but the kick hits overhead and is positive on block. Launches.
|
| B
|
Damage
|
Red Damage
|
Proration
|
Cancel
|
Guard
|
| 350*3, 1200 (2104)
|
(1266)
|
70% (O)
|
-
|
LHA (1-3), LH (4)
|
| First Active
|
Active
|
Recovery
|
Frame Adv
|
Circuit
|
Invuln
|
| 10
|
17 (8) 3
|
27
|
-17
|
2.7%*3, 10.8%
|
Low 7-26
|
|
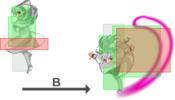
Similar to 623A, but it can't be charged, isn't EX cancellable, and the kick wallslams. Super jump cancelable after she lands, before the kick. Used in corner combos. On block, there is a 1f window before the last hit where the opponent can act. When SJC'd before the kick, it's -3 (SJ9) and -7 (SJ8) on block normally. May be 1-3 frames more advantageous when the last hit is tippered.
|
| EX
|
Damage
|
Red Damage
|
Proration
|
Cancel
|
Guard
|
| 200*9, 1300 (2506)
|
(1765)
|
70% (M)
|
-
|
LHA
|
| First Active
|
Active
|
Recovery
|
Frame Adv
|
Circuit
|
Invuln
|
| 2+3
|
18 (7) 3
|
19
|
-10
|
-100.0%
|
Full 1-4
|
|
A powered up 623B. Wallslams and does more damage, but multiplicative proration and it being fully air blockable means it won't see much use. Invincible until it's active, so it can be used as a last resort reversal. OTG relaunches.
|
|
|
|
| A
|
Damage
|
Red Damage
|
Proration
|
Cancel
|
Guard
|
| 1000
|
707
|
70% (O)
|
-
|
LHA
|
| First Active
|
Active
|
Recovery
|
Frame Adv
|
Circuit
|
Invuln
|
| 67
|
300
|
39
|
29
|
9.0%
|
-
|
|
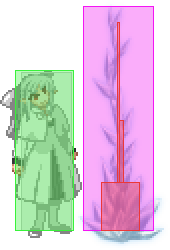
A vertical ice trap. It's guaranteed to come out if White Len is not interrupted before frame 37. Disappears on contact with the opponent, if the opponent hits it, or if White Len blocks or gets hit.
|
| B
|
Damage
|
Red Damage
|
Proration
|
Cancel
|
Guard
|
| 1000
|
707
|
70% (O)
|
-
|
LH
|
| First Active
|
Active
|
Recovery
|
Frame Adv
|
Circuit
|
Invuln
|
| 69
|
300
|
39
|
29
|
9.0%
|
-
|
|
An horizontal ice trap. It's guaranteed to come out if White Len is not interrupted before frame 37. Disappears on contact with the opponent, if the opponent hits it, or if White Len blocks or gets hit.
|
| EX
|
Damage
|
Red Damage
|
Proration
|
Cancel
|
Guard
|
| 500*5 (1630)
|
(1318)
|
70% (O)
|
-
|
LH
|
| First Active
|
Active
|
Recovery
|
Frame Adv
|
Circuit
|
Invuln
|
| 4+23
|
20
|
0
|
8 ~ 64
|
-100.0%
|
Full 1-10
|
|
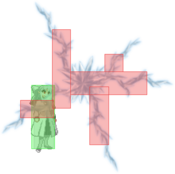
A five-hit snowflake summoned by White Len. Fully invuln on superflash, making it a pseudo-reversal that guarantees a trade in your favor. White Len can get thrown out of it before the hitbox comes out. OTG relaunches.
|
|
|
|
| A
|
Damage
|
Red Damage
|
Proration
|
Cancel
|
Guard
|
| -
|
-
|
-
|
-
|
-
|
| First Active
|
Active
|
Recovery
|
Frame Adv
|
Circuit
|
Invuln
|
| -
|
-
|
41
|
-
|
-
|
Full 18-27
|
|
A forward teleport. Invulnerable while traveling (from frame 18 to 27). Can cross the opponent up.
|
| B
|
Damage
|
Red Damage
|
Proration
|
Cancel
|
Guard
|
| -
|
-
|
-
|
-
|
-
|
| First Active
|
Active
|
Recovery
|
Frame Adv
|
Circuit
|
Invuln
|
| -
|
-
|
36
|
-
|
-
|
Full 1-20
|
|
A fakeout 623X. Returns to White Len's original position after the fakeout ends.
|
| C
|
Damage
|
Red Damage
|
Proration
|
Cancel
|
Guard
|
| -
|
-
|
-
|
-
|
-
|
| First Active
|
Active
|
Recovery
|
Frame Adv
|
Circuit
|
Invuln
|
| -
|
-
|
46
|
-
|
-
|
Full 1-30
|
|
A fakeout 623X. Unlike the B version, White Len travels about the same distance as 22A. Can cross the opponent up.
|
| D
|
Damage
|
Red Damage
|
Proration
|
Cancel
|
Guard
|
| -
|
-
|
-
|
-
|
-
|
| First Active
|
Active
|
Recovery
|
Frame Adv
|
Circuit
|
Invuln
|
| 23
|
X
|
5
|
-
|
-
|
-
|
|
Cat transformation. Cute, but useless. Essentially a taunt, but can be used as a gimmicky feint for 22A. Recovery frames take place once any direction or button is pressed.
|
|
Aerial Specials
|
|
| A
|
Damage
|
Red Damage
|
Proration
|
Cancel
|
Guard
|
| 1000
|
808
|
100% (O)
|
-EX-
|
LHA
|
| First Active
|
Active
|
Recovery
|
Frame Adv
|
Circuit
|
Invuln
|
| 9
|
X
|
12
|
16
|
9.0%
|
-
|
|
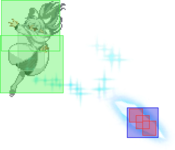
An ice shard projectile shot diagonally down. Along with j.[C], this is an integral part of White Len's runaway zoning game. EX cancellable, which can be used to keep the pressure on or confirm with j.236C. Recovery frames are on landing. OTG relaunches.
|
| B
|
Damage
|
Red Damage
|
Proration
|
Cancel
|
Guard
|
| 1000
|
808
|
100% (O)
|
-EX-
|
LHA
|
| First Active
|
Active
|
Recovery
|
Frame Adv
|
Circuit
|
Invuln
|
| 15
|
X
|
20 (12)
|
2 (TK)
|
9.0%
|
-
|
|
Same as j.236A, but freezes you in place, comes out slower, goes faster and launches the opponent. Leaves you fully actionable. Good for baiting reversals safely.
|
| EX
|
Damage
|
Red Damage
|
Proration
|
Cancel
|
Guard
|
| 400*5 (1691)
|
(1280)
|
95% (M)*5
|
-
|
LHA
|
| First Active
|
Active
|
Recovery
|
Frame Adv
|
Circuit
|
Invuln
|
| 2+8
|
X
|
12
|
61
|
-100.0%
|
-
|
|
Air version of 236C. About as good a tool to get in as the grounded version, its diagonal angle is very good for using it after fuzzy pressure. Can be used in corner carry combos and oki setups. Don't use it too low or it won't come out.
|
|
|
|
| A
|
Damage
|
Red Damage
|
Proration
|
Cancel
|
Guard
|
| -
|
-
|
-
|
-EX-
|
-
|
| First Active
|
Active
|
Recovery
|
Frame Adv
|
Circuit
|
Invuln
|
| 6
|
X
|
9
|
-
|
-
|
-
|
|
A diagonal fastfall. EX cancellable while falling.
|
| [A]
|
Damage
|
Red Damage
|
Proration
|
Cancel
|
Guard
|
| -
|
-
|
-
|
-EX-
|
-
|
| First Active
|
Active
|
Recovery
|
Frame Adv
|
Circuit
|
Invuln
|
| 16
|
X
|
9
|
-
|
-
|
-
|
|
A diagonal fastfall that happens when held for at least 13 frames. Has no collision box. EX cancellable while falling.
|
| B
|
Damage
|
Red Damage
|
Proration
|
Cancel
|
Guard
|
| 800*3 (2142)
|
(1701)
|
100%
|
-EX-
|
LHA
|
| First Active
|
Active
|
Recovery
|
Frame Adv
|
Circuit
|
Invuln
|
| 5 (6)
|
9 (4)
|
8
|
-19 (TK)
|
7.2%, 6.3%, 3.6% (18.9%)
|
-
|
|
A rising flipkick that shoots down an icicle below White Len. EX cancellable.
|
| EX
|
Damage
|
Red Damage
|
Proration
|
Cancel
|
Guard
|
| 400, 450, 500 (1193)
|
(1024)
|
65% (M)
|
(N), (SP), (EX), (J)
|
LHA
|
| First Active
|
Active
|
Recovery
|
Frame Adv
|
Circuit
|
Invuln
|
| 1+4 (1+5)
|
6 (4)
|
8
|
-20 (TK)
|
-100.0%
|
Full 1, High 2-3
|
|
EX version of j.214B. If the initial hit lands, the last hit afterwards is cancellable into anything except j.214C and air backdash. Use this to ensure kills or as a meter dump.
|
|
Arc Drive
|
|
| Damage
|
Red Damage
|
Proration
|
Cancel
|
Guard
|
| 440*N
|
363*N
|
50% (O)
|
-
|
LHA
|
| First Active
|
Active
|
Recovery
|
Frame Adv
|
Circuit
|
Invuln
|
| 8+9
|
X
|
38
|
-7 (min)
|
removes all
|
Full 1-8, Clash 17-X
|
|
White Len summons a magical orb, which slowly floats towards the other side of the screen. Acts as a potent reversal, as the orb is guaranteed to come out and is positive on block because of its multiple hits. Will often carry a blocking opponent to the other side of the screen and corner them while inflicting significant chip damage. However, its proration makes it lackluster as a combo starter. Like 214C, is vulnerable to getting thrown.
|
|
Another Arc Drive
|
|
| Damage
|
Red Damage
|
Proration
|
Cancel
|
Guard
|
| 0, 700*32 (4779)
|
(3838)
|
50% (O)
|
-
|
LHA
|
| First Active
|
Active
|
Recovery
|
Frame Adv
|
Circuit
|
Invuln
|
| 8+0
|
X
|
70
|
-38 (min)
|
removes all
|
Full 1-58
|
|
White Len summons a magical orb, which quickly moves towards the other side of the screen. On hit, traps her opponent within a world of mirrors. While it is still a reversal, it only has a single hit if blocked, making it extremely unsafe.
|
|
Last Arc
|
|
| Damage
|
Red Damage
|
Proration
|
Cancel
|
Guard
|
| 1000, 500*6, 5000 (3827 ~ 7285)
|
(2953 ~ 5593)
|
50% + 50% * remaining BH time
|
-
|
U
|
| First Active
|
Active
|
Recovery
|
Frame Adv
|
Circuit
|
Invuln
|
| 4+0
|
1
|
46
|
-
|
removes all
|
Full 1-4
|
|
White Len traps her opponent within a world of mirrors. Grants a hard knockdown.
|
|
General Gameplan
Neutral
Offense
Defense
Combos
| Combo Notation Help
|
Disclaimer: Combos are written by various writers, so the actual notation used in pages can differ from the standard one.
For more information, see Glossary and Controls.
|
| X > Y
|
X input is cancelled into Y.
|
| X > delay Y
|
Must wait for a short period before cancelling X input into Y.
|
| X, Y
|
X input is linked into Y, meaning Y is done after X's recovery period.
|
| X+Y
|
Buttons X and Y must be input simultaneously.
|
| X/Y
|
Either the X or Y input can be used.
|
| X~Y
|
This notation has two meanings.
- Use attack X with Y follow-up input.
- Input X then within a few frames, input Y. Usually used for option selects.
|
| X(w)
|
X input must not hit the opponent (Whiff).
|
| j.X
|
X input is done in the air, implies a jump/jump cancel if the previous move was done from the ground.
Applies to all air chain sections:
- Assume a forward jump cancel if no direction is given.
- Air chains such as j.A > j.B > j.C can be shortened to j.ABC.
|
| sj.X
|
X input is done after a super jump. Notated as sj8.X and sj9.X for neutral and forward super jumps respectively.
|
| dj.X
|
X input is done after a double jump.
|
| sdj.X
|
X input is done after a double super jump.
|
| tk.X
|
Stands for Tiger Knee. X motion must be buffered before jumping, inputting the move as close to the ground as possible. (ex. tk.236A)
|
| (X)
|
X is optional. Typically the combo will be easier if omitted.
|
| [X]
|
Input X is held down. Also referred to as Blowback Edge (BE). Depending on the character, this can indicate that this button is held down and not released until indicated by the release notation.
|
| ]X[
|
Input X is released. Will only appear if a button is previously held down. This type of input is referred to as Negative Edge.
|
| {X}
|
Button X should only be held down briefly to get a partially charged version instead of the fully charged one.
|
| X(N)
|
Attack "X" should only hit N times.
|
| (XYZ)xN
|
XYZ string must be performed N times. Combos using this notation are usually referred to as loops.
|
| (XYZ^)
|
A pre-existing combo labelled XYZ is inserted here for shortening purposes.
|
| CH
|
The first attack must be a Counter Hit.
|
| Air CH
|
The first attack must be a Counter Hit on an airborne opponent.
|
| 66
|
Performs a ground forward dash.
|
| j.66
|
Performs an aerial forward dash, used as a cancel for certain characters' air strings.
|
| IAD/IABD
|
Performs an Instant AirDash.
|
| AT
|
Performs an Air Throw. (j.6/4A+D)
|
| IH
|
Performs an Initiative Heat.
|
| AD
|
Performs an Arc Drive.
|
| AAD
|
Performs an Another Arc Drive.
|
All combos in this section are taken from this video.
Air Combo Enders
| Condition
|
Notation
|
Damage
vs V.Sion
|
Notes
|
|
| Air combo ender
|
|
-
|
| |
| Meter Gained: - |
Meter Given (vs C-Moon): - |
| Regular air combo ender. |
|
|
| Air combo, 100% meter
|
- dj.(A)BC > j.214B > j.214C > AT
|
-
|
| |
| Meter Gained: - |
Meter Given (vs C-Moon): - |
| Meter dump ender for meter managed or to juice a confirm for a KO. |
|
|
| Air combo, 200% meter
|
- dj.(A)BC > j.214B > j.214C > j.[C], j.44 j.214B > j.214C > AT
|
-
|
| |
| Meter Gained: - |
Meter Given (vs C-Moon): - |
| Optimal 200% meter dump for a KO. Useful in MAX or to end the deciding round. |
|
|
| Air combo, MAX mode
|
- dj.(A)BC > j.214B > IH j.214B > j.214C > AT
|
-
|
| |
| Meter Gained: - |
Meter Given (vs C-Moon): - |
| Optimal Initiative Heat usage for damage. j.214B has insane damage output, and getting two in the same combo without j.214C's scaling getting in the way adds up very quickly. |
|
|
Air combo
Works On: Kouma only, corner
|
- dj.(A)BC > AT, (j.236A, j.BC > dj.ABC > AT)×2
|
-
|
| |
| Meter Gained: - |
Meter Given (vs C-Moon): - |
| Kouma-exclusive AT, j.236A OTG relaunch loop. Reliant on ground bounces, so each instance of 2CC, 5[B], 623B or 623C prior to this will reduce the maximum rep count by one. |
|
|
Normal Combos
| Condition
|
Notation
|
Damage
vs V.Sion
|
Notes
|
|
| Normal starter, grounded opponent
|
- 2AA > 5B > 2B > 2CC > j.ABC > sdj.ABC > AT
|
3834
|
| |
| Meter Gained: 77.4% |
Meter Given (vs C-Moon): 25.8% |
| Standard midscreen combo. Press 5B as fast as possible; the timing is unusually strict for a 2A > 5B string. |
|
|
| Normal starter, grounded opponent
|
- 2AA > 5B > 2B > delay 4B > 5C > j.BC > sdj.ABC > AT
|
4274
|
| |
| Meter Gained: 72.9% |
Meter Given (vs C-Moon): 24.3% |
| Optimized midscreen combo. The delay is very short and serves to let both hits of 5C connect. 4B whiffs at max range; do the previous combo. |
|
|
| 5B starter, grounded opponent
|
- 5B > 2B > delay 5C > j.BC > sdj.BC2C > AT
|
4405
|
| |
| Meter Gained: 63.9% |
Meter Given (vs C-Moon): 21.3% |
| Optimal meterless midscreen combo for DP punishes. The delay lets j.2C connect. Does not work against standing opponents in the corner. |
|
|
| 623[A] starter, grounded opponent
|
- 623[A], microwalk (2A > 2B)×2 > 2C > 214A/B
|
2140
|
| |
| Meter Gained: 30.6% |
Meter Given (vs C-Moon): 10.2% |
| Ice trap okizeme off of 623[A]. Microwalk only necessary if you want to get two reps midscreen; you can always do a single 2A > 2B rep without microwalk. |
|
|
| 623[A] starter, grounded opponent
|
- 623[A], microwalk (2A > 2B)×2 > 4[B] > 5C > j.BC > sdj.ABC > AT
|
4230
|
| |
| Meter Gained: 74.7% |
Meter Given (vs C-Moon): 24.9% |
| Damage route off of 623[A]. Microwalk only necessary if you want to get two reps midscreen; you can always do a single 2A > 2B rep without microwalk. |
|
|
| j.[C], j.214B starter
|
- j.[C] (throw), j.214B (icicle hit) ~ j.[C] (hit), 2B > 4[B] > 5C > j.BC > sdj.ABC > AT
|
4241
|
| |
| Meter Gained: 66.6% |
Meter Given (vs C-Moon): 22.2% |
| Confirm off of successful j.[C], j.214B setup in neutral. 2B, 2A > 2B is possible depending on distance. |
|
|
Shield Counter / Air CH starter
Works On: Everyone except Neco-Arc and NAC
|
- (D~236D/Air CH), 2B, (2A > 2B)×2 > 4[B] > 5C > j.BC > sdj.ABC > AT
|
3320
|
| |
| Meter Gained: 78.3% |
Meter Given (vs C-Moon): 26.1% |
| Values tested with Shield Counter starter. Optimized shield counter / air counter hit pick-up. |
|
|
| Raw airthrow starter
|
- Raw AT, 5B > 2B > delay 2C > 214A/B
|
2053
|
| |
| Meter Gained: 22.5% |
Meter Given (vs C-Moon): 7.5% |
| Ice trap okizeme off of a raw airthrow. |
|
|
| Raw airthrow starter
|
- Raw AT, 5B > 2B > 4[B] > 5C > j.BC > sdj. ABC > AT
|
3106
|
| |
| Meter Gained: 66.6% |
Meter Given (vs C-Moon): 22.2% |
| Damage route off of a raw airthrow. |
|
|
Corner Combos
| Condition
|
Notation
|
Damage
vs V.Sion
|
Notes
|
|
Normal starter, grounded opponent
Works On: Everyone except Arcueid, Kouma, Nanaya, Nero, Tohno and Warachia
|
- 2AA > 5B > 2B > 2CC > delay j.C/j.2C > sdj delay j.214B
|
2970
|
| |
| Meter Gained: 50.4% |
Meter Given (vs C-Moon): 16.8% |
| Values tested with j.C. Impractical but optimal meterless HKD route. They have to be in the corner after j.C/j.2C hits. |
|
|
Normal starter, grounded opponent
Works On: Everyone except Neco-Arc and NAC
|
- (2AA) > 5C > 623B, 5A > delay 5C > j.BC > sdj.ABC > AT
|
4992
|
| |
| Meter Gained: 86.4% |
Meter Given (vs C-Moon): 28.8% |
| Optimal corner combo. Values tested with 2AA starter. |
|
|
| CH 5[C] starter
|
- CH 5[C] > 214A, 2B > 2CC > j.BC > sdj.ABC > AT
|
3824
|
| |
| Meter Gained: 67.5% |
Meter Given (vs C-Moon): 22.5% |
| Counter-hit 5[C] lets you plant an ice trap and pick up with 2B, getting strong oki after air throw ender. |
|
|
Raw airthrow starter
Works On: Everyone except Ciel, Roa, Ryougi and Warc
|
- Raw AT, 5B > 2B > delay 2C > 214A/B
|
2246
|
| |
| Meter Gained: 30.1% |
Meter Given (vs C-Moon): 10.0% |
| Corner optimization of the ice trap okizeme route off of a raw airthrow. 5B > 2B whiffs on Ciel, Roa, Ryougi and Warc in the corner, so replace the pickup with 2B, 2A > 2B. |
|
|
| Raw airthrow starter
|
- Raw AT, 5B > 2B > 4[B] > 5C > j.BC > sdj. ABC > AT
|
3186
|
| |
| Meter Gained: 74.2% |
Meter Given (vs C-Moon): 24.7% |
| Corner optimization of the damage route off of a raw airthrow. 5B > 2B whiffs on Ciel, Roa, Ryougi and Warc in the corner, so replace the pickup with 2B, 2A > 2B. |
|
|
| Ground throw starter
|
- Throw, 5A > 5C > j.BC > sdj.ABC > AT
|
2775
|
| |
| Meter Gained: 50.4% |
Meter Given (vs C-Moon): 16.8% |
| Basic combo off of corner throw. |
|
|
Ground throw starter
Works On: Everyone except Satsuki
|
- Throw, (2A > 2B)×2 > 2C > 214A/B
|
2126
|
| |
| Meter Gained: 25.2% |
Meter Given (vs C-Moon): 8.4% |
| Ice trap okizeme off of corner throw. Cannot do a second loop rep on Satsuki. |
|
|
Ground throw starter
Works On: Everyone except Ciel, Roa, Ryougi and Warc
|
- Throw, (2A > 2B)×2 > 4[B] > 5C > j.BC > sdj.ABC > AT
|
3166
|
| |
| Meter Gained: 69.3% |
Meter Given (vs C-Moon): 23.1% |
| Damage route off of corner throw. Cannot do a second loop rep on Satsuki. |
|
|
Metered Combos
| Condition
|
Notation
|
Damage
vs V.Sion
|
Notes
|
|
Normal starter, grounded opponent, 100% meter
Works On: Everyone except Riesbyfe* (view notes)
|
- 2AA > 5B > 2B > 2C > 236C/delay tk.236C, 5B > 2B > delay 2C > 214A/B
|
3571
|
| |
| Meter Gained: -61.6% |
Meter Given (vs C-Moon): 22.6% |
| Metered ice trap oki route. 28.8% meter gain before spending. Use the tk.236C version to sideswitch. 236C whiffs Riesbyfe after a sweep, so only use the tk.236C route on her. |
|
|
| Normal starter, grounded opponent, 100% meter
|
- 2AA > 5C > tk.236C > 5B > 2B > 2CC > j.BC > sdj.ABC > AT
|
4498
|
| |
| Meter Gained: -54.1% |
Meter Given (vs C-Moon): 33.7% |
| Metered not-quite-corner-carry route. 17.1% meter gain before spending.
Always puts the opponent in the corner, but White Len ends up half a screen away when done from the opposite corner.
Use strictly for corner carry; does less damage than just tacking on j.214B j.214C at the end of your normal combo.
Delay 2CC on Neco-Arc and NAC, or j.B will whiff. |
|
|
| Normal starter, grounded opponent, 100% meter, cornered
|
- 2AA > 5B > 2B > 2C > delay tk.236C > 5B > 2B > delay 2CC > j.BC > sdj.ABC > AT
|
4299
|
| |
| Meter Gained: -42.4% |
Meter Given (vs C-Moon): 37.6% |
| Metered corner steal combo. |
|
|
| Half-screen 236C starter, grounded opponent
|
- (236A) > 236C, sj9.2C, (5B >) 2B > 2CC > j.BC > sdj.ABC > AT
|
4027
|
| |
| Meter Gained: -62.5% |
Meter Given (vs C-Moon): 33.7% |
| Values tested with 236A starter. Press j.2C as you're about to land. Omit 5B at farther ranges. |
|
|
| 623A starter, 100% meter
|
- 623A > 623C, j.BC > sdj.BC2C > AT
|
2294
|
| |
| Meter Gained: -77.3% |
Meter Given (vs C-Moon): 26.4% |
| Values tested with last hit of 623A as starter. Midscreen confirm to keep your turn after 623A hits non-CH. Only works from ~1/3 of the stage. |
|
|
| 623A starter, grounded opponent, opponent cornered, 100% meter
|
- 623A > 623C, 5A > 5C(1) > j.BC > sdj.BC > AT
|
2317
|
| |
| Meter Gained: -76.9% |
Meter Given (vs C-Moon): 26.7% |
| Values tested with last hit of 623A as starter. Corner confirm to keep your turn after 623A hits non-CH. |
|
|
| Normal starter, grounded opponent, MAX mode
|
- 2AA > 5C > 623A > IH 5C > tk.236C, 5B > 2B > 2CC > j.BC > sdj.BC2C > AT
|
5026
|
| |
| Meter Gained: Uses all |
Meter Given (vs C-Moon): 42.4% |
| Full corner carry Initiative Heat combo. |
|
|
OTG Pickups
| Condition
|
Notation
|
Damage
vs V.Sion
|
Notes
|
|
| Normal OTG starter
|
|
-
|
| |
| Meter Gained: 23.4% |
Meter Given (vs C-Moon): 7.8% |
| Lets you tech trap with 2B or set 214X if you think they won't tech. |
|
|
| Normal OTG starter, 100% meter
|
- 5AAA > 5C > 623C, j.BC > sdj.ABC > AT
|
-
|
| |
| Meter Gained: -71.5% |
Meter Given (vs C-Moon): 28.0% |
| Highest damage OTG string. Use this if it will KO. 26.1% meter gain before spending. |
|
|
Character-Specific Optimizations
F-White Len has plenty of minor character-specific optimizations to juice more meter and damage from any loopable starter — Shield Counter, air counter-hit, corner throw, corner airthrow and 623[A]. The following is a table, taken from
this sheet compiled by ViviMayoi, denoting optimal variations for each character and starter. Characters who can't be comboed with the basic variation of a specific loop have their alternatives bolded.
Optimized Loops
| Character
|
SC/Air CH Loop
|
Corner Throw Loop
|
Corner AT Loop
|
Corner 623[A] Loop
|
| Basic Variation
|
2B, 2A > 2B, 2A > 2B
|
2A > 2B, 2A > 2B
|
5B > 2B, 2A > 2B
|
2A > 2B, 2A > 2B
|
| Akiha
|
2B, 5A > 2B, 5A > 2B
|
5A > 2B, 5A > 2B
|
5B > 2B, 5A > 2B
|
5A > 2B, 5A > 2B
|
| Aoko
|
2B, 5AA > 2B, 2A > 2B
|
5AA > 2B, 2A > 2B
|
5B > 2B, 5AA > 2B
|
5AA > 2B, 5AA > 2B
|
| Arcueid
|
2B, 5AA > 2B, 5A > 2B
|
5AA > 2B, 5A > 2B
|
5B > 2B, 5AA > 2B
|
5AA > 2B, 2AA > 2B
|
| Ciel
|
2B, 5AA > 2B, 5A > 2B
|
5A > 2B, 5A > 2B
|
2B, 5A > 2B, 5A > 2B
|
5AA > 2B, 5A > 2B
|
| Hime
|
2B, 5A > 2B, 5A > 2B
|
5A > 2B, 5A > 2B
|
5B > 2B, 5A > 2B
|
5A > 2B, 2AA > 2B
|
| Hisui
|
2B, 5A > 2B, 5A > 2B
|
5A > 2B, 5A > 2B
|
5B > 2B, 5A > 2B
|
5A > 2B, 5A > 2B
|
| Kohaku
|
2B, 5AA > 2B, 2A > 2B
|
5AA > 2B, 2AA > 2B
|
5B > 2B, 5AA > 2B
|
5AA > 2B, 5A > 2B
|
| Kouma
|
2B, 5AA > 2B, 5A > 2B
|
5A > 2B, 5A > 2B
|
5B > 2B, 5A > 2B
|
5AA > 2B, 5A > 2B
|
| Len
|
2B, 5A > 2B, 5A > 2B
|
5A > 2B, 5A > 2B
|
5B > 2B, 5A > 2B
|
5A > 2B, 5A > 2B
|
| Mech
|
2B, 5AA > 2B, 5A > 2B
|
5AA > 2B, 2A > 2B
|
5B > 2B, 5AA > 2B
|
5AA > 2B, 2AA > 2B
|
| Miyako
|
2B, 5AA > 2B, 5A > 2B
|
5AA > 2B, 2AA > 2B
|
5B > 2B, 2AA > 2B
|
5AA > 2B, 2AA > 2B
|
| NAC
|
5B > 2B, 2A > 2B
|
5AA > 2B, 2A > 2B
|
5B > 2B, 2A > 2B
|
5AA > 2B, 2A > 2B
|
| Nanaya
|
2B, 5AA > 2B, 5A > 2B
|
5A > 2B, 2AA > 2B
|
5B > 2B, 2AA > 2B
|
5A > 2B > 2AA > 2B
|
| Neco-Arc
|
5B > 2B, 2A > 2B
|
5AA > 2B, 2A > 2B
|
5B > 2B, 2A > 2B
|
5AA > 2B, 2A > 2B
|
| Nero
|
2B, 5A > 2B, 5A > 2B
|
5A > 2B, 5A > 2B
|
5B > 2B, 5A > 2B
|
5A > 2B, 5A > 2B
|
| P. Ciel
|
2B, 5AA > 2B, 5A > 2B
|
5A > 2B, 5AA > 2B
|
5B > 2B, 5AA > 2B
|
5AA > 2B, 2AA > 2B
|
| Riesbyfe
|
2B, 5A > 2B, 5A > 2B
|
5A > 2B, 5A > 2B
|
5B > 2B, 5A > 2B
|
5A > 2B, 5A > 2B
|
| Roa
|
2B, 5AA > 2B, 2A > 2B
|
2A > 2B, 5A > 2B
|
2B, 5A > 2B, 2A > 2B
|
5AA > 2B, 2A > 2B
|
| Ryougi
|
2B, 5AA > 2B, 5A > 2B
|
5AA > 2B, 5A > 2B
|
2B, 2AA > 2B, 2A > 2B
|
5AA > 2B, 5A > 2B
|
| Satsuki
|
2B, 5A > 2B, 2A > 2B
|
5AA > 2B
|
5B > 2B, 2AA > 2B
|
5A > 2B, 5A > 2B
|
| Seifuku
|
2B, 5A > 2B, 5A > 2B
|
5A > 2B, 5A > 2B
|
5B > 2B, 5A > 2B
|
5A > 2B, 5A > 2B
|
| Sion
|
2B, 5A > 2B, 2A > 2B
|
5A > 2B, 5A > 2B
|
5B > 2B, 5A > 2B
|
5A > 2B, 5A > 2B
|
| Tohno
|
2B, 5AA > 2B, 5A > 2B
|
5AA > 2B, 5AA > 2B
|
5B > 2B, 5A > 2B, 2A > 2B
|
5AA > 2B, 5AA > 2B
|
| V. Akiha
|
2B, 5A > 2B, 5A > 2B
|
5A > 2B, 5A > 2B
|
5B > 2B, 5A > 2B
|
5A > 2B, 5A > 2B
|
| V.Sion
|
2B, 5AA > 2B, 2A > 2B
|
5AA > 2B, 2AA > 2B
|
5B > 2B, 2AA > 2B
|
5AA > 2B, 2AA > 2B
|
| W. Arc
|
2B, 5A > 2B, 5A > 2B
|
5A > 2B, 5A > 2B
|
2B, 5A > 2B, 2A > 2B
|
5A > 2B, 5A > 2B
|
| W. Len
|
2B, 5AA > 2B, 5A > 2B
|
5AA > 2B, 5A > 2B
|
5B > 2B, 5AA > 2B
|
2AA > 2B, 2AA > 2B
|
| Warachia
|
2B, 5A > 2B, 5A > 2B
|
5A > 2B, 5A > 2B
|
5B > 2B, 5A > 2B
|
5A > 2B, 5A > 2B
|
Additional Resources
F-WLen Match Video Database
F-White Len Combo Guide by ViviMayoi
White Len Combo Compilation
F-White Len Essentials Combo Video by yuzukimasu
F-White Len Beginner/Low-level Resource Playlist (W.I.P.) by Midnight Melancholy
F-White Len Tech Playlist (W.I.P.) by Midnight Melancholy
F-White Len Defense Playlist (W.I.P.) by Midnight Melancholy
F-White Len Pressure Playlist (W.I.P.) by Midnight Melancholy
Notable Players
| Name |
Color
|
Region |
Common Venues |
Status |
Details
|
| Deus |

|
North America |
Netplay |
Active |
Showcases a very aerial playstyle
|
giovanni
(ジョバンニ) |

|
Japan |
KorewaMelty,
Netplay |
Active |
|
shige
(しげ) |

|
Japan |
A-cho |
Inactive |
|
| ViviMayoi |

|
North America |
Netplay |
Active |
|
| yuzukimasu |

|
North America |
Netplay |
Inactive |
Formerly known as bellreisa.
|
MBAACC Navigation

