Melty Blood/MBAACC/Satsuki Yumizuka/Crescent Moon/Advanced Combo Theory
Advanced Combo Theory
22B
In certain situations, Satsuki can use her 22B in a combo and get a 5A, 2A, or 2C link off it. In general, using 22B will increase a combo's damage by roughly 1000. Whether a button can be linked off of 22B is extremely hit-count and character specific. Grab based moves like 236B, 623[B], 236C, and 623C do not count toward the internal hit count.
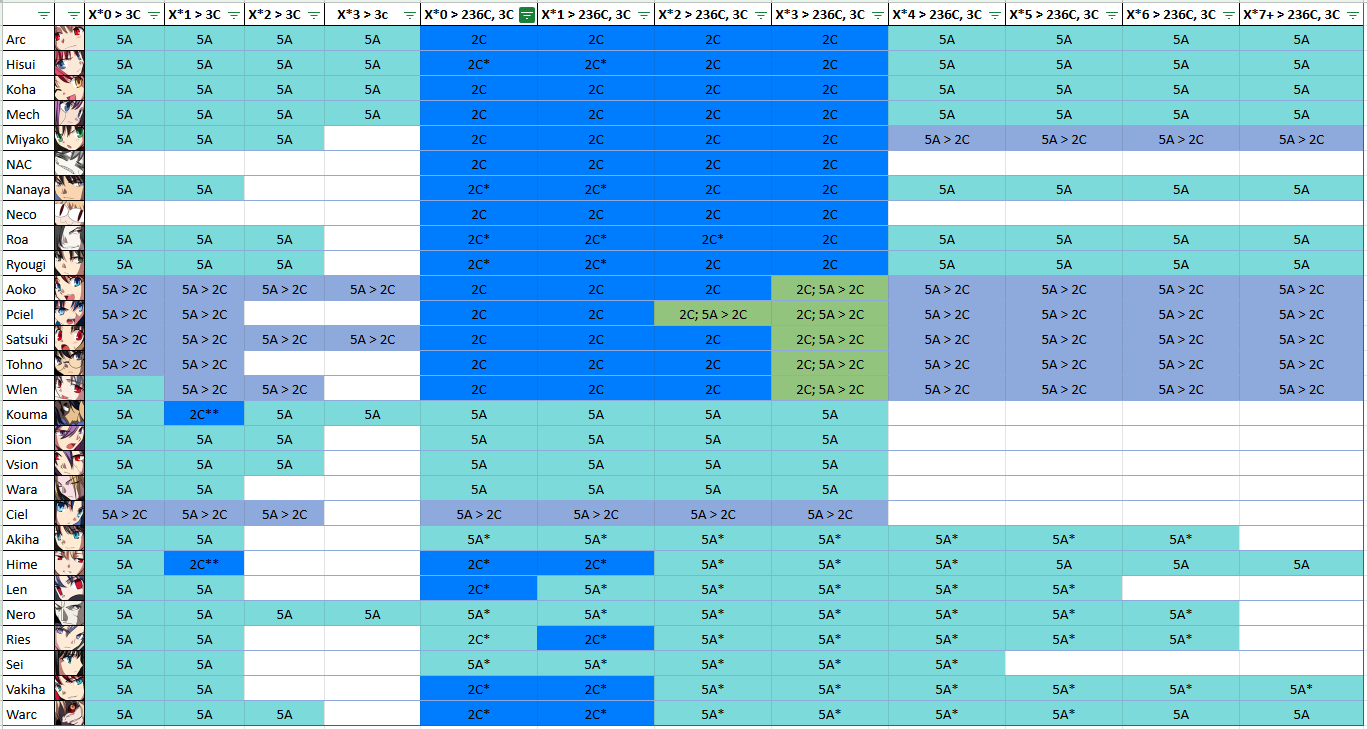
Here is a technical spreadsheet on 22B routing. In the doc you'll see '5A', '2C', '5A > 2C', and '2C; 5A > 2C'.
- 5A: You can link a 5A or 2A, but you must spend meter on 623C after in order to combo.
- 2C: Same as 5A, but it is a 2f link instead. Also, you can 1f link into 2C. Don't hold the C button for longer than 2 frames or you'll be too slow.
- 5A > 2C: 5A is a 1f link, but unlike the 5A section, you can meterlessly combo by chaining 5A into 2C. Like stated above, don't hold C for too long if you try this.
- 2C; 5A > 2C: 5A is a 2f link AND you can meterlessly combo into 2C. This is by far the most applicable type of 22B links.
It should be mentioned that 5A links can be plinked with 4/6[D]A~E or 4/6[D]E~A. If that notation looks confusing, it is just saying to hold D and forward/backward, then piano A into E or E into A. While potentially awkward, this technique gives an extra frame of lenience when mastered.
This is a demonstration of what a 22B combo looks like.
623A (Hit)
Against a handful of characters, instead of using 623[A], Satsuki can use very delayed 623A. Having 80% (O) proration instead of 71% (M) will mean that routing through 623A will do more damage than 623[A].
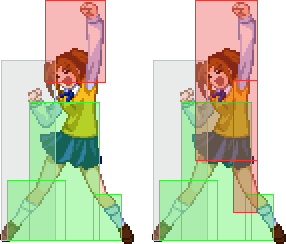
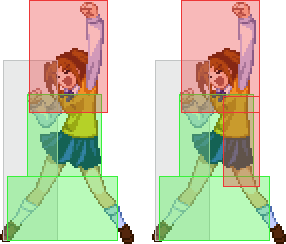
623A and 623[A] work the same way: there is a hitbox on Satsuki's hand that will grab an airborne opponent, if that hitbox whiffs, a new hitbox comes out which will launch an opponent. 623A's grab hitbox is bigger than 623[A], which is why it is harder to make whiff.
Unfortunately 623A is always a 1f link which can vary its delay timing based on spacing and hit count. Here is a list of characters whose hurtbox is short enough to let the 623A grab hitbox potentially whiff:
- Ciel (Can't be too close or you'll grab her feet)
- Miyako
- V.Sion (Extremely picky about hitcounts)
- Sion (ditto above)
- Roa
- Mech
- Satsuki
- Ryougi
- Nero
- NAC
- Neco-Arc
- Kohaku
- Hisui
Theoretically, 623A would also work on most other characters in the game too, but it would require much harder setup. In recoil, hurtboxes gets wider through the animation, which implies it should be possible to find a precise spacing where you can do 623A and have the grab hitbox whiff, but the hit hitbox connect after their hurtbox expands.
Here are the few known setups discovered so far:
Hime:
- Corner 2A > 2B > 2C > 3C > 623A
Ciel:
- Corner (j.C/5A >) 5B > 2B > 2C > 3C > 623A
Arc:
- Corner (j.C/5A >) 5B > 2B > 2C > 3C > 623A
Ryougi:
- Corner 5C > 2C > 3C > 623A
- Midscreen (j.C/5A/2B >) 5B > 5C > 2C > 3C > 623A
421A OTG
Certain characters at certain screen positions at certain hitcounts can be meterlessly OTG'd with 421A. That sounded complicated, so here's a chart.
INSERT CHART
Corner Loops
421A
Example route: 214B, (421A~2E, j.A(whiff), land 2C > 3C > 623[A])xN
421A/B can loop in the corner for as long as you have meter and don't go over the bounce limit. Very light on meter usage.
OTG
Example route: 2C > 3C > 623[A], j.8[C] > delay sdj.[C], land 5[C] > 2[C], (2C > 5B > 5C > 623[B], 5B > 2C > 623C)xN
Good loop to use to close out the final pixel in a healthbar. Will fail to OTG if your hitcount is in the 30s. Very meter hungry.
421A + OTG
Example route: 2C > 3C > 623[A], j.8[C] > delay sdj.[C], land 5[C] > 2[C], (2C > 5B > 5C > 623[B], 5B > 2C > 623C, 2C > 3C > 623[A], 421A~2E, j.A(whiff))xN
Very technical loop which combines the two loops above. Optimal for stalling the opponent's MAX or playing for a timeout. With full meter, it can last for over 20 in game seconds.
Mechanics
OTG Strings
A good rule of thumb for what OTG string to use is to use as few attacks as possible. For example, after 236B, simply 5B > 623C is the optimal OTG string.
Midscreen, when 5B > 623C stops working, you will want to switch to 5B > 5A > 623C
Air Button Cancels
Unlike a majority of characters in MBAACC, C-Satsuki cannot cancel her air buttons on hit or block into jump or other buttons. The only cancels she has access to are 2E and 63214C; neither of which are very useful.
However, j.[C] follows the same cancel rules every other in the game uses, meaning she can jump, airdash, and do an attack.
Ground Bounce/Wall Bounce Limit
Ground bounce and wall bounce are treated as the same thing, so this section will refer to them both simply as "bounces".
You are allowed 2 bounces in your combo. If you do a third, the person being comboed will enter an uncomboable state until they recover. This is a strict limitation for most characters, but Satsuki is blessed with a tool to ignore it. 623C resets the bounce limit back to 1, so she is allowed to extend her combos for very long. To see some examples of Satsuki bending the rules, refer to the Corner Loops section above this.
If you use 236C/623C when your bounce limit is still at 2, it will force you down to 1, so you must adjust your routing. 623C, 2C > 3C > 623[A], j.[C] > sdj.[C], land 2C will whiff on the second final 2C, for example.
Jump Cancel Limit
Satsuki does not have fancy tricks to play around this. Only one jump cancel is allowed per combo.
Scaling Hitcount
Explanation Refer to the [stats for nerds] box on the main page for a move-by-move breakdown. Two rules of thumb: moves that can OTG launch have 0 hits, and Satsuki throw moves that are not 421A/B have 0 hits.


