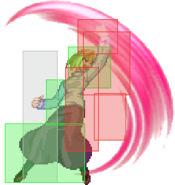
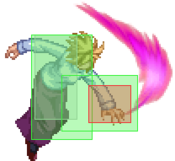
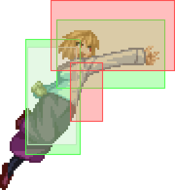
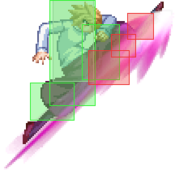
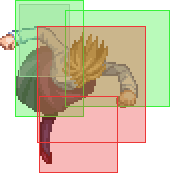
Melty Blood/MBAACC/Arcueid Brunestud/Crescent Moon: Difference between revisions
(properties of 5B) |
m (added an extra descriptor) |
||
| Line 234: | Line 234: | ||
|frameAdv= | |frameAdv= | ||
|invuln=false | |invuln=false | ||
|description= arc takes her fist and downward punches at the enemy | |description= arc takes her fist and downward punches at the enemy, moves arc slightly forward. | ||
}} | }} | ||
}} | }} | ||
Revision as of 17:26, 22 September 2020
Character Page Progress
This page is still a work in progress, consider joining as an editor to help expand it. Please update this character's roadmap page when one of the editing goals have been reached.
| In Progress |
|---|
|
Additional Resources
C-Arcueid Match Video Database
Players to watch/ask
JP:
- Text goes here after asterisk
- Text goes here after asterisk
NA:
- Text goes here after asterisk
- Text goes here after asterisk
Overview
| Strengths |
|
| Weaknesses |
|
General Gameplan
Place text here*
Neutral
Place text here*
Pressure
Place text here
Okizeme
Place text here
Defense
place text here*
Combos
The combos listed here are meant for beginners, if you want to know optimal routes, watch Kouki's video: https://www.youtube.com/watch?v=jXJZ9bz8PPA
| Input | Damage (on V.Sion) | Meter generation | Meter cost | Video |
|---|---|---|---|---|
| Anywhere | ||||
| 2A 5B 2B 2C 4C j.BC j.ABC j.6AD | 3764 | 66% | 0% | https://youtu.be/_dDV5p3QAoY |
| 2A 5B 2B 2C 5C 623B - 6B j.BC j.ABC j.6AD | 4044 | 77% | 0% | https://youtu.be/JX5LaOH6_4A |
| 2A 5B 2B 2C - 4C j.66 j.C 5B 2B 2C 4C j.BC j.ABC j.6AD | 4445 | 104% | 0% | To be filled |
| 2A 5B 2B 2C - 4C j.2AB j.63214A 5B 2B 2C 4C j.BC j.ABC j.6AD | 4737 | 71.8% (21.8%) | 50% | http://www.youtube.com/watch?v=cbMpIlUMFso |
| 2A 5B 2B 2C - 4C j.66 - j.C 2C - 4C j.66 j.C j.63214A j.ABC j.ABC j.6AD | 4641 | 116% | 0% | http://www.youtube.com/watch?v=-pHKObR2a9w |
| 2A 5B 2B 2C - 4C j.66 - j.C 2C 2A(whiff) 2A 2C - 4C j.BC j.ABC j.6AD | 4570 | 104% | 0% | To be filled |
| Full Screen | ||||
| 2A 5B 2B 2C 5CC j.B (2nd hit) j.63214A land j.ABC j.ABC j.6AD | 3636 | 80% | 0% | To be filled |
| 2A 5B 2B 2C - 4C j.66 j.C 2C 5C j.B (2nd hit) land 5A 5B 2B 2C 4C j.ABC j.ABC j.6AD | 4254 | 110% | 0% | To be filled |
| Corner | ||||
| 2A 5B 2B 2C - 5C - 236[B] 2A 5B 2B 2C - 5C - 236[B] 2A 5B 2B 2C 4C j.BC j.ABC j.6AD | 4995 | 154% | 0% | https://www.youtube.com/watch?v=VJXVUWH-qpU |
| 2A 5B 2B 2C - 5C - 236[B] - j.63214B 5B 2B 2C - j.63214B 5B 2B 2C - 5C - 236[B] - j.63214B 5B 2B 2C 4C j.BC j.ABC j.6AD | 5698 | 194% | 0% | http://www.youtube.com/watch?v=V1ymxeV2LyM |
| 2A 5B 2B 2C - 5C - 236[B] - j.63214B 5B 2B 2C - j.63214B 5B 2B 2C - 5C - 236[B] - j.63214B 5B 2B 2C - 214B 5A 5B 2B 2C - 4C j.66 j.C j.63214A 5B 2B 2C 623A | 5705 | 214% | 0% | http://www.youtube.com/watch?v=IIAdTqC_JSQ |
| 2A 5B 2B 2C - j.63214C 6/66 5B 2B 2C - 5C - 236[B] - j.63214B 5B 2B 2C - 5C - 236[B] - j.63214B 5B 2B 2C 4C j.BC j.ABC j.6AD | 5842 | 147.2% (47.2%) | 100% | To be filled |
Notes:
- - During the corner wall bounce combos, almost every component of the loop has to be delayed (where '-' is noted). You need to do this in order to keep your opponent as low as possible, without reaching OTG
- - If having trouble with the j.63214B 5B link, do your best to do the TK as low as possible
- - Aforementioned combos use standard air combo finishers. However, you can do pretty much every finisher after a 2C. Some options are:
| 4C j.(A)BC j.ABC j.6AD | High damage, standard oki |
| 4C j.BC j.ABC j.2C | High damage, techable oki, OTG with j.63214C if no tech |
| 623A | Long oki |
| 236A 236A 214A | Long oki, OTG. 623C OTG if done on an airbone opponent |
| 5C - 236[B] | Long oki and corner space |
Move Descriptions
| Frame Data Help | |
|---|---|
| Header | Tooltip |
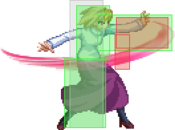
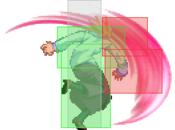
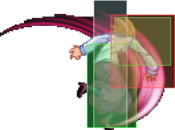
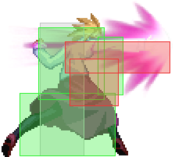
| Move Box Colors |
Light gray = Collision Box (A move lacking one means it can go through the opponent's own collision box). |
| Damage | Base damage done by this attack.
(X) denotes combined and scaled damage tested against standing V. Sion. |
| Red Damage | Damage done to the recoverable red health bar by this attack. The values are inherently scaled and tested against standing V. Sion.
(X) denotes combined damage. |
| Proration | The correction value set by this attack and the way it modifies the scaling during a string. See this page for more details.
X% (O) means X% Overrides the previous correction value in a combo if X is of a lower percentage. |
| Circuit | Meter gained by this attack on hit.
(X%) denotes combined meter gain. |
| Cancel | Actions this move can be cancelled into.
SE = Self cancelable. |
| Guard | The way this move must be blocked.
L = Can block crouching |
| Startup | Amount of frames that must pass prior to reaching the active frames. Also referred to as "True Startup". |
| Active | The amount of frames that this move will have a hitbox. (x) denotes frame gaps where there are no hitboxes is present. Due to varied blockstuns, (x) frames are difficult to use to determine punish windows. Generally the larger the numbers, the more time you have to punish. |
| Recovery | Frames that this move has after the active frames if not canceled. The character goes into one frame where they can block but not act afterwards, which is not counted here. |
| Advantage | The difference in frames where you can act before your opponent when this move is blocked (assuming the move isn't canceled and the first active frame is blocked). If the opponent uses a move with startup that is at least 2 frames less than this move's negative advantage, it will result in the opponent hitting that move. |
| Invul | Lists any defensive properties this move has.
X y~z denotes X property happening between the y to z frames of the animations. If no frames are noted, it means the invincibility lasts through the entire move. Invicibility:
Hurtbox-Based Properties:
Miscellaneous Properties
|
Normal Moves
5A
5A
5A |
|---|
5B
5B
Text |
|---|
Charged5B
5[B]
Text |
|---|
5C
5C
Text |
|---|
Charged5C
5[C]
Text |
|---|
2A
2A
Text |
|---|
2B
2B
Text |
|---|
2C
2C
Text |
|---|
4C
4C
Text |
|---|
3C
3C
Text |
|---|
j.A
j.A
Text |
|---|
j.B
j.B
Text |
|---|
j.C
j.C
Text |
|---|
j.2B
j.2B
Text |
|---|
j.2C
j.2C
Text |
|---|
Universal Mechanics
Mechanic
(Mechanic)
Text |
|---|
Special Moves
236X
(Example Special)
236A/B/C |
|---|
Arc Drive
Another Arc Drive
Last Arc
