|
|
| Line 48: |
Line 48: |
|
| |
|
| - blockstring> 236[A] | | - blockstring> 236[A] |
|
| |
| to safely use air a sonic(j63214a), use 2A 5B 624A tk j624A | | to safely use air a sonic(j63214a), use 2A 5B 624A tk j624A |
|
| |
|
Revision as of 14:28, 5 October 2020
Character Page Progress
This page is still a work in progress, consider joining as an editor to help expand it. Please update this character's roadmap page when one of the editing goals have been reached.
| In Progress
|
- Combos:
- Add missing combo damage.
- Move Descriptions:
- Expand on the move descriptions, cite their uses, add captions where helpful, etc.
- Additional Resources/Players to watch/ask
- Add any external links to resources such as video guides or articles.
- If you know any players in particular that can be helpful for learning this character, please add them with, if possible a way to contact them (such as a Discord handle) and a name that can be searched in the match video database.
|
Additional Resources
C-Arcueid Match Video Database
Players to watch/ask
JP:
- Text goes here after asterisk
- Text goes here after asterisk
NA:
- Text goes here after asterisk
- Text goes here after asterisk
Overview
Strengths / Weaknesses
| Strengths
|
- Text goes here after asterisk
- Text goes here after asterisk
|
| Weaknesses
|
- Place text here be sure to use "*" for each point*
|
General Gameplan
C-arc's general gameplan is to prevent the opponent from playing for as long as possible using as many tools as you need.
Neutral
matchup dependant
Pressure
use blockstrings that end with:
236B
236B 236[B]
236B 236B 214B
214A
tip of 214B
- blockstring> 236[A]
to safely use air a sonic(j63214a), use 2A 5B 624A tk j624A
if enemy is still blocking use 4/6AD2 and oki tk j624X
Okizeme
Defense
wakeup 22b/c(dont use this too often)
shield bunker
Combos
The combos listed here are meant for beginners, if you want to know optimal routes, watch Kouki's video: https://www.youtube.com/watch?v=jXJZ9bz8PPA
| Input |
Damage (on V.Sion) |
Meter generation |
Meter cost |
Video |
| Anywhere |
| 2A 5B 2B 2C 4C j.BC j.ABC j.6AD |
3764 |
66% |
0% |
https://youtu.be/_dDV5p3QAoY |
| 2A 5B 2B 2C 5C 623B - 6B j.BC j.ABC j.6AD |
4044 |
77% |
0% |
https://youtu.be/JX5LaOH6_4A |
| 2A 5B 2B 2C - 4C j.66 j.C 5B 2B 2C 4C j.BC j.ABC j.6AD |
4445 |
104% |
0% |
To be filled |
| 2A 5B 2B 2C - 4C j.2AB j.63214A 5B 2B 2C 4C j.BC j.ABC j.6AD |
4737 |
71.8% (21.8%) |
50% |
http://www.youtube.com/watch?v=cbMpIlUMFso |
| 2A 5B 2B 2C - 4C j.66 - j.C 2C - 4C j.66 j.C j.63214A j.ABC j.ABC j.6AD |
4641 |
116% |
0% |
http://www.youtube.com/watch?v=-pHKObR2a9w |
| 2A 5B 2B 2C - 4C j.66 - j.C 2C 2A(whiff) 2A 2C - 4C j.BC j.ABC j.6AD |
4570 |
104% |
0% |
To be filled |
| Full Screen |
| 2A 5B 2B 2C 5CC j.B (2nd hit) j.63214A land j.ABC j.ABC j.6AD |
3636 |
80% |
0% |
To be filled |
| 2A 5B 2B 2C - 4C j.66 j.C 2C 5C j.B (2nd hit) land 5A 5B 2B 2C 4C j.ABC j.ABC j.6AD |
4254 |
110% |
0% |
To be filled |
| Corner |
| 2A 5B 2B 2C - 5C - 236[B] 2A 5B 2B 2C - 5C - 236[B] 2A 5B 2B 2C 4C j.BC j.ABC j.6AD |
4995 |
154% |
0% |
https://www.youtube.com/watch?v=VJXVUWH-qpU |
| 2A 5B 2B 2C - 5C - 236[B] - j.63214B 5B 2B 2C - j.63214B 5B 2B 2C - 5C - 236[B] - j.63214B 5B 2B 2C 4C j.BC j.ABC j.6AD |
5698 |
194% |
0% |
http://www.youtube.com/watch?v=V1ymxeV2LyM |
| 2A 5B 2B 2C - 5C - 236[B] - j.63214B 5B 2B 2C - j.63214B 5B 2B 2C - 5C - 236[B] - j.63214B 5B 2B 2C - 214B 5A 5B 2B 2C - 4C j.66 j.C j.63214A 5B 2B 2C 623A |
5705 |
214% |
0% |
http://www.youtube.com/watch?v=IIAdTqC_JSQ |
| 2A 5B 2B 2C - j.63214C 6/66 5B 2B 2C - 5C - 236[B] - j.63214B 5B 2B 2C - 5C - 236[B] - j.63214B 5B 2B 2C 4C j.BC j.ABC j.6AD |
5842 |
147.2% (47.2%) |
100% |
To be filled |
Notes:
- During the corner wall bounce combos, almost every component of the loop has to be delayed (where '-' is noted). You need to do this in order to keep your opponent as low as possible, without reaching OTG
- If having trouble with the j.63214B 5B link, do your best to do the TK as low as possible
- Aforementioned combos use standard air combo finishers. However, you can do pretty much every finisher after a 2C. Some options are:
| 4C j.(A)BC j.ABC j.6AD |
High damage, standard oki |
| 4C j.BC j.ABC j.2C |
High damage, techable oki, OTG with j.63214C if no tech |
| 623A |
Long oki |
| 236A 236A 214A |
Long oki, OTG. 623C OTG if done on an airbone opponent |
| 5C - 236[B] |
Long oki and corner space |
Move Descriptions
| Frame Data Help
|
| Header
|
Tooltip
|
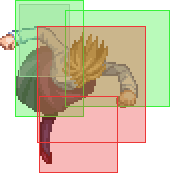
| Move Box Colors
|
Light gray = Collision Box (A move lacking one means it can go through the opponent's own collision box).
Green: Hurt Boxes.
Red: Hit(/Grab) Boxes.
Yellow: Clash Boxes (When an active hitbox strikes a clash box, the active hitbox stops being active. Multi-hit attacks can beat clash since they will still progress to the next hitbox.)
Magenta: Projectile-reflecting boxes OR Non-hit attack trigger boxes (usually).
Blue: Reflectable Projectile Boxes.
|
| Damage
|
Base damage done by this attack.
(X) denotes combined and scaled damage tested against standing V. Sion.
|
| Red Damage
|
Damage done to the recoverable red health bar by this attack. The values are inherently scaled and tested against standing V. Sion.
(X) denotes combined damage.
|
| Proration
|
The correction value set by this attack and the way it modifies the scaling during a string. See this page for more details.
X% (O) means X% Overrides the previous correction value in a combo if X is of a lower percentage.
X% (M) means the current correction value in a combo will be Multiplied by X%. This can also be referred to as relative proration.
|
| Circuit
|
Meter gained by this attack on hit.
(X%) denotes combined meter gain.
-X% denotes a meter cost.
|
| Cancel
|
Actions this move can be cancelled into.
SE = Self cancelable.
N = Normal cancelable.
SP = Special cancelable.
CH = Cancelable into the next part of the same attack (Chain in case of specials).
EX = EX cancelable.
J = Jump cancelable.
(X) = Cancelable only on hit.
-X- = Cancelable on whiff.
|
| Guard
|
The way this move must be blocked.
L = Can block crouching
H = Can block standing.
A = Can block in the air.
U = Unblockable.
|
| Startup
|
Amount of frames that must pass prior to reaching the active frames. Also referred to as "True Startup".
|
| Active
|
The amount of frames that this move will have a hitbox.
(x) denotes frame gaps where there are no hitboxes is present. Due to varied blockstuns, (x) frames are difficult to use to determine punish windows. Generally the larger the numbers, the more time you have to punish.
X denotes active frames with a duration separate from its origin move's frame data, such as projectile attacks. In this case, the total length of the move is startup+recovery only.
|
| Recovery
|
Frames that this move has after the active frames if not canceled. The character goes into one frame where they can block but not act afterwards, which is not counted here.
|
| Advantage
|
The difference in frames where you can act before your opponent when this move is blocked (assuming the move isn't canceled and the first active frame is blocked).
If the opponent uses a move with startup that is at least 2 frames less than this move's negative advantage, it will result in the opponent hitting that move.
±x~±y denotes a range of possible advantages.
|
| Invul
|
Lists any defensive properties this move has.
X y~z denotes X property happening between the y to z frames of the animations. If no frames are noted, it means the invincibility lasts through the entire move.
Invicibility:
- Strike = Strike invincible.
- Throw = Throw invincible.
Hurtbox-Based Properties:
- Full = No hurtboxes are present.
- High = Upper body lacks a hurtbox.
- Low = Lower body lacks a hurtbox.
Miscellaneous Properties
- Clash = Frames in which clash boxes are active.
- Reflect = Frames in which projectile-reflecting boxes are active.
- Super Armor = Frames in which the character can take hits without going into hit stun.
|
Normal Moves
|
|
| Damage
|
Red Damage
|
Proration
|
Cancel
|
Guard
|
| 300
|
150
|
75%
|
Text
|
LH
|
| First Active
|
Active
|
Recovery
|
Frame Adv
|
Circuit
|
Invuln
|
| 4
|
4
|
7
|
-1
|
3.0%
|
false
|
|
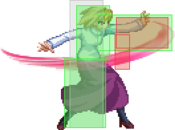
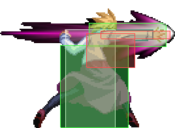
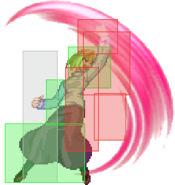
arc does a quick pink swipe while standing
|
|
|
|
| Damage
|
Red Damage
|
Proration
|
Cancel
|
Guard
|
| 650
|
400
|
80%
|
Text
|
LH
|
| First Active
|
Active
|
Recovery
|
Frame Adv
|
Circuit
|
Invuln
|
| 8
|
4
|
15
|
-4
|
6.0%
|
false
|
|
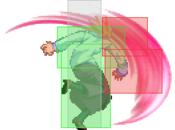
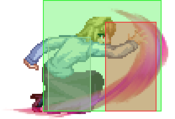
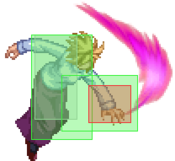
arc takes her fist and downward punches at the enemy, moves arc slightly forward. pushes enemy to the ground.
|
|
|
|
| Damage
|
Red Damage
|
Proration
|
Cancel
|
Guard
|
| 800
|
550
|
60%
|
Text
|
H
|
| First Active
|
Active
|
Recovery
|
Frame Adv
|
Circuit
|
Invuln
|
| text
|
text
|
text
|
Text
|
6.0%
|
no
|
|
pushes opponent to the ground if they are in air. used in mixups when opponent is crouch blocking. charged
|
|
|
|
| Damage
|
Red Damage
|
Proration
|
Cancel
|
Guard
|
| Text
|
Text
|
Text
|
Text
|
Text
|
| First Active
|
Active
|
Recovery
|
Frame Adv
|
Circuit
|
Invuln
|
| Text
|
Text
|
Text
|
-9
|
Text
|
Text
|
|
If it hits the opponent in air, it can be followed up with another 5C for a superjump pursuit.
|
|
|
|
| Damage
|
Red Damage
|
Proration
|
Cancel
|
Guard
|
| Text
|
Text
|
Text
|
Text
|
Text
|
| First Active
|
Active
|
Recovery
|
Frame Adv
|
Circuit
|
Invuln
|
| Text
|
Text
|
Text
|
Text
|
Text
|
Text
|
|
charged version of 5C. unblockable.
|
|
|
|
| Damage
|
Red Damage
|
Proration
|
Cancel
|
Guard
|
| Text
|
Text
|
Text
|
2aa
|
Text
|
| First Active
|
Active
|
Recovery
|
Frame Adv
|
Circuit
|
Invuln
|
| Text
|
Text
|
Text
|
+1
|
Text
|
Text
|
|
Standard jab that hits low. spammable
|
|
|
|
| Damage
|
Red Damage
|
Proration
|
Cancel
|
Guard
|
| Text
|
Text
|
Text
|
Text
|
Text
|
| First Active
|
Active
|
Recovery
|
Frame Adv
|
Circuit
|
Invuln
|
| Text
|
Text
|
Text
|
-4
|
Text
|
Text
|
|
A decent poke with low recover that advances forward, useful for cross-downs.
|
|
|
|
| Damage
|
Red Damage
|
Proration
|
Cancel
|
Guard
|
| Text
|
Text
|
Text
|
Text
|
Text
|
| First Active
|
Active
|
Recovery
|
Frame Adv
|
Circuit
|
Invuln
|
| Text
|
Text
|
Text
|
-6
|
Text
|
Text
|
|
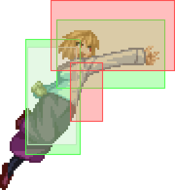
A sweep that reaches pretty far and high. Long recovery.
|
|
|
|
| Damage
|
Red Damage
|
Proration
|
Cancel
|
Guard
|
| 300 on first hit, 800(combo)1000(alone) on second hit.
|
200
|
95%(alone),65%(combo)
|
Text
|
LH,(H only on charge)
|
| First Active
|
Active
|
Recovery
|
Frame Adv
|
Circuit
|
Invuln
|
| 9(34 on charge)
|
9
|
33(36 on charge)
|
-24(-27 on charge)
|
Text
|
no
|
|
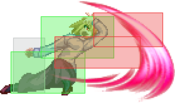
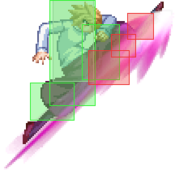
Arc launches forward. thrusts enemy upward on hit. does not thrust in combo.
|
|
|
|
| Damage
|
Red Damage
|
Proration
|
Cancel
|
Guard
|
| Text
|
Text
|
Text
|
Text
|
Text
|
| First Active
|
Active
|
Recovery
|
Frame Adv
|
Circuit
|
Invuln
|
| Text
|
Text
|
Text
|
-10
|
Text
|
Text
|
|
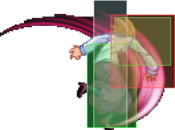
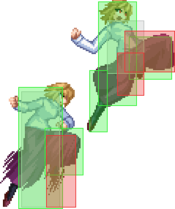
A swipe up which launches opponents (grounded or in the air). Has clash frames at her head before the hit, and has a disjointed hitboxe above her head.
|
|
|
|
| Damage
|
Red Damage
|
Proration
|
Cancel
|
Guard
|
| Text
|
Text
|
Text
|
Text
|
Text
|
| First Active
|
Active
|
Recovery
|
Frame Adv
|
Circuit
|
Invuln
|
| Text
|
Text
|
Text
|
Text
|
Text
|
Text
|
|
Standard jA that hits mid
|
|
|
|
| Damage
|
Red Damage
|
Proration
|
Cancel
|
Guard
|
| Text
|
Text
|
Text
|
Text
|
Text
|
| First Active
|
Active
|
Recovery
|
Frame Adv
|
Circuit
|
Invuln
|
| Text
|
Text
|
Text
|
Text
|
Text
|
Text
|
|
A move that hits twice, and as such often wastes air counter hits. The first part of the move hits upwards, and the second part hits downwards. Only the second part will come out if you input the move while rising.
|
|
|
|
| Damage
|
Red Damage
|
Proration
|
Cancel
|
Guard
|
| Text
|
Text
|
Text
|
Text
|
Text
|
| First Active
|
Active
|
Recovery
|
Frame Adv
|
Circuit
|
Invuln
|
| Text
|
Text
|
Text
|
Text
|
Text
|
Text
|
|
everyone's favorite move. lots of active frames, and good recovery when done close to the ground. used in jump-ins.
|
|
|
|
| Damage
|
Red Damage
|
Proration
|
Cancel
|
Guard
|
| Text
|
Text
|
Text
|
ground
|
Text
|
| First Active
|
Active
|
Recovery
|
Frame Adv
|
Circuit
|
Invuln
|
| Text
|
Text
|
Text
|
Text
|
Text
|
Text
|
|
A claw dive with not-so-many active frames. Big recover, very situational, Hits mid. changes trajectory
|
|
|
|
| Damage
|
Red Damage
|
Proration
|
Cancel
|
Guard
|
| Text
|
Text
|
Text
|
Text
|
Text
|
| First Active
|
Active
|
Recovery
|
Frame Adv
|
Circuit
|
Invuln
|
| Text
|
Text
|
Text
|
Text
|
Text
|
Text
|
|
Changes your trajectory, can be used as a sort of airdash. 2 parts, the second one having huge priority but coming very late during the move. Can be neutral/positive on block if done at very low height. Hits mid.
|
|
Universal Mechanics
|
|
| Damage
|
Red Damage
|
Proration
|
Cancel
|
Guard
|
| Text
|
Text
|
Text
|
Text
|
Text
|
| First Active
|
Active
|
Recovery
|
Frame Adv
|
Circuit
|
Invuln
|
| Text
|
Text
|
Text
|
Text
|
Text
|
Text
|
|
Text
|
|
Special Moves
|
|
| Damage
|
Red Damage
|
Proration
|
Cancel
|
Guard
|
| Text
|
Text
|
Text
|
Text
|
Text
|
| First Active
|
Active
|
Recovery
|
Frame Adv
|
Circuit
|
Invuln
|
| Text
|
Text
|
Text
|
Text
|
Text
|
Text
|
|
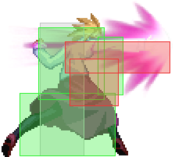
Rekka, can be used to mixup during pressure. Damage doesn't change between versions.
(A version) - Arcueid swings her arm foward, with a pinkish-purple aura following it. Also pushes her foward. Can be charged.
(B version) - Same as above, but the attack pushes Arcueid slightly further.
follow up 236ABC
Can be charged.
(A version) - Arcueid swings again, moving her even further.
(B version) - Same as above, but she moves further.
(third hit options)
236ABC
(A version) - Arcueid swings one more time. Hits low.
(B version) - Same as above. Goes further.
214ABC
Hits high if charged. Deals more damage than the 236 ender.
(A version) - Overhead swing, hits mid.
(B version) - Same as above, but goes slightly further.
EX-Edge. Super version of Arcueid's rekka.(dont use this in blockstrings cause it's unsafe)
|
|
|
|
| Damage
|
Red Damage
|
Proration
|
Cancel
|
Guard
|
| Text
|
Text
|
Text
|
Text
|
Text
|
| First Active
|
Active
|
Recovery
|
Frame Adv
|
Circuit
|
Invuln
|
| Text
|
Text
|
Text
|
Text
|
Text
|
Text
|
|
Text
|
|
|
|
| Damage
|
Red Damage
|
Proration
|
Cancel
|
Guard
|
| Text
|
Text
|
Text
|
Text
|
Text
|
| First Active
|
Active
|
Recovery
|
Frame Adv
|
Circuit
|
Invuln
|
| Text
|
Text
|
Text
|
Text
|
Text
|
Text
|
|
Text
|
|
|
|
| Damage
|
Red Damage
|
Proration
|
Cancel
|
Guard
|
| Text
|
Text
|
Text
|
Text
|
Text
|
| First Active
|
Active
|
Recovery
|
Frame Adv
|
Circuit
|
Invuln
|
| Text
|
Text
|
Text
|
Text
|
Text
|
Text
|
|
Text.
|
|
|
|
| Damage
|
Red Damage
|
Proration
|
Cancel
|
Guard
|
| Text
|
Text
|
Text
|
Text
|
Text
|
| First Active
|
Active
|
Recovery
|
Frame Adv
|
Circuit
|
Invuln
|
| Text
|
Text
|
Text
|
Text
|
Text
|
Text
|
|
text
|
|
Arc Drive
|
|
| Damage
|
Red Damage
|
Proration
|
Cancel
|
Guard
|
| Text
|
Text
|
Text
|
Text
|
Text
|
| First Active
|
Active
|
Recovery
|
Frame Adv
|
Circuit
|
Invuln
|
| Text
|
Text
|
Text
|
Text
|
Text
|
Text
|
|
Text
|
|
Another Arc Drive
|
|
| Damage
|
Red Damage
|
Proration
|
Cancel
|
Guard
|
| Text
|
Text
|
Text
|
Text
|
Text
|
| First Active
|
Active
|
Recovery
|
Frame Adv
|
Circuit
|
Invuln
|
| Text
|
Text
|
Text
|
Text
|
Text
|
Text
|
|
Text
|
|
Last Arc
|
|
| Damage
|
Red Damage
|
Proration
|
Cancel
|
Guard
|
| Text
|
Text
|
Text
|
Text
|
Text
|
| First Active
|
Active
|
Recovery
|
Frame Adv
|
Circuit
|
Invuln
|
| Text
|
Text
|
Text
|
Text
|
Text
|
Text
|
|
Text
|
|
MBAACC Navigation
