|
|
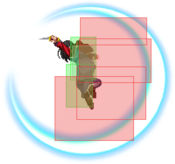
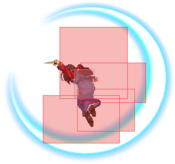
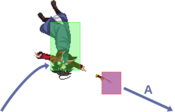
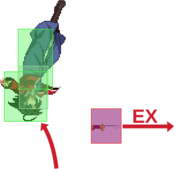
| Line 14: |
Line 14: |
| |- | | |- |
|
| |
|
| |[http://mbaacc.melty.games/?p1moon=h&p1char=ryougi&p1n=ru-sha%20(%E3%82%8B%E3%83%BC%E3%81%97%E3%82%83) Ruusha]|| style="text-align:center;"| | | |[http://mbaacc.melty.games/?p1moon=h&p1char=ryougi&p1name=ru-sha%20(%E3%82%8B%E3%83%BC%E3%81%97%E3%82%83) Ruusha]|| style="text-align:center;"| |
| [[File:MBAACC_Ryougi_Palette_18.png|Color|65px]] | | [[File:MBAACC_Ryougi_Palette_18.png|Color|65px]] |
| | Japan || Play Spot BIG ONE 2nd || Active || Legendary H-Ryougi player, absolute lab monster. Showcases almost everything the character has to offer, or at least he used to. Loves to go camping. Can be found on [https://twitter.com/Ruushap/status/1352611195690184707 Twitter] | | | Japan || Play Spot BIG ONE 2nd || Active || Legendary H-Ryougi player, absolute lab monster. Showcases almost everything the character has to offer, or at least he used to. Loves to go camping. Can be found on [https://twitter.com/Ruushap/status/1352611195690184707 Twitter] |
| |- | | |- |
|
| |
|
| |[http://mbaacc.melty.games/?p1moon=h&p1char=ryougi&p1n=N2L N2L]|| style="text-align:center;"| | | |[http://mbaacc.melty.games/?p1moon=h&p1char=ryougi&p1name=N2L N2L]|| style="text-align:center;"| |
| [[File:MBAACC_Ryougi_Palette_03.png|Color|65px]] | | [[File:MBAACC_Ryougi_Palette_03.png|Color|65px]] |
| | North America || Netplay || Active || Uses random color palettes. Great at forcing arcane unconventional interactions, turning any interaction into a potential mixup. Knows a ton of crazy gimmicks and setups. Found in the [https://discordapp.com/invite/33cskPv main Discord]. | | | North America || Netplay || Active || Uses random color palettes. Great at forcing arcane unconventional interactions, turning any interaction into a potential mixup. Knows a ton of crazy gimmicks and setups. Found in the [https://discordapp.com/invite/33cskPv main Discord]. |
Character Page Progress
This page is mostly complete, consider joining as an editor to help finish it up. Please update this character's roadmap page when one of the editing goals have been reached. When no main goals are left, please remove this section from this page.
| In Progress |
To-do
|
- General Gameplan:
- Finish WIP pressure sections, improve and update existing information. Shorten sections that arent as important so someone doesnt inevitably hyperfixate on one aspect of the character that doesnt matter as much.
- Continue improving grammar and look of the page
|
- Combos:
- Add damage, meter gain/given numbers and video links to existing combos.
- Clean up combo section and remove redundant / irrelevant routes.
|
Additional Resources
H-Ryougi Match Video Database
Melty Bits: H-Ryougi
H-Ryougi Combo Document
Players to watch/ask
| Name |
Color
|
Region |
Common Venues |
Status |
Details
|
| Ruusha |
Color
|
Japan |
Play Spot BIG ONE 2nd |
Active |
Legendary H-Ryougi player, absolute lab monster. Showcases almost everything the character has to offer, or at least he used to. Loves to go camping. Can be found on Twitter
|
| N2L |
Color
|
North America |
Netplay |
Active |
Uses random color palettes. Great at forcing arcane unconventional interactions, turning any interaction into a potential mixup. Knows a ton of crazy gimmicks and setups. Found in the main Discord.
|
Overview
Playstyle
 H-Ryougi is a fast, passive-aggressive rushdown character with long blockstrings, tricky mixups, and stylish combos. H-Ryougi is a fast, passive-aggressive rushdown character with long blockstrings, tricky mixups, and stylish combos. |
| Pros |
Cons |
- Good general mobility: Her run speed is decent, and her airdash covers lots of ground quickly, but is a bit slow to act out of.
- Good meter gain, corner carry, and damage when optimized: She has various high reward combo routes for many different situations, notably her iconic knife loops.
- Strong variety of okizeme options: Many of her tools, namely her unique roll (6A+B while running) and 624A/C enable potent ambiguous mixups that can loop into themselves with proper routing in the corner.
- Easy, strong corner pressure: One of the few characters in the game that can reasonably threaten to break your guard bar. Knife toss/manual pickup dispenses plus frames.
- Knife toss utility: Due to the knife auto-pickup / catch mechanic unique to H-moon, her knife is a consistently accessible resource (when properly managed) that is used for basically everything.
- Big buttons : Her buttons are quite large, making it hard for most of the cast to contest her at good angles when spaced well.
|
- Half-moon system mechanics: Her only strong defensive options are metered, on the moon with the least access to meter, and no EX guard or EX shield.
- Weak air-to-ground game: Lacking any downwards disjointed air normals, she must either space horizontally or approach unpredictably with j.C to avoid being anti-aired.
- No knife, no hope: Losing access to her knife greatly weakens ALL aspects of her gameplay.
- Character specific jank : Her execution is already high, but her routing is filled with so many character specific nuances you could write a book on it.
- Weak to EX Guard : While she can keep her turn easily, her strings are linear. It's hard for her to threaten strong mixups mid-blockstring without meter. Patient opponents utilizing EX guard properly are hard to open up without extreme commitment.
- Low health : Ryougi has the 5th lowest guts value in the game, she bleeds for her mistakes.
|
General Gameplan
Work in Progress.
Half-moon Ryougi lacks the unblockables of the other two moons and the buffed rekkas of Full-moon. As a trade-off however her 22X knife toss series has fantastic utility and she arguably has the best pressure of the three moons, even if it is linear. Her normals have better horizontal reach than Crescent's, while retaining the ability to Reverse Beat. Additionally, Half is the only moon capable of catching the knife in the air, allowing for an extremely tricky mixup and some additional neutral options. She is very much reliant on having her knife either near her or on her, as it strengthens all aspects of her gameplan.
Neutral (WIP)
Since Ryougi doesn't have great ground-to-air or air-to-ground tools, you should usually try to approach aerial opponents from the air, and grounded opponents from the ground. With good spacing you can tag grounded or low air approaches with 5B, you must be cautious as it does not hit as vertically as the animation implies. Her 5A6AA series also serves as an anti-air due to hitbox and startup buffs. Both of these options have lengthy recovery so you can get blown up for whiffing these.
Pressure
While H-Ryougi's midscreen pressure is nothing too impressive, and requires you to sacrifice your knife or do high risk resets to keep her turn, her corner pressure can be absolutely suffocating. Use 2A or 5A as whiff cancels in blockstrings, 2A is preferred. 22A and 22X manual pickup enable very strong looping pressure strings in the corner. Avoid using 22A knife toss midscreen if possible as you will have to risk a telegraphed IAD knife catch to reset, or lose your turn to pick it back up. 624A enables pressure resets from around 5C range, but it can be shielded. Its jump cancellable even on whiff so you can play around with baiting common non-blocking options after 624A on block.
Pressure String Components
- (2A) > 5B~B > 2B > 5C > 2C > 3C
- Generic string. +1 on block.
- Frametrap
- Overhead attempt, made safe by the knife. Does not work off of 5A6AA; you must cancel the second hit in the series. Additionally if the 4C connects, 22A will confirm the combo.
- Delay 5BB slightly to avoid Reverse Beat. Use this to condition the opponent to not expect the overhead after 5A6A.
- 22A is at least +5 on block; 2A will be airtight if you are close enough, 2B/5B will frametrap and catch jumps, microdash 5A6A will catch jumps and resets pressure if they don't respond to the 5A whiffing crouch, or you could dash up 2A for a pressure reset. The only disadvantage is that midscreen you lose the knife, in the corner having the knife on the floor next to you can be a very good thing. See below
- (Corner) (Close Starter) > 3C > 22A , 66 > (throw)
- In corner, if you don't do 5C or 2C (which pushes you out too far), a 22A knife throw will bounce back and land right on top of you. You get a free blockstring reset and then you can do...
- (on top of knife) ... 3C > (22X pickup) , (2A)/(5B)/(2C)/(etc.)
- Picking up the knife after a 3C will give you extra frame advantage, which you can use to do an airtight 2A or frametrap with a 2B or 5B.
- (Corner) 22C , 66 > (throw)
- There are a couple of advantages to using 22C over 22A. First, if you are not smack in the corner, the knife will hit multiple times, giving you huge frame advantage and time to do basically anything you want. Second, it comes out faster than 22A, which means you can do 2C 22C without suffering from 2C's pushback, meaning you can use this to close the distance mid-blockstring. You can use this as a safe way to reset distance in a pressure string if you don't want to risk getting poked out of a dash.
Okizeme
(All setups assume the opponent is cornered)
- xx > 2C > tk 236B > 5BB > 214A > (microwalk) 2C > 3A~C > 421C > 66 6A+B
- The "roll" mixup, sets up a left/right mixup in the corner that can be looped for consistent setplay. Rolling as soon as possible will always leave Ryougi on the opposite side, crossing up the opponent. The strength of this mixup however comes from understanding how long you can hold run, while still making the roll cross up. Once you understand the timing, you can make which side you'll end up on after rolling look very ambiguous. 2A/2B are the preferred options after you've picked a side to land on, but you can also IAD back > j.C to present a high option and bait low shield too.
- ... (microwalk) 2C > 3A~C > 624A
- Knife throw mixup, same lead up as the previous setup. Once you throw the knife, jump straight up with "8" and then drift with "6" to make a left/right mixup. How long you hold drift will determine which side you end up on. Once you land, you can meaty with 2B. Alternatively, you can airdash back > j.C after jumping for a quick cross up overhead, catching the knife in midair in the process.
- ... (microwalk) 2C > 3A~C > 624C
- Enhanced knife throw mixup, super jump to catch the knife as its falling, allowing you to perform numerous mixup options. If you don't press anything else and simply fall after catching the knife, you'll pass through the opponent and cross them up. After you cross up but before you land, jump forward and quickly air dash backwards to do an overhead with j.C. You can also airdash back > j.B after catching the knife to stay on the same side. With so many options to choose from, this is easily one of Ryougi's best mixups if you have the meter for it.
Defense
Without meter, Ryougi's defensive options are very limited. Parry (421X) offers slightly better reward and has more active frames than shielding. It is also riskier, because you have to know exactly which move the opponent is going to use and where it would hit visually, so that you know which version of parry to use. It isn't something you'll want to hard read with every time, but it's an option worth keeping in mind against predictable or overly aggressive opponents. Keep in mind that certain moves cannot be parried, such as hitgrabs, (with the exception of F-Kouma 5[C]) and Nero's B / EX Deer plow right through it.
With meter however, 22C will usually be your best option. While it doesn't have frame 1 invul, it does come out frame 1 and will always hit at least twice unless you're point blank. This means that against meaty attempts, even if the opponent hits you, the knife hitting them will force most trades in your favor by allowing you to recover and still have time to convert off of the knife hits. If the opponent blocks the knife instead, the multi hits will give you a chance to start you own pressure. 22C is strong, but it's important to not be over reliant on it. It can be low profiled by many low to the ground moves, and even by some character's dash animations (e.g. Ciel, Kouma). It can also universally be jumped over.
Using Bunker (214D) while in blockstun is a solid way to get the opponent off you, and you can use the hard knockdown time to switch sides if needed. Like with 22C, be careful about where you Bunker in pressure, as it too can be low profiled by some moves, though it hits a little bit lower and can be used at many more points in a blockstring. Mixing up between your reversal options is important, as each has different answers.
Lastly, 214C is a frame 1 invul flip that can be used for a quick corner escape. While it does have a lengthy recovery, the distance that it puts you away from the corner is substantial enough that the opponent may not be able to punish you. This reversal looks very weak compared to your others on paper, but it can cover for some of the answers to her other reversals. Many moves that can low profile 22C have significant recovery, possibly being able to rebeat into an A normal to stay safe against bunker as well. The weakest of your reversal options, but not something to entirely ignore.
Combos
| Combo Notation Help
|
Disclaimer: Combos are written by various writers, so the actual notation used in pages can differ from the standard one.
For more information, see Glossary and Controls.
|
| X > Y
|
X input is cancelled into Y.
|
| X > delay Y
|
Must wait for a short period before cancelling X input into Y.
|
| X, Y
|
X input is linked into Y, meaning Y is done after X's recovery period.
|
| X+Y
|
Buttons X and Y must be input simultaneously.
|
| X/Y
|
Either the X or Y input can be used.
|
| X~Y
|
This notation has two meanings.
- Use attack X with Y follow-up input.
- Input X then within a few frames, input Y. Usually used for option selects.
|
| X(w)
|
X input must not hit the opponent (Whiff).
|
| j.X
|
X input is done in the air, implies a jump/jump cancel if the previous move was done from the ground.
Applies to all air chain sections:
- Assume a forward jump cancel if no direction is given.
- Air chains such as j.A > j.B > j.C can be shortened to j.ABC.
|
| sj.X
|
X input is done after a super jump. Notated as sj8.X and sj9.X for neutral and forward super jumps respectively.
|
| dj.X
|
X input is done after a double jump.
|
| sdj.X
|
X input is done after a double super jump.
|
| tk.X
|
Stands for Tiger Knee. X motion must be buffered before jumping, inputting the move as close to the ground as possible. (ex. tk.236A)
|
| (X)
|
X is optional. Typically the combo will be easier if omitted.
|
| [X]
|
Input X is held down. Also referred to as Blowback Edge (BE). Depending on the character, this can indicate that this button is held down and not released until indicated by the release notation.
|
| ]X[
|
Input X is released. Will only appear if a button is previously held down. This type of input is referred to as Negative Edge.
|
| {X}
|
Button X should only be held down briefly to get a partially charged version instead of the fully charged one.
|
| X(N)
|
Attack "X" should only hit N times.
|
| (XYZ)xN
|
XYZ string must be performed N times. Combos using this notation are usually referred to as loops.
|
| (XYZ^)
|
A pre-existing combo labelled XYZ is inserted here for shortening purposes.
|
| CH
|
The first attack must be a Counter Hit.
|
| Air CH
|
The first attack must be a Counter Hit on an airborne opponent.
|
| 66
|
Performs a ground forward dash.
|
| j.66
|
Performs an aerial forward dash, used as a cancel for certain characters' air strings.
|
| IAD/IABD
|
Performs an Instant AirDash.
|
| AT
|
Performs an Air Throw. (j.6/4A+D)
|
| IH
|
Performs an Initiative Heat.
|
| AD
|
Performs an Arc Drive.
|
| AAD
|
Performs an Another Arc Drive.
|
Notes:
- 22X refers to knife pickup, rather than throw.
- 63214X is abbreviated as 624X, however this does not mean you can skip the diagonals.
- 2B and 5B can be used interchangeably as combo fodder quite often, however 2B > 5B does more damage than 5B > 2B.
- Ryougi can end almost any air combo with either Air Throw or j.236B, favoring positioning and damage respectively.
- For air combos, Ryougi's j.A, j.B, and j.6B have identical damage, but different hitboxes, different startups, and different changes to the opponent's momentum. You can interchange them in any air combo that uses j.B to see which one works better for you.
- Rekka ender gives better oki than air throw ender.
- On airborne opponents (example: 2C > rekkas), the final ~236A input must be reversed (~214A instead of ~236A) midscreen on every character except the following; Satsuki, Necos, and White Len at certain hitcounts
Normal Combos
Meterless
| Condition
|
Notation
|
Damage
vs V.Sion
|
Notes
|
|
| Normal starter, grounded opponent (Rekka BnB, Basic)
|
- (2A >) 2B > 5BB > 5C > 2C > 236A~236A~236A
|
3366
|
|
| Meter Gained: 42.7% |
Meter Given (vs C-Moon): 18.3% |
(Video) |
| Your rekka BnB. Very easy and always useful. Hard knockdown gives you time to pick your knife back up, meaty, safejump, whatever you want really. There is a slight trick to get it to work midscreen properly, Refer to the notes at the start of the combo section. |
|
|
| Normal starter, grounded opponent (Airdash BnB)
|
- (2A >) 2B > 5BB > 2C > 5C > j8.C > 66j.AC > land > j8.C > sdj.AC > (AT)/(j.236B)
|
4116 / 4242
|
|
| Meter Gained: 63.3% / 67.5% |
Meter Given (vs C-Moon): 28.2% / 28.9% |
(Video) |
| Your airdash BnB. Works both midscreen and corner, but can drop in the corner vs some characters. You can sometimes do j7 instead of j8 to help make this more consistent / work in the corner (Example: Tohno). Decent corner carry and meterless damage without having to do anything too fancy. If you aren't comfortable with 66j.AC, do 6A+Bj.AC instead. Without sdj, AT ender will not reach, but j.236b will. Some characters will drop out of j8.C if you are not fast enough; notably Miyako, Sion, Hisui, Ciel, and both Lens. You can circumvent this by immediately holding 8 after you press 5C to jump cancel as soon as possible, then pressing C again right as you see it hit. This method is not necessary for it to connect if it feels too awkward for you. |
|
|
| Normal starter, grounded opponent (Rejump BnB)
|
- (2A >) 2B > 5BB > 5C > 2C > 5A6AA > delay j.AC > land > j.AC > dj.AC > (AT)/(j.236B)
|
4178 / 4262
|
|
| Meter Gained: 73.1% / 77.3% |
Meter Given (vs C-Moon): 32.4% / 33.1% |
(Video) |
| Your 5A6AA rejump BnB. Easy damage for not much effort, you're going to be using this and the airdash route a lot so get used to it now. You want the first j.AC to hit as you descend, press j.A as you start to fall and j.C before you touch the ground, refer to the video example. j.C has a lot of untech time so don't feel like you have to rush. This route is quite difficult in the mirror match, so usually its better to either do the easy version (5A6A > j.BC > dj.BC > AT/j.236B) or the airdash BnB instead in that matchup. If you are insistent on landing this combo vs other Ryougis however, you must very heavily delay the final hit of 5a6aa. |
|
|
| Normal starter, airborne opponent
|
- 5B(B) > j.BC > dj.BC > AT
|
2753
|
| |
| Meter Gained: ??? |
Meter Given (vs C-Moon): ??? |
| Generic antiair combo. |
|
|
| Normal starter, airborne opponent
|
- 5A6A(A) > j.BC > dj.BC > AT
|
2937
|
| |
| Meter Gained: ??? |
Meter Given (vs C-Moon): ??? |
| Does more damage than the 5BB antiair combo above. Requires the enemy to be very close to the ground and/or significant delays between each hit in the 5A 6AA series. This is the standard meterless midscreen combo to confirm into after an air-to-air counterhit. |
|
|
| Counterhit normal starter, airborne opponent
|
|
???
|
| |
| Meter Gained: ??? |
Meter Given (vs C-Moon): ??? |
| Air-to-air counterhits can also be confirmed into the 623B loop. |
|
|
| Counterhit normal starter, near corner, airborne opponent, knife
|
- CH j.X , (land) 2C > 3C > 5BB > 63214A , 2C > 3C > tk.236B , 5A > (22X)/(22X , 2C > 3C > 22A , 2A > 2C delay 5C)xN > 5A6A6A > 214A , j.BC > dj.BC > AT
|
???
|
| |
| Meter Gained: ??? |
Meter Given (vs C-Moon): ??? |
| Air-to-air counterhits near the corner, can also be varied with 214C after 214A for 2C > 3C > 22X oki. |
|
|
(623B Loop)
knife
|
- (Starter >) 2C > 3C > 22A , 2C > 3C > 623B , (2C > 3C > 623B, )xN , 5BB > j.BC > dj.BC > (AT)/(dj.236B)
|
???
|
| |
| Meter Gained: ??? |
Meter Given (vs C-Moon): ??? |
| The 623B loop works both midscreen and in the corner. However, 623B crosses through midscreen, and 2C may cross under midscreen depending on spacing and character. Builds a decent bit of meter, and is easier than the Knife Pickup Loop in addition to not being corner-specific.
In most circumstances it is possible to do 2-3 reps of 2C > 623B. |
|
|
(623B Loop)
knife
|
- (Starter >) 2C > 3C > 22A , 2C > 3C > 623B , (2C > 3C > 623B, )xN , 2C > 236A~236A~236A
|
???
|
| |
| Meter Gained: ??? |
Meter Given (vs C-Moon): ??? |
| Sweep loop variant ending in rekkas. Provides stronger okizeme than either aircombo-ender variant. |
|
|
4C Starter
All 4C > 22A combo routes have a ~3 frame cancel window for knife toss to connect.
| Condition
|
Notation
|
Damage
vs V.Sion
|
Notes
|
|
| 4C starter, grounded opponent
|
|
1495
|
|
| Meter Gained: ??? |
Meter Given (vs C-Moon): ??? |
(Video) |
| Knifeless, meterless overhead combo. Other rekka strings connect, but do less damage. At extremely close range the third rekka may cross up, reverse inputs accordingly. |
|
|
| 4C starter, grounded opponent, knife
|
- 4C > 22A , 5BB > j.BC > dj.(B)C > (AT)/(j.236B)
|
2266 / 2370
|
| |
| Meter Gained: ??? |
Meter Given (vs C-Moon): ??? |
| Basic meterless combo off of Ryougi's ground overhead. Using 5C instead of 5BB does about 50 more damage, and in some cases lets you recatch the knife. |
|
|
| 4C starter, corner, grounded opponent, knife (Basic)
|
- 4C > 22A , 5BB > 214A , j.BC > dj.BC > AT
|
2344
|
| |
| Meter Gained: 51.45% |
Meter Given (vs C-Moon): 23.1% |
| Meterless corner combo off of her ground overhead. Provides air throw oki, but doesn't put you right on top of the knife. |
|
|
| 4C starter, grounded opponent, knife
|
- 4C > 22A , 2C > 3C > 623B , 2C > delay 3C > delay 5A6A > j.BC > dj.BC > AT
|
2715
|
|
| Meter Gained: 71.26% |
Meter Given (vs C-Moon): 31.6% |
(Video) |
| Advanced midscreen overhead combo. You can start 623B loops off of the first 623B, but past the 2nd rep it is very inconsistent. If you wish to sacrifice about 200 damage for consistency, as the delay timing for 2C > 3C is character specific, you can pick up after 623B with 2C > 5BB instead. Depending on screen position you can reverse your AT direction to get closer to your knife. |
|
|
| 4C starter (close), corner, grounded opponent, knife
|
- 4C > 22A , 2C > 3C > 22X > 5BB > 214A, j.AC > dj.AC > AT
|
2687
|
|
| Meter Gained: 61.95% |
Meter Given (vs C-Moon): 27.6% |
(Video) |
| 4C corner combo utilizing knife pickup. Saves your knife so extending with j22C is an option, however due to scaling the additional damage will be very low. |
|
|
| 4C starter (close), corner, grounded opponent, knife
|
- 4C > 22A , 2C > 3C > 22X > microwalk 5A6AA > delay jAC > land > jAC > dj.AC > AT
|
2852
|
|
| Meter Gained: 69.65% |
Meter Given (vs C-Moon): 30.9% |
(Video) |
| 4C corner combo utilizing knife pickup and a rejump. The microwalk forward is for consistency and acts as a delay. Depending on how high the enemy is after the rejump you may need to sdj for air throw to be possible. |
|
|
| 4C starter (close), corner, grounded opponent, knife
|
- 4C > 22A, 2C > 3C > 22X > 5B > 624A, 2C > 3C > 22X > 5B > 22A, 2C > 3C > 623B, delay 236A~236X~236A
|
3130
|
|
| Meter Gained: 87.36% |
Meter Given (vs C-Moon): 37.6% |
(Video) |
| 4C corner combo utilizing 624A. Good reward considering the scaling on 4C being so bad, and you still get rekka ender oki. |
|
|
| 4C starter (close), corner, grounded opponent, knife
|
|
Variable 2.6k ~ 3.1k
|
| |
| Meter Gained: High, variable |
Meter Given (vs C-Moon): Variable |
| As long as you are close enough to do the above knife pickup routes, you can start knife loops. While the damage is very low compared to normal loops, the meter build is fantastic. |
|
|
Extremely Character Specific (WIP)
| Condition
|
Notation
|
Damage
vs V.Sion
|
Notes
|
|
Normal starter, grounded opponent, knife
Works On: Warachia, Akiha, Powerd Ciel, Nero
|
- (2A >) 2B > 5BB > 5C > 2C > 5A > 236B~236A(w)~214A , 2A > 2C > 5C > 22A , 2C > 3C > 623B , 236A~236A~236A
|
???
|
| |
| Meter Gained: ??? |
Meter Given (vs C-Moon): ??? |
| One of her most damaging midscreen combos, 236A also works on some characters. 214A input is reversed during the rekkas; original input is 236A. Timing is variant depending on the character. |
|
|
Metered
| Condition
|
Notation
|
Damage
vs V.Sion
|
Notes
|
|
| Normal starter, grounded opponent, 100% meter, OTG 236C. (Basic)
|
- (2A >) 2B > 5BB > 5C > 2C > 236A~236A~236A , 236C , j.BC > dj.BC > AT / j.236B
|
4624 / 4677
|
| |
| Meter Gained: -46.8% |
Meter Given (vs C-Moon): 38.7% |
| A basic metered OTG combo that works anywhere on the screen. You don't have to time the jump cancel on 236C, just hold j9 and you will jump as soon as possible. |
|
|
Normal starter, grounded opponent, 100% meter, OTG 236C.
Works On: Everyone except Necos, see notes.
|
- (2A >) 2B > 5BB > 5C > 2C > 236A~236A~236A , 236C , delay j.A/B > delay j.C > land > j.AC > j.AC > AT
|
4732
|
|
| Meter Gained: -43.1% |
Meter Given (vs C-Moon): 46.6% |
(Video) |
| Optimized version of the above 236C route, with a rejump. Delay the first j.AC so you hit them with j.C just before you land.
The first j.A whiffs vs Hisui, Akiha, Vakiha, Arc, Warc, Mech, Seifuku, and Len. Substitute it for j.B instead. |
|
|
| Normal starter (2B preferred), grounded opponent, 100% meter, knife
|
- (2A >) 2B > 5B > 5C > 236A~236A~236C > 624C, 2C > 3C > 5C > j8.C > 66j.AC > land > j.C > dj.AC > j.236B
|
6171 (2B starter)
|
|
| Meter Gained: -39.5% |
Meter Given (vs C-Moon): 41.3% |
(Video) |
| Huge damage, especially from 2b starter. Works both midscreen and in the corner. In the corner, 66j.AC may drop vs some characters. You can always do j.BC > dj.BC > AT / j.C > 66j.C > dj.C for your air combo if it doesn't work there. The price you pay for doing 6.1k is leaving your knife on the other side of the stage. |
|
|
| Normal starter (2B preferred), grounded opponent, 100% meter, knife
|
- (2A >) 2B > 5B > 5C > 236A~236A~236C > 624C, 2C > delay 3C > 623B, 2C > 3C > 623B, 2C > 3C > 5A6AA > 214A > j.A/BC > dj.A/BC > AT
|
6059 (2B starter)
|
|
| Meter Gained: -11.7% |
Meter Given (vs C-Moon): 76.2% |
(Video) |
| Another high damage 624C combo, this one is corner to corner and gives you your knife back! Only works with your back to the corner or at least right outside of it. Make sure you have enough room for 623B to recover outside of the corner, you want to be perfectly spaced for 2C. If you look too far away for the second 2C link you can do 623A instead to save the conversion with a knockdown, cutting it short. Theoretically works directly in the corner but you are better off going for another route in that situation. Slightly execution heavy and has many character specific nuances, but is worth learning. |
|
|
j.22C Combo Extensions
Ryougi can extend effectively any air combo with j.22C to get more damage and much better advantage than her air throw gives her, especially midscreen. Thanks to H-moon's auto-pickup mechanic, you usually can get your knife back afterwards.
| Condition
|
Notation
|
Damage
vs V.Sion
|
Notes
|
|
| From air combo, midscreen, knife save
|
- Air Combo > j.22C, 2C > 3C > 623B, 2C > 3C > 623A
|
Combo dependent
|
| |
| Meter Gained: ??? |
Meter Given (vs C-Moon): ??? |
| Arguably the most useful j.22C extension as 623A gives you HKD and puts you right on top of your knife. Has effectively the same combo properties as 623B loops so there will be character specific delays, but with time you can eyeball those and this is much easier than a full loop. Learn this one! |
|
|
| From air combo, corner, knife save (Basic)
|
- Air Combo > j.22C, 2C > 3C > 236A~236A~236A
|
Combo dependent
|
| |
| Meter Gained: ??? |
Meter Given (vs C-Moon): ??? |
| Rekka ender, still gives you HKD. In the corner your knife will be right next to you, and you still get Rekka ender oki. |
|
|
| From air combo, corner, (Basic)
|
- Air Combo > j.22C, 2C > 3C > 5A6AA > 214A, j.AC > dj.AC > AT
|
Combo dependent
|
| |
| Meter Gained: ??? |
Meter Given (vs C-Moon): ??? |
| Air combo extension with AT / j236B ender, slightly more damage than the previous two but much worse oki. Use if you need to inch out enough damage to try to kill or would prefer the AT 50/50 on slow wake-up characters over better knockdown. Combo can work midscreen but it leaves your knife so far away its not worth it. |
|
|
Corner Combos
| Condition
|
Notation
|
Damage
vs V.Sion
|
Notes
|
|
| Normal starter, grounded opponent (Basic)
|
- (2A >) 2B > 5BB > 5C > 2C (delay) 5A6AA > 214A , (5BB) > j.BC > dj.BC > 4AT
|
???
|
|
| Meter Gained: ??? |
Meter Given (vs C-Moon): ??? |
(Video) |
| A meterless, knifeless corner combo that provides airthrow okizeme. You may need to slightly delay the 6AAA on some characters. Back air throw is required in order to keep the opponent in the corner. |
|
|
Normal starter, grounded opponent, knife
Works On: To be tested, WIP
|
- (2A >) 2B > 5BB > 5C > 2C > tk.236B , delay 5BB > 214A , (microwalk) 2C > delay 5C > 22A , 2C > 3(X~)C > 236A~236A~236A
|
4939
|
|
| Meter Gained: 64.9% |
Meter Given (vs C-Moon): 42.1% |
Both examples (Video) |
| An easier version of a somewhat technical meterless corner combo, the price paid for less difficulty is your knife is directly in the corner instead of somewhere more useful. Provides HKD. The rekka ender can be replaced with 623A and put you in the corner, if you want that for some reason. Has two versions and you need to be able to do either on the fly if needed. Delay 5C so that it corrects for sideswitch. Microwalk after 214A will make 2C cross under, forgoing this will 2C into the corner. If 2C crosses under and you press 3C normally, it will just whiff facing the wrong direction. To save the combo and prevent it from dropping when this happens, you need to plink it for it to correct sides. I personally do 3A+B~C, but what buttons you choose is entirely personal preference. 2C > 3X~C delay is character specific. Remember to reverse your inputs for the final rekka. As far as meterless damage goes without doing knife loops this is pretty decent. This can be further optimized if you wish, see the following combo. This combo utilizes most aspects of H-Ryougi combo theory other than 22X stuff, so please watch the attached video if this seems confusing. |
|
|
Normal starter, grounded opponent, knife
Works On: To be tested, WIP
|
- (2A >) 2B > 5BB > 5C > 2C > tk.236B , delay 5BB > 214A , 2C > delay 5C > 22A , 2C > 3X~C > 623B, 2C > 3X~C > 236A~236A~236A
|
5120
|
|
| Meter Gained: 80~100+? |
Meter Given (vs C-Moon): 52.2% |
(Video) |
| Optimized version of the previous corner combo, moderately technical. Don't microwalk 2C or else you will have to do a different route, you need to 2C into the corner after 214A. Incredibly good meterless damage, great meter build, and provides HKD. A huge advantage of this optimized version is you even get your knife back after 623B if you do it right, meaning on the last 3C you can choose to stop the combo and go for a roll / 624A mixup instead. 2C > 3X~C delay is still character specific. Still gotta reverse your inputs for the final rekka. This might possibly be one of the higher damage meterless combos you can do without knife loops. All notes in the previous combo apply. Again, watch the attached video if this seems confusing. |
|
|
| Normal starter, grounded opponent, knife
|
- (2A >) 2B > 5BB > 5C > 2C > tk.236B , 5B~B > 214A , walkback 5A > 22A , 2C > 3C > 623B , 236A~236A~236A
|
???
|
| |
| Meter Gained: ??? |
Meter Given (vs C-Moon): ??? |
| Not as much damage as the above combo series, but much easier to execute and consistent on the entire cast. |
|
|
Knife Pickup Loops
The combos that make H-Ryougi famous. If you don't know anything about H-moon, you probably have still heard of knife loops. Noteworthy for their insane meter build (effectively auto-heat on demand off of any clean hit) and difficulty, the ability to consistently do knife loops is a good indicator you've spent your required time in training room. Due to the nature of how creative H-Ryougi's routing can be, its a bit futile to try to list every single possible variant of the loop. The combo theory behind the knife loop however generally is consistent across all starters for the loop, once you know how to do a rep or two feel free to use a route that is most comfortable for you. The link gets tighter after a few reps if you do not change your routing, but that's just part of the combo theory.
If you wish to practice the timings for the loop, or you struggle with 2C > tk.236b, 2C > 5C > 22a also starts the loop. Try to keep your hitcount at or below 32 hits total. While it is very possible to go past that, the infinite prevention system kicks in and your opponent rapidly builds meter, meaning you get diminishing returns.
Below is an incomplete list of possible loops:
- [2C > 3C > 22X > 5B > 22A] x N
- [2C > 3C > 22X > 2B > 22A] x N
- [2C > 3C > 22X > 2A > 2C > 22A] x N
- [2C > 3C > 22X > 2A > 2C > delay 5C > 22A] x N
The 5B variant is universal, 2A > 2C > delay 5C usually will start to work at higher gravity. Other than that, which loops do and don't work is character specific.
| Condition
|
Notation
|
Damage
vs V.Sion
|
Notes
|
|
Normal starter, grounded opponent, knife
Works On: (See Notes)
|
- 2A > 2B > 5B~B > 5C > 2C > tk.236B , 5A > (22A , 2C > 3C > 22X , 2A > 2C , (delay) 5C)xN > 2C > 3C > 623B , 236A~236A~236A
|
???
|
| |
| Meter Gained: ??? |
Meter Given (vs C-Moon): ??? |
| More than two loops may be possible depending on the character.
Works on Aoko, Riesbyfe, V.Sion, Warachia, Akiha, Powerd Ciel, and Seifuku. Possible with very strict timing and / or lots of delays on Tohno, Nanaya, Sion, Hisui, Arc, and Kohaku. |
|
|
Normal starter, grounded opponent, knife
Works On: (See above)
|
- 2A > 2B > 5B~B > 5C > 2C > tk.236B , 5B~B > 214A , ~4 > 5A > (22A , 2C > 3C > 22X > 2A > 2C delay 5C)x2 > 2C > 3C > 623B , 236A~236A~236A
|
???
|
| |
| Meter Gained: ??? |
Meter Given (vs C-Moon): ??? |
| Slightly more damaging variant. Still character specific. |
|
|
Normal starter, grounded opponent. knife
Works On: Everyone
|
- 2A > 2B > 5B~B > 5C > 2C > tk.236B , 5A > 22A , (2C > 3C > 22X , 5B > 22A ,)xN , (2C > 3C > 22X , 2A > 2C delay 5C > 22A ,)xN , 2C > 3C > 623B , 236A~236A~236A
|
???
|
| |
| Meter Gained: ??? |
Meter Given (vs C-Moon): ??? |
| Less damage than either of the above but universal on entire cast. Try to go into the 2A > 2C > 5C loop as soon as you build enough gravity for it to work since it deals way more damage than the 5B version. 2B can be used instead of 5B. Makes no real difference, use whatever is easier for you. 2A > 2C may be impossible or at least very difficult on some characters. However, 2A > 5C will always work so long as you have built up enough gravity. |
|
|
| Normal starter, grounded opponent, 100% meter, knife
|
- (2A >) 5BB > 2B > 5C > 2C > tk.236B , 5A > 22A , 2C > 3C > 22X , 2A > 5C > 22C , (22X , 2C > 3C > 22A , 2A > 2C (delay) 5C)x2 > 2C > 3C > 623B , 236A~236A~236A
|
???
|
|
| Meter Gained: ??? |
Meter Given (vs C-Moon): ??? |
(Video) |
| A metered knife loop variant. Unlike meterless versions, this is universal. |
|
|
Move Descriptions
| Frame Data Help
|
| Header
|
Tooltip
|
| Move Box Colors
|
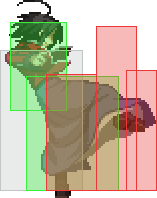
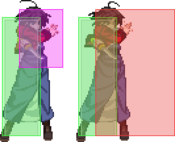
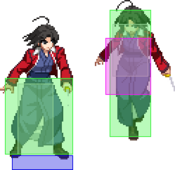
Light gray = Collision Box (A move lacking one means it can go through the opponent's own collision box).
Green: Hurt Boxes.
Red: Hit(/Grab) Boxes.
Yellow: Clash Boxes (When an active hitbox strikes a clash box, the active hitbox stops being active. Multi-hit attacks can beat clash since they will still progress to the next hitbox.)
Magenta: Projectile-reflecting boxes OR Non-hit attack trigger boxes (usually).
Blue: Reflectable Projectile Boxes.
|
| Damage
|
Base damage done by this attack.
(X) denotes combined and scaled damage tested against standing V. Sion.
|
| Red Damage
|
Damage done to the recoverable red health bar by this attack. The values are inherently scaled and tested against standing V. Sion.
(X) denotes combined damage.
|
| Proration
|
The correction value set by this attack and the way it modifies the scaling during a string. See this page for more details.
X% (O) means X% Overrides the previous correction value in a combo if X is of a lower percentage.
X% (M) means the current correction value in a combo will be Multiplied by X%. This can also be referred to as relative proration.
|
| Circuit
|
Meter gained by this attack on hit.
(X%) denotes combined meter gain.
-X% denotes a meter cost.
|
| Cancel
|
Actions this move can be cancelled into.
SE = Self cancelable.
N = Normal cancelable.
SP = Special cancelable.
CH = Cancelable into the next part of the same attack (Chain in case of specials).
EX = EX cancelable.
J = Jump cancelable.
(X) = Cancelable only on hit.
-X- = Cancelable on whiff.
|
| Guard
|
The way this move must be blocked.
L = Can block crouching
H = Can block standing.
A = Can block in the air.
U = Unblockable.
|
| Startup
|
Amount of frames that must pass prior to reaching the active frames. Also referred to as "True Startup".
|
| Active
|
The amount of frames that this move will have a hitbox.
(x) denotes frame gaps where there are no hitboxes is present. Due to varied blockstuns, (x) frames are difficult to use to determine punish windows. Generally the larger the numbers, the more time you have to punish.
X denotes active frames with a duration separate from its origin move's frame data, such as projectile attacks. In this case, the total length of the move is startup+recovery only.
|
| Recovery
|
Frames that this move has after the active frames if not canceled. The character goes into one frame where they can block but not act afterwards, which is not counted here.
|
| Advantage
|
The difference in frames where you can act before your opponent when this move is blocked (assuming the move isn't canceled and the first active frame is blocked).
If the opponent uses a move with startup that is at least 2 frames less than this move's negative advantage, it will result in the opponent hitting that move.
±x~±y denotes a range of possible advantages.
|
| Invul
|
Lists any defensive properties this move has.
X y~z denotes X property happening between the y to z frames of the animations. If no frames are noted, it means the invincibility lasts through the entire move.
Invicibility:
- Strike = Strike invincible.
- Throw = Throw invincible.
Hurtbox-Based Properties:
- Full = No hurtboxes are present.
- High = Upper body lacks a hurtbox.
- Low = Lower body lacks a hurtbox.
Miscellaneous Properties
- Clash = Frames in which clash boxes are active.
- Reflect = Frames in which projectile-reflecting boxes are active.
- Super Armor = Frames in which the character can take hits without going into hit stun.
|
Normal Moves
Standing Normals
|
|
| 5A
|
Damage
|
Red Damage
|
Proration
|
Cancel
|
Guard
|
| 350
|
192
|
75% (O)
|
-N-, -SP-, -CH-, -EX-, (J)
|
H
(Whiffs vs Crouch.)
|
| First Active
|
Active
|
Recovery
|
Frame Adv
|
Circuit
|
Invuln
|
| 5
|
4
|
11
|
-3
|
2.45%
|
-
|
|
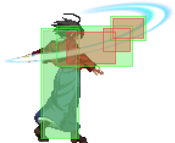
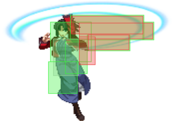
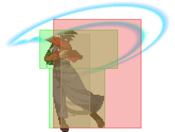
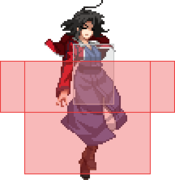
Close-standing knife swing tilted about 30 degrees up. Works good for covering airspace as a pre-emptive anti-air, hitting opponents before their buttons come out, as the hitbox is not good at directly challenging most jump-ins. Only whiff cancels into 6A followup and special moves.
|
| 5A~6A
|
Damage
|
Red Damage
|
Proration
|
Cancel
|
Guard
|
| 600
|
384
|
80% (M)
|
N, SP, -CH-, EX, (J)
|
LH
|
| First Active
|
Active
|
Recovery
|
Frame Adv
|
Circuit
|
Invuln
|
| 7
|
3
|
16
|
-4
|
4.2%
|
-
|
|
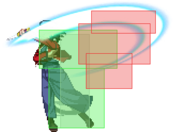
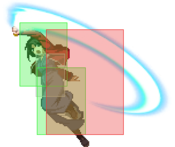
Doesn't whiff on crouching (unlike 5A), and can be cancelled into even on whiff, allowing for ambiguous frametrap setups and anti-jump blockstrings. Is a strong anti-air but you must do so very early as you have to whiff 5A first.
|
| 5A~6A~6A
|
Damage
|
Red Damage
|
Proration
|
Cancel
|
Guard
|
| 1000
|
768
|
60% (O)
|
(N), SP, EX, (J)
|
LH
|
| First Active
|
Active
|
Recovery
|
Frame Adv
|
Circuit
|
Invuln
|
| 10
|
4
|
19
|
-5
|
7.0%
|
Clash 11-14
|
|
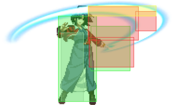
Ryougi swings upwards, identical to her Shield Bunker. Launches on hit allowing for air follow-ups for more damage. On block you cannot rebeat out of this, only special cancel.
|
|
|
|
| 5B
|
Damage
|
Red Damage
|
Proration
|
Cancel
|
Guard
|
| 500
|
240
|
80% (O)
|
N, SP, CH, EX, (J)
|
LH
|
| First Active
|
Active
|
Recovery
|
Frame Adv
|
Circuit
|
Invuln
|
| 8
|
3
|
18
|
-6
|
3.5%
|
Clash 9-11
|
|
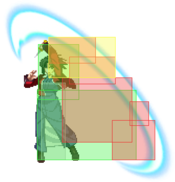
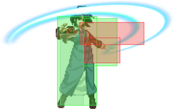
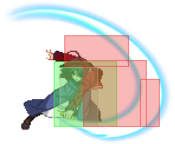
Mid-range knife swipe with excellent horizontal range and clash frames. Moves forward very slightly. Best overall standing poke. Can cancel into 5BB followup only on hit/block. Long recovery makes this a very committal tool. Said clash frames allow for for OSing heat, although setups vary due to variable heat timings. Can clash with shield counters/bunkers too.
|
| 5B~B
|
Damage
|
Red Damage
|
Proration
|
Cancel
|
Guard
|
| 600
|
336
|
70% (O)
|
N, SP, EX, (J)
|
LH
|
| First Active
|
Active
|
Recovery
|
Frame Adv
|
Circuit
|
Invuln
|
| 4
|
3
|
18
|
-4
|
4.2%
|
Clash 5-7
|
|
A close range knife swipe follow-up to her 5B. Has higher vertical range, but lower horizontal range than 5B. Be mindful of this when confirming, as at longer ranges it will whiff. The cancel window between the two is just long enough for you to frametrap with, but keep in mind delaying between buttons gives more time for pushback to occur.
|
|
|
|
| Damage
|
Red Damage
|
Proration
|
Cancel
|
Guard
|
| 900
|
480
|
100%
|
N, SP, EX, (J)
|
LH
|
| First Active
|
Active
|
Recovery
|
Frame Adv
|
Circuit
|
Invuln
|
| 13
|
5
|
17
|
-4
|
6.3%
|
Clash 14-18
|
|
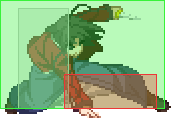
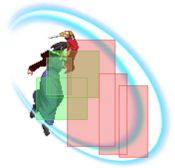
Long-range horizontal knife swipe; slow. Moves forward slightly but has a lot of pushback. The far hitbox whiffs on crouch.
|
|
Crouching Normals
|
|
| Damage
|
Red Damage
|
Proration
|
Cancel
|
Guard
|
| 300
|
144
|
75% (O)
|
-SE-, -N-, -SP-, -EX-, (J)
|
L
|
| First Active
|
Active
|
Recovery
|
Frame Adv
|
Circuit
|
Invuln
|
| 4
|
4
|
9
|
-1
|
2.1%
|
-
|
|
Close ranged crouching low kick. Her fastest ground move. Your only normal that can whiff cancel into any unused normal.
|
|
2 frames faster than C-moon 2B 2 frames faster than C-moon 2B
|
| Damage
|
Red Damage
|
Proration
|
Cancel
|
Guard
|
| 550
|
384
|
90% (O)
|
N, SP, EX, (J)
|
L
|
| First Active
|
Active
|
Recovery
|
Frame Adv
|
Circuit
|
Invuln
|
| 8
|
3
|
17
|
-3
|
3.85%
|
Clash 9-11
|
|
Mid-range crouching horizontal knife swipe with clash frames. Good range, and now just as fast as 5B (with less recovery). Optimal grounded combo starter. For max damage, skip 5BB and go into a metered route with rekka. Like 5B, it can clash and low profile DPs / Heat activation if spaced/timed properly.
|
|
|
|
| Damage
|
Red Damage
|
Proration
|
Cancel
|
Guard
|
| 900
|
480
|
55% (O)
|
N, SP, EX, (J)
|
L
|
| First Active
|
Active
|
Recovery
|
Frame Adv
|
Circuit
|
Invuln
|
| 13
|
2
|
28
|
-12
|
6.3%
|
-
|
|
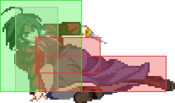
Slow, long-range crouching low slash that also moves Ryougi forward. Gives an untechable knockdown and hits at a very large arc in front, behind, and a little bit above her. Very useful in blockstrings and staggering combos as it propels Ryougi forward, allowing her to catch any backdash cancels. Had its active frames nerfed from AA to CC, changing the timings on many of her corner combos.
|
|
Aerial Normals
As green as the grass in springtime As green as the grass in springtime
|
| Damage
|
Red Damage
|
Proration
|
Cancel
|
Guard
|
| 350
|
144
|
75% (O)
|
N, SP, EX, J
|
LHA
|
| First Active
|
Active
|
Recovery
|
Frame Adv
|
Circuit
|
Invuln
|
| 6
|
3
|
-
|
-
|
2.45%
|
-
|
|
Horizontal knife slash with good range. Unlike most j.A normals in Melty Blood, this one is not air actionable on whiff and cannot cancel into itself. Also on the slow side startup-wise. Its large size often makes it a more consistent button for use in air combos over j.B, said size also making it the target of some unfortunate counterhits.
|
|
|
|
| Damage
|
Red Damage
|
Proration
|
Cancel
|
Guard
|
| 350
|
144
|
80% (O)
|
N, SP, EX, J
|
HA
|
| First Active
|
Active
|
Recovery
|
Frame Adv
|
Circuit
|
Invuln
|
| 7
|
2
|
-
|
-
|
2.45%
|
-
|
|
Quick horizontal knife slash with amazing range. If spaced out, can be hard to challenge from the ground.
|
|
|
|
| Damage
|
Red Damage
|
Proration
|
Cancel
|
Guard
|
| 900
|
384
|
90% (O)
|
N, SP, EX, J
|
HA
|
| First Active
|
Active
|
Recovery
|
Frame Adv
|
Circuit
|
Invuln
|
| 7
|
3
|
-
|
-
|
6.3%
|
-
|
|
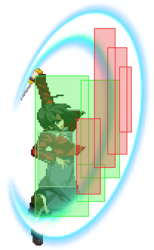
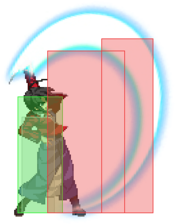
Large vertical knife swing that hits in a large arc from below to very high above her. Your best button for IAD approaches. Covers above you very well.
|
|
Command Normals
|
|
| Damage
|
Red Damage
|
Proration
|
Cancel
|
Guard
|
| 600
|
336
|
65% (O)
|
N, SP, EX, (J)
|
L
|
| First Active
|
Active
|
Recovery
|
Frame Adv
|
Circuit
|
Invuln
|
| 15
|
2
|
17 (20)
|
1
|
4.2%
|
-
|
|
Low sweep with short range. Untechable knockdown on hit. Quick access to +1 during pressure, be mindful of EX guard though as you may get pushed out too far for this to connect. This move has a unique property, Ryougi does not suffer any hitstop from this move, however your opponent still does. Any cancels from this move need to be buffered before it hits, or else they will come out late.
Your best button to pick up and throw knife from framedata-wise. 3C > 22A is gapless, 3C > 22X is +5.
|
|
|
|
| Damage
|
Red Damage
|
Proration
|
Cancel
|
Guard
|
| 800
|
576
|
45% (O)
|
SP, EX
|
H
|
| First Active
|
Active
|
Recovery
|
Frame Adv
|
Circuit
|
Invuln
|
| 26
|
1
|
35
|
-9
|
5.6%
|
-
|
|
Extremely close ranged overhead kick. Gives untechable knockdown after a ground bounce. Poor reward for an overhead, but still useful as another way to open the opponent up. Removes the collision boxes for Kouma, Ries, Roa, and NAC on grounded hit for some reason. Start-up frames were nerfed from AA to CC, making it even slower than it already was.
|
|
|
|
| Damage
|
Red Damage
|
Proration
|
Cancel
|
Guard
|
| 350
|
144
|
80% (O)
|
N, SP, EX, J
|
HA
|
| First Active
|
Active
|
Recovery
|
Frame Adv
|
Circuit
|
Invuln
|
| 7
|
3
|
-
|
-
|
2.45%
|
-
|
|
Quick knife slash tilted slightly upwards.
|
|
Universal Mechanics
|
|
| Damage
|
Red Damage
|
Proration
|
Cancel
|
Guard
|
| 1500
|
960
|
100%
|
-
|
U
|
| First Active
|
Active
|
Recovery
|
Frame Adv
|
Circuit
|
Invuln
|
| 2
|
1
|
20
|
13 ~ 18
|
10.5%
|
-
|
|
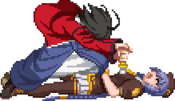
Ryougi drags the opponent to the ground, stabbing them. Does not apply throw protection due to a bug.
|
|
Raw Raw Combo Ender Combo Ender
|
Raw /
Combo Ender
|
Damage
|
Red Damage
|
Proration
|
Cancel
|
Guard
|
1600 (1408)
1000
|
(844)
768
|
35%
100%
|
-
|
U
|
| First Active
|
Active
|
Recovery
|
Frame Adv
|
Circuit
|
Invuln
|
| 1
|
1
|
12
|
-
4 ~ 9
|
0.0%
7.0%
|
-
|
|
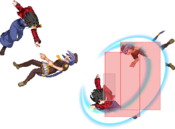
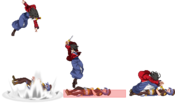
Raw: Ryougi throws the opponent down and slices through them. You can combo after this.
Combo: Ryougi drops the opponent straight down then stabs them like in her ground throw. Also does not apply throw protection like her ground throw.
|
|
|
|
| Standing
|
Damage
|
Red Damage
|
Proration
|
Cancel
|
Guard
|
| 500 (345)
|
198
|
40%
|
SP, EX, (J)
|
LHA
|
| First Active
|
Active
|
Recovery
|
Frame Adv
|
Circuit
|
Invuln
|
| 8
|
4
|
18
|
-4
|
3.5%
|
-
|
|
Bugged to your benefit. Same animation as 5A6A, which may be the reason it can be cancelled into ~6AA as if it were a normal allowing you to beat safejumps.
|
| Crouching
|
Damage
|
Red Damage
|
Proration
|
Cancel
|
Guard
|
| 1500 (1035)
|
662
|
50%
|
SP, EX, (J)
|
LA
|
| First Active
|
Active
|
Recovery
|
Frame Adv
|
Circuit
|
Invuln
|
| 8
|
4
|
18
|
-4
|
10.5
|
-
|
|
Same animation as F-Ryougi 2B.
|
| Air
|
Damage
|
Red Damage
|
Proration
|
Cancel
|
Guard
|
| 500 (345)
|
198
|
50%
|
-
|
HA
|
| First Active
|
Active
|
Recovery
|
Frame Adv
|
Circuit
|
Invuln
|
| 8
|
4
|
-
|
+14
|
3.5%
|
-
|
|
Same animation as C-Ryougi j.C.
|
|
|
|
| Neutral
|
Damage
|
Red Damage
|
Proration
|
Cancel
|
Guard
|
| 500
|
192
|
50%
|
-
|
LHA
|
| First Active
|
Active
|
Recovery
|
Frame Adv
|
Circuit
|
Invuln
|
| 25
|
4
|
19
|
-5
|
0.0%
|
Clash 1-10
|
| (Clash)
|
Damage
|
Red Damage
|
Proration
|
Cancel
|
Guard
|
| 500
|
192
|
100%
|
-
|
LHA
|
| First Active
|
Active
|
Recovery
|
Frame Adv
|
Circuit
|
Invuln
|
| 7
|
4
|
19
|
-5
|
0.0%
|
Strike 1-7
|
|
Same animation as 5A6AA. May whiff on crouching opponents.
|
| Blockstun
|
Damage
|
Red Damage
|
Proration
|
Cancel
|
Guard
|
| 0
|
0
|
100%
|
-
|
LHA
|
| First Active
|
Active
|
Recovery
|
Frame Adv
|
Circuit
|
Invuln
|
| 18
|
3
|
22
|
-7
|
-100.0%
|
-
|
|
H-Moon specific reversal bunker. The knockdown gives you enough time to sideswitch out of the corner with either j9 or 6A+B and still meaty.
|
|
|
|
| Ground
|
Damage
|
Red Damage
|
Proration
|
Cancel
|
Guard
|
| 100
|
0
|
100%
|
-
|
U
|
| First Active
|
Active
|
Recovery
|
Frame Adv
|
Circuit
|
Invuln
|
| 10
|
10
|
20
|
-
|
removes all
|
Full 1-39
|
| Air
|
Damage
|
Red Damage
|
Proration
|
Cancel
|
Guard
|
| 100
|
0
|
100%
|
-
|
U
|
| First Active
|
Active
|
Recovery
|
Frame Adv
|
Circuit
|
Invuln
|
| 11
|
10
|
15
|
-
|
removes all
|
Strike 1-30
|
|
Universal burst mechanic. Unlike Crescent/Full Heat activation, the hitbox and frame data doesn't vary between characters. However, you can be thrown out of this move if you input it in the air.
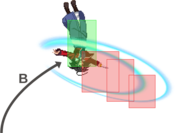
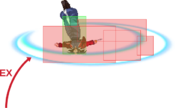
|
|
Special Moves
Special Movement
|
|
| Damage
|
Red Damage
|
Proration
|
Cancel
|
Guard
|
| -
|
-
|
-
|
-
|
-
|
| First Active
|
Active
|
Recovery
|
Frame Adv
|
Circuit
|
Invuln
|
| -
|
-
|
32
|
-
|
-
|
-
|
|
Ryougi rolls forward. Removes her collision allowing her to cross up opponents and other obstacles. Utilized in mixups.
|
|
Grounded Specials
A/B A/B ~236X ~236X ~214X ~214X ~236A (Ender) ~236A (Ender) ~236B (Ender) ~236B (Ender) ~236C (Ender) ~236C (Ender) ~214D/X (Ender). ~214D/X (Ender).
|
| A
|
Damage
|
Red Damage
|
Proration
|
Cancel
|
Guard
|
| 750
|
528
|
80% (O)
|
-CH-
|
LH
|
| First Active
|
Active
|
Recovery
|
Frame Adv
|
Circuit
|
Invuln
|
| 9
|
4
|
21
|
-7
|
5.25%
|
-
|
| B
|
Damage
|
Red Damage
|
Proration
|
Cancel
|
Guard
|
| 750
|
528
|
80% (O)
|
-CH-
|
LH
|
| First Active
|
Active
|
Recovery
|
Frame Adv
|
Circuit
|
Invuln
|
| 15
|
3
|
33
|
-18
|
5.25%
|
-
|
|
Ryougi lunges forward and slashes, starting your rekka chain.
- A version has faster startup.
- B version moves further but has worse framedata.
A version is preferred in blockstrings due to better framedata, B version is preferred in combos as the extra forwards movement helps in longer range confirms.
|
| ~236X
|
Damage
|
Red Damage
|
Proration
|
Cancel
|
Guard
|
| 900
|
720
|
80% (O)
|
-CH-
|
LH
|
| First Active
|
Active
|
Recovery
|
Frame Adv
|
Circuit
|
Invuln
|
| 4
|
5
|
19
|
-6
|
6.3%
|
-
|
|
Basic Rekka Follow-up. Will knock down aerial opponents. All versions are identical. Safe but minus on block.
|
| ~214X
|
Damage
|
Red Damage
|
Proration
|
Cancel
|
Guard
|
| 1200
|
864
|
80% (O)
|
-CH-
|
H
|
| First Active
|
Active
|
Recovery
|
Frame Adv
|
Circuit
|
Invuln
|
| 26 ~ 23
|
3
|
19
|
-7
|
8.4%
|
-
|
|
Overhead Rekka Follow-up. The hop can go over and punish many low attacks commonly used as abare after the first rekka. Creates a highlow mixup when used in tandem with the Low Kick follow-up.
|
| ~236A (Ender)
|
Damage
|
Red Damage
|
Proration
|
Cancel
|
Guard
|
| 700
|
384
|
50% (O)
|
-
|
LH
|
| First Active
|
Active
|
Recovery
|
Frame Adv
|
Circuit
|
Invuln
|
| 8 ~ 4
|
4
|
20
|
-6
|
4.9%
|
-
|
|
Basic Rekka ender, gives hard knockdown on hit and leaves you safe but minus on block. On aerial opponents, Ryougi will sometimes cross under and reverse inputs when midscreen (making 236 into 214, etc.) so be sure to do 214A to get this in those situations (e.g. 2C>236A~236A~214A). Interestingly, you do not need to reverse your inputs on Satsuki or Necos.
|
| ~236B (Ender)
|
Damage
|
Red Damage
|
Proration
|
Cancel
|
Guard
|
| 1200
|
768
|
40% (M)
|
-
|
LH
|
| First Active
|
Active
|
Recovery
|
Frame Adv
|
Circuit
|
Invuln
|
| 12 ~ 8
|
6
|
25
|
-13
|
8.4%
|
-
|
|
Launcher ender of Rekka. Extremely beefy untechable knockdown on grounded opponents, but does not work on airborne opponents. You can link a 5B or 2B after at extremely low hitcounts if you wish to convert. Pushes you back enough to keep you safe on block, but you're much better off doing A Ender in that case.
|
| 236C Ender
|
Damage
|
Red Damage
|
Proration
|
Cancel
|
Guard
|
| 1500
|
960
|
100%
|
-EX-
|
LH
|
| First Active
|
Active
|
Recovery
|
Frame Adv
|
Circuit
|
Invuln
|
| 16
|
10
|
20 ~ 16
|
-10
|
10.5%
|
-
|
|
EX Cancelable Rekka ender. Punishable on block lunge that goes past the opponent midscreen unless cancelled. Risky to use in blockstrings without meter to cancel into 22C, which allows you to reset pressure.
|
| ~214X/D (Ender)
|
Damage
|
Red Damage
|
Proration
|
Cancel
|
Guard
|
| 450
|
336
|
50% (O)
|
EX
|
L
|
| First Active
|
Active
|
Recovery
|
Frame Adv
|
Circuit
|
Invuln
|
| 10 / 8
|
3
|
22
|
-7
|
3.15%
|
-
|
|
Input with either 214D as the second part of a rekka string, or as ~214A/B/C/D at the end of the rekka. Useful for catching opponents trying predict the overhead and/or to catch people trying to jump out. The pushback keeps you safe on block and can be cancelled into 22C to keep a blockstring going. Cannot be cancelled into other rekka followups no matter when it is used.
|
| EX
|
Damage
|
Red Damage
|
Proration
|
Cancel
|
Guard
|
| 400*7 (2107)
|
288*7 (1517)
|
80% (O)/(M)
|
(J)
|
LH
|
| First Active
|
Active
|
Recovery
|
Frame Adv
|
Circuit
|
Invuln
|
| 1+6
|
62
|
25
|
-13
|
-100.0%
|
Full 1-6
|
|
Not a Rekka. Ryougi dashes in and does 6 slashes in rapid succession followed by a jump cancellable B Ender. Can fall out on strange air connects. Has some invuln, but must not be used recklessly, as it loses invuln before it becomes active. OTG relaunches, and is a hitgrab, so it will reset your bounces and the combo afterwards is unburstable.
|
|
|
|
| A
|
Damage
|
Red Damage
|
Proration
|
Cancel
|
Guard
|
| 1200
|
1056
|
80% (O)
|
-
|
L
|
| First Active
|
Active
|
Recovery
|
Frame Adv
|
Circuit
|
Invuln
|
| 14
|
4
|
31
|
-7
|
6.86%
|
-
|
| [A]
|
Damage
|
Red Damage
|
Proration
|
Cancel
|
Guard
|
| 1200
|
1056
|
55% (O)
|
-
|
L
|
| First Active
|
Active
|
Recovery
|
Frame Adv
|
Circuit
|
Invuln
|
| 37
|
4
|
30
|
-6
|
6.86%
|
-
|
|
Ryougi dashes forward and cuts through the opponent. Has the fastest startup of the 623X series, hits low, and grants knockdown on hit. Charging (623[A]) gives it the launch properties of B Version, allowing for conversions as well as increasing its range. Its long range and low profile during the actual slash allows its use as a way to challenge high-commitment zoning tools / moves with long recovery. However, 623A is a high-commitment move itself. On block, either you're about to die, or your opponent gets to start their offense. The farther you cross up, the safer you are on block.
During all charged (623[X]) versions, Ryougi is in counterhit state for the entirety of the "run" animation.
|
| B
|
Damage
|
Red Damage
|
Proration
|
Cancel
|
Guard
|
| 1200
|
1056
|
55% (O)
|
-
|
L
|
| First Active
|
Active
|
Recovery
|
Frame Adv
|
Circuit
|
Invuln
|
| 21
|
4
|
28
|
-4
|
6.86%
|
-
|
| [B]
|
Damage
|
Red Damage
|
Proration
|
Cancel
|
Guard
|
| 1200
|
1056
|
55% (O)
|
-
|
H
|
| First Active
|
Active
|
Recovery
|
Frame Adv
|
Circuit
|
Invuln
|
| 44
|
4
|
30
|
-6
|
6.86%
|
-
|
|
Longer startup than the A version, but travels slightly farther and always launches on hit regardless of charge. Does not grant knockdown on normal hits, as the untech time ends just before the opponent touches the ground allowing them to air tech. On counterhit however it is full untech, granting knockdown. Fully charged 623[B] is an overhead, and visually identical to the charged A version (bar the longer startup), but both are still stand shieldable.
|
| EX
|
Damage
|
Red Damage
|
Proration
|
Cancel
|
Guard
|
| 1200
|
1056
|
60% (O)
|
-
|
L
|
| First Active
|
Active
|
Recovery
|
Frame Adv
|
Circuit
|
Invuln
|
| 1+17
|
5
|
35
|
-7
|
-100.0%
|
-
|
| [EX]
|
Damage
|
Red Damage
|
Proration
|
Cancel
|
Guard
|
| 1200
|
1056
|
55% (O)
|
-
|
L
|
| First Active
|
Active
|
Recovery
|
Frame Adv
|
Circuit
|
Invuln
|
| 1+38
|
5
|
29
|
-6
|
-100.0%
|
-
|
|
Travels the farthest of the three versions. Other than being an OTG relaunch, it has the same properties as counterhit 623B even on normal hit.
|
|
|
|
| A
|
Damage
|
Red Damage
|
Proration
|
Cancel
|
Guard
|
| 1000
|
912
|
(90% (M)), 85% (M)
|
-EX-
|
H
|
| First Active
|
Active
|
Recovery
|
Frame Adv
|
Circuit
|
Invuln
|
| 24
|
4
|
20
|
-6
|
7.0%
|
-
|
|
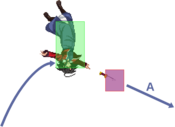
A series of flip slashes, all versions are air unblockable.
Ryougi leaps forward and slices straight horizontally. Technically an overhead, but whiffs on crouching opponents, so it can't be used as one. Instead it is a combo tool and situational anti-air. Knocks opponent full screen on hit, wallslams in the corner allowing you to combo afterwards. Interestingly, there's a second hitbox early in the move that guarantees this will connect mid-combo (provided your opponent is standing) by applying enough hitstun for it to connect after B and C normals. This allows for confirms that dodge Nero’s snake summon as well as standing-only combo routes. Said hitbox can also be shielded and clashed.
|
| B
|
Damage
|
Red Damage
|
Proration
|
Cancel
|
Guard
|
| 1200
|
960
|
50% (O)
|
-EX-
|
H
|
| First Active
|
Active
|
Recovery
|
Frame Adv
|
Circuit
|
Invuln
|
| 26
|
3
|
24
|
-8
|
8.4%
|
-
|
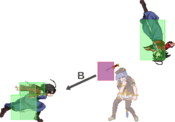
|
Ryougi leaps forward and slices diagonally downward. The only version of 214X that doesnt whiff on crouchers, most of the time (be careful using this vs Akiha, as well as other short characters). To avoid whiffing on short characters, use from further away. Grants hard knockdown on hit. Can be converted off of on counter hit, some airborne hits, EX cancel into j.22C, EX cancel into j.236C in the corner, and any OTG relaunch. When used after AT ender it will catch wake-up backdash, making it an important part of your AT ender RPS.
|
| EX
|
Damage
|
Red Damage
|
Proration
|
Cancel
|
Guard
|
| 1400
|
960
|
50% (M)
|
N, SP, EX, J
|
LH
|
| First Active
|
Active
|
Recovery
|
Frame Adv
|
Circuit
|
Invuln
|
| 1+13
|
4
|
22
|
-5
|
-100.0%
|
Full 1
|
|
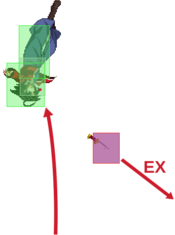
Similar animation to 214A, with a much larger hitbox. Just like 214A, it whiffs on crouching opponents. If your opponent makes the mistake of standing to block, it has the same cancel properties on block as on hit. Has full invuln on frame 1, and strike invuln during superflash. She moves forward a lot during this move, so it can be used as a way to escape the corner. If your opponent used a move that is whiff cancellable or has low recovery, they may be able to catch the recovery, making it quite a risky reversal option versus opponents aware of this move.
|
|
A A B/C B/C A/B Hit A/B Hit C Hit C Hit
|
| A/B
|
Damage
|
Red Damage
|
Proration
|
Cancel
|
Guard
|
| 0
|
0
|
60%
|
(N), (SP), (EX), (J)
|
-
|
| First Active
|
Active
|
Recovery
|
Frame Adv
|
Circuit
|
Invuln
|
| 4
|
12
|
12
|
-
|
0.0%
|
-
|
|
A: Ryougi does a standing pose and readies herself for an attack. Once triggered, she throws the opponent behind her. The counter only covers her head and upper body, making it the one used for high hitting attacks and aerials. It is not only triggerable by attacks that must be blocked high, it can counter mids and lows but some hit too low for this counter to work so choose wisely. On successful counter you can convert into a standard air combo. If you're too far, walk forward a bit so 5BB can properly connect.
B: Ryougi does a crouching pose and readies herself for an attack. Once triggered, she throws the opponent just like the A version. This counter only covers her lower body. Just like A version, this can counter some mids and overheads but not all of them. Conversions off of a successful counter are exactly the same as A version.
Possibly because parries might have the same rules as clash, these do not work on Nero's B and EX Deer but work fine on A version. You can also parry F-Kouma 5[C] despite other hitgrabs beating it.
|
| C
|
Damage
|
Red Damage
|
Proration
|
Cancel
|
Guard
|
| 1000
|
672
|
45%
|
-
|
-
|
| First Active
|
Active
|
Recovery
|
Frame Adv
|
Circuit
|
Invuln
|
| 4
|
9
|
9
|
-
|
0.0%
|
-
|
|
Ryougi assumes the same pose as B version. This counter has the same hitboxes as the B version but has less active frames, meaning you have to be more strict with your timing. Upon successful counter, Ryougi throws her opponent into hard knockdown. Worse combo options than other versions but less recovery.
This counter has less recovery than A and B which makes it another option for cancelling during blockstrings, but more importantly you use it to cancel the recovery of 3C for the corner left / right roll mixup.
|
|
22A. 22A. 22B. 22B. 22C. Reversal, pressure reset, and combo extender 22C. Reversal, pressure reset, and combo extender Auto-Pickup Boxes Auto-Pickup Boxes Manual Pickup. Manual Pickup.
|
| A
|
Damage
|
Red Damage
|
Proration
|
Cancel
|
Guard
|
| 950
|
720
|
60% (O)
|
-
|
LHA
|
| First Active
|
Active
|
Recovery
|
Frame Adv
|
Circuit
|
Invuln
|
| 13
|
X
|
22
|
5
|
6.65%
|
-
|
|
Half moon's signature knife toss series. All versions are air blockable.
One of H-Ryougi’s strongest tools that defines her whole character. Notable for being +5 On block. Ryougi throws her knife straight forward at chest-height. Travels fullscreen, and bounces off the wall back to where Ryougi threw it. Ground-techable knockdown on hit. Combined with manual pickup cancels this move enables blockstrings that loop into themselves and crazy, high meter build combo extensions. It's also decently usable as an anti-zoning tool. At closer ranges it is quite risky to toss in neutral, as it has a long recovery and the knife itself can be low-profiled.
|
| B
|
Damage
|
Red Damage
|
Proration
|
Cancel
|
Guard
|
| 950
|
720
|
60% (O)
|
-
|
LA
|
| First Active
|
Active
|
Recovery
|
Frame Adv
|
Circuit
|
Invuln
|
| 16
|
17
|
18
|
-3
|
6.65%
|
-
|
|
Ryougi tosses her knife at a downwards angle. Hits low. The knife will get stuck in the ground instead of bouncing back if it hits the floor instead of the wall, leaving you in quite an unfortunate situation if your opponent blocks it midscreen. This doesn't see much use due to not covering a particularly useful angle, inconsistent knife placement, commonly gets your knife stuck in the ground, frame disadvantage, and extremely limited combo usage.
|
| EX
|
Damage
|
Red Damage
|
Proration
|
Cancel
|
Guard
|
| 500*4 (1501)
|
288*4 (863)
|
90% (M)*4
|
-
|
LHA
|
| First Active
|
Active
|
Recovery
|
Frame Adv
|
Circuit
|
Invuln
|
| 1+0
|
X
|
21
|
3 (min)
|
-100.0%
|
-
|
|
Ryougi throws her knife straight forward, this time with some extra oomph. Hits up to four times depending on range, the closer you are the less it hits. Great for dumping 100 meter to make sure you don't enter Heat. Just like 22A you can convert off of almost any stray hit, and it still serves as a good combo extender. Extremely advantageous on block, a pressure reset at the cost of 100 meter. The knife is active on frame 2, guaranteed to come out if used on wakeup. Useful as a reversal, as you can convert off of trades that do not knock Ryougi down, and it is of course plus on block if they attempt to bait it like a normal reversal. Weak to being low profiled.
|
| Knife Pickup
|
Damage
|
Red Damage
|
Proration
|
Cancel
|
Guard
|
| -
|
-
|
-
|
-
|
-
|
| First Active
|
Active
|
Recovery
|
Frame Adv
|
Circuit
|
Invuln
|
| -
|
-
|
12
|
-
|
-
|
-
|
|
Unlike other Ryougi Moons, H-Ryougi is able to pick up the knife by simply crouching on top of it, and can catch it while it's spinning in midair as long as she is in a neutral state (not attacking). Keep in mind if you wish to pick your knife up on wakeup you must go from standing to crouching first, leaving you exposed to lows. H-Ryougi does still posses the ability to pick up the knife manually with 22X, which has more range and can be special cancelled into, and it has less recovery than Crescent and Full moon’s manual pickup. Manual pickup cancels reduce recovery from laggier buttons, granting at least some frame advantage on most C normals.
An interesting "feature" (bug) her knife has is auto-pickup stops working after your knife is reflected. It is no longer her knife, the game considers it THEIR knife now. In the situation this occurs, you have to do manual pickup to get it back, after which auto-pickup will work normally. The consequences of your knife being reflected can be absolutely devastating, as you lose your strongest tool on top of having to commit to manual pickup.
|
|
|
|
| A
|
Damage
|
Red Damage
|
Proration
|
Cancel
|
Guard
|
| 950
|
720
|
90% (M)
|
-J-
|
LHA
|
| First Active
|
Active
|
Recovery
|
Frame Adv
|
Circuit
|
Invuln
|
| 19
|
12
|
18
|
3 (min)
24 (jump cancel)
|
6.65%
|
-
|
|
Leaping forward, Ryougi throws her knife downward. Leaps right over low attacks. Just like 22B, it will get stuck into the ground depending on where the knife is thrown. It starts a combo if they get hit by it.
Moves forward a lot and is plus on block, making it very useful in blockstrings. However, the knife will whiff at close range. This greatly limits when you can use it, and it can be shielded or reversaled if an opponent expects it. If they shield it, you can still jump cancel, unless their shield option is air unblockable and fast enough to catch you.
|
| B
|
Damage
|
Red Damage
|
Proration
|
Cancel
|
Guard
|
| 950
|
720
|
90% (M)
|
-
|
LHA
|
| First Active
|
Active
|
Recovery
|
Frame Adv
|
Circuit
|
Invuln
|
| 25 ~ 58
|
15
|
12
|
3 (min)
|
6.65%
|
-
|
|
Ryougi dashes forward, jumps past the opponent and throws the knife downward toward them. Ryougi will ALWAYS throw the knife in the direction she came from, meaning if your opponent is in the corner and cannot be crossed up Ryougi will just throw the knife away and you will eat a fat combo. Not something to just toss out in neutral, though you can (with some difficulty) get a normal combo if it lands depending on your spacing. Can be used to escape the corner, as despite lacking invcibility, Ryougi moves forwards very quickly, and covers her recovery with the knife toss.
|
| EX
|
Damage
|
Red Damage
|
Proration
|
Cancel
|
Guard
|
| 950
|
720
|
50% (O)
|
-
|
LHA
|
| First Active
|
Active
|
Recovery
|
Frame Adv
|
Circuit
|
Invuln
|
| 10+1
|
15
|
29
|
3 (min)
|
-100.0%
|
-
|
|
Ryougi leaps back and throws the knife downwards. This version has the fastest start up of the three. Big damage, the best out of the three for combo extending, notably from ~236C rekka ender. Also utilized in very potent oki setups in the corner.
|
|
Aerial Specials
A version, even the hitbox is worse A version, even the hitbox is worse B version B version EX version EX version
|
| A
|
Damage
|
Red Damage
|
Proration
|
Cancel
|
Guard
|
| 1500
|
1344
|
75% (O)
|
-
|
HA
|
| First Active
|
Active
|
Recovery
|
Frame Adv
|
Circuit
|
Invuln
|
| 17
|
2
|
15
|
-17 (TK)
|
10.5%
|
-
|
|
Ryougi swings her knife in a crescent shape. Objectively inferior to B and EX versions, outside of being a risky overhead that is unsafe on block and can't be converted off on non-counterhits. Only useful for finishing rounds.
|
| B
|
Damage
|
Red Damage
|
Proration
|
Cancel
|
Guard
|
| 1600
|
1440
|
75% (O)
|
-
|
LHA
|
| First Active
|
Active
|
Recovery
|
Frame Adv
|
Circuit
|
Invuln
|
| 10
|
2
|
3
|
-5 (TK)
|
11.2%
|
-
|
|
The ACTUAL j.236. The traditional air combo ender for when you want more damage instead of air throw okizeme. A staple combo extender in the corner, enabling many combo routes including knife loops and your corner mixups. Hitbox is very large, thus can be used to tag people trying to enter your space from an awkward angle, and get yourself out of uncomfortable scrambles (Example: as seen throughout this round). Knocks opponents fullscreen/wallslams in the corner, ending in an air techable state.
|
| EX
|
Damage
|
Red Damage
|
Proration
|
Cancel
|
Guard
|
| 2200
|
1920
|
40% (O)
|
-
|
HA
|
| First Active
|
Active
|
Recovery
|
Frame Adv
|
Circuit
|
Invuln
|
| 1+9
|
2
|
6
|
-6 (TK)
|
-100.0%
|
Full 1-14
|
|
Same as j.236B, but with more damage and has invincibility frames. Can be used to close out rounds if you need just a bit more damage after an air combo. Has niche usage as a reversal, but as an air special it must be TK'd, meaning if you do it on wake-up you can still eat a meaty.
|
|
|
|
| A / B
|
Damage
|
Red Damage
|
Proration
|
Cancel
|
Guard
|
| 900
|
720
|
90% (M)
|
-
|
LHA
|
| First Active
|
Active
|
Recovery
|
Frame Adv
|
Circuit
|
Invuln
|
| 20 / 19
|
X
|
3
|
-
|
6.65%
|
-
|
|
Useful in some problematic matchups for when you want to stall your landing, beat grounded projectiles, catch people chasing your airdash back, or for trying to catch people doing stuff full screen. As you are not air-actionable afterwards, you can get yourself killed using this. Use cautiously.
A: Ryougi lunges forward and throws the knife downwards.
B: Ryougi hops back slightly and throws the knife downwards.
The knife can get stuck in the ground if it does not bounce off the wall, but due to how far the knife travels this will rarely happen.
|
| EX
|
Damage
|
Red Damage
|
Proration
|
Cancel
|
Guard
|
| 950
|
720
|
50% (M)
|
-
|
LHA
|
| First Active
|
Active
|
Recovery
|
Frame Adv
|
Circuit
|
Invuln
|
| 1+0
|
X
|
17
|
-
|
-100.0%
|
-
|
|
Ryougi hops and throws the knife horizontally. The main purpose of this move is to get much better okizeme than possible from air throw ender. The untechable knockdown on hit this move has gives you enough time to land and link 2C.
|
|
A/B. A/B. EX EX
|
| A
|
Damage
|
Red Damage
|
Proration
|
Cancel
|
Guard
|
| 1100
|
720
|
50%
|
-
|
LHA
|
| First Active
|
Active
|
Recovery
|
Frame Adv
|
Circuit
|
Invuln
|
| 20
|
2
|
7
|
9
|
7.7%
|
Full 1-3
|
|
Ryougi flips in midair, slashing at a downwards angle infront of her. Command air tech series unique to Ryougi, the only one of its kind in the game. Referred to by the community as neco tech. The direction she hops towards is determined by the input (44/66/22). If you use any of these while your opponent is close to or in the corner, you can convert into an air combo. You are not air-actionable after all versions of neco tech, so you better have done this intentionally. You’ll want to use the 22 versions of this move if possible, as you want to hit the ground as fast as possible after.
This version of the move has the longest startup, however it is also the safest on block and has the least recovery of the three. At lowest height it is plus, which will allow you to start blockstrings if used close enough to the ground.
|
| B
|
Damage
|
Red Damage
|
Proration
|
Cancel
|
Guard
|
| 1100
|
720
|
50%
|
-
|
LHA
|
| First Active
|
Active
|
Recovery
|
Frame Adv
|
Circuit
|
Invuln
|
| 15
|
2
|
15
|
1
|
7.7%
|
Full 1-3
|
|
Has faster start-up than A version, and will most likely be the one you rely on. It isn't as safe as A version, but can still give you some advantage if it's blocked low as possible.
Along with C version, this can be used to punish certain reversals on hit provided they are air-techable, normal bunkers on hit, and escape some specific tech trap setups.
|
| EX
|
Damage
|
Red Damage
|
Proration
|
Cancel
|
Guard
|
| 1800
|
1152
|
75%
|
-
|
LHA
|
| First Active
|
Active
|
Recovery
|
Frame Adv
|
Circuit
|
Invuln
|
| 6+6
|
2
|
15
|
-4
|
-100.0%
|
Full 1-14
|
|
Situationally useful reversal. Has the fastest startup of the three versions, Full invuln, and still retains the combo potential from previous versions. As a trade-off, it isn't safe on block like the other two.
|
|
Arc Drive
|
|
| Damage
|
Red Damage
|
Proration
|
Cancel
|
Guard
|
| 3500 (3080)
|
4664
|
100%
|
-
|
U, LH
|
| First Active
|
Active
|
Recovery
|
Frame Adv
|
Circuit
|
Invuln
|
| 17+3
|
2 (35) 5
|
45
|
-31
|
removes all
|
Full 1-2, 17-70
|
|
Ryougi crouches down, locks on to the opponent with her Mystic Eyes (unblockable), then dashes forward with a series of slashes (blockable). This has non-invulnerable startup before the superflash and a few frames where the opponent can move or jump out before the Eyes activate, so it can easily be jumped out on reaction. Only invulnerable after the superflash, and is punishable on block. You have enough time to meaty after it hits, and it forces a sideswitch even in the corner.
|
|
MBAACC Navigation

