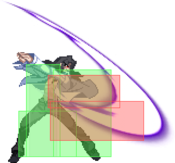
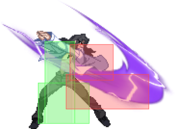
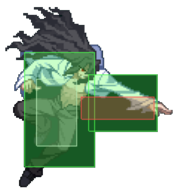
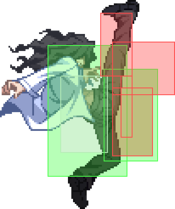
Combos
This page is a translation from the French wiki BasGrosPoing.
Original can be seen at : http://wiki.basgrospoing.fr/index.php/Melty_Blood/Roa/Half_Moon
Be sure to check this article about H-Roa: https://drunkardshade.com/2015/08/13/melty-bits-h-roa/
H-Roa tutorial by sibladeko: https://www.youtube.com/watch?v=2Pj7WIS1aR8
Note: For all combos including "6AAA 6[C]", do not let the "5C" do more than 2hits. You'll loose damage and make it harder to combo.
Basic combos
  2A 5B 2B 5C 6AAA 6[C] 236A (3751 dmg)
Deals less damage but ensures an okizeme, allowing mixups or getting back to pressing safely.
  2A 5B 2B 5C 6AAA 6[C] delay 214A jBCA jABC AT (5065 dmg)
Deals a bit more damage but without okizeme. Can corner-carry, and a "214B/C" will force the enemy to block.
  2A 5B 2B 5C 6AAA 6[C] 214A jBC jBC AT
Combo version without the "delay 214A" but needs to take off the "jA", deals a bit less damage.
  5B 2B 5C(2) 6C 236A (3466 dmg)
Combo to use when too far for a "6AAA".
  2A 5B 2B 5C 6AAA 6[C] 214A 236C (4952 dmg)
Combo with meter, deals good damage and the same okizeme compared to "236A".
  2A 5B 2B 5C(1) 6AAA 6[C] 236A 41236C (5868 dmg)
Combo with maximum damage, but requires to be in Heat mode.
Situational combos
After an Ex-shield counter / AirCounter / 214B counterhit :
  6C jBCA jABC AT (4032)
Easiest combo.
  6[C] 214A, jBC jABC AT (4538)
Deals more damage, but "6[C]" requires some time to charge and can't be used in any situation/counter-hit/height.
  2C delay 6C jBCA jABC AT (3517 dmg)
Deals less damage but easier to execute, and can be used anywhere.
After Golden AirThrow :
  gAT 2A 6C jB jABC AT (2979 dmg)
Deals good damage.
  gAT 2A 236A (2060 dmg + oki)
Deals less damage, but allow an okizeme.
Strategy
Do what you need to do to extrapolate on the character. Here are example categories below.
Half
Spacing
Pressure
Move Descriptions
Normal Moves
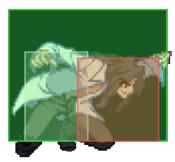
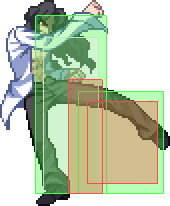
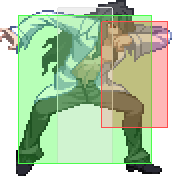
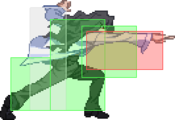
2A
2A
|
| Damage
|
Red Damage
|
Proration
|
Cancel
|
Guard
|
| 300
|
-
|
75%
|
-
|
HL
|
| First Active
|
Active
|
Recovery
|
Frame Adv
|
Circuit
|
Invuln
|
| 4
|
4
|
8
|
0
|
3.0%
|
-
|
|
Description
|
|
5A
5A
|
| Damage
|
Red Damage
|
Proration
|
Cancel
|
Guard
|
| 300
|
-
|
75%
|
-
|
HL
|
| First Active
|
Active
|
Recovery
|
Frame Adv
|
Circuit
|
Invuln
|
| 4
|
4
|
9
|
-1
|
3.0%
|
-
|
|
Description
|
|
5A6A
5A6A
|
| Damage
|
Red Damage
|
Proration
|
Cancel
|
Guard
|
| 600
|
-
|
80%
|
-
|
HL
|
| First Active
|
Active
|
Recovery
|
Frame Adv
|
Circuit
|
Invuln
|
| 7
|
4
|
16
|
-5
|
6.0%
|
-
|
|
Description
|
|
5A6AA
5A6AA
|
| Damage
|
Red Damage
|
Proration
|
Cancel
|
Guard
|
| 1000
|
-
|
60%
|
-
|
HL
|
| First Active
|
Active
|
Recovery
|
Frame Adv
|
Circuit
|
Invuln
|
| 9
|
4
|
17
|
-3
|
10.0%
|
-
|
|
2B
2B
|
| Damage
|
Red Damage
|
Proration
|
Cancel
|
Guard
|
| 550
|
-
|
80%
|
-
|
L
|
| First Active
|
Active
|
Recovery
|
Frame Adv
|
Circuit
|
Invuln
|
| 7
|
6
|
14
|
-5
|
6.0%
|
-
|
|
Description
|
|
5B
5B
|
| Damage
|
Red Damage
|
Proration
|
Cancel
|
Guard
|
| 550
|
-
|
80%
|
-
|
HL
|
| First Active
|
Active
|
Recovery
|
Frame Adv
|
Circuit
|
Invuln
|
| 8
|
5
|
13
|
-3
|
5.5%
|
-
|
|
Description
|
|
2C
2C
|
| Damage
|
Red Damage
|
Proration
|
Cancel
|
Guard
|
| 900
|
-
|
55%
|
-
|
L
|
| First Active
|
Active
|
Recovery
|
Frame Adv
|
Circuit
|
Invuln
|
| 8
|
11
|
13
|
-6
|
9.0%
|
-
|
|
Description
|
|
5C
5C
|
| Damage
|
Red Damage
|
Proration
|
Cancel
|
Guard
|
| 400, 550
|
-
|
80%, 90%
|
-
|
HL
|
| First Active
|
Active
|
Recovery
|
Frame Adv
|
Circuit
|
Invuln
|
| 8
|
3 (10) 7
|
14
|
-16, -3
|
4.0%, 5.5%
|
-
|
|
Description
|
|
6C
6C
|
| Damage
|
Red Damage
|
Proration
|
Cancel
|
Guard
|
| 1000
|
-
|
100%
|
-
|
HL
|
| First Active
|
Active
|
Recovery
|
Frame Adv
|
Circuit
|
Invuln
|
| 12
|
2
|
17
|
-1
|
10.0%
|
-
|
|
Description
|
|
6[C]
6[C]
|
| Damage
|
Red Damage
|
Proration
|
Cancel
|
Guard
|
| 1400
|
-
|
100%
|
-
|
HL
|
| First Active
|
Active
|
Recovery
|
Frame Adv
|
Circuit
|
Invuln
|
| 24
|
5
|
14
|
-1
|
14.0%
|
-
|
|
Description
|
|
j.A
j.A
|
| Damage
|
Red Damage
|
Proration
|
Cancel
|
Guard
|
| 250
|
-
|
75%
|
-
|
HL
|
| First Active
|
Active
|
Recovery
|
Frame Adv
|
Circuit
|
Invuln
|
| 5
|
4
|
-
|
-
|
2.5%
|
-
|
|
Description
|
|
j.B
j.B
|
| Damage
|
Red Damage
|
Proration
|
Cancel
|
Guard
|
| 600
|
-
|
85%
|
-
|
H
|
| First Active
|
Active
|
Recovery
|
Frame Adv
|
Circuit
|
Invuln
|
| 6
|
4
|
-
|
-
|
6.0%
|
-
|
|
Description
|
|
j.C
j.C
|
| Damage
|
Red Damage
|
Proration
|
Cancel
|
Guard
|
| 950
|
-
|
90%
|
-
|
H
|
| First Active
|
Active
|
Recovery
|
Frame Adv
|
Circuit
|
Invuln
|
| 7
|
4
|
-
|
-
|
9.5%
|
-
|
|
Description
|
|
Special Moves
Name 「JP name」 - 236A/B/C
- (Description) - Roa fastly charge with some electricity and rush foward, leaving a trail of sparks. It does hit one time, and the hitbox is not as long as the spark trail, as Roa do teleport some steps before the other end of the spark trail, but is long as long is the part of the trail between the start and the end(about 2/3 of the field). It is a great punisher.
- (A version) - This version got a faster startup and a slower recover. It does 1500 damage. Can chain into 236A one time or in a little combo(a bit shorter than B version).
- (B version) - This version got a slower startup and a faster recover. It does 1500 damage. Can chain into 236A one time or in a little combo.
- (EX version) - One of the perfect punishing of the game, this is a mythical "fullscreen" punishing that have an hitbox large as the screen and a startup between A and B version. Can combo into intself or into other ground EX moves and Normals. 8300 Damage without correction (3043 Damage vs VSion).
|
Name 「JP name」 - j236A/B/C
- (Description) - Roa stop in-air and electrifies the air around him, while slowly falling down. The hitbox is smaller than the area the sparks cover. Hard to use singularly, but it's better in combos, as it can be used in air in the mid of a combo.
- (A version) - 1 Hit. 800 damage
- (B version) - 3 Hit, longer duration. 2100 damage( 1579 vs VSion )
- (EX version) - 6 Hit, longer duration. Can't be comboed after a launch, but after hitting the opponent while in air. End the combo because of the long recover after its use.
|
Name 「JP name」 - 623A/B/C
- (Description) - Roa jump with an angle of like 45° and cover himself with some lighting. The hitbox is a bit smaller than the sparks. Can only be used as ground combo ender mostly. Especially after launching the enemy in air or while the enemy was knocked down.
- (A version) - From 1 to 2 hits. 1500 Damage ( 1000 a single it ), 1351vs VSion (single hit don't get correction).
- (B version) - From 2 to 4 hits. The jump covered area is the double of 623A and the startup is a bit slower. Uncorrected damages are: 1000 ( 2 Hits ), 2000 ( 3 Hits ), 2500 ( 4 Hits ). Respectively 925, 1749 and 2133 vs VSion.
- (EX version) - From 6 to 7 hits and wallslam. The jump covered area is the triple of 623A and the startup is slower. Uncorrected damages are: 3000(6 hits) and 3400(7 hits). Respectively 2437 and 2706 vs VSion.
|
Name 「JP name」 - 214A/B/C
- (Description) - An Orb appear and evoke one or more thunders that hit with an angulation of 45° and a fixed distance from Roa. Can be chained after 236B/C(A version recover too slowly to be connected with this).
- (A version) - The thunder hit nearer to Roa and pass a bit on his model. Same startup as B. 1000 damage.
- (B version) - The thunder hit farther to Roa and the Orb appear over Roa's head. Same startup as B. 1000 damage.
- (EX version) - Evoke a series of thunder that start from about the same distance as 214B and go farther. How many hits depends of many factors, but the max is 7 hits for 3150 damage(uncorrected, 2559 vs VSion). Funny things you can connect the Arc Drive easily to this: just 41236C while the thunders hit the enemy.
|
Arc Drive
「」
- (Description) - AD description
|
Another Arc Drive
「」
- (Description) - AAD description
|
Last Arc
「」
- (Description) - LA description. Mention where it is activated (air or ground shield) first.
|
MBAACC Navigation
